Transcripts
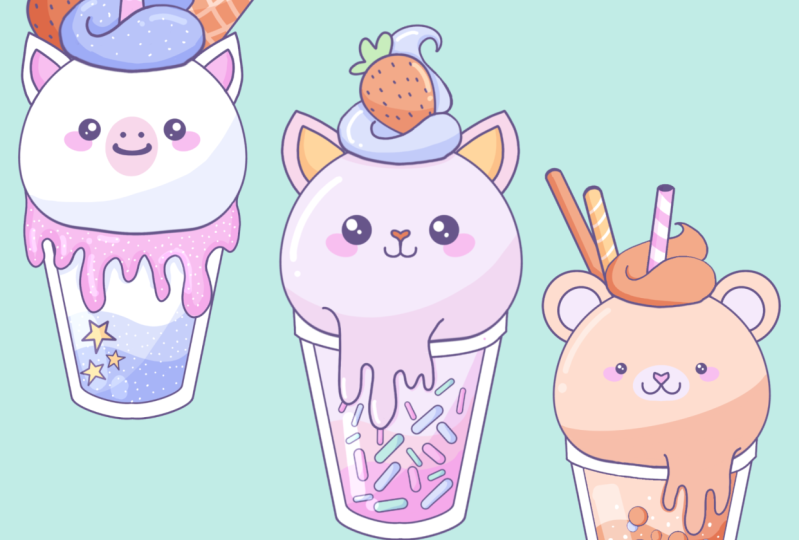
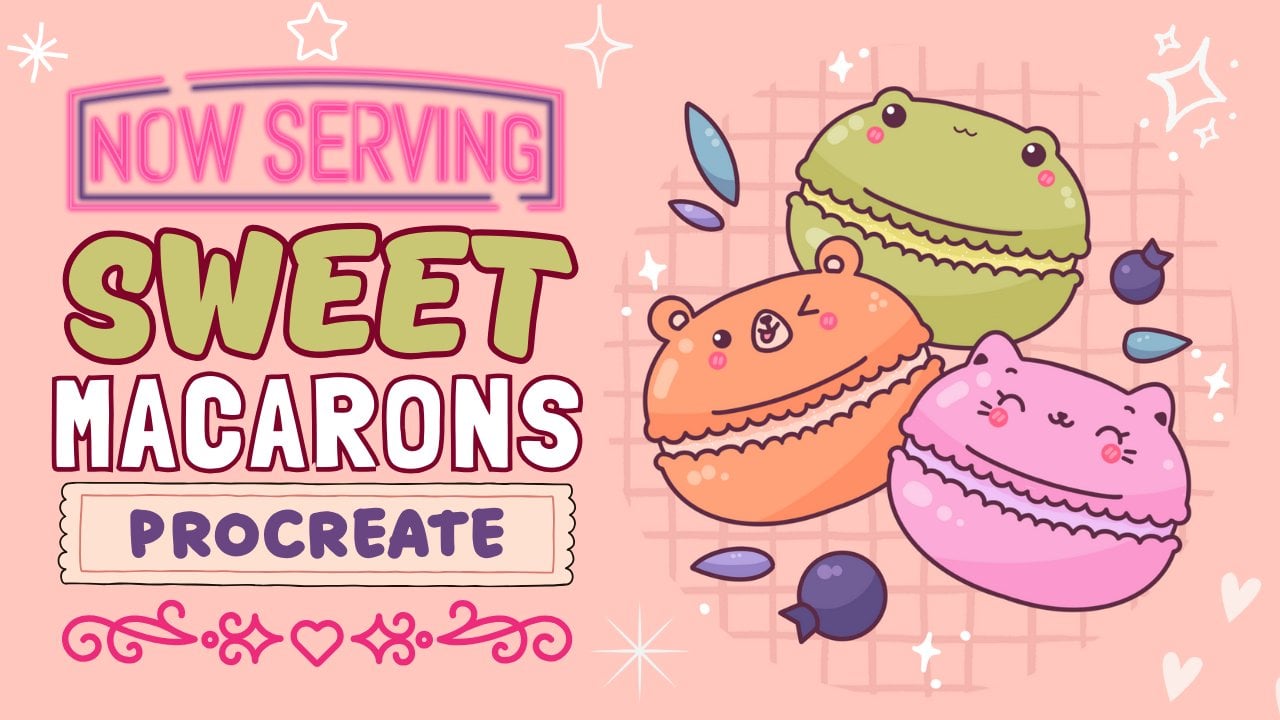
1. Introduction : Hello, everyone. I'm uni
and into this class. We'll drop you milkshakes. This class doesn't require any prior experience
or offensive tools. We'll start from
scratch and we'll be using simple techniques
throughout the process. Everything you'll see will
be happening in Procreate. However, if you
have a the software or want to try
traditional materials, you are welcome to join. If you're ready to start,
let's jump right into it.
2. Base: Begin our class firstly by deciding what kind of canvas
we are going to be using. Today we are using a simple
standard square canvas that you can find in Procreate, both our pixel weeds
and pixel hat are set at 2048 pixels. Curis, if you'd like to use any other dimensions for
your canvas, just go for it. As for GPI, we are using 300 and our color profile is set as
S RGB with this low number. It's all done, let's
just he done and will be redirected
to our N canvas. The first thing that you
will need to decide is the colors that we'reg to be using throughout
the whole class. Of course, if you
would like to use your own colors, go for it, but if you want to
follow along and use the same colors that you will
see throughout the class, please go to the project ers sap and download
all the materials. Also while you are in
the project s sap, download the brass that we're going to be using
during this class. Firstly, let's just go and change the color
of our background. We will go to our
layers and we'll go to our background
color layers. We will go to this
bottom part and you can see we have our new
color palette right here, but we'll go under palettes and here we'll go under cards. We have all the colors names and it will be easier for us
to navigate through that. The color for our background is the color with the name CN. Let's just tap on it and let's change our color
of the background. When we did it, we will go and select the brush for
our first scheme. We'll go to our
brush library and we will go to the
calligraphy folder. Into the calligraphy folder, we will choose monoline brush, and if you want all of your
lines to be very smooth, we can just go and tweak one option of this
monoline brush. We'll just tap on it and we'll go inside
the brash studio. On the left, we'll go
under stabilization, and here on the top, we have the option streamlined
with a slighter amount. By default, it is set
at a very low value. We can just go to our drone pad and try it out right here. You can see we have
a very jagged line, but we have a lot
of control over it. If you want your lines to look
like that, very naturally, You can just go
with this option. But if you want your
lines to be very smooth, you can just go and tweak the amounts to find
what works for you. Let's just go with
maximum and let's just try out onto our drone
pad one more time. You can see we lost a
bit of control here, but our line is
very, very smooth. You can play with this option. You can get back to the
canvas, try out there. You can always get back to this option and adjust it
later on if you need to. Find the amount
that works for you, and when you are done, let's just he down over our top right. Now, when we've
prepared our brush, let's just get back to our color palette and
here one more time, we will go under cards. The first color that
we are going to be selecting will be the color
with the name purple. When we did it, we will go
and turn on one option that Procrit has that will help
us to build up our skin. Let's just go under
our range icon and we'll go under Canvas. Here we will go and togle drawing guides and
now we can see that we have these cells
that are going through the whole
shape of the Canvas. That's not the
option that we need. Let's just go under
80 drawing guides, and on the bottom, we
will go under symmetry. When we've selected symmetry, we have just one line that is going through the
center of our canvas. We're not touching
anything here. We're not tweaking
anything here. We will just go and heat
down over our top right. Now everything that
we are creating on one side will be mirrored
on the opposite side too. Now let's just go and adjust the size of our brush
to something around 4%, and we will go over
one of the sides and we will create a
descending line like that. And the ends on the line, we will hold it and
you can see that we can adjust the
direction on this line. Let's just not go very sloppy. We will just go with
something like that. When you have the
result like that, lift up your apple
pencil and let's just go under this option that
popped up on the top, which now says line. It is our edited mode. When we are in the edited mode, you can see we have some nodes on our original line and that means that we can
just go to some on the nodes and we
can adjust them. We are holding our
apple pencil there, and we can just go
hold it and move it to the side to make our line
a little bit different. Find what works for you. If you want to
move your line and make this shape a
little bit more narrow, we can just go hold
our Apple pencil at some b link space and move it to the place we want it to be. For now, let's just go
with something like that, and when we have the
result like that, let's just tap on the screen to get away from our editing mode. When we have the
result like that, let's just go to our
layers and we will turn off assisted drawing
to create the next line. To do that, we will need
to tap on the layer and we will choose drawing
assist from the list. When we did it, we
will just go to the bottom and we will create
a curve to close the shape. Just going into one
of the sides and creating the curve
just with one line. Connecting it nicely,
holding it at the end, and then we are going
to our editing mode. We have our nodes here, and let's just go and
make this curve very, very smooth and very, very nice. Spend some time here adjusted to your liking,
connect it nicely, and when you have the
result that you like, let's just tap on the screen to get away from our editing mode. Now, take a look at this line without the lines that you
have in the editing mode. If you need to adjust something, grab an eraser, grab a brush
and adjust these lines. For example, let's just
work on our little corners. If you want to make them
differently sheets, for example, you can go and throw them into the curve instead of this
very straight corner, you are welcome to
go and do that. Let's just spend some time
here and adjust our corners. Now, when you are overall
satisfied with this shape, let's just go and make
the inner part of our cp. What we need to do is go into our layers and we'll make
a copy of this layer. To do that, we will need to swap the layer from right to
left and choose duplicate. Now we have two layers
with the same content. We will go to this
layer on the top, and we will go to our
er key on the top left. On the bottom, we will
choose the option uniform, and we also will go under
snapping and into the setens, we will turn on snapping here. When we have it in that way, let's just go to one of the nodes that we
have in the center, either on the top
or on the bottom, and we will just drag this node to adjust the size
of this element. For example, let's just go
with something like that, and you can adjust the
thickness to your liking. What we need to do next is
to move this sheep down so the thickness on
all sides is equal. When we have the
result like that, let's just go and deselect everything by heating
our arrow key. Now when we have the
result like that, let's just go to the top and adjust these lines that
we have on the outside. Let's just zoom in our canvas, grab our eraser, and we will erase these
lines a little bit. You can do it right now because we are not at the right layer. Let's firstly go to
our layers and we will merge these two layers together
to be able to do that. We'll tap on the layer on the top and we will
choose merge down. Now, let's just go and erase these lines that
we have on the sides. When we have the
result like that, let's get back to our brush
and we will go on the top and we will create
a similar curve to what we have on our bottom. Let's just go through
the whole shap and we will step a bit from the side and we will
just create this line. The same way as before,
just creating a curve, holding it at the end and going into our editing
mode to adjust it. Position it nicely, connected with your mean sheep,
and when you are done, let's just get away
from our editing modes, and let's just go and work a
little bit more on our site. Let's just grab our eraser and erase all the parts
that we don't need. If you have some areas where you need to put a line
on the contrary, get back to the brush and a departs t. When you have
the result like that, let's just go to the top and we will create
another sheep here. We can do it on the same
layer or we can just go and create one more
layer for convenience. Let's just get back
to the lease and tap on this plus I can
screte a new layer. Now we will go on
the top and we will create a sheep of the
perfectly round circle. We will do it just with
one line and in the end, we will hold our line. When you have the
result like that, we will go over the soap and you will have the
option circle here. If you don't have
the option circle, you can work with an ellipse, or you can try it out one more
time to have this option. Let's just tap on circle
and we will go and make this shape a little bit bigger through our editing mode. To do that, we will need to
go right between the nodes, hold our Apple pencil there
and drag it to the site. Let's go with the
size like that. If you want to position it differently, you know
what you need to do. Hold your apple pencil
at some blink space, and adjust the position
of this element. Also, we will just need to
go and position it right in the center and we can do
it by going to our arrow key. When you are done adjusting this sheep on the editing mode, I just tap on the screen, and then we'll go
to our arrow key. When we have our
snapping selected, we will just go and hold our Apple pencil at
sampling space and we will move our sheep to see this line that is going
from top to the bottom. It is either the orange
line or the blue line. You can just go
along this line and you will know that you
are right at the center. When we have the
result like that, let's just go and make it
just a little bit bigger. We will just go again to
one of the nodes either to the bottom or to the top and we will have the
shape like that. When we have the
result like that, let's just tap on our air kit to get away from
our editing mode. If you have some
gaps into your line, go and adjust it, so we will be able to add the
color later on. Now when we have the
results like that, let's just go and adjust the C. What we are
going to be doing? We will firstly go
to our layers and we will go to this layer
where we have our circle, we will tap on it, and we
will choose drawing assist. We are going to be using
our symmetry line. When it is selected and
when it is assisted, we are going to
our magic one tool and we will go under liquefied. Don't worry, we have a lot
of options on the bottom. We are going to be using
just the option push, and we are going to be adjusting only the size of our brush that we're
going to be pushing with. Let's just go and
make it just a little bit bigger and when we have it, let's just go to the
bottom and we will squeeze our sheep
just a little bit. You can work on the
sheep and you can see when we have our
symmetry tool on. It is gradually adjusting
on the opposite side too. Now let's just spend
some time here and adjust the sheep to our cm. Generally, what we need
is something like that. When you are satisfied with it, let's just go to our ear key one more time and we'll drag
it just a little bit doe. Again, following our
orange or blue line. When you have it in that way, let's just deselect everything
by heating our ear key, and let's just go and
continue finishing up. When we have our brush selected, we will just go to
the side and we will go to the side of our cup. Let's just go up with
a line like that. It is a line that is parallel to the line that we have
right here on the side. If you have the
results like that, when you are not quite equally adding the
line on both sides, you can try it out
one more time, firstly by going to the
lis and turning off assisted drawing from this layer where we have our top element. First, let's just tap
onto this lay and we will turn on drawing
assist and then manually, we will go and
adjust these lines by adding the elements
going in that way. Let's just go on both sides and adjust these little places. Now when you have
something like that, let's just get
back to our layers and we will merge these
two layers together. Let's just tap on the layer on top and we will
choose merge down. When we did it,
let's just go and adjust our shap by making
it a little bit smaller. When this layer is selected, we are going to our
key one more time, Uniform method, snapping is on, and we will go over one of the nodes in a
middle and we will drag it up or down depending on the node
that you are taking. Now let's just go with the sheep like that with a size like that, and when you are satisfied
with everything here, let just tap on our air key
to deselect everything. Now, let's just go and
add one more detail. Firstly, we will go
back to our layers. We'll tap on this layer, and we will choose
drawing assist. Now, when we have it assisted, let just go and increase
the size of our brush, and we will go to the middle
part of our soap element, and we will add two
dots for our eyes. We are just going to
one of the sides, going somewhere in the middle, and let's just go
and put the dot. You can play around with
the size of this element. You can play around
with its position. With the distance
from the center, it's all up to you. When you found what you like, let just go and zoom
out our canvas to take a look at the whole
scheme from the distance. If you are satisfied
with everything here, we are ready to move
on to our next part, we will be creating our
first illustration.
3. Bear: Lines: 's begin this byte firstly
by going to our layers, and we will go to this layer
where we have our scheme, and we will rename it as scheme. To do that, we will
need to tap on the layer and choose
rename from the list. Now, when we have
this layer created, when we have it renamed, let's just go and
make a copy of it. Again, we are swiping
our layer from right to left and we
are choosing duplicate. Now we will go to
this layer that we have on the bottom
and we will store it, we will just go and hide it by taping on this
little checker mark. When we have it, we will just go back to this layer
that we have on top, our copy layer, and we will go and start adding
the details here. Firstly, let's
just go and create one more layer on top and
when we have two layers, let's select them both and put them in a group for convenience. When one of the
layers is selected, we will go to the next one and we will swipe it
from left to right. Now, when we have the two layers selected, we will hit group, and we will go to
this new group title, we will tap on it, and we
will rename it as Bar. And now let's just get
back to this new layer, we will tap on it, and we
will choose drawing assist. We will get back to the
size that we used before. For our main lines,
it was around 4%, and we will go to the sides and we will create
the ears firstly. Let's just go to the top and we will create half of
the circle like that. Hold your line and the end to create a smooth and nice sheep, and then let's just go to the engine mode and
adjust it to our end. You have the result like that, let just tap on the screen to get away from
our edited mode, and then let just
go inside this ear, and we will create an inner part by repeating the shape
that we have on the top. Again, we are creating half of the circle or half on the Allis. If we need to, we will go to the edited mode and we
will adjust it from here. When we have the
result like that, if you have something not
very symmetrical like here, what you have on the
ear on the left, we can easily go and adjust it. But firstly, we'll just
need to go to our layers, turn off the assisted drawing from this layer with the ear, taping on it and select and
drawing as and then menually, we will go and adjust
these little parts. When you are done, adjust
in these little parts, let's just get back
to our layers, and we can just go and merge
these two layers together. Let's just tap on the
layer on the top, and we will choose merge down. Now, when we have the
result like that, let's just go and work
onto facial features. Our layer with the
scheme is assisted. Let's just zoom in our canvas, let's just get back to y brush, and we will just go
right between the eyes, and we will create a very
soft rectangular shape. Let's just go with
something like that. Again, you can hold
your line and the end, you can go to the sin mode
and adjust it from here. Find the shape that works for
you and when you are done, if you need to adjust
it in any way, let's just go and adjust it. If you are satisfied with
the sheap for the nose, let's just go on the
boot zum from it, and we will create
the little mouth. We'll just go with a
simple shape like that. Again, you can hold
your line at the end, you can adjust it
to your liking. You can go to the editing
mode and adjust it from here if you want
to adjust it even more. Find what works for you
and when you are done, let's just tap on the screen to get away from our editing mode. Now when we have our
facial features, let's just go and add some deta. Firstly, let's just go again to lease and create
one more leave on We are using the same brush and we are using the same
size of the brush, and let's just go
over the bottom part either side that you prefer, and we will add some
melting part here. Let's just go with
the shape like that. Just create a dripping effect like that or create
a different sap. If you feel that maybe the size of the lines is a
little bit too big, you can just go and adjust
it and try it one more time. When you have the dripping
part that you like, let's just get back
to our lease and we will go back to our
La with this scheme, we will tap on it and we will
turn off assisted drawing. When we did it, we will
grab our eraser and we will erase all the lines that we have inside this dripping part. Also, if you want to adjust your dripping part in any way, you are welcome to
go and do that. For example, we can
get back to this L. We can go to our error key, and we can move it just a
little bit toward the center. When you have the
result that you like, let's just get back to
our with the scheme, grabbing our eraser and erasing the parts
that we don't need. Now when we have
something in that way, let's just get back
to our layers, and we will go and merge
these two layers together. Again, we are going to
our lay on the top, taping it and
selecting merge down. When we have it in that way, let's just go and add
some additional elements. Firstly, let's
just go and create one more layer on top
and we will start by creating a little
whipped cream element on the top right
between our ears. Firstly, let's just
get back to our brush and we will go with a
pecular shape like that. Firstly, we are going
over our left side and we are going with a curve
going down in that way. We are creating everything
just with one line, and then we are going on top and creating a little peak
element like that. When you have it in that way, we will go to the peak, and we will create a shap
going down in that way. If you have some elements
that you want to adjust or erase or work on, you are welcome to
go and do that. If you have something to erase, again, go and erase it. If you want to work on
this sheep, even more, we can go to our magic P tool and we can go under liquefy. Let's just go and
spend some time here to adjust this sheep. When you are satisfied
with this element, let's just tap on
our magic one tool twice to deselect everything, and then we will
just go to our les and let's rename this
layer as whipped crip. Again, taping on it
and selecting renee. We will use this little element
later on into this class, so we can just go and make
a copy of it and store it. Let's swipe this layer from right to left and
choose duplicate, then we will hold this
layer, when it is selected, and we will just drag it
higher than our group. Also we will go and hide it by typing on this
little checkmark. When we did it,
let's just get back early with the
scheme on the bear. We'll grab our
eraser and we will erase all the lines
that are overlapped. When you have it in that way, we are ready to get back to our lays and merge these
two layers together. Go into the top
one, type in on it, and select and merge down. When we did it, let's just
create one more layer on top and we will get
back to our branch. We will go right in the middle of this
whipped cream element, and we'll go and create
a little straw here. Just with one line,
let's just go and create a shape
of the rectangle. At the end, we will hold it, and we will then go to
our option on the top, and if you have the
option rectangle, let's just select it. If you don't have the
option rectangle, you are welcome to go and work with any other option
that you have here, that is quite rectangular. Let's just now go and
adjust it to our liking. For example, we will
just go to this node on our right and we will
try to make it straight. So spend some time here and adjust the shape to your liking. When you are done,
let's just go and deselect everything by
tapping on the screen. When we have the
result like that, let's just go over
the top and we will erase the straight
line completely, and we will grab our brush
and turn it into a curve. Just create a curve,
holding it at the end, if we need to adjust it, go into our editing mode
and adjusting it from here. Now, when we have the
result like that, let's just go and make
a copy of this element. We will go to our lease, we will swap this layer
from right to left, we will choose duplicate, and we will do it one more time. Let's just go and create one more duplicate
of this shape. Then we will go to this layer
that we have in a middle, so the second straw, and we will go to our arrow key. Let's just go and move it a little bit toward the
left and this time, we will go under free form
method on the bottom panel. Let's just make it just a
little bit longer by going to this node that we
have in a middle on the top and just drag it up. When you have the
result like that, let's just go and
position it in that way, and then we will go to this
green node over the top. We will hold our
apple pencil there and we will make a
irrotational movement. We will just go and find the
placement for this element, and this elements will be a little cookie or
some kind of Waffle. Find the position, the rotation, the size for this
element to your liking. When you have the
results like that, let's just deselect everything
by heating our arrow key. When you have it, let's
just get back to our list, we will go to our next
layer where we have the duplicates of our straw and we will
do the same thing. When it is selected, we
will go to our arrow key, we will use free for method, we will make it a
little bit bigger, we will move it
towards the left side. Find the placement and
ration for this element, you can overlap these two
elements to your liking. When you have the
result that you like, let's just tap on our key, and let's just go and erase all the lines that
we don't need. When we in this two player, let's just grab our eraser and erase this line that we have
right here on the left. Also, we will just go right
here and erase this line. When we did it, we will
get back to our layers, we will go to our next layer, and we will go and erase again all the lines
that we don't need. When we have the
result like that, let's just get back
to our layers, and we will go to our
layer with this scheme, and we will erase this line
that is overlapping too. When we have the
result like that, let's just get back to our list, and let's combine all of
these four layers together. Go into the T pan, tap
it, selected merge down, and do it quite a
few times until we have just one layer with
the whole illustration. Now when we have the
result like that, let's just go and add additional elements
inside our milkshake. What we need to do is to
go and select the brush that you downloaded from
the project aresor Sap. Now we can go and adjust the size of it and
we will go inside our milkshake and we
will just go and put some dot to create
some boba elements. You can overlap them. You can put them in any
pattern that you prefer, go and add a few
elements like that. If you want, you can adjust
the size by going with a little element or just bigger elements,
it's all up to you. Find what works for you
and when you are done, if you have some
overlapping parts, grab an eraser and erase
these little parts. Now when we have the
results like that, we are done with our lines, so we can move on
to our next part, where will be AD Bs colors.
4. Bear: Basic Colors: Let's begin this part
firstly by going to our brush library
and we will get back our calligraphy
Monge brush, and then we will go to
our s and we'll create one more layer inside
the group with our beer. Let's just tap on the plus icon, and we will need to drag this layer underneath
our layer with a scheme. But for us, it will be easier to select our layer with a scheme, hold it and drag it higher
than the new layer. That way, everything
will stay in the group. So now we want to use our lines, but we want to add the colors
on the separate layers. We will do this in that way. Let's just tap on our
layer with the scheme, and we will choose reference. When we are using reference, we are using this lines, and we can go to any separate
layer and we can use these lines on it
and drag and drop the color to the ears
that we want to recolor. When we did it, we
will get back to this layer that we have
created a new one, and we will go to
our color palette and we will select the
color with the name Bach. When we did it, we will
just go to our heads, and we also will recolor our little ears
that are outside. When we did it, we will get
back to our color palette and we can select either light grayish purple or white color. With this color, we will just go and add the color
inside the ears. When we did it, let's just
go with the same color, or if you are using white, you can go with light
grayish purple, we will go and create a
little snout element here. Firstly, let's just
get back to our lays. We will go to this lier where we have our color in four day hat. We will tap on it and we
will choose drawing a cyst. Now let's just go and
create a circle or a little ellipse right here around this
little snout element. If you need to adjust it, go to the tin mode
and adjust it, create a nice connection
in the middle, try to make it very smooth and try to position it
right in the center. When you have the
result that you like, let just tap on the screen to get away from our editing mode. Let's criticize of our brush, and manually, we will go and
recolor these little please. When you are done, when we
are using this symmetry tool, let's just get back
to our color palette and let's select either pink or red orange or
orange or magenta color. With this color, we
will go underneath our eyes and we will
create little cheeks. Adjust the size of your
brush if you want to, and let's just go right
underneath one of the eyes, and we will create a
shape of the lives. Hold it at the end, go to the As mode to adjust
it if you need to, position it horizontally, try to make it very
nice and very cute. When you did it, let's
just tap on the screen to get away from our
edited modes and manually, let's just go and recolor
these little parts. When we did it with
the same color, let's just go inside the nose and let's recolor
this area, too. Now when we are done with our facial features
and our face, let's just get back to
our list and let's create one more layer on top of
our layer with the hat. If you want to, you
can just go and rename every layer that we will be creating for our coloring parts. But if you are okay with the
generic layer generic names, you are welcome to
keep them as they are. Now when we have a new layer, let's just go and
select the white color. Go into our color palette, selecting white color, and
with this white color, we will go to our outer
parts of our cap, and we will just recolor them. When we did it, we
will get back to our layers and we will create
one more layer on top. When we did it, we will get
back to our color palette, and we will select
again the beige color. We will go inside
this middle part of our milkshake and
we will recolor it. When we did it, we will one
more time go to our layers, and we will create one
more layer on top. This time, let's just get
back to our color palette and we will select the color
with the name red orange. With this color, we will go and recolor this whipped
cream element. When we did it on
the same layer, we can just go to these little bubbles that
we have inside, and we can go and recolor
them differently. You can go just with one color, or if you want to recolor
some of them with this red orange color and add different color to
some other of that. For example, let's just
keep it in that way. Then we'll get back
to our color palette. We will select the orange color, and we will recolor some
of the other elements that we have right here in
meda you are done, let's just get back
to our color palette and select any other colors. For example, light
grayish purple, and let's recolor the rest
of these little parts. Now, when we are done
with our Boba elements, let's just get back to our lease and let's create one
more lay on top. We will get back to
our color palette, and we will select
magenta color. With a magenta color, we
will recolor our straw in emile then we'll get back
to our color palette, and we will select either
orange or beach color, and we will go and recolor our little cookies or
waffles on the site. Now, when we did it, we are
done with our basic colors. Let's move on and add
some beautifications.
5. Bear: Shadows, Highlights & Beautification: Let's begin adding
our beautifications by going to our layers, and we will go and start by going to our layer
with our head. Onto this layer, we
will go and create one more layer and we will be
adding the shadows firstly. Let's just go to this new layer, we will tap on it and we
will choose clipping mask. When we are using clipping mask, everything that we are creating
on this layer will appear only inside the areas that we already have on our layer that we have on
the previous one. What we need to do is to
go to this new layer, we will go to our N icon and we will change
the blending mode to multiply because
we are going to be creating our shadows
and it will look nice. When we have it in
that way, for now, let's just keep the
opacity at maximum, and we will go to our
color palette and we can select either
orange or beach color. Select one of these colors
and when you are done, let's just go and increase
the size of our brush, and we will go to
the bottom part and we will create the
first curve like that. Again, hold it at the end, go to the sin mode if you need to adjust it
to your liking, and when you are done, let just go and menially recolor the rest of the area that
we have on the bottom. When you are done, let's
just get back to our layers, we will go to our
layer with the shadow, we will tap on our icon, and let's just go
to the pact lider, we will grab it and we will
move it toward the left until we like the
opacity for our shadow. Something around 45% look nice. Let us go tap on this
layer when we are done and let's move
on to our next layer. Firstly, let's just go to our layer with this
lit middle part of our milksha let's first go and add
additional colors inside. When this layer is selected, we will tap on it and we
will choose Alpha low. You can see around our
elements inside our layers, we have a checkerboard and
that's exactly what we need. That means that we can
add additional colors and additional elements only inside the existing areas that
we have on this layer. It is quite similar
to the clipping mask, but it is on the same layer. Now when we did it, let's just get back to our color palette, and again, let's select
the orange color firstly. We will go and increase
the size of our brush, we'll step a bit
from the top and we will go and create the
wavy line like that. Let's just go and add some
thickness to it and we will create a layer
with a different color. When we have it in that way, let's just get back
to our color pallets and let's select the
red orange color. With this color, we
will go to the bottom, and we will add another
layer of color here. You can go with any
pattern that you like. It's all up to you. When we did it, let's just
get back to our layers, and we will create one more
layer above this layer with our additional elements right here on the middle part. Let's just stop on this and
we will choose clipping mask, and we will go to our end icon and change the blending
mode and multiply. Again, for now, let's just
keep it at maximum a pacity, and we will go with
the same color, red orange, and we will
add our shadow here. Let's just go with the
first curve like that, and we will hold it at
the end if you want to. Adjust it to your lichen
through your editing mode, and when you have the
result like that, let's just go manually and
adjust this little part. If you want to add
a little shadow underneath the dripping part, you are welcome to
go and do that too. Just connect it nicely
with your main shadow. When you have your
result in that way, let's just get back
to our layers, and we will go to this
icon on our shadow, and we'll adjust the pacity. Find the opacity that works
for you something around 40, 45%, or if you want to
go a little bit higher, you are welcome to
go and do that. Just find what works for you. When you did it, let's
just go to our next layer, which is our layer with this whipped cream and
our little boba elements. Let's just go and add
our shadows here too. Firstly, we are creating
one more layer on top, typing it, selecting
clipping mass, going in to our icon, selecting multiply
blending mode and let's go with the same
color and add shadow. Firstly, let's just
go to the top and we will go and create a
shadow going in that way. If you want to add
additional shadow right here onto our back part, you are welcome to
go and do that two. The same way we can go to our little boba elements and we can add the
shadows to them too. Let's just go over one of
the sides of all of them, and let's just go and create the shadows going in that way. When we are done with it, let's just get back
to our layers and let's adjust the
opacity by typing on our icon and moving our slide toward the left
until we like the result. When you are done, let's
just get to our next layer. Firstly, let's just tap on
it and choose Alpha lock. When we did it, we
will get back to our color palette and let's firstly go and select
the white color. With the white color selected, we will go to our straw and we will add a few
elements like that. Go along your straw and
add a few little stripes. The same way we will go
to one of the cookies, and we will just go and
add our stripes here too. When you are done,
let's just get back to our lease and let's create
one more layer on top. We will tap on it. We will
choose clipping mask. We will go to our icon and change the blending Ma multiply. Let's just go again to our color palettes and select
the magenta color firstly. We will go to one
of the sides of our straw and we will
add our shadow here. Then we'll get back
to our color palette, select the orange color, and add the shadows to
our waffles or cookies. When you're done with this task, let's just get vector layers, let's adjust the
opacity of this layer. When you done, let's just go above our lier
with the scheme, create one more lier here, and we will go to
our color palette and select the white color. With the white color selected, we will go and
adjust the size of our brush and we'll
go inside the ye, and we will put little
highlights there. Let's just go and put
the dots in that way, or if you want to experiment a little bit and maybe
add more highlights, you are welcome to
go and do that. Find what works for you. When you are done
with this task, let's just go with the
same white color inside our middle parts and we will
add some sparkles here. Let just go and randomly put some dots of
different sizes. Also, if you want, you
can go to the spark that we have on the top and
put some sparkles here. When we have the
result like that, let's just go again to our
list and we will create one more layer on top on which we will create
little highlights. We will go to our icon and we will change the blending
mode to overly or. Let's just go with and we will go with opacity around 20%. The same white color we are using and we will
go firstly over the top of the heat on the
opposite side from our shadow. We will increase the
size of our brush and we will create a highlight
going in that way. If you want to experiment, you are welcome to
go and do that. When you have the
first highlight, let's just go to the top. For example, to
this little element that we have as whip cream, and let's add a little
highlight there too. When you did it, let's just go and increase the
size of our brush, we will go to the
middle part and we will create a big
highlight like that. Adjust it to your liking, if you want to, and
when you are done, the very last thing that we will do is go into our layers, go into our layer with our little waffles
and little straw. We will go to our color palette and select the purple color. With a purple color, we will
just go over the two part of our straw and we will add
a little element like that. When you did it, we are done
with our first illustration. Let's move on to our next part, we will create the next one.
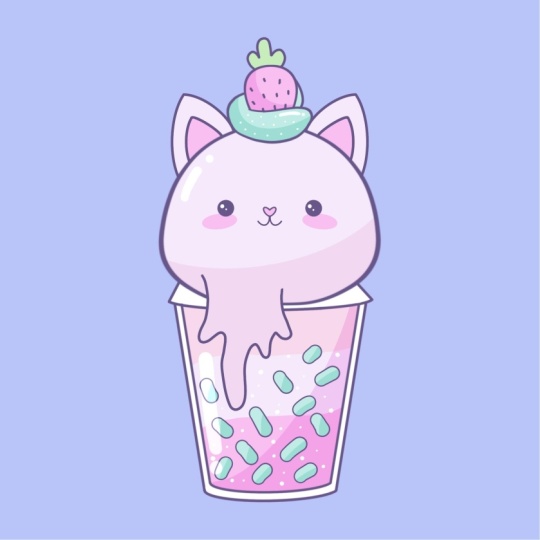
6. Cat: Lines: Let's begin this fight.
Firstly, by going to layers, and we will go to our
group with the beer, and we will tap on this little V icon to
collapse the group. Also we will just go and hide it to create a new illustration. Firstly, we are going
to our skin layer, we will create a duplicate
of it and we will grab this new layer and put it on top of our group with the beer. Let's unhide it, and let's just go and create one
more layer on top. We will go and select
these two layers and we will put
them in the group. We will go to our new group
and rename it as CAT. Now when we did it, let's
just get back to our new ar, we will tap on it and we
will choose drawing a cist. Now we are getting
back to our brush, we are adjusting
the size of it to something that we used
for our main lines, something around three or 4%, and then we will
go to the top and we will create a
pointy ear like that. Let's just go with
the shape like that. You can adjust it
to your liking. You are welcome to choose
any shape that you prefer. When you have the
first shape like that, let's just go inside
and repeat it to create the inner
part of the ear. Now, when you have
the result like that, let's just go and adjust these little elements
on our left. Firstly, we are
going to our layers, we are going to this
lier with our ears tapping it and
selecting drawing a Xs. We will select our eraser and we will go and erase these
parts that we don't need. You are done, let's
just go again to our layers and let's merge
these two layers together. We are taping on the top one, we are selecting merge down, and then we will go and
create one more layer on top. Let's just go again
to our brush and let's just go to one of
the sides on the bottom, and again, we will create
some melting parts. This time, let's just go to the opposite side to
what we had on our beer. Let's just go and create a
dripping element like that. When you are done,
let's just get back to our layers and we will go back to our layer
with this scheme. Let's just tap on it and
turn off assisted drawing. Let's just grab our eraser and erase all the lines
that we don't need. When you have it in that way, let's just get back
to our lease and let's just merge the
two less together. Go into the top
one, tap in on it, and select and merge down. When we did it, let's
just tap on this layer, and we will turn on
our assisted drawing. Let's just go to the middle part and let's work onto
ficial features. Let's just get back to
our brush and we'll go right between the eyes and we
will create our nose here. Let's just go with a
hard sheat like that. Adjust it if you need to by
going to the editing mode, find what works for you, and when you are done, let just tap on the screen if you are at the editing mode. If you need to adjust it
even more with an eraser, you are welcome to go and do it and find the sheet that
will work for you. Now, when we have our
sheep for the nose, let's just grab our
brush one more time, and we will go underneath
our nose and we will create this mouth part similar to
what we had on our beer. Of course, if you would like to experiment and create
something different, you are welcome to
go and do that. Now, when we have
facial features, let's just go and
work on the top part. Let's go again to our
lease and we will create a copy of our
whipped cream layer. Let's just go there,
we will swipe it from right to left
and choose duplicate. We will select this
layer and we will hold it and put it in the
group with our cat. Now let's unhide it, and let's position
it differently, maybe make it a little bit smaller and adjust
it to our lichen. When the layer is selected, we are going to our error key, going either to free for
method or uniform method, and adjusting R shape. Find what works for you
and when you're done, deselect everything,
then go to your layers, go to the layer with the scheme. Firstly, turn off the
assisted drawing and then grab the eraser and erase the
parts that are overlapped. When you are done
with this task, let's just get
back to our layers and merge these two
layers together. When we did it, let's just
create one more layer on top, and let's just go and create additional elements in the
shape of the strawberry. Let's just get
back to our brush. Let's just go to some
blank space on our canvas, and let's create a
shape of the circle. Let's just create it with one
line, hold it at the end. We'll go to our editing mode, and we will create a circle. When we hold it in that way, we will go to our air
key on the top left, and we will go
under warp option. When we are using a warp option, you can see we have not
just the bounding box, but some intersection inside, and that means that we
can go to any place on this bounding box and inside this bounding box
and we can tweak it. Let's go to the corner
that we have on our bottom right and let's
just drag it in that way. When you have it in that way, we will do the same
on the opposite side, just creating a shape
of the strawberry. If you want, you can go
to the middle part and drag it a little bit down
to create an egg shape. When you have the
result like that, let's just deselect everything
by heating our arrow key. When we have it in that way, let's just get
back to our brush, and we will go over
the top and create a very simple leafy
element like that. When you have the
result like that, let's just go to the middle
part of our strawberry, and let's just go and add
some lines for the seeds. When you did it, let's
just get back to our lease and let's rename
this as strawberry. Also, we can use this a little
element little bit later. Let's just go and make
a copy on this lay. Again, we will hold it and
drag it higher than our group, and also we will go and hide it. Now, let's just get
back inside our group with a catch to our
lay with a strawberry. We will select this lay and
we will go to our arrow key. Let us go to the uniform
method and let just drag these little element to
our whipped cream parts. Adjust it to your liking, make it bigger, make it smaller, position it again
to your lichen, find what works for you, and when you are
done, let's just deselect everything by
heating our arrow key. When we did it, let's
just grab our eraser and let's erase the parts
that are overlapped. When we have the result like
that, when we are done, erasing the parts that we have on our strawberry
on the bottom, let's just get back to ours and we'll go to with this scheme. Again, we will go and erase
the overlapping parts. When we have it in that way, let's just get back
to our list and let's combine these
two lists together. Now, let's just take
a look at everything that we have here and
let's just go and select our brush
that you downloaded from the project
and reser t. Let's adjust the size of
it a little bit and let's just go to the middle
part of our milkshake, and let's create some
pecular shapes like that. When you are done, take a look
at your illustration from the distance and decide whether you want to
adjust something or not. If you're satisfied, let
me on to our next part, where we'll add our colors.
7. Cat: Basic Colors: Let's begin this part firstly by going to our brush library. Again, we will get back
to our monoline brush. When we did it, we will go
to our lays and we will create one more layer on top of our layer
with the scheme. But we will need to
grab this layer with the scheme and put
it on the top, and we will need to tap on
it and choose reference. When we did it, let's just
get back to our new layer. We will go back to
our color palette, and let's select this light
grayish purple color, or if you want, you
can go with pink. When we did it, we
will just go to our main shape to our
head and to our ears, and we will drag the color here. When we did it, let's
just get back to our color palette and
let's magenta color. With magenta color,
we will put it to the inner parts
on the ears to the nose and also
we will just go and put the color to our cheeks. For the cheeks, firstly, we will just need to
go to this layer, and we will need to turn
on assisted drawing. When we did it, let's
just go right underneath our eyes and let's create
the shapes for our cheeks. Hold your sap and the end, go to the tin mode, if you want to adjust
it to your liking, go away from your
editing mode and manually adjust
this little parts. When you have the
result like that, let's continue by going to our layers and creating
a new layer on top. Let's get back to
our color palette, select the white
color and t color our outer parts of the cap. We have it in that way, let
just get back to our s, create one more layer, and we will go to our
color palettes and select again our light
grayish purple color. Let just go inside our milkshake and let's
add the color here. When we did it, let's
just get back to our lias and create
one more layer on top, we will go to our color palettes and we will select the CN color. With the CN color, we will go inside
our milkshake and to the top part that we have as a whipped cream and we
will add our color here. But to make sure that we
are doing everything right, let's firstly go to our layers, and let's just go and hide our layer with the backgrounds. When we did it, let's just go and add the color
to these areas. Also, you can use this continue feeling option when you
are using color drop. When you drag the color
to one of the places, you can turn it on
and then just go to the other areas and just top
on them to recolor them. When you are done
with this task, one more time, let's just
get back to our layers. Let's firstly go and unhide
layer with the background, and then we'll create
one more layer on top to recolor our strawberry. For our strawberry,
let's just go with magenta color for
the middle part, and then we will select our light green color to
recolor our leafy part. Now, we are done with
our basic colors, so let's just go and add
some additional elements.
8. Cat: Shadows, Highlights & Beautification: Let's start by
going to our lease and going to our
lay with the heat, we will create one more layer
on top, we will tap on it, select clipping mask,
go to our icon, change blending
mode to multiply. Straightaway, let's go with
something around 40, 45%, and we'll go to our
color palette and select the pink
or magenta color. With this color, we
will go to the bottom and we'll create our
first curve like that. Adjust it if you
want to go manually to the bottom part and
tricolor the rest of the area. If you want to adjust the opacity of this
layer of the shadow, you are welcome to
go and do that. When you are done, let's
just get back to our layers, and let's just go to
our layer with our cup. We will tap on it and we will
choose Alpha log firstly, then we will go to
our color palette and select the pin color. With a pin color, we will
just go in the middle and we will create our
layers of different color. When we did it, we
will get back to our color palette and
select magenta color. With the magenta
color, we will go to the bottom and we will
add the color here. When we did it, we will
get back to our list, we will create one
more layer on top, tap on it, and select
clipping mask. Let's just change the
blinding mode to multiply. Let's go with something
around 60% for our capacity, and let's just go to one of the sides and we will
add our shadow here. And the color manually
to the rest of the area. If you want to add more
shadows to other areas, you are welcome to
go and do that. When you are done
with this task, let's just get back to our lease and let's just go
to our next layer. We are going to our layer with the top part and
our some particles. We'll create one more
lay here, tap on it, clip in mask, multiply
blending mode, adjust the aposte straight away, then we will get back
to our color palette and select our CN color. With the CN color, we will
go and add our shadow. If you want to adjust the
pacity and make it more bright, you are welcome to
go and do that. Let's just go to
the bottom part, and we will add some shadows to our little particles here. When you are done, let's
just get back to our list. Let's just go to our strawberry, create one more lie
on top, tap on it, clip in mask, multiply
blending mode, adjust the pacity straight away, or wait for a liter. Let's just get back
our magenta color and let's just go and create
a shadow on the bottom. Adjust the opacity
if you want to, and when you are
done, let's just go above our li with the scheme, create one more li, go
into our color palette, selecting white color, and adding some sparkles
and highlights. Let's just start with the eyes, and let's just go and put
our highlights there. The same way as before, let's just go to the top part, and let's create
some sparkles here. Also, we will just go to the middle part
to our milkshake, and we will add some
elements here too. You can go with one size of the brush or you can go
with multiple sizes. When you ad done, let's just
go again to our layers, and let's create one
more layer on top. We will change the
blending mode to ad. Let's just go with
around 20% of opacity, same white color going
over the top and adding our highlights on the opposite side
from our shadows. And then we will go
to the bottom to our middle part and we will add a big
highlight like that. If you are overlapping or if you want to
adjust something, go with the eraser and erase the parts that
you don't need. Now, when we have the result like that, take a look at it, decide whether you
want to adjust the opacity of your highlight. When your ad is fed, let's move on to our next part, where will create our
last illustration.
9. Unicorn: Lines: Let's begin this part, firstly
by going to our layers, we will collapse our
group with the cat, and we will also hide it. We will go to scheme lay, we will make a duplicate, we will drag it above
our group with the cat. Let's unhide it, and let's just go and start creating our ears. Firstly, we are going to our color palette and
selecting the purple color. We are adjusting the size of the brush to what we had before. Let's just go to the top
and let's create very, very pointy ears like that. Let's just go with the
shape going in that way. You can adjust the position
of these elements. You can adjust everything
that you want to adjust. When you have the mean shape, just go inside and create
the inner parts too. If you need to erase some parts, go to the layers, go to
this layer with the scheme, firstly, turn off
assisted drawing, grab your eraser, and
adjust these little parts. If you did it on
a separate layer, get back to your list and
combine them together. When you are satisfied
with everything here, let's just tap again on
our layer with the scheme, and we will turn on
our assisted drawing. We will get back to embrush, we will creasicize over
just a little bit, and we will go right between the eyes to put the.in that way. When you have it, we will
just go underneath it and we will create a
little mouth in that way. Hold it in the end adjusted
from your editing mode. If you need to,
it's all up to you. When you and the
result like that, let's just get back
to our layers, and let's just go and turn on our layer
with whipped cream. Let's just select it and let's
adjust it to our lichen. For example, let's just go
and make it a little bit bigger by going to our
er key uniform method and dragging one of
the node that we have either on the bottom or
in the top in a Meda. Adjust this little sheep
and when you are done, let's deselect everything
by heating our arrow key. Then we will get
back to our layers, and we will get back to
our layer with the scheme. We will turn off our
assisted drawing. We'll grab our eraser and we will erase all the
overlapping parts. When you have the
result like that, let's just get back to our s. Let's just grab
our we cream lia. We will drag it
underneath our with a strawberry and we will merge it with a with this scheme. Also, we can just go and
select these two lias and we can group them and t
name this group as unicorn. Now, let's just get back
to a with this scheme, and from here, we will go
and create one more Lia. We will go grab our brush and we will go and
create the melting part. This time, let's just
go with something big going through the
whole shap in that way. Connect it nicely
with a main sheep. If you need to
adjust some parts, you are welcome to
go and do that. When you are satisfied, let's just get back to Alias, go into Ale with the scheme and adjusting some parts
that we need to erase. We will just need to
go and very accurately erase the parts that
we have on the Bota. When we did it in that way, let's just get back
to our less and let's merge these
two lives together. Then we will go to our leer with a strawberry,
we will unhide it, and we will go to
our ear key and we will go and position it a
little bit differently. Let's just go and rat
it it and we will put it behind our
little whipped cream. Find the position
that you would like and adjust it to your lichen. When you have the
result like that, let's just grab our eraser and let's erase all the parts
that we don't need. Now, when we have the
result like that, let's just go and create one
more layer on top and we'll go to the opposite side and we will create a shape
going in that way. Just with one line, we are creating some kind
of this shape. Adjusted, if you want to, this part will be
a little waffle. Adjusted, find the placement, go to the eraser and erase
all the overlapping parts. Now, when we did
it, let's just get back and merge all of
these layers together. Starting from the
strawberry or from the top, just merge in the layers. When we did it, let's just go and grab our brush
one more time, and we will go inside
our little milkshake. Let's just go and create
a star going in that way. Just with one line, we are creating our star
and in the end, we are holding our line. Let's just go to the 18 mode
and adjust it if we need to. When you are done
tapping on this screen, and let's just go and make
a copy on this element. To do that, we will need to
go to our S ribbon icon. We will use free
hand method and we will select only
our star element. So Lop it around and then
we will just need to go and swipe down three
fingers on our screen. We will need to make a copy, and then we'll do
it one more time. Three fingers down, and we
will use the method piece. Now, we can go to
our list and you will see that we have
our star right here, and we can just go and make
one more duplicate of it. Let's just wipe it from right to left and choose duplicate. Now we will go to our
error key and we will position our elements
on our middle part. When you are done with
one of the stars, let's just go to the next one and position it differently too. When you are done,
let's just go and merge all of these
three layers together. When you did it, let's just take a look at our illustration from the distance and decide whether we want to adjust
something or not. If we are satisfied, let's move on to our next part, where we are going to
be creating our colors.
10. Unicorn: Basic Colors: Let's begin this part firstly by going and creating
one more layer, and we will drag it underneath
our layer with the scheme. When the layer with the
scheme is selected, we will tap on it, we
will choose reference, and then we will get back to our layer that we have created, we will go back to
our color palette and select the white color. With the white color,
we will recolor the main area and also our ears. When we did it, let's
just get back again to our color palette and
select the magenta color. With magenta color, we will recolor our inner
parts of the ears. While we are add Rule, we will just get back
to our color palette and select the pin color, and we will go and add the middle part right
here for our snout. If you want, you can go and
turn on your assisted drawing or you can just go and create the shape manually in that way. Hold your line and the end, go to the 18 mode, position it differently,
if you want to, adjust it if you want to, it's all up to you. Just create something
in that way. When you have the
result that you like, let's just go and
manually recolor it. When you did it, let's
just get back to lease and if your assi drone
is not selected, let's just go and turn it on, and then we'll go and
select magenta color to create the cheeks
underneath ice. Again, adjust it,
position it differently, make them nice and cute, and then manually add
the color insight. When we did it, let's just
get back to our lease, create one more li on top. Again, with magenta color, let's just go and recolor
these middle parts. We also will go to our
lease, create one more li, grab our white color and recolor this outer
part of our cup. When we did it one more
time, go into our lease, create one more li, go
into our color palette. Either with white color
or light grayish purple, we will go inside our milkshake and we will add the color here. When we did it, we will
get back to our lease, we will create one more leer. We will go to our color palette, and let's select our blue color. With a blue color, we will
go entry color the two part. When we did it, one more time, going into our lease and
creating one more lier. Let's just get back
to our color palette, entry color our
strawberry by using magenta color and our
light green color. Also, let's just go again
to our color palette and select the orange color and
recolor this waffle part. One more time, we'll go to
our color palette, and again, let's select light green color, and with this color, we will
recolor our little stars. Or if you want to
use any other color, you are welcome to
go and do that. When we have the
result like that, we need to add a
little horn here. Let's just get back
to our lease and we will go to our lee
with the scheme. Let's just turn on
our drone assist and let's just get back
to our purple color. With a purple color and
with the size of the brush, something similar to what
we had before, 3% or 4%. Let's just go and add
our little horn here. We also will go, grab our eraser and erase
this part in a meddle. Let's just go and
very easily do that. If you need to, you can
go to your lease and turn off assisted drawing to
erase this part in a middle. When we have our little horn, let's just go and
recolor it too. We are going to our previously where we have our strawberry and other elements and let's just go with the color of light orange. Let's just go and
drag it to this area, and when we did it, we are
done with our Bs colors. Let's move on and add our additional colors and finish up our last illustration.
11. Unicorn: Shadows, Highlights & Beautification: Let's begin this
part by going to our layers and we will
go from the bottom. We are going to
our head element, creating one more layer
on top, taping it, selecting clipping mask,
multiply blending modes, going with opacity around 40%. We will then go to
our color palette and select either light
blue or blue color, and we will go and add the shadow to the bottom
part of our head. Create the first curve and then menually recolor the rest
of the area on the bottom. If you want to
adjust the opacity, you are welcome to
go and do that. When you are satisfied with
everything right here, let's just go to our next lie, which is our dripping part, and let's just add a
little shadow here too. Doing all the things
that we did before, clipping mask, multiply blending mode, adjusting the opacity. Let's just get back and
select our magenta color, and we will go to
the bottom part, and we'll just repeat our line on the bottom
to create our shadow. When we have the
results like that, let's just go again
to our layers, and let's just go to our
layer with our milkshake. Let's tap on it and let's
select Alpha log firstly. We will then go to
our color palette and select the light blue color. We will go to the middle and create our first
little wavy part. When you are done with it, let's just get back and select the blue color and
add it to the bottom. Now let's just get back to our les and create one
more layer on top. Let's clip it. Let's go and change the blending
mode to multiply, adjust the opacity to your
liking straight away, and then go and add the
shadow to the bottom part. Recolor the rest of
the area and if you want to add a little shadow
underneath the dripping part, you are welcome to
go and do that. When we are done with this task, let's just go to our next layer. Let's do the same
thing, clipping mask, multiply blending mode,
adjusting the opacity. Let's just go to
this bottom part of our little whipped cream and
let's add our shadow here. If you want to add
the additional shadow right here in the back, you are welcome to
go and do that too. When we are done with it, let's just go and add little shadows to these
little parts right here. But firstly, let's just go and add some additional colors. Firstly, let's just
tap on this layer with our detail strawberry and everything that we have
right here on the top, and we will go and
choose Alpha Lock. When we did it, we will go
to our color palette and we will firstly go and
select our light blue color. Let's just go a little bit
to the middle part that we have right here on the horn and we will add a
little stripe here. When we did it, we
will go to our color palet one more time and
select the magenta color, and we will go to the bottom
and add the color here. Also, we will go again to our color palettes and let's
select the beach color. With the beach color, we will decrease the size of our brush, and we will go to the
waffle elements and we will create some stripes
going in that way. When you're satisfied
with everything here, let's just get back to our lease and create one more lay on top. One more time, taponate,
selecting clipping mask, multiply blending mode, adjusting the apaste
straight away. Let's just get back
to our color palette and select magenta color first. We will go and start aiding the shadows by going
to our strawberry. With the same
color, we can go to our horn and we can
add the color here, and then we will go to our color palette and
select the orange color. With the orange
color, we will go and add the shadow to
our waffle parts. If you want to add little
shadows to the stars, you are welcome to
go and do that. If you don't want
to do that, let's just get back to our liars. Let's just go above our
lio with the scheme, tap on the plus icon, go to our color palette and
select the white color. With the white color, we
will go firstly to our eyes, and we will add little
highlights there. With the same color,
we can go to our to part and add
some sparkles here, and also we will go inside our milkshake and we will
add some sparkles here too. Also, if you want,
you can go and add some sparkles to
the dripping parts, so it's all up to you. You can go with one size or choose multiple sizes
for your sparkles. When you are done
with this task, let's just get back to our
list and create one more lay on top on which we will
add our highlights. We are going and changing our
blending mode to add and we are selecting the opacity
of around 15 or 20%. When we did it,
let's just go with the same white color and let's start adding our highlights. Let's just go to the
opposite sides from our shadows and let's just go and put some highlights
in that way. As for the milkshake in
the middle part of it, we will just go and criticize of our brush and create a
big highlight like that. If you want to adjust the
opacity of this leer, you are welcome to
go and do that. Find what works for you,
and when you are done, we are done with our
last illustration and with our class. Thank you for
watching this class, Ley review, if you like it, and conside subscribing for
MoCaI videos in the future. Looking forward to
testing your projects.
 Uni Corn, ⭐Kawaii Art Enthusiast⭐