Transcripts
1. Introduction: Hello, everyone. I'm uni,
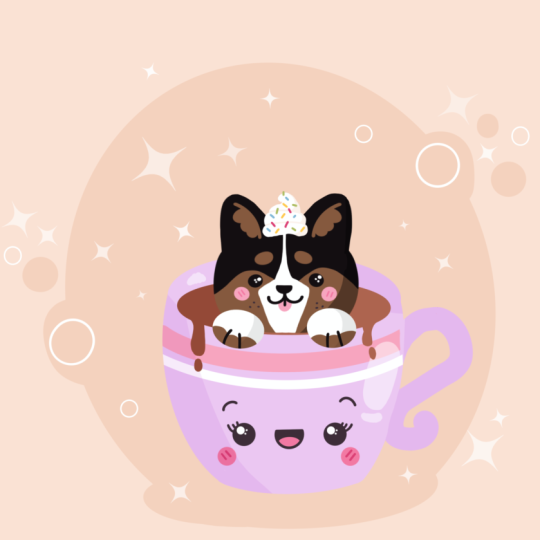
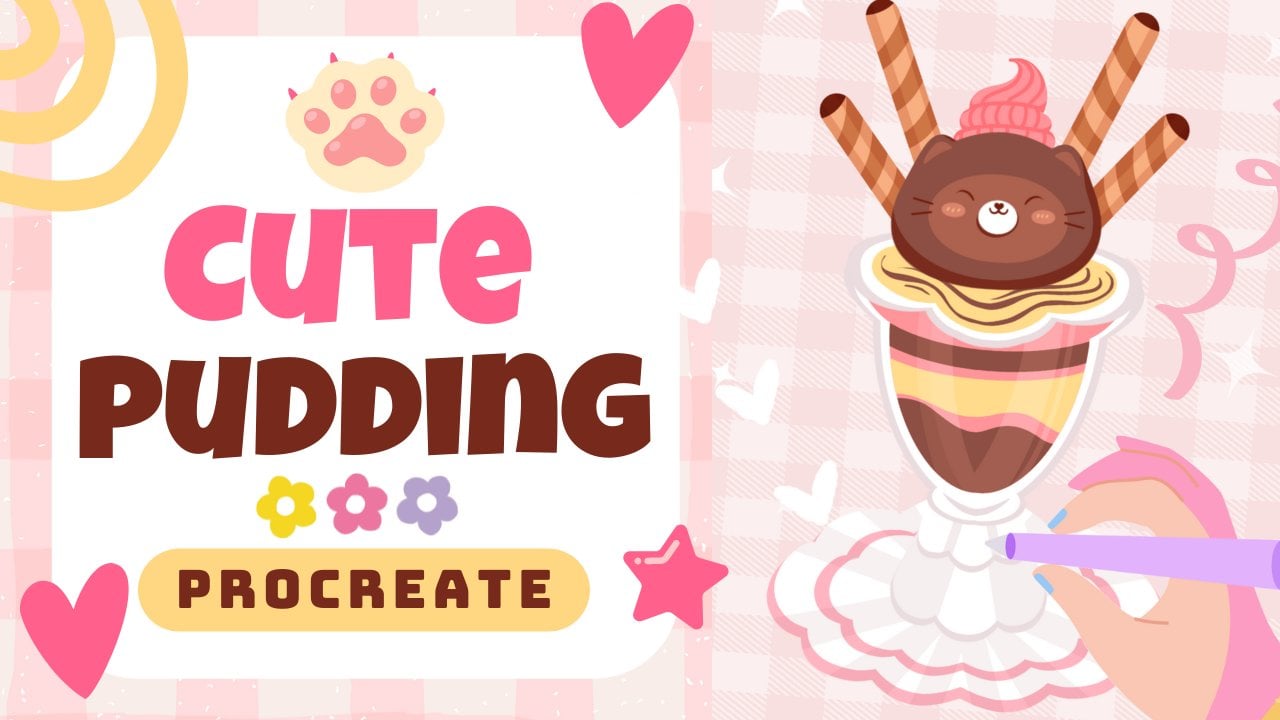
and into this class. We'll draw a cute dog in a cup. This class doesn't require any prior experience
or fancy tools. We'll start from
scratch and we'll be using simple techniques
throughout the process. Everything you'll see will
be happening in Procreate. However, if you have a software or want to try
traditional materials, you are welcome to join. If you are ready to start,
let's jump right into it.
2. Sketch: Begin our class firstly by deciding what kind of canvas
we are going to be using. Today we are using a simple
standard square canvas that you can find in procreate. Both pixel weight
and pixel height are set at 2048 pixels. Our DPIs are 300 and our color profile is set as
SRGB with this low number. When it's all done,
let's just done over our top right and will be
redirected to our new canvas. Zoom it out a little bit so
we will see the whole canvas, and then we will need
to decide what colors we're going to be
throughout the whole class. You can go to the
project and rest your up if you want to follow along and use the same colors that you will see
throughout the class, you can download all the
materials and use them. When you did it, first
thing that we will need to do is to change the
color of our background. Let's just go to our layers and we'll go to our
bground color layer. On the bottom, you can see you have your color
palette, but for us, it will be easier to go
under palette right here on the bottom right and
here go under cards. Here we have all the
colors names and it will be easier for us to
navigate through them. When we here, we will just go to our light base color
and we will check it. We will change the color
of our background, and we can continue by
going to our brush library. We'll go to the sketching
folder and you can pick any brush that
you like from here. You can go try one
brush on your canvas, if you don't like it, get
back to the brush library, select another brush and
find what works for you. When you found the brush, let's just go to our
color palettes here, one more time, we'll
go under cards, and we will select
either dark magenta or any other antrasclor that
we can see on our screen, so we can create our sketch. When we did it, let's
just go and start very easily by creating
a shape of the ellipse. We're just going with one
line somewhere in the middle of our canvas and we will
hold our line in the end. You'll see we
snapped our shape to the perfectly elliptical ipse, and we can move the shape, we can make it bigger or smaller by moving our apple pencil. Our main goal now is to go
and try to put it quite parallel to the lines
that we have on the top and on the
bottom of our canvas. On the top, we have
the option edit. Let us go there, and let's adjust our
shape if we need to. You can see we have
some blue nodes. We can just go with our
apple pencil to them. We can hold our
apple pencil there, and we can adjust our
shape to our lichen. Again, we are trying to achieve a straight position
for these elements, and also let us go to the
node that we have on the top. Again, we'll hold our
apple pencil there and we will make the shape
a little bit more open. I you want to reposition
your element, hold your apple pencil at some blank space and move it to the place that
she want it to be. Find the position that you
like when you are done, let just tap on the screen and we'll get away from
our editing mode. When we did it, let's just go to the bottom and we'll
continue creating our cup. Firstly, we will go to
the sides and we will go with firstly straight lines
like that on both sides, and then we will need to create a curve going
on the bottom. Let's just go there and
create a curve like that. Again, we will hold our line
in the ends and if we need to we'll go over
our editing mode and we will adjust
the curvature. So let me just make it
very round it like that. If again, you need to adjust the position
of your elements, go and move your line to the place that
you want it to be. When you are done, let
just up on the screen, and let's connect the
straight lines on the sides with the curve
that we have on the bottom. You can try out different
variations on this line. You adjust creating a cup right now, find what works for you. Let's just work on the sheep and we will do the same
on the other side. For now, don't worry for
the sides to be very equal to each other if they are not quite equal, it's okay. We can adjust it later on when we are going to be
creating our colors. Now we are just mapping out
everything that we need onto our skit and we don't
need it to be very perfect. When you have
something like that, let's just grab
our eraser and we will go and erase the
lines that we don't need. When you have
something in that way, if you want to adjust your cup. Let's just go under our magic one tool and we
will go under liquefy. On the bottom, you can see
we have a lot of options. All that we need is option push, and we are going to
be changing the size of our brush. You
can try it out. If you don't like
it, you can always get back to the
option and adjust it. What we need to do is
to go to the sides and maybe move them a little
bit more toward the center, so our cup is a little
bit more rounded. Now let's just spend
some time here and let's adjust our
cup to our lichen. When you have the
result that you like, let's deselect everything
and get away from our liquefied tool by typing
on our magic one tool twice, and then we will get back to our brush and we will go
and add more details. Firstly, let's just go
inside the sheep on the top and we will step a bit
from this line on the top. And we will create
another curve. Again, we are holding
it at the end. We are going to our editing mode and adjusting the curvature, so it is matching our line
that we have on the top. When you found the
result that you like, let's just get away from
our editing mode and then we'll go to one of the sides and we will create
a little handle. Let's go for example on our left and let's create
a shape like that. We are creating
half of the ipse, that is a little bit
turned to the right. When we have
something like that, if you want to add additional
elements, for example, maybe you want to create a little handle going in that way, you are welcome to
go and do that. When we have this elements, let's just go inside and let's
just add some thickness. We are stepping from
this first line and just repeating the
line that we already have. When we have
something like that, let's just go to the top
part and we will go and create another curve going for the whole shape of our let. Again, we will hold our
line in the end and we will try to make it parallel to the
curve that we have on top. When we have it, we will go to this middle part and let's just work on the
facial features. Firstly, if you
want, you can go to this middle part and you can
create a cross like that. You will see where the
center of your shape is and it will help you to build
up your facial features. When you have this cross, let's just go over the
left side firstly, we'll go underneath
this horizontal line, and we will start by creating a shape of the circle
or an ellipse. Just manually create a shape and then just go inside
and shade it. When you have it, we will go to the opposite side and we
will try to repeat it. We are going to the same line. We are trying to keep
the same distance from the center and we are trying to repeat the size the same that we
have on our left. Again, if it's not that matching to what you
have on your left, don't worry, later on,
we will adjust it. Now, when we have these eyes, let's just go and add
more facial features. For example, let's
just go to the size and let's create little
eye lashes like that. If you want to experiment
with your facial features, you are welcome to
add as many details or as less details as you want. When you have the eyelashes, let's just go above our eyes, and let's create little
curves like that, that will represent
the eyebrows. Again, if you want to experiment
and use other shapes, you are welcome to
go and do that. When we are done
with our eyebrows, let's just go right
between the eyes, and we will start by creating
a line going like that. We are building up our
little mouth here. When we have this first line, we'll go to the bottom
and we will create half of the circle or half
of the ypse here. When you have it, let's just
go inside and let's create a little shape like that that will represent a little tank. If you want, you can go inside this top part and
you can shade it. When you have it, let's just
go underneath our eyes, and let's create little
shapes for our cheeks. They will be again,
either circles or allpss. When you have them
on both sides, we are done with our cup. Let's just go over the top and let's create our main element. Our main element
is a little dog. Firstly, let's step a bit from this line right
here on the top, and we will create a
line going in that way. When you have this line, we will go over the
top of it and we will start by creating
a shape like that. Firstly, we are
going to the sides and we are creating two curves. Again, we don't need
to be very precise. We don't need these
two curves to be super matching one another. Later on, we will adjust it. Create two curves like that, and when you have them, we will go over the top and
we will create a little ear. When you are on the left, let's just go with another
curve going up in that way, and then we will create another curve going
down on the right. When you have
something like that, let's just go to
the opposite side and let's create
something similar. Again, going into the top part on the line and creating
the line going up. Again, don't worry about the reflection about the
mirroring, the opposite ear. Later on, we will
fix everything. Now, when you have
the second ear, let's just go right between the ears and let's
create a curve, very curry one, so we will just connect our shape of
the hat with the ears. When you have
something like that, let's just go over the top of the ears and we will
soften them a little bit. It is a dog and not a cat. Of course, if you
want to create a cat, you are welcome to
go and do that. When we have
something like that, let's just go more toward the
right side of the left ear, and we will create a
little line like that. We'll do the same on
the opposite side. When we have these little lines, we will go to the
sides from them and we will create fluffy
parts of the ears. So just creating a few half
of the opses like that. When you are down
on the left side, let's do the same on our right. Now let us get our eraser and we will erase all the lines
that we don't need. When we did it, we will
get back to our brush, and then we will go to the
bottom part of our head, and we will create a
little mask like that. We are starting by
creating a wavy line. It is going up on
our middle part, and again, we are going to the opposite side and
creating another curve. Again, try to make it
quite equal on both sides, but don't be too precise. Later on, we can adjust everything that we
need to adjust. So when we have
something like that, let's just go to the side, and we will again start by creating a sheap of the circle. We will have a circle that big, and when we have it on one side, we will go to the
opposite side and we will create another e here. Let's just go inside and
let's she the sheaps. When you have these two shapes, let's just go right between them to this little peak that we have on our mask and we will
go and create a little nose. Let's zoom in our canvas and we will start
by creating a very, very soft triangle like that. Again, you can go and play
around with the size of the element with the scuratre with everything that you
want to play around with. When you have the
shape that you like, let's just go and shed it. When you have this shape, let's just go underneath it. Firstly, we are going over our left side and we will
create a shape like that. Again, half of the circle
or half of the ps. You can play around
with the size and the curvature
of this element. When we have it on one side, go into the opposite
side and just repeating what we
have on our left. When we have these two sheeps, let's just go right
between them and we will just go and create a
tank going in that way. Again, creating a half
of the ipse in that way, and then we'll go over
the top and we will create a line going
down in that way. When we have it,
let's just go over our eyes and let's create a little elements
for the eyebrows. We are just creating tilted ipses position them
in a way that you like, you can make them
equal on both sides, or if you want, you can just go and create the different
shapes for them. When you are done with this, let's just go and add the pause. Firstly, we will go to
this area where we have our top of the cup and we will start by creating
a shape like that. We are creating an ipse
that is very, very thick. When we have the first element, we'll go to the
opposite side and we will create
something similar here. You can play around
with the shape, you can make it
similar to what you have on your left
or if you want, you can create
something different. Also, we can just go to the bottom parts of these
elements and we can make the bottom part
a little bit more white than we have
it on the top. For example, when you
have something like that, let's just grab our eraser and let's erase the lines
that we don't need. Let's just do the same
with our pull on our left. And again, we will
grab our eraser and we will erase the
lines that we don't need. When we have something
in that way, let's just get back to a
rash and we will go to the bottom parts
of our pause and we will create lines
going in that way. We are just creating
the divisions for our pause so some
kind of a finger. When we have it, if you want to add more details, for example, some nails or
something like that, you are welcome to
go and do that. The last thing that
we will need to add here will be going on the soap right here between our ears and we'll create
a little whipped cream. Firstly, let's just go and
create a shape like that. We are repeating the
shape on the hat, and when you have
the cucumber shape, We will just go over the
soap and we will repeat it. We are step in a little bit
from the sides and just repeat the similar shape to
what you have on your bottom. When we have these two shapes, we will go over the soap and we will create a peculiar
shape like that. Firstly, let's just
go over our left. We will go up with
the line like that, and then we will go with
the curve going up. When you have
something in that way, we will go on the
opposite side and we will create the shape
going in that way. Try to make it very
soft and very rounded. When you have
something in that way, let's just grab our eraser and let's erase all the lines
that we don't need. Now, let's just go to this
middle part and we will add a few lines so they will
represent some sprinkles. Later on, we will
adjust them and we will make
everything more nice. Now, let's just zoom out our
canvas and let's take a look at everything here and decide whether we want to
adjust something or not. If we want to adjust something, we will just go again
to our magic to, liquefy and we will spend some time here and
adjust our elements. When you're done
adjusting your shapes, let's just get away from
our liquefied tool, and we can continue by going to our next part where we will start creating our basic colors.
3. Cup: Let's begin this bit firstly
by going to our layers, and we will go to
this leer number one and we will rename it as sketch. To do that, we will
need to tap on it and we will need
to choose rename. Also, as we want
to see everything that will be happening
into our illustration. Let's just go to this layer with this sketch and we will
change the opacity of it. We'll go to this icon and we will go to
the pasity ladder. We will grab it and we
will move it toward the left until we still can
see what's happening here, but when it's not that
bright and disturbing. Find the apacit level that works for you, and
when you're done, let's just tap on our
layer with the skache and we'll create one more layer
by tapping on the plus icon. Let's grab this layer
and drag it underneath our layer with the
skage when we have it, we will go again to
our brush library. We'll go to the calligraphy
folder and we will choose monoline
brash If you want, we can go and tweak one
option of these two, so our lines will
be very smooth. We will tap on our
mon line brush and we will get inside
the brush studio. We will go under stabilization
into our brush studio, and here you can see we have the stream line option that
has a slighter amount. If it's set at a very low value, let's just go to
our drawing path and try out how it works. We have a lot of
control over our line, but it is quite jagged. If it's okay with
you, if you want to create the lines that are
looking quite natural, you are welcome to
go and do that. But if you want to
create smoother lines, you can go and try out how maximum amount of
stream line works. So you can see that now we are creating a very smooth line, but we lost a bit
of control over it. So you can play
with this option, find the amount
that works for you, and when you are done, let
it done over the top right. Of course, if you
are not satisfied, later on, you can get back to this option and
adjust it later on. Now when we are done, let's just go and decrease
the size of our brush, and then we will get back to our color palettes and we
will select this pink color. With the pink color,
we will go and recreate the lines that
we have for our cp. Let just go and recreate this element that
we have on the top. Again, the same way as before, we are creating our lies. We are holding our line in the ends and then
if it's needed, we are going over the
top to our editing mode. Adjust your line, so it's matching your skitge
when you are done, let just tap on the
screen when we are ready. When we have the elements, let's just go to our icon on the top right and we will just drag and drop
the color here. Now, to make our sheap of
the cup equal on both sides, let's just use one option
that Procreate has. We will go to the range
icon over our top left, we'll go under canvas, and we will use drawing guide. Let's just togle this option, and now you can see we
have the cells that are going through the
whole shape over a canvas. That's not the
option that we need. We just need to go under aged drawing guide and we
will go under symmetry. You can see right now that we
have one line that is going from top to the bottom and now it is going
through the center. Let's just keep it as it is, and we'll just hit done
over our top right. Now, let's just go
again to our layers, and we will create
one more layer on top of this layer number two. Now we will need
to make this layer assisted the same way as we
have our layer number two. We will just tap on this new layer and we will
choose drawing assist. Now, everything that
we do on one side is repeating automatically
on our other side. That's exactly what we need. Now, let's just go and we will create the sides of our cup. Let's just go over one on the side and we will just go and start recreating our sheep or adjusting it if you want to. We can use all the options
that we used before. We can hold our line
and the ends will go on our edited modes and
adjust our line from here. You can see right here we are not matching our sheap
that we have on top. That's okay. We can
fix it later on. When you're satisfied
with the overall sheap, let's just get away
from our editing mode. So we'll just tap on the screen, and then we will
go to our layers. We will go to the
layer number two, and we will hide it by tapping
on this little checkmark. When we did it, we are
add our le number three, where we have our main sheep, and we will just
go over the top. We will create another line so we are closing
the whole sheep, and then we'll just go and drag and drop the color inside. Now, when we have
something in that way, let's just go again to our lease and we'll
unhide our le number two. We don't need this option with
symmetric drawing anymore. Let's just go firstly
to arrange icon, we will total drawing
guide from here, and then we will go to
our layers and we will turn off assisted manually
from these two layers. Typing on the layer and
choosing drawing assist on lay number three and doing
the same on lay number two. Now, let us go and try to make this element
that we have on the top similar to the size of the element that
we have on the ba. When this layer is selected, we are going to our
key on the top left and we can use either uniform
method or free for methods. For example, let us go
with free for method, we will go to the
snow that we have on the left in the middle and we will just drag it to the side. It is matching our main sheap. We'll do the same
on the other side. If you are using snapping, you will see the guiding
lines that will show you that you are doing
everything quite right. If you want, you can
go to the snapping and turn snapping right
here in the settings. And when you are done, let's just go again to our arrow key. If you feel that the sap
is still not matching, you can try it out
one more time, go again to your arrow key, use snapping, use free
form methods and try to match the shape on the top to the size of the
sheep on the boa. So try to match the elements, and when you are done, let's just get back
to our layers, and we will merge these
two layers together. We are going to
this layer on top, we tap on it, and we
will choose merge down. Now, this shape is on one layer, and we will just go
again to our brush. We will make the size of
it a little bit bigger, and we will go and
recreate the shape on the handle that we have on
the left just with one line. When we are done with this task, let's just go inside our shape, and let's create
a coffee element. We will just go to our layers. If you want, you can
go to this layer where we have our cup and
rename it as cup. Tap on it and choose the
limb for this layer. When you have the cup, let's
create one more layer. When you have the new layer, let's rename it as coffee. When you have this layer, let's just go back to
our color palettes and let's select this
red orange color. With this color, we will
decrease the size of our brush and we will
go inside the cup. We will recreate this line that we have right here on the top, and we will create another lips. Let's just go hold our
sheap and the ends, go to the edited modes and
adjust the shape from here. When you are done,
let's just tap on the screen and let just drag
and drop the color inside. Let's take a look
at everything that we have right now
without the lines on the skage we are
going to our layers and we will hide our
layer with this sketch. If everything is looking nice, let's just get back our layer with the skage and
let's continue. What we need to do next is
to go back to our layer with a cup and let go and add
some additional elements. Firstly, let's just create
one more layer above, and let's clip this
layer to a previous one by typing on this layer and
choosing clipping mask. When we're using clipping mask, everything that you are
creating will be seen only on the areas that you already have on your previous layer. We are not going
beyond the sheep. When we did it, we will get
back to our color palette. Firstly, let's just go and
select the purple color. When we did it, we will go and increase the size of our brush. Find the size that works for
you and when you are done, let's just go and create this curve that we
have on our skitch. Again, let's just hold
our line in the end, let's just go to
our editing mode and add the curvature
of this line. We will need to make
a parallel curve to what we have on
our top of the cp. When you are done, let's
just up on the screen, and let's go and eraase this line that we have
right here on the candle. We will grab our eraser
and very easily, very accurately, we will just
go and eraase these parts. When you are done,
let's just go again to our color palettes and
select the white color. Let's do criticize of our
brush just a little bit, and we'll go underneath
this first curve, and we'll create another
curve going in the same way. Again, holding our line
and the end going to our editing mode and adjusting the curvature
of the elements. Trying to make this line parallel to the line
that we have on top. If you need to find a
different placement for it, you are welcome to
go and do that. When you are done,
let just tap on the screen to get away
from our editing mode and then let just go again to our layers and let's create
another layer on top. We will create our
facial features. Let just go enter in this
layer as facial features. You can keep this
layer as it is, or if you want, you can clip this layer to
your previous one. If you want to clip it, tap on it and choose clipping mask. When you did it,
we will go back to our color palette and we will select our dark magenta color. We will go and start recreating the elements
that we have right here. Firstly, let's just go and increase the
size of our brush, and we will put the
dots for our eyes. When you did it, let's just
go and decrease the size of eye brash and we will
recreate the other elements. Firstly, let's just go to
these little eyelashes that we have and create the
lines going up in that way. We'll do the same on
the opposite eye, and then when we are done, we will just go and recreate
our little eyebrows. Again, you don't need to
recreate everything with 100% of similarity to what
you have on your sketch. If you want to adjust something, you are welcome to
go and do that. When we are done
with the eyebrows, let's just go to our mouth and let's create the
line going in that way. When we have it, we will go to the bottom and we will
recreate these elements. Again, hold your
line in the end. If you need to adjust it, go to the editing mode and
adjust it from here. If it's not happening
from the first try, try it out one more time. When you are done,
let's just go to the middle part and we will recreate the shape for the tank, the same way as before,
holding our line, and if we need to adjust it, go into the editing mode
and adjusting from here. Now, when we did it, let's
just go over the top to this area that we shade it and we will drag and
drop the color here. When we did it, we
will also go to our color palettes and we will select this hot being color. With this color, we will
just go inside the mouth and recolor our tongue also we will go and
recolor our cheeks. Let's just go and increase
the size of our brush, and we will go and put
the dots for that. Take a look at your
facial features from the distance and
also if you want, you can go to your liars
and hide your liar with this cage to check
out how everything looks. When we did it,
let's just go inside our cheeks firstly and we will add additional
elements here. We will then go to
our color palettes and we will select
this pen color. When we did it, let just
decreticize of our brush, and let's just go inside
the cheeks and we will add little lines
like that. Okay. Also, while we are still here, let's just go and add the
highlights for the eye. We will go back to
our color palettes and select the white color. We will go and increase
the size of our brush, and we will go to one of
the sides, for example, the top left and we will put the first highlight in that way. We'll do the same on
the opposite side, trying to put it on the same
line and on the same side. When we have it, let's just
go and criticize our brush, and we will go and put a few
more highlights like that. If you want to experiment
with the highlights, maybe you want to try
out different sheeps, you are welcome to
go and do that. When we are done with our cup, let's just go and add some
shadows and highlights. Firstly, let's just go back to our layers and we will create one more layer above our le with facial features
if it's clips, or if it's not clip, we will just go to our
layer where we have our little elements and we will create one
more layer here. Let's remain this
new layer as shadow. As we are creating a shadow, let's just go and change the
blending mode of this layer. We will go to this icon and you can see we have a
list of options. We will need to find
multiply blending modes. As for the opacity for now, let's go with something like 30% and if it's not enough
or if it's too much, we can always get back to this
option lier and adjust it. Now, we will get back to our color palettes and
select the same pin color, or if you want,
you can go and try out hot pin color.
It's all up to you. When we did it, we will
just go to one on the side. For example, to our right one, and we will go and start creating a shadow
going in that way. Let's just go and
create a first curve. We will just hold our line and the end as always, if
we need to adjust it, we are going over our top to the en mode and
adjusting the curvature. When we have
something like that, let's just go away from our
mode by typing on the screen, and then we will go and increase the size
of our brush and manually recolor the rest of the area that we
have on our right. When the shadow on the top try to continue this line
that you have on the top. When you have
something like that, let's just go to this side
that we have on our left. We will go to this inside part and we will create
a shadow here too. Firstly, we will
just go and recreate the line the same way as
we have it on our right. And when we have the, we will just go over the middle part or a little bit more toward the
left from the middle, we will create a little
curve going in that way, and then manually, we will
recover the rest of the area. When we have something
like that, also, let's just go to our handle and let's put it
completely in the shadow. When you have it in that way, let's just go again to
our lives and we will create one more layer that
we rename as highlights. It's already eclipse if you are underneath your le
with facial features, and we will just need to go to the icon and change the
blending mode to overlay. As for the opacity, let's go with something
like 50% for now. If we need to
adjust it later on, we will then go and adjust it. Now, let's just get back to our color palettes and
select our white color, and we will go again and
increase the size of our brush. We will go to the opposite
side from our shadow, and we will create a
highlight that be. If you want to create
other highlights, maybe different sheps or maybe some dots
or some sparkles, you are welcome to
go and do that. If you feel that this
highlight is too bright, let's just go again
to our layers, we'll go to with the highlight, we'll go to our icon
and adjust the opacity. When you are satisfied
with your highlights, let's go back to our
canvas and we will go to the opposite side right
here on our back part, and we will create a
little highlight here too. Now when we are
done with our cap, let's move on to our next part, where we will recreate our dock.
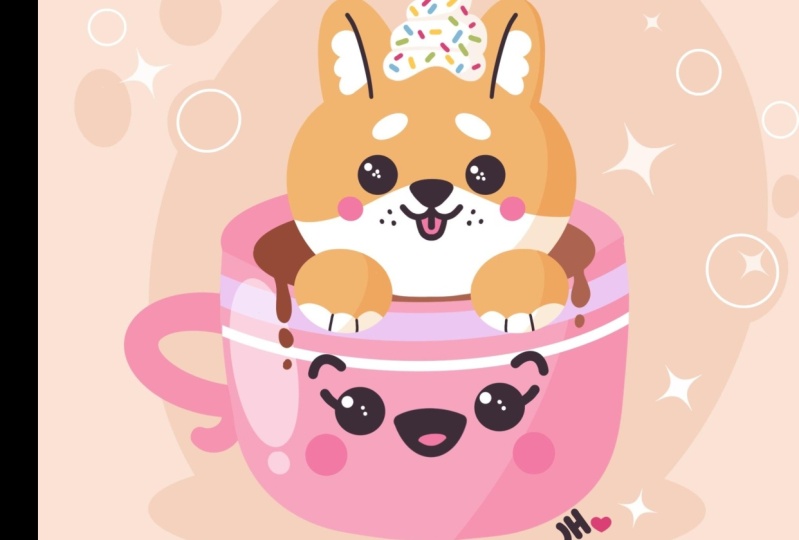
4. Puppy: Let's begin this part
firstly by going to our layers and we will unhide
our layer with this sketch. Now, we will go to our
layer with the coffee, and we will create
one more layer here. Let's rename this layer as dog. Now, as we want everything
to be very in a middle. Let's just go to our
range icon one more time, go into our drawing guide, toggling our drawing guide here, and then we will go
back to our layers, go to this layer with dog, we will tap on it and we
will choose drawing assist. Now, when we have it, we will go back to
our color palette, and we will select
this orange color. With this orange color, let go and recreate the
shape for our heat. Let's just go and de
creticesize of our brush. We are using symmetry, so our elements are mirroring on the opposite
side automatically. Let's just go and
recreate the main shapes. When you have the outline, let just drag and drop
the color inside, and if you have some
elements that you want to adjust maybe
soften some corners, you are welcome to grab and reserve and adjust these parts. Okay. When you did it, when you're satisfied
with the overall shape, let's just go and start
adding the details. Firstly, we will go again to our liers and we will
create one more layer. You can rename this
layer as details. We will just need to go
to the layer, tap on it, and choose drawing a cyst, and then we will go again
to our color palettes. Firstly, let's just
go with white color. With the white color,
we will go and recreate the eyebrows firstly. Again, just go into
the shapes that we have on our Skage
and recreating them. If you want, you can do them
manually or if you want, you can go and hold your
apple pencil at the end. There are snapping to a When we are done
with our eyebrows, let's just go again with
the same white color, and we will go and recreate these fluffy parts on our ears. When you have these outlines, let's just go again to our color palettes and we will select this dark magenta color. We will go to the sides. For example, if we are
going to our right, we are just going there and recreating this
element in that way. Try to make the whole shape close so you are overlapping
your white elements, and then we will get back to our color palettes
one more time, select the white color, and just drag and drop it
inside this shape. When we did it, let's just go and recreate the
shapes for our ice. Again, we are going back
to our color palette, selecting our dark
magenta color, increasing the size of our brush and just putting
dots for our ice. If it's not happening
from the first try, you know what you need to do,
just try out one more time. When you are done with
positioning your eyes, let's get back to
the smaller size of our brush and let's go and
recreate the nose elements. Again, we are just going
there and creating our nose. You can see our line of symmetry is not matching what
we have on our skage. We can just use
the elements that we have on the skage as a guide, but follow more this line that we have as our line of symmetry. When you are done with
the overall shape, just drag and drop
the color inside, and then if you need to
work more on the shape. When you are done with it, let's just go to the side and we will recreate these
part right here. Again, we are creating
half of the circles, half of the epses. It's all up to you. If
you need to adjust it, go to the 18 mode and adjust it. If you want to take a look at your illustration
from the distance, you are welcome to
go and do that. When you are done adjusting
these little elements, let's just get away
from our editing mode and let's recreate the tone. We are just going to
the middle part of this new element and creating the time going
down in that way. Hold it at the end, try to create a nice connection
in the middle. When you are done,
let's just go to the middle part and create
our line going down. Hold it at the end, try
to make just one line, and when you are satisfied with the position
of these elements, let just go away from
our editing mode. Now, when we are done with this, let's just go and
recreate our pause. What we need to do is to
go again to our layers, we will create one
more layer on top. We will renin this
layer as pause. When we did it, we
will get back to our color palettes and select
again our orange color. With this color, let just
go and recreate the pause. If you want, you can just
go to your post layer, you can just tap on it and use
assisted drawing here too. Let's just go and
recreate our sheep. If it's easier for you, you can just now go to your
less and hide your liar with the main shape so you can work more on the overall
shape of the pole. When you are generally done, drag and drop the color inside and work more on the
shape if you need to. When you are done working onto the main shape
on the pause, let's just go and add
some details here. Firstly, we will
go to our layers, we will go to this
layer with pause. We will tap on it and we
will choose Alpha lock. Now, everything that we are going to be adding here will be seen only on the areas
that we already have here. Let's just go to
our color palettes and select the white color. We will go and in criticize
our brush and we will go to this bottom part and we will
create an element like that. We will go then to
our bottom part and manually recolor
these parts. When we did it, we
will get back to our color palettes,
dark magenta color, make our brush a
little bit smaller, and we will go and recreate these little lines that
we have on our sketch. When we did it, let's just
get back to our layers, we will unhide our
layer with the dog, and then let's just go and add additional elements to our dog. What we need to do firstly is to go to our
with the details. We will go again to our color palettes and
select our hot pin color. We will drag this
color to our tongue, and when we did it,
we also will need to go and add our little cheeks. So let's go and change the size of our brush
to a bigger one, and then we'll go underneath our eyes and we will
put our little cheeks. If you want to, we
will then go to our color palettes and select
a different pink color. So either pink or
the darker pink, and we will go inside
our cheeks and we will add the same lines
that we have on our cup. If you don't like
that it is mirroring, you can add these
lines later on. Now when we are done
with the cheeks, let's just get back
to our layers, we will go to the
layer with details. We'll tap on it, and we will
turn off assisted drawing. If you don't want this line to be right here in the middle, we will go again
to our range icon. We will go and total
drawing guide from here. Now let's go if you want to add these lines
inside the cheeks, let's just go and add them, and then we'll go and add
the highlights to our eyes. So for the highlights, we will go against our
color palettes like the white color and
do the same thing as we did with our cup. Let's just go over
one of the sides and let's put our
little highlights. You can go to the same
side or if you want, you can go to the opposite one. The same way as before, let just make our
brush a little bit smaller and add a few more
highlights like that. Now, when we are done with this, let just get back to our
layers and we will go to this layer underneath our layer with details, our
layer with the dog. From here, we can
create a new layer. Let's just tap on the plus icon and let's clean this
layer to a previous one. We are using the same white
color and we will just go and recreate this
little mask element. Very easily, let go
and create our sheep. If you want, you can
create it manually, but if it's not going too well, we can just go back
to our layers, go to the layer number 11
that we clip to our Dclear, tap on it and choose drawing as. If you need this line that is going from top to the bottom, you can just go back
to your range icon and total drawing
guide from here. But if you don't want it, it will work the same way right here on our screen
without this line. Let me just go and
create the shape. Close the shape and then drag
and drop the color inside. Take a look at it without
the lines on the skitch and decide whether you
like it or not or whether you need to
adjust some parts or not. If you need to adjust something, just go and adjust it. Also on the same layer, if you want to, you can just go and add some
additional elements. For example, let's
just get back to our color palettes and select the same dark magenta color, make the size of our brush
a little bit smaller, and let's just go and add
a few dots like that. That will represent some
kind of the whiskers. Now, when we are done, let's just take a
look at our dog from the distance and decide
whether we like it or not. If we want to adjust something, we can go again
to our arrow key. But firstly, we
will need to select all the layers that
belong to our dog hat. Let's just go and select the
layer number 11, do layer. When we have one layer selected, we will need to go underneath
and swipe the layer from left to right and select
the details layer two. So when all three layers that belong to our dog are selected, we are going to our key. Let's just use the
free for method and let's squish
it a little bit. We are going to this
node that we have on our top and we'll just
drag it down a little bit. If you want to make
it bigger or smaller, you are welcome to
go and do that. Play run with your dog
and when you are done, let's just go and de select fine by heating our error key. When we did it, we will need
to get back to our layers. We will need to go to our layer with a
sketch and unhide it, and we will need to recreate
this little element on top. Let's first go above our
layer with the pause. We will tap on it, and we
will create one more layer. If you want, you can rename
it as whipped cream. Now let just zoom in our canvas. We will go to our color palette, select the white color, and we will just go and
increase the size of our brush, and we will go and with the
bigger size of the brush, we will just go and
recreate the first sheep. Just go there and create
the curve like that, or if you want to create
a more pecular shape, you are welcome to
go and do that. Just with the thickness
of your line, create the element like that. Then we will go on the top and we will create another shape. We are stepping a
bit from the side, and then we'll go to the top
and recreate this top part. Again, let's just go and
create it in that way. Menually the color inside, and let's just take a look
at this element without the lines of the sketch and decide whether we need to
adjust something or not. If we need to, we will grab
our eraser and adjust it. For example, let's
just go to the top and make this part a
little bit more pointed. If you want to adjust
other elements, are the details, you are
welcome to go and do that. When you are done
with this task, let's just go and
add some sprinkles and additional elements to
this whipped cream firstly. What we need to do is to
go to our layers and we will go and create one more lay above our layer
with whipped cream. Let's remain this
layer as shadow. Let's clean this layer to a
previous one and then we'll go to our icon and change the
blending mode to multiply. As for the opacity, let's go with
something like 30%, and then we will go
to our color palettes and select either light
beach or beach color. When we selected our color, let's just go to the
right part and we will start by creating a little
shadow going in that way. We will just go to the
right part and create the first curve and manually recolor the rest of the area. We'll make the size of our
brush a little bit smaller and we will divide the parts that we have for this element. Just go there and
create a curve, and then we will
do the same with our curve on our middle part. Just creating the shadow
going up in that way. Work on the overall shape and manually recolor the
rest of the areas. When you have the shadow
on the second element, let's just go to the top and create the little
divider here too. In the same with the shadow
we will do on the top. Just go in there and
repeating the shape, going up in that way and manually recoloring
the rest of the area. If you need to
adjust some parts, you are welcome to grab an
eraser and adjust them. When you are done
with this task, let's just go and add
some sprinkles here. Firstly, going back
to our layers, and creating one
more layer on top, if you want, you can rename
this layer as sprinkles. You can keep it as it is, or if you want, you can clean this layer to
your whipped cream. When you are done
with this layer, let's just go to our color
palettes and let's just go to the bottom and we will select firstly our
s and blue color. We will go to our
whipped cream elements, and we will just go and start creating the elements
going in that way. So just go and randomly create a few elements
with this blue color. And when you are done, we will go back to our color palettes. We will select our
yellow, orange color, and we will add a few more
sprinkles in that way. When you are done with yellow, going back to our color palette, selecting yellow, green,
and with this color, we will add a few
more of R sprinkles. When you are done with
the green, one more time, going back to our
color palettes and selecting this dark pink color. Lean just add a few more of
R sprinkles with this color. When you are done, let's just
go and do one more thing. We will go to our elements
that we have for our dog, our hat, and we will just
create the shadow here too. Firstly, we will just
go back to our layers. We will go to our layer with our white element right here and we'll create one
more layer again. We will remain this as shadow. Let's clean this layer
to a previous one. Let's go to our icon and change the blending
mode to multiply. As for the opacity, again, let's go with something
like 30 or 40%. When we did it, we are going
back to our color palettes, and again, let's select the same orange color that
we used for our main she. We will first go over our bottom right
parts and we will create a shadow going
up in that way. We will also go a little bit to our ear and we will repeat
the shape here too. Very nicely connect your
shape right between your ear and the main shape and then manually recolor
the rest of the area. Decide whether you like
the amount of the shadow. The amount the opacity
that you have right now, if you need to adjust it, go back to your layers, go to the shadow layer, go into the icon, and adjusting the
opacity from here. The same thing we
will do to our post. Let's just go to our post layer and we will create
one more layer above. Again, let's rename
it as shadow. Let's clean this layer
to a previous one. Let's go to our icon and change the blending
mode to multiply. Again, going with the similar
amounts of our opacity and going to the bottom right part and creating
our little shadows. When we are done, we also can go and work a little bit
more onto our coffee. Firstly, let's go
back to our layers. Let's find our
layer with coffee, and let's create one more above. Let's rename this
layer as shadow. Again, let's clean this
layer to a previous one. Let's go to our icon change the blending mode to
multiply opacity around 40%. Going back to our
color palettes. Again, let's select
this red orange color. Let's just go to the left side and we will put this
left side in a shadow. When we did it, we
also can go and add a few details to our coffee. For example, if you like it, how it looks right now, you can keep it as it is, but also we can just go and add a few splashes that are going through the shape of our cup. What we need to do is to
go to our layers and we will create one more layer above our layer with the shadow, or you can work onto
your layer with coffee. For example, let's just
go to this new layer. You can rename it or you
can keep it as it is. Let's just pick the color from the colors that we already
have onto our screen. We will hold one of our
fingers on the screen, and you will see that we
invoked our eye drop a tool. If we are moving our finger, the color on the soap on
this tool is changing. We'll just need to go to this area right
here on the left, on our coffee and pick
the color from here. When we did it,
let's just go and decrease the size
of our brush and we will go and create the splash that is
going down in that way. Work on the shape.
It's a little drip. Let's just go to
the corners if we have them and make
them very soft. If you want to create a little drop going
down in that way, you are welcome to
go and do that. When we have this first drip, we can go to the opposite side and do the same thing here. First thing that
we need to do is to pick the color right here. Again, we are invoking
our eye drop at two. Let's just go and
decrease the size of our brush and make this little
drip a little bit smaller. Again, going to the top and creating a little drip
going in that way. Our shape is a little
bit wider on the bottom, when we have the shape, we will close it and we will just drag and drop
the color inside. Again, if you want to
create a little drop, you are welcome to
go and do that. Now when you are done with this, let's just go and work a little
bit onto our background. We will need to
go to our layers. Firstly, let's just
go to our layer with the cup and above all the
layers that are clipped to it. We are going to our
facial features. From here, we will
create one more layer, and if you want, you can rename
this layer as background. When we did it, we will
just grab the layer and drag it down underneath
our layer with the cup. When we have it right here, let's just get back to our color palette and
select this beach color. When we have it, we will first go underneath
our cup and we will create a little shadow
in the shape of the ellipse. Firstly, again, we are
creating our shape, holding it at the end, trying to put it horizontally
if we need to adjust it going over our editing mode and adjusting the overall sheep. Find the position that you
like, and when you are done, let's get away from
our editing mode and drag and drop the
color to this area. When we have these
first elements, let's just go along the top part and let's
create another shape. Let's first go with the
shape of another pse. Go along the whole shape, holding our shape at the end, going to our editing mode and adjusting the
shape from here. For example, let's balance
everything out and make the shape a little
bit bigger on our right. Position the shape in
a way that you like, then get away from
the editing mode and let just drag and drop
the color inside. When we have it, let's just go and add a few more elements. Firstly, let's just go and
increase the size of our brush to maximum and let's
just go alone the shape, and we will add a few
elements like that. Just adding another element
for our background elements. If you want to go a little
bit more toward the edges, you are welcome to
go and do that. When you have these elements, let just go and add a few more elements that are
going beyond the frames. Again, just with the
line, with one dot, we are just going
along the shape, and we are creating
a few more elements. You can vary the size of them, you can vary their placement.
It's all up to you. When you are satisfied with
the amount on these elements, let's just go and change
our color to white. When we have it,
we will go and use a pecular brush that you can find in a project and ser stop, and we will use it to
add a few more elements. So we are just going and
selecting this brush. It is our brush that is
called double monoline, and we will just go and again, put the dot to the
elements that we have right here that are going beyond the frame of
the whole sheet. Let's just find the
size of the bars that we like and that will
match these elements, additional ones that we
put on our main shape. Let's just go and put the dots to add these
additional elements. We will do the same
on the opposite side. If you want to
adjust the size of the elements and maybe go and add a few more
elements like this, you are welcome to
go and do that. When you are done
with this circles, we will use another brush and
we will put a few sparkles. Again, this brush you can find in a project and reser sap. With this brush, let's just
go to some blink pieces. Let's adjust the size of it, and let's just go and add a
few highlights in that way. Try not to overdo it with
your little sparkles. When you are done with it, the very last thing that
we will need to do is to position the whole illustration
more in the center. What we need to do is to go to our layers
and we will need to select every layer that we
have for our illustration. When one layer is selected, we are just going for
all of these layers, and we are swiping them
from left to right. When we have them all selected, we will go to our arrow key. We will turn on snapping
if it's not turned on. We will use uniform methods, and we will just drag
the shape to the middle until we match it with
these orange lines. When we found these
two orange lines, one horizontal, one vertical, we are right in the center. If you want to make your
illustration bigger, you can just go when you
are at the uniform method, right to one of
the nodes that are in the middle top or bottom and drag it up or down depending on the node
that you are using. If you did it, you will just
need to go again and find these two orange lines so you know that you are
right in the center. And when you're satisfied
with everything here, let's deselect everything, and we are done with our class. Thank you for
watching this class, review if you liked it, and continue subscribing for more Cai videos in the future. Looking forward to
seeing your projects.
 Uni Corn, ⭐Kawaii Art Enthusiast⭐