Transcripts
1. Introduction: Hello everyone, I'm uni,
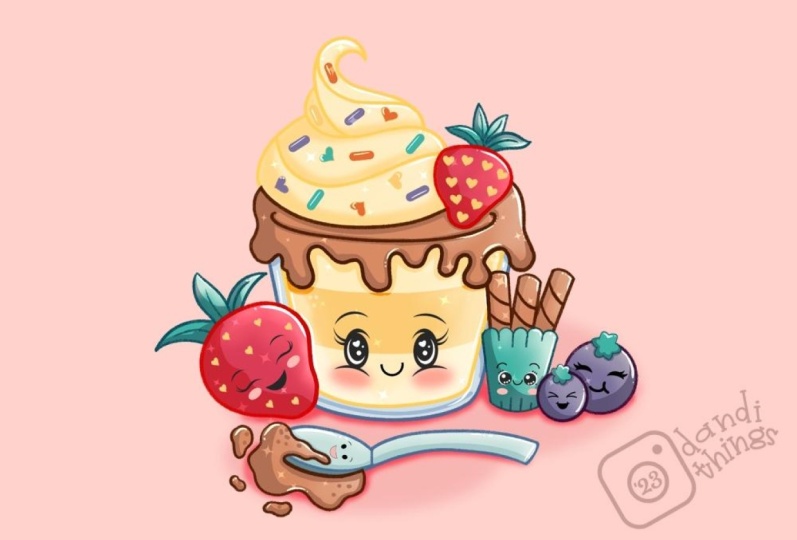
and enter this class, we'll draw a very cute and
sweet dessert and position. This class doesn't require any prior experience
or fancy tools. We'll start from scratch
and we'll be using simple techniques
throughout the process. Everything you'll see will
be happening in Procreate. However, even have
other software or one to try to
traditional materials, you are welcome to join if
you are ready to start, Let's jump right into it.
2. Preparing the Canvas & Making a Pudding Sketch: Let's start our
class by deciding what kind of Canvas we
are going to be using. You can see it is a very simple standard square canvas because both big sepal width and
pixel height are 2048 pixels. As for DPI, we are
using 300 and S1, the color profile we are at
SRGB with this low number. When it's all done, let's
hit Done and we will be redirected to our new canvas. And now, if you would like
to use the same brush for this kitchen part and use similar colors to what you
will see throughout the class. Go to the project and
resources tab and download all the materials. When you are done
with this task, let's just go straight to our color palettes and we will check out what we have here. Here we have two options of
how we can use the colors, the compact here, and the cards. We will go to the cars because here we have all the colors, names, and they are
ready for us to be used. Well, I still here under
our color palettes, Let's select our first color
for this gauge in parts, and it will be dark red lines. Let's tap on it to select. And when we did it, we
will need to go and select this brush that we have downloaded from the
Project and Resources tab. Dao fled pencil when
you have arrogance that led you to start by
creating a simple scheme. Today we are
starting by creating a very simple shape
that will help us find the composition
that will work with our sketch and the whole
illustration in general. Before starting just a few
words about composition. Simply, composition is some kind of structure or
into your Canvas. Your objects aren't
scattered randomly. They are grouped in some way and that makes it more pleasing to the eyes without going
too deep into the theory, we can start with
a simple shape, a triangle, circle,
rectangle, etc. When we have a guide in
a form of simple shape, we can position all of our elements in accordance
with the balance. Because composition
is all about balance, you don't want to end up
with something very big on one side and something very
small on the other side. This way, everything
will be unbalanced and your eyes will be not very
pleased with the composition. So now when we know just a
little bit about composition, Let's move on to our
Canvas and we will start creating our little scheme
that was mentioned before. We will start by
creating a triangle. But if you would want to find
out something different, if you want to
experiment a little bit, you are welcome to use any
simple shape that you like. Now let's just go to
the canvas and width one line without lifting
up our Apple pencil, we will start
creating our shape. Let's just go and try that. Just going across the Canvas and creating these beak shape. Hold your Apple pencil
and the end of the line, and you will see that you snap your shape to a
better one if you need to adjust the angle and make this line on
the bottom straight, you can move your Apple pencil
in a circular direction. If you need to make
it bigger or smaller, you will need to move
your Apple pencil from side to side or from
top to the bottom, depending where you have
stopped creating your line. If it's on the top, you will need to go from
top to the bottom. If it's on this side, you will need to go from sites. This act when you have
something like that, Let's hold our Apple
Pencil and we will go to this option that
pops up on the top. You can see for
me it's polyline, but for you it might be a triangle or
something different. Then just tap on it and we will see that we have a
few options here. If you have the option
triangle, Let's select it. Now you can see that we
are in the editing mode. And this editing
mode had some nodes. That means that we can adjust our shape by moving these notes. All you need to make sure that our triangle is
similar on both sides. So we will need to go over the top nodes and we
will need to move it right above our nodes in the middle on
the bottom part. So when you have something
like that's ledgers go and adjust our shape
just a little bit more. Firstly, let's position
it right in the center. To move the whole shape, we will need to go and
find some blank space onto our canvas and hold
our Apple pencil there. When you did it, we
will need just to move our shape to the
place that we need. Position it right in the center. And when you are done, ledgers go to the
bottom part and we will adjust it
a little bit more. Firstly, we will make our
triangle a little bit wider. We will need to keep some
space from the bottom, from the sides and from the top. Everything should be balanced. But we will just
go to this side, to the bottom nodes
on this side, and we will tweak them
more toward the sides. Let's just go firstly, our right side and we
will move the dots more toward direct when you
have something like that, Let's move on to the
left side and let's do something like that
when you are done and when you feel
that your triangle is very pretty ledger
step on the screen with one of our fingers or with our Apple Pencil and we will get away from the editing mode. So now we have this
scheme on the triangle, and it is too bright
for us to use it. So we will go and change the
opacity level on this layer. The opacity level shows how bright or transparent
your objects on your canvas. So now let just
go to our layers. You can see that we have this layer number
one straightaway. We can rename it as
triangles scheme. So let just tap on it
and choose Rename. We will go to this little icon near the checkbooks.
We will tap on it. You can see that we have
this opacity slider, which we can grab
and move toward the left side and make it less
bright and less border it. So find the opacity level
that works for you. And when you're done,
let just tap once at this triangle skin layer to
get away from this mode. And we will need to create one more layer for
our sketching parts. But before doing that, let's make sure that
we are not creating any new objects onto our
layer with triangles scheme. So we will just go and look at, we will swipe this layer from right to left and choose look. Now, if you try to create
something onto this layer, you will have this message. Now, when we are safe to go, we are going back to our layers and we will create
one more layer. So let just tap on the plus
icon and straight away, Let's rename it as Sketch tab and on the layer and
choose and rename. And when we have this triangle, when we have our new
layer for this gauge, we are ready to start
creating this gauge. And we will start by creating a big object inside
of this triangle. And we will try to position
it right in the middle. We don't need to go
very precisely and use this line of the scheme strictly trying to position
everything inside. You need to make
sure that you are somehow inside these frames
to keep in mind the balance. But you are using the
frame as a guide, not as an unbreakable rules. So now let's just go inside
of our triangle and we will start by creating a little jar or a little glass
with some Putin. Firstly, go over
one of the sides and creating a descending
line like that. You can play around
with its position. You can play around
with the angle, and you can play around of how you are making these slides. You can create a few of
them and work manually. Or if you want to
work very neatly, you can go and create
one line and hold it at the ends and snap
it to a straight line. You can adjust the
angle by moving your Apple pencil
from side-to-side. And if you need to
adjust it even more, you are doing or the
top to this edit mode. So now when you have the
first line on one side, Let's move on to
the opposite side. We will mirror the slant. So that means that
we will need to keep the same angle and we
will need to put it on the same place
where you just go and create this line
on the opposite sex. When you have
something like that, Let's move on to the
bottom and we will connect these two
lines with a curve. Again. You can create it manually. You can play around
with the curvature. It's all up to you, or you can hold your
life and the end and snap it to a perfect curve. Let's just go and create
something like that. So you can see that
we are not staying inside this shape
on the triangle. It's okay. We are using
our lines as a guide. Now when we have these
bottom part of our jar, Let's move on to the
top and we will finish it up by creating a
little ellipse here, going over one of
our alliance and from it we are creating
the ellipse here. Hold your shape and the ends. And when you snapped it
to a perfect ellipse, Let's go over the top to edit modes and we will
adjust it even more. So now let us go to our notes
and we will need to combine our nodes on this side with the lines that
we have for our jar. So let's just go and
combine the lines. And if you are
satisfied with it, we will tap on the screen
to get away from this mode. If you need to
adjust it even more, if you want to make
it more open or more closed or position it
more horizontally, ledgers go and do that when you have the
shape that you like. Let's just tap on the screen to get away from the editing mode. When we have this basic shape, let's just go inside and we
will add some thickness. So that means that we will
need to step a little bit from our sites and we will need to repeat the lines that
we already have. Let's just go over
one of our sides. Firstly, we will go and
start repeating our lines. Just go in with the same
direction that we have. And we are trying to keep
this distance going across the whole shape in that way we are creating some thickness. And later on when we
are going to be aging some colors and
when we are going to be working onto
our characters, this part will be a glass part. The part inside will be
the part with the pudding. And now when we
have these shape, we are ready to go
to the top and we are ready to add
some melt and Putin, firstly, let us go
over one of the sides. So e.g. the left one, we will go to this
intersection where we have our ellipse connecting with
this side of our glass. And from this intersection, we will start creating
our dripping parts. Firstly, ledgers
due to this line that we have on
top of our Alice. And we will go a little
bit above it and going down and create a little curve
going in that direction. Don't go too far from
your glass elements. And when you have
this little curve, Let's just go and
create a little drop. So it will be looking like that. You can play around
with its size. You can play around
with its curvature. You can play around
with a chunk in as. And when you're done
with the first droplets, move on and go along
the whole size of our glass and we will add
a few more draping parts. You can play around
with their amounts. You can play around
with how big they are. It's all up to you. Just go with some pattern and
create some melting parts. All you need to do is to
go and create the way we lights when you've
reached the other sides, you will need to repeat the same thing that
you have here. So let's just go firstly for
our top part of the ellipse. And from it, we will just repeat this curve that we have
on the opposite side. And we will create a
little drop on the site. So now you can play around and work more once a
year dripping parts. You can just make them a little bit thicker, you can work on. So these connections right here make them more melting down. So to do so, you will need to soften this part a little bit, either if you need to
go a little bit above or inside the shape that
you have for your ellipse. It's okay. You can just go
and soften it up. Most of the times
your bottom part on this drip will be a little
bit wider than the top part. So you can play around
with these options. Now when your eyes down ledgers, grab our eraser tool and we will erase all the lines
that we don't meet. Now when we have
this melting parts, we are ready to move on
to the top of it and we are ready to add some
additional elements. So e.g. Lynch's go
over one of the sides. Maybe they're right
one or the left one. It's up to you and we will
add some whipped cream. But before starting
with our whipped cream, we will need to figure out
where we need to put it. So firstly, let us give
a little bit above these lines that we have
for our dripping part, we will repeat the
same line that we have for our little
ellipse over the top. But this time we can
play around with it. We can put it a little bit
lower or a little bit higher. We can play with the curvature and do whatever we want here. Basically, what we need
to do is to go alone the size of our glass and
create a curve like that. When you have this curve here
onto these little elements, we will be aging are
additional elements. So let's start with our whipped cream before it
starts and we will need to figure out how it works when we are aiding
the whipped cream. We are doing inner
spiral movement, but we are not looking at our
whipped cream from the top. We need to figure
out how to turn these as if we are looking
at it from this side. So basically what we need to do is to create
something like that. As you can see, we are adding some layers and the layer on the bottom will
be the biggest one. The layer on top of it will
be a little bit smaller and the layer on top of
it will be the smallest. So now let's just go and start by creating a few ellipsis. We are going over
one of the sides, so e.g. the right side. And we will start
by creating a shape like that with very fine lines. Let's just go and
create this ellipse. And now we will go over
the top of it and we will add another ellipse that will
be a little bit smaller. You can overlap these shapes
and when you have it, we will go over the top of this shape and we will
add another layer here. So again, making an ellipse and making it a
little bit smaller. Now for the top part, we will need to go to
the middle part on this little ellipse that we have created over the top part. And we will need to create
a little hook here. When you have this basic shape, we will need to work on site. We will need to figure out
what shapes will overlap, what shade, and we will
just grab our eraser tool. And firstly, we will
go over this part and we will erase all
the oral 11 elements. So we are doing it
in that way so that top element is overlapping
the bottom parts. When you have
something like that, we can work on it
even more and we can make the connection
between these elements. So now we are going to the
second element right here, and we will just
grab our brush and we will connect it with
the previous part. So what we're doing is creating a little line going
through the whole shape. You can play around with
how it looks on the board. So you can just make a smooth connection between
these two elements. When you have
something like that, just grab an eraser tool and erase all the lines
that you don't need. And now we'll do the same
thing with the top elements. So again, we are going
to these elements where I go into the
bottom of it and we are turning this line
that is separate now into a curve that is connected
to a previous shape. So now you can see that we
are creating some twirl. When we have these, you can just go grab your eraser tool and
erase everything that you don't need if you are okay
with what you have right now, ledgers go over the top and
work onto this hook elements. So what we need to do is to go along this line and we will need to thicken this hook by creating another line like that. So we are just going and
repeating the line and just go and down and creating a
little hook in that way. Also, we will need to work
on to this part and we will need to connect these
bottom part with our hook. So we will just go to our
bottom part and we will create a curve going in that direction over
the top parts, play with a curvature
when you add downgrade the Eraser tool and erase
everything that you don't need. If you think that you
can adjust some parts, just go and do that. And when we are done
with our width cream, let's move on to the
opposite side and let's put a little
strawberry here. We will start by creating
a little triangle. So firstly, we will
need to pay attention on how we create
the bottom line, because we will need to
position our strawberry. We will need to put it on top of our Putin and we will need
to make it believable. So it's not just
hanging out there, it is just laying
on the surface. So let's just go
over this line and we will create the
diagonal line like that. When you have this first line, just continue and
create a triangle. And as you can see, we can
go and overlap our objects, play around with the
size of your strawberry. Just create this triangle
and when you have the lines, ledgers go and turn
them into the curves. So just go and above these very straight lines and we are turning them
into the curves. When we are reaching
our corners, we are turning them
into the curves too. When you are done adjusting
your sheep led just grab our eraser tool and we will erase all the lines
that we don't need. Now when we have the shape
for our strawberry ledgers go over the top of it and we
will add some leaves here. Firstly, let us go to the top of our
strawberry and ledgers, find its center
just marking down. And when you have it
from this little mark, we will go above
it and we will add a few guiding lines
for our leaves. So let's just go and create a few curves going in
opposite directions. When you have your
guides in lines, all you need to do is
turn them into leaves. You can play around with
the sheep own beliefs. You can just go and
create some drop shape. Or if you want, you can create something similar
to the lemon shape. It's up to you.
Let's just go and create a few of these slides. When you are done, grab the eraser tool and erase
everything that you don't neat. Now let us go
inside the shape of our strawberry and we
will add some seats. You can just play around
and add a few lines like that going in the whole
shape of our strawberry. Or you can play around with
the shapes and maybe add some hearts here because we are creating acute illustration. Just find what works for
you and when you are done, let's work a little
bit more on our glass. So we will go inside the shape and we will add some layers. All we need to do is to go alone the whole shape of our inner
part and add a few lines. Let's just go and
create the first curve going a little bit apart
from our middle parts, you can hold your line and the, and snap it to a better shape. And when you have the line
that is looking nice for you, just hold your Apple pencil and let's go and create
one more line. We will go to the top of it. Or if you want to create
a layer on the bottom, just go and add the line here. Later on, we will color these little parts with
a different color. Now, if you have some parts
that you need to erase, grab your eraser
tool and erase them. And let's work on to our acute phase for our
first illustration. Let just go and find the
center of iron glass. So we will just create
one line that is going vertically and one line
that is going horizontally. We know where our center is, so we are going to the top of our little triangle
that is RSA scheme. And from it we will just go
and create a line going down. If you see that it's not a
center of your illustration, you can go over the top
to this edit mode and find the center manually
when you have it, let just tap on our screen to get away from
the editing mode. And when we have
this vertical line, we will go and repeat the
curve that we have right here. We could have created
just a straight line, but it's not our
case because we are creating some kinds
of volume here. And when we are going to be
aging our facial features, we will need to use
this volume to NGOs go to this line and we will just repeat it a
little bit lower. Hold it and the end, find the curvature
that works for you. And now we will go and
add our facial features. Firstly, we will go over our left side and we will
add the first eye here. We will just add a
little dot here. Or we can start by creating
a shape of the ellipse. Find the position
that works for you. Step a little bit
from our center onto this line that we have just created, the horizontal one. We will create the first dot when you have it on one side. Let's move on to the
opposite side and let's add this
similar shape here. We will need to put
it on the same line. We will need to keep the same
size and we will need to keep the distance from the
center when you haven't slept. Just go inside this shape
and let's shade it. When you have done one side, Let's move on to the opposite
one and let shaded two. Now let's go over our eyes and we will
add little browse, e.g. we have some free space
over the left side. Let's just go and add a
little brow here by creating, just have on this circle
over the right side, we don't have the free space because here we have
this dripping parts. So here we just can
leave it as it is. Or if you want, we can go over this drooping part and
add a little brow here. Now when we have our eyes, Let's just go and add
our little mouth. We will go to the same
line that we have right here of where we
have created our eyes. We will go in the
middle part and we will create a little curve like that. You can hold your
line and the ants, you can play with the curvature. If you think that
you want to put this line a little bit lower
or a little bit higher. Let's hold our Apple pencil and go over the
top to edit mode. You can play around
with the position here. And always, you can
just go and zoom out your Canvas and take a look at your object
from the distance, because that way you will see more clearly
what you're doing. Now play around, find a
position that works for you. And when you're satisfied, ledgers tap on the screen to get away from the editing mode. Now, let's just zoom in
our canvas and let's go to one of the sides and we will add a little tongue over our mouth. So we are going over
one of the sides and we are creating
the shape like that. It is the bottom
part of the lips. When we have it,
we will go just in a middle part and we will
add a little line like that. When we have our little
tongue alleges go underneath the ice and we
will add little chicks here. So let's just go over one of the sides, the left one, e.g. we will go just below
the eye and we will add a little ellipse here
when you have it on one side. Let's move on to
the opposite side and let's do the
same thing here. If you don't like the ellipsis, you can just go and
create the circles. Now we have our main shape, but let just go over
the whipped cream and we will add some
details here. So e.g. we can add some sparkles, ledgers go and add a few hearts if you
little sparkles and if you just play
around and position of these elements and
try not to overdo it. When we are done with
aging are little elements, are little sparkles
or little hearts. We are done with our
first and main object. And in the next chapter, we will be adding the
additional elements.
3. Finishing up the Sketch with Additional Objects: We have finished our previous
part by creating our Putin, and now we need to
continue and add additional elements to finish
up our whole composition. And it's also very good
for the composition to have multiple objects
with different sizes, a big one, medium
ones, and small ones. If we go with a percentage, we don't need to make
everything equal. 30% of your illustration
is for a big object, 34, the medium and
furtive for the small. Your big object is
your main object. So you will need to give it about 50 per cent
of space, 30, 35%, you will need to spend
on medium-size objects, and you will leave 15 to
20% for small objects. And of course, you don't need to measure everything precisely. So now let's just go
to this side and let's continue agency
American position. We won't go firstly
over our left side and we will add another
strawberry here. We will do the same thing
as we did on the top. We will start by creating
a little triangle. Again, we will be
overlapping Irish shapes. So let us firstly go and create the line going
in that direction. We also need to think about
how it lays on the surface. So you don't need to make it
floats above the surface. You will need to figure out
how to put it on the surface. Now, when you have
this first line, let's just continue by
creating our little triangle. When you have it's, let's
turn our straight lines into the curves and we will
do the same with the corners. You can play around with
the size of this object, because now we are adding
the medium-size objects. You can make it a
little bit bigger than the strawberry that you
have over the top part. When you soften the corners lie, just grab the eraser tool and erase everything
that we don't need. Now, again, let's just go to
the top of our strawberry. We will find its center and we will add a
few leaves here. So e.g. let's play around
with these shapes here. And let's go with
something like that. We will create the first
shape in the middle part, and then we will go
to the sides and we will create a
few smaller ones. You can make them
straight or you can turn them into some bean
shapes elements. And when we have our
strawberry lead, just turn it into a character and we will add
the facial features here. So firstly, lead,
just zoom our Canvas and we will find the
center on these elements. Again, we will create
one vertical line and one horizontal leg just go over the top and we will create
these guiding lines. Your lines, if you need
to adjust the angle, move your Apple pencil. If you need to
adjust it even more go or it's up to Edit mode. When you have the
vertical line ledgers go and create the
horizontal line, but we will make it not a
straight line but a curve. Hold your land and the end. And if you need to
adjust the placement, go over the top to edit mode. Let us try to put it
somewhere in the center. When you aren't, then
tap on the screen and ledgers go and start agent
our facial features. And again, we will start
by creating the ice. We are going over
one of the sides and we are aiding our circles here. If you want to play
around with the size, if you want to play
around with this shape, you are welcome to do it. Now when you have the first, I move on to the opposite side and do the same thing here. Try to put it on the same line. Try to keep this size and try to keep the distance
from the center. Now let us go and add
our little mouth. We will go right
between the eyes and we will create
an open mouth. So this time we will start by creating an ellipse
going in that direction. And when we have
this first ellipse, we will go to the opposite side and we will just mirror it here. We are ending up with some
kind of the heart shape. Let's shade it right away. If you want to make
it more rounded, you are welcome to do it when you are done
with the whole shape. If you want to go
and add some Browse, you are welcome to do it. Now, let us go underneath the eyes and let's
add our cheeks again. You can play around
with the shape. You can go with the
ellipse or with a circle. And now let's just go to the empty space and let
just add some little seats. Again, you can play
around with the shape. You can just end up with creating some
ellipses like that. Or if you want to
make it even cuter, ledgers go and add some hearts. Maybe this time we will make
them a little bit smaller. When you are done, optional part is to add
some arms or maybe Lex. So e.g. let's just go over our left side and we will go to the bottom part of
our strawberry and we will add a little arm
going in that way. If you want to work on
your shape even more, maybe soften it up even more. Just go and do that. If you want to add another
arm on the opposite side, Let's just go to this
side and we will continue the line that
we have for the body. We will create it. And on the top we will add a
few more lines for the hat. Now when we have our
second character lead, just add a little elements. That small one, we will
go right here where we have a little intersection that now is looking Not quite good. So this intersection, we
will add another buret. So this time let's just
add a little blueberry. We can work just with a circle, or if you want to change the shape and play
around with it, you are welcome to do it. So let's just go there
to this intersection and we will create a
little element right here. When you have it, let just
grab our eraser tool and we will erase all the parts
inside that we don't need. Now let's just go
over the top of it and we will add a
few leaves here. So again, we can play
with something like that. You can end up
with three leaves. Or if you want, you can
play around and add as many leaves as you
like to make it cute. You can just add a
little heart and later on we will
color it as leeks. Now when we have our shape
for this little berry, Let's just go and add
some facial features. You can play around with your
facial features right here. So e.g. let's just go
and add our little eyes. And let's just go and add
a little cute mouth here. So we will go and create
the shape like that. If you want to add some browse and if you
want to end the cheeks, you are welcome to do it. And now let's just turn
it into a character to, and we will add a few Lex. So we will go to the
bottom part and we will go in a direction
where our surface is. And we will add a
few lines like that. At the end of this line, we will add two opposite lines, so we are turning them into
the vertical direction, making the diagonal lines. And when you have this, if you want to add
some little arms, you are again, welcome to do it. Now we are done
with our left side, so let's move on to the
right side and let's continue finishing
up our composition. We will need to make
aref imbalanced. So that means that
we will need to add another object of
the medium-size. Each should be
similarly weight wise to the object that
we have on our left. Let's just go there and
create another object. And maybe this time we
will create some muffin. So firstly, we will
go or our right side and we will start by creating
a little guides in light. Let's just go and create a
diagonal line like that. When you have this
diagonal line, we will do to this side
and we will create two descending
lines similarly to what we did to our
shape of the jar. So let's just go to the
top part of this line. Maybe a little bit above the center or Ellis will
be below the center. And we won't go and create
these descending lines. So e.g. you can mark down
where you want to finish them and go to the sides and
add these diagonal lines. Also, if you go and start
creating the lines, Try not to create
something like that. Don't touch one object
with another object. But when you are touching them, you are creating some
kind of tension and you are inviting an unwanted
attention to this place. And generally, it
doesn't look very nice. So it's always better to go and overlap one object
with another object. When you hand this
to descending lines, Let's just go over
the bottom and we will connect
them with a curve. When you hand this curve, let's just go to the bottom part of this line that
we have created. And we will tap a little
bit from this side, and we will create two more
descending lines like that. You can play around
with its size. Or if you don't
want to add them, You are welcome not to do that. When you have these two
little lines ledgers go and connect them
with another curve. And now we will go over the parts and we will
create a wavy line here. And this wavy line will represent some kind
of morphine wrap. Let's just go and create
something like that. When you have it led, just grab our eraser
tool and we will erase all the lines
that we don't need. Now when you have
the clean shape, Let's just go and add
our facial features straightaway so we can
go and find the center. The better one that
we had before with this line that we
have created before. So again, we are creating one line that is going
from top to the bottom and another line that is going through the center of our shape, which will be horizontal, but it will be not a
straight line but a curve. So let just go and
create this curve. We can hold it and the
ends if you want to, if you need to
adjust it even more or find a better
placement for it, go to the edit mode and
find what works for you when you are done leg just go and add our
facial features. So firstly, going over one of the sides and
aiding our first i, if you want to play
around with the shape, you are welcome to do it
when you hand the first eye. Let's move on to
the opposite side and do the same thing here, putting it on the same line, keeping the same
size, the same shape, and trying to keep their
distance from the center. When you have the isolate just
go and add a little mouth. We will go this
time a little bit above this line that
we have in the center. And we will create something similar to what we
had right here. Let's just go and create
this half of this circle. Play around with this curvature, play around with its
placement if you want to. When you have these
curved ledgers go to this side and let's
add little teeth, suggest creating some
rectangular shapes. And two, when you're
done with the teeth, let just go to the top. We will create some
eyebrows here. And when you're done
with the eyebrows, we will go and add our little
cheeks underneath the ice. And let's continue working
on these main shapes. So we will go to
this intersection right here of our
line on the top. And we will continue this lines by going
a little bit down. So we're just
repeating this angle and we are creating
these lines here. We will go to the bottom
part and we will try to create these lines
on the bottom too. All we need to keep in mind
that these lines are going in that direction because our
allies are descending. The lines on the
bottom will be a little bit closer to each other. But again, try to remain
the line as if it is solid. When you have these lines, let just go to the bottom part and here we will create
the solid lines. Now when you're done, ledgers go over the top of our muffin and we will
add some cream here. So e.g. let's just go and
create some curves like that. As always, you can play around with the amount
on this elements, with their shapes,
with everything. And when you have them, ledgers, grab the eraser tool and erase everything
that we don't need. Now, let's just go to this
little wheat cream and we will add a few details the same way as we had on the
main whipped cream. Let's just add a few sparkles. If you heard everything
that you want to add here. When you are in San Lun, just go over the top parts to these elements and we will
add a little straw here. So we will go and firstly, creating a line going
in that direction. Hold it and the hands. When you have it, we will go and repeat it a little bit as site. So step one to the
right side and creating this draw in that way, you can hold your
line and the eons and you can go to the
edit modes and e.g. you can play with the
shape of this trope. You can make it a
little bit narrower on the bottom and make it
more white on the top. When you are done
with this shape, Let's just tap on this
screen and we will go over the top part and we will create this Indian part of the straw. So we won't go to
one of the sides, e.g. the right one. And firstly, we will create a line going in that direction. And when we have it, we will go over the top
of it and we will end this same relation that we
had on our main strokes. So one of our sites
will be a little bit wider and one a
little bit narrower. Let's finish it up by
connecting the dots. Now let us go inside of the
straw and we will create a few diagonal lines that
later on we will color differently and we will
create some stripes. If you want to work on
this shape even more, you are welcome to do it. Now we are done with
our main parts. But if we take a look
at your illustration, you will see that
we have something very blank here on
this little corner. And I create an, a
triangular composition. We need to pay attention
to it and we will need to fill it up to make
it more balanced. So let's just go to
this corner and we will add a few
berries like that. You can play around
with their size. You can play around
with their position. If you want. You can add a little story
to this little berries. Let's just go and fill
up this little corner. So e.g. you've ended up
with something like that. If you have some
overlapping parts, grab the eraser tool
and erase them. And let's just go and add some story to our
little berries here. E.g. we will go
to this big Barry and we will add a little
elements like that. So basically we are just adding a little
hard on this side, or we can start by
creating a digit three, but it is reversed
when we have it, we will know that these big Barry just
kissing our little buret. So let's just go to our various and we will add some
facial features here, play around and find
what works for you. At the top of the berries. Let's add our little leafs so we can repeat this
same thing that we had on our first Barry ledgers go to the top and we will add
this little heart here. If you want to add some arms and legs for your
little elements, you are welcome to do it. We are done with our
main character is, but let's just go
to the bottom of our Canvas and we will
add a few beautification. Firstly, we will start by creating some chocolate puddles. We will do, or one of the sides and we will create some
wobbly shapes like that. When you have it on one side, Let's move on to the
opposite side and let's create another
wobbly sheep. If you want to add more of them, you are welcome to do it when you have all of
your wobbly shapes, ledgers go audit
soap and we will add a few sparkles going alone the whole shape of
our composition. So we will just go to the
sides and to the top. And we will add a few sparkles. We can add a few
highlights, little stars. Everything that you
want to add here, all we need to do is to go in the direction
of the triangle. Try not to overdo it. Just add a few own
these elements. And when you're done, ledgers go to our
layers and we will hide our layer with
a triangle scheme. Let's just take a look
at our composition. And if you want to
adjust some parts, you are welcome to do it. We can do it by going to our
arrow key on the top-left. Firstly, you can see that we have this little bottom panel. Here we have the uniform
methods and we can move our shapes in accordance with
the center of our canvas. So let's just go
with Elizabeth app. So we have the equal space on the top and on the
bottom also we have the equal space from the sides when you're
satisfied with the position, if you want to
adjust it even more, we can go under work. You can see that here we
have this bounding box and we have some
intersection insights. We can just go there and we can move these lines to
adjust our illustration. So e.g. you can make it
a little bit bigger. You can adjust the whole
illustration in general, if you want, you can
play with these two. If you don't want to
just leave it as it was, play around, find
what works for you. And if you don't want to
use this word method, we can use another method. We can just go away
from this mode. So we will need to
tap on the arrow key. We will need to go to this little magic wand
tool and select liquefy. We will use the push option. We can adjust the size of it, we can adjust the pressure. But basically it works
similarly to that worked so, but here you have a little
bit more of freedom. So you can play with
all the elements separately and they are not some kind of
attached to one another. So let's just try
it out the leg, just adjust the size of our push and we will go to
this whipped cream and e.g. we can make it a little
bit differently placed. So you can play around
with your elements. You can make them a
little bit bigger, smaller, maybe push them
to the other sides. Just find what works for you. Find what works nice
with your composition. If you want to make
some parts smaller, you are welcome to do it. If you want to
liquefy them again, go and do whatever
you need to do here. When you are done playing
with your elements lead, just deselect
everything by heating our magic one tool
one more time. And when you are done, we are done with our sketch. In the next part, we will be
creating the clean lights.
4. Adding Clean Lines: Let's start our clean
lines marked by going to the Brush Library and
changing them branch. So we will tap on
the brush icon. We will go to the calligraphy
folder and we will choose monoline brush while we are still under our
brush library late, just go to our
monoline brush and we will tweak just
one setting of it. So tapping on the brush and you're inside the brush studio. On the left, we will need
to go under stabilization. And here you can see that we
have the value streamline. This value has this
slider amounts. If we change the
amount of streamline, we are changing the
way our stroke looks. So now they just go
to the drawing pad and try to create a line here, you can see when we
are creating a line with a lower amount
of streamline, it is very natural. It has some flaws. It is just following
the direction of our hands and it is
a little bit jagged. It's not what we need. We want arrogant
to be very smooth. So let's just go and
adjust these amounts. You can go and try
out maximum and then try out what works
for you later on. So now if we go to our drawing pad and if we
tried to create our line, you will see how smooth it is. Yes, you are losing a little
bit of control over it. But if you go a little bit
slower with your stroke, it will work perfectly. So now, just play around with the amount
that works for you. If you don't want
to use this option, if you want to go
with natural lines, you are welcome to do it when you are ready
with the settings. Let Jess, he'd done and we
will get back to our canvas. So now let's just go
and prepare our layers. We will go to the
layers and firstly, we will change the opacity
level of our sketch layer. Just tap on the icon. We will go to our opacity
slider and we will find the amount of capacity
that works for us. We still need to see what's happening on our layer
with the sketch, but we don't need it
to be very bright. When you find the amount of
capacity that works for you. Ledgers tab on our sketch layer, and we will need to
create one more layer. So let's just step on the
plus icon and straight away, we will rename this
layer as clean lines. So again, tapping on the
layer and choosing Rename. Now when we have this new layer, we can go to their color palette and select a different
color for our lines. Or if you want to
use the same color, that dark red lines, you can go with it. If you want to try out a different color,
these purple lines, you are welcome to
select this color, e.g. let's select it. Let's just go and try
out how our line works. If it is too thick, go to your slider over the
top-left to the top font and adjust the size of your
brush if it's okay for you, the same size that
you have right now, let us go to our sketch. And what we need to do
here is to repeat what we have onto our sketch
with the queen lines. You don't need to
repeat everything with 100 per cent of similarity. If you think that you'll find some places that
you want to adjust, maybe tweak something, maybe make something
bigger or smaller, or maybe at all
lose some elements. You are welcome to do it all. You need to remember
that now at this stage, we will need to go and
create the closed shapes. So everything that you are
making should be closed. Closed means that you don't have any gaps between your shapes. This is not closed. This is closed. You can use all the tools
that we use before. So e.g. if you need to hold
your line at the answers, snap it to a better one, you are welcome to do it. If you need to adjust it even
more, you can go over it. It's up to Edit Mode
and adjusted from here. If you want to use
the eraser tool, you are welcome to Zoom as well. All you need to remember
is that we need to create the clean
and closed lags. So now with this mindset, very quickly ledgers go and
create our clean lines. Very smooth, very nice. And for now, we will
focus only on to the main objects without
our facial features. Our facial features we
will leave to the nth. Now let's just go and very
quickly add this green lights. When you are done with the main outlines ledgers get back to our layers
and just for 1 s, we will hide our layer
with the sketch. We will get back to our
Canvas and we will check out whether all of
our lines are closed. And if we need to
adjust, some parts, will grab the eraser to
and we will adjust them. When you've checked
everything and all your lines are
closed, smooth and nice. Like just get back
to our layers and we will get back our
layer with the sketch. So we add tapping on
this little checkbox and now we will create one more layer for
our facial features. So let just tap
on the plus icon. Let's rename this layer
as facial features. And on-site this layer we will go and repeat our
facial features. So let's just go and do that. If you want to adjust
the size of your brush, but if you want to keep the same size that you
are using right now, you can do the following. We will need to go to our slider with the size of the brush. We will need to tap onto this little mark that
we have for our size. When you have this little
window with your size, we will need to tap
on the plus icon. Here we have a marked
down onto our slider. And if we would like to
go and change the size, we can very easily get back to the size
that we used before. So now, if you need to put
the dots for your eyes, ledgers, Gil increase the size of the brush and put the dots. If you see that the maximum
size of the brush is not enough to put the
dots for your elements, we can do the following. We will need to get back
to our brush library. We will need to go to
our monoline brush, and we will need to
go under properties. Here we have the
option brush behavior. Here we change the
slider maximum size. You can just pull it to maximum and when
you are satisfied, lie, just hit Done. And let's continue. Agent, our facial features. For this part, we are
adding only eyes, mouth, and our eyebrows. We will leave our cheeks, blink for this
heart shape that we have for the mouth
on our strawberry, we can repeat it in this way. We can just increase
the size of our brush. We will go to our Canvas and we will create a little
V-shape like that, which we will hold at the end. You will see that
now it's snapped to a better shape,
but that's not it. We can hold our Apple Pencil
and we can go over it. It's OK to this option
that is popped up. So now I can see that we have some dots here.
We can adjust it. We can make it more chunky if you want to find the
different placement, go and move it. And as always, when you add Dan, just dab on the screen, get away from the
editing mode and let's continue agent
our facial features. And when we are done with
our facial features, Let's get back to our layers and we will hide our
layer with the sketch. One more time. We will take a
look at everything that we have on the earlier, just reminding you that
we need all the lines clean and when you are
ready with this task, we can move on to our next part where we will add our colors.
5. Adding Colors: Let's start our
color inspired by changing the color
of our background. We are going to the layers, we are going to the layer with background color from
our color palettes. We will select the color
with the name backgrounds. If you would like to use any other color for
your background, you are welcome to do it. So now when we have our
color for the background, Let's go to the
layers and we will prepare our layer
with the lines. So it will be easier for us to add the color on
the separate layer. We will need to
go to our layers. We will need to go to
earlier with clean lines. We will tap on it and we
will choose reference. When we are choosing reference, it will use these lines that we have on this layer
with clean lines, but it will let us add the
color on the separate layer. So now we will go in that way. We will be creating a new layer
for every new color, e.g. if we would want to add the red color for
our strawberries, we will create a new layer, if you would like to create the color for our stamps
on the strawberries, it will be green or a CN. We would want to create
a new layer. Later on. It'll be easier for us to
add some shadows on it. So now let's just go underneath
earlier with clean lines. So we are selecting earlier with this gauge and we will
create a new layer here. So let just tap
on the plus icon. Let's rename it as red. Now we are going to
our color palettes and we isolate in the color
with the name rats, with this color is selected. We are going to our
top-right corner and we will just drag and drop the
color to the new place. Now, if you take a
look at the top, you will see that you
can continue feeling. Let's just tap on
it and you can see that now we are using
color drops. So e.g. if we go to our
second strawberry, we can just tap inside of it
and it will be recolored. Now Lynch's go over
our little hearts alone of our elements and let just add the
same color there. When you are done
recoloring all of your hearts and all of
your strawberries lead, just tap on this
little check marks near the color
drop over the top. Now, let us get back
to our layers and we will create a new
layer for the next color. So let just tap on the plus icon and
let's rename it as Cm. Now getting back to
our color palettes and selecting the color with
the name, see on lights, doing the same thing, selecting some of our objects and we are recoloring
them with its color. So e.g. let's just drop
it to our stems and let's recolor the main shape of our
muffin over the right set. Again, just go into
our top right corner, dragging and dropping the color and choosing continue filling. Then we're arguing to the needed places and
just tapping on them. When you are done, let just tap on this little
checkmark and let's continue selecting another color and another layer one more time, going back to our layers, tapping on the plus icon, Let's rename this
layer as yellow. Now going back to
our color palettes, and let's select this color
with the name light yellow. These color we will put onto our whipped cream on
both of our objects. When you are done tapping
on this little check mark, Getting back to our layers
and creating another layer, which we will call brown, getting back to our
color palettes and selecting the color within
the orange chocolate. Now, let's just drag this
color to our pudding, to all of our little months and maybe to some other
objects, if you would like. When you add down, again, we're arguing to our little
check mark or the soap, and we are going back to our layers and create
an another color. So let's just tap
on the plus icon. Let's rename this
layer as white. Now going back to
our color palettes, selecting the white
color and we will put this color to our outer
part on the glass. And also we can recover some of our starts with
this white color. When you add down one more time, tapping on to our
little checkmark, going back to our layers, creating one more layer. And this time it will
be bright yellow. So let just tapping it, Let's choose Rename
and rename it. Now, going back to
our color palettes, selecting the color
with the name yellow. And we will drag this
color to some of our stars into the
inner part of our jar. Also witness color. We can recolor this little
hearts on our main strawberry. Nao. Lynn, just tap once on
our little checkmark ledgers, get back to our
layers and we will create one more layer
and it will be purple. I just tap on the plus icon to rename the layer as purple. Now, getting back to
our color palettes and selecting the color
with the name purple. With this color, we will recolor our little berries
on the bottom. When you add down leg, just tap on our
little check mark. And when you see that you have some objects that you would like to recolor it to you, e.g. a. Strawberry the
boys and part of our little muffin or some
other blank elements. We can just go to our layers and figure out what colors we
would want to add here. E.g. alleges put the same
color to the bottom part of our muffin ledgers get
to earlier with Sian, we will select the same color and we can do it in
two different ways. We can always go back to our color palettes and
select the color from here. Or if we have the color
that we need on our canvas, we can invoke the
eyedropper tool. We can do it by going to the needed color
and hold in one of our fingers on it until
you see this little too. So if you move,
you will see that the top part of this
too is changing. And when you've reached
the color that you need, you can just hold your finger and continue
recoloring your objects. If some elements are
very small and it's not very convenient to
use the color drop. You can just grab your brush
and recolor them manually. Also, while we're doing
this part manually, we can get back to
our monoline brush and we can adjust
our stabilization. We go into the stabilization
one more time over our left side and we are changing the amount
of streamline. So this way, it will
be easier for us to just manually
recolor some places. Now let's just take a
look at our illustration and let's recolor the
rest of the areas. If you would like to
recolor your little tank with this color that we
used for the strawberry. And it's not working onset
these concrete keys because we have our layer with our bright yellow above our
layer with rats, e.g. if we get back to
our layers and if we select our layer
with bright yellow, we can drag it under
earlier with rest. And that way you can recolor your little part of
the tongue here. So to move your layer, we will need to
hold it and we will need to drag it to
the needed place. And now you can easily
go to your LEA with red part and you can recolor
your little tongue here. Now, take a look at your
elements and figure out whether you want to change
some part or recolor them. So e.g. ledgers go and add white color to our
little teeth here. When we are done aging the color to all
the needed places, ledgers go and beautify
our inner part of the jar. We will add the same color that we have for
the whipped cream. But as you remember, we had some stripes
on our sketch. We will repeat it here. Let us go back to our layers. We will find earlier with
this gauge and we will just drag it above our
layer with colors. We can unhide it so that way we will know where we
need to put our lines. Also in that way we know where
we need to put our cheeks. So let's just go to
our layer with a bright yellow and we will
do one more thing here. We will need to set this
layer as an Alpha Lock. Alpha lock will help
us to work only on the existing areas that
we have on this layer. So we are not going to be
creating some other elements going beyond the frames on the elements that we
already have here. Let's just go and do that. So we arguing to earlier
with bright yellow, we will need to tap on it and we will need to
choose Alpha Lock. Now, if we get back to our color palette and select
the color with light yellow, we can go very easily and these tribes that we
have on our sketch, we won't be going
beyond the fruits. So let's just go and try it out. Let's increase the size of our brush and we will
create these traps. As always, you can hold
your line and the ends and snap it to a better curve
if you need to adjust it, go over the top to edit when
you have the first stripe, Let's decrease the
size of our brush and create another one above it. When we are ready, ledgers get back to our layers. We will hide our layer with this gauge and we will
check out how it looks. If it looks quite okay, we are ready to
continue and we are ready to start
adding some details. Let's firstly create the
layer for our cheeks. We can go to our layer
with clean lines and e.g. a. Buret, we can create
our layer with the cheeks. Or if you want, you can go to your LEA with rats
and edit here. You don't necessarily
need to put this layer between your
two layers with the lines. You can just leave it on top of all the layers that you
have for the coloring. Now when we have earlier
with the cheeks, we can just get back to
earlier with this gauge. We can unhide it so that way we know where we
need to put them. And when we have it, we will get back to
our color palettes. We will select the color red. And when this color,
we will go to our main object, to our Putin. We will add the cheeks here. You can play around
so you can work with the same shape that you
have on your sketch. Or if you want to experiment, you can try out
different shapes. For the rest of the objects
ledgers get back to our color palettes and we will select the color
with the name pink. We will go with this
color to our strawberry, to our muffin and
to our berries, and we will add the
cheeks here in that way. When you are done
with this part, let us get back
to our layers and we will hide our layer
with the sketch. Now we are ready to
add some details. So let's move on
to our next part, where we will add our
shadows and highlights.
6. Adding Shadows & Highlights: Let's start our
shading part with a bit of theory,
just a tiny bit. Don't worry. Firstly, we need to imagine that our objects are
exposed to the light. It might be some, it might be some lamp
or something like that. To simplify everything, we
can imagine that the light goes from one corner,
e.g. the top-right. And that will mean
that some parts of our objects
that are closer to the light will be lead
and some that are further from the lights
will be in the shadow. Basically, objects have to shed their own shadow
that you can see on the objects body and
the shadow that they cast from their body
to other objects. Don't worry, we will
simplify everything because we are creating
a stylized illustration. And all we need to know
is where our light source is and what objects will
overlap other objects. So let us go and try
out our shading parts. Firstly, we will go
back to our layers and we will start with our layer
that we have on the bottom, which is our bright yellow. Let's select it and we will need to create one
more layer above it, so it'll be easier for us
to adjust our shadows. We will create one more layer, so tap on the plus icon, Let's rename it as shadows. And we will need to clean
this layer to a previous one, so it'll be easier for us
to create our shadows. Our alliance won't go
beyond the object that we already have onset
are a previous layer. So it works similarly to the alpha log that we
use for the middle part, only jar, but it is on
the separate layer. So let's just go and
do the following. We go into our shadow layer, we add tapping on it and we
are choosing clipping mask. And as we are creating shadows, we can use a different
blending modes. Blending modes are
different ways your layers can interact
with each other, so you are creating a
different visual effects. We will use a multiply blending modes and
multiply blending mode. Some kind of darkens the
areas underneath it. So we will need to
go to this icon. From this list, we are
selecting multiply. We can go and try it out
with 100% of opacity. And later on we can get back to the opacity slider and we
can adjust it to our liking. So firstly, let us go to our color palettes and we will select the color with
the name yellow. When we have it, we
will go underneath this little dripping
parts, melting parts, and we will just
repeat them by going along the lines and creating
another outline here. Let us go and try it out. When you have your new outline, you can go back to
your layers and you can adjust the intensity
of your shadows. So we will go to this
icon and we can get back to our opacity slider
and find what works for us. So e.g. something like 70
per cent will work better. Now with this technique, we will go and add the
shadows to other objects. So now let us get
back to our layers and let's continue
with the next layer, which is our red. Above it, we will
create one more layer. And again, we can rename
it as shadow layer, just tap on it, choose
Rename entry, name it. We will clean this layer
to a previous one, so tapping on it and
choose and clipping mask. And one more thing that
we need to do is to go to this icon and change the
blending mode to multiply. Now legislative
opacity at maximum, and later on we will
get back and adjust it. So now going back to
our color palettes and selecting the color with
the name pink, red shadow. Now we need to take a look at our arrow that we have
for our light source. And we will need to put the
shadow on the opposite side. So if it's going from
our top-right corner, our shadow will be on
the bottom left corner. So let's just go to our strawberries and we
will put our shadows here. We will go to the bottom part
and we will add the shadow. You can simplify everything and create just a little
curve like that where you can repeat the sheep
of your boards and part of these objects
when you have the line, let just go to the
bottom part and we will recolor the whole
thing in general. Nao Lynn, just go to our second strawberry and we
will do the same thing here. Let's just go to the bottom left part and we will add
our shadow here. Also here you can see
that we have this little hearts that we have for the leaf on
this little berry. So we can add a little shadow underneath it to when you have the first outline
ledgers go to the bottom and we will recolor
the whole bottom part. The same thing we will
do with our straw. We will go to the right part
of this vertical straw and we will create the shadow here
S for the horizontal part. We will go to the bottom part and a little shadow here too. If you want to add the shadow to these little hairs that
are floating above, you can go and do that. If you don't want to do that, let us go and change the
opacity level of our shadow. We are going back to our layers. We go into our m icon and
adjusting the opacity. So e.g. you can leave it at 40, 45 per cent if you
want to go with a lower value or with a
higher value, it's up to you. Now let's continue agent our
shadows to other objects. Let's go to our next
layer, which is Cn. We will create one
more layer above, and we will rename it as shadow. Let's clip it to a
previous layer so we are tapping on it and we are
choosing clipping mask. I go into the icon and change in our blending
mode to multiply, leaving it at 100 per cent. For now, going back
to our color palettes and selecting the color
with the name c and shadow. And now one more
time we are looking at our light source
and we are going to our green objects
and we are aging the shadow in accordance
with our light source. So to the bottom left parts, when some objects
are overlapping, other objects, as it is
on our little muffin, the little part is fully
overlapped by the top part. We can just go and fully
recover it with our shadow. When you identify eight and
shadows to our green objects, Let's get back to our layers and we will adjust the
opacity level. Again. If you leave it at 40%, it will work perfectly. Now let's continue and
go to our next layer, which is our yellow. Let's select it and let's
create another layer above it. We will rename it as shadows. Let's clip it to
a previous layer. So it's sapping, choosing
clipping mask and ledgers go and select them
multiply blending modes. Now, let us get back to our
color palettes and you can decide what color you would want to use for your shadow here, light yellow or yellow, select one of them
and ledgers go to our shapes and let's
add the shadow here. Let's start by going to our whipped cream
over the top parts. We will go to the bottom
part and we will start from here by creating a
little shadow here. Here we can also add a
little shadow on the job because our top part might overlap it and cast the shadow. So let's just go
there and create a little shadow underneath
our second element. And we will continue by going to the bottom part of
this second part, and we will add the shadow here. Let's continue by going over the top part and we will cast a little shadow from the top elements
going over the board, some of it, and we are
adding another shadow here. Also here we can use the eraser tool to
erase your elements. Now, if you want to
add little shadows underneath your
additional elements such as stars and hearts, you are welcome to do it. All you need to remember
is your light source. And now when we are done
with our whipped cream, let's move on to another
whipped cream on our muffin, and let's add the
shadows here as well. So again, we are
aging our shadows either coordinates
with our light source. So we are eight and our shadows to the boards and left parts. Now we have the same
color on this true. So let just go and continue
aging our shadow here. And when you're done, Let's get back to our
layers and we will adjust the opacity
of our shadow. So again, we're going to
earlier with the shadow, we are going to the m, I can end up adjusting the
opacity for these elements. Let's leave it at 50 per cent. And now with the same technique, we will go to the next layer, which is our brown. We will create one
more layer above. We will clip it and we will change our blending
mode to multiply. Now let's get back to our
color palettes and we will select the color within
the purple shadow. With this color, we will go to our brown elements,
the shadow here. So firstly, let
just go underneath our whipped cream and
our little strawberry. And we will put this
cast shadow here. So we will need to
go to our left side and we will just go and
create this little shadow, just repeating the
shape of our elements. When you have it, we will
go along the bottom part of our mountain parts and we will repeat our lines in that way. We will add our shadows. Make nice clean lines. If you need to adjust some furs, just grab the eraser tool and erase some parts
that you don't need. And with the same color, we will go to the
imports m and we will add our shadows to
this little puddles. Again, we are going over
our boards and parts. When it's ready, we are
going back to our layers and we will adjust the
opacity of this shadow, go into the m Eigen and blend
with our opacity slider. Let's leave it at 35 per cent. Now let us get back and we will add one more shadow
for this white part. Let's create one more layer. Let's rename it, clip it, and change the blending
mode to multiply. Now we will get back to
the color palettes and we will select the color with
the name light yellow. We will go to the bottom
part of our glass. And firstly, we will create
just a little line here. You can play around with
the thickness of this line. And this line, we
are showing that our glass is not playing. Now, we will go to the top part. We will go underneath this
mountain parts and we will just continue
adding the shadow here. If you see that
some elements are overlapping your white parts, Let's just go and add the
shadow underneath them. If you want to add the
shadows to white stars, you are welcome to do it. Just do it in accordance
with your light source. If you want to change the
opacity of this shadow, you are welcomed to get back
to the layers, go to the m, I can adjust the opacity from this slider if it's
okay with you, Let's move on to
our purple layer will create one
more layer above. We will snap it to
the previous one, and we will go and change
our blending modes. Now one more time, going back to our
color palettes and selecting the color with
the name purple shadow. And we will go to our bottom left parts and we
will add our shadows. Now let's get back to
our layers and we will change the opacity
of the shadow. 30, 35 per cent will
work perfectly. And now let's take a look at
our layers and figure out whether we have other elements that we would want to
add the shadows too, if we don't have them anymore, we are ready to add
some highlights. The highlights will be the very bright parts that
are exposed to the light. They will be leaked. Ledgers go and create
one more layer. So we are tapping on the plus icon and let's
rename it as highlights. Let's add all the highlights
just on one layer. So let's just go to our layer and let's rename
it as highlights. For the highlights, we will use a different blending modes. So we will go to an icon and we will find
at blending modes. For now, we will leave
it at 100 per cent. And if we would like
to change it later on, we can always get back to our opacity slider
and change it. Now, we are going back to our color palettes and
selecting white color. And we will go to some
of our elements and we will add this white
color to the exposed parts. Firstly, let's
work on our glass. We will go and add two
bright highlights, one on one side and one
on the opposite side. Firstly, going
over our left side and we will go to this part, it's right where we have our
line for the inner part. And here we will create a
bright highlight going down. You can hold your line
and the ads and then very accurately go inside the
shape and recolor it. You also need to pay attention
to the elements like here, because your highlights
couldn't go under your shadow. So you will need to grab an eraser tool and erase
this little parts. Now when you have
it on one side, leg, just move on to
the opposite sides. And we will step a little
bit from these parts and we will create
another highlight going from top to the bottom. So basically, we will stop
a little bit from the side, as mentioned before, and we will create a curve like that. You can hold it and the answer, you can adjust it in
any way that you like. And we will go and thicken
it up just a little bit. So let's just go and
repeat the same sheet, going a little bit to the right. Now we won't go inside this
shape and we will recover it. Grab the eraser tool and erase all the parts
that we don't need. So everywhere where it is
overlapping the other elements and everywhere where our shadow
is above our highlights. If you want to add a
few more highlights, once the areas right
here inside our Putin, you are welcome to do
it so you can go and add a few lines or if
you do it, if you like. If you want to work
more on the shape, you are welcome to date. When we are done
with this shape, Let's move on to our
melting part and we will add our highlights
here to firstly, we go into our right part and we will add the
highlight right here, just repeating the line
that we already have. Also, you can go
underneath this line right here and you can add a
few highlights there. You don't need to go
just with the line. You can create a
little chunky elements if you want or if you want, you can just go
and add some dots. Now let us go to the other
elements and we will put our highlights to the shapes
that are near our lights. So e.g. here on
our whipped cream, we will go on our right side, which is on the top, and we will add a
few highlights. And in that way, lynchers go above all of our elements and we will
add our highlights. If you want to make
it even sparkly, or you can go to the project and resources tab and download
the sparkle brush. With this brush, we
will go over some of our objects and we will
add some highlights. Now, if you want to go and change the opacity
of your highlights, you know what you need to do, you will need to get
back to your Layers, go to this little icon
and adjust the opacity to your liking when you found the amount of opacity
that works for you. Ledgers go and do one more. I think we will end
the highlights to our facial features
and also we will work on the inner
part of the mouth. So firstly, let us go
to our layers and we will go to our layer
with facial features. We will turn on Alpha
lock onto this layer. So let just tap on the layer
and choose Alpha Lock. We will select this white color. We will select our
regular brush. So it is our calligraphy folder and it is our monoline brush. And we won't go to our eyes firstly and put the
highlights to them. So let's just go over one of these sides and we
can just figure out where our light source is and we can put our highlights
to these parts. Let us go over r right top part and we will put the
highlights here. When you are done aiding the
highlights to the eyes land just go and add little
tongs to our open mouth. We will go back to
our color palettes. We will select the color
with the name pink, and we will firstly go inside the mouth of our
little strawberry. And as we are using
our alpha log, we can very easily go
to the bottom part of the mouth and we can create
a little shape here. So when you're done
with the first mouth, let just go to our little berry and we will add a
little tank here too. And when you are
done with this task, Let's move on to our final part, where we will change the
color of our alliance.
7. Recoloring the Lines & Final Touches : Let's try this part by
going to our layers. And we will need to
go to our layer with clean lines and create
one more layer above it. So I just tap on the
plus icon and we will need to clean this
layer to a previous one. If you want to rename
it, go for it. Let's just tap on the layer
and choose clipping mask. We will also go and
change our brush. We will go to the Brush Library, we will go to airbrushing, and we will select medium length that we will use for
our recoloring part. Or if you want to use
your regular brush, which were our mono line brush, you are welcome
to do it with it. So now let us go to
our color palettes and we will select the color with
the name dark red lines. With this color, we can go over r elements and we
can recolor them. E.g. ledgers go
over our paddles on the bottom and we can
recover our lines. You can go all over
all of your objects, the parts that you want to recolor and recolor
the lines in that way. So e.g. we can go and get rid on the lines on our glass ledgers. Go select this white
color and we will go very easily and add the
color to these lines. Lynch's go all over our white part on the glass
and recolor the lines. Now when you are ready
with your glass elements, let us get back to
our color palettes. We will select the color with
the name dark lines again. And we will go all
over our elements. And if we would like to
recolor some of the lines, we will go with this
color and recolor them. Or if you want to get
rid of the lines, just select the color that you have for these concrete objects. Maybe make it a little bit darker and just go and
recolor the lines. Also, you can add just
a teen's by going to this second slider
on the top-left and adjusting the
opacity of the brush. So in that way, you
can just go and add just a little bit of color
of these little dark brown. If we wanted to get rid
of the line completely, we can select the same
color that we need. So e.g. if we want to get rid of this line on the pudding, we can invoke our
Eyedropper Tool and go over this
line and erase it. You might have some
parts like here. You just need to select the
color that you have for your shadow and go over
the line with this color. So basically what we
need to do is to recolor our yellow and
Tourette elements with brown color and leave green
and purple with blue lines. When you are done with
recoloring your lines, Let's just do one more thing. We will go and put
a little shadow underneath our elements
on the bottom. So what we need to do is
to go to our layers and create one more Lee under
all of our elements. So let just go to our layer
with triangles scheme. We will select it and here we
will create one more layer. You can go and
rename it as shadow. We argue into an icon and we are changing our blending
mode to multiply. For now, let's leave it at 100%. Again, we are going back
to our brush library. We are selecting
our median blend, or if you want, we can
select soft blends. We need to go and adjust the opacity of the brush
to almost minimum. And we will go back to
our color palette and select the color within
the bean grad shadow. When the scholar we will go and increase the size of our brush. And very likely we
will go underneath our objects and we will
add our shadow here. When you have it,
we will get back to our layers and we can go to our, an icon and a jazz, the opacity. And when you're satisfied
with your shadow, we are done with our class. Thank you for
watching this class. Leave a review if you liked it, and consider subscribing for
more videos in the future, looking forward to
seeing your projects.
 Uni Corn, ⭐Kawaii Art Enthusiast⭐