Transcripts
1. Introduction : Hello everyone, I'm uni
and into this class, we'll draw at youth
Autumn illustrations. These class doesn't require any prior experience
or offensive, so we'll start from scratch and totally using simple techniques
throughout the process, everything you'll see will
be happening in Procreate. However, if you
have other software or wanted to try to
traditional materials, you are welcome to join if
you are ready to start, Let's jump right into it.
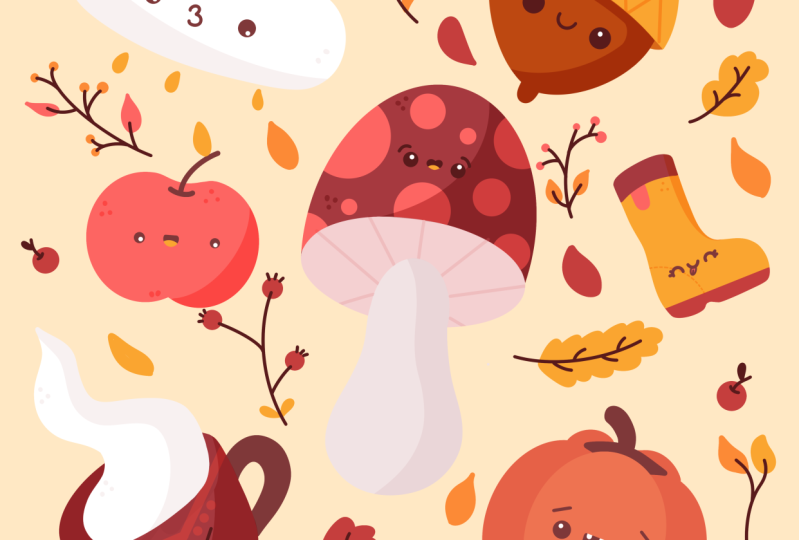
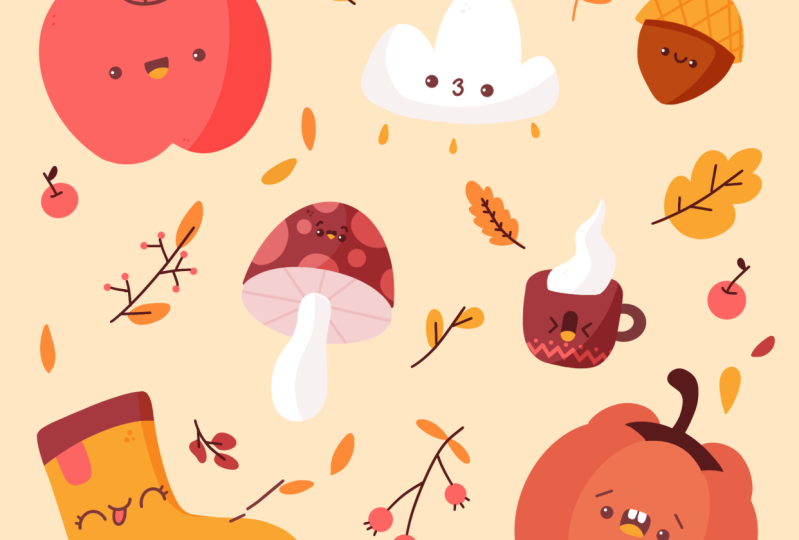
2. Apple Sketch: Let's start today's
class by deciding what kind of Canvas we
are gonna be using. You can see it is a very
simple square canvas because both pixel width and pixel
height are 2048 pixels. If you would like to use any other dimensions
for your canvas, just go for it and
adjust these values. As for DPI, we are using 300 and ask for
the color profile. We are at SRGB with
this low number. When it's all done,
let's hit Done and we will be redirected
to our new canvas. And now we need to decide
what kind of colors we're going to be using
throughout the whole class. You can go to the project
and restaurants app. You can download
the color palette and you can follow along. And when you did it,
Let's go straight into our color palettes and we will check out what we have here. Here we have two options of
how we can use the colors, the compact view and the cards will be using cars because
they have all the colors, names, and they are ready
for you to be used. Now, our first task for today is to change the
background color layer. Just go to our layers and let's go to our
background color layer. We will go to the disk option. And if you downloaded
the color palette, we will go to the
very first color in the first row and
we will tap on it, and that way we will change
our color of the background. So now when we have the
color for the background, we are ready to start
making this sketch. But before starting,
we will need to select a brush and we will
need to select a color. So firstly, let us go to our brush library and we will
go to this kitchen folder. Into this kitchen folder, we will select procreate pencil. If you would like to use any other brush for
sketching part, you are welcome to do it. Now when we have
the brush ledgers, get back to our color
palettes and who will select the first color and
it will be lines one. So let's tap on the
scholar to select it. Now when all the
preparations are done, we can start creating
our own objects and we will be creating them
in a very simple way. We will be using simple
shapes and we will be using the quick shape to the quick shape tool will help us to create better shapes. So firstly, let us go to any place that you
like onto your Canvas. And we will start by
creating an ellipse. So without an holding
your Apple pencil, just go and create the shape
of an ellipse with one line. At the end of the line, we will hold our Apple
pencil and you will see that you snap your
shape to a better shape. This is called the
quick shape tool. If you move your Apple
pencil from side to side, you will be scaling
your shape up and down. And also, if you move
your Apple pencil, you will be rotating your shape. So for now, let's leave it at something not too
big, not too small, and we will leave it at not
very irritated position. So when you have
something like that, ledgers and hold our
Apple Pencil and we have the first
part of our elements. If you want to adjust
the shape even more, we can go or the
top to edit shape. If we tap on it, we will
see that we have some nodes here and we can move these
nodes and adjust the shape. So e.g. let's go to one on this side knows and
we will drag it a little bit more
to the site when you have a more open shape, let just tap on our screen
with one of our fingers. Or also you can tap on your
screen with an Apple pencil. And we will move away
from these modes, and now we can continue
adding another sheet. So we will go and we will try to repeat this same sheet
that we have right here. And we will need to connect
these two shapes together. So we will just kinda overlap
one shape to another. So now let's just go
and try to create the same shape that we
already have onto our screen. Hold your Apple pencil
at the end of the line. Adjust the size of your elements and if you
need to adjust it even more, Let's go over the top to Edit
Shape and then just make this shape as same open as
we have it on the left. If you need to move the shape, just hold your Apple
Pencil at some place on your canvas and move
your shape to the set. Try to make something like that, that you see right
now on your screen. And when you're done, let just tap on the screen
with one of our fingers or with our Apple pencil to
get away from these modes. Now when we have
something like that, we are ready to
add more elements and make it more
looking like an apple. So let's first go over
the top part and we will connect these two shapes
together by creating a curve. Let's just do
something like that. We will create a very
smooth connection. And when we have this line, we will go over it and
we will create a stem. So let's just find some
intersection right here. And from it, we will
create a curve going up. You can play with the
size of this line. You can make it thick, you can make it small,
you can make it thin. It's all up to you. And when we have it,
let's just go over one of the sides and we will
add a little leaf. E.g. let's go over the labs and we will create
the shape like that. And again, you can
play with the size, you can play with the rotation, you can play house trade. This corner right here is, it's all up to you. When we have
something like that, let us again go to this intersection and we
will create another curve. But this time it
will be like that. So we are making some little dance where
this stamp is going from. And when we have these, we are ready with our apple, but we will need to make it more cute so we will be
aided in their face. So let us go to the middle
part of our Apple and we will create a horizontal
line going through the whole shape of this apple. Don't worry where I just go
in there to the middle part and we are creating this horizontal line
at the end of it. We are holding it to snap it to a better shape to
the straight line. And also while holding it, we can move it up and down
to find the angle that we want now legislated
at something like that. And we will go over
the top to edit shape. Also, you can just go to your Canvas and you
can zoom in and zoom it out to make
sure that this line that you are creating
is pretty straight. And also we will need to
move this line a little bit up to make sure that it is
inner approximate center. Let's just go and move it. And when you have
something like that, lie, just tap on our screen and we will go and start adding
the facial features. So firstly, we will go to these intersections and we will move a little
bit from them. So we are going on the left
side more to the left, and we are starting
by creating the ice. So firstly, let just tap
a little bit aside from this intersection and we will start by creating
an adult like that. You can play around
with this size. If you want to make these eyes
more closer to each other, you can do that if you want
to move them further apart. Again, you can do
that when you have this little sheep ledgers go and manually recolor
the inside part. And when we have it, we will go to the
opposite side and we will try to recreate it
on the other side. So the same way as
before we are going, they're stepping a little bit aside from this intersection. We are creating a circle
or an ellipse here. Try to keep this same size that you have on
the opposite side. And when you have
this shape layer, just manually go
inside and recolor it. And now when we have the ice ledgers go and
add a little mouth. So we will go to this horizontal
line that we have right here and we will stop a
little bit up from it. We will create another
horizontal line. When you have this line, let just go underneath
it and we will create half on the circle or
half of the ellipse here, and we will come back this
half of the circle or half of the ellipse with
this line on the top. Hold your Apple pencil
at the end of the line. And if you need to
adjust this line, go up to Edit Shape. Here. Again, you have some nodes
and you can play with them. You can find the
shape that you like, make it bigger or
make it smaller. And when you're satisfied
with airfare here, let just tap on our screen. And now we will go inside this shape and we will
add a little time. So firstly, the legend is
grab our eraser tool so we will erase this line
that we don't need anymore. And we will go to
the bottom part of the shape and we will
create another curve. So something like that. This will be our tank, and now we are done
with our apple. So let just continue it
in different shapes.
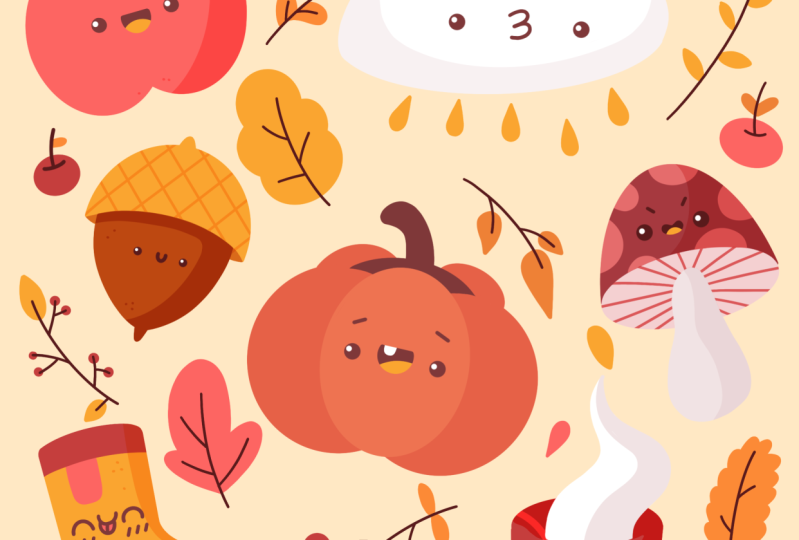
3. Acorn Sketch: Ledgers go to the
different place and we will start to
create an anchor. We will start again by creating a shape of
the ellipse layer. Just go and do that the
same way as before. We are creating the
shape without an holding our Apple Pencil
and we are holding our Apple pencil at
the end of the shape. You can adjust the size by moving your Apple pencil
while holding it. And also ledgers go
over the top to Edit Shape and we will make the
shape a little bit more open. One more time. I go into this side nodes
to the one of them. And we will just go and move these nodes more to the side. When you have
something like that, if you need to move your shape, just go to any place on
your Canvas homepage, Apple Pencil and
move your shape. E.g. let's leave it at
something like that by just tap on the screen and let's
continue adjusting our sheep. So to make the record, we will need to go to these sites and we will need
to make them more narrow. So firstly, let us go to
the bottom and we will put a little.in the
middle when you have it, we will go to this site
right here and right here. And from this sides, we will go and create
another curves. So e.g. let's just
start from the left and we will go and
narrow this thing down. When you haven't done one side. Let's move on to
the opposite side and let's do the
same thing here. So just mirroring
the line that we already have To
make it even cuter. We will go to this
little door that we just created and we will add
a little stem here. So we're just going to this
node and we are stepping. Alice will be from
the side of it and creating a little
shape like that. If you want to keep
everything clean, you can just grab
an eraser tool and erase all the places that
you don't need anymore. Let's work onto
these connections and let's move them down. So we will need to go and create different shapes,
e.g. the curves. And we will just soften
this list of parts. And when you soften
these pieces, let's just grab our eraser
tool and we will erase them. So later on we
won't be confused. And now let's just
go over the top and we will create
a little hat here. So firstly, let us go to our sheep over the Acker
in the body of it, and we will find the
third of it on the top. So just approximately, let's
put a little dot right here. When you have it,
we will go through the whole shape of our Eckert
and we will create a curve. So let's just do
something like that. You can play with the curve if you need to adjust this line, go up to Edit Shape. And now when you are ready, when you played in half, just tap on the screen
with one of your fingers. And let's go over the top and we will
create the hat here. So basically we
are just going and repeating the shape that
we have right here. But we as tapping a little bit aside from these little parts. So let's just go and to repeat this shape creates a curve. And at the end of the line you can hold your Apple pencil. If you need to adjust your line, go over the top to edit shape. If everything is alright, lets just grab our eraser tool and let's erase everything
that we don't need. So it will be these little
parts on the sides. We don't need them and
also will go inside and we will erase this
top part of our occurred. Now when we have some
feel like that's led, just go over the top of
our hats and we will try to put this same stamp
that we have on the bottom, but maybe this time it will
be a little bit bigger. So go and just do
the middle part and creating this shape like
that when you have it, Let's go to the cap and we
will add some texture here. We will just go firstly
and we will create the diagonal lines
go into one side. Let's just go over the whole cap and let's add these
diagonal lines. Add as many lines as you like. And when you went through
the whole shape of the cap, Let's just turn these lines a little bit to the other side. So we will repeat
the diagonal lines, but this time they
will look to the left. And when we are ready, we can go to these
little parts and we can just loop the
whole shape around. So it's not like a flats thing. It is like a thing that
is on top of the acorn, so it has some back parts. Let's just go over this
list of parts and we will create another
line like that. So we, I just closing the shape when we
have it on one side, Let's move on to
the opposite side and let's do the
same thing here, just creating a little curve. When we have it, Let's
just go and add the face. So again, if you need some help, we can go and create
one horizontal line going through the approximate Sandra and one vertical line. So let's just do that. Let's just go firstly
with a vertical line. Let's create and going
through the whole shape. Let's hold our line at
the end and we will move this shape and we
will make it very straight if you need to
adjust it even more. If you need to find
a different position or the top to Edit Shape and find this position
and the angle that you like. Now let us give it to
our horizontal axis and let's create the
horizontal line, hold your line and the eons. And when you have it, if
you need to adjust it, of course go over the
top to edit shape. But when we have this
approximate center, we will go and we will
add our facial features. So firstly, let us go over our left part and we will start by creating the same dose
that we use for our apple. So let's just go a
little bit wrong. Our center. And we will put the first
daughter right here, play with the size,
play with the distance. It's all up to you when
you have the first note, let's move on to
the opposite side, and let's add the same. I own the opposite side. We will need to keep
this same size and we will need to keep the same
distance from the center. When we had the eyes
for convenience, we can grab our eraser
tool and we can erase these lines in the middle so we don't be very disturbed by them. And also we will go and
add a little mouth. Then just go to the same line
that we have our eyes on. And we will add just
a very Smiley mouth. So this time it will
be very simple, just the curve like that. You can hold it at the end and
you can adjust its size to your liking if you need to
adjust it even more as always, go up to Edit Shape. If you want, you
can move it up or down and find what
works for you. And when you're done, I just tap on the
screen with one of our fingers and we are done
with our current layer. Just move on to the next shape.
4. Cloud Sketch: Let's just go and
create a little clouds. So we will go and find
some place on our Canvas. And we will start by
creating a line like that. You can start by creating
a very straight line. Hold your Apple pencil at the end of the line to snap
it to a straight line. And also now when we have this line legislature
or the top of it, and we will add some loops here. So now we are creating
a Cloud ledgers go to these sites and we will start by creating a curve like that. Play with the size is always and when you
have this curve, lie, just continue
adding another curve. So this time we are doing
a little bit upper. We are creating
something like that. And now when I have
this second loop, ledgers go and close the shape
by creating another one. Again, you can play
with the size. So when we close the
shape of our Cloud, allege us, make it
a little bit cuter. We will go to this
line on the bottom, which is now very straight, and we will turn
it into a curve. I just go into this line and we are creating the curve instead. Hold your line and dance and if you need
to adjust something, go over the top to aided shape, you can play with a curvature. You can find what works for you. And when you are satisfied, alleged just tap on
the screen with one of our fingers or with
our Apple Pencil. And now we will just
grab our eraser tool and we will erase all the
lines that we don't need. It will be these
lines on this side, and also it will be this
line that we created for our guides in line
that is very street. Also, we can work once at
these little corners and we can turn them into curves instead of the various
street corners. So let's just go and
create the curves instead of straight corners when
you have it on one side, Let's move on to
the opposite side and let's do the
same thing here. And again, we will just grab our eraser tool and we will erase everything
that we don't need. And now let us go
and add some fates. So firstly, we can go
and again we can create another line that
is going through the horizontal axis and
for the vertical one. But also we can be very
brief and we can start by creating them manually
without any guiding lights. So let just go to
one of the sides, e.g. the left one. And again, we will
start by creating the first dot or the
first ellipse here, play with the size and
play with the position. And now when you have the
first dot on the left, Let's move on over r right part. And let's try to prove
the same dot there. So we will try to put
it on the same line, and also we will try to put
it on the same distance from this line that we have going
through the middle part, which is approximate,
which is invisible, but we know that it is here. Let's just go. If you need, you can just go and
create this dotted line. And we will go to the
opposite side and we will create another
daughter for our eyes. Now we can erase this
line if you made it, and we will add a little mouth. So this time, let's just
create a Kesey clouds. We will go between
the eyes and we will create a digit three here. When you have it, let
just add some details. We will go underneath
this line and we will add some
shapes like that. If it's hard for you to create the shape just from the scratch, ledgers create one
circle like that. And then we'll put
one dot on the top. And with the straight lines, we will connect it with
the shape on the bottom. And in that way we will create
a few drops going down, as many drops as you like. And when you are done, Let's move on to the
next illustration.
5. Boot Sketch: Now let's continue
by making a boot. So firstly, let's
find some blank space onto our Canvas and
we will zoom it in. And we will start by creating a rectangle that
will be a little bit wider on the top and a little bit narrower
on the bottom. So ledgers created
and you can play with the wideness on the
top within their illness. On the bottom, you
can play around with how long this little
thing will be, and it's all up to you. Let's just create this shape. And when we have it, we will need to find
the center of it. So let's just go
and approximately just make a little mark. From this mark, we will
go a little bit down and we will start creating another shape on the rectangle, but this time it will be
on the horizontal axis. So again, you can play
around with its size. You can make it similar
to the one that you already have on your screen. Or you can make it
bigger or smaller, just create these sheep. And when you have it, we will need to go to this intersection and
we will need to make this whole shape more
looking like a boot. So what we need to do,
we will need to go and turn this corner to occur. So let us go to
this intersection and let's create some
field like that. You can play around with
the curvature on this line. You can try it out a few times, find what works for you, and when you have it, we will need to continue. And we will go to the
bottom part and we will create this
soul of the boots. So let's just go to
this part and we will just continue the line
and we will just go down, play around with
the size of this. So as you like, and when we have this line, we will go just to the
left with a straight line. Ledgers go to the
center of this shape. We can just mark it down and we will create another
line like here. Now when we have this line, we will need to work
on so they heal. So we will go to this
site and we will go to this line that we have for our second shape on the bottom. And from this slide, we will create a curve going down the same way as
we did right here. We will just go to
the intersection. We will create a slight
curve going down, just create something like that. And when you have
it, we will need to connect it with our right part. So let just go to this slide to its end and we will
go and create a heel. So we are just go in and create
an, another little line. And when we have
something like that, we will need to create this little cards
that the boots, hats. You can start very
easily by creating a line like that that
is going diagonally up. And then we will create
another line like that. And in the opposite side, we will create another
curve going down. When you have
something like that, Let's just go and connect
everything nicely. And also we can go to
these little corners and maybe make them
more around it. Let us go and try to create the curves instead of
very street corners here. And when you have it's allege us continue making this
line right here. So we are just creating a horizontal line various
treat and when we have it ledge as grip our
areas or two and we will erase all the
lines that we don't need. Now when we have this shape, if you want to adjust it in
any way, you can do that. So e.g. if you want to make
a smaller dendrite here, or on the contrary, a prominent dendrite here. You are welcome to do that. We will go to the
top part and we will create a little
line right here. So maybe later on it will be colored with a
different color. So let's just go and
create the curve here. We will stop a little bit
aside from this line that we have on the top and we
will create another curve. And also we can turn these very straight line on
the top into a curve two. So let just repeat this
line that we just created. Now one more time we can grab our eraser tool and we can erase all the lines
that we don't meet. The very last thing that
we will add here for our boots will be a
little elastic bands. So we will go
somewhere right here and we will create just a
little shape like that. When you have it, we are ready to add our face. So let just go to this line
that we have right here. And from here we can just
help ourselves by creating another horizontal line
that will help us to find the approximate
center of our boots. Or we can just go very
easily and very boldly and start aging the facial
features just manually. So let's just go to the left
part and we will create a little curve like that for the eye when you
hired on one side. Let's move on to the
opposite side and let's try to repeat
the same shape. You can play around with the distance between
the elements. You can play around
with their size. You can play around
with everything. And when you have it, let just go and add
a little mouth. We will go to this line
where we have our eyes on and we will create a little curve like
that for the mouth. Again, you can play
around with its size. If you want, you can
leave it as it is, or if you want, we can go under this line and
we can add a little tongue. So let's just go and create
another loop like that. You can play around
with its size. And the very last thing
that we will add here is a little divider
on their tongue. So let's just go to
the top part and we will create a line like that. If you want, you can go
to the eyes and you can add a few lines like
that for the eyelashes. And when we are done
with this task, we are done with our boots.
6. Adjusting the Elements: So now we can see that we have some space onto our Canvas, but it will be easier for us to start adjusting our
elements onto the canvas. So we can just go and make
some elements smaller. We can make some of them bigger and we can free some space. E.g. allege us go and make this apple a
little bit smaller. What we need to do, firstly, we will need to select these elements and we
can do it by going to our top-left and by
selecting this S ribbon shape, you can see that we
have a little tab on the bottom and we won't need to go to the free hands method. So let's just tap on
it and we will go to our Canvas and we will
start to select this shape. You can see that
when you are moving your Apple Pencil and
holding it onto your Canvas, you are making these lines and watching you to do is
to close this shape. You can now see
that when you close the shape that this
area that you were selected now is looking more bright and that's
exactly what we need. So when we have
selected this area, we will need to go to
the Transform tool. And transform tool is this
arrow key on the top-left. So that's tap on it. We will use uniform
method and you can see that we have the
bounding box right here. And also you can notice that this bounding box
has some nodes. And if we go to this nodes
with our Apple Pencil, We will be scaling or a shape up or down by moving
our Apple Pencil. E.g. ledgers go to our nodes. On the top-right, we'll hold our Apple pencil on it and we will move it
diagonally down. You can see that we are
making our shapes smaller. So try to make it as
small as you like, because now we need to
find some place for more objects and we will go and move this shape
across our Canvas. So to do so, we will need to go to any place onto our canvas. We will need to hold
our Apple Pencil and we will just move it
across our Canvas also while we're eye here on the uniform method and when we are transforming our shape, we can go and rotate it. To rotate the shape. We can go to this green
node over the top, we will hold our Apple
Pencil here and we will move our Apple
Pencil circularly. Find the position that you like. Just go around, play little
bit with this shape, find what works for you. And when you are done,
alleges deselect everything. To deselect everything, we
will need to get back to our S ribbon shape and we
will need to tap on it. Now we will continue adjusting
our shapes and we are continuing to free some
space onto our canvas. Let's just go and select this
little occurred and we will find a different placement
for it. One more time. We are going into
our S ribbon icon. We are using freehand method. We will go to this
sheep and we will just go around over it
with a little loop. So let's close this shape. And when it is closed, we will go to our arrow
key on the top-left, we will use uniform method. We will go to our shape, we will make it
smaller or bigger. You can play around right here. You can rotate it
to your liking. Just find the placement
that you like and try to leave some space for the other objects when
you have its ledger, deselect everything by
hitting R S ribbon icon. And we will continue adjusting
our elements and we will continue placing them
differently on our canvas. Let's just go and select our little cloud the
same way as before. Just go into our S
ribbon icon free. Hence methods creating
the selection like that and closing it. When it is selected,
we will hit our arrow key on the top-left and we will find a
different placements you, these elements, if you want to make it bigger, It's up to you. When you are done
with this task, Let's just tap on our S
ribbon icon one more time. And we will go to our boots and we will
do the same thing here. So let's just go again
to the S ribbon icon, freehand methods
selecting this object. And then we go into our arrow key on the top-left ledgers, move it to the center or to
any place that you like. Make it bigger, make it smaller. It's all up to you
if you want to adjust the shape
even more so e.g. you don't really like the
whole shape in general, we can play around
by going to work. So let just Sap, Warp ones are bottom panel and you will see that we still have
this bounding box, but it also has some
intersections here. So here we can go not
only on this side nodes, but on all the intersection and on all the places that
we have right here, and we can adjust our
shape very generously. Let's just go if you
want and make this shape bigger or smaller or play
around with its size. So e.g. let's just go
to our top part and we will make these two parts of the boots a
little bit longer. So we will need to go to
the notes and we will need to put them a
little bit more up. So play around with this to
find what works for you. And when you are done, ledger, deselect everything by
hitting R S ribbon icon. And now when we
freed some space, let just go and continue
adding more objects. So e.g. ledgers go and
create a little mushroom.
7. Mushroom Sketch: This starts with our
mushroom ledgers. Find some blank please,
onto our canvas. Let's zoom it in and we will start very easily by creating a horizontally
aligned ellipse the same way as before as
we did with our apple. We are going into the
Canvas and creating the shape without an
holding our Apple Pencil. So we are doing it with one line and at the
end on this slide, we are holding our
Apple pencil to snap it to a perfect
shape of the ellipse, you can play around
with its size and if you need to
adjust it even more, Let's go over the
top to edit shape. Here we can move it, we can make it narrower
or we can make it wider. It's all up to you. This part will be the bottom
part of the mushroom. When you found what you like, Let's just tap on the
screen with our finger or with our Apple pencil to
get away from this modes. And we will continue by adding the top part
of the mushroom. So firstly, we will go to these two sides and we will
firstly go to the left side. And from this side we will go over the top and we will
create a big curve. These will have the
shape of the dome. So let's just find
the intersection on the left and let's
create this big curve. We are going to
the opposite side and we are trying to find the intersection
with these new line and our sheep on the bottom. When we have it, we will unfold our Apple Pencil and we will go over the top to edit shape. If you want, you can leave it as very low mushroom,
It's your choice. Or if you want, we can go
to the node on the top and we can move it a little bit
down to make it more smooth. Find what works for you when you are satisfied
with the Shape Layer, just tap on the screen to
get away from this mode, and we will continue
by adding this type. So firstly, let us find the approximate
center on the shape. We will do it by creating the vertical line going
from top to the bottom. So let just go and
do that just very easily creating this line at
the end, we are holding it. We are adjusting
the angle to try to make it right in the center
if we need to adjust it, were arguing over
the top to Edit Shape and adjusting
it from here. Now when I have this slide, we will need to go to
this shape right here, and we will find it's
approximate center just by making a
little mark down. If you want, you
can go and create the whole horizontal line going through the
approximate center. It's up to you, but we can
go and we can be very bolt. So let's just find this center. We will make a
little mark and we will go a little bit
above this center. And from here, we will go to the left side and we will
create a wobbly sheep. The sheep should be a
little bit smaller on the top and a little bit
wider on the bottom. So let's create
something like that. When you have this
line on the left, Let's move on over r right part. And let's do the
same thing here. It doesn't need to be very
similar on both sides. You can play around
with the whole shape. And when you have
something like that led, just go and erase everything
that we don't need. So we are grabbing
our eraser to go into this line on this type
and we are arrays in it. Now, we will go to
these parts and we will add these bottom
texture of the mushroom. So what we need to do, we will firstly go and
create the first line, and it will be
diagonal like that. When we have it, we will need to go with a straight line along the whole shape and we will need to go in a circular direction. So let just go along the shape and we will add a
few more lines. You can add as many
lines as you like. And when you have
something like that, let just go over our cap and we will
add some details here. We will go and add some dots. We can play around with their
size and their placement. But we will need to
make sure that we are not adding too many details in the center part of the shape because here we will add
some facial features, ledgers go over r cap and we will add some
lines like that. We are adding half of
the circles or half of the ellipses or full
ellipsis, a full circles. As always, you can play
around with their size and the placement and with
everything right here. When we've added this pattern, ledgers go over this middle part and we will start aging
the facial features. If you want, you can help
yourself by creating the horizontal
line going through the approximate
center of the shape. Or we can go very boldly
and start manually. So let's just go
to our left part. We will step a little
bit aside from the central line and we
will put a first dot here, play around with its size
and with its placement. And when you have
it on one side, Let's move on to
the opposite side, and let's try to do
the same thing here. We will need to keep the size. We will need to keep
the distance from this element to the middle part. Also, we will need to
put it on the same line. So let's just go
and try to do that. When we have
something like that, Let's go over our eyes and
we will add little browse. You can play with
the shape of that. So e.g. we can go and add
little curves like that. And when we have
these elements lead, just go and add our mouth. We will go right
between the eyes. And firstly, we will go over our left part and we will
create an ellipse like that. We can just go and
edit color inside, and we will move to the right side and we will
do the same thing here. So this time we will mirror these olives on
the opposite side. Now, if we want, we can go and adjust
the whole shape. So e.g. we can go to our Astrium
and Eigen one more time. We are using freehand methods. We will go and loop
around this shape. We will close it
with our selection, and then we will go to our
arrow key on the top-left, which is our transform tool. So we can play around
with the word method. We can make it
smaller by going to the uniform method
or maybe free form. With the free form method, you can just freely adjust
the size of your elements and it won't be scaling
down equally on both sides. So e.g. we can go over
our bottom parts to the middle nodes and we can
make it smaller like that. Then we can just go to Warp and play around with our elements. So just spent a
little time right here and adjust your
shape if you need to. When you are
adjusting your shape, let's just go to uniform method and maybe make it smaller or bigger depending on what size
you have on your screen. And let's just find the
placement for these elements. So irritated, move it
around your Canvas, find what works for you
and when you are done, let's just deselect
everything by hitting R, S or ribbon icon one more time. And now we are ready to move on and we are ready to
create another shape. And these elements
will be the pumpkin.
8. Pumpkin Sketch: One more time, let us find
some space onto our canvas. Let's zoom it in
and we will start by creating a very simple
shape of the ellipse. This time, it will be
vertically aligned. Let's just go very easily to our Canvas with
our Apple Pencil. And we will create the
shape with one line. And the end of it, we will
hold our Apple pencil to snap it to a perfect
shape on the Alice, we can adjust the size and we also can go up to Edit Shape. So let just make this
shape a little bit wider. We will go to one
of the side knows and we will drag it
more to the site. We can find the placement of
our elements to our liking. And when we are done, Let's just tap on the screen with one of our fingers or with
our Apple Pencil. And now we can go
and continue editing the ellipses the same way and positioning them on this side, but also we can go
and do it manually. So let just do it manually. Ledgers firstly, find
the approximate center on this element that
we already have. So again, we are doing
to the top and we are creating the vertical line
going from top to the bottom. Hold it at the end. Try to find this approximate. Sandra, try to adjust the
angle and when you have it, we will go over the top
parts and we will stop a little bit aside from this line that we
have on this center. We will go to the left firstly, and we will make a little mark when we have it on one side. Let's mirror it on
the opposite side. And the same we will
do on the board exam, but this time we will step just a little bit
from the center line. So let's firstly do
it on the left leg, just add a little mark and we will do the same
on the opposite side. Try to keep the distance and when you have
something like that, Let's just go firstly over our left side and we will
create a big curve here. So basically it will be
half of the ellipse. We are connecting the dots
with this little shape. And if you need to adjust it, go over the top to Edit
Shape and adjust it. When you are done
with this task, let's do the same on
the opposite side. So the same way as before, we are doing firstly
to the top nodes and we are creating
the curve going down. Let's connect the nodes. And when we have it, we will go over the top to
Edit Shape and we will try to create the same shade
that we have on our left. And when we have this new shape, ledgers go to the
top part and we will be creating the back
part of our pumpkin. But before starting, let just create these little
pleas for this term. So what we need to
do, we will go to these two parts and we will connect them with another curve. You can just start by creating
some little marks down. Try to make them
similar on both sides. And when you have them, just connect them with
a curve like that. Play around with this curvature, play around with its size. If you need to adjust
your over-the-top to edit shape when you have it. Ledgers tap on the
screen with one of our fingers to get
away from this mode. And then we will go to the
back parts and we will need to create a few
slices like we have here. So let's just go to
this little part that we just have right
here on the left. We can start by making another little mark
down if you want, if you want to repeat it
on the opposite side, try it out on the opposite side. And when we have
all these marks, we will just need to go and create another part like that. You can play around
with this curvature. You can play around
with its size. It's all up to you when you have something
like that on one side, we will need to go to
the opposite side and we will need to do
the same thing here. So find what works for you. And when you have this
back part of the pumpkin, we will need to go
and add this town. So we are going to this part, to this intersection right here. We will go and create
the curve going up. So you can play
with the curvature, you can play with the angle. It's all up to you. Let's just firstly
create the first curve. When you have some
field like that, we will need to
repeat this curve on the opposite sides so you
can play around so you can make it the same as we have
it on the left or you can play how wide it will be on
the top and on the bottom. So find what works
for you tried out a few times and when you have it, we will need to
connect it on the top. You can have something like that or you can have
something like that. Just try out a few options. And when you have two lines, let us go over the top and we will connect them
with another curve. When you have
something like that, we are ready to go
to our middle part and we are ready to add
the facial features. So we can start by creating this horizontal
line that will go through the approximate center if you need it,
let just make it. So we are just going
there creating this line, holding it at the end. And we can adjust it by going
to Edit sheep or the top. Now we will tap on the screen and we will go to the left part. Firstly, we will add the
first dot for our AI. You can play around
with its size and with the distance from the center
when we have it on one side, Let's repeated on
the opposite side, try to keep the same size and the same distance
from the center. Now, let's go above our eyes
and let's add some eyebrows. So again, you can play around with the shapes to your liking. So e.g. we can go and create
straight lines like that. And when we have them lead, just add a little mouth. We will go right
between our eyes to this intersection and we will
create a rectangle here. You can play around with
its size to your liking. And when we have
something like that, alleges grab our eraser
tool and we will erase this middle
parts when we have it. Let's just go inside and
we will add some details. So firstly, we will go to the bottom part and we
will add a little tongue. So just go into the
bottom line and we are creating another
curve right here. You can play around
with its size. You can play around
with its curvature. It's all up to you. And when we have
the tongue lead, just go to the top part and
we will add some teeth. So e.g. we can go firstly
to the left side and we can create another shape like that when we have
it on one side, Let's repeated on
the opposite side. And when we have
something like that, we can just go and adjust it
by going to our selection so we can find a
different placement or we can adjust the
shape in general. So firstly, let just selected by going into our S ribbon icon, we will use the freehand method. We will select the shape
and then we will go over our top-left and we will
select the arrow key to. You can make it smaller, you can rotate it with
a uniform method. You can find a different
placement for it. It's all up to you. Let's just play
around right here. And when you are done, we can go to the warp and
we can adjust it even more. So play around and find
what works for you. And when you are done a
jazz and your shape ledgers deselect everything by
hitting R S ribbon icon. And now, when we are done
with the pumpkin lead, just go and add one
more character, which will be a little cup.
9. Mug Sketch: Ledgers go and find some place and we will start by creating a little ellipse
the same way as we had with our little mushroom. We will go with the
horizontal access, just Gil variable Lee and
create the shape without an holding your Apple pencil at the ends of it, just hold it. And if you need to adjust and go over the top to edit shape. When we have
something like that, we will go to the bottom and
we will add some lines here. So let's just go to the sides. Firstly, we will add
the lines going down. You can go with a
straight lines or you can go with little curves. Firstly, just going over our left part and we will create a little
curve like that. And then we'll repeat it
on the opposite side. When we have
something like that, we will need to close this shape right here on the
bottom by creating another curve that will be similar to what
we have right here. So let's just go and
create this curve. You can play with the corners, you can make them very soft. And when we have
it's ledgers go to one of the sides and we
will add a little handout. So e.g. we can go over r right bites and we will add a little ellipse right here. You can play around with its
size and with its placement. If you need to adjust it, you or the top to Edit Shape
and find what works for you. When you are done, we will
need to add the inner part. We are going inside
the shape that we have just created and we
are just repeating it, stepping from a little line
that we just have right here. When we have it, ledgers guilt and work on. So these parts, we will
need to add the inner part. Firstly, we will just
go to this part and we will repeat it by creating
another ellipse insight. So jazz given there and
creating this ellipse, hold it at the end, adjusted by going over
the top to Edit Shape. And when we have this shape, ledgers go inside of it
and let's add some steam. So e.g. we can go and mark down where we are
going to be putting it. We can mark it down on the
left and on the right. When we have this marks, we are given firstly
on the left and we are creating a very
wobbly line like that. You can play around with
how wobbly you want this line to be and
when you have it, let just go over the top. We will go just to
this line and we will start creating another
wobbly line going down. So just play around
with this lines. Find what works for you. If it's not working
from the first try, you can try it one more time. Nothing to worry about. And when we have this
sheep for this team, lead, just grab our eraser
tool and we will erase this line that
we have in the back. And when our top part is done, let just go to the
middle part of our cup. We will add the facial features. So e.g. ledgers go firstly
over our left part. We will go somewhere in the middle and we
will create the first i with this shape when
we have it on one side, let us move on to
the opposite side. And floods mirror it, tried to put it
on the same line, play around with the
distance between the eyes. And when you are done
with the second eyelid, just go between them and
let's create a mouth. So we will start by creating
a beak shape like that. You can play around
with its size. You can play around
with this position. And when you have it, let
us go to the bottom of it and we will add a
little tongue here. So the same way as always, we are creating half of the circle or half
of the ellipse. And when we have
something like that, we are done with our cup.
10. Cleaning up & Positioning: When we have all of our
main characters alleges go and continue adjusting
them onto our canvas. So firstly, we will grab
our eraser tool and we will erase all the lines
that we don't need, e.g. all the lines that are going beyond the frames
of our characters. So let's just go and
very easily erased now, when we've cleans everything up, let us go to our selection tool. And one by one, we
will be selecting r objects and we will be finding a better
placement for them. Maybe scaling them up, rotating and doing
something like that. Let's just go over our left so the S ribbon icon and we will be using the
free hands methods. Ledgers go to our
app, Let's select it. And then when we have selected, we will go to the arrow
key on the top-left, which is our transform tool. We are using uniform methods. And if I want to
scale our object, we are going to one of the sides to one of
the nodes and we are dragging it to the side
if we want to rotate it. When I go into the green
nodes and we are rotating it. And if we want to move, our object will just go into
any place onto the canvas. We are holding our
Apple Pencil and we are moving it to
the needed place. So now one-by-one ledgers go
and adjust the placement of our elements and let us try to make everything look
quite balanced. When you've played in half
and when you position your elements onto the canvas to the way that you like them, we can continue by adding some additional autumn
elements such as leaves, maybe berries, and
something like that.
11. Adding Miscellaneous Elements: So let's just go to
the blank spaces and we will start
adding the leaves. Let's just go and
zoom in our Canvas. And we will start by
creating the line like that. When we have it, we
will go to the sides and we will add a
few more lines, go into the opposite directions. We will have
something like that, and then we will go along the shape and we will
create some leaves. So basically we are
creating some loops. You can play around with their amounts and
with their curvature. It's all up to you. And when you have the
first leaf layer, just go to the other place and we will create another leaf. So let's just go and
zoom in our Canvas. Let's create the first curve. And when we have it, led, just go to the sides and
we will add some leaks. We will be creating
the shapes like that. When you haven't done one side, Let's go to the opposite side. Let's step a little bit
from this leaf that we already have and we will
create it on the other side. So just repeating the shape. If you want, you can play
with their position. You can play with the angle where you are putting
on the leaves. It's all up to you. Just play around and add
some leaves on this branch. Continue adding this
leaves until you are at the top of the branch when you have the
second branch led, just continue by going and
a11, maybe some Berets. So let's just zoom into the place that we
have blank right now. And we will start by
creating the line like that. When you have it, we will need to go
to the sides and we will need to create
two more branches. You can play with their
position when you have them. Ledgers go to the bottom parts of these little branches
and we will add the circles there and
they will represent the Barrett's one
barrier at each line. When you have them ledgers
go to the bottom of these ellipses and we will
add some lines like that. And when you have
some feel like that, let just go over the top part. And here we'll add some leaves. We will go to both of
the sides and we will create some shapes like
that when you have it, let just go to the top
of our first branch and let's make it a little bit thicker and let's
continue, agent. So find the place that is blank
right now and let just go and add another branch with the leaves or maybe
with the berries. Let's just go somewhere here. And again, we will start by
creating a line like that. That will be our branch and we will create a few more lines. Go into this sights on
to this little lines. We will add a few more lines. So e.g. let's have
something like that. And under these little lines, Let's just go and
add the berries. One more time. We just go in there and aid in some ellipses or half of the
circles or just circles, whatever you feel, what
barriers look like. And the top leg just
add a little leaf. If you want to add more leaves somewhere on the boards
and just go for it. Now let's find
another place which is blank and we will
add another leaf. So let us go somewhere here. Again, we are
starting by creating elite cell line for the branch. And we will start by creating
the loops like that. You can again play around
with their amount. And if you want, we can go
inside of the shape and we can add a few lines
for the branches. Now let us find another place
and let's add another leaf. So somewhere here
we can just go and start again by creating a line. We can go to the
sides and we can add a few more lines for the branches and owns
this loose alliance. We can add some leaves. You can play around with
the shape of the leaves. It's all up to you. Let's find another
place and let's find another shape of the leaf. So e.g. let's just
go to their boards. And right here we will create the first-line for the leaf. We will add a few
lines on the sides and we will go and create
this shape like that. You can play around
with the shapes. Again, it's all up to you. Just find what
looks like a leaf. Now, let's just go over some
of the places and ledgers, add just round berries. So we're just go into
the blank space. We are creating a
circle or an ellipse. And e.g. we can turn this
big bear into Elissa Epel. So we can go inside of
this shape and we can create half of this circle
right here, over-the-top part. We've made this little line which will represent the dance. And from this dance, we
can create a line that will represent the
leaf and the branch. So when you have it,
ledgers go to one of the sides and we will
add a little leaf. Now let us go and
find another place and we will add the
same apple there. As always, you can
play around with the size and we the
whole shape in general, Let's find another place and
let's add another apple. And when you have
the apples lead, just go and add a
few more branches. Lead, just add a
little branches. Right now, we are finding the place we are
starting by creating a little branch and
we are going to the sides and we are
adding some leaves. Lay just add a few of them. Basically, we are
just going alone the blank spaces and we are adding some elements
to fill them up. You don't need to add
too many elements. You just need to go and make
everything look balanced. So if you feel like some of the elements are too
close to one another, you always can go to
the selection tool, which is the S ribbon
on the top left, you can use freehand methods, select this element e.g. and go again to the Transform
tool and adjust the shape. You can rotate it. If you don't like
the placements, you can play around and
find a better placement. It's again, all up to you. Now let us continue and add
maybe some single leaves. We will go to the places and we will add the
leaves like that. You can make a few
of them nearby, or you can just go and
add just a single leaf. And also we can
just go and repeat the shapes of the barriers
that we have right here. So let's just find
some places and lead. Just put this little berries, they will be just single. So we're just creating a circle or an ellipse
and we are adding a few elements on the top or on the bottom depending
what size you want. These Barrett's, you
look at Lynch's go alone of our canvas and
let's add a few of them. When you are mostly done, we can again go to our
selection tool and to the Transform tool and
maybe adjust some elements. Again, it's up to you. If you want to do
that, go for it. If you're happy with the result
that you have right now, we can move on to the
next chapter where we are going to be
a generic colors.
12. Coloring the Main Objects: Let's satisfied from
some tiny preparations. So firstly, we will go and
we will change our brush. So we are going to
the Brush Library. We go into the
calligraphy folder and we are choosing
mono line brush. If you would want to do that, you can go to the
top-left slider and you can adjust the size. And you can create
every element right here with one size of the brush. Or probably it will be easier
to go back-and-forth and adjust the size to any element that you
will be recoloring. So now let's just go and create one more layer
for our color and parts. We go into our
layers and we will firstly go to this layer with the sketch and
we will rename it. Let's just tap onto this layer. Let's choose Rename and
let's name it sketch. When we have earlier renamed, let's just go and
create one more layer. So we are tapping
on the plus icon. When we did it sled, just go enter name this
layer one more time, tapping on the layer,
choose Rename. And for this layer, Let's
go with the name coloring. And we will need to put this underneath our layer with
the sketch because we want to see what's
happening onto earlier with this gauge because we
would want to recreate it. So let's just go to early with the coloring when
it is selected, we will hold it with
our Apple Pencil and we will drag it down under
our layer with the sketch. And one more time, we will need to see what's happening on the outer
layer with this gauge. But we don't need it
to be very bright. We will need to go and change the opacity level of this layer. The opacity level means how
transparent you earlier is. So let's just go to
earlier with this sketch. We will select it. We will go to this little icon and
we will tap on it. You can see that we have
some lists with the titles. We don't need it right now. We need to go to
this opacity slider. And you can see that we
have a little handle here, which we can grab and which we can drag over our left side. And when you are doing it, you can see that
your illustration, your sketch now is looking more transparent and that's
exactly what we need. So find the opacity
level that you like. Probably something like 50, 60 per cent will work for you. And when we have it allege us get back to our
layer with coloring. Onto this layer, we will
be grabbing the color and we'll be recreating what we have owns the early
with the sketch. It doesn't mean that
we need to do it with 100% of similarity. If you want to adjust
some elements, you are welcome to do it. So firstly, let us get
back to our color palettes and we will select the color
with the name red, apple. Let's tap on this
to select and lead, just start recoloring our apple. What we need to do,
we will need to go and we will firstly
need to create an outline that later on we will put our color into ledgers, go and we will repeat the line that we have
for our outline. You don't need to go along the whole shape entropy
that with one line, you can go and create
parts of the lines. You can hold your
Apple pencil at the end of the line to snap
them to a better shape. If you need to adjust the line, you can go over the top to Edit Shape and adjust it from here. And then you can just go and
continue creating the line. But makes sure that
the connection between these lines that you are
creating are smooth. And also to make the
lines even smoother, we can go to our brush library and to the adjustments
on this brush. So we're just going
to the Brush Library. We are going to
this monoline brush that we are using right now. We can tap on this brush and we can go to
this stabilization. Here you can see the
value stream line and the value amount. So we can adjust
this amount and you can try out how it works
onto the drawing pad. So if the amount is very low, you can go and create
the line like that. It will be wobbly, it will
be a little bit jagged, but you will have a lot
of control over it. But if we increase the
amount of streamline, your line will be very smooth, but you will lose a
little bit of control. So find the amount
that works for you. And when you write down ledgers he'd done over the top right? And we will go and continue creating our outline
for the Apple. When we have this outline leg, just go with our eraser and we will find some places
that we need to adjust. So e.g. here we can
see that we have a little shape right here that we will just
need to adjust. So we will need to
make this line smooth. Glenn, just do and
make it smooth. And when we have our outline, we are ready to go and
add the color insights. What we need to do,
we will need to go to our top-right corner. We will just go to this
little icon with a color. We will hold it and we will
drag it to our middle part. And that way we will
recolor our elements are coloring for the main shape
of the apple is done. Now we can get back to
our color palettes and we can select the color
with the name lines. With this color, we will go over the top and we
will add the stem. And this little debts
when we have selected, Let's just go and do that. If you want, you can adjust
the size of your brush. When we have something
like that, sled, just go back to our color palettes and we
will select another color. With this color, we
will recolor our leaf. Let's just go and select the color with the
name orange, one. With this color, we will
go over our shape that we have on our sketch and
we will create this leaf. Make sure that all
the shapes that you are creating are closed. That means that they don't
have any gaps on the outline. So when you have the
closed shape ledgers go to our top-right corner and we will drag and drop the
color insights. If you want to adjust
this little part, if you don't want the leaves
to overlap the branch, you can just grab the
same color that you had for your branch and
recolor this little piece. And we can do it very easily by invoking the eyedropper tool. So we don't really need
to go back-and-forth to our color palettes if we already have the colors
onto our canvas. So what do we need to do? We will go to this place where
we have the needed colors. So to this stamp and we will hold one of
our fingers on it. You will see that we have
a little tool right here. And if we move it, we will see that we are
changing the color. So when you have the
color that you need, you will just hold your finger and you will
have the new color. So now let's just go and create this little piece right here
that will overlap our leaf. And now let's just go and continue recoloring
our own objects. So firstly, alleges go to our occurred and who will
go to the top part? So let's just go and select the same color that
we use for the leaf, the same way as we did before with invoking the
eyedropper tool. So we are going to this color
and we are holding one of our fingers there until
we have this little too, when we have the needed color
on the top of the tool, we are on hold in our finger and we argue in to this top part of our equation and we will
go and repeat this shape and we will create an
outline, the closed outline. So let's go and very
quickly do that. You can create the whole curve. And if you need to adjust it, go over the top to edit
shape when you have it, let just go to the bottom and we will create another line. We will connect two
shapes together. And when we have it,
we also will go to this little parts on the bottom
and we will do them too. Let's go over the
top and we will outline this little
stem on the top. Now when we have this shape, ledgers go to our
top-right corner and we will drag and drop
the color to this place. And the same way as we
did with the main shape. Let's just go over the top and we will drag and
drop the color here. Now when we have recolored our top part of the acre
and ledgers go and select the different color and we
will add the bottom part of the Eckert one more time going back to our
color palettes, and we have the color with
the name Brown's occurred. Let's select it and
let's just go and create this outline
when you have it, let just go to the bottom and we will add this little stem. We can recolor it manually. We also will need to
go over our lines on the top and we will need to make sure that they are closed. If they are closed, we can go or our
top-right corner and we can drag and drop the
color inside this area. We can go manually and a jazz this lethal pieces that
we need to adjust. So we can just go menu and recolor these little
pieces on the sides. So one more time,
let just invoke our eyedropper tool by holding our finger
on the needed color. And manually, we will go to these places and we
will recolor them. And now we are ready with
our little occur and lead us continue by going
to this little clouds. So one more time, we will get
back to our color palettes and we will select the
color with the name whites. With this color, we will go
over the whole shape and we will put our outlines
the same way as before. You don't need to create the line just without
interrupting it. You can create the
piece of the lines and you can connect
them very nicely. When you have the
outline ledgers go to our top-right corner and we will drag and drop the
color insights. And when we have it, led just adds lead cell
color to this little drops. So we can do it with the same yellow color
that we used before. So let just go to the
top of our Acker and we will invoke the
eyedropper tool. We will select the color
that we need and we will go to this drops and we will
recolor them manually. If you need, you can go to the top-left slider and you can adjust the size of your
brush with the same color. Ledgers go to our boots and we will go along
the whole shape, the top part, the bottom
part of the soul. We will create one
outline for everything. Remember that it
should be closed and when you made sure
that it is closed, ledgers go over our top right, and we will drag and
drop the color insights. Now what we need to do, we will go to entry color, this little tag that
we have right here. And we will go to our
color palettes and we will select the color
with the name rat apple. We will go over this part and
we will recover it firstly, legis create the outline, and then we will
manually recolor it. When we have
something like that, we will need to add
a different color to the top part and to
our rubber soles. So we will do it in
a different way. We will get back to our layers
and we will need to tap onto earlier with
the coloring and we will need to
choose Alpha Lock. When we have selected
Alpha lock will be working only on the areas that were already have
onto this layer. So let's just go to
our color palettes. We will select the color with the name dark red mushroom
or maybe a red mark. It's up to you. If you want to play
around with the colors, you are welcome to do it. We will select this color and we will go over the top parts. And very briefly, we will go there and we will
create the outline. You will see when
you are doing it, you are not going
beyond the frames of the object that you already
have on your canvas. So now let's just increase the size of our brush
and we will get, or this top part and we will
recolor it the same way. We will go to our bottom and we will do the
same thing here. So if you want to
change the color, maybe you want to
experiment a little bit. Go again to your color palette, select a different color, and let's go or our bottom part, and we will create
the line here. When you have it, let us get back to our layers
and we will do to our layer with the
color and we will tap on it and we will
deselect alpha lock. Because when we are
using alpha lock, we can't add any more details beside the places that we
already have onto our canvas. So now the same color and
layer we are getting back to our Canvas and we are continuing aging our colors to the objects. Let's just go to
this little mushroom and we will start by creating these little olives that we have to
the bottom parts, we will get back to
our color palettes. We will select the
color with the name grayish red, mushroom. With this color, we will go to this place and we will create our ellipse the same way
as we did with our sketch. You can just go create
this shape with one line. Hold it at the end, adjusted by going to
Edit shape over the top. And when you hand the
shape that you need, you will need to go back to your top right corner and drag
and drop the car insights. Now, let us get back
to our color palettes. Let's select the color with
the name dark red mushroom. And we will go over
the top and we will add this little curve here. So let's just go and
create it very nicely. Let's connect it with
the shape on the bottom, a jazz the shape
if you need to by going over the top
to Edit Shape. And when you have something
like that's led to us go to our top-right corner and we will drag and drop the color inside. Now, manually, we can select the same color that we
have to this bottom part, and we can adjust this
little places right here. We will need to have a
very smooth connection between the elements. Now when you have
something like that, let us get back to
our color palettes. We will select the color with
the name light grayish red. Or if you want, we can
select the color with the name whites and we can
go and edit to ours type. Let's just go and
create our outline firstly, make it closed. And let's just drag and
drop the color inside. And you can see that you recolor
it only the bottom part. We will need to go to the
top one and we can try to put the color the same way
with the color drop method. Probably we will have
something like that. And if you have
something like that, if you recolored
everything here, you don't need to hold
your Apple pencil. You will need to move
it toward the left part until only the area that you want to recolor is recolored. You can see that we
have this blue line which is called color
drop threshold. And when we are moving it, it is getting a
little bit smaller. And you will need to
find this area where only this area that you want to be recolored is recolored. You also can go over these little parts and you
can notice that you might have some little lines between these shape that you just
recolored and your outline. You can go and manually
recolor these pleats. And when we are done
with our mushroom, let's move on to the pumpkin
and let's recolor it to. So firstly, we will
zoom in our Canvas, we will get back to
our color palettes and we will select the color
with the name red, orange, pumpkin, one
with this color. We will go to this part in the center and we will
create this ellipse. Hold the line and the ends
adjusted if you need to, when you have the
outline ledgers go and drag and drop the color. And now we will get back
to our color palettes and we will select the color with
the name Arad pumpkin too. With this color, we will recolor the rest
of the elements, but not the stamp. So all the parts of that pumpkin cool the
lines, make them smooth, color drop the color inside
the area that you need, and continue adding these
elements entry color in them. For this stem alleges
go and select the same color that we
used for the lines, lie, just grab it and lead jazz create these lines
for this term, we will add the same
color right here for this little part of
the top of this time. Let's drag and drop
the color inside. And then we will
just grab the color that we use on the
sides and on the back. And we will adjust this
little places that we need to adjust when we are
done with the pumpkin, Let's move on to our
little mark and we will select the same color that we have on the top of our boots. Let's invoke our eyedropper
tool with one of our fingers holding on
the color that we need. And we will go to
our bottom part and we will start to create
the shape on the bottom. And we will add the
same color right here for these outlines to
finish up our Mac, Let's drag and drop
the color inside. And let's just grab another
color for this little handle. So let's one more time, go to our color palettes. Let's select the color
with the name lines, and ledgers go to the handle
and we will recover it. Create Outlines, make
them very sought, make them closed, and also let just go and drag
and drop the color insights. If you need to
adjust some places, select the color that she needs, NCHS that now let us get
back to our color palettes. Let's select the color
with the name whites. And let's just go
over our esteem and we will add
our outline here. Let's drag and drop the color. And also let's drag
and drop the color to this place that is recolored
with the red color, a jazz the threshold without an holding
your Apple pencil, move it until this
area is recolor it. And if you have this line, just go manually and recolor it. And when we have all of our main elements
recolored with base color, Let's just go and
create one more layer. And onto this layer, we will recover all
the little pieces.
13. Coloring the Miscellaneous Objects: So let us get back
to our layers. Let's tap on the plus icon and let's rename it
as miscellaneous. And onto this layer
we will just go over our little parts and
we will recolor them. So let just start by going
to our color palettes. Let's pick one color and
with this color, so e.g. it will be orange one. And with this color, we will go to different places, to different objects, and we will recolor them
with this color. You decide which objects you would want to
recolor with this color. Let's just go and
recolor them very easily to have some balance
on, say your picture. Don't put too many elements with the same color
near each other. When you are done
with the first color, Let's get back to
our color palettes and let's select another color. So e.g. let's continue with orange to end
with this color. Again, we will go to some of the elements and we
will recolor them. When you are done
with this color, Let's move on to our color palettes and let's
select the next color. This time, it will be red apple. With this color,
we will go entry color more of the elements. And again, when
you are done with this color ledgers,
grab another color. So e.g. it might be a
red mark and we can go and add another color to
the rest of the elements, or maybe to some
of the elements. And the last color
that we will add will be this color
within the lines to, with this color, we will go
to this little branches and we also will add all of the branches with
this color as well. So let's just go and
add the branches and the little leaves and everything that we
need with this color. And when you are done
recovering all of the objects, ledgers go and
make sure that all of our shapes are looking nice. So what do we need to do? We will get back to our
layers and we will hide our layer with the sketch we will do to earlier
with this gauge. And we will need to go to
this little checkbox near the icon n. Let's just
go to our layers. Firstly to our layer with
the coloring less grab our eraser tool and let's make sure that everything
is looking nice. So e.g. we can go to our little boots and we can
adjust these little sites. So we will turn this
very street corners into the softmax. Erase the corners,
edges, the lines. If you need to recover some little places like
we have right here, we can just go and
manually recolor them by invoking the eye dropper
tool with one of our finger. And just by grabbing our
brush and doing it manually, just go all over the
places and adjust them. If you think that
they need adjustment. When you are done with the
main layer with our coloring, do the same with the layer with the miscellaneous objects. Just go to them and make sure that all of them
are looking nice. And when you are
done with this task, we can move on to the next
chapter where we're going to be aiding the details
and the shadows.
14. Adding Shadows: Let's say this part by adding some details on some
of our objects. Firstly, let us get back to our layers and we will unhide
earlier with this gauge because here we
have some map and all these objects
that we need to add onto our little elements. So what do we need to do? We won't need to go
to our sketch layer. We can select it or
we can not select it. We will need to go to
this little checkbox and we will need to tap on it. Now, you can see that we have
the texture on the top of the occurrence on its head
and we have some elements. Onset are a little mushroom. So let's just go. We will create another layer above early with the coloring, so it will be easier
for us to adjust it. And onto this layer we
will add these details. So firstly, we are going to
early with the coloring. We will select it and we will create one
more layer above. Let's tap on it. We can leave it without
any name because later on we will merge
these two layers together. So let's just go
to this new layer. We will tap on it and we will clip it to a previous layer. So we are selecting
Clipping Mask. And onto this layer
we will go to our objects and we
will add the details. So firstly, I just go to occur, Let's go to our color
palettes and we will select the color with
the name orange details. With this color,
we will go along this diagonal lines and we
will add them with this color. So let's go and do that. Don't worry, if you
are going a little bit beyond the cap of
this little sucker. We can later on grab our eraser tool and erase all the elements
that we don't need. So let's just go there and let's add these diagonal lines. As always, you can
hold your line and the ends to snap it
to a perfect shape. And if you need to
adjust it even more, you can go over the
top to edit shape when you are done with
adding this little pattern, let us get back to our layers and we will hide our
layer with this gauge. Just for one seconds. We will go over
this extra parts. We will grab our areas or
two and we will erase that. When you are done, let us get back to our layers. Let's one more time, unhide our layer
with the sketch, and let's continue,
aid in some details. Now we will go to our mushroom, we will grab another color. It will be red mushroom. And with this color, we will
go over this little elements that we have on the cap
and we will add them here. So let's just go
increase the size of our brush and we will
put these little dots. You don't need to recreate everything with 100 per
cent of similarity. Just remember it. You can create more details. You can make them even better. Or if you want to
adjust them in any way, you are welcome to
do it when you are done adding these little
details one more time. Let just get back to our layers. Let's hide our layer
with the sketch. We will grab an eraser
tool and we will go over the extra elements
and we will erase that. When we are done, Let's just add some pattern once
they are little mark. So we will zoom in our
Canvas and you can play around with a extra elements that you would want to add here. So e.g. you can end up adding some little dots here
or maybe some lines, maybe some extra pattern. It's all up to you. Let's just go to our
palettes and we will select the color within
the infrared APA. And with the scholar, we will go to our main shape of the mark, so to its body and we will add some extra elements right here. E.g. ledgers go and
add some lines. And when you are done
with adding the pattern, let us get back to
our layers and we will merge these two
layers together. We are going to this layer where we have added our details. Layer four, we will tap on it and we will
choose merge down. And now everything that we
have related to our coloring, our main coloring on our main
elements is on one layer. And now we can move on and we can start adding
some shadows. So for the shadows, we will
need to create another layer. We will need to clip
it to a previous run. And we also will need to
change the blending mode of this layer because we
will be adding the shadows. So firstly, let us go and
create one more layer. We will tap on the plus icon, and this time we will rename
this layer as shadows. So tapping on the
layer, choosing Rename, we will need to clean this
layer to a previous one. So again, we are tapping on the layer and we are
choosing clipping mask. When we clean this lead to a previous one we
will be working on. So the areas that we have
on the previous layers. So you saw how it worked when
we were adding our details. Now when we have this new
layer and when it's clips, we will need to change
the blending modes. Blending modes are
different ways you earliest can interact
with each other, so you can add different
visual effects. And for our shadows, we will need to use
multiply blending mode, multiply blending
mode multiplies the colors of the blending
layer and the base layer, and the resulting color
is always darker. Ledgers go and we will find out where all the
blending modes are. We will tap onto
our an icon and you probably remember that
we've already been here. So we will need to go to this little list that
we have on the bottom, and we will need
to find multiply. It is the first mode that you can find into
this little list. So when you selected it, we will need to also go and
change the opacity level because now it will be very bright and we don't
really need it. So let's just go to
our opacity slider and we will set it at 50% if it will be too
bright for us later on, we can always get back to our opacity slider
and we can change it. So for now, let's just go and find 50 per cent on the slider. When all the
preparations are done, we are ready to go
to our objects. We will be selecting each
color for each object, and we will be
adding the shadows. So firstly, let's
start from our apple. We will select the
same color that we have for our shape of the apple. So let's invoke our
Eyedropper Tool. You remember how we
need to do that? We go into our color that
we would want to select. We are holding one
of our fingers there and we are invoking
this little tool. So when you have the color
that you need on it, so we are holding our finger and we are ending up with
a color that we need. So now alleges go over
one of the sides. So e.g. there, right, one, and we
will add the shadow here. Let's just go and firstly, we will create a curve. You can play around
with the curve. You can play around with how big you want your shadow to be. You can hold your Apple pencil
at the end of the line. You can adjust it in any way if you need to
adjust it even more. Go up to Edit Shape and
adjust it to your liking. Play around, find what works for you and when you are ready, ledgers go along this side. So it is our right side and we will manually recolor this area. So let's increase the size of our brush and let's
go and do that. Also. If you need more
control over your line, you can always get back
to your brush library. Go to your monoline brush, go to the stabilization
and adjust the amount of streamline
when you are done, we are hitting down
and we will continue agent Irish shadows
to other elements. So now let us go over our anchor and let's select the color
that we use for the base. We are invoking our Eyedropper
Tool and we will go over the same right side and
we will add the shadow here, ledgers guilt and decrease
the size of our brush. And let's start by
creating a curve. Adjust it to your liking. If you need to
adjust it even more, Let's go or that
soap to edit shape. Let's play around with
these little handles. And when you are done, Let's just tap on
the screen with one of our fingers and menu. We will recolor the shadow. Also. We will go under our cap and
we will add the shadow here. So we're just go in there and repeating the shape
of the bottom line. Let us go and do that. And also we can add
a little shadow to this sides of
our acronym CAP. These shapes that we
have on the back. When you have
something like that, let us work onto
this connection. We will make it more soft. So let's just go
and manually turn this very street
corner into the curve. And now we can just
grab our eraser tool and we can erase everything
that we don't need. Ledgers go over r cap
and we will erase these lines when we had the
shadow onto our anchor. And let's continue and we will go and add the
shadow to the boots. So firstly, let's
zoom in our Canvas. Let's invoke our Eyedropper
Tool and we will select the same color that we have for the main shape of our boots. So these yellow lab selected, let's increase the size of
our brush and we will go over one of the sides and
we will add our shadow. So let's just go e.g. or the right one. And we will add the shadow here. As always, you can play
around with how big your shadow would be when
you have added your shadow. Not only we can add the shadows with this blending mode
and with this color, we also can add some details. So e.g. let's just go to the heel area and we will
add some details here. So e.g. some stitches, ledgers guilt and decrease
the size of our brush. And we will firstly go and add the curve going into this area. So something like that. You can hold your Apple
pencil at the end. You can adjust your curvature by going over the
top to Edit Shape. Play around with the curvature
and with everything here, find what works for you. And when you are done, ledgers grab our eraser
tool and we will go along this line and we will cut some pieces to make
it a dotted line. So let's just go and do that. When you have
something like that, we can go and add more details. So e.g. we can just
get back to our brush. We can increase or
decrease the size of our brush and we can
add some dots here. So that way we are
adding some texture. If you want to go and add
some dots or other places, you are welcome to do it. And the same we can do
onto our previous objects. So you can always get
back to your elements. You can select the
color that you would like to add your
details with ants, you can just go over some
places and add them. Just try to keep
everything balanced and try not to add too many
of these elements. Now, when we have
the shadow onto our boots and when we have
added some little details, Let's continue by
going to the Cloud. We will add the
shadows on the bottom. So let us firstly go
to our color palettes. We will select the color with
the name light grayish red. And with this color, we
will do to the bottom area. And again, we will start
by creating a curve. So play around and find
what works for you. As always, you can go
over the whole shape. You can hold your
Apple pencil at the end to create
a better curve. You can go over the
top to edit shape. It's all up to you. So play
around with the curvature. And when you are done, ledgers tap on the screen. Let's increase the size of
our brush and we will go over the bottom part under this
line that we just created. And manually, we will
recolor this area. Also we can go to one of the sides and we can add
another curve there. So let's just decrease
the size of our brush. Let's go over one
of the sides and we will start by
creating a curved. So e.g. let's go
over our left part. We will create
something like that. We will play around
with the curvature and with the angle of
our little curve. And then we will increase
the size of our brush. And manually we will recover this part and also
we can go over that so part or on any place that you like and we
can add some details. So e.g. we can go to this middle part and we
can add some dots here. If you want to add more details, you are welcome to do it. When we are done
with our clouds, Let's continue and we will
move on to the mushroom. So firstly, we will get back
to our color palettes and we will select the color
within the red mushroom. With this color, we
will go over one on this side and we will
add the curve here. Firstly, alleges go
over the right one and we will create
this curve as always, play around with the curvature, play around with how big your shadow will be when
you have the curve, we will increase the size
of our brush and manually, we will recolor the
rest of the area if you went a little bit beyond the frame so you know
what you need to do. You will need to grab
your areas are two and erase all the extra parts
that you don't need. If you want to add more
details or the soap, just go for it. While we're still here
on our mushroom ledgers. Get back to our color palettes. We will select the same color
that we use for creating the shadow onto our
clouds, light grayish red. And we discount, we will
go over the right part of ours type and we will
add the shadow here. So very easily, ledgers
go and create the curve. Firstly, probably here, we will need to
create a few curves. Or if you want to go menu, you can just go along the whole shape and
try to recreate it. When you have, then
you get curve. Let us increase the
size of our brush and let's add the
shadow to this place. If you weren't a little
bit beyond the frame sled, just grab our eraser tool and we will erase all the extra parts. And also, if you
remember on the sketch, we had the lines on the
bottom part of our mushroom. We can just get
back to our leaves. We can unhide early
with this gauge and we can check out where we
need to put these lines. So now let us get back
to our color palettes. Will also add the color with the name grayish red mushroom. And we will go over
these lines and we will add them
very accurately. Let's decrease the size of
our brush and let's do that. So just go over these lines
and remember that you can always hold your line at the end to create
a straight line. When you are done
with this task, like just get back to our layers and we will hide
earlier with this cage. So one more time we go into this little checkbox and
we are tapping in it. Now, let's make sure that
everything looks nice. And if we forgot some lines, we will just go over them
and we will recreate that. So let us go and we will
create this line on the top. And also we will need to
make sure that all the lines are looking fine and that we
don't have any extra parts. So lets just grab our eraser
tool if we have them, and we will go over
and erase that. And now we will get
back to our little map. Here. We will select
the same color that we use for this
little stripes. We will select it by invoking
our Eyedropper Tool. And we will go to
one of the sides and we will add the shadow here. So e.g. let's just go over our right part and we will
start by creating a curve, play around with the curvature, play around with its size
when you are ready manually. Let's go over this
little part over there, bottom right, and
we will recolor it. And also we will go over our back part of the mark and we will
add the shadow here. So let's just go
very accurately. If you need, we can always
go back to your layers and you can find out where
these back part starts. So you can go to the
layer with the sketch, you can unhide it, and you can just
go over this part on the back and you can
add the shadow here. And when you are done, let just go back to our layers
we will hide earlier with the sketch and we will add a
little shadow to our team. So one more time, we are getting back to our
color palettes. We are selecting the
color with the name light grayish red when I go
into one of the sides. So probably it will
be the right one. We will go and add a
little shadow here that will be recreating the shape of the whole shape of this team. Lead, just go and
edit as always, starting just with a line, just mapping out where
our shadow will be. And then we will manually go and recolor the
rest of the area. If you want to add more details, some doors or something, just go for it. When we are done adding
shadows to our main elements. If we don't like the opacity, we can always get
back to our layers. We can get back to our
layer with the shadows. Go to this icon and adjust the opacity on the
opacity slider, we can find what works for us. If you want something
more broad, you can go to the right side. If you want some
families will be transparent guilt
or the left part. And when we're done
with our shadows, let's move on to
the next part where we are going to be aiding
the facial features.
15. Adding Facial Features: Starts with our facial features. Let just go back to our layers. We will go to earlier with
the shadows and above it, we will create
another new layer. So let's tap on the plus
icon and straightaway, Let's rename this layer
as facial features. So tapping on the layer
and choose and rename, we can leave this
layer as it is, or we can clip it
to a previous one. It's all up to you when
we have this layer and while we're still
in the earliest panel, alleges go to earlier with this sketch and we
will unhide it. So that way we will
know what we need to draw onto early away
the facial features. Now when we have
Eric in here set, let us get back to our
color palettes and we will select the first
color for our features. Let it be lines one. And with this color, we will go to our
bright objects and we will add the facial
features with it. So let's start from our apple. We will be using
the same brush as we used for our coloring part. It will be our mono line brush from the calligraphy folder. And we will go over our objects the same
way as we did before, and we will create
our facial features. You don't need to
repeat everything with 100% of similarity. If you want to adjust some
elements, if you want, e.g. make the eyes bigger or
smaller, you can do that. It's all up to you. What we need to do is just to
add these facial features. So firstly, let us
go over our apple. We will increase the size of
our brush and we will go to the eyes and we will put these two dots when
you have them, we will decrease the
size of our brush and we will repeat this
shape of the mouth. So firstly, we will
create the outline layer. Just go and start with
the horizontal line. And the same way as always, we can hold it at the end. And if we need to
adjust it even more, we can go over the top to edit shape when you're
satisfied with your land, ledgers go underneath
it and we will create this half of the circle
connected nicely. Adjust your sheet if you need to go over the top
to edit shape. When you had the
shape that you like, ledgers go and add
the color inside. So we go into our
top right corner and we add dragging and
dropping the color inside. If you need to adjust
some places, e.g. you miss color it
some little piece. You can go and manually do it. And when we are done
with our apple, Let's move on to
our next elements, to our bright elements. And e.g. alleges
go to our boots. Just go and repeat our shapes
for the facial features. Firstly, we are decreasing the size of our brush and we are repeating this lines
for the ice as always, hold the line at the end, adjusted if you need to repeat the same line
on the opposite side, tried to make them, even
if you need to adjust, then go up to Edit Shape. When you are done with
the eyes ledgers go to the sides and let's add these two lines
for the eyelashes. Let's repeat it on
the opposite sides. And we will go and add this
little mouth with the tongue. So we are just going
there and repeating the shape that we already
have onto our sketch. When we're done with this shape, Let's move on to the
next bright sheet and it will be our
little clouds. So one more time we will go and increase the
size of our brush. Firstly, we will put these
two dots for the eyes. When we have them lie, just go decrease the size
of our brush and we will add our line for the
mouth when you have it. Let's move on to our pumpkin. So the same way as always, we are starting by
creating our eyes. Let's increase the
size of our brush. Let's put these two
dots for the eyes. When we have them, let us go to our mouth
and we will create a rectangle with this
beak size of the brush. Let's just go and
try to do that. You can hold your
Apple pencil at the end on the line and
you will snap it to some shape which you can adjust by going over
the top to edit shape. Here you can see that you have some options or
the soap and e.g. you can select square
with this shape. We can tap on our screen and we can go and add our eyebrows. So let's just
decrease the size of our brush and we will go
over our eyebrows and we will repeat these
shapes when they have added all the facial features
to our bright elements. Let us get back to our color palettes and we
will select another color. So this time it
will be lines too. Let's tap on it to
select and let's continue doing
what we were then. We will go over our
elements and we will continue agent
our facial features. Firstly, let us go to our acre and let's increase the
size of our brush. Let's put two dots for our ice. Now let's decrease the
size of our brush and we will add this little
smile as always, July and at the ends, adjusted if you need to by going over the soap and when you are done with the
Acker and let's continue by going
to our mushroom. And we will do the
same thing here. Let's just start by
adding our eyes, increasing the size of the
brush and putting two dots. When we have these two
dots for our isolate, just go and create the mouth and we will do it very easily. We will go over the
shape that we have, only our sketch and we will create a little sheep of the v. So we are just creating a
line going down like that. We are holding it and
we are moving up. When you have
something like that, you will see that you
have a little heart. When you haven't slept, just go over the top and
we will adjust the shape. We will put it right
in the center. And also you can notice that you have a lot of these
little nodes. You can play with them. You can make your mouth
smaller or bigger, less curvier or more curry. It's all up to you when you are done adjusting
this little shape, like just tap on the screen, Let's decrease the size of our brush and let's
add the eyebrows. When we are done, Let's just move on and add our facial features
to the last elements. And our last element
is this little mark. So let just first lego
decrease the size of our brush and we will add
these lines for the ice, just repeating the shapes that you have once a year sketch. Try to make the eyes even on both sides and when
you have them, Let's increase the
size of our brush and we will create these
big shape like that. We are holding it at the end because if we
need to adjust it, we can go up to Edit Shape
and adjust it from here. So e.g. we can move it, play around with its size, play around with the
angle of the mouth. And when you are
done leg just tap on the screen to move
from this mode. And we will continue by adding the additional elements
to our facial features. So e.g. we will be adding
our little tongues, but we will do it
in a different way. We will turn on
Alpha lock and it'll be easier for us to
add some details. Let's just get back
to earlier is lead. Just tap onto our layer with visual features and we
will choose alpha lock. We will go back to our color palettes and we will
select a different color. So e.g. for the tongues leg, just use the color with
the name orange one. We will go over these little shapes and we
will go to the board, Sam. And we will create our tongues
just with a little curve, play around with this size, go over all the elements that need to have this
little tongue and edit. And when you're done
adding the terms, ledgers get back to
our color palettes, will also add the color
with the name whites. With this color, we will add
the highlights to the eyes, and also we can go and add
little elements such as teeth. So let's just go and do that. Firstly, we will zoom
into our little pumpkin. We will decrease the
size of our brush and we will go over
the top part and we will add two little lines above to create
this little teeth. As always, play
around with the size, play around with
everything that you need. If you need to adjust
some elements, you know what you need to do. You will need to hold
your little line and your over-the-top
to edit shape. When we hand this little
teeth ledgers go to the eyes. We will increase the
size of our brush. We will go over
one of the sides, probably to the top area. We will go and add a little dot here when we have
it on one side, Let's move on to
the opposite side. And let's do the
same thing here, trying to put the highlights
on the same line. When we haven't sledges
go over all the i's and we will add our
highlights the same way. When you are done with this task ledgers get
back to our layers. We will hide our
layer with the sketch and also we will tap
onto earlier with the facial features
and we will turn off alpha lock because we will need to add the color to this little tongue own
so they boots ledgers. Go back to our color palettes. We will select the color
with the name a red apple. And we will need to get back to earlier with the
coloring and insight, our layer with a color
and we will go over this little tank and we
will add the color here. And when we added the
color to our little tank, we are done with our
whole illustration. And as we have created our miscellaneous objects
onto the different layer, you can always go back to your layers and hide this layer. So that way you will have only the objects
with the face sets. Or if you want to have this whole illustration with
the additional elements, you are welcome to get
back to your layers and unhide your LEA with
these little objects. Thank you for
watching this class. Leave a review if you liked it, and consider subscribing for
more videos in the future, looking forward to
seeing your projects.
 Uni Corn, ⭐Kawaii Art Enthusiast⭐