Transcripts
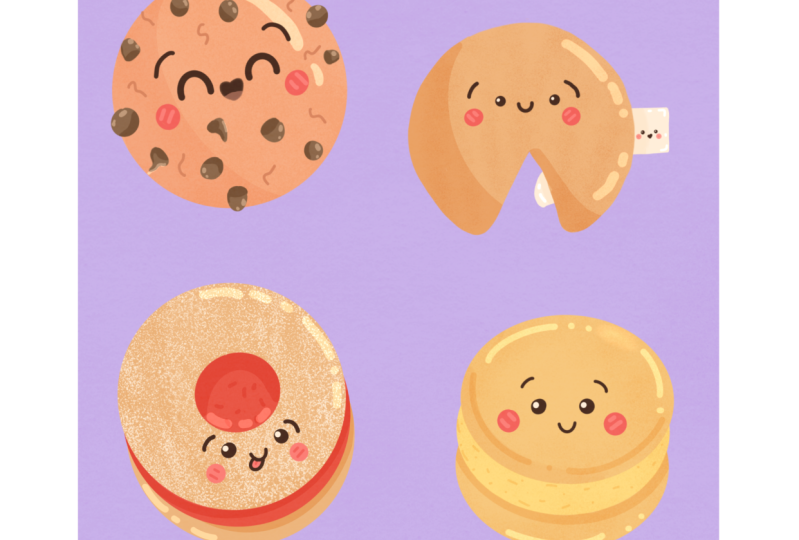
1. Introduction : Hello everyone, I'm Union. And into this class we'll draw a few cute cookie illustrations. These class doesn't require any prior experience
or fancy tools. We'll start from scratch
and we'll be using simple techniques
throughout the process. Everything you'll see will
be happening in Procreate. However, if you have other software or wants to try three
additional materials, you are welcome to join if
you are ready to start, Let's jump right into it.
2. Chocolate Chip Cookie: Sketch: Firstly, we need to
decide what kind of Canvas we are going
to be using today. And you can see it is a very
simple square canvas because both pixel width and pixel
height are 2048 pixels. As for dpi there 300 and
S for the color profile, either set as SRGB with
this loan and scary number one and so on down
we are heating Dan and we are at our Canvas. So now we need to decide
what kind of colors we are going to be using
throughout the whole tutorial. You can go to the Project
and Resources tab. You can download the
color palette and you can follow along with this
class when you did it, we will go straight to our color palettes and we will check out what we have there. And here we have two options of how we can use the colors, the comeback to
you and the cards. We will be using the cards because they have
all the colors, names and they are ready
for you to be used. So our first task for today is to change
the background color. Let's go to the layers and let's go to the background
color layer. Here you can see that you have your little color
palette on the bottom. And we would need to select the first color
in the first row. So this purple one,
Let's tap on it. When you did it,
you will see that you have changed the
background color. And that means that
we are ready to start making our
first illustration. And our first illustration
is a chocolate chip cookie. We will be starting
with a sketch in parts. So we would need to select a brush and we would
need to select a color. Let's start with a brush. Go into the Brush Library and go into the
Sketching folder. Into this kitchen folder, we are selecting
procreate pencil. And if you would like to use any other brush for
sketching part, you are welcome to do
it with your new brush. Let's get back to our
color palettes and we would need to select
some contrast color. For example, let's go with
this color face elements. Now when all the
preparations are done, Let's zoom in our
Canvas and we will need to create a
perfectly round circle. And it's easier than it sounds. We will go to our
Canvas and we will try to create as best
circle as we can. Don't. And hold your
Apple pencil at the end of the line
and you will see that the whole shape now is looking a little bit better than you
were expecting it to be. But still it is
an ellipse and we would need to have a
perfectly round circles. So let's go to our
Canvas and we will tap and hold one of our
fingers on the screen. Now you can see that it snaps
to a perfectly round shape. If you move your Apple
pencil from side to side, you will see that you are changing the size
of your elements. For now. Let's leave it as
something very neutral, not too big, not too small. And when you're satisfied, Let's add hold everything that
we are holding right now, and we are almost done
with our cookie kidding, we would need to create
the facial features. We would need to create
some additional elements. So let just go and try
to start with that. We will begin by creating the facial features and to
put them somewhere here, we would need to know
where to put them, right? So we would go and
we will create one vertical line and
one horizontal line, and we will try to just follow them in a
center of our shapes. So let's go to the top and we will create a vertical line. You don't need to
be very precise. Just try to put this line
somewhere in the center. When you have
something like that, we are ready to create our eyes. And for the eyes, we will go
just with a simple shape. So firstly, let's zoom
in our Canvas and we will go to the left
side for the eyes, we will go with
half of the circle that will look up
something like that. When you have the first shape, we will repeat the same
shape on the other side, what we need to keep
in mind is to saving the distance between this
and the center line. So let's go to the
other side and we will try to recreate
what we have there. Try to make them even. And when you have two eyes, we will go just right between them and we will create a mouth. For the mouth, we will go with a little bit
of a weird shape. You can start by creating
an ellipse like that, and you can go to the other side and create
the same Alps there. So we will make it a
little bit thicker and it will look like a heart. So when you have
something like that, we are ready to move
on and add the cheeks. For the cheeks, let's
go underneath the eyes. We will start by creating
a simple circle. When you have the first cheek, let's move on to the other side and we will repeat
the same shape there. The last thing that we need to add are going to
be the eyebrows. So let's go above our eyes and we will create two
curves for the eyebrows. You can go with any shape
that you like and you can vary the distance between
the eyes and the brows. And we are done with
our facial features. So now we can move on and we
can add the chocolate chips. For the chocolate chips, we will go with three
different shapes. The first one is very simple. We will repeat what we
have for the cheeks. So let's just go along the whole shade that
we have right here. We will add a few circles. You can vary the size, you can vary their placements. It's up to you just
try not to overdo it. So a couple circles and you don't really need to stay
right inside the shape. If you want to go a little bit beyond the frames of
the whole cookie, you can go for it when
you think that you have enough of the chocolate
chips of this shape, Let's move on and
add the other shape. So the next shame that we will add will be starting like that. We will start with
a little Alice. And when I have the Arabs, we will go over
the top of it and we will create some
kind of a dome. Again with this shape, we will go and add a few more shapes like that
on the different places. Again, try not to overdo it. And for our last shape, for these chocolate cheap, so let just go with
a shape like that. So firstly, we will start
the same with the Arabs, and then we will go
over the soap and we will create
something like that. So it looks like a
little mushroom. And we will go and add
just a few of them, maybe one or two, on the places that are
now free of the elements. So let just go and add that to fill up some spaces
that are left, right here, we can add some kind of cracks
for the cookie. We will go just
with the lines like that and we will feel the areas. Again, try not to overdo it, just add a few of them. You can vary this size, you can vary the direction. It's all up to you. Just try to make
everything quite balanced. And so when you are
done with this task, we are done with this
sketch in parts. And in the next one, we are going to be
editing the colors.
3. Chocolate Chip Cookie: Basic Coloring: Let's start our color in
part by changing the brush. So we will go to the Brush
Library and we will go to the calligraphy folder where we will select monoline brush. With this new brush, we will get back to our
color palettes and we will select the color with
the name took a cheap. Now when we have a
brush and the color, we would need to create a
new layer for our base. So let's go to our layers and we will tap on the plus icon. Now you can see
that then you layer is above earlier with a sketch, but we would want to put it
underneath it because we have a very detailed sketch and
we have some path to follow, so we would want to
see what's going on. So let's just go
to our layers and we will go to this new layer. We will hold it and
we will drag it down while we I still
here into the layers. Let's change the opacity
level of our sketch. By default, all these come
with a 100% of opacity. And that means that if you
have two layers with contents, the contents on
the top layer will overload the contents
on the board Sam. And as we put our layer
for the base underneath, we want our sketch to be
a little bit transparent. So let's go and do that. We will go to our layer with
a schedule, select this. Then we'll go to this
icon near our checkbox. So let's tap on it. You will see that you
have the opacity slider that you can grab and
drag to the left. So you still will see
what's happening on your canvas and onto
this concrete layer. But it won't be overlapping and it won't be
that disturbance. Let's get back to our
new layer and we will be repeating the same thing that we have right here
under the sketch. So by using the same technique, we will go with
our new brush and we will try to
create the outline. So let's just try to do that. Hold your Apple pencil at the end of the line
and hold one of your fingers on
the screen to snap it to a perfectly round shape. If you see that your new outline doesn't feed what you
have on the sketch. You can unfold your
Apple pencil and you can go to Edit
shape over the top. Here you can just drag your
shape to the needed area. And when you're satisfied with the position and with error, then just tap on the screen
with one of your fingers. Now we need to make sure that this shape that we
created is closed. So let's just quickly go
to our layers and we will hide the layer with our
sketch just for a second. We will make sure that it is closed and we can get
back our layer with the sketch onto the same layer that we have for our outline, we will need to drag and
drop the color insights. Let us go to our
top-right corner and we will just drag
and drop the color. Now we have the perfect
base for our cookie, and let's just move on
to adding some details. And the first
detail that we will add will be a little shadow. But before sars and we will need to make some preparations. Firstly, we will go to our color palettes and we will
select a different color. This time it will
be cheap shadow, and we would want
our shadow to be or write on one side of our
elements for the base. And we don't really want
to go beyond the phrase. So we would need to
create the shadow on a different layer and we
would need to use one trick. Firstly, let's go to our layers
and through we'll create one more layer above the
layer with our base. So tapping on the
plus icon now to make sure that we won't go beyond
the frames of our base, we would need to clip this
layer to the previous one. And we can do it by tapping
on this new layer and select clipping mask to
demonstrate to you how it works. I will just make a few
lines like that and you will see that I'm not
creating any new shapes. I'm just inside
this area and I'm adding the new elements
only inside this area. So one more thing that
we need to do with this new layer is setting a
different blending modes. Blending modes are different
ways your layers can interact with each other and they add different
visual effects. For our shadow, we would
need to use multiply blending modes to go into this
list with blending modes, with one more time, we'd need to tap on this icon. And you can see that there is a great list with
a lot of options. And we will go to the top of it and we will select Multiply. And one more time, we would need to change the
opacity level of this layer. So you can grab and
drag it to the left where you can just write down the amount of person
that you need. So for this concrete case, for these multiply
layer, Let's use 15%. Now when everything is SAT, we will go over
one of the sites. We will go along this side
and we will create a curve. So let's try to do that. Holds your Apple pencil at the end of the line
and adjust this line. And if you're an
unsatisfied how it looks, you can go to Edit Shape
and you can use one or all of these handles to find the appearance
that you would like. So when you are
satisfied with this, Let's tap on the screen one more time to get
away from this mode. And we will increase the size of our brush and we
will manually go over this suppose shadow
area and we will recover it. And now we can move on
to edit more details. So let's just add a bit
of texture to our cookie. We will go and create
one more layer above, and one more time. We will clip it to
the previous layer or our parental layer, which is this cookie. So let's tap on it and we
will select clipping mask. And this time we
will go again to this icon into the
blending modes, and we will select Color Dodge
S for the opacity level. For now, let's leave it
as 15 per cent as well. We will go to our color palettes and we will select
a different color. So these sounds,
we will be using the color with the
name sprinkles. And also you can find in a
project and resources tab, and you brush for this extra, you can download it and
you can follow along these brushes called
steepen dry brush. And with this brush, we will just go over our cookie and we will
add a bit of texture, so it is barely seen. But if you zoom in your Canvas, you will see that we
have a bit of texture. And when we did it, we are ready to move on and we are ready to add more details. So firstly, let's go and
create one more layer. And onto this layer
we are going to be aiding our chocolate chips. So we are going to our
color palettes and we are selecting the
different color, this time, chocolate drop, and the same thing as we
did with our main shape. We will go over these
shapes that we have on the sketch layer and we will just quickly recolor them, get back to your monoline brush and start recoloring
your objects. Remember that you don't
really needs to follow with a 100 per cent of similarity of what you have on
your sketch layer, you can vary everything here. If you think that something looks better than it
is on the sketch, you can adjust it
to your liking. Remember that you can
hold your Apple pencil at the end of the lines to snap
them to a better shapes. When you are done
with the color drops, Let's get back to
our color palettes and we will select
a different color. This time it will
be cheap details. We will decrease the
size of our brush and we will go over these little
cracks that we have onto our sketch and we
will try to recreate them ends when you are done with recoloring these elements, we can quickly go to our layers and we can hide the layer with our sketch to check out how
it looks without the sketch. And if you're satisfied with it, we are ready to move on
and add more details.
4. Chocolate Chip Cookie: Coloring Details: For this little part, let's pay more attention
to our chocolate drops. And later on we will add
some highlights to them too. So firstly, let's go to
our color palettes and we will select the same color that we used before, chocolate drop. Then we will go to our layers, and above this layer with
our chocolate drops, we will create a new one. So tapping on the plus
icon and we will be adding the shadows the same way as we did it with our basic shape. So we will need to tap onto this new layer and we will need to set it as a clipping mask. When we did it, we are going
into this n icon and we are selecting multiply blending
modes for the opacity level, we will set it at 20 per cent. Now we will go over
one of the sides, or the bottom side, or each side that you prefer. And we will add little shadows. So very quickly let
us go and do that. When you are done
with this task, we will be adding
the highlights. So firstly, let's get back to our layers and we will
create one more layer. For this layer, we will
choose Add blending mode. So tap on the icon and go and find ads for the opacity level, we will set it at 20 per cent. Now when you did it, we will get back to our
color palettes and we will select a different color
with the name sprinkles. Now we can decrease the size
of your brush and we will go over the opposite side from the shadow on
the chocolate drops. We will add a few highlights. So you can go simply just adding a little dot or you can just go and add a little
line and adults. So let's just go over all of these shapes and we will
add the highlights. And when we are done, we can increase the size
of our brush and we can go to the opposite side from
the shadow on the cookie, and we can add the
highlight there too. For example, let's go over this side and we will add
a little curve over there. If you want to add
more highlights, you are welcome to
do it ends when we are done with our whole base. In the next chapter, we will be aiding
our facial features.
5. Chocolate Chip Cookie: Face: Now we have the whole base
for our illustration, and that means that we are ready to add the facial features. Firstly, let's go to our layers and we will
unhide the layer with our sketch because
we still want to see where we need to put
our facial features. When he did, we
will need to create one more layer for
these facial elements. So tap on the plus icon
and when you are ready, we will go to our color palettes and we will select
a different color, and this time it
is face elements. Now let's decrease
the size of our brush and we will start by
creating the ice. So very easily
just go and repeat the shape that you
have on your sketch. Hold your Apple pencil
at the end of the line, and if you want to
adjust it even more, go to the top and
choose this edit shape. Here you will have a bunch
of handles to tweak. So you can play around
and find what works for you when you're satisfied
with everything right here, Let's just tap on the screen
with one of our fingers. And when we have the first eye, Let's move on to the
right and we will try to recreate what
we have on the left. So one more time,
start from the curve. Hold your Apple pencil
at the end of the line. If you want to
adjust it even more, go to Edit shape or
whether it's soap and tweak these little handles, try to make the ice, even on both sides
and 20th satisfy, just tap on the screen
with one of your fingers. Now let's decrease the size
of our brush just a little. And we will go over the top
and we will add the eyebrows. So repeat what you
have on your sketch. Or if you don't want to repeat what you have
on your sketch, you can adjust it
to your liking. Now when I have the eyebrows, Let's increase the size of
our brush and we will go over these areas for our mouth and we will try to create
the same shape here. So very easily going over this shape and we are
creating a V-shape. Hold your Apple pencil
at the end of the line, adjust the size, adjusts
everything that you need here. And if you want to
adjust it even more, go to Edit shape over the top. Here you will have a bunch of these little
handles so you can play around and find what you
like when you're satisfied. Let's just tap on our screen
with one of our fingers. We will go and change
the color of our brush. So let's go to the color
palettes and we will select this color with
a name, cheeks one. Now let's increase the size
of our brush even more. And we will go to these little
things that we have for our cheeks on this gauge
and we will add the dots. Let's add two more details. The first one will be a
little sand inside our mouth. And yes, we can go again with the same method
that we used before. So we can create a
clipping mask and we can create this little
mouth on a different layer. But we can also do it
in a different way. We can go to our
layers and we will tap on this layer with
our facial features. We will select Alpha Lock. Alpha lock works the same
way as a clipping mask. So you will be working on, so the areas that you
already have on the layer, but you are working
on the same layer. So let just go to our brush. Let's decrease its size
and we will go over the bottom part of the mouth and we will add a little tongue. So you can see with this mode, you are not going
beyond the frames. And one last detail
that we will add is going to be the
lines for the cheeks. So firstly, we will go to our
color palettes and we will select the different color
for the cheeks, cheeks to. Now let's decrease the size of our brush and we
will go over one of the cheeks and we
will add two lines like that when you have it, Let's go to our right side and we will repeat
the same thing. And when we did it, we will go to our layers and we will hide our layer
with the sketch, and we are done with
our first illustration. But before moving on, let's adjust what we
have into our layers. We will select each
layer that belongs to our first cookie and we
will put it into a group. So everything into
our layers is neat. So you can see that the
Firstly is already selected. And to select other layers, we will need to go to
the next layer and we will need to swipe
it from left to right. So let's do it for all the layers that we have
for our little cookie. Now when everything
here is selected, we will go over our top right corner
and we will hit Group. Now we can collapses grew by hitting this V icon
near the chat box. And you can see that now
everything is pretty neat. The last thing that we will do here is renaming this group. So let's tap on it and let's select Rename for these group. Let's go with a name
chocolate chip cookie. And now we are done with
our first illustration. So let's meet in
the next chapter where we're going to be
creating a sandwich cookie.
6. Sandwich Cookie: Sketch: Alright, let's move on to our next illustration which
will be a sandwich cookie. Firstly, we will need to select a different brush and
a different color. So let's start with
a brush library. We will go there and we will
go to the sketching folder. In the sketching folder, we will select procreate pencil when you have
selected your brush. Let's get back to our
color palettes and we will select the same color that
we use for our first sketch, and it was face elements. So now with our new
brush and new color, we will need to go to
our layers and we will need to create one more layer
for the sketching part. So let's tap on the plus icon. All the preparations are done. We are ready to zoom
in our Canvas and we will start by creating
a simple ellipse. So let's go and do that. Don't and hold your
Apple pencil at the end of the line to snap
it to a perfect ellipse. And when you're satisfied
with the size and everything, Let's hold our Apple pencil. We will go to Edit
shape over the top because we want the shape to
be a little bit more open. So let's go to the
top nodes right here, and we will just drag it up. So when you have
something like that, Let's tap on our
screen with one of our fingers to get
away from these modes. And we have the base for
our second illustration. So now we would need to create two more copies of this shape. We will be doing it
with duplicates. So firstly, we are
going to our layers. We have this layer
with our sketch, select it, and we would need to move it from right to left. So just swipe it. You will have an option
duplicate and we will tap on it. Now we have the same
shape on the same place, but we would need
to move it down. So to do so, we will need to go to this
arrow key on the top-left. Let's tap on this. Here you can see you have a few options and for this case, we will need to select
uniform methods. Also, we would need to
go to this snapping, will need to tap on it. And when we have
this little menu, we will need to toggle
snapping here as well. Now we can get back to our earlier and we can
move our shape down. We would need to put it
right under our first shape. And to make sure that you
are doing it correctly, you need to follow
these three lines. So for example, if you move
it a little bit to the side, you won't have
these three lines. And that will mean that you are not right under the first shape. So let just follow these three lines and let's
move it a little bit down. With this shape, we are
creating some feelings. So let's just keep it
as something like that when you are satisfied with
everything right here, Let's deselect
everything by going to this arrow key
on the top-left. And now we need to
create one more shape like that because we would
want a bottom cookie. So firstly, again, we are
going to the layers and we are swiping this layer from right to left, choosing duplicate. The same thing that
we did before. We are going to our arrow key and we are moving
this shape down. Try to use these three lines that are on the sides
and in the middle. And also try to keep
the same distance that you have with
two previous circles. So when you are satisfied
with everything here, Let's tap on our heirarchy one more time to
deselect everything. And we will grab the eraser tool and we will get rid of all
the lives that we don't need. But before that, we
can go to our layers and we can combine all these
three layers together. You can do it in
two different ways. The first one is to tap on the top layer and
choose merge down. Now we have two layers and two shapes that we had
before are on one layer. And the second option of how
you can combine the layers together is to pinch these
layers in the Layers panel. So just used two of your fingers and make
a pinch movements. Now we have everything
on one layer. So let's grab an eraser
tool and we will go over the top part and we will erase everything
that we don't need. So that will be
these two lines that we have on our top elements. Let's quickly erase them. And also we don't need these
lines that are right here. So let's erase them to. Now we have the
perfect base and that means that we are ready to
add the facial features. So let's get back to our brush. And again, you can
start by creating across going from
top to the bottom and from side to
side to find where the middle part of
your elements ease. Or if you're feeling
very confident, you can start without
this cross and you can just create the facial
features by themselves. Let's go a little bit
below these two lines. If you have created them. And we will start by creating
just two dots for our eyes. So create the first one
and go to the other side trying to remain
the same distance from the eye to the middle part. When you have the two
dots for the eyes led, just go right between them and we will create
a curve like that for a little Smiley mouth when you have the
basic features, Let's go above our eyes
and we will create two dots or two lines or two
curves for our eyebrows. So very simply just go and create some shapes
for your eyebrows. When you have the eyebrows, lads go under the
eyes and we will create two shapes
for our cheeks. And when we have the
facial features, we are done with our sketch. So in the next part, we will be doing our coloring.
7. Sandwich Cookie: Coloring: Let's start our
coloring part the same way as we did with
our first cookies. So we will go to
our brush library and we will go to the
calligraphy folder. Into the calligraphy folder, we will select monoline brush
with this new brush when I go into our color palettes and we are selecting
the next color, this color will be
sandwich cookie. Now within your brush
with a new color, we are go into our layers and we are creating a new layer. So let's tap on the plus icon. We would need to put this layer underneath the layer
with our sketch. So let's go for that. Let's tap on it. Let's hold it and drag it down. Well, we are still here. Let's go to our layer that
we have for this sketch. And we will need to
change the opacity level. So tap on the icon and just moving our
handle to the left, getting back to
the way that we've created for our coloring parts. And here we will be doing the same thing that we
have on our sketch. So we are starting by
creating an ellipse. Hold your Apple pencil, add the nth on the line, adjust this size and
when you're satisfied, Let's just on hold
our Apple pencil we are doing to our
top-right corner. And we add dragging
and dropping the color inside that outline
that we have. And now we have the base. So we will be doing the same things that we
did with our sketch. We will be creating duplicates, go into our layers, swiping earlier from right
to left, choosing Duplicate. Now let's select the layer
that we have on the bottom. So this one, and we will go to our arrow key on the top-left. And one more time
doing the same thing, just dragging it
down until we reach this line that we
have on our sketch. Try to find these three
lines and we will know that we are right
underneath our first shape. And when you have them just
on hold your Apple pencil. Now let's deselect everything by heating our heirarchy
one more time. And we will do the same
thing one more time. So we will go to our
layers and we will swap this layer from right to
left, choosing Duplicate. Now go into the bottom layer, go into the arrow key, and just moving this shape down, trying to keep these
three lines to make the whole thing in
one line when we have it, Let's deselect everything
by heating this arrow key. And we would need to select a different color
for the middle part. So let's go to our layers and let's go to this middle layer. When we selected it, we will go to our color
palettes and we will select the color
with the name cream. And now we're going to the
top-right corner and we add dragging and dropping the color to this middle circle. Now we have the base
and we can go again to our layers and we can combine these three
layers together. So one more time, you have a few options of how to do that. You can tap on the layer
which is on the top, and you can choose merge
down or you can just be your two or three layers
together with your fingers. When you have everything
on one layer, we are ready to add
a little shadow. So we will be doing it in
the same way as before. We will create one more layer. We will tap on this layer and we will set it as a clipping mask. When we have the clipping mask, we are going to this icon and we are selecting
multiply blending mode. As for the opacity level, this time, let's set it at 30%. Now when we are done
with our layers, Let's go back to
our color palettes and we will select the
color for our shadow. So it will be sandwich
cookie shadow, and very easily Let's increase the size of our
brush and we will add a little shadow underneath
our layer with our creams. So go there and create
a little shadow. Hold your Apple pencil at the end of the line to
create a nicer curve. And if it's not enough, you can go to Edit Shape
and edit it even more. Let's tap on the screen to
get away from these modes. And also we can go and
hide the layer with our sketch to see what
we have on this layer. So let's just go and do that. Go into the Layers and
tapping on this checkbox, I can see that you
have some gaps that you need to feel manually. So let's go and do that. If you already did your shadow, you can grab an eraser
tool and you can erase the parts that
you don't meet while we're still here with an
eraser to ledgers go and make the sides of our shadow
a little bit thinner. And when you did it, Let's get back to our
brush and we will go to this green part and we will
add a few dots like that. Just adding some details. If you want to add more details, you are welcome to do it when you are done
with this part, Let's move on to our top cookie and we will add some
thickness there as well. But this time we
will go just with a simple line and we will create a curve, the bottom part. So something like that. You can hold your Apple pencil
to achieve a better line, or you can do it manually. And when you have
something like that, we are ready to
create one more layer and we are ready to
add some highlights, go into our layers, creating one more layer on this layer and select
clipping mask. Now go into this an icon and
select an ad blending modes. As for the percentage
of our opacity, let's set it at 15%. Now going back to our color
palettes and selecting the color with the name
sprinkles or cream. It's up to you. Let's go over the top part and we will create
a few highlights. Also, we can add a little
highlight on the bottom. If you want to add some texture, we would need to
create one more layer. Let's tap on this plus icon. We will tap on this layer and we will select clipping mask. Also, we will go to this icon and we will choose
multiply blending modes. And one more time we can go
for third year per cent. We can select a different color. For example, we can select the same color that we
use for the shadow, and we can get back to our
brush for the texturing. Now go over the whole shape
and add some texture. Try not to overdo it. And when you are satisfied with everything
that you have here, we are ready to move on, adding our facial features.
8. Sandwich Cookie: Face: Let's prepare ourselves for this part by changing the brush. So firstly, go into the
brush library one more time, go into the calligraphy folder and choose and mono line brush. When we did it, we are go
into the color palettes and we are selecting the color
with the name face elements. When these
preparations are done, we are getting back
to our layers. And firstly, we will need to unhide our layer with the sketch because we want to know where we need to put our facial features. So let's tap on this checkbox. Now when we have this layer, let's create one more layer
for our facial features. So tapping on the plus icon, now checkout your
size of the brush. And let's start with our eyes. So we will just go
and create two dots. When we have these dots, Let's decrease the size of our brush and let's create
a lethal Smiley mouth. Hold your Apple
pencil if you want, and if you want to
adjust it even more, you can go to Edit
Shape and tweak these little handles to make
a shape that you would like. And when you are
ready with the mouth, Let's go for the eyebrows. So creating the shapes that
we have onto our sketch. Now let's get back to
our color palettes and we will select
the color cheeks one, one more time, increasing the size of our
brush and go into these areas that we have for our cheeks on the sketch layer. The last thing that
we will add here will be additional
elements for our cheeks. So let's go to the
palette and select this color cheeks to decrease
the size of our brush. And we will go over these cheek, the one on the left, and we will create
two lines like that. When you have it,
Let's move on to our right side and we will
repeat the same step. And the very last thing here is aging the highlights
for the eyes. One more time, go into our color palettes and
selecting the colors sprinkles will go for
our first i on the left. And we will put a
little highlight that when we have the
first highlights, we will move on to
our right part and we will try to repeat the same
highlights on the other eye. And now we are ready
to go to our layers and we are ready to hide
the layer with our sketch. So that's what we have
for our second cookie. And we will need to do the
clean up into our layers. So let's select every
layer that belongs to this cookie and we will
put it in a group. So the first one is
already selected. We will go to the top one and we will swipe it from
left to right. We will do the same
with the other leaves. Now when all of
them are selected, we will hidden group. We will collapse this group
by going to this V icon. And also we will
rename this group. So let's tap on it and choose
Rename for that cookie. For that group, Let's go with a nice sandwich cookie and we are done with our
second illustration.
9. Fortune Cookie: Sketch: For our third illustration, Let's create a fortune cookie. But firstly, we will need to
go to our brush library and we will need to change our
brush to procreate band saw. When we did it, we are going
back to our color palettes and we are selecting the color with the name face elements. When this is done, we are going back to our
layers and we are tapping on the plus icon to create a new layer for our
sketch in parts. When all of the
preparation as are done, we are ready to zoom
in our Canvas and we will start by creating
a simple circle. So let's go and do that one more time zones and hold your Apple pencil at
the end of the line. Instead, just hold one of
your fingers on the screen. And when it snaps to a
perfectly round shape, you can adjust the
size of your elements. And when you're
satisfied with that, Let's unfold everything that
we are holding right now. And now we have the
base and we will need to create the shape
of the fortune cookie. So we will need to go on the
bottom and we will need to cut something like a
quarter of these elements. Firstly, let's go and find an approximate center
of this ellipse. So just put the dots and we will create two lines like that. When we have these two lines, we would want to make
them a little bit softer. So instead of this
straight lines, Let's turn them into the curves. Just go over them and create the curves repeated
on the other side. And if you want to
turn these corners in a software once you
are welcome to do it. Now let's grab our eraser tool and we will erase all the
lines that we don't need. And when we have the base, we are ready to move on and
add the facial features. So let's get back to our
brush and we will go to the upper part of our elements and we will start
by aiding the eyes. So very simply just two dots. Put the first one on the left, and then when you have it, just move on to the right
and try to repeat it. You can vary the size, you can vary their placement. It's up to you when
you have the eyes. Let's go right
between them and we will add a little Smiley mouth. So just a simple
curve like that. Now let's go above our eyes and we will
add little eyebrows. Again, you can play
with the shapes. And the last two elements
that we will add for our facial features
will be the cheeks. So we are going under
our eyes and we are creating an
ellipsis like that. They're very last element for our sketch part will
be Elliot's paper TAC. So let's go to one
of the sides and we will create a
rectangle like that. Again, you can vary the size, you can vary the placement. It's up to you. And to make it cuter, let just go to this little think and we will add the
face here as well. So very simply two dots
and a little mouth. And when we have
something like that, we are ready to move
on and recolor it.
10. Fortune Cookie: Coloring: As always, let's start our color in part by
changing the brush. So we will go to
the Brush Library, we will go to the
calligraphy folder and we will choose
monoline brush. When we did it, we will
go to our palettes and we will select the color with the name fortune cookie. When we did that, we will get back to our
layers and we will tap on the plus icon to
create a new layer. We will need to put this layer underneath our layer
with the sketch. So let's hold it
and drag it down. And while we're still here, Let's change the opacity
level of our sketch. Go into this an icon and
dragging our slider to the left. When we did it, we are
ready to continue and we are ready to repeat what
we have onto our sketch. So if it's easier for you, you can start by creating a full circle and then erasing this part
that we don't need. Or if you are feeling
quite confident, we can go to this part and
we can recreate what we have right here by creating
three-quarter of our circle. Let's go and do that. As always, hold your Apple
pencil at the end of the line. And if you want
to adjust it even more and go to Edit
shape over the top, you can play with these handles and achieve the
look that you have on your sketch layer when you
are ready with this shape, Let's continue by creating
these two lines that recreating the shape of our fortune cookies
so very easily, Let's go and do that. Our main goal here is to
create a closed shape. So very quickly, let's go to
our layers and for 1 second, we will hide our layer
with the sketch. Now let's check out whether
the shape is closed and if we have some places
that we would like to change or adjust in any way, we can grab an eraser
tool and do that. When we have the
shape that we like, just drag and drop
the color insights. And when we have
the color ledgers, get back to our layers and unhide our layer
with the sketch. What we need to do right now, we are ready to add some
additional elements, and the first
additional elements will be a little shadow. So firstly, we go
into our layers and we are creating
one more layer above. So tapping on the plus icon, now we need to set this
layer as a clipping mask. So let's tap on it and we will select Clipping
Mask from the list. And one more thing
that we need to do is to go to this icon. We will need to select
multiply blending mode. As for the opacity level, Let's go with 30%. Now let's go back to our color palettes and we will select the color for the shadow. So it will be fortune
cookie shadow. And now we will go on one side and we will
create a curve. So let's get to the left
and we will try to do that. Hold your Apple pencil
at the end of the line. And if you want to adjust
this curve even more, go to Edit Shape, play with these
handles and find what works for you when
you're satisfied. Lead just dab on our screen
with one of our fingers. Let's increase the size
of our brush and menu. We will recolor this place
when we have the first shadow, let's create one more. We will go to these parts and we will create
the curve over here. So one more time,
creating a curve, holding our Apple Pencil and
if we want to adjust it, go into Edit Shape. Now manually we will recolor these little place
to see how it looks. Let's go and hide our
layer with the sketch. And if we need to adjust
some places, Let's do that. Now when we have our shadows, let's get back our layer with our sketch and we will
create the highlights. So firstly, let's
create one more layer. We will set it as
a clipping mask. So tapping on it and
creating clipping mask. And we will go to
this icon and we will choose at blending modes
for the opacity level, we will go with 15%. Now let's go to our
color palettes and we will select the color
with the name sprinkles. You can adjust the size of
your brush and we will go to the opposite side from our shadow and we will
create a few highlights. When we are done
with our highlights, let's add a bit of texture. So we will go to our layers and we will go right between
these two layers, one for the shadow and
one for the highlights. And we will create
a new layer there. So it's automatically
now is a clipping mask. And we will need to go to this icon and we will
need to choose multiply. Let's increase our opacity
level to 40 per cent. When we did it, we will go back to our color
palettes and we will select the same color
that we use for the shadow, fortune
cookie shadow. Now let's get back to our
brushes and one more time we will be using the same brush that we used before
for the texture. It is steep line dry brush. Now, let's increase the size
of the brush and we will go over our whole cookie and we
will add a bit of texture. So when we are done with this, let's work on our
little paper TAC. So one more time where I go into the layers and we will need
to create one more layer. So let's go over our layer
with the highlights and tap on the plus icon to
make it easier for us, we can just hold
this layer and put it under our layer
with the main shape. When we did it, we are going
back to our color palettes and we are selecting the color
with the name sprinkles. And we will go over this
little thing that we have on our sketch layer and we
will create our shapes. Don't forget to
change the brush to your Manoa N1 and
create the shape. And when you have it, we are ready to move on
to our facial features.
11. Fortune Cookie: Face: Start adding our
facial features. We will need to go
and change the color. So go into the
color palettes and selecting the color with
the name face elements. When we did it, we are
getting back to our layers and we go into our layer
with the highlights. Here we will tap
on the plus icon. On this new layer, we will go and try to recreate what we have
on to the sketch. So firstly, let's
increase the size of our brush and we will
start from the ice. Let's put these two dots. When you are done with the eyes, Let's decrease the
size of our brush and we will create this
little Smiley mouth. So very easily
creating the shape and hold and our Apple pencil
at the end of the line. If you want to adjust it even
more, you know what to do. You need to go to edit
the shape over the top. Here you have your handles to tweak and when you're satisfied, Let's tap on the screen
with one of our fingers. When the mouth is done, Let's move on to
the top and we will recreate the shapes
for our eyebrows. And when the main
elements are done, Let's move on to our
little paper TAC. And here the same way
that we did before, we will start from the
eyes putting the two dots, then maybe decrease the
size of your brush. And we will try to recreate the same mouth
shape that we have here onto our
chocolate chip cookie. Creating the V-shape and holding our Apple Pencil
at the ends of the line. If you need to adjust it, go to the edit
shape over the top. And now we are ready
to add the cheeks. So let's go firstly
and change the colors so we are selecting the color
with the name cheeks one, Let's increase the
size of our brush, and let's put these two dots. Now, getting back to our color palettes and
selecting the color with the name cheeks to lead to decrease the size of our brush. And we will add two
lines in each cheek. And the very last thing for this illustration will be
the highlights in the eyes. So let's go back to
our color palettes and we will select the color
with the name sprinkles. Now go to the left
eye and create the first highlights when
you have the position, try to go to the right and tried to repeat it when you did it. Let's get back to
our layers and we will hide the layer
with the sketch. Now we have our
cookie and we will need to clean everything
up into our layers. So let's select each
layer that belongs to this cookie and we will
put it inside a group, go to this top right
corner and choose Group then collapses by going to this V icon and let's rename it. So tapping on it and choosing
rename for these cookie, Let's go with a name
fortune cookie. And in the next part, we will finish up the whole class by
creating edge jam cookie.
12. Jam Cookie: Sketch: Alright, let's move on to our last illustration which
will be jam or jelly cookie. But before starting,
we will need to select a brush and we will need to
select the color as always. Let's firstly go to our brush
library and we will go to this sketching folder where it will select
Procreate band cell. With this new brush, we are getting back to
our color palettes and selecting the color within
the same phase elements. When you did it, we
are getting back to our layers and we are tapping on the plus icon to create a new layer for
this kitchen parts. When all the
preparations are done, Let's zoom in our Canvas and we will be
creating a circle. So very easily you
know what to do. You just need to go to
your canvas and create as Beth circle as
you can don't want. And hold your Apple pencil
at the ends of the lines that just hold one of your
fingers on the screen, adjust the size and when
you're satisfied with it, Let's unfold everything that
we are holding right now. So basically we are
going to be doing the same thing that we
have right here for our sandwich cookie
because we will need to create some layers. So let us go and we will be creating the duplicate
of this shape. So firstly, go into our
layers and we will swipe this layer from right to
left, choosing Duplicate. Now with this new
layer, select it. We are going to the arrow
key on the top-left. And by using snapping and
by using uniform method, we will drag this new
shape down this time. Let's just leave it as
something very thin. And you need to remember that you need to follow
these three lines. So you will be sure that you are putting your next shape
underneath the first one. So when you have
something like that, Let's hold our Apple
Pencil and floods, deselect everything by going to our arrow key one more
time. One more time. We will go to our layers
and we will make one more. It's replicate. So swiping earlier
from right to left, choosing Duplicate and repeating the same step one more time. So with this layer selected, we are going to our arrow
key on the top-left. And again, by using snapping
and uniform method, we are dragging
these shapes down. Let's try to keep the distance
between the lines equal. And when we have
everything here SAT, let just deselect everything by heating our arrow
key one more time. For our next step, we will get back to
our layers and we will combine these
three layers together. So just reminding you that you can do it in a few
different ways. The first one is to tap on the top layer and
choose Merge Down. And the second one is to make a pinch movements
all of your layers. So you are tapping
with one finger on your top layer and on the bottom layer
with another finger. And you are making
a pinch movements when you merged all
the layers together, Let's grab our eraser
tool and we will get rid of all the lines
that we don't meet. Now we have the base and
we would want to put a little cuts right
in the middle of our shape for now
for this question part, let's make it manually. So we will go to our layers and we will create
one more layer above. Now getting back
to our brush and creating a little circle
right in the middle. One more time. Hold
your Apple pencil at the end of the line. Tap and hold one of your
fingers on the screen. Now we have our little hole and to put it right
in the middle, we will go again to our
arrow key on the top-left. And one more time by using
snapping and uniform method, we will try to find the
middle part of this elements. So when you put it
somewhere in the middle, Let's deselect everything by hitting our arrow
key one more time and we will go and create our
facial features right now. But before that,
let's go back to our layers and we will combine
these two layers together. So tap on the top layer
and choose Merge Down. We will go underneath this little hole and we will
create the facial features. So firstly, let's
start with the eyes. One more time. I go in
just with simple circles. So go to the left side
and create the first one, and then repeat it on the right. Let's create the eyebrows
above so you can choose any shape that you
like or you can follow something very simple. So for example, let's ends up
with the curves like that. Now when we have the eyebrows, Let's create a little mouth. So we will go right between the eyes and this time a
little bit above them. We will create a little curve
like that for these cookie. Let's make it a little bit more playful and we will
add a little tongue. So you can go to any
site of the mouth and you can create a
little shape like that. Let's divided by two pieces. And we will create just a
simple line going through the middle part
of our little tap into when we have these, Let's ends up these parts by creating the shapes
for our cheeks. So we will go underneath
the eyes and we will create two circles or to
an ellipsis like that. And we are done with
our sketch and parts. So in the next one, we will be adding the colors.
13. Jam Cookie: Coloring: As always, let's start our coloring part by
changing the brush. So we are going to
the brush library. I go into the
calligraphy folder and we are choosing mono line brush. When this is done, we are getting back to
our color palettes and we are selecting the color with the name jolly cookie. Now, when we did that, we are getting back to
our layers and we are creating a new layer by
tapping this plus icon, this layer we will need to put underneath our layer
with the sketch. So let's hold it and
let's drag it down. Now while we're still here, Let's change the opacity
level of our sketch. We are going to this
icon and we add dragging our slider to the left. Now we are ready to go to our new layer and we are
ready to go to our Canvas. And we will be recreating
what we have on this sketch. And we will start by
creating this big circle. So let's go and do that. Don't forget to hold your Apple pencil at the end
of the line and hold one of your fingers on
the screen to snap it to a perfectly round circle. Adjust the size. If you need to
adjust it even more, you can go to Edit Shape. If you need to move
this shape, do that. And when you're satisfied, let just tap on the screen
with one of our fingers. Now when we have the outline, we are ready to put
the color inside. So go into our top right corner and dragging and
dropping the color. And now we have the base. So what we're gonna be doing, we will be going into
our layers and we will survive this layer
from right to left, choosing Duplicate now go
into the layer underneath, so the bottom one. And when it is selected, we are going to our
arrow key on the top left with snapping on and
with uniform methods, we will drag this
shape down until we reach the land that we
have onto our sketch. And remember that we need to put this shape right
underneath the first one. So we will need to follow these three lines
when you have it. Let's unfold
everything and let's deselect everything by
heating this arrow key, we need to repeat the
same step one more time. So go into our layers, swiping the layer
from right-to-left, choosing Duplicate, go
into the bottom layer, go into our heirarchy. Snapping is on uniform methods, dragging this shape down until
we reach the line that we have onto our sketch
following these three lights. And when you have, it's
deselecting everything and we are ready to
recolor our elements. So firstly, let's go to
our layers and we will go to the middle parts
of these cookie. So selecting this layer
that is in the middle, go into our color palettes and selecting the color
with the name jelly. And with this color selected, go into our top-right corner and dragging and dropping the
color to the middle part. And now we have the affiliate. Now when we have that, let's go to the top layer and we will cut this little piece. How we are going
to be doing that. Go into our Layers, go into the layer on the top and creating one
more layer above. Now go into our color palettes and we can select any
color that we want, but let's make it contrasts. So for example, let's select the color with the
name face elements. We'll go over this little circle and we will try to recreate it. So let's go and do that. As always, hold your Apple
pencil, hold your finger, adjust the size and
when you're satisfied, Let's put the color inside. Go into our top right corner and dragging and
dropping the color. Now, let's make sure that this thing is right in
the middle of our cookie. So we will go to our arrow key. Snapping is on uniform methods, moving it until we have one vertical line
and one horizontal. When you have them on hold your Apple pencil deselect everything by hitting
your arrow key. And we will use this little
thing as a stem cell. So we are getting
back to our layers. With this layer selected,
we will tap on it. We will choose, Select. Now only this thing is selected. And if we go to our layers, and if we hide this layer by tapping on this little checkbox, we can get back to our
layer underneath it. So our top part of the cookie, and we can grab the eraser tool with the
eraser so you can increase the size of it and
you can go over the selected area
and erase this part. When you did it, Let's go to this S ribbon icon
on the top left. Let's tap on it and we
will deselect everything. And we have the whole
base of our cookie. So that means that we
are ready to move on and we are ready to
recolor our elements. We are ready to add
little shadows. So firstly, we will start
with recovering part. We will go to our bottom cookie and we will go back to
our color palettes. Here we will select the
color jelly cookie shadow. Now with that color and
with this layer selected, we will go and drag this
color to this area. And when we have it, we are ready to add a little
shadow over our top part. So before starting, we will need to create
one more layer. So tap on the plus icon and tap on this layer to set
it as a clipping mask. Now when we did that, we are going to this icon and we are selecting
multiply blending modes. As for the opacity level, let's set it at 30 per cent. We already have the
color selected. So let's go alone one of the sides and we
will create a curve. Hold your Apple pencil
at the end of the line, find the shape that you like. If you need to
adjust it even more, go to Edit shape
or whether it's o, play with this little handles, find the look that you like
and when you're satisfied, Let's go and manually
recolor this area. Our main shadows are exam, but we will need to add a little shadow to this
jelly or a gym area. So let's go to our layer with a jam and we will go and
create one more layer. So tapping on the plus icon, tapping on the layer
clipping mask, go into the NI, can multiply, and let's set it at
30 per cent as well. Now, going back to our
color palettes and selecting the color with
the name jelly shadow. So when you have
this color selected, we will go over the top part of our jelly and we will add a
little shadow go in there. You can vary its size. You can recolor this
part and if you want, you can add more details
to this little area. So for example, you can go and create a few lines like that. Also, while we're still
here onto this layer, we can go over our
main part with these jelly that is in the
middle of two cookies. And we can add a little
shadow there as well. So as guilt and do
that a jazz the curve. And if you need to make sure that everything is looking okay, you can go to the
list and you can hide the layer with your sketch. If you need to adjust
something there, go for it. And if you don't, let us get back our
layer with the sketch, and we are almost done
with our recoloring, but we will need to add
some sugar texture. So let's go over our layer with the shadow and we will
create one more layer. We will tap on it
and we will choose clipping mask for
the blending mode, we will go with normal, but we will go to our
color palettes and we will select the
colors sprinkles, and we will be using a different brush with a
name steeply and large. So we will go and select this
brush and we will go over this little area that we have on the top and we will be
adding some sprinkles. Try not to overdo it, and when you are ready, let's add the highlights. Firstly, we will go back
to our brush library. We will go to our
calligraphy folder and we will choose
monoline brush. When we did it, we are
getting back to our layers and we are creating
one more layer above. When we have it, we will need to go to
our blending modes. So tapping on this
icon and we are choosing at blending modes
for the opacity level. We are setting it at 15%. The color is already selected. So let's just go over some
of the parts and we will add the highlights on the
opposite side from our shadow. Let's go and create
little highlights. If you want to add
more highlights, you are welcome to do it. Also, you can add
a little highlight to this little jelly part. So go over it and create
a little highlights. And when you did it, We are ready to move on and
we are ready to add the face.
14. Jam Cookie: Face: Let's start our final part
by changing the color. So when I go into our
color palettes and selecting the color with
the name face elements. Now when we did that, we are going back to our
layers and we will need to create one more layer
for our facial features. So tapping on the plus icon. Now onto this new layer, we will go over our
shapes that we have on our sketch and we will
try to recreate them. So firstly, let's
start from the eyes, go into our brush, go into increase the size of it and going over
these two dots. And we will need to put them
when you have the eyes. Let's decrease the size
of our brush and we will go and try to
recreate the eyebrows. When you are done
with the eyebrows, Let's go and try to
create this little mouth. So very easily go in and
recreating this shape, holding our Apple Pencil
and the ends of the line, snap it to something perfect. And when you have it, if you want to
adjust it even more, you can go to Edit Shape over that soap if you are
satisfied with it, let just continue by adding
this lizard sunk and to make everything easier for us and to make everything clean, ledgers do the following. We will go to our layers and we will create
one more layer. So tap on the plus icon. We will put this
layer underneath our main layer with
our facial features. So let's hold it and let's
drag it down onto this layer. We will add a little tongue
and also the cheeks. So firstly, go into
our color palettes and selecting the color
with the name cheeks to. Now let's go over this little tank and we will
try to recreate this shape, recolor the inner part. And when you are ready, let's go and create our cheeks. So we will increase the size
of our brush and we will go over these two
places and we will put two dots for our cheeks. Now when you have that, let's go back to our
layers and we are ready to hide our
layer with the sketch. Let's tap on this
little checkbox and onto the same layer, the layer with the cheeks
and with the tongue, we are ready to
add some details. So firstly, let's go to
our color palettes and we will select the color
with the name cheeks one. We will decrease the size of our brush and we will
start from the cheeks, we will go over and we will create two lines in each cheek. When we are done with these, Let's decrease the size of
our brush just a little. And we will create this little
divider for our tongue. So just create a line like
that and we are good to go. So now we will go to our layers and we will combine these
two layers together. Go to your main
layer with the eyes, tap on it, and
choose merge down. Onto this layer. We will add our final
details and they will be our highlights for the
ice to go into the pallets, selecting the color with
the name sprinkles, increasing the
size of our brush. We will go over one eye and we will put the dots
for the highlights. Now when we have the first dot, Let's go to the other eye and we will try to recreate
the position. We are done with our
last illustration. But before finishing
AP ledgers go to our layers and let's
clean everything here. So we will select each layer that belongs to
this little cookie and we will put it into the group to let
us go and do that. When you've selected every layer that belongs to this cookie. Let's go over the top right, and we will hit Group. Now we can collapse
this group by going to this V icon near our
checkbox and tapping on it. The last thing that
we will do here is changing the
name of the group. So let's tap on it and let's choose Rename for that group, you can go with a title jam
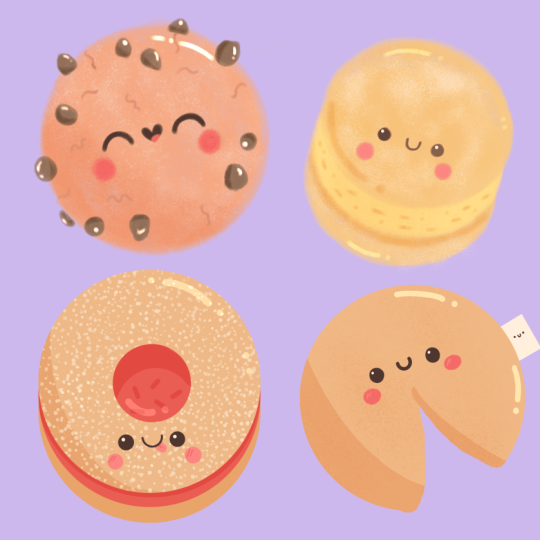
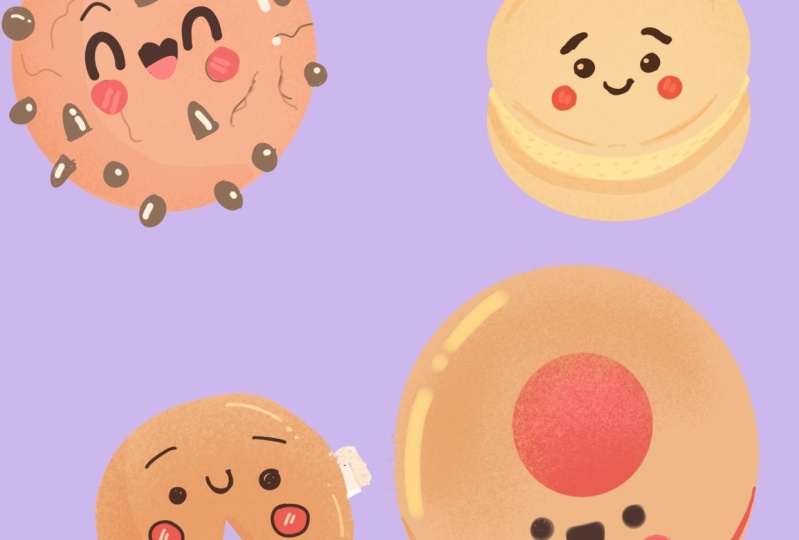
cookie or jelly cookie. And the very last thing
that we will do here is rearranging our elements
as we are having groups, it will be really easy for us. So with the group selected, we will need to go to this
arrow key on the top-left. And we are using
uniform methods. We can readjust our elements, we can rotate them, we can make them bigger
or make them smaller. It's all up to you. To make it bigger, we
will need to drag one of the corners and find
the size that we like. Drag it to the other side or
to any place that you like, you just need to drag it. So when you have it, let's just deselect
everything and we will do the same thing with
three remaining cookies. So go into our group, go into our arrow key, making it bigger, rotating it, or finding a different place, repositioning it, doing
the things that we need to do when you have
these deselected, go back to your layers
and do it two more times. And that's it. Thanks
for watching this class. Leave a review if you
liked it and consider subscribing for more Kawhi
videos in the future.
 Uni Corn, ⭐Kawaii Art Enthusiast⭐