Transcripts
1. Introduction: Hello everyone, I'm uni
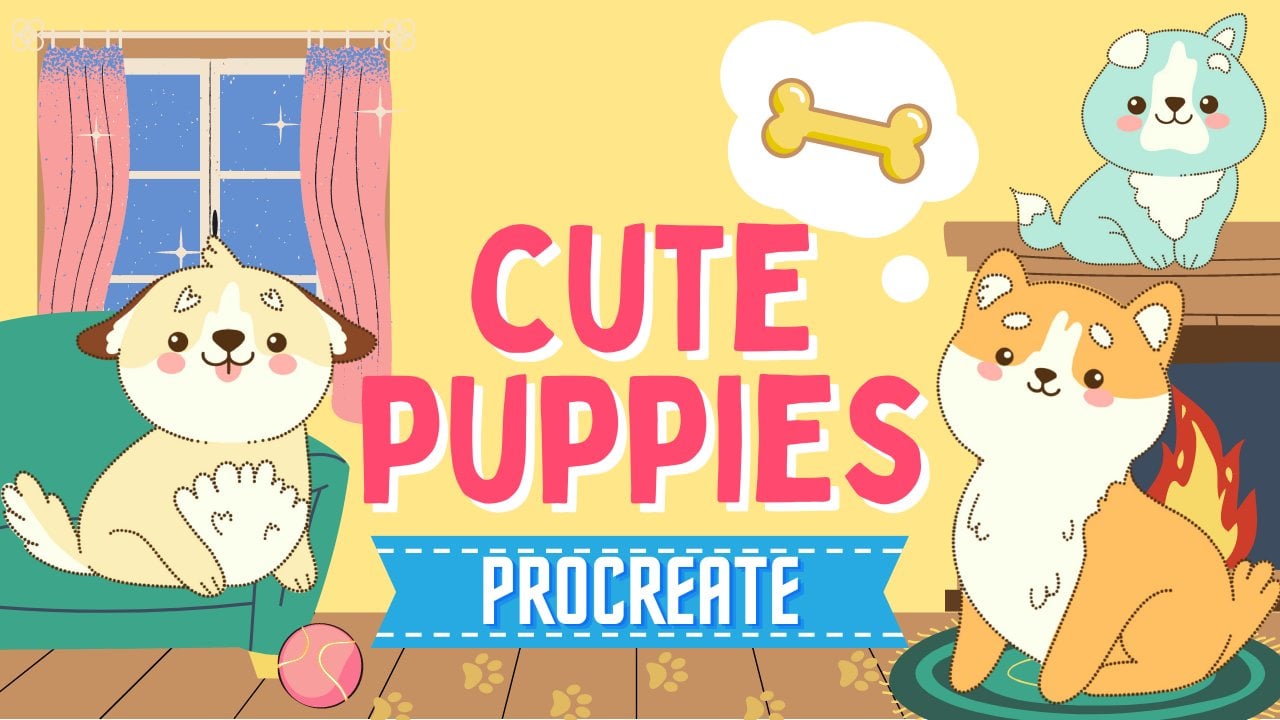
and into this class we'll draw a few cute
bear illustrations. These class doesn't require any prior experience
or a fancy tools. We'll start from scratch
and we'll be using simple techniques
throughout the process. Everything you'll see will
be happening in Procreate. However, if you
have other software or once a trad,
traditional materials, you are welcome to join if
you are ready to start, Let's jump right into it.
2. Making a Sketch: Let's start our
class by deciding what kind of Canvas we
are gonna be using. You can see it as a very
simple square canvas because both pixel width and pixel
height are 2048 pixels. As for either 300 and ask
for the color profile. It is set as SRGB
with this law number. When it's all done
where I hit in Zan and we are at our canvas. Now we need to decide
what kind of colors we are going to be using
throughout the whole tutorial, you can go to the project
and restaurants app. You can download the
color palettes and you can follow along
with this class. When we did it, we
will go straight into our color palettes and we will see that we have two options of how we
can use the colors, the compact and the carts. We will be switching
between these two options. But for now let's just go
to the cards and you will see that every color
here has its own name. And that might be
quite useful for us. So our first task for today is to change
the background color. We'll go to our layers. We will go to the
background color layer. And you can notice that you have your little color
palette on the bottom, we will need to select the
first color in the first row. So let's tap on it. When you did it, you
will see that you have changed the
background color. And that means that we are ready to start
making our sketch. Before starting, we
will need to select a brush and we will
need to select a color. So firstly, let's go
into our brush library. Let's go to this folder and we will select
procreate pencil. If you want to use any other
brush for sketching part, you are welcome to do it when
you've selected the brush. Let's get back to our color
palettes and we will select the color with the name sketch
lines. So let's tap on it. Now when all the
preparations are done, where I getting
back to our canvas, Let's zoom it in
and we will start by creating a very
simple ellipse, just trying our best. Let's go to our Canvas
and try to do that. At the end of the line, hold
your Apple pencil to snap. It's a better shape. You can move your Apple
pencil a little bit to the sides to adjust the
size of your elements. And when you're
satisfied with it, we will unfold our Apple pencil. Then we'll go to Edit
shape or the top. We can move our shape very easily and also we will
need to make this shape. It was a bit more open. So we will go to our top handle and we will grab and drag it up. So we are creating something
very close to the circle, but still it is more
like an ellipse. And when we have
something like that, Let's just tap on our screen
with one of our fingers. Now when we have the base, we are ready to add some
details before it starts. And we will need to find an approximate center
of these elements. And we will do by creating one vertical line
and horizontal. So let's just go
over the top and we will try to create
a vertical line. You don't need to
be very precise by finding the exact
center of the shape. Just try to find it
very proximately and just go fruit
with a vertical line. When you have the vertical line, Let's move on to the horizontal axis and
let's create another line. You can hold your
Apple pencil at the end of the lines
to make them straight. And when you have
something like that, we are ready to add
our facial features. So firstly, let's
zoom in our Canvas. We will go over our left. On the horizontal line. We will put a dot
for the first i. Let's go and try to do that. When we have the first shape, we will go over there, right? And we will try to
recreate it there. So we will need to remain the same size and we will need to put it
on the same line. And also we will need to keep the same distance
from this i2, the line that we have
gone through the center. So keeping everything in mind, we are going to the
right and we are trying to create another item. When we have two eyes, we are ready to add
a little snout. So we will go right between these two shapes and we
will create an ellipse. Most of it will be underneath
the horizontal line, but a little piece
will be just above it. So let's just go and
try to create it. Again. Hold your Apple pencil
at the end of the line. And if you need to
adjust the shape, adjust the placement
of the shape and hold your Apple pencil and go
over the top to edit shape. Here, Let's adjust this shape. Try to keep the distance
between the eyes and these shapes
equal on both sides. And when you are satisfied
with everything here, Let's just tap on the screen
with one of our fingers. And now when we have this, now we are ready to
add a little nose. So we will zoom in our
Canvas and we will go right onto this intersection. We will create a
little triangle. So let's go and try to do that. When you have this
triangle for the nose, let's create a little mouth. So firstly, we will
go from the bottom of the nose with a line that
is going vertically. So something like that. And when we have this line, we will go on the bottom
of it and we will create a bottom part of half of the circle or
half of the ellipse. So let's go and try to do that. As always, you can hold your Apple pencil to
create a better shape. And now when we have the
main facial features, Let's go underneath our eyes
and we will put the cheeks. So each cheek will
be on one side and they will be just a shape
of an ellipse or a circle. And try to do that. You can vary their size or their placement by tried to make them equal on both sides. So when we have these, we will need to go above and we will need to
create the ears, but we will need to know where we need to
put them, right? So what we're gonna
be doing, firstly, we will go to this
intersection that we have for our vertical
and horizontal lines. And from this intersection we will go and create
the line like that. Approximately. This is the line
with 45 degrees. When we have this line, we will go over the right and we will try to recreate
it on the other side. Let's go and try to do that. And now we can go
over the top and we know where we need
to put the ears. So firstly, let's go
over the left part and we will create half
of the circle there. Again, you can hold
your Apple Pencil and if you need to
adjust the shape, just go over the
top to Edit Shape. Tweak these little handles, make them bigger,
make them smaller. It's all up to you. So when you have this shape, Let's just tap on our screen
with one of our fingers and we will need to recreate the same shape
over there, right? So let's go and try to do that. Jazz this shape. And when you are ready, let's tap on the screen
with one of our fingers. When we have these two shapes, we will need to add the
inner parts of the ears. We will go inside the first
shape and we will recreate the lines that were already have when you are done with
their first year. Move on to the right and again, recreate this shape insights. And now we have
everything that we need. If you want to clean
up this gauge and grab an eraser tool and erase all the lines that
we don't need. And in the next part, we will be recoloring our bear.
3. Making a Bear in Grayscale: Less or this virus from
some tiny preparations. Firstly, we will need to make this illustration Ellis
little bit smaller, and we will need
to put it aside. And we can do it
by going to art so Platt and by selecting
the arrow key. So let's tap on it. Now you can see that we
have a bounding box and also that we have a little
panel on the bottom here. Into this panel, we
will need to select uniform methods when we did it, we will need to get back to our bounding box and we will be dragging
one of the corners. So for example, let's go
over our bottom right, and we will drag this
corner diagonally up. So now when we found
the size that we like, let just drag this
shape to the left. Let's find the position. And when we are ready, Let's deselect
everything by hitting our arrow key one more time. And now we're almost ready
to start adding the colors. But before starting, we will need to create one more layer. So let's go to the layers and
let's tap this plus icon. And we will need to put
this new layer underneath our layer with the
sketch because we have all these little shapes, all the details that
we would want to see and that we would want to
recreate onto our new layer. And we will need to put
this layer underneath. So let's just go
to this new layer. Let's hold it and
let's drag it down. And while we're still here, we also will need to change the opacity level of our
layer with the sketch. By default, all layers come
with a 100% of opacity. And that means that if you have the contents on the
layer on the top, it will overload the content
on the layer on the bottom. And we would want to see what's happening on both of our layers. Let's go to earlier
with the sketch. We will select it
and we will go to this icon near the checkbox. Let's tap on it. You
can see that we have the opacity slider
here and we can just grab it and we can
drag it to the left so we still can see what's
happening onto our canvas, but it's not that disturbance. So when we have it, we will tap on our layer
one more time to close this window and we will
do to our new layer. Onto this layer, we are going
to be agent our colors. Today we are working
in gray scale. And that means that
we are going to be using the variation
of gray colors. But don't worry, it's
not the final result. In the next chapter, we are
going to be recoloring it. So firstly, let's go to
our color palettes and we will start by selecting the color within
the Great Sioux. Also, we will need to go back to our brush library
and we will need to change the brush
to a mono line. It is in the calligraphy folder. Once you have the brush, when we have our first color, Let's zoom in our Canvas. We will start recreating what we have on our layer
with the sketch. You don't need to
be very precise. You don't need to
recreate it with a 100 per cent of
similarity, it's up to you. So firstly, let's
try to recreate these shapes that we
have for the face. So again, the same
way as before. We are just going along
the whole shape and we are holding our Apple pencil
at the end of the line. So let's go and try to do that. Adjust the size,
adjusts the position. If you need to adjust more, go to Edit shape over the top. When you are done, we will need to make sure
that this shape is closed. So if you have some gaps, go and manually recolor
that when you are sure that your outline is
closed, We will go over r. It's so bright and we will drag and drop the
color insights. So when we did it, we
have the first shape and that means that we are ready
to move on to our ears. So firstly, let's go to the
right and we will start by creating two
curves for our ear. Again, you can hold your Apple pencil at
the end of the line. You can go over the
top to Edit Shape. You can play around
with the handles. You can find what works for you. And then we are ready with our first curve and we are
ready to create another one. So let's go and do that. When we have two curves, we will need to recolor
only the top era. Let's go to our top-right corner and we will drag and
drop the color here. When we have it, we will go over our left and we will
do the same thing. So starting by
creating two curves. Now when we have two curves, let just drag and drop the
color inside that soap area. And now we have our base. That means that we are
ready to get back to our color palettes and we are ready to select a
different color. This time, it will be
great for with this color, we will go over
our inner parts on the ears and we will drag
and drop the color there. And also with the same color, we will add the cheeks. So let's go and increase
the size of our brush. And we will put these two dots. Now when we are ready
with this task, Let's decrease the size of our brush and let's go back
to our color palettes. We will select the color
with the name Gray five. And with this color, we will be recreating
the snout one more time. Just go in there and
recreating the shape. Hold your Apple pencil, make your adjustments
and when you are ready, Let's go and drag and
drop the color insights. So let's try to do that. If you have something
like that, don't worry. You just don't need to
unfold your Apple pencil. If you take a look over the top, you will see there is
color dropped threshold. And if you just move
your Apple pencil, you will decrease the amount. Only the area that you want
to recolor will be recolored. So when you reach these, when only the area that
you want is recovered, you will unfold
your Apple pencil. And now that easily we are ready to continue agent
our facial features. So let's zoom in our canvas. Let's go to our color
palettes and we will select the color
within the dark gray. Let's increase the size of our brush and let's
start from the eyes. When you are done with the eyes lead to decrease the
size of our brush. And let's continue by adding
the nose and the mouth. When you are done
with this task, let's get back to our layers and we will hide our layer
with the sketch. So let's tap on this checkbox. Now when we have
something like that, we are ready to
add some details. And for the details, we will go back to our
color palettes and we will select the color
with the name Gray three. Firstly, with this new color, we will increase the
size of our brush and we will add two
lines in each cheek. So firstly, let's
zoom in our canvas. Let's go over the
left and we will create two lines over
our first cheek. When you did it,
Let's move on to the right and let's do
the same thing here. For our next details, we will need to get back to
our color palettes and we will need to select the color
with the name gray one. With this color, we will
go over our snouts. We will repeat the same line
that we have over the top. So let's go and try to do that. Let's firstly
decrease the size of our brush and very easily, again, the same way as before, holding our Apple pencil
at the end of the line. When you have the line, you
can add a few more details. So for example, you
can go over the sides of your line and add
a few dots there. And when we have this
line for this now, let's do the same for the ears. So we will go over the top and
here we will add the line. Hold your Apple
pencil if you want, add a few more details. And when you have this line, Let's go over the rights and we will do the same thing here. Now, let's add the
highlights inside the eyes. We will be using the same color that we used for this now. And we can pick the same
color in two different ways. The first one is one more time, go into our color palettes and selecting the
color from here. But also, we can
select the colors from what we already
have onto our Canvas. And we can do it by
tapping with one of our fingers and holding
it onto our canvas. You will see that you have
a little tool right now. And if you move your finger, you will see that
you are changing the color that you
want to select. So we will need to go over this white area and we will need to select
the color here. When you are done just on
hold your Apple Pencil, you will see that the color here in the top-right changed. Let's go and increase
the size of our brush. And firstly, we will go over our left eye and we
will put the dot here. When we have these dot
for the highlights, we will go over our right
eye and we will try to put it in the same distance
and in the same placement. And now we have the base. And that means that we are
ready to add more details. And we are going to be
adding a few shadows. We won't be adding shadows
on a different layer. So let's go to the layers
and we will tap on this plus icon and we will need to set this layer as
a clipping mask. Let's firstly do it and then I will explain what it means. Firstly, we are
tapping on this layer and we are choosing
clipping mask. You will see a little
arrow that is now mean that it is clipped
to a previous layer. And for example, if
we do to this layer, and if we start to create
the lines like that, you will see that we are not
going to be on the frames. So that's how it works. We are creating then
you elements only on to the shapes that we
have on the previous layer, not going beyond the frames. So let's also set this layer as a different
blending modes. Blending mode is
a different ways that your layers
can interact with each other so they can add
different visual effects. We will go to this icon and you can see that
we have a list here. For this case, we will need to choose multiply blending modes. And also we will need to change the opacity level of this layer. We can do it in two
different ways. The first one is manually to go to the slider and dragging it to the left until we reach
the amount that we need. And for this case we will need
virtual percent or we can go to this percentage and we can just write down the
amount that we need. So when we did, We
are going back to our Canvas and we will need
to go on one of the sides, for example, the bottom rights. And we will need to start
by creating a curve. And we will need to select the same color that
we have for the base. You already know how to do that. You will need to
go over this area and you will need to hold
one of your fingers. So select the color and
then go over this shape. And let's create a curve. Hold your Apple pencil at the end of the line to
create a better curve. And if you need to adjust the
placement or the curvature, go to the top to Edit Shape, play with this little
handles and find what works for you
when you are done, Let's tap on the screen to
go away from this modes. And then we will increase
the size of our brush. And manually we will go over this bottom part and
we will recolor it. Now when we have
the first shadow, Let's decrease the size of
our brush and we will go over our right ear and we will
add the shadow here as well. So we will go to the
boardroom and we will start by creating a
little curve like that. Adjust its size such
as the placements, adjust the curvature by
going to Edit shape over the top and when you
are satisfied with it, let's go away from this mode by tapping on the screen
with one of our fingers. And then manually we will
go and recolor this area. Ethan need to erase some parts, just grab an eraser and
do what you need to do. Now when this is done, we will go underneath
our snout and we will add a little
shadow here as well. So let's decrease the size of our brush and let's
create the shadow here. So the same way we are starting by creating a little curve, adjust the curvature
and then manually recolor the areas that you need to recolor
for the shadow. If you need to adjust
some places and grabbing the razor
tool and adjust them. Now with the same color, we can add a bit of texture. So for example, we can grab our brush and we can
go alone Irish shape, and we can add a
few dots like that. So you can vary the size, you can vary their amounts. Just add a few dots
for the texture. Ends. The last shadow
that we will add will be on the bottom
of our snouts. So let's select the color
that we have for our cheeks. And we will go over
this bottom part and we will start by
creating a curve, a jazz the curvature and then
manually recolor this area. And Ethan you to fix some
places you know what to do. You need to grab an eraser and erase the parts that
you don't need. And here is our base. That means that we are
ready with this part. And in the next chapter, we are going to be using
a method that is called gradient maps to
recolor our shape.
4. Making Copies & Rearranging : As always, let's start our new part from
some preparations. Firstly, we will go to our layers and we
will need to combine these two layers
together earlier with the base and our layer
with the shadow. So how can we do that? We'll go to our top layer, which is our layer
with the shadow. We will select it and we will tap on it into this little list. We will select Merge Down. And now everything
that we have for our illustration
is on one layer. And what we're gonna
be doing next, we'll be creating the coop
is on this illustration and who will be positioning
them onto the canvas. So how can we do that? We will be going
into our layer that we have for our illustration
and will be swiping. And from right to left here you can find the
options applicant, which we need to tap on. And now we have the same
illustration on the same place, and we will need to move it
a little bit to the right. So let's go to our
heirarchy on the top-left. We will select it. We will see our bounding box. We are using uniform method
and we will just drag it to the site if you want to
arrange it differently. If you want to make
it bigger or if you want to rotate it,
you can do that. To rotate your object, you will need to go over the
top of your bounding box. So this green node, and you will need to
hold it and you will need to move your Apple
pencil to the site. Now find the perfect placement. Find the perfect rotation
that works for you. And when you are
satisfied ledgers tab on our arrow key to
deselect everything. And now we will need to
create two more copies. So again, we go into our layers. We are swiping the
layer from right to left and we are
choosing Duplicate. Now we're arguing to
our arrow key using our bounding box and just
moving this shape down, if you want to rotate it, just go for it when you're satisfied with the placements
and with everything here, let's just deselect everything
by hitting our arrow key. And we will do this same
thing one more time. Go into our layers. Swiping delay from
right-to-left, duplicates go into
the Arrow key, moving this shape to the left, rotating it if we want. Now let's deselect everything
by hitting the arrow key. And for this storage
for just in case, let's just make one more copy
of our first illustration. So I again go into our layers, where I go into the
bottom layer and we are against wiping it from right
to left, choosing Duplicate. Let's go to the bottom
layer and we will just hide it by going to
this little checkbox. Let's just tap on it
and we don't have it. We can forget about it. Now. We are ready to start recoloring our little
illustrations. So we are going to
be using a method that is called gradient mapping.
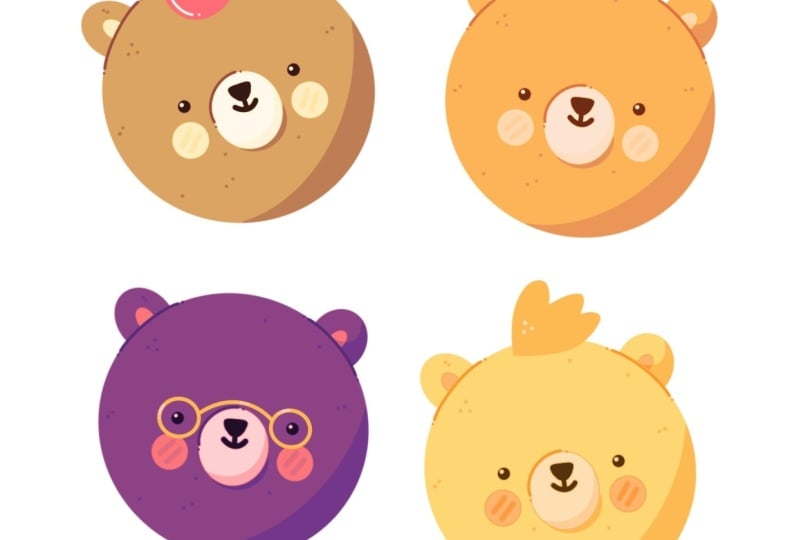
5. Recoloring with Gradient Maps: Alright, at these points
where I quite right, it says start
recoloring our beers. And as I mentioned before today, we are using a very
interesting technique that is called Gradient Maps. So what is gradient mapping? Analyses the
highlights, mid tones, and shadows of an image, and then it replaces or maps these values
with the colors, fonts in your credit. I know now it sounds
more like a gibberish, but we will go and we will
try it out on practice. So firstly, what we need to do, we will need to go to our
layers and we will need to select our first
illustration when we did it, we are going to our top-left
and we are selecting our magic wand to enter
these adjustments least, we are selecting gradient map onto the bottom we
have a little panel and we can see that we have a few colors schemes that
come with Procreate app. And also here we can create
our own gradient maps. That's what we're
going to be doing. So we will go and we will
tap on this plus icon. And we are starting from
the very beginning, and we are starting with default black and white graduates. So the books on the bottom
is our gradient and it represents the tonal range of the original image
from dark to light. So that's what we have on our
illustration with the bear. But we are not going to
be using these colors. We are going to be
recoloring them by using our own colors
from the color palette. So we will start by
going to our left and we will tap onto this little window
with a dark color. You can see you invoke
the color palettes. We will start from the top. We will select this dark color
from the color palettes. It is black, but we are going to be choosing
our own colors. So now we can go to this gradients little
thing on the bottom, and we will be creating
two more dots. So it is very easy. We can just go and tap on the place where we want
to put these dots. When you have it, we can sap on it and we can select
a different color. So we are starting
with this brown. Let's select it. Now you can see that you already recolored
your illustration, but we will add one
more dot and we will be tweaking down until we find
the result that we like. So now let's one more time, go to our gradient
on the bottom, and we will create
one more dots. Now let's go and select
this yellow color. And now we can go to our Gradient and on our
little handles on the bottom, and we can tweak them until we find the result that we like. So play around with this little handles and find what works for you when you're satisfied with the colors legis he'd done. And then we will
deselect everything by going to this magic one
tool one more time. And now you know what
we're going to be doing. We will be recoloring all
three remaining bears. And we are going to be
using this same method. So firstly, we are going to our layers and we are selecting
the next illustration. Now where I go and again to the magic one tool and we
are selecting Gradient Map. Now you can see
that each recolor, It's our new beer with the same gradient map
that we used before. So we will be starting
from scratch. So let's just hit
this Plus icon. And again we are
starting from the left. So let's just go and tap on
this little dark window. We have the next color scheme, and we will start from
this very dark brown. And also we will need to
create three more dots. So let's go and do that. And we will recolor them with the colors from the
color palettes. If you take a closer look
to our color palettes, you will see that the last color in this row is not white. Let's go to our white-collar
in the gradient and we will recover it with
the color from the palettes. And now we can go to our gradient and we can
play with this little handles until we
see the result that we like when you
are done playing ledgers he'd done and we
will deselect everything by going to our magic
one tool one more time. When we did it, we are
going back to our layers. We are selecting the next layer, and we are getting back
to our magic one tool, selecting Gradient
Map and hitting the plus icon to create a
new gradient map scheme. So again, starting from the left tab and on our
little window here, and starting by
recoloring our scheme, we will need to add three more colors inside
this little graduate. So let's go and try to do that. Again. The last color is not wide, so we will need to recolor
it from our palettes. And also here, Let's play a little bit with
our sides handles. If we move the left
point to the right, will make the dark
greens of the image, then you black points. So all the tonal values of our black and white
box still displays where we put the
first dots will be forced to be that
color that we chose. And we can just go
and try to do that. You can see it more clearly
with their white colors. So if we move to the left, you will see that it changes the color of our
ears and our cheeks. So let's put these two
handles like that and we will rearrange these three as well when you are
satisfied with the color, let's hit Done and let's
deselect everything by going to our magic
one tool one more time. Let's recolor our
last illustration. So again, go into the layers, go into our last layer, and then when it is selected, we are getting back
to our magic one tool that's in Gradient Map, tapping on the plus icon
Starting from the left, selecting the color for
this left hands up. And we will need to
put two more dots. So let's go and do that. Let's play around with the
position of these handles. And when we are satisfied with the colors, Let's hit Done, and let's deselect everything by hitting our magic one to n. Now we are done with
recoloring our forebears. If you want to experiment, you have one spare
bear that you can use for creating your
own gradient maps. And when we are done
with our bears, in the next chapter, we will add more details.
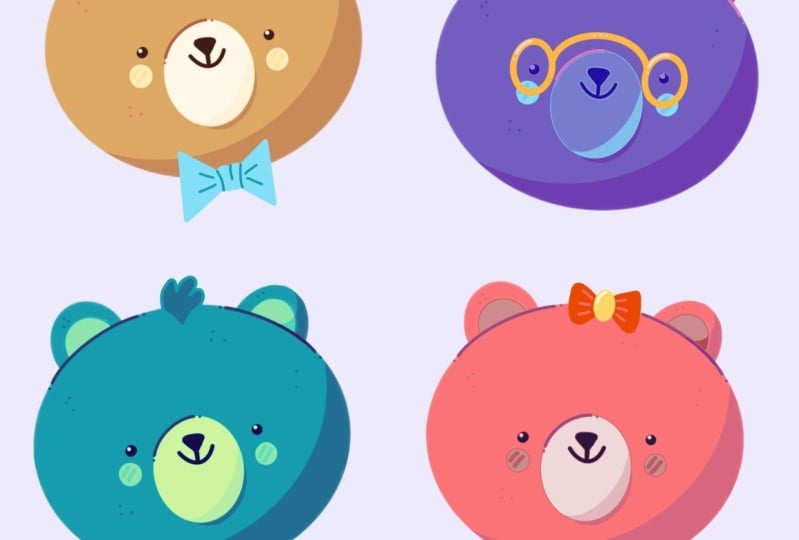
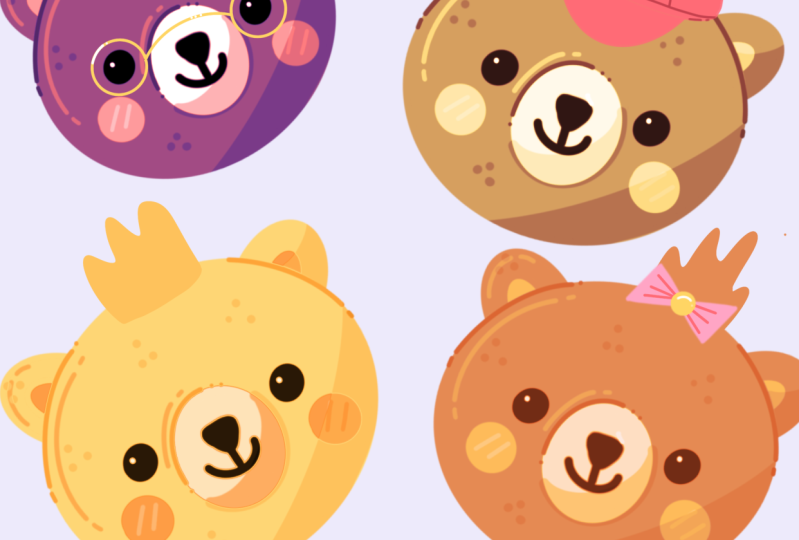
6. Purple Bear Details: Okay, when we have
recolored our bears, it's time to add some
individuality to them and we are going to
be adding some details. So firstly, let's go
to our purple bear and let's go to our layers to
create one more layer above. When we have this layer, we will clip it to our
layer with the beer. So let's tap on it and
let's choose clipping mask. On this layer we are going
to be aging little glasses. So firstly, we will
need to select a color and we will be using the
same color that we have, owns a beer on the right. This color will be our
color of the shadow. So let's go there and we will be using the eyedropper tool. So go over this color and
use one of your fingers, hold it there until
you see a little tool. And when you have the color
and hold your finger. Now when we have the color, Let's move on to our beer and we will start by
creating a circle. We are using the same
brush as before. It is in the calligraphy folder and it is called mono line. Going to the left and
creating a circle. Hold your Apple pencil at the end of the line
and hold one of your fingers on the screen to snap to a perfectly
round circle. If you need to adjust it, go over the top to Edit Shape and adjust
it to your liking. When you have the first shape, Let's move on to the right and
we will recreate it there. And when you have
these two shapes, we will need to connect
them by creating a curve, going alone the whole
shape of our snout. So let's go and do that. As always, hold your
Apple pencil at the end of the line to
snippets to a perfect curve. And if you need to adjust it, go over the top to Edit Shape, play with the handles
and when you are ready, let's select this white color
that we have for this note. And with this color, we will add a few highlights
onto our glasses. For example, we can go
to the middle parts to this little curve
that we have for connecting our two circles. And we can add a few lines
like that when you have them. Let's move on to the
left and we will create a little
highlight there as well. So very simple, just a
line and a little dots. If you want, you can
go over there, right, and create the highlight
there as well. And our first detail is done. So let's move on
to our next bear.
7. Yellow Bear Details: So our next there
is this yellow one. We can go to the layers and
we can select this layer. Let's tap on the plus icon
to create a new layer. This time we are not
creating a clipping mask. We'll be adding
just a detail here. So let's just go to
this beer and we will start by creating
a little hairdo. We will use the same color
that we used before. So this is the color
of our shadow. We will go over the
top and we will create a very funny hairdo. So let's start from this shape. Try to be accurate and loop this shape around
to make it closed. When you have it led, just drag the color insects. Now you can go with
an eraser tool and erase the part that you don't need and to make it very neat. Now let's select the
color that we have for our inner parts on the ears. And we will add a few dots
to this little hairdo. And that's our details
for these bare. Let's move on to another.
8. Orange Bear Details: Our next bear is
this orange one. So let's go to the
layers and let's go to this layer with
this orange beer, we will select sets
and we will hit the plus icon to create a
new layer for our details. So firstly, we
will go and create a little hairdo the same way as we created it on
our yellow bear, but this time it
won't be tilted. It will be just growing
toward the top. So let's just go over
these beer and we will select the same color that
we have for our bees. So again, by using
the eye dropper tool, selecting the color and
then going over the top and creating the
shape for our hair. Loom this shape around and
when you have it closed, ledgers go and drag and
drop the color insights. When we have the hair, Let's go back to our
color palettes and we will select the color
with the name pink. Now when we have this color, we will create a little bow. For the bow, we
will need to create two very rounded triangles. So firstly, let's go over the left and we will try to do that. When you have the outline manually recolor
the inner parts. And now when you have
the first shape, Let's move on over
the rights and we will try to
recreate it there. If you need to
adjust the shapes, go and grab an eraser
tool and adjust them. Now when you have
the shape like that, Let's get back to our
color palettes and we will select the color with
the name yellow, orange. With this color, we will go
to the middle part and we will connect these two
triangles with an ellipse. So let's go and do that. As always, you can
hold your Apple pencil at the end of the line
to adjust the shape. And if you need to
adjust it even more and go to Edit
shape over the top. Now find the placement of these elements
and then manually recolor the inner parts when you have the whole
shape of the ball. Let's get back to our
color palettes and we will select the color
with the name rats. Now we will decrease the size of our brush and we will go to this side from this little Arabs and we will create
the lines like that. When we have them on one side, Let's move on over
the left and we will try to recreate them there. And the very last thing
that we will add for this bot is gonna be
a little highlight. So let's go and grab
the color that we have for our snout here
onto this bear. And then we'll go over
this little Arabs that we have for the bow and we will
add the highlight there. If you want to add
more highlights, you are welcome to do it. And that's our third there. So now let's move
on to the last one.
9. Brown Bear Details: For our last bear, Let's add a little hats. So firstly, we're arguing
to the layers and we argue into our last
illustration with the beer. Here, we will select
it and we will tap on the plus icon to create a
new layer for our details. When we did it, we are going
back to our color palettes and we are selecting the
color within the red. Now we will go over the top of our bare heads and we will
create a shape like that. When you have something similar, we will go underneath it and we will connect it with a curve. You can hold your
Apple pencil at the end of the line to
create a better curve. But all you need to do is
to create a closed shape. When you have the closed shape, ledgers go to our
it's upright and we will drag and drop the
color to this area. And when we have this shape, Let's create a visor. We will go underneath the shape and we will create
a curve like that. When you have this shape, ledgers go and drag
and drop the color. When we have the
base for our hats, Let's get back to our color
palettes and we will select the color with the
name dark bean grad. We will divide the
parts from each other. So firstly, let's go and create the curve
over the bottom. If you want to add more details, you are welcome to do it. And the very last thing
that we will add here will be a divide in parts
over the top parts. Firstly, let's go and create a little ellipse like
that over the top. And from this ellipse, we will create two
curves like that. You can play around with the curvature and
when you are done, Let's add a little highlight. One more time. We are selecting the color that we
have for our snout. And we will go over
our shape for the hat, and we will add a
few highlights, and we are done with
our bare illustrations. Thank you for
watching this class. Leave a review if you
liked it and consider subscribing for more Kawhi
videos in the future.
 Uni Corn, ⭐Kawaii Art Enthusiast⭐