Transcripts
1. Introduction: Hello, everyone. I'm
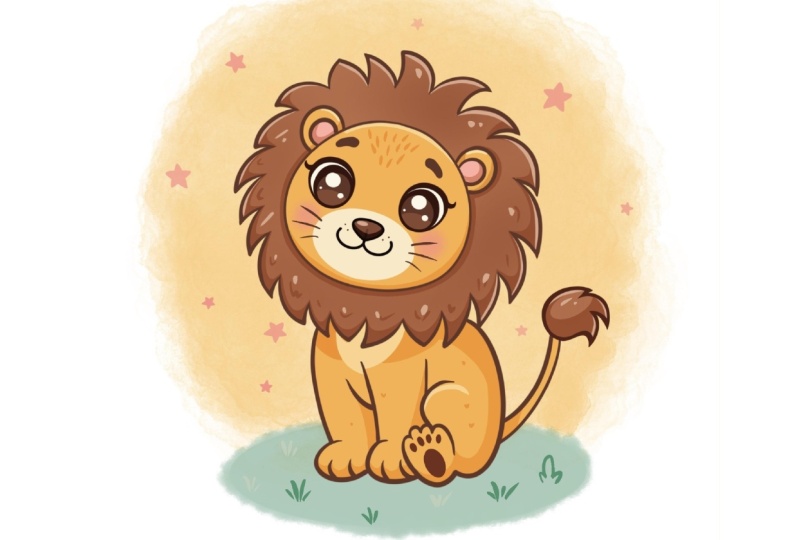
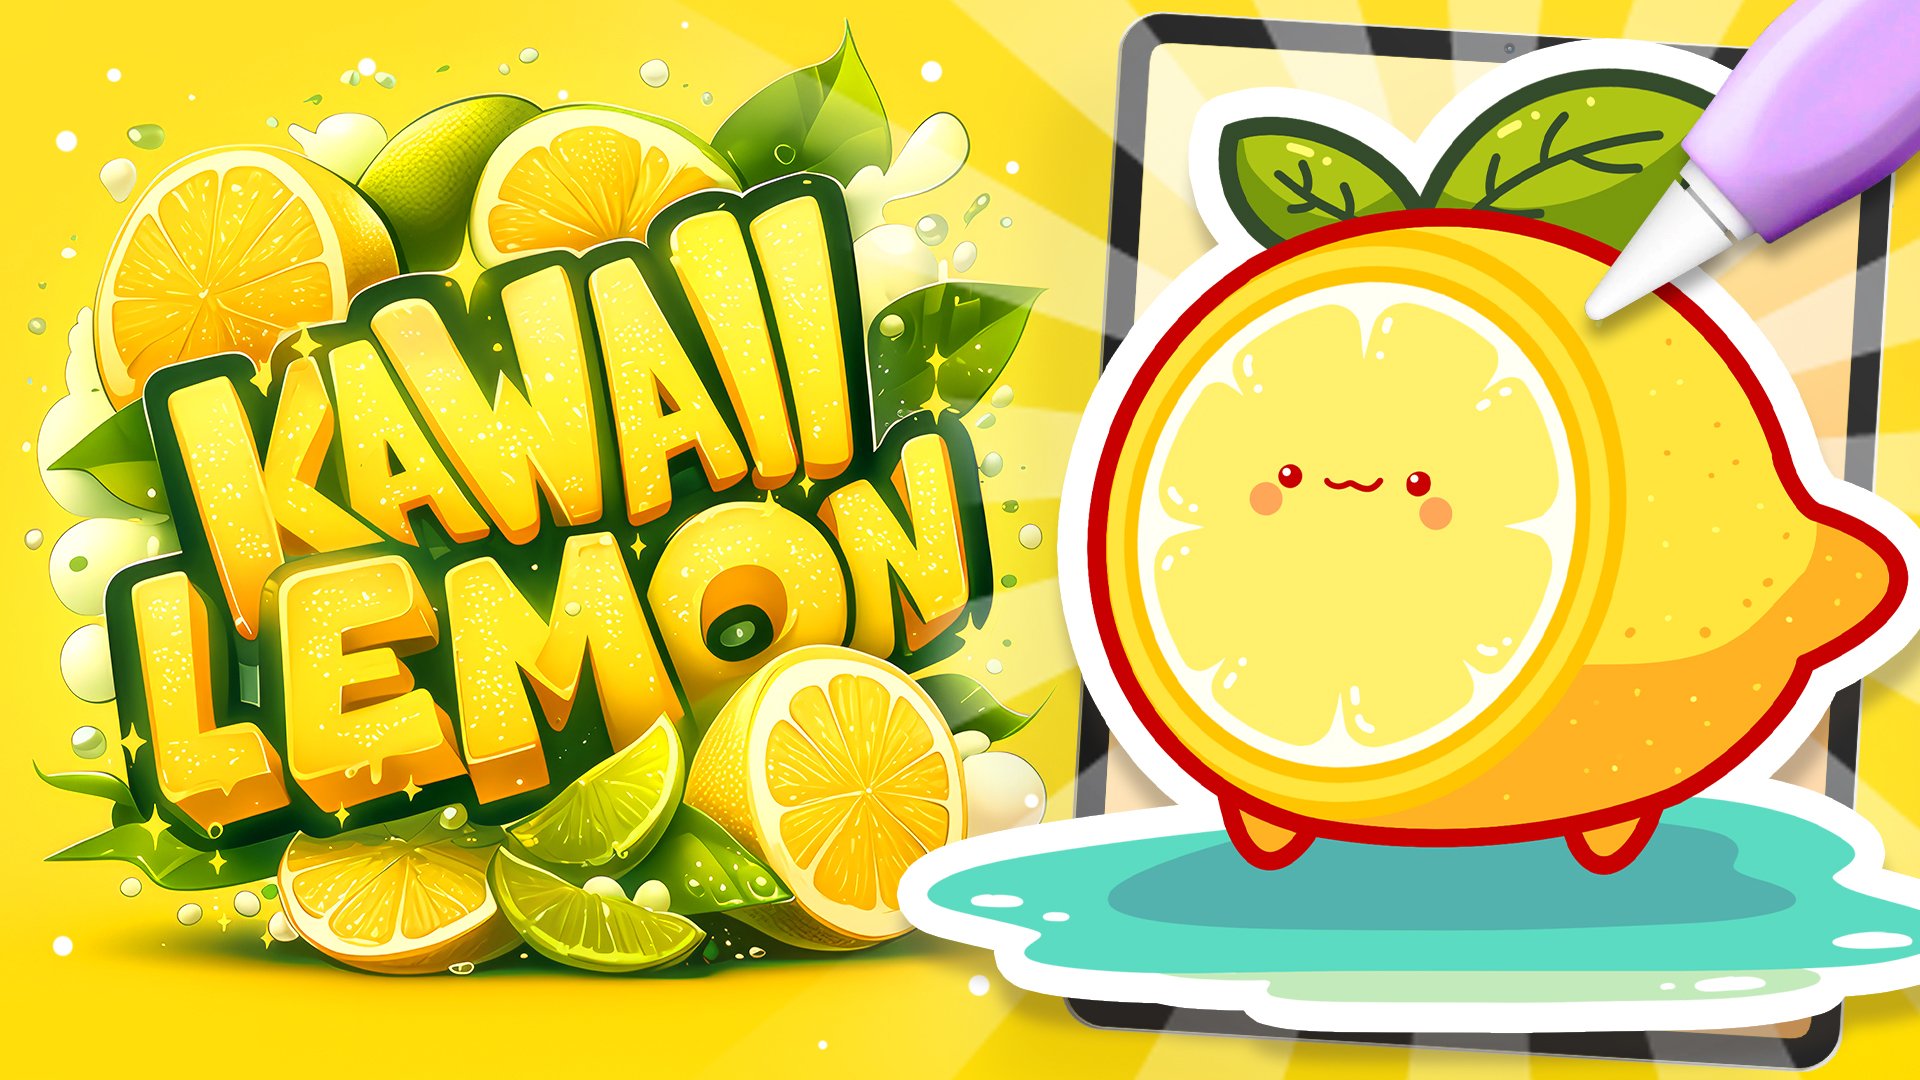
Uni, and in this class, we are going to draw
this cute cow why illustration of an adorable
lion in Procreate. During this class,
you'll get familiar with a lot of useful features
like QuickShape tool, Symmetry Tool, liquefied
tool, clipping masks, and blending modes, and learn the basics of drawing
in Procreate. By the end, you'll not only draw an adorable illustration
you'll be proud of, but also feel super
confident using procreate. And now let's spend
some time drawing.
2. Scheme: Begin our class firstly by deciding what kind of canvas
we are going to be using. Today, we're using a standard square canvas from
Procreate with Pixel Weed and Pixel
heights at the 2048 pixels. DPI a 300 and our color profile is set as
SRGB with this loan number. When it's all done,
heating down, taking a look at our new canvas, and then to continue with
our preparational parts. Let's go to the Project
reso Sub and download all the materials
mentioned for this class. When you did it, let's
first go and select the brush that we
are going to be using for our sketching part. We will go to the brush
library and we will select this brush that you
downloaded Doll flat pencil. If you prefer any other brush, you are welcome to go
to the sketching folder and select any brush
that you prefer. When you are done with it, let's go to the color palette to this color palette
that you downloaded. We'll go to the palettes
on the bottom and to the cards on the top to
see the colors names, and we will pick
some darkish color. So for example, let's go with this dark, red, orange color. Now, send the size of the brush to the level that you prefer, go with something not
too big, not too small. And when we have the
results like that, when we are all prepared, let's start creating
our little scheme that will help us to build
up our illustration. So with one ln we will go
to our canvas and we will create a shape of the recting
hold your line at the end, and you also can try to
hold one of your fingers on the screen and you might see the shape of
the rectangle here. When we have something
going like that, let's lift up everything and let's go to the ky
on the top plate. On the bottom, we
first will go under snapping and we'll turn on snapping right here
into the settings, and then we will select
the free form method. For now, what we're
going to be doing is going into the nose that we have right here and we will be squishing our sheep slightly. We will need to end up with
pretty tall shape like that, and we also will need to
position it at the center. To position it at the center, we turned on snapping
right for this part. So let's hold our Apple pant and we'll be looking for
these two orange lines, one vertical and one horizontal. When we found them, we know that we are right at the center. So when we have the
result like that, let's tap on our Ike to
get away from this mode, and let's create a couple
of more lines right here. We will need to deal with
the proportions right here. Let's go and create a couple of lines to help us with that. We will go toward
this middle part, the shape that we've created, and we will need to find
five equal parts right here. So let's go and try to do that. We will be going with
the straight lines going from this side, and what we are going to be
doing is creating this line. Firstly, going like that,
holding our line at the end and holding one of our fingers on the screen to make
the line straight. Now when we have
it, we can go and start to do it on
the separate list, so it will be easier for us to navigate through
this whole sheet. So let's get to our list. We will create one
more lay on top, and one more time, we'll go and create another straight
line right here. So again, hold
your Apple pencil, hold one of your fingers on
the screen to adjust it. If you need to move it slightly, go to the Aoki and move this line to the place
you want it to be. Again, reminding you that
we will need to have five equal parts right
here ons this she. Now when we have
this one more time, going to our last, creating
one more layer on top, going again to our brush and creating another little
line right here, going through the
horizontal axis. Again, holding our line and
then if we need to move it, we can go to this editing
tool on the top two. This is another option of what we can do right here
to move this line. So we will again need to find
the equal part right here, and when we are down
tap on the screen, one more time, go to the list and create last line right here. So again, the same way,
holding our Apple pencil, holding one of our
fingers on the screen, and now we will need to
position these lines, so we will have them
equally right here. So the bottom part right now
is a little bit too big. So we can go to the layer
where we have these parts, and we can move everything
that we have right here. So, for example, let's select these three layers that we
have right here for this part. So when the first one is selected, we'll go
to the next one. We'll swipe it from
left to right, and we will do it one
more time like that. We will then go to
our Aero key and we will move these lines
that we have on the bottom, a little bit more
toward the bottom, so we will have equal
space right here. And now when we have
the results like that, let's tap onto our oke, and now we have our scheme. So what we need to
do next is to find the center with the line that will go from
top to the bottom. So what we need to
do right here is to go to our range icon over the top left and we will
go under the drawing guide. We also need to go to
AD drone guide and tap on the symmetry
option on the bottom, and that's our middle line
from top to the bottom. So that is the
line that is going from middle part right here. Now, when we have the
results like that, let's tap on De option, and let's go to our last, and we will go to
all these layers that we have for our scheme, and we'll merge them together. So we will put one of our
fingers on the layer on the top and another on the layer on the bottom and make a
pinch movement like that. Now, to make it a little
bit less disturbing, let's tap onto the N icon, and we will go to
the opacity slider, and we will make everything a little bit more transparent. So let's go with
something around 50%. Now when we are done with it, our scheme is done, so let's move on to our sketch.
3. Sketch Head: For this sketch, firstly, let's create one
more layer on top by tapping on R plus icon. And then we will
go to this area, the second and the third
little part right here, and between them with one line, we will create a
shape of the circle. Hold your line at the end, hold one of your
fingers on the screen, and if you need to
adjust the size, while holding everything, move your Apple pencil more
toward the inside part. So let's go with something
like that for now, and when we have
it, we will need to position it straightly
at the center. And we know how to do
that, we will need to go to our Aoki on the top plus. Using right now the
uniform method, snapping is on and we are moving our shape until we
find this orange line. When we have the
result like that, when you are sure that you
are right at the center, let's tap onto our e key, and let's go and work a
little bit onto the sheep. This is our head, but we don't
want it to be very boring. We want it to be a little
bit more peculiar. To do it, we will
go firstly to our less and onto this leer where we have the shape for the head, we will tap on it and we will use the option drawing assist. When we have this
assisted little thing on the bottom of our layer, we will be using
our asymmetry too and that means that if we
will adjust something, we will be adding the same thing onto the opposite side too. With this knowledge, let's
go to our magic one, two over the top left and we
will use the option liquefy. On the bottom, we will use the option push and
we also will go to the side slider to adjust the size of the brush that we are going
to be pushing with. So when we have the
size pretty big, let's go to one of the sides
and we will be adjusting our shape by moving it and making it a
little bit squished. So we are going in that way. You can play around
with the roundness of the ship with the
overall look of it. We are creating a
head right now, so we will need to have it
in a pretty rounded way, but also in a bit
of a peculiar way. So spend some time here
and adjust the shape to your liking and end up with
something going in that way. So when we have the
shape like that, some kind of the
loaf of bread shape. Let's go and tap onto our major Q two twice to
get away from the mode, and we will get back to our
brush to go over the top, and we will add little
ears right here. So for the ears, let's tap a bit from this line that
we have on the top, and we will go with half
of the circle like that. Hold your at the end, if you want to make it a circle, hold one of your fingers on the screen to make sure
that it is a circle. If you need to adjust
anything here, the placement or the
size or anything, go to this option
on the top circle. This is our editing mode. And inside the editing mode, you can see that we have
some notes right here, so you can go to them.
You can tweak them. You can make everything
smaller, bigger, differently positioned,
and in that way, you can adjust your
thing right here. So when you have the
result like that, let's tap on the screen, and let's go inside the shap, and let's create
the similar shape to what we have on
the outside part. So we are creating the
inner part of the ear. For now, we don't need to be very perfect with our
shapes and everything. We are mapping out everything that we are going to
be creating later on. So you can go and
create it in that way and later on deal with what
you've created right now. So when we have the
results like that, let's go and work with
our facial features. So for the facial
features, firstly, let's go to the middle part
right here to our line of symmetry and to this line that is going
through the middle. And onto this line, we will
go and create a little, very, very soft triangular
sheep right here. So go like that and starting
to create a little nose. Straight away, you
can go and shade it. So you can go with a bigger
shape with a smaller shape. It's up to you if you
overdid it a little bit, go to your eraser, make it smaller, make it bigger, and adjust the shape
to your liking. So, for example, let's go
with something like that, and then let's get
back to our brush. Let's go underneath the nose. We will create a little
line in that way. And from the bottom
part of this line, we will go to the sides and we will create a little
mouth like that. Again, you can play
around with the shape, make it bigger, make it smaller, adjust the placement of it, find what looks good to you when you have the
results like that, let's go and create little ice. For the ice, let's go to this line that
we have right here. We'll go slightly
lower than it is, so we are not going with
this line to the center, a little bit lower
than the center, and go and creating a
rounded shape like that. Hold it in the end, hold your Apple pencil and hold one of your
fingers on the screen, adjust the size to your liking. If you don't like the placement, go to the editing mode
and adjust it slightly. So for example, let's go with something like
that, and straightaway, let's tap on the screen
and go inside these eyes, and we will shed them. Now, when we have the
result like that, let's also go and map out where we are going to
be putting our cheeks. So go into the side slightly
lower than the shep that we have for our eye and creating a shape of
the eps like that. Now, when we have the
result like that, we are done with our fees. So let's go and work onto them.
4. Sketch Body: For the mean, we can go with
our symmetry tool turned on, but also we can go and be a
little bit more spontaneous, so we can go back to our layers. We can tap onto our layer with the lines that
we've created, and we are welcome to go and hit drawing assist right here to get rid of this option
onto this layer. When we did it, let's go
toward the top firstly, and we will go from
the center and start to create the
shapes going like that. We are going with
half of the circles, half of the ellipses, going along the shape
and starting to add these details going down
with our whole illustration. So going like that and starting
to create these details. You have created
the details and you see that maybe you want to
try it out one more time, so maybe go with the
bigger shapes right here. You are welcome to
go and do that. Let's, for example, go and
try it out one more time, so creating something
go like that, creating a bigger
shape onto the bottom, and starting to do something similar onto the
opposite side too. You don't need to
be very similar on both sides because we turned
on our symmetry tool, and we can play around with the shapes that we
are creating right. When we have the top part done, let's go to the bottom and start to add the
details here too. Let's go toward
this line that we have on the bottom,
created in that way, and then we'll go
slightly higher towards the right part and
we will finish up by creating the shape
going in that way. If you need to fix some parts, maybe make some of the lines a little bit bigger size wise, you are welcome to
go and do that. Create what you want to create right here if you see that you can go with your eraser and erase the parts
that you don't need. You are welcome to do that, too, to have a clean look
of your sketch. So when we have the
result like that, let's get back to our brush, and let's go and
add some details that later on we will create. So we will go from the shape of our head and we will
go toward the sides, and we will create some kind
of the folds right here. So we are creating a couple of lines going in
that direction, and we are creating them
not in a street way. So we are creating
them, not going toward the top or toward
the sides strictly. We are creating little
curves that later on we will turn
into some details. So now when we have the result
like that one more time, take a look at everything
from the distance, whether you want to
adjust something or not. When we have it, let's go and work with our
body right now. So for the body first, let's go with the front legs
and we will start by going to the line
that we have right here for our head and from it, mentally, we will go and create a very nicely looking
diagonal line. You can go straightaway, not mentally and
create it in that way. And when we have it, we will go and start to create
a line on like that. Now when we have it, we will go towards this line that
we have on the bottom. We will step a bit
from it and we will create another line in that way. So creating it, and
when we have it, we will need to connect this
thing that we've created on the bottom with
this line that we have on the top and
create a little pull. So for the pull, let's go with a very simple shape of half
of the circle like that, and we'll connect it nicely with the line that we have
right here onto the top. If you have the lines
that you need to erase, grab your eraser, erase
everything that you don't need, and when we have it,
let's go slightly toward the and we will create another
little line right here. So going closer to this line
that we have in the center, you also be toward the
left from it and creating a line that will
be quite parallel to what we have right
here onto this side. So when we have it,
we will need to recreate this thing that
we have for the pow, creating the similar shape to what we have onto
the opposite side. Now to finish up with our pause, let's go towards the pore that we have onto
the left first, and we will create
some definitions right here to create some
kind of the fingers. Going like that, repeating the overall shape that
we have onto this side, but making it slightly smaller. Going toward the next side, and we are creating
something similar here. Again, creating a
little lingon like that and one going more
toward the outside part. If you want to work a little
bit onto the bottom part, you are welcome to go and
make it slightly rounded. And when we have the
result like that, let's go and work on the
back part of our line. So for the back, firstly, let's go and create
the pow and we will go toward this little
space that we have right here, and we will create a
shape going in that way. So create a little ellipse
that will be to be tilted, and when we have it,
we will go towards this side and we will create
a little bam right here. So go like that from this
little shape that we have on the mean and go into the bottom with a very
rounded shape like that. When we have it,
we will need to go toward this part and we
will need to connect it, and we also will need to think that we are creating
a seated line. The part that we
are creating right now should be on the ground. That means that we will need to create it in a bit
of the flat way. Let's create a line like that. Let's try to connect it
with our bam right here. Work on the line right here
that you have on the top, try to make a very nice and smooth connection
with everything. When we have it, let's go and work on this pot that
we have right here. For the pow, we are going alone this shep that
we've created for our ellipse and we are going with a couple of
fingers right here. Go like that over the top and starting to add half
of the circles, half of the ellipses like that, and then going alone this shep and starting to
add more fingers right here. We will end up with four
fingers onto this pore. So let's go like that,
and we will finish up by creating a little
shape going in that way. If you want to go
with different shapes or define the shapes
a little bit more, you are welcome to
go and do that. When you have it,
let's go toward the bottom part and we will
create the actual pot. We will need to go and create the ellipse that
will go in that way. So we are mainly repeating
what we have outside. You can go with a bigger
shape with a smaller shape. You can decide on your own. When you have it, we will need to create the
fingers right here. So probably let's make this part a little bit bigger
to go on like that. You can straightaway
go and sheet it. And when we have it, let's go toward this part
that we've created, and let's create little
elements like that. So go along the shape starting to add these
details in that way. Now when we have it, we
also can straightaway go and think a little
bit about perspective. So we will need to
go and position these fingers more on
the diagonal line. You can spend some
time here and you can adjust the placement
of these elements, or you can go again to your liquefied tool that is
our magic one to liquefy and play around with this poor by adjusting it
with this option. You can go with
your push and with the side slider and adjust the things slightly right here. For example, let's spend a bit of time right here and adjust the placement of these elements or a little bit of the
perspective of it. When we have the
result that we like, let's get back to our layer and we will go again
with our brush, we will go toward
this part and we will need to create firstly, the continuation of this pause. We are going toward the bottom and we are thinking
where it ends. If we need to create a
little line right here, we will do it and we also
will go toward the top and we will elongate this line
going up in that way. When we have it, we will go
slightly toward the right and we will create a little
fold going in that way. When we have it, we also will go towards this part
and we will create a little Let's go slightly higher than this line that
we have on the bottom, and from it, we will and create a little langon up in that way, and then we will create a
little fluffy part like that. You can spend a bit
of time right here. You can create different
shape if you want to. And when we have the
result like that, let's take a look at everything
from the distance and decide whether we want to
adjust some parts or not. When we have the
result like that, we don't need our
scheme anymore, so let's get back to
our list and hide it by typing into this check
mark on the bottom. Now when we have that, if you want to adjust something, you are welcome to
go and do that. For example, we can go to
our Aoki on the top left. We can go to the
free form method and we can go towards the
node that we have right here in the
middle and we can squish our little
line a little bit. If you want to
squish it even more, you are welcome to go
and do to other nodes. You are welcome to
spend some time here. When you are done,
the main thing that we will need to do right now is to go and position it at the center when you
are done adjusting it. So go towards the
lines that we have right here and adjust
everything that you have. What we need to do
right here is to position our face
onto this line, so our halves that we have
for our mouth is in a misle. So when we have the
result like that, let's tap onto our ki. Again, if you want to adjust some parts slightly or
more than slightly, you are welcome to go back
to your liquefied tool, push option and adjust
some parts to your liking. For example, we can go to the mean and we can
adjust it slightly, make it a little bit fluffy, maybe or adjust some other
parts if you prefer that. So let's spend
some time here and adjust the parts to our lichen. I decided to move the pace a
little bit down and make the poor a little bit bigger so
everything is more kawaii. And when we have the result that we like, when we are done, liquefy it, let's tap one of our adjustments twice
to get back to earlier. And also, if you want to go manually and adjust some parts, you are welcome to
go and do that. So for example, we can go to the ice and make them
a little bit bigger. You can go and experiment
a little bit and create the details in a different
way from what you had before. So you can spend some time
here and adjust some parts. When you're done,
adjusting everything, let's move on to
our next part where we are going to be
creating the colors.
5. Colors: Begin this part firstly by going to our layers and
we will tap into the icon on our layer with the gauge and adjust
the opacity of it. When we have it, we
will go to the layer underneath it and from here we'll create one
more layer on top. When we have the position
of the layers in that way, we will go to our
color palette to select the color with
the title skin firstly. When we have it, we will
get back to our layers. We will tap onto this layer that we have right here
that we've created, and we will tap on it and use
the option drawing assist. Now to see clearly
what we are doing, we also can go straight away
to our background color and select the background color for everything that we are going to be creating right now. When we are done with it, make sure that you are
on the right layer. And let's go to
our brush library, and we will go to the ink and folder to select
technical pen brush. When we are at this
brush library, and if we want to make all
of our lines smoother, we can tap onto
our technical pen, go inside the brush studio, go under stabilization and play with amount of streamline
and amount of stabilization. You can set the
settings the same way as you see them right
now onto your screen. You can try it out
onto the drawing pad. Feel how it feels. If you want to adjust
something here, you're welcome to
tweak these options, and when you are ready, let's
tap on down on the top. Now when we have the
result like that, let's go and recreate the shep that we have
right here for the face. You can set the size
of the brush to something not too big
or not too small, something around
12% or so let's go to where the lines that
we have right here and let's create our sheep. As we turned on
our assisted draw, we are creating the lines on
both sides at the same time. And basically, what we
are doing right now is repeating what we have onto
our layer with the sketch. Make sure that your lines
are looking nice and smooth, make sure that the
line is closed. To see clearly whether
the ship is closed, you can go to your last and hide the layer with your sketch. So tapping onto the check mark. Straightaway, you can see
whether your lines are okay. Whether you need to go with
your eraser or Aja something, try to make everything very, very smooth and create the
shape going in that way. When it is created, let's go to our icon with the color and drag and
drop the color inside. Now, when we have this,
let's get back to our list. Let's unhide our layer
with our sketch, and let's continue by
going to our brush and recreating the shape
that we have for our ears. So you can go and repeat the same shape that you
have onto your sketch, or you can experiment
a lttle bit and create it in
a different way. So for example, lit
bit more round. Just it by going to the
editing tool if you need to adjust the curvature
of the elements, take a look at it from the
distance when you already tap onto the screen
and drag and drop the color inside these shapes. Now, with the same color, let's go and
recreate the bottom. But firstly, we
will need to go to our layers and we will need to turn off our assisted drone. Let's tap on the layer and use the option drone
assist from the list. You can recreate the
shapes that we have on the bottom on the same
layer where you have the face, but you also can go and create
one more layer on top and go to these places and add
the details onto this layer. Let's go and going around the whole shape that
we have right here, starting to add the colors. Create the outlines, go along the lines that
you have right here. Remember that you don't
need to go with 100% of similarity to what you
have onto your sketch. If you want to adjust
something, go and adjust it. Just go around everything
that you have right here and create the closed and
clean and smooth lines. For now, going like
that and starting to add the lines to everything
that we have right here. Again, you can hold
your lines and the ends and adjust them with the
editing tool on the top. You don't need to create
the lines with one line. You can go partially. And when you have created the shape, let's go to the top
right here and let's create the clothing
shape element like that. When we have it, drag and drop the color inside
and straightaway, let's go with a bigger size
of the brush and create the line that we will create
right here for the teal. W one line going like that and creating the shape
going in that way. Now let's get back to the
previous size of the brush, and when we have it, let's go and create the
men right here. So for the min, we
need to go underneath the layer with our face and we'll create one
more layer here. Let's go to our color palettes
and select the main color, and let's go and recreate everything that we
have right here. Again, we are doing
the same thing. We are holding our
lines at the end to create a nicer
and smoother sheet. If you need to adjust it, go to the editing tool on the top and adjust it from here. Let's go around
everything that we have right here and
create our elements. When you reach the bottom, you might see that you
are creating your lines, but you don't see what's
happening right here on the shape that you
have for the body. We can go to our s. We can grab this leer
where we have the body. We can hold it and we can drag it underneath the
layer with armine. That is the right
position for this part. And when we did it, let's get
back to our layer where we have mine and let's continue
creating our details. G on the round the
same way as before, holding everything that we
need to hold at the end of the lines and going on to
create the whole shape for me. Dusting it with our
editing tool if we need to and trying to make
everything nice, everything smooth, and
everything closed. Have the result
like that when we went through the whole
circle right here, let's go to our list
and one more time, hide the layer with
the sketch to see whether everything that
we've created is closed. So you can zoom in,
zoom out to check out, and when you have
everything closed, let's go and drag and
drop the color inside. Now, when we have the
result like that, let's get back to our list and hide our layer
with the lines, and let's work onto some
of the details right here. Firstly, let's go and work on the detail that
we have right here. We'll need to create
one more layer. Let's tap on the plus icon. Let's go to our color
palette, select dark, red, orange color, and let's go and create this little shade
that we have right here. So either with one line or
with a couple of lines, create firstly the
bottom part like that. Go and create it in a nice
way, in a smooth way. Try to create nice connection between the parts if you
are creating the parts, work with your brush, work with your eraser, adjust it nicely. When you have it, let's go and create the
details right here. So you can repeat what you have onto your skage or you can play a little bit around and create something a little
bit going in that. When we have it, make
sure that it is closed, drag and drop the color inside, and if you need to work on it, go to your o key
on the top left, rotate it by going
to this green note, holding your Apple pencil there, and moving it in a
rotational movement. Find the placement and
rotation that you like. When you are ready,
you also can get back to your eraser and
maybe work a little bit on these parts that you have on the top to
make them a little bit more pointy and on the overall shape that you have right
here for the tail element. When you are quite
satisfied with everything, let's get back to our brush, and let's go and work
onto the facial features. For the facial
features, firstly, let's go to the lay that
we have for our face. Let's create one more
layer on top and to make sure that we are
creating it on both sides, at the same time, let's tap on the lay and use the
option drawing assist. Now, let's go and work
onto the ice firstly, go like that with our
brush with one line, creating our shape,
holding it at the end, holding one of our fingers to make sure that it is a circle, adjusting it if we need to
size wise or position wise, when we have everything
like we want it to be, let's drag and drop
the color inside. Now when we have it,
let's go to our colors, and let's switch the color
to a different color. We will go and select
this red orange one. When we have it, we will go and create our little mouth firstly, going into the line that
we have in the center and creating the line going
down like that firstly. Try to create only one
line, and when you have it, let's go down from it to the sides and create our
little mouth like that. Again, if you need to adjust it, go to the Editing
tool on the top, adjust it from here, try to
make it pretty friendly. And when we have it,
let's tap on the screen, and then let's go
and create our nose. We will need to create it with the same color that
we used for the eyes. Very easily go into our colored little finger
right here onto the top. We will hold our Apple pencil there and we will get back
to the previous color. Now let's go and create our
little nose right here. So you can experiment
a little bit with the placement and with
the overall shape. Go and end the colors
straight away inside. If you have some
elements that are overlapping the previous
color or something, go and get rid of
these little places. Take a look at everything
from the distance, decide whether you want to
adjust some parts or no. So, for example, we can go
and make it a little bit bigger or a little
bit more triangular. So spend some time here and adjust the shape to your liking. When we have the
shape that we like, let's also go toward our color palettes and
change the color to cheeks, and we will go to our layers and we underneath the layer where we have our
facial features. Again, to our layer
with the face, and we'll create one
more layer here. Tapping on the lay, selecting our drawing assist go into these places where
we have our cheeks, and we will create
the cheeks here. Repeating the same shape
that we had before. If you need to go
to the editing tool and adjust it slightly, you are welcome to
go and do that. You are welcome to go and decide on the size and the rotation of this thing and the placement of find the placement
and everything, tap on the screen
when you are ready, and drag and drop
the color inside. And also, let's go toward this little part that we
have right here on the top, and we will go and create this
half of the circle things. So again, you can hold one of
your fingers on the screen to make sure that you are
creating a circular shape, and then let's go
toward the bottom, and we will close the shape and dragon drop the color
inside when we are ready. Now when we have the
result like that, let's go to our
layers one more time. And let's go and start adding some additional
little lines. Firstly, let's go above
all the layers that we have and we'll create
one more layer on top. And let's first go
towards the line that we have right here for our
face and let's recreate it. So we can go with the same brush that we
are using right now, our technical pen brush
from the ink and folder, where we can make it a
little bit more fun. We can go and select this well
behaved liner that you can download from the
project and reso Stap and we can work
with this line here. So we will go and select one of these brushes and then go into our color palettes and
changing the color firstly to this dark
red, orange color. Now, when we have it, let's
go back to our layers. Let's go and hide our
layer with our sketch, so we will tap onto
this little icon. Now, going toward our brush, and we are going toward the bottom part right
here for our fast, and we will go and recreate
this line right here. You can go with a different
size of the brush, and we will go and start to add the additional little
texture right here by going around this whole
thing that we've created. Like that starting to recreate everything that
we have right here. Let's go around the whole
thing and create these lines. When we have it, we will go to our color palette and switch
the color to red orange, and we will go toward the
top part toward this very, very top part of our head, and we will add
this reddish line right here to this part. When we have it,
we will go again to our color palette and
switch the color to orange. And with this orange color, we will go toward the
inner part of the ears, and we will go and add
the color here too. So we will need to repeat the
overall shade that we have for our head and go like that and starting
to add the color. Going toward the top
parts and making sure that we are adding the line
right here to this part, too. So going around and
starting to add this additional little
line right here to create a nice looking effect. If you want, you can go and grab your eraser and get rid
of this little line. So we will need to
have only the line that we have on one side. If you need to go to
some of the places a couple of times to create
a nicer looking element, you are welcome to
go and do that. And don't forget that
we will need to go to the opposite side and
do the same thing here. So let's very quickly
go and do that. If you want to connect it with other lines that
you have right here, you are welcome to
go and do that. If you want to go back to some of the lines
and work on them, maybe work onto the
connections between the parts, you are again, welcome to go and do what you need
to do right here. If you need to change the
color and add some details, go and do what you need to do. And when we have the
result like that, let's go and work onto these little parts that
we have onto our sketch. So let's first go
to our list and unhide our layer with
this sketcheGting back to this layer where we
are right now at and going underneath it to
create one more layer here. Onto this new layer, we
will go firstly with this darkish color that we are using right now our dark red, something color, dark red, orange color, and we'll go to this part with a bigger
size of the brush, and we will be
going and creating these additional little details. You can go and repeat what
you had onto your sketch. What we're going to be
creating is a bit of a thicker element
onto the bottom and a bit of a thinner
one onto the top. Let's go and create these
little details right here. If the lines that you have onto your schaue are a
little bit distracting, you can go and hide this lay
and improvise a little bit and create these lines going very naturally
to your hands, going like that and starting
to add the details, and remember that we
will need to go not with the straight lines and not on the straight
angle right here. We will need to go
along the shape and we will need to
create the curves. Now when we're done with it, let's get back to our list, hide the lay with our sketch
and see what we've created. If you want to go and
adjust some parts, you work with your brush, work with your eraser, adjust some parts that you
don't need, erase them, or maybe go along the lines and make them a little bit more clean if you prefer so when you have the
result that you like, go take a look at it and then let's go and add the
lines over our body. So when we are at this stage, let's get back to our layers. Let's un hide our layer
with this sketch. And let's go to the layer that we are either right now
on or we can go and create one more layer for what we are going to
be creating right now onto this new layer or
onto the previous layer, let's go back to
our color palette, select the red orange color, and we will go towards
the lines that we have right here for
our legs firstly, and we will go and
create the lines here. So let's go firstly
toward this little part, we will go and create it. When we have it, we will go to the definition the pause
between the fingers, and we will go and
create them here too. You can go with
the thicker lines right here or with
the thinner ones. It's up to you.
When you have it, let's go toward
this little part. We will create a line here too. Go and enter creating
the pull line, so we will have,
again, some definition between the parts. When we have it, make a
nice connection right here and also we'll need to create another
line right here, so it will be our chest part. Let's go and create a very nicely looking line in that way. Now when we have it,
let's continue by going Andre creating
these details. Also, you can go to the bottom
parts and make the lines a bit thicker there and create
something in that way. And also, let's go and recreate these little parts that
we have for our fingers. Now when we have it, let's recreate this little line
and also we'll go with the same color towards
these little shapes that we have for our paw and let's
go and create them too. Let's go and start to recreate
the lines going like that, going along the fingers. Again, repeat what you have onto your sketch or create something
different right here. It's up to you. Go toward the bottom part to have
a very nicely looking defined little paw and then go toward the top and finish up creating the
lines right here. So going like that, going
around the whole thing, and creating the
lines in that way. And also, we'll need
to go right here and create a little
line like that, a little definition right here. So let's go and
switch the color to orange to make it a
little bit softer. And let's create it in that way, a bit of the bigger
line right here. If it's easier to
start from the top, it's okay, you can
go and do that. Let's go and create this line. And when we have it,
let's go and take a look at everything without our
lines of this sketch. So let's again go to the list, hide if we need to go to some of the areas and adjust some parts right here,
we will go and do that. For example, you can
go and maybe add some color towards
the lines right here. So for example, you've created
something in a red way and you want to go and maybe create it in orange
way, it's up to you. You're welcome to
go and do that. Make sure that you
are not going to other elements with
your lines right here. So if you need to go
and adjust something, erase some lines,
go and do that. When we have the
results like that, we also can think a little bit about the overall sheet
that we've created. So for example, we can go to the layer where
we have our body, and we can work on
this little part right here with our erasa. So let's clean it up in
that way and then let's get back to our layers one more time and hide our layer
with our sketch, and finally go and recreate this little element right here. Let's go and create
one more layer. For example, we can go
straight away from here where we are right now at creating
one more layer here, going back to our
technical pan brush, going to the dark red, orange color and
recreating these details, the same way as we have
them onto our sketch. So firstly, create these ps
that you have on the bottom, adjust everything that you
want to adjust right here, add the color inside, and work onto the fingers
that you have on the top. Take a look at it
from the distance and without the lines that
you have for your sketch, whether you need to go and
adjust some parts or not, you will see it when you
are doing it in that way. If you need to adjust
something, go and adjust it. If you see that some of the
lines are not too perfect, you are welcome to go
and adjust them too. So for example, go right here
to the layer where we have our main shape for the bottom part and if we
need to adjust some parts, we will go and adjust them. If you see that you missed
some colors, for example, right here, you are welcome to go and add the color here too. Now when we have the
result like that, let's do the final
part right here, and we will go and
add some shadows.
6. Shadows & Final Touches: Begin with our shadows firstly
by going to our layers. We will go underneath
our layer with the body, and we will create
one more layer here. Let's change the
color to orange, and with our
technical pan brush, we will go toward the
bottom and we will create a little p right here where
our little line is sitting. Let's hold it at the end. We also can hold one of
our fingers to make sure that we are going
straight with the shep. So adjust the size
if you need to go and end the color
inside when you are ready. Need to adjust it, go to
the key on the top left, go to the freeform method
or Uniform method to adjust the placement and the overall look
of this element. If you want to.
When you are done, you also can go and change
the opacity of this layer, so this is not too bright. You can tap onto the N
icon right here onto this layer and adjust the opacity from
the opacity slider. Now when we have it, let's continue by going
to our next layer, which is our layer with the leg. We'll create one
more layer here. We'll tap on it, and we will use the option
clipping mask. That way we will stay inside the shape that we
have underneath. Also, we'll go to this N icon, and we'll change the
blending mode to multiply because we are
creating the shadows. Straightaway let's go to
the apacte slider and set it to something
around 20, 25%. Now, got our color palette
to select the main color, and we will go towards
the slider with the size. We will adjust the size of it, and we will go toward
this leg that we have right here and we will put
it completely in the shadow. If you want to change
the brush, for example, to something more behaving, you are welcome to
go and do that. So you can go, for example, to the calligraphy folder
and select moon line brush and work with this brush to
add the color in that way. So let's go and put this
leg into the shadow. If you already go and erase the parts that
you don't need. Also, we can go
underneath the main right here and follow the
direction that we have right here for the
mean shape of the main and add the little shadows
going in that way. So for example, going like that, starting to add a
bit of the shadow, going right here to this part and adding a bit of
the shadow here too. When we have it, we will go with the smaller size of our brush going towards the tip that we have right
here on our tail. We are creating a
bit of a shadow right here and then going toward this little part that we have and we will add a bit
of a shadow here too. Firstly, we are elongating
the line that we have for our paw and then going toward the outside part and creating
a shadow going like that. You can go and end the color inside and then we'll
take a look at it from the distance to see
whether we need to adjust the overall
shape right here. For example, we can go with slightly smaller shapes so grab your eraser and adjust
the look of the shadow. When you are satisfied
with everything here, let's go and add the details
towards some other elements. Firstly, let's go and work with our sheet that
we have for the fees. Let's go and create one
more layer above it. We will again tap on this lay and use the
option clipping mask. We will tap on the icon and send the blending
mode to multiply. Let's go and adjust the opacity to again, something around 20, 25% and with the same color, we will go with the bigger
size of the brush toward the bottom part right here and we will add the color here. Firstly, probably we will
need to select the brush rather than eraser and go and
try to do it one more time. Go and repeat in the same shape that we have for our face. Go on like that, you can
hold your line at the end, you can go to the editing
tool over the top to adjust the overall
look of this line. Let's go with
something going like that, maybe slightly smaller. And when we have it
tapping onto the layer, tapping onto the screen, and if we need to
adjust something, make it a little bit more
peculiar or more clean, we will go with our eraser and do what we need
to do right here. If you see that this
is a bit too much, you are welcome to go and adjust the opacity of this layer
by tapping on the icon. For example, let's go with
something around 15%. Now when we have it with the same brush, with
the same color, we can go toward our ears, and we can go toward
the bottom parts of them and add a bit
of the shadow here. Repeat the overall shapes and go to the both sides
with these details. When we have it, we
will go and work a little bit on the inner
parts of our ears. Let's go and find
the needed layer. We'll go toward this layer, we will create one
more layer on top, tapping, selecting
clipping mask. Let's go for now with the
normal blending mode and change the color to red orange
and we will go with ears, the inner parts of them, and we will go toward
these little parts and add a bit of
the shadow here. Going toward these parts, if we need to work with our
eraser, we'll go and do that, doing the same onto
the opposite part too, so trying to repeat what we
did onto the opposite side. Again, if we need to work with our eraser, we will erase it. Now when we have these things, let's go and adjust
the opacity of them. Tapping onto the icon and adjusting the opacity
slightly so it looks nice. When we have the result
like that, straightaway, we can go with the same color and with the smother
sides of the brush toward the cheeks and we can go and end the lines like that to
create some blushing effect. Let's do it on both
sides like that, and when we have the
result like that, let's continue by
going to the men and add a bit of a
shadow right here too. Firstly, let's go and find
the needed lair to go into our lay with the men and again put in one
more lay on top. Tapping on the list,
selecting our clipping mask, going to the icon, and adjusting the blending
mode to multiply. Straightaway, let's go
with something around 20, 25% of opacity. Let's go and select the color. Let's probably go
with orange color. Let's go to our size slider and let's go towards
the ears firstly. We will go underneath
them and we will start to create the believable
shadows right here. Basically, we are
repeating the shape of the ear and then
going a little bit toward the bottom
and starting to continue creating the shape
of the shadow right here. If you want to go down
or if you want to go with a thicker shapes
for your shadows, you are welcome to
go and do that. Let's continue creating
the shadow on the bottom, and we will go and create
something in that way. Then we will move on to the
opposite side and again go underneath the ear and create a little bit of the
shadow right here too. If you want to go and connect it with slide shadow right
here onto the side, you are welcome to
go and do that too. Of course, if you want to
go and add more shadows, you are welcome to do it too. And if you want to change
the blending mode or if you want to change the
opacity of this layer, you are welcome to
go and do that too. And when we have the
result like that, now let's go to our layers. Let's go above all the layers
that we have right here. We'll create one more layer. We will first go to
our color palettes and change the color to white. And if you want, we can go
and make our face a little bit cuter by adding the little highlights
toward the eyes. Let's go with slightly
bigger size of the brush. We'll go to one of the sides of our eyes and we'll put the
eye highlights like that. And when we have the
results like that, let's first go to
our range icon, Canvas, and we will toggle
drawing guide right here to get rid of this middle
line that we've created. And to finish up with
our illustration, let's again go to our last, create one more layer on top, and we will go
outside the shapes, and we will add some additional
elements right here. For example, let's go with
the bigger size of the brush, and let's create some peculiar
little details like that. Adjust this size of your
brush to something smaller, and let's go and add a couple more details going in that way. So for example, create a
couple of these details, go with the dots, go with peculiar little
details like that. Try not to overdo it, and when you are satisfied
with everything, when you are done with adding
these additional elements, we are done with
our illustration. Thank you for
watching this class. Le review if you
liked it and continue subscribing for Markai
videos in the future. Looking forward to
seeing your projects.
 Uni Corn, ⭐Kawaii Art Enthusiast⭐