Transcripts
1. Introduction: Hello, everyone. I'm
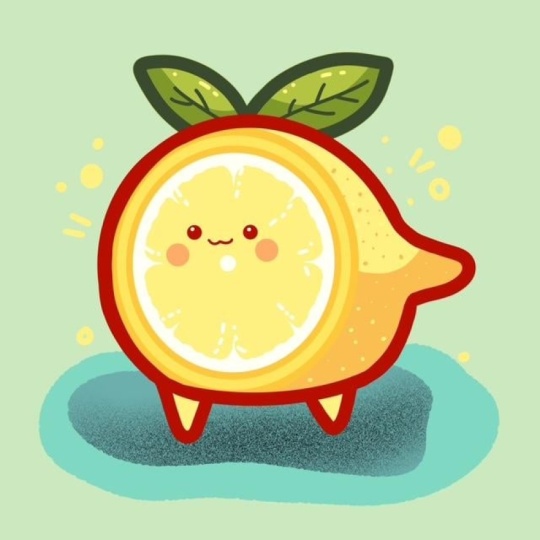
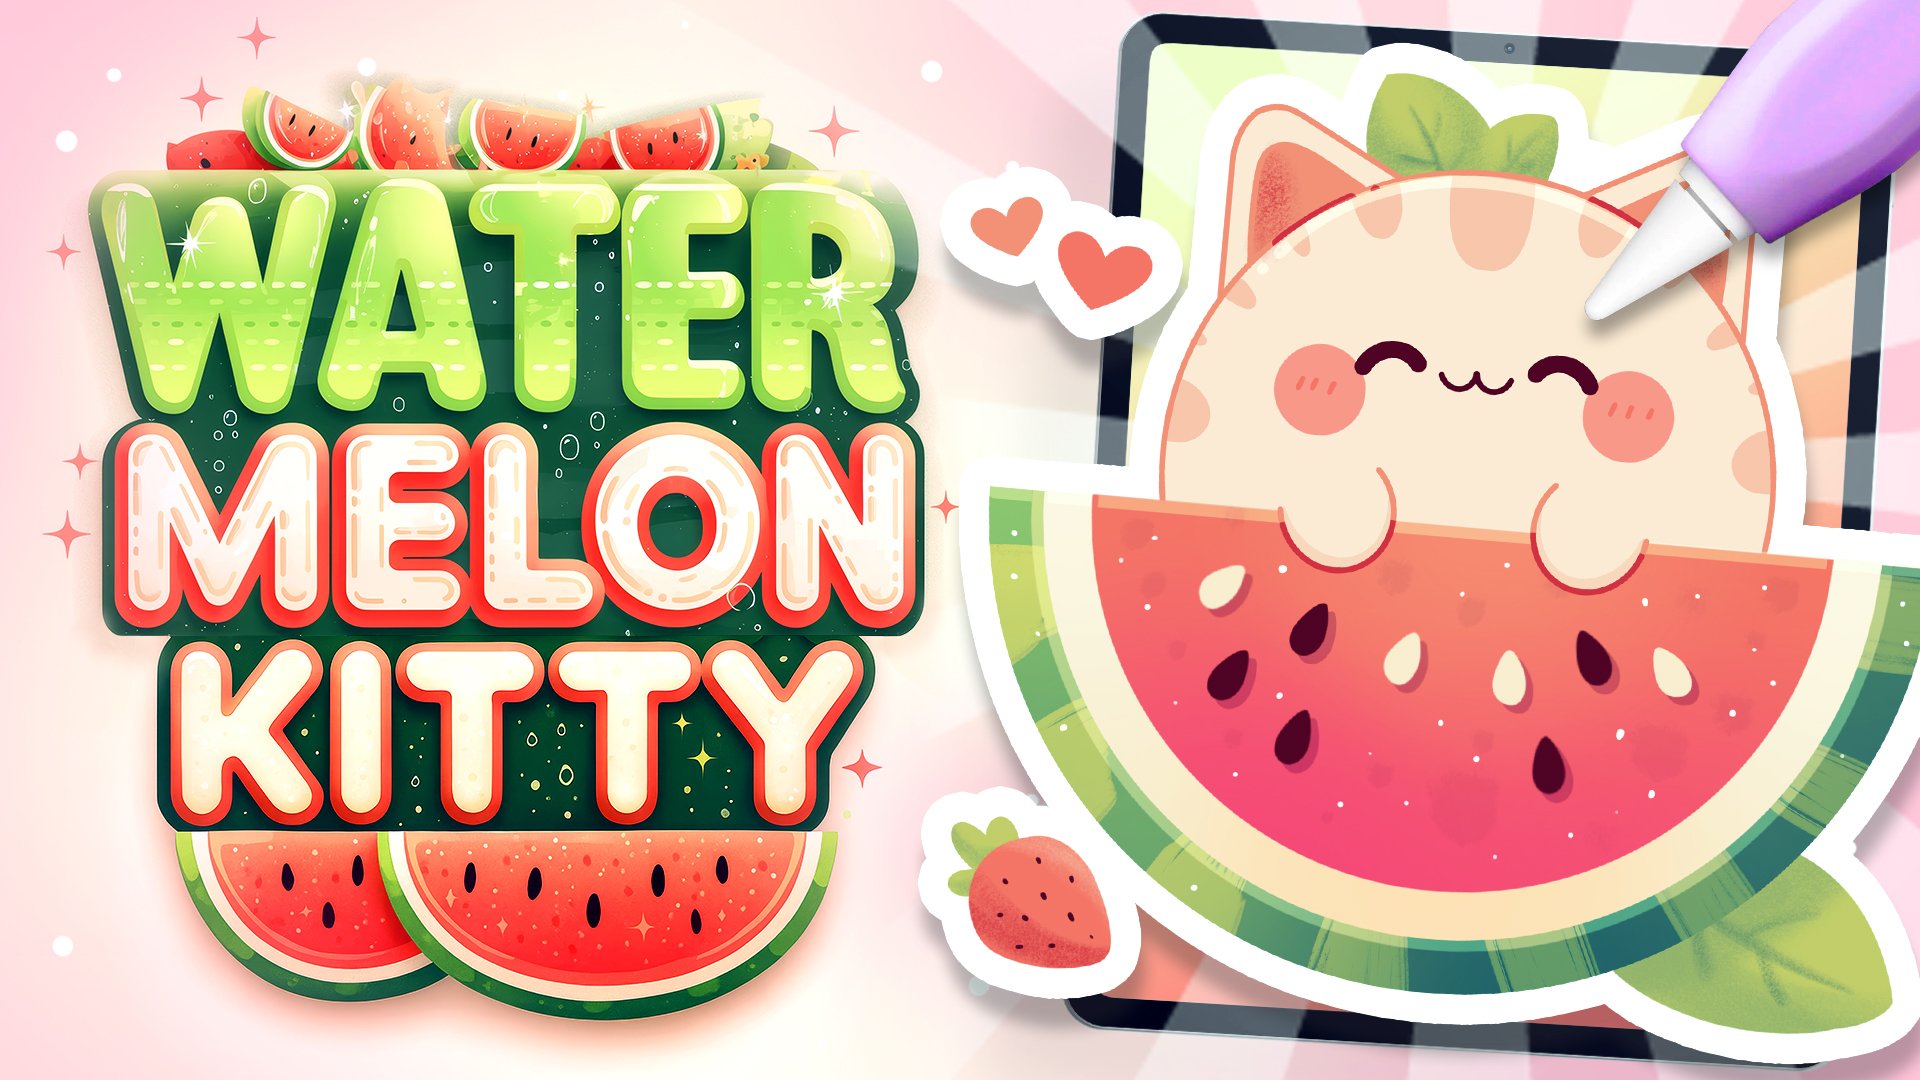
Uni, and in this class, we are going to draw this
cute Kawhi illustration of a Lemon infrocret. During this class, you'll
get familiar with a lot of useful features like
quickshape two, symmetry two, recoloring with reference,
clipping masks, and blending modes, and learn the basics of drawing
in procreate. By the end, you'll not only draw an adorable illustration
you'll be proud of, but also feel super
confident using Procreate. And now let's spend
some time drawing.
2. Base Shape: Begin by deciding what kind
of canvas we are getting VM. Today, we're adding a
standard square canvas from Procrite with pixel weed and pixel
huts at the 2048 pixels. Our DPI are at 300 and our color profile is set as
SRGB with this low number. When it's all done,
heating done, go into our new canvas and let's begin our
preparational parts. Firstly, let's go to the
brush library and we will select the Monoline brush
from the calligraphy folder. As we are creating
a Kai illustration, we want all of our
lines to be very, very smooth and
easy to work with. Let's tap onto our
moonlin brush, and we'll go inside
the brush studio. On the left, we'll go
under stabilization, and we will be playing
with amount of streamline and amount
of stabilization. If you want to go on your own
and adjust these options, you are welcome to
go and do that, try it onto a drawing pad, or you can set these
settings the same way as you see them right
now onto your screen. When you are done with
adjusting the brush, let's hit done and let's go
under the project and rush sap and download
all the materials mentioned for this class. So all the color
palettes and everything. Now when you are done with
downloading the materials, let's go to our color palette. We'll go the palette right here on the bottom and under card to this color palette that you downloaded and we will
pick our first color, and it will be our
dark red color. Now, when we did it, let's
also go to the slider with the size and we will set the size of our brush to
something around 13%. When we are done with it, let's begin working
on our illustration. Let's go toward the middle
part and we will start by creating a rounder shape
on the top like that. We are starting with the
top part of our lemon. Hold your line in
the end and you will see that you snap your
shape to a better shape. You also can lift up your Apple pencil when you are done with snapping it
to a better shape, and you will see that
here on the top, we have a poked up option edit. You can tap on it, and
you will see that you have some notes right here
that you can go and tweak. So for example, we can go and
make this overall shape of the lemon slightly
rounder and we can go to these notes and
we can make it happen. Adjust this shape
to your liking. Let's make it very,
very rounded. And when we have the
result like that, also try to make it positioned
quite horizontally. When you have the
result like that, when you are satisfied
with everything, let's tap on the screen
to accept the changes, and then we will
go over the bottom and we'll do something
similar here. But this time, let's go with
our shape a bit flatter. So again, we are
creating our shap, we are holding it and the end, we are trying to
make it slightly flat and slightly
horizontally positions. When you are done
with snapping it, let's go to our 182, and let's go first
and move the shape slightly down so we will
have a queer illustration. So when we have the
result like that, if you don't like
how this line looks, you can go a little bit
more open with the shape, so not too flat and try
to position it in a way that it fits the option
that we have on the top. So when we have the
result like that, if you accidentally put
something like I did, you can go with your eraser and erase the extra parts
that you don't need. And when we have
these two pieces of the illustration
that we have, we will need to connect
them nicely onto the side. And let's go and do it
on a separate layer. So we will go to our layers, and we will create
one more layer by tapping on the plus icon. Make it convenient for us, let's get back to
the previous layer. We will tap onto the icon
right here onto this layer, and we will go to
the aposti ladder and make it a
little bit reduced. So that way we'll be creating
the next illustration, the next part right here of our illustration
on the new layer, and it'll be easier for us
to see what we are doing. So let's get back to this new
layer that we've created. And firstly, let's go
towards the left part, and we will be
going and creating a rounder connection of
these two parts right here. So with one line the
same way as before, we are creating our
ship and we are trying to match the sheep
with the previous lines. So if you need to go to your editing mode and
adjust the overall sheep, you are welcome to
go and do that. Pay more attention to the
connections that you are doing with this line and with the lines that you
already had before. So adjust the line
to your liking, try to make it pretty rounded. And when you have the
result that you like, you also can go and
take a look at it from the distance to see whether you like the result or not. When you are satisfied with it, let's tap on the screen. And now let's go and get rid of all the extra
lines that we don't need. Let's get back to our layers. Let's go to the previous layer where we have the
reduced opacity. We will select it and we will
go and select our erasa. With the erasa with
the bigger size of it, we will go and erase these
lines that we don't need, and we will need to make nice connections right here
with the previous ship. So if you need to adjust the size of your
eraser, go and do that. Try to make the connection seamless and do the same
onto the opposite side tip. So when we've erased everything, let's go and go to the opposite side and create a continuation of
the shape here, too. Firstly, going
back to our brush, and let's go and do the follow. We will first go
toward this part. You can rotate your canvas, so it will be easier for
you to create this thing. We will go towards the layer that we've
created for this left side. So it will be again
easier for us to erase the parts
that we don't need. And we will go to this
gap that we have right here and create the
thing like that. Again, you can hold your
line in the ends to adjust it with the
editing tool on the top. We will need to make it maybe slightly smaller and a little
bit pointed right here. Adjust it, adjust the placement
of it if you need to. And when we have the
result like that, let's tap on the screen, and let's go and continue creating the
connections right here. Again, going to the
previous line that we had right here and trying to make very nice connections here. You can hold your
lines at the end. You can go and create something
in that way, very smooth, going toward the bottom and
trying to connect our thin right here you can play around
with the shape slightly. You can create something
different from what you already have
onto your screen. Use all the options
that we used before. So if you need to go
and edit something, go to the 18 mode and adjust the parts
that you don't need. Now let's take a look
at our shape and again, we will go firstly to our eraser on the same layer that we are right now on if you have some elements that
you need to adjust, for example, some connections, you will go grab your eraser and adjust the parts that are
needed to be adjusted. Let's go again,
trying to the things seamless and trying to make nice and smooth connections
between the parts. Now when we have the
results like that, let's get back to our previously where we have the
reduced opacity. Again, with the
help of our eraser, we will go and very easily erase the parts
that we don't need. Again, we are paying attention to the connections
between the parts. Let's do it on both sides. Now when we have the
result like that, we have the base for our lemon. Let's get back to our layers. Let's get back to this layer where we have the
reduced opacity. We will tap onto the icon
and make it at maximum. Then we will connect these
two layers together, so we will need to mersa. We will use two fingers. We will put one of
them on the top and another on the bottom and make a pinch movement like that. Now, when we have the
result like that, let's get back to our brush, and let's finish up with the shape that we are
going to be using for our lemon by going to the bottom and adding some
little legs right here. As again, we are creating a Kai illustration that
will be suitable here. So let's first go over
the left side and we will create the
little leg like that. So something similar to
the shape that we used for the bottom
part of our lemon. Make it smaller, make it bigger. If you need to adjust
it, go to the 18 mode. When you have the
first little leg, let's go to the opposite side and create something
similar here, too. Try to put them on one
line so it doesn't need to be bigger on one side than
it is on the opposite side, and the shape should be similar to the first shape here, too. Size wise, again, adjust
it if you need to. And when you are done,
tap on the screen, make sure that you don't have any extra elements that
you don't need right here. If you have something, go grab your eraser and adjust the
parts that you don't need. When we have the
result like that, let's go and add details
right here onto the top. Firstly, we will go toward our layers and we'll create
one more leaf right here. Let's go to the color palettes and change the color
to dark green. We will use the same brush and the same size of the brush, and we will go firstly over the top and we will create
a little leaf right here. So eyeball where the center
of your illustration is, and then let's go and create the line going
up in that way. Again, you can use the holding
of your Apple pencil at the end of the line to make
the nice and smooth line. Adjust it if you need
to when you have it, let's go towards the bottom, and let's create the
second half of our. Again, we will need to
connect everything nicely, so it will be easier for us
to work on the color liter. If you need to adjust
something right here, the curvature or anything, and adjust it to your liking. When you have the
result that you like, take a look at everything
from the distance, decide whether you like the
position or rotation of it. If you want to adjust it, go to the Ao key
on the top left. Use uniform method and go and, for example, rotate it slightly by going to the
green node right here. Now when we have the
result that we like, let's get back to our canvas
by tapping onto the key, and let's go to the
opposite side and create slightly smaller
leaf right here. Doing the same
things that we did before creating a
leaf on the top, the shape of the
leaf right here, if we need to
adjust it going and adjusting it and finishing up the whole fin right here by creating the second half
of the leaf right here. Now when we have the
result like that, let's go and make the size
of the brush smaller. But firstly, make sure that you remember the size that
you are using right now, so it will be useful for us later to make sure that
you know the size, you can tap onto the
checkmark right here, ta your slider, and right here, you will have a little
window with the size. You can see right here onto the top corner of this window,
I have a little minus. You will have the plus if you don't have a
markdown right here. So you can tap on it
and you will have a markdown ta your slider. So when you remember the size of your brush that you
are using right now, let's go with something small. So for example,
something around 6%, and we will go toward the
middle part of our leaves, and we will create the
division right here. So let's create a
little line like that. Again, adjust it if
you need to go toward the side and add some
pattern for the veins. Adjust it if you need to create some nicely looking
effect right here. And when you are done
with the first side, go to the opposite side and create something
similar here too. So when we have the
result like that, we are done with our leaves, adjust them by using
the ki if you need to. For example, we can move
them slightly higher, so we will have more space
on the veins and everything. And when we are done with it, let's get back to
our middle part, and let's work on the
top part of our lemon. We are going to be
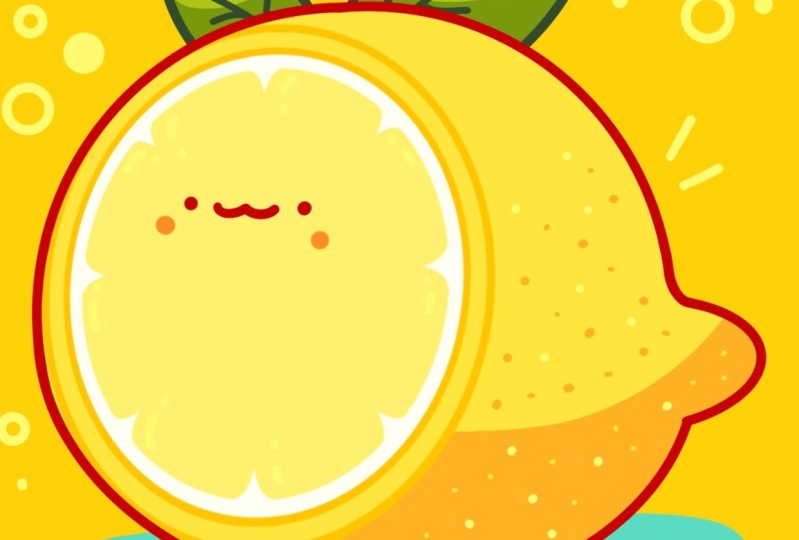
creating some kind of the cut right here.
3. Pulp & Face: For this cut, what we're
going to be doing? Firstly, we will go back to our list and we will
create one more lay here. Tapping on the plus icon. Now, get back to
the size that we use for all of the
previous lines. When we are done with it, let's get back to our
color palette and let's select this
vibrant yellow color. When you did it, let's go
towards one of the sides of our lemon and we will go and create a shape
of the circle. Going with one line and in
the end, we are holding it. Make sure that we are
creating a circle, we'll use one finger and
we'll put it onto our canvas, so it will snap to a
perfectly rounded circle. Adjust the size by moving your Apple pencil
from side to side. This size should be
pretty similar to the overall size of the whole
levem that we are creating. So when we are done with it, let's go to our error key on
the top left one more time, and we will again use
uniform method and we also will go under snapping
right here onto the left. Go into the settings and turn it on snapping right
here into the settings. When we did it, let's
go and do the phone. We will need to find
the center with the shape that we've created
and to find the center, we will need to look for
these two orange lines, one vertical and one horizontal. When you've put your
shape in that way, let's get back to our
canvas by tapping onto our o key and then
for convenience, let's go back to our
layers and we will hide these two layers that
we've created before, the leaves and the main shape. Tapping onto these
two checkmarks. Now, when we have only
the circle like that, let's go and make a
couple of copies of the circle to create
the shape of the lemon. What we need to do is to go
to the layer where we have the circle and swipe
it from right to left and choose the
option duplicate. Now we have the second copy, let's select it and let's
go again to our arrow key. Again, uniform method,
snapping is on and we will need to go toward the nose that we
have in the center. For example, let's
go firstly from the top and we'll drag
the shape slightly down. We will do the same onto
the bottom part here too. It just decides we
will need to have a bit of space between
these two elements, and let's make sure that
the shape is in center too. Again, we are looking for
these two orange lines. When we did it, we are
going back to our list and we will make one more
copy of these elements. Again, swiping the
layer from right to left and choosing
the option duplicate. Now, with this third element, we are again going to our
Ar key uniform method, snapping is on, going towards our top first and doing the
same thing as we did before. Creating the similar shape
to what we have before. Then we position eight, let's make sure that
it is in a center, so when it is in the center, we will tap onto our eo ki and we will go and start
again the colors right here. Firstly, going
towards our layers, we will go to the bottom one, so to the bigger one, and we will change the color to zest. With this color,
we will go towards the middle part and we will add the color inside these elements. Now when we have it,
we will go again to s, go to the middle
part right here to the middle element and
changing the color to white. And with the white color, we are going and eating
the color inside. Now, when we have the
result like that, let's get back to
Ls and we will go to our last little
circle right here, and we will need to
do one more thing. We will need to recolor the shape that we
have for this rim. So what we need to
do is to tap onto this layer and use the
option alpha look. You will see the
checkerboard right here. That's exactly what we need. So we will get back
to our color palette, and we will choose the
color with the title pulp. Now we will go toward
the size later and we will go and recolor
this thing completely, making sure that
everything is recolored so you don't have any gaps
with a different color. When you have the
result like that, we are going back to our layers. We will tap onto
this layer where we have recolored this rim, we will tap on it
and we will choose the option alpha
lock to turn it off. Now with the same color, we will go and edit
toward the middle part. Now, when we have the
result like that, we will go and turn this circle
that we worked onto right now into the so what we need
to do is the following. We will go to range
icon on the top left, we will go under canvas, and we will toggle
drawing guides. Now you can see we
have these cells. It's not the option
that we need, so we will go under
any drawing guide and we will go under symmetry. Now, we will need to go under options and we will
choose the option radio. You can see now we have the very nicely cut element right here, so we have the pie slices. When we have it,
we will hit done, and then we will go and
tap onto our erasa. And with a smaller
size of the eraser, we will go so we're in the
lines that we have right here, and we will be cutting
the parts right here. So let's go and start doing
the things like that. You can see we are
doing it readily. We are not only cutting
the piece on the top. Let's go and erase the
parts that we don't need. So you can work with the bigger size of the eraser or with the smaller size of the eraser
if it's easier for you. As if you a can go to your brush and adjust the
parts that you overdid. For example, we can
go and maybe make this cut a little
bit more pointy. So you can adjust the
shape very easily. Again, you can go and maybe work onto the overall
shape right here, make it a little
bit more rounded or when you have the
results like that, let's move on to the next
little part right here. Again, you can play a little
bit around right here, maybe create the smaller
cut or bigger cut, create some pattern
with it or something, and when you have the cut, go and erase the part
that you don't need. Where on the overall look. So if you want to go and maybe make this whole thing
slightly rounder, you are welcome to
go and do that. If you need to get
back to your brush and adjust the parts with it, you are welcome to
go and do that too. When you have the
result that you like, we will go and turn off our draw assist by going
first to our wrench icon, and we will toggle
drawing guide right here. And then we will go to our
list and you will see that this layer that we have
this pulp on is assisted. We'll need to tap on it and use the option draw assist from
the list to turn it off. Now to make it more
convenient for us, let's go and select
these three list that we've created for
the pulp elements. When the first one is selected, we will go to the
next one and swipe it from left to right and
do it one more time, and we will use
the option group. Now let's get back to the two
layers that we had before. We will unhide them. And what we need to do
is to get this group, so we can go to this
new group option and we will drag it
toward the left side. Let's go to arrow key
on the top left and we will try to fed this element
right here onto the left. We also can play a little
bit with the position of it and maybe with a bit
of a perspective right here. We can go and use the option
distorted right here. Let's go to where the nodes and let's try to fil this
element in a way that it will look nice and we can create some of the
perspective right here, connect it nicely on the top and on the bottom and play a bit with these little handles and
little toggles right here. So for example, let's go
with something like that, and when we have the
result that we like, we can straightaway
go to our layers, and what we need to do is to grab our layer
with the lines, select it, and we
will need to drag it above our layer with
this middle part. Now, when we have the
result like that, let's go and color the elements
that we have right here. So we will start with our
mean shape of dilemma. Tap ta the layer. Use the option reference. Now we'll go
underneath the group that we have right here and
create one more layer here. Now, change the color to zest and let's go and edit right
here to the middle part. As we'll go toward the
little legs that we have and recolor these
two elements too. Now when we did it,
let's get back to our layers and let's find
the layer with our leaves. We will do it one
more time. We'll tap on the layer and use
the option reference, and then we'll create one
more layer and put this lay underneath our
layer with our leaves. Now, changing the
color to vibrant yellow green and adding the color right
here to our leaves. Now when we have the
base for our lemma, let's go and work onto
the facial features. Firstly, we will go to our layer where we
have the red line. We will go and select
our dark red color. We will use either
the same size of the brush or a little bit
bigger than we used before and we will go sowere
in the middle part of pulp and we will put
two dots right here. You can adjust the
size to your like and you can try it out
a couple of times. You can play around with the position of these
elements. It's up to you. When you found what you like, when you have the eyes, let's go and make the size of
the brush smaller. For example, four person, and let's go right
between the eyes and let's create a little
smiley mouth like that. Again, if you need to
play around with it, if you need to maybe try
it out a couple of times, you are welcome to
go and do that. When you found what
you are looking for, let's go and change the
color to this orange. And with the bigger
size of the brush, even bigger than the size
that we use for the ice, we will go underneath
the ice and we will put the dot
here for the checks. Again, if you need to try
it out a couple of times, you are welcome to
go and do that. Now when we have the
thing like that, we are done with the base, so let's move on to our
shadows and highlights.
4. Shadows, Highlights & Final Touches: To start with our
hos and highlights, let's get back to our layers, and we will again go to this layer where we
have the reference on. We will tap on it, and we'll
turn it off from this list. Now, go into our layer with the leaves firstly because
we have it on the bottom. Let's go and select it, and let's create one
more layer above it. We will tap onto this
new layer and we will use the option
clipping mask, and we also will tap onto the icon and change the
blending mode to multiply. Go into the opacity
slider and let's go and reduce it slightly
to, for example, something around 50 parisen
then we will get back to our color palette and change
the color to green shadow. Adjusting the size of the
brush if you need to, and let's go over
the bottom part of our leaves and create the
shadows going in that way. You want to play around with a position or anything
of these leaves, you are welcome to
go and do that. When you are done
with the leaves, let's get back to our layers. Let's go to this layer where we have the
base for our lemon. Let's create one
more layer above it, tap on the leer, clipping mask, and I can multiply
blending mode and something around 50% of
opacity for this layer. Changing the color to orange
shadow and going toward the bottom right here
of our lemon and starting to create a
little shadow here. You can go with
some peculiar shape or you can go maybe and
create something different, maybe something
simple, going toward this bottom part and adding
the color like that. Play around with this thing. If you want to maybe
create a different shape, you are welcome to
go and do that. When you have the
results like that, let's go and add a bit of
texture to the top part. Go in with a slightly
smaller size of the brush, and let's go and add
some little dots. You can go and vary
the size of the brush. You can go with bigger
size, smaller size, you can go maybe with
even bigger elements, it's up to you. Try not to overdo these parts, add a couple of these details, and create something
in that way. Now when we have the
result like that, we can make it even nicer
by going to our erasa. Again, with a smaller
size of the eraser, we can go toward the shadow
and we can continue adding the texture here onto this
part with our shadow. Going like that, starting to
add the details in that way. And when we have the
result like that, we are done with our shadows. Let's move on and start
adding some highlights. For the highlights, let's
get back to our layers, and we will go above all the layers that
we have right here. Even above the layer
with our lights. Let's create one more layer
here and let's go firstly to our color palette and select the color with
the title light yellow. With the light yellow color, we will go toward
the leaves and we will go with little dots, little lines with
the bigger size of the brush or with
a smaller size of the brush to the opposite side from our shadows and we will
add little highlights here. You can try to create a
couple of these details, take a look at them
from the distance. If you like how it looks, let's continue by going
to our zas right here. Again, we will add some
texture to these elements. Let's again go and add
some dots right here to create a nice effect
for our texture. If you want to go
to the bottom part to make a couple of
these dots here too, you are welcome to
go and do that. Now when we are done
with this task, let's get back to our
color palettes and switch the color
to white, firstly, we will go toward the eyes with slightly bigger
size of the brush, and we will put the dot right here to create
the highlights. Try to put them on one
line and on one side, and when you have the
results like that, let's continue by going toward this little part of our pop, and we will go and add
some highlights here too. Again, going toward all of
these elements and starting to add little details in the shape of the dought and little lines. Try to make them consistent and try to make them cute and nice. Now when you have the
result like that, we are done with our details and with our
overall shape of the lemon. But if you want to create
a full illustration, the full fledged illustration, we can go and add
some details outside. So firstly, let's go and select every layer that
we have right here. We know how to do that. When
the first one is selected, we are swiping the next
layer from left to right. We can do it with a group, and we are going toward all of the layers that
we have right here. And when all of
them are selected, we will first go
to our error key. We will go again to
our uniform method, and we will go and reposition
our sheep by again, looking for these two
orange lines, one vertical, one horizontal, or at least one vertical or one horizontal. Find the placement
for this element. Try to position it
somewhere in the middle. When you add down with it, let's again tap onto our row key. And then let's go back to our last and we will go to our
background color layer. Let's switch the color to
this background color, and then we will one more
time go to our layer. We will go to the bottom and we will create one
more layer here. Firstly, let's go toward
this layer where we have the clipping
for our leaves. We will create one more
layer here and we will drag it underneath the
layer with the leaves. Now onto this layer, let's go to our color palette, and let's select the color with the title C. So with this
color and with the same brush we will go underneath our
little lemon to create a little splash right here
or some kind of a paddle. So let's go and create a
peculiar shape like that. Try not to create it
in a too open way. If you need to try it
out one more time, you are welcome to
go and do that. For example, let's go with
something going in that way. Close the shape
so you don't have any gaps and then add
the color inside. Now, when we have it, let's go again and create one
more layer on top. Let's go and select the color
with the title blue green, and we will need to drag this layer underneath the
layer that we have right here. Let's select this layer and
let's drag it underneath. Now, we will go and create the second layer of the puddle. You can go again and play
around with the overall shape. For example, we can go a
little longer with the shape, close it, drag the car inside. If you want to maybe go and
create something different, you can go and create
something different. You can go and maybe add some cuts right here
to add some interest. You can go with a bigger size of the eraser or with a
smaller size or the eraser. Add some peculiar details, add some interest
to the picture. And when you are
done with this task, let's go and do one more
layer of this plush. So one more time,
go into our layers, creating one more layer and
dragging it to the bottom. Holding it and drag it underneath this layer that
we are working on right now. Changing the color to light
green and going towards the very bottom part
right here to balance everything out and creating another little
puddle right here. Again, drag in the color
when we have the closed sap. If you want to maybe play runs with the shape,
go and do that. Adjust it if you need to add maybe some little
peculiar details, maybe some cuts or something. When you are done with it, take a look at everything that
you have right here. If you want to adjust
something either one by one or by selecting all of the list that we
have right here, we can go to our Aoki
and, for example, go into the free form
method and let's make this puddle lit
a bit less open. Let's create something
you. In that way, if you want to adjust the
placement, go and do that. When we have the
result like that, let's get back to our
list and let's create one more layer above our
little puddles right here. Now, go into our color palette, go into the light yellow color, and let's go outside the shape, and let's create some
peculiar little details here. We can go and add
some little lines, some little dots, something interesting right here to
finish up our illustration. Again, you can use all the
options that we used before. You can go and maybe hold
one of your fingers on the screen to create shapes
that will look nice. You can add the color
inside or you can keep them with little
dots right here, little open elements, and it's up to you how many of
them you want to add, but try not to overdid. And when you have the
results like that, we are done with
our illustration. Thank you for
watching this class. Review if you liked
it and continue subscribing for more KAI
videos in the future. Looking forward to
see in your projects.
 Uni Corn, ⭐Kawaii Art Enthusiast⭐