Transcripts
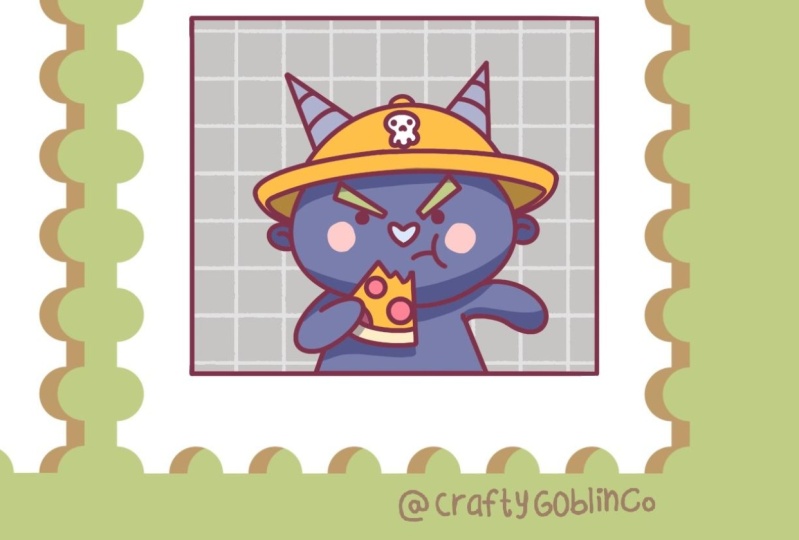
1. Introduction: Hello everyone, I'm
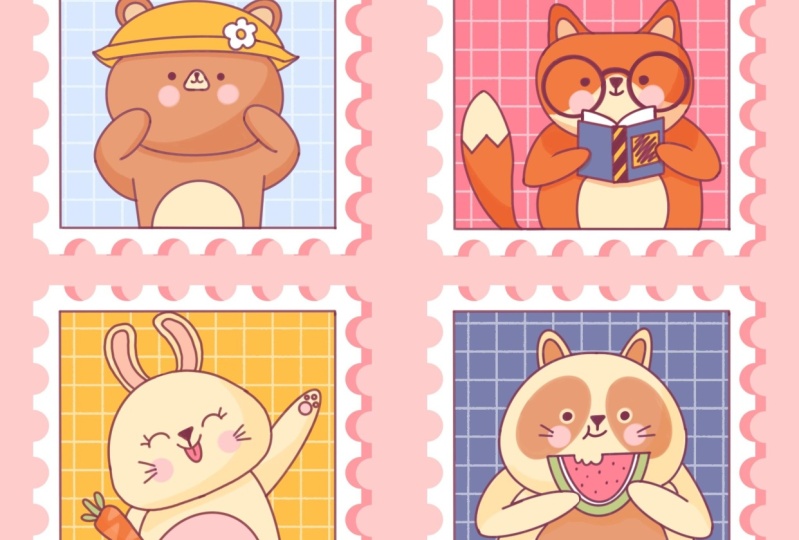
unique and easy. This class we'll draw a few cute both stamps with animals. These class doesn't require any prior experience
or fancy tools. We'll start from scratch
and who they using simple techniques
throughout the process, everything you'll see will
be happening in Procreate. However, if you
have other software or one to try
traditional materials, you are welcome to join if
you are ready to start, Let's jump right. Insects.
2. Preparing the Canvas & Making Colorful Stamps: Let's start our today's class by deciding what kind of Canvas
we are gonna be using. You can see it is a very
simple square canvas because both pixel width and pixel
height are 2048 weeks apps, if you would like to use any other dimensions for a Canvas, just go for it. S for DPI, we are at 300
and S4, the color profile. We are using sRGB with this low number
when it's all done, let's hit Done and we will be redirected to our new canvas. And now we need to decide
what kind of colors we are going to be using
throughout the whole class. You can go to the Project
and Resources tab. You can download
the color palette and you can follow along. While you're still here
under the Resources, download the brushes that we
are going to be using today. Today we are creating
some post stamps and these brushes would
be really helpful. So now download everything
that we need and let's start our class by changing
the background color. Let's go to our layers, and let's go to the
background color layer. Let's tap on its deselect. And if you have downloaded
the color palette, you will see it
on the board Sam, and we will go to the first
color in the first row. So let's tap on it. And this way, we will change
our background color. Now when we have it, we
are ready to move on and we are ready to
put our first step. We will do it by going
to our folder with the brushes that we have
downloaded from the resources, you can see that we have
three brushes here and we will be using
post stamps square, if you would like to explore
that sewer main ones, you are welcome to
do it later on. So now let's select this
poor stamp square brush, and we will go and
change the size of it. So go into the left top
slider and we are setting our brush at 65 per
cent when needed it, we are ready to go and change
the color of our brush. So I go into the color
palettes and you can see that we have two options of
how we can use the scholars, the compact view, and the cards. We will be using cars because
they have all the colors, names and they are ready
for you to be used. When we are under cards, ledgers go to this color
with the name stamp. We will tap on it to select and with this scholar
and with this brush will get back to our Canvas and we will put just one
dealt with our brush. Go to any place that you
like onto your Canvas. And when you have
something like that, we are ready to move on and we are ready to add more details. And the first thing
that we will add will be a little frame
inside of this shape. We will do it with
a different brush and with a different color. And later on, all these
plays that we will create right now will be
recovered in a different color. So now let me just get back to our brush library and we will go to the
calligraphy folder. Into the calligraphy folder, we will choose monoline brush. We will get back to our
slider on the top-left, and we will set this size
of this brush at 2%. When you are ready with
this task, ledgers, get back to our color
palettes and we will select the color
with the name lines. Now when we did it, we are ready to move on and we are ready to add the frame. We will do it only
different layer. So let's just get
back to our layers. And firstly, let's rename
this layer with this tab. We will tap on it, we
will choose Rename, and we will name it as tap. And now let us go to this little plus
icon and we will create another
layer straightaway. Let's rename it as frames. So one more time we add
tapping on the layer, we are choosing Rename and we are doing within the same frame. Onto this layer, we
will create this frame, but we don't want
to do it manually. We want to use one instrument
that Procreate has. So when this layer is selected, we are doing the following. We go into the wrench
icon over that soap left. We are going under Canvas and we are choosing
Drawing Guide. So let's toggle it. And you will see that we
have some grid that is going through the whole
shape of our canvas. That's exactly what we need, but we will need to adjust
it just a little bit. So let's just go to edit
drawing guide into this menu. And you will see that you were redirected to a
different window. And here we have some
panel on the bottom. We are using 2D grid, but we will need to go to the bottom right
corner and we will need to toggle assisted draw it. When we did it, we
are ready to go to the top-right and we
are ready to hit Done. So now if we go to our Canvas, if we zoom in it so these
little pores that we have, we will be creating
the street lights. So ledgers go firstly and
create one vertical line going from top to the bottom of
our stamp on the left. Let's go and do that. You can see how easily
you can do that. And when you have this
first line on the left, Let's move on to the right side and we will do the
same thing here. So let's just go and create
this vertical line there. So when we have these
two vertical lines, Let's create two
horizontal lines to connect them together. Let us go firstly, ordered soap and we will create this horizontal
line there. Try to connect the corners nicely and try to make no gaps. When you have it on the top. Let's move on to the bottom and let's do the
same thing here. Try to create no gaps. If you have some lines
that are going a little bit beyond the
frames like here, you can just grab an eraser tool and very easily erase this part. So now we have the frame and we don't really need this
assisted drawing anymore. So let's just go
and toggle it down. So we are getting back to our
wrench icon one more time. We are toggling
drawing guide here, but this is not enough
if we just go back to our canvas and if we
create some lines here, you will see that
we are still going inside this little grid
that we had before. So we will need to
do the following. We are getting back to our
layers and you can see that earlier with the
frame is now assistant, we will need to turn it off. So we will tap onto
this layer and we will select Drawing
Assist from this list. And now if we just get
back to our Canvas, we will create our lines very
easily without any grid. Now when we have our frame, we need to put it right in
the center of our posts, and we will do it by
using the transform tool. Transform tool is this little
arrow key on the top-left. So let's tap on it
and we will see that we have again some
panel on the bottom. We will be using uniform method and we will need
to go to snapping, and we will need
to toggle snapping into this little
window when we did it. If we get back to our canvas and if we move our shape here, you will see that we
have some lines go up and down when we
found this grows. So one line is going vertically and one line is
given horizontally. That means that we are right in the center of the
previous sheet. So when you find it, alleges deselect everything by hitting our arrow
key one more time. And when we have the result
that we are ready to continue and we are ready
to add more details. And the first thing that we
will do here will be adding the shadow underneath our
layer with the post-lab, we will do it very easily. Let's just get back
to our layers and we will go to our layer
with this tab. Let's select it and we will
need to make a duplicate. So we will go to
this layer and we will swipe it from
right to left. We will choose Duplicate. Now you can see that you
have two layers with similar content and we will
go to the layer underneath. So to the bottom one, we will tap on it and
we will choose Rename. We will add stamp shadow here. Now when we have it, we will need to adjust it. So firstly, we will
need to go and we will need to change the
blending modes of it. We are adding different
visual effects by changing the blending modes. And blending modes
are different ways your layers can interact
with each other. So to change the blending mode, we will need to go to this icon and we will need to tap on it. You can see there is
a list and we are going for multiply
blending modes. When we have selected, we need to go and change the
opacity level of this layer. We don't want it
to be very bright, so we will need to make it a
little bit more transparent. I go into this opacity
slider on the job. We can do our opacity changes
in two different ways. Firstly, we can go
to this slider and we can grab our handle and mood. So we're in the left until
we reach 50 per cent. Or we can go to this title max and we can write down 50 here. Now when we are ready, we will need to adjust
the color of this tamp. So we will do it
again very easily. Let's tap onto this layer and
we will choose alpha lock. When we are selecting
Alpha lock, we are working on to the areas that we have
on to this layer. So we are not adding
more details. We are going only
inside the shape or the shapes that you
have onto this layer. And we can add the
color on you there. Now when the Alpha
Lock is selected, we are getting back to our color palettes and we will
select a different color, so it will be pinks. Let's say one is to select. And now we will go to the
top-right corner and we will drag and drop our
color to this area. Let's make sure that we
did everything right. So we are getting back to our
layers and you can see that our layer with this temp
shadow is now pink. That's exactly what we need, but also we will need
to go and change the position of this layer
so it will look as a shadow. So when this layer is selected, we are going back to
our Transform tool, which is our heirarchy
on the top-left. Let's tap on this to select, Let's use uniform method
and let's use snapping. We will move our shape just
a little bit to the right. When you have
something like that, alleges deselect everything by heating our arrow
key one more time. And now when we have
these allege us get back to our layers and let's make eric and clean here. So we will go and
select every layer that we have and we will
put them in the group. So when one layer is
selected, when it's blue, we will go to the
other layers and we will swipe it
from left to right. When you have
something like that, Let's just go to the soap
and we will heat group, we will rename this
group as bare. And when we have this group, we are ready to make
more copies and then we will position
them onto our canvas. We will do it the same way as we did with our stamp layer. We, I go into this group, we are selecting it and we
are swiping it from right to left to just duplicate
straightaway. Let's rename it as folks. Let's do it one more time. So go into this new group. We are swiping and from right to left choosing Duplicate
straightaway, renaming it as Bonnie. And the last time, again swiping R-group
from right to left, choosing x0 replicates entry, naming it as cats. Now you can see that we
have arrogant position on one place and
we will need to go grab our arrow key
and we will need to position them
onto our canvas. Let's just go firstly to
our group with the folks. We will select it. We will go to our arrow
key on the top-left. We are using uniform method. We are using snapping and we are just moving our
group to the right. You can see that we
have some lines going through the middle part and
for the top and the bottom. And that means
that we are moving our shape on the same line. So we will need to follow these three lines that
are going horizontally. When you have them, we are deselecting everything by hitting our arrow
key one more time. Going back to our layers, go into our group
with the bunny, select, and going back to our arrow key and
just move it down. This time we are following these three lines that
are going vertically. When you have it led, just deselect everything
by hitting our arrow key. And one more time, we are
getting back to the layers. We are selecting the
group with the cat. And one more time we are
going to our arrow key and we are moving our group
down to the right. Follow the lines. And when you are done LED just heat are heirarchy
one more time. And let's position everything
strictly in the center. So we will get back
to our layers and we will select all
of our groups. So when one group is selected, I go into the next
one and we are swiping it from left to right. Let's do two more times with
the rest of the groups. When we have it, we are getting back
to our arrow key. We are using uniform method, we are using snapping, we are doing to our
Canvas and we are finding this intersection
with the orange lines, one vertical, one horizontal. That way we know that all of our stems are right
in the center. When we are done, Let's deselect everything by heating
our arrow key. And now we are ready
to move on and we are ready to
add more details. So firstly, let us go
back to our layers and we will go to the
group within the bear. We will go to the layer with this time and we will
create one more layer here. So let's tap on the plus icon. We will rename it as
background color. We will be adding the color to this middle part to our frame
insight onto this layer. So we will need to prepare
our layer with the frame. Because if we go there
to the new layer and if we try to put
the color inside, nothing good will happen, will be filling the whole
canvas with the colors. So we will need to
do one more thing. We will go to our
layer with the frame. We will tap on it and we
will choose a reference. Now, if we get back to earlier with the background color and if we go to our color palettes and select a different color. So e.g. this time, let's go with a light c and
stamped backgrounds selected. And we will go and putting the
color to this middle part, you can see that it
is working and we will need to do it
three more times. So let us get back to
the earliest ledgers. Go to our group with the folks, go into this template, you're creating one
more layer above, renaming it as background color, go into earlier with the frame tab and then
it's choosing reference. Now going back to earlier
with the background color, going back to our color palettes
and selecting the color with the name pink stamped
backgrounds with this color. When I go on inside
our frame and we are dragging and
dropping the color here. And let's continue by
going back to our layers. Go into the next
folder with the bunny, go into this template layer, creating one more layer above, renaming it as background color. Going back to earlier with
the frame, it's happening, it's choosing reference, getting back to earlier
with the background color, going back to our
color palettes, selecting this orange stamped backgrounds with this color, go in and dragging and dropping the color
inside the frame. And the last time, let us
get back to the layers, go into our folder with the cat, select an earlier with this stamp and creating
one more layer above, renaming it as background color, go into the layer
with the frame, it's happening, it's
choosing reference, getting back to earlier
with a background color, going back to the color
palettes and selecting this blue stamp backgrounds with this color going inside the frame and dragging
and dropping the color. Now we will do one more
round of adding details, and we will do it with
a different brush. So firstly, let us go to
our brush library and we will find this brush that you downloaded from the resources, which is called grid. With this brush,
we will go back to our color palettes and we will select the color
with the name stamp. And we will go inside our colored parts and we
will add the grid here, but we want to make
everything accurate so we will create one more
layer above ledgers. Get back to our layers. We will go to our
group with the bear. We are selecting the
background color layer and we are tapping
on the plus icon. Let's rename it as grid. To make everything
very accurate, we will need to clean this
layer to a previous one. So it will work the same
way as an alpha log, but it will be only
different layers. So if something went wrong, we can go and start
all over again. We will need to do this. Let's go to this
layer with the grid. We will tap on it
and we will choose clipping mask onto this
layer width and grid. We will zoom in our Canvas to the first frame
and we will go inside and we will add this grid here just without an
holding our Apple pencil, we are going alone the whole
shape and add in this grid. Also, let's get back to
our layers and let's set the opacity level of this
grid at 50 per cent. How to do that? You
will need to go to this icon and you will need
to write down 50 right here. And now Lynch's go alone our groups and let's do the
same thing there as well. So we are zooming in our Canvas to this
second post stamp. We go into the fox group where I go into the
background color, creating one more layer above. Let's go strictly and
rename it as great. Let's clean this layer
to a previous one. So we at SAP and in it we are choosing clipping
mask straightaway. Go into this and I can add, we're setting our
opacity at 50%. When we did everything right
here we go into our Canvas, we are doing inside
of our frame and without an holding our Apple
pencil with one stroke, we are creating the grid here. Now let us do the same
to the remaining groups. So go in again to Arles, go into our group
with the bunny, go into the background
color layer, creating one more layer above, renaming it as great, Let's clear this layer
to a previous one. So tap and choosing
clipping mask, go into the an icon and set
our opacity at 50 per cent. Now getting back to
our canvas and with one stroke creating
our grid here. The last time, going
back to the earliest, go into our folder
with the cats, go into the background
color layer, grades in one more layer
above tapping in it, choosing, Rename and
naming it as a grid. Let's clean the layer. So tap in and choose
clipping mask, go into the icon and setting
the opacity at 50 per cent, getting back to our
canvas and with one stroke created
our grid here. And when we are ready
with this task, all the preparations are
done for now and we can move on and we are ready
to create our sketches.
3. Bear: Sketch: Alright, let's start making a sketch for our
first illustration. So firstly, let us
go to our layers and we will go to our
folder with the beer. For convenience, we can go and collapse all the groups above. So to collapse the group, we will need to go to the group. We will need to go to
this little v icon and we will need to tap on it. So let's go over the body and the folks who will collapse these groups when you have it, Let's go inside our bare group. We will go to
earlier we the frame and we will create
one more layer above. So let's tap on the
plus icon straightaway. Let's rename it as sketch. When we are ready, Let's just go and grab another brush for our
application parts. So we will go to
our brush library and we will go into
the Sketching folder, into this kitchen folder, we will grab procreate pencil. If you would like to use any other brush for
sketching part, you are welcome to do. So. When we are done, we will go to our first stamp and we will start by
creating a circle. We are using the same color
that we used for our lines. So now let us go and we will
create the first shape. Our friendship will be
a very simple circles. So we are going to this shape. We are going inside the
frame and we are creating this circle without an holding our Apple pencil
just with one line. Let's go and do that. At the end of the line, hold your Apple
pencil and you will see that you snapped your sheet, that you are creating
a better one. You can see now
it is an ellipse, but we will need to create
a perfectly round circle. Without an holding
our Apple pencil, we will hold one of our
fingers on the screen. You can see that it snaps to
a perfectly round circle. And if we need to adjust it, we can unhook everything and we can go over the top
to aided sheep. Here, we can make it
bigger or we can just go and move this
shape to the center. So when you are done
with everything here, when you are satisfied with
the size and the position, Let's tap on the screen
with one of our fingers. Now when we have the sheep, we will need to adjust
it just a little bit. We will make it a little
bit wider on the bottom and we will make it a little
bit narrower on the top. So we will do it in that way we are doing to our
Transform tool, which is the arrow
key on the top-left. And we are going to the warp
right here on the bottom. So let's tap on the word. You can see that we still
have this bounding box, but also we have some intersection with the lines inside of this bounding box. And that means that we
can go to any place here and we can
adjust these places. So not only the corners, but all the places that you can see onto this bounding box. So as I mentioned before, let us firstly go to
the bottom and we will go to this node
on the bottom right. We will grab it and we
will move it to the right. When you have
something like that, Let's move on to
the opposite side and we will do the
same thing here. Go into this node, grabbing
it and moving it to the left, try to make it even
on both sides. And when you are done, Let's continue by
going to the soap. And firstly, we will go to the middle part and
we will grab it here. We will move this shape down. So let's just go to the
middle part on the top. Let's hold our Apple Pencil here and let's
just move it down. When you have
something like that, Let's go to this side and we will move them
toward the center. So firstly, when I go
into the top right, we are grabbing our nodes and we are moving it
toward the center. When you have something like
that, Let's do the same. On the other side, go into the notes, grabbing it and moving
towards the center. If you want to adjust the shape even more, you can go for it. You can use the warp or e.g. we can go to the
free form method. So let's go there. Let's tap on the free
form and we will go to the top nodes in the middle
and we will move it down. So we are somehow squishing it. When you have
something like that, let's just deselect
everything by hitting our arrow
key one more time. And now we have this shape and we are ready to
add more details. So firstly, we will
go to the top and we will create a vertical line
going from top to the bottom. We will be finding the
middle part into our sheep. So let's just go and
create this line. Try to find the
approximate center and at the end of the line, hold it if you need to
adjust it even more. If you need to move it, go over the top to edit shape. You can move it here, find the approximate center
by moving your line. And when you're satisfied
with everything here, Let's tap on this green
with one of our fingers. When we have these, we will need to create a horizontal line going through
the center of our shape. So doing it the
same way as before. We are doing so one
of the sides and we are creating this
horizontal line. Who owned the land and the
ends and make it straight if you need to address it even more over-the-top
to aided sheep, move it here five and
approximate center. And when you are done, Let's tap on the screen
with one of our fingers. Now when we have this
intersection and when we found the approximate center of our shape, Let's continue. Agent are guiding lines. So firstly, we will go to
this intersection right here. And from this intersection
we will create two lines go in at 45 degrees, one on each side. So let just go from this intersection and we will create the first-line going up. When you have the first-line, Let's go to the opposite
side and we will create the same line
on the other side. So we will mirror this
line that we just created. Tried to make them
even on both sides. And when you are done, Let's continue
adding our details. So when we have
something like that, we will go underneath
our shape of the head and we will create
some kind of a body. So firstly, let us go and
make this shape a little bit smaller because we don't have
enough space on the bottom. I getting back to our
arrow key on the top-left, we are going to uniform method
and we are grabbing one of the corners and
we're scaling it down. So e.g. we can go
to the top node on the right and we will
drag it diagonally down. So when you have the
result that you like, the size that you like, lead, just position it the
way that it will be in the center and the way that we have some space on the bottom. When we are done, alleges go to our arrow key
on the top-left, and let's tap on it to
deselect everything. So now we have this space
on the bottom and we will create two lines
for our body, e.g. ledger step a quarter from
this side and we will create a line going down and it will
be connected to our head. It may be very straight or
it might be descending. So when you have it on one side, Let's move on to
the opposite one, and we will do the
same thing here. So step and a quarter
from this side, and we are creating
the same line that we have on the left, but it will be mirrored. Try to keep the distance between this line
that you've created and the distance
from the middle line equal on both sides. When you have this thing, we will go and we will
add some little arms. So firstly, let us go and
create our guiding lines. We will go to these
intersection and to the opposite intersection
on the other side. And we will create a line like that when we have
it on one side, Let's move on to
the opposite side, and let's do the
same thing here. Now when we have
this guiding lines, we will go and turn them
into the ALIP sets. So let just go and
create the olives, these big that we
have, our line. When you have it on one side, Let's move on to
the opposite one and let's do the
same thing here. Now we have the top part of the arms and we will need to
connect them with the body. So we will go to
these parts and we will go and create a
little curve there. So let's just do
something like that. And again, when you
have it on one side, Let's move on to
the opposite side, and let's do the
same thing here. We are going to the
bottom of our ellipse and we are creating
a curve and again, try to make it similar to what you have on the opposite sides. When we have it led, just go to the middle part of our body and we will add
a little Tommy here. We will just go
and create half of the circle or half
of the ellipse here. Just step a little
bit from this side. And let's create these sheep. When you have
something like that, Let's move on to art. So parts to the hats and we will be adding
the details here. So firstly, let us go to the middle part
and we will start by creating the facial features. We will stop a little bit from this line that we have
on the horizontal axis. And we will start by
creating a little snout. For the snout, we will
use this shape like that. It is a very rounded triangle. Or if you want, you
can just go and create a little ellipse or
maybe a circle here. So let's just try to
repeat this shape. Just reminding you that to
make a very cute illustration, we will need to go a little bit up from this
horizontal line. When you have it, you can
grab an eraser tool and erase everything that you
don't need here in the middle. So it will be very clean and you will be sure that you are
not missing out something. So when you have this shape, Let's just go and
add a little nose. So we're arguing to the
top part of the shape and we are creating a little
rounded triangle here. Let's go and try to do that. You can vary its size
and its position. It's all up to you. And when you have the nose, let's create a little mouth. So we are going underneath
our nose and we are starting by creating one half of
the circle on the left. When you have it on the left, Let's move on to
the opposite side and let's do the
same thing here. Again, you can play with the
size and you can play with the position of this little
mouth when you have it. Let's move on and we
will add the ice. So let's go to our brush. Maybe we will increase its
size just a little bit. And we will go to one
line where we have the nose and we will create
two dots on both sides. So one on each side, just put the first dots
and when you are done, Let's repeat it
on the other set, we will need to keep
the same distance from this node to
this node elements. And we will need to put this
second dot on the same line. Let's go and do that. Now when we have
something like that, Let's move on underneath our eyes and we will
add very cute cheeks. They will be just
simple circles. You can play with this size
and so you can play with the position when you
have one on one side. Let's move on to
the opposite side, and let's do the
same thing here. Now when you have
something like that, Let's move on to the top part of our heads and we will
add a little hat here. So we will firstly
go to this line that we have on the vertical, and we will put a
little mark here. So let's put this mark going halfway from the center.
When you have it. Here we will go
and create a curve going alone the whole
shape of r hat. Let's go and try to do that. Hold your Apple pencil at the end of the line to
make it a nice curve, if you need to adjust it, go over the top to Edit Shape. You can play around with the curvature and
maybe make it even on both sides when you have it and when you're
satisfied with your line, Let's tap on the
screen with one of our fingers to get
away from this modes. We will go to the
top part and we will create another
curve for our hats. So we will do, and we will repeat this line
that we have here, but it will be a little
bit more curvier. Hold your Apple
pencil and the DNS, find the position that you like. And if you need to adjust it, go over the top to aided shape, try to make this curve
even on both sides. And when you have
something like that, when you're satisfied with
this curve over the top, Let's tap on the
screen with one of our fingers and let's go and adjust the
shape a little bit. So firstly, we will
grab our eraser tool and we will erase all the
lines that we don't need. When you have cleans
up the corners, we will give it to
this little place and we will add a little
bit of volume here. Basically we are adding
their back part of the hat. So we are going to
this intersection and we are creating
the line like that. When you haven't done one side, Let's move on to
the opposite side, and let's do the
same thing here. We go into this
intersection and we are creating elites
align, going insects. When you have
something like that, Let's move on to the top
and we will add the ears. We have these lines that
are going at 45-degree and we will go to them and we will add half of
the circle there. So these lines will
go right through the center of our shape. Let's just go over
the left and let's create this first
half of the circle. Hold your Apple
pencil at the end, and if you need to adjust it, go over the top to edit shape. Play around with the size and with the curvature of your ear. When you're satisfied
with this shape, tap on the screen with
one of your fingers. And if you want, you can erase all the lines
that you don't need. So grab an eraser
tool and do that. When we have this first shape, we will need to go inside and we will need to add an inner part. So we will just basically
go and insight and we're recreating the shape
that we have outside. But this time it will be
a little bit smaller. So let's go and do that. And again, if you
need to adjust it, go over the top to edit shape. When we have the
ear on the left, Let's move on to
the right and we will do this same thing here. We are going to this
line and we are trying to put it in the
middle of our new shape. Let's create this half
of the circle here. Hold your Apple pencil, go up to Edit Shape and try to make the same year that
you have on the left. You can zoom in and
zoom out your Canvas to see from the distance whether everything
is looking alright, when you are done
adjusting your shape, tap on the screen with
one of your fingers, and let's add this inner parts. So one more time where I go and inside the shape and we
are repeating the shape that we have on the top
and we are making it in the incites a jazz the
sheet if you need to. And when you are done making all these
little things here, Let's just go and add elite
cell outline on r hat. So we will stop a little bit
from this line and we will add another line going through
the whole shape of r hat. So let's just stop
just a little bit. And we will create another
curve that will have the same curvature that
we have on the bottom. Hold your Apple pencil
at the end of the line, and then grab an eraser tool to erase all the lines
that you don't need. If you want, you can go to this little part and
you can play with it. E.g. we can go and make this a little bit more
go into the sides. So let's just go to
this intersection and we will create
the curve like that. We will need to go to this
intersection and we will need to connect this part with the
part that we already have. We can adjust this little curve that we have on the bottom, and we will need to do the
same thing on the other side. So let just one more time go to this intersection
and we will create another curve going
from this intersection. When you hand this curve, lead, just go and connected with the lines that we already have. And when we have
something like that, Let's add one more detail. And the detail will be a little flower on
the top of the head. So we will go to one
of these sides and we will create a simple
flower like that. So we will start by
creating a little circle, and then we will go above it and we will create a few petals. You can make it
straight on the hat or you can go a little bit
aside, create this shape. And then we will need to
go to the S ribbon shape, to the freehand method. And we will need to select this little shape
that you've created. So we're just looping the shape around and we are creating
the selection like that. You can see that we have
selected only this area. And when we have it, we will need to get
back to our arrow key. We are using uniform
method and we are just moving this new
shape to our hats. If you want to adjust
it in any way, make it smaller, rotates it, go for it ends when you are done with positioning this
shape and adjusting it, let us go and deselect
everything by hitting R, S ribbon icon one more time. So now we are ready
with our shapes. We are ready with our sketch and we will go and
adjust it a little bit. We will position it differently and maybe we will make it bigger or smaller depending on what
results you have right now. We will go to our arrow
key and we will adjust the placements and adjust
everything that we want. So e.g. let's make our
bear a little bit bigger. So we will go to
one of the corners and we will drag
it to this site. Now let's position it right in the center and let us go
and maybe play around with the work methods
so we can go there and we can adjust everything
that we want here. So play around, find
what works for you. And we will meet in the other chapter where we are going to be aiding
the clean lights.
4. Bear: Clean Lines: Before starting our
clean lines part, let's do the following. Firstly, we will go
and change them brush. So I go into art brush library and we go into the
calligraphy folder and choosing the same
brush that we use for our frame, which was monoline. When we selected the brush, electrical that are size
of the brush is at 2%. When we did it, we are ready
to go back to our layers. And we will firstly
need to go and change the opacity level on this
layer with the sketch, because we still
want to see what's happening onto our Canvas and we want to recreate the lines that we
have on this gauge. But we don't want
them to be very bright and very disturbing. Let's just go to this
icon and we will change the opacity to the level
that you like. So e.g. something like 40 or
50 per cent will work best when we are
done with this task, let's create another
layer on top, so we are tapping on the
plus icon and straightaway, Let's rename it as clean lines. So tapping on the layer
and choose rename, our main goal into this part is to create
the closed lines. So the same way as
with the frame. We don't need to have any gaps. It's alleges go to our shape and let's try to recreate
what we have here. Remember that you
don't need to recreate everything with 100 per
cent of similarity. If you want to
change some parts, you are welcome to do it. Let's just zoom
in our canvas and let's start by going
to the left part, and let's start
creating the lines. So firstly, let's create this line that we have
on the site layer. Just go and create the curve
at the ends of the line. We can hold it to
make it clean and to make it nice and
easy, need to adjust it. You know what to do. You need to go over the top
to edit shape over the top. So when you have the first line, Let's continue adding
the next line. We will go to this curve
that we have for the hat. And we will try to
create this curve that is going through the
whole shape of r hat. Also, to make this
work very easy, we can go back to
our brush library. We can go to this mono line
brush so we can tap on it. We can go to this stabilization and we can change the
streamline amount. You can check out what
amount works for you. So e.g. if you go to this
drawing pad and if you create a line with a very low value
of the amount of streamline, you will see that you have
all the control or the line, but this line might
turn out very jagged. If you want to avoid it, you can go and
increase the amount of streamlined to maximum or
something near maximum. And you will see that
the line that you create in is more smooth. So try out different amounts, find what works for you
and when you're done, Let's hit down and let's
get back to our lion part. We are going to this
line that we have on the bottom of the hat and we
are trying to recreate it. When you have this line let
straight away go to this little priors that we have on this side and we will
create the lines there. So now let's move on to
the opposite side and we will add this line for
the cheek of the bear. So one more time we are going to our side and
creating this curve. If we need, we can hold
our Apple Pencil and if we need to adjust it
even more going over the top to aided shape, remember that you
need to connect all the lines and you don't
need to have any gaps. So now let's move on
over the top and let's try to recreate these
slides the same way as before we are doing
firstly to this side and we will create the
first line like that. You don't need to go the
whole shape straightaway. You can create a few
lines and connect them smoothly and maybe
erase some parts with an eraser to let us go and try to create a
shape straight away. Let's grab our eraser
tool and let's fix this little places that
we need to make smooth. Now when we have the main
shape of our hats, ledgers, grab our brush one more time and we will create this line
that we have right here. So again, we are
going very straight lead to this part and we
are creating this line. Hold your line at the end. And if you need go up to Edit Shape when you are
done straight away, grab an eraser tool if you have some little places that you need to adjust and adjust them. When you are done
with this part, ledgers go and continue
adding the lines. So let's move on to our ears. Let's repeat this shape. And again, we are holding our Apple Pencil at the ends
to create a better shape. If we need to adjust it going
over the top to edit sheet. When we are done, Let's create the inner parts. When they're first
year is ready. Let's move on to
the opposite side and do the same thing here. Remember that you can zoom
in and zoom out to check out whether everything
is looking okay When we are done
with the main shape, let's add the inner parts. Now, let us go to
this little flower. We will grab our eraser tool. We will erase this inner
part that we don't need. It will be easier for us to
create a flower in that way. So let's start by creating this little part in the middle, we will hold our Apple pencil
at the end of the line, and we will hold one
of our fingers on the screen to make a
perfectly round circle. So when we did it,
we are going alone the shape and we are
creating some petals. When we are done with this part, Let's move on to aid in the
lines to our facial features. And again, we can go and start by creating a
little snout here. We will need to go and
to repeat this shape. If you are adding this shape
with a multiple shapes, make sure that all the
connections are smooth. If you need to adjust them, grab an eraser tool and adjust them when you
are done with this, now, let's move on and
add this little nodes. So we are repeating
the same shape that we have on to our sketch. Try to put the nodes in
a center on this now. And when you are
done with Minos, let's move on and
add a little mouth. When we are done with the mouth, Let's go and add
our lead sell ice. You can increase the
size of the brush or you can create little
circles there by using the Apple Pencil and by
using one of your fingers on the screen and then manually
recolor the inner parts. This act when you have the eyes, we don't want to
add the lines for the cheeks later on when we are going to be
recoloring our shapes, we will add these lines just
with the color and parts. So now let's move on to the bottom part and
we will firstly create this line that is going
on the bottom of the face. When you are done, Let's move on to this little
enhance that we have. Let's repeat this line that we have on the top of the Arabs and we won't connect it the same way as we have
it on the sketch. So let us firstly go over the top and we will
create the line here. When you have this line alleges go to this
line on the bottom. And we will firstly make
a little mark here. We will go to these parts and we will put a
little dot where just go and connect
this line that we have on the top with
this little dots, make a smooth
connection or mid soap. So grab an eraser tool and erase this little
line if you have it. And also we will go to the
bottom part where we have our little dots and we will
adjust it here as well. So we will need to make
everything very smooth. Now when we have
something like that, Let's continue
aging these slides. I go into these lethal dose
that we have right here on the top and we are
connecting it with the body, as always tried to make
a smooth connection. And if you need to
adjust some parts, just go with the eraser
tool and adjust them. Now let's get back
to our brush and let's work on this line
that we have for the body. We will need to go
and we will need to start by creating
a little dot here. Let just go and
put it right here. When we have it, we will go to the bottom and we will create the
line going down. You can hold it at the end if
you want to create it with a straight line or you can
create a little curve there. It depends on you. When you hand this line, Let's make sure that we
don't have any gaps. Let's connect these
parts together. And when we have it, we will also need to
go to the bottom part. We will need to connect this part on the
left with the part on the right because we
don't want to have any gaps. So we will go to this line
that we have right here. And we will need to create
a horizontal line that will do underneath our
layer with the frame. So let's just go and do that. We go into the
opposite side and we go into this line that
we will create later on. So let just put these dots, let just on hold our
Apple pencil and let's continue by adding
the lines on the right. Let's one more time. Start from this
little thing here. We will go the same
way as before. We are going to this curve
that we have over the top and we are making it
when we have this curve, ledgers go to this line on the bottom and we will
add a little dot here. And that way we will know
where we need to end our line. So let just go somewhere here
and we will put our dots. Now when we have it, we are going to get
soap and we are connecting this line that we have on the top with these dots, make a smooth
connection and make sure that you don't
have any gaps. If you have some places
that you need to adjust, grab an eraser tool
and adjust them. Now when we have a little hands, Let's move on and connect
the arm with the body. So we are going through
these curve and we are recreating it
from our sketch. When you have the arm Dan, lead, just go to this
line that we have for the body and we will try to put this same though
that we have on our lips. So let's just go
and put the dots. And then we will
connect this line with the line that we
have on the bottom, makes sure that we
don't have any gaps. And also just for 1 s, we will get back to
our layers and we will hide our layer
with the frame. We will need to
go to this little check box on the right and we will need to tap on it
with this layer hidden. We will make sure that
this line that we have on the bottom is closed. When you see it. When it's closed,
we are ready to get back our layer with a free. One more time. We are going to this little checkbox and
we're tapping in it. When you did it, ledgers. Get back to our canvas and
let's create our last line. It will be this
little tiny line. So let's just go and create it. Try to make the distance
from the sides, from the body to this little Tommy parts
equal on both sides. Adjust this line if you need to. And when you are done, ledgers go and hide our layer with the sketch because
we don't need it anymore. So we are going
back to our layers, we are doing to our
layer with the sketch. We are tapping on this little
checkbox one more time. Ledgers go over the
whole lines that we have right here and
we will make sure that all of them are
closed if you want to adjust some parts or if you
need to add some detail, just go for it. And when you made sure
that everything is looking nice and you are
satisfied with the result. Let's move on to
the next chapter where we are going to
be aiding the colors.
5. Bear: Adding Colors: For our coloring part, we will need to create
one more layer. So let's just go back to our layers and we
will need to put this new layer between earlier with a clean lines
and with the sketch. So firstly, let us go to earlier with this
schedule, select it, and we will tap on
the plus icon to create a new layer from
here straightaway, Let's rename it as colors. And when we have this layer, we will need to prepare our
layer with the clean lines. So remember what we were
doing earlier with a frame. We went to this layer. So we are go into
the clean lines. We are selecting it,
we add tapping on it, and we are choosing
the reference. Now we are getting back to
our layer with the colors and we are ready to start putting
the colors, do the shapes. So let us go to the
color palettes. And firstly, we will select the color with the name browns. And now we are ready to go to our top-right corner and we
are ready to drag the colors. Do they needed places? So let's recover the whole shape of the body less recolor, the whole shape of the hat, and also the outer
parts of the ears. Let's go and do that. Now let's get back to
our color palettes and we will select the color
with the name yellows. With this color, we will
recolor our hat when we did it, we are getting back to
our color palettes and we are selecting the color
within them, creams. This color, we will
recolor the snout that Sammy and the inner
parts of the ears. Now let's get back to our
color palettes and we will select this white
color with the name stamp, with this color, we will recolor the main shape of our flower. So when I go in there and we are dragging and dropping
the color for the inner part or
less recolor it with the same color that
we have for our hats. And let's do it by using
the eyedropper tool. To use the eyedropper tool, you will need to go to your
Canvas and you will need to hold one of your fingers on the color that you want to pick. So let's just go
to this yellow and let's hold one of our fingers. You will see that you
have a little tool. And if you move it, you will see that you are
selecting a different color. So we will go to this
yellow part and we will hold our finger right here. You can see that the color
change on that soap, right? And we can just go
and drag and drop the color right here
onto this little part. And we are done with
the main coloring, but also we want
to add the cheeks. So let us get back to our
color palettes and we will select this color
with a name like pinks. If you want variable
leads to go and put these dots underneath the
eyes, you can do that. Or if you want to just make sure that you
are doing everything right and you are
putting them on the same places that
you had on this gauge. You can do the following. You can get back to the layers. You can go to your sketch layer, you can select it
and you can put it above our layer
with the coloring. So let's just go and drag it
up and we will unhide it. Now let's get back
to earlier with the colors and we will
increase the size of our brush and we will go and put the dots where we have
them on the sketch. Now one more time we
are getting back to our layers and we will hide
our layer with the sketch. Let's make sure that everything
is looking quite alright. And we will add
some shadows here. So firstly, for the shadows, we will need to create
one more layer. Ledgers, go to R
plus icon and create one more layer above earlier with the coloring straight away, Let's rename it as shadows. So tapping on the layer
choosing Rename and we will need to clean this
lead to a previous one. So we are doing the same thing that we did with our great. So let just tap on the layer and let's choose clipping mask. And also we will need to change the blending mode and the
opacity level of this layer. So we are giving to the n icon, I go into the multiply
blending mode and we are changing
the opacity to 35%. Now, let's just get
back to our Canvas and we will have the same
brush that we had before. We will decrease the
size of our brush, or we'll increase it if you
are at some lower values. And firstly, we will
need to pick the colors. So we will go to this main color that we have for our bear, this brown one, and we will
use the eyedropper tool. So holding one of our fingers and invoking this little too, too big, this color. So now when we have it, we will go to the bottom part of the face and we will start
by creating a curve here. So let's just go and variable, they create the curve like that. Hold it at the end, adjust its placement and
adjusts its curvature. When you have
something like that, Let's just tap on the screen
with one of our fingers. And manually, we will go underneath this curve
and we will recover it. If you have some places
that you need to erase, grab an eraser tool and do that. So our first shadow is
done and let just go underneath the hats and we will add a little
shadow here as well. So we, I go in there
and we are repeating this line that we have for
our bottom part of the hats. When you have it, let just go to this little part, this little corner that
we have right here, and we will soften it. So we will add another shadow and we will add just
a little curve here. Now, we can grab our eraser tool and erase all the lines
that we don't need. Let's add the shadows to
this bag parts of r hat. So we will grab our brush and we will go and
manually recolor them. Also, let just put both
ears in the shadow, so we will go over them and very easily just put
them in a shadow. When we are done with this task, Let's go underneath our heads and let's add a
little shadow here. We are repeating the
same line that we have for the bottom
part of the hat. Now, let's make little
shadows underneath the arms. So we will go there and we will repeat the shape that
we have for the arm, soften the corners and let's do the same
on the other side. We will also go to
the bottom parts of the arms to these connection
that we have right here. And we will add little
shadows there as well. So just to repeat
the curve and then manually recolor the
rest of the area. Let's do the same on
the opposite sex. Now let's grab our eraser tool and we will erase everything
that we don't need. And when we did it, we are ready with our
first illustration. In the next part, we
will be creating a fox.
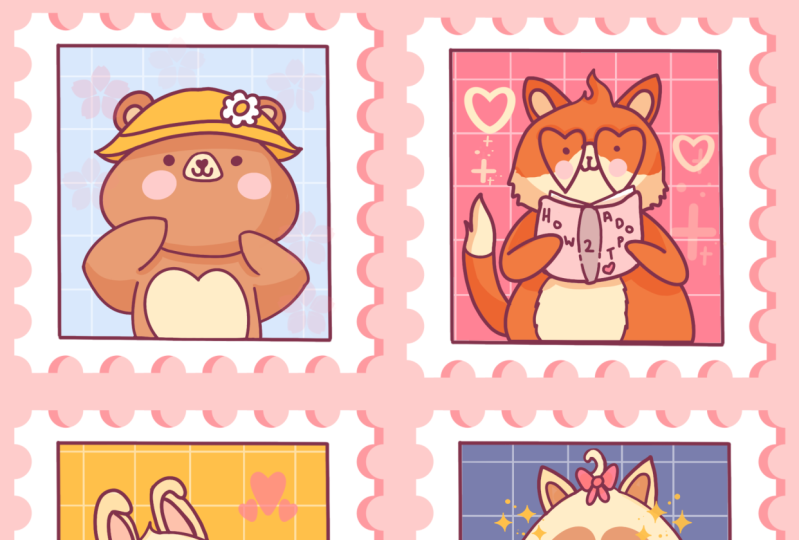
6. Fox: Sketch: Let's start making our
folks from the sketch. We are going back to
our layers and firstly, let's collapse our
group with the beer. So I go into this group, we are selecting it and we are going to this little v icon. Let's tap on it. We will collapse that group and we will do to our group with the flux through this little
arrow and we will tap on it. So when we have it, let's create one more layer above
earlier with the frame. So select the layer
with a frame and tap on the plus
icon straightaway. Let's rename it as
Sketch tab and then the layer and choose and rename
when we have a new layer, Let's get back to
our brush library. We will go into
this kitchen folder and we will select
procreate pencil. When we did it, we
are getting back to our color palettes and we are selecting the color
with the name lights. And when we have
everything prepared, we will go to our second stamp. We will zoom in our
Canvas and we will start by creating a
very simple circle. So the same way
as we did before, go into our canvas and without and holding
our Apple pencil, we will create one line. At the end of the line. Hold your Apple pencil and
hold one of your fingers on the screen to snap to a
perfectly round circle. When you have it, we
can go over that, so up to Edit Shape. And we can move this shape a little bit more to the center. And when we are ready
with this task, Let's just tap on the
screen with one of our fingers and we will go and adjust the shape
just a little bit. We will go to the
heirarchy on the top-left, which is our transform tool. And we will go into work. So we will need to squish
our shape just a little bit. You can go to the
top or you can go to the bottom and move this shape a little bit down or up depending on
where you went. So let's just go first.
Let's do this soap and we will move this shape
a little bit down, and we will do the
same on the bottom. And when you are
done with this leg, just go to our arrow
key and we will tap on it one more time
to deselect everything. When we have this shape, we will need to find a center. So the same way as before, we will create one
line which is going vertically and one line
which is going horizontally. So let's start with
a vertical line, Julian, and the hands
to make it straight. And if you need to adjust
it, if you need to move it, go over the top to edit sheep, find an approximate center
and when you have it, Let's create a horizontal line. And again, if you
need to adjust it, go over it, it's
up to Edit Shape. Now when we found the center, Let's go and add the ears. Firstly, we will go to the left part and we
will make two marks. So let's just go
to the left side and we will create the
first mark like that. When you have it, we
will go a little bit more to the left and we
will create another mark. When you have
something like that, we will go to the
opposite side and we will try to make these marks
on the opposite side too. And we can do it by creating two horizontal lines go
in for our guidance. So now when we have these marks, led just go and create
very soft triangles. So let's first go over our left part and let's
create this triangle here. You can play around with the curvature and
with everything. And when you have
something like that, Let's go to the
opposite side and we will create another year here. So firstly, let us go to the top part and we will create
another horizontal lines. So that way we will know where we need to put another ear. Let's just go and create
this guide in life. When you have it, you know, where you need to finish
your ear and it will be easy for you to recreate what you
have on the opposite sides. So let's just go and
create this year on direct when you have your
main shapes for the ears, Let's go inside of the shapes and let's
add the inner part. So we're just going
there and we are recreating the sheep insight, making it a little bit smaller. When we are done with the ears, Let's go and add our
facial features. So firstly, we will go to this intersection that
we have in the middle, and we will start by
creating a little nodes. So let just go a little
bit above airline that is going horizontally and we will create a little triangle here, make it soft when you have it. Let's go underneath it and we
will create a little mouth. You can make this same shape
that we had on our beer, or you can just
make it very easy. You can create another
line that is going down and you can create
half of the circle, go in under this line. Let us try out this one. You can vary its shape, you can vary its curvature
and you can vary its sets. So when you are done, Let's go and add the ice. We will stop a little
bit from the center and we will put the
first dot on the left. Again, we can go a
little bit above our ascender line when
you have it on one side, Let's move on to
the opposite one and we will do the
same thing here. Try to keep the same
size on the eye and try to keep the same distance
that you have from this i2, the middle parts when
you have these ledgers go underneath our eyes and we will add
little cheeks there. We are just going
under our eyes and we are adding to an
ellipsis or two circles. When you haven't done one side, try to recreate it
on the other side. Try to put it at the same
line and try to keep the distance from this
elements to the center line. And when we have
the main features, Let's add some details. So firstly, it alleges go
and add very big glasses. We will go to the left firstly, and we will create
another circle there. So let's go the
same way as before, and we will create this shape. Hold your Apple pencil at the end of the line and
decide whether you want to keep it as an ellipse or if you want to make a
perfectly round circles. So let's just go for a perfectly round circle without an holding
your Apple pencil, hold one of your
fingers on the screen and snap it to a
perfectly round shape. Let's unfold everything
that we are holding right now when you're
satisfied with the size. And we will go to that. So up to Edit Shape. And we will move these shapes a little
bit toward the left, find the position
that works for you. And when you are done, Let's just tap on the screen
with one of our fingers. And let's do this same
shape on the other side. So we are going to the
right and we are trying to recreate the same shape
that we just meet. Hold your Apple pencil, hold one of your fingers, and when you are done, ledgers go over the
top to edit shape. We can move this shape to our previous shape and we will try to make it the same size that we have there when
they are similar to one another legis move it
so we're there, right? Let's try to keep the same
distance from the right, the same way as we
have it on the left. And when we are done, Let's just tap on the screen
with one of our fingers. And now we need to connect our circles for the
glasses by going over the top of our nose and creating this little connection
between the glasses. So let's just go and
create one curve there. When you have it's
ledgers go and we will add one more
element for the fees. We will create a little
line for the snout. Each should be going like that. Firstly, we will go to our left part and we will
create a curve like that, starting a little bit under our horizontal line and creating a curve going toward the nose when you
haven't done one side. Let's try to recreate
on the opposite sides. Try to keep the curvature
is similar on both sides. And when you are done, let us go to the bottom and we will start creating a body here. Firstly, let us
create two curves for the main shape of the body. We will go to the
middle part like here, we will make a
little mark and we will do the same
on the other side. So let's go and put
down another mark. From these two marks, we will go down and we
will create curves. Let us go and try it on the
left and one on the left. Let's move on to the rights, and let's try to
recreate this line. And when we have this
shape for the body, Let's add another
element for our folks. Let's add a little book here. So firstly, we will need to mark down where we want
to put this book. Alleges go a little bit
under our guiding line, which is on the horizontal axis. We will go just have
from these parts, let's put this
little mark and we will do the same on the bottom. So we will find a
half of our body. When we have these marks, we are ready to create
a little spine. So firstly, let's go over
our left part and we will create a little curve going
from top to the bottom. If you would like to go and
create the straight lines, you are welcome
to do it when you have the line on the
left. So let's move on. So words are right, and we will do the
same thing here. And when we have
something like that, when we have our spine, we need to create these
sides of the book. So let just go to
one of the sides and we will create one
line like that. Firstly, go into the top when
you have it on one side. Let's move on to our other sites and let's repeat
the same line here. And when we have these
lines on the top, we will need to do the
same on the bottom, the lines that we are going to be creating there should be parallel to the ones that
we have over the top. So let's go to the bottom and let's recreate these slides. And when you have this scheme, we are ready to create
the vertical lines on the sides and we will need to make the corners very rounded. So let's firstly
create the lines and then we'll
soften the corners. So just go to the
corners and create the curves instead of
very street corners. If you want to make
everything clean, ledgers grab our eraser tool and we will erase
the street corners, and also we will need
to add some pages. So firstly, alleges
go over r one side and we will create
a line like that. It is growing
strictly vertically. And when we have it on one side, we will do the same thing. On the other side, we are stopping just a little
bit from the sites. When you have these lines, we will need to connect
them with a curve with these little spine that
we have over the center. So let's just go and
start from the left. And we will create a curve
that will be connected into this intersection
when you have it on the left or if you are
starting from the right, Let's go to the opposite side and we will do the
same thing here. Now when we have
something like that, we can add some details on
the cover of the book, e.g. you can add some pattern with the flowers or anything that
you would want to add here. Or you can just do very simply
with a little check here. We will create two
vertical lines like that. And then we will
repeat this line that we have on the top
and on the bottom. And we will put them right here on these lines that
we just create it. Try to make them parallel
and if you want, you can go and
soften the corners. Also, you can add a
few lines like that. And when we have this, we are ready to add little hands and we will start by
creating the guiding lines. So let's just go over
this area and we will create a line like that when
we have it on one side, Let's move on to
the opposite one, and we will add this
same line here. And now when we have
the guiding lines, we are ready to turn
them into the ellipsis. So the same way as we
did with our bare, let's go and create the ellipsis
instead of these lines. And when you have this ellipsis, we will need to connect
them with the body. So let's go to this
little part that we have here and we will
create another curve. So we are going to these
corner is our elbow, and we will connect it with
a curve with the head. When you haven't done one side, Let's repeated on
the opposite one. Now when we have our arms, Let's go underneath the book and we will repeat these
lines on the sides. We will add a little Tommy step a little
bit from the side, and let's repeat the slides. And the very last
thing that we will add for our sketch will
be a little tail. So let's go to one of
the sides and let's create the line that will
be our guiding line. When you have this guiding line, ledgers go and make it
a little bit wider. So we will be going
with the soft lines, we will go around this line and we will create
a little tail. So step a little
bit from this side, and let's repeat these curves. On the top, we will create a very soft connection and we will go to
the opposite side. And again, we will repeat the same line that we created
for our guiding line. Now let's go a little
bit to the top of this tail and we will
create another curve here. So later on, we will add a different color
to these parts. And now we are ready
with our sketch. But if we want to
adjust something or if you want to place
something differently, we can get back
to our arrow key. We can go to uniform
method if you would like to make it smaller
or maybe bigger, or we can go to work and
adjusted to our liking. So let's play around
with our sketch. Let's find what works
for us, what we like. And we will meet in
the next part where we are going to be
creating the clean lines.
7. Fox: Clean Lines: Let's start our part with
a clean lines by going to our brush library and
we will change the brush. I go into the
calligraphy folder. We are choosing monoline
brush and we are setting the size of
this brush at 2%. When we have it's ledgers, get back to our layers and
we will need to create one more layer above our
layer with the sketch layer, just tap on the plus
icon and we will rename this layer
as glean lights. Now we will need to get
back to earlier with this sketch and we will need to change the opacity level of it. So let's just go to this and I can own the layer
with the sketch. And we will grab our handle on this slider and we
will move it toward the left until we see that it is more transparent and
it's less disturbance. When we are done with this task, let's get back to earlier with a clean lines and
we will start to recreate what we have owns our sketch the same way as before. We are creating the clean lines, we are creating the close lines. We don't need to have any gaps. Very quickly. Let
us go and do that. Remember that you can go inside the Brush Library and
inside your monoline brush, go over the stabilization and change the amount
of streamline, find what works for you. And when you're satisfied with the amount of streamline Jazz, get back to making
your clean lines. Also remember that
you can create not the whole shape from
the very beginning. You can create it in parts. And also remember that you can use this quick
shape tool that you are using when you are holding your Apple pencil at
the end of the line, if you need to adjust some
curves or some lines, you need to go over
the top to edit the shape when you are
using this quick shape to. So now let us go and
add these lines. When we are done with
the main shape ledgers, make sure that we have everything clean and
everything closed. So firstly, ledgers go over our layers and let's hide
our layer with the sketch. And also we will go and hide just for 1 s earlier
with the frame. And you can see that we will
need to add one more line, go in on the bottom. So let's just go and
add it also led to grab our eraser tool and let's erase all the lines
that we don't need. And we will fix all the
places that we need to fix. If you have the full
ellipses for the arms, you can go to this little places and when the arm is bending, you can erase this line. So let's just go and do that. Also, you can go to the
places like here with the book pages and
you can overlap some places that are
e.g. the glasses. Just try to make sure that
you are not connecting it just one part to
another part like that. And when we have
our clean lines, when everything is
clean and closed, we are ready to get back
to our layers and we are ready to turn on our
layer with the frame. And in the next part, we will be making
our color parts.
8. Fox: Adding Colors: For our coloring part, we will need to
create another layer. So let's just go back to
our layers and we will make this layer between earlier with the clean lines
and with the sketch. We will go to the
layer with the sketch. And here when this
layer is selected, we will tap on the plus
icon straightaway, we are renaming it as colors. Now, we will need to prepare our layer with the clean lines. So let's go there. Let's select this layer. Let's tap on it, and let's choose reference. When we did it, we
are getting back to earlier with the colors and we are starting to drag and
drop the color to our object. So let's just get back
to our color palettes and we will start
with this color way, the name oranges Lab selected. And let's put it to our face and to the main
part of our body. Let's add it to the arms and to the tail and to the
outer parts of the ears. Now we will get back
to our color palettes and we will select this
color with the name creams. With this color, we will
add the color to the tummy, to the end of the tail into
the inner part of the ears. And when the same
color we will need to add our snow that we
had on this sketch. So firstly, let us get
back to our layers. Let's grab our layer
with the sketch and we will put it above our
LEA with the coloring. So when it is selected, we are holding it and
we add, dragging it up. Let's unhide it by going
to this little checkbox. Now we will get back
to earlier with the coloring and with our brush, we will go and we will
create the snout, but we will do it on a different layer so it will be easier for us to navigate. It alleges go and tap on the plus icon and we will cleave this layer
to a previous one. We can not make it
with a different name. Ledgers go and tap
on this layer and let's choose clipping
mask onto this layer. We will go and we will recreate this line that we
have for the snout. When you have this line, let's go and increase
the size of our brush. And manually we will
recolor these bottom parts. Ethan need to adjust the
curvature in any way. Just go for it. Now while we're still here, Let's just add our cheeks
so we are getting back to our color palettes
and we are selecting this color within
named light pinks, ledgers tap on it to select, Let's increase the
size of our brush and let's put the doors
for our cheeks. Now when we have the cheeks, ledgers get back to the
earliest and we will hide our layer with the
sketch when we have it. If we need to go and adjust
something, Let's do that. And if everything
is looking fine, we will get back to
earlier that we clipped to our layer with the colors and we will merge it down
to our main layer. So to merge the layer, we will need to tap on
it and we will need to choose merge down
from this list. And now everything that we need is on earlier with the colors. Let's continue editing
the colors to the book. So we are getting back to our color palettes
and let's select this color that we had for
our blue stamped backgrounds. We will select it and we will edit to the cover of the book. Now we will again back to
our color palettes and let's select the color
with the name yellows, these color we will
add to the spine. And the last color
that we will add here will be this color
with the name stamp. So let's select it
and we will add it to this little tag that we have on the book and do the pages. And when we are done
with the base colors, we are ready to
add some shadows. So firstly, let's
just go and create one more layer above our
layer with the colors. Let's tap on the plus icon and let's rename this
layer as shadows. We also will need to
click this layer. So let's tap on it and
let's choose clipping mask. And we will need
to go and change the blending mode and
the opacity level. So we go into our n icon and Firstly we are selected
multiply blending mode. As for the opacity, Let's go with 35%. Now when we set our layer, Let's get back to our
canvas and let's grab this orange color
that we have for the main shape of our folks. And again, we will do it
with an eyedropper tool. So let's just go to this place. Let's hold one of our
fingers on this color. When you have this lethal two, Let's hold our finger
and now we will go to the bottom part and we will add some shadows the
same way as before. We are starting from the curve. Let's go over the left
and let's start by creating the curve on the
bottom part of the face. If you need to adjust it, go to the top to Edit Shape, play around with the curvature and when you are satisfied, Let's just tap on the screen
with one of our fingers. Let's increase the
size of our brush. And manually, we will go and recolor this part on the bottom. Now let's go over our ears and we will put
them under the shadow. So let's just increase
the size of our brush and very briefly go
there and recolor them. Now we will decrease the size
of our brush and we will go to this little place right
here where our hands bends. And here we will add
a little shadow. Let's do the same on
the opposite sex. Now let's go to
the bottom parts. And firstly, we will
add a little shadow underneath the
book and the arms. So we are just repeating
the shape that we have for our arms
and for the book. We will also go to
this book underneath the arms and we will add a
little shadow here as well. So again, just
repeating the shape of the arms and the
lush Chenault that we will add will be on the sale. So let's just go to
one of the sides and let's create
the curve there. Play around with its curvature
and play around with its size and then manually
recolor the bottom parts. And now let's just
grab our eraser tool and we will erase everything
that we don't need. And when you are
done with this task, we are done with our
second illustration. And in the next part, we will be starting
making our bunny.
9. Bunny: Sketch: Let's start our
third illustration by changing them brush. So we are going back
to our brush library. We're arguing to this
kitchen folder and we are selecting
procreate pencil. When we did it, we
are getting back to our color palettes and we will select the color
within the lines. So let's tap on this and select, and when we did it, we are
getting back to our layers. Firstly, we will collapse
the group with the fox. So let's select the whole
group and let's go to this little v icon near the chat box and
we will tap on it. When we did it, lead you to our group with the bunny
and we will open it. So we are going to this little
arrow near our checkbox. When we are here, let just select the layer with the name frame and who will
create one more layer above. So let just tap on the plus
icon and straight away, we will rename this
layer as sketch. Onto this layer, we will
get back to our Canvas. We will zoom in our Canvas to this little frame with
yellow background. And here we will
start by creating a very simple shape
of the circle. And you know how to do that, we will need to Gill variable
only inside of our frame. And we will need to
start creating the shape without an holding
our Apple Pencil. So let's go and do that
at the end of the line. Let's hold our Apple
pencil and let's hold one of our
fingers on the screen. Let's adjust the
size to your liking. And if you need to move it a little bit more to the center, goes over the top to edit shape. Move your shape, and
when you are done, we will go and adjust it. So we go into our
transform tool, which is the arrow key. On the top-left, we
are going under Warp and we will do the
same thing that we were doing with our bare. So firstly, we will go and we
will widen our bottom part. So let's go to this
side notes and we will move them a little bit
more toward the sides, tried to make it
even on both sides. And when you're done, we live
Watson part. Let's move on. So where did soap? And we will move these nodes on this side toward the center. Again, try to make it
even on both sides. And when you have
something like that, Let's go over our
free-form methods. On this bottom panel. We will select it and we will squish this whole shape
a little bit down. So let's just go over the top central nodes and we will move it toward
the down part. When you have
something like that, let us move this whole
shape a little bit down and we will go and
continue adding our details. So firstly, let's deselect everything by hitting
our arrow key. And we will go and
find the center by creating one vertical
line going through the approximate center and one horizontal line going through this approximate center. Let's go and do that. Hold your line and the bottom
if you need to adjust it, go or the top two aided shape, try to put it in a center. And when you have
the vertical line, Let's go and create the horizontal one the
same way as before, just creating the line and
holding it at the end. Now, if you need to adjust it, go over it, it's
up to Edit Shape. When we have it led, just go and add the
facial features. So firstly, we will zoom
in our Canvas and we will go to these intersection
in the middle parts. And we will go a
little bit above, are alive, that is on
the horizontal axis. And we will start by creating a little knowns the
same way as before. We are creating a
very soft triangle. Let's go and do that. You can vary its size and
you can vary its placement. When you have a little nose, Let's create Eliot's own mouth. So we will go underneath
our nose and we will create one line going
vertically like that. And under this line we will
create half of the circle. So let's go and do
that as always, play with the size and
play with the curvature. And when you are done,
Let's go underneath this line and we will
add a little tank. So we will go just in
the intersection with this line and we will
create another curve. This curve will be remaining
half of the ellipse or a little bit more
than a half ledgers go and create this shape. And again, you can play with its size and you can play with how much of this ellipse you
would like to create here. When we are done with creating our nose and the
mouth with a tank, Let's move on to the eyes. So firstly, let's go
over our left part. And again we will go a
little bit above our line, which is going on
the horizontal axis. And we will create a
different eye this time, it won't be just the dots. We will create another
half of the circle here, but this time it
will be looking up. So let's just go and create this curve when you have
something like that, Let's move on to this corner and we will
create a few eyelashes. So we will make them just
with two straight lines. When you have these shape. Let's move on to word are right bites and we will
do the same thing here. So we are starting by
creating this half of the circle and we will try
to put it on the same line. And we will try to keep
the distance between these elements and
with the middle part. And when you have this curve, Let's move on to words are right parts and we
will add to eyelashes. And when we have our eyes, Let's go underneath
them and we will add two circles for our cheeks. So one on each set. If you want, we can
add a little whiskers. So we can go right on our cheeks and we
can add two lines or three lines like that on one
side and another side to it. Now we are done with
our facial features. So let's go over the top
part and we will start by creating two guiding
lines for the ears. We will firstly
go over our left. We will step aside from the center line and we will
create a curve like that. When you haven't done one side. Let's move on to our right side and we will try to recreate it here by mirroring it when you have two guides
in lines like that, let us go over that so
part and we will create one horizontal line
which will show us where we need to
finish our ears. So the same way as before. We are just going there and
creating the horizontal line, which we will hold at the
end to make it straight, if you need to adjust it, go up to Edit Shape. Now when we have this scheme, ledgers Gil firstly
toward our left, and we will try to create a very thick shape for our ears. Firstly, we will go to the bottom to the
connection with the hat, and we will add
two little marks. Firstly, let's go a
little bit more to the right and we will
put the first mark here, and then we will go
towards the left end. We will put another mark. When we have
something like that, we can make more horizontal
lines to make sure that we will add the same
marks on the opposite sides. So let's just go and do that. We will firstly go
to this top mark and we will create
a horizontal line here until we reach the
intersection with the hat. When we have it, we are
putting another mark on the different sites and we will do the same to
the bottom mark. So go in there and create an a horizontal line until
we reach the opposite side, until we reach the
intersection with the hat. When we have it,
we will just mark down another little dot here. So when we have
these construction, we will go to the left firstly, and we will try to create
the sheep like that. So firstly, just repeating these guidelines that
we have and ended. So we are creating a
very big curve here, and then we are
looping it around. And we are again recreating the shape of the guides in line. When you haven't done one side. Let's move on toward
our right side, and let's do the
same thing here. So starting from
this little mark and repeating the sheet of
our guides in length, and it's OK, we are
making a very big curve. And then again we are looping this shape and we
are moving down, recreating the shape
of our guides in line, try to make the curves
and all the lines similar to one another
on different sides. And when you have
something like that, Let's go inside these shapes and we will add the inner parts. So we're just starting from going a little bit
aside from this slide that we have outside and we are recreating the
sheep go with insects. And when we have the whole
shape of the head done, lane, just go and
adjust it a little bit. So firstly, we will go to our
arrow key on the top-left, we will select it and we will
go to the uniform methods. We will scale this shape
a little bit down. So e.g. let's go
over our notes on the top-right and we will move it a little bit
diagonally down. When we have
something like that, we will rotate this shape. So we will go to this
green nodes over the top. We will hold it and we will move our Apple pencil to the left. When you have something
like that led, just move our shape
more to the top bar. And if you think that
you can go and make this shape of the head
a little bit smaller, you can go and scale
it down even more if you think that everything
is looking fine right now, let's just deselect everything
by hitting our arrow key. And when we have these shape
of the head is tilted, we can go on the bottom part
and we can add our body. So firstly, let us go to this little quarter and we
will find the center of it. We will go to this
line and we will make a little mark here
when we have it. Let's move on. So we're the opposite side and we will put another mark here. So again, I go into this quarter and we are trying
to find its center. When you have these two
marks alleges go to them and from them we will
start creating the curves. Let's start from the left part. We will go down and we
will create a curve like that when you
have it on the left. Let's move on to the right and we will do the same thing here. This time. This curve will be a
little bit bigger, but we will need to
do the same thing as we have it on the left. So let's go and create
the mirrored curve. When we have the body, Let's go inside of this shape and let's
add a little Tommy. Firstly, we are
going a little bit aside from these lines
that we just created, and we are creating a shape of half of the ellipse insights. So let's go and edit. You can play with this size
and with the curvature. It's all up to you. And when you have
this body part, Let's go and start making the guiding lines for the
hints and for the Arts. Ledgers go toward these parts to this intersection
and we will stop a little bit down from this intersection and we
will put a little mark here. And from this mark we will
create one line going up. Let's just create
something like that. When we have this
little mark and when we have this little
line that is going up, we will go and turn
it to something that we have on to our ears. So we will need to repeat
this shape like that. Let us go and try to do that. We will create another
curve here so you can go a little bit more towards
this part of the hat. And we will start from here
and we will create the curve. When you have something
like that on the top, make the beak curve, and then continue going
down with the curve. As always, play with the size and play
with the curvature. And when they have
its own one side, Let's move on to
where the left part, and here we will add
the different arm. We will start by creating
a guiding line like that, suggests the horizontal line. And we will turn this horizontal
line into an ellipse. So let's just create an
ellipse, these beak. When we have it, we will need
to connect it with the hat. So let us go to these sites and we will create
another curves. So the same way as we had
it right here on our folks. Let's just go and
create these sheep. And when you have it, Let's create one more detail. We will add a little carrots. We will have to go to this
arm that we just created. And here we will create
another guiding line. So let's just create
something like that. When you have the
line like that, we will need to create a very soft and
elongated triangle. So we will go over
the top part and we will start by creating
a curve like that. When you have it, we will go and we
will connect it with this little line that we
created for our guiding lines. So just creating
the diagonal lines when you haven't done one side, Let's repeated on
the opposite sex. And when you have
it lead you over the top of this shape and
we will add a few leaves. So firstly, let's start from the center and we will create another elongated ellipse
like that when you have it, Let's move on to
where the right part, and we will add a smaller
version of this little ellipse. And also we can tilt it and we will do this same thing
on the opposite side. You can play little bit with
the shape if you want to. And now we are done
with our sketch. But the very last
thing that we will do is go into our heirarchy, go into the warp, and playing around with the
whole shape in general. So you can move these
little nodes and find the version of your
sketch that you will like. So play around and we will
meet in the next chapter, we are going to be
aiding the clean lights.
10. Bunny: Clean Lines: Start with our part
with a clean lines. Let's just go and
change them brush. So we are going to
the Brush Library. We go into the
calligraphy folder and we are choosing
mono line brush. We will set its size at 2%. And now let us get
back to our layers. And firstly, we will change the opacity level of
earlier with this sketch. We will go to this
icon and we will move the handle
toward the left part. Let's stop at 50 per cent when my parents alleged just go and create one more layer above. So we are tapping on
the plus icon and we will rename this layer
as clean lights. Onto this layer, we
will go to our Canvas and we will try to recreate
what we have on the sketch. Remember that you
don't need to repeat everything with 100 per
cent of similarity. If you want to adjust some
places, go for it all. You need to remember
that you will need to create the closed lines. That means that you don't
need to have any gaps. Ledges go very quickly and z, That's when you are done with adding the lines to
your main shapes. Ledgers get back to our layers and let's hide our
layer with the sketch. Also, we will go and hide
earlier with the free. We will need to go to
the bottom part and we will need to
connect these parts. Let's just go and create
a horizontal line. Now we can get
back to our layers and we can unhide our frames. So let just add onto this little checkbox and now we'll get back to earlier
with clean lines. We will go all over the places and we will
find out whether we have some gaps that we need to feel or if we want to
adjust some elements, maybe we will go
with our eraser to erase some parts and who
will make everything clean. So let's just go and do that. When we are done with this part, Let's move on to the
color in Chapter.
11. Bunny: Adding Colors: Starts with our coloring part. We will need to go back to our layers and we
will need to create one more layer between
the layer with a clean lines and
with the sketch. So firstly, ledger select early with this sketch and we will tap on the plus icon here to create a new layer straightaway, Let's rename it as colors. Now, we will need to get back to our layer with a clean lines. We will need to select it and
we will need to tap on it. And we are choosing
reference from the list. When we did it, we are getting back to our layer
with the colors. And when this layer is selected, we are ready to drag and drop the color to all
the needed places. So let's just get back to
our color palettes and we will start with the color
with the name creams. And we will put this color to almost every element that
we have on to our bunny. Just start with the hat. We will add the same
color to the body. We will add the same
color to the arms into the outer
parts of the ears. When we are done with this task, let's get back to our
color palettes and we will select the color with
the name light pinks. These color we will put to the Tammy into the inner
parts of the ears. And also we will need to add the same color
to the cheeks. So firstly, we are going
back to our layers and we will need to unhide
our layer with the sketch. And also we will need to drag it above earlier
with the colors. So when this layer is selected, we are holding it and
we add, dragging it up. Now we know where we
need to put our cheeks. So let's get back to
earlier with the colors. Let's get back to our
slider on the top right. Let's increase its size. And we will go to these
places and we will put our cheeks when we are done, ledgers get back
to our leaves and let's hide our layer
with the sketch. Let's continue
aiding the colors. So we are getting back to
our color palettes and we will select this color
within the oranges. We will drag it to our carrots, and now we will also get
back to our color palettes, will select the color greens, and we will add these
ingredients to this tab. The last thing that
we will need to recolor is our little tongue. So ledgers get back to
our color palettes. Let's select the color with the name pink stamp
or just beings, almost the same color. And we will go inside and we
will drag the color here. And also, when we are done
with the main coloring, we can just go and
add some details. So e.g. we can add some little lines to
the carrot ledgers, get back to our color palettes. Let's select this color
with the name pale orange. And we will go to this side of our carrots and we will
create a few lines. Ledgers decrease the
size of our brush. And let's just add
a few elements. If you want, you can create some kinds of shapes like that. You can vary the size and you
can vary their placement. It's all up to you. And when you are done, lead jazz go and add our shadow. So firstly, we will need to get back to our layers and we will need to create one more layer above earlier with the colors. Let's just tap on
the plus icon and let's rename this
layer as shadows. We will need to clean this
layer to a previous one, so we will tap on it
and we will choose clipping mask and also will need to go and change
the blending mode and the opacity
level of this layer. So firstly, we are getting
into this icon and we are finding multiply
blending mode. And S for the opacity, we will set it at 70 per cent. Now, let us get back
to our Canvas and we will select the same color
that we have for our base. So let's invoke our
eyedropper tool by holding one of their
fingers on the screen. And when we have
this green color, selected, ledgers go
and add our shadow. So firstly, we go into the bottom part of the hats
and the same way as before, we are starting by
creating a curve there, hold your land and the ends. And if you need to adjust
the curvature or anything, go over the top to aided sheep. When you are done adjusting your line ledgers go
to the bottom parts, to the part underneath
and manually, we will recolor these parts. Let's continue our shadows
underneath the head. So we will just go and
repeat the shape that we have for this line
underneath the hat. Now, let us go to this
little part where we have our carrots and we will add
the shadow here as well. If you already did something, just grab an eraser tool and erase everything that
you don't need when we have it here alleges go to the opposite arm and we will start by creating
a curve like that. Play with the curvature
if you need to adjust it, go over the top to Edit Shape. And when you're
done adjusting it, alleges Gil, menu and
recolor these bottom parts. If you want, you can put the
ears in the shadow as well. Let's just increase the size
of our brush and ledgers. Gil very boldly and put
the shadow on the ears. If you want to add more shadows, just go for it. Let's recolor this
little triangle between the tummy
and the carrots. And also let's add a little shadow to
the carriage itself. So we will go to
one of the sides and we will add the curve. Firstly, it is very subtle. So if you don't want to add it, you can skip this part. If you want to
adjust some parts, just grab an eraser
tool and adjust them. And when you're satisfied
with your result, we are done with our bunny. So in the next chapter, we will be starting
to create our cat.
12. Cat: Sketch: Let's start our last illustration
from sketch as always. So firstly, we will go
and change the brush. So we are going to
the Brush Library to this kitchen folder and we
isolate in Procreate pencil. When we did it, we are going to our color palettes and we are selecting the color
with the name lengths, let sadness to select. And when we did it, we are
going back to the layers. And firstly, let's collapse
our group with the bunny. So we will select
the whole group. We will go to this V icon near the chat box and
we will tap on it. And now let's just go
and open our group with the cats so we can go and
select the whole group. And we will go to this little
arrow near the checkbox, which we will tap on. And now we are doing to the
layer with the name free. And from here we are
creating a new layer by tapping on the plus
icon and straightaway, Let's rename it as Sketch. And now when we have
this gauge, the brush, and the new color ledgers
get back to our canvas. Let's zoom in our Canvas
to our last frame. And we will go very easily and create the shape of the circle. So the same way as before, just going inside the frame and starting to
create this shape without an holding
our Apple Pencil at the end of the line. Hold your Apple pencil and
hold one of your fingers on the screen to snap to a perfectly round circle,
adjust this size. And if you need to
adjust it even more, or if you need to move
it more to the center, Let's just go over the
top to aided shape. Let's position it. And when you are
done with this task, let just tap on the screen
with one of our fingers and let's go and a jazz
these whole shape. So we are going to
the Transform tool, which is our heirarchy
on the top-left. And we are going to the work. So the same way as before. We are firstly go into
the bottom part and we will drag this side
knows more to the sides. So firstly, let's go over our right part and let's
just drag these nodes. When you did it on one side. Let's move on to
the opposite side, and let's do the
same thing here. Try to make it even
on both sides. When you are done, ledgers go to the
soap and we will move these nodes or this up a
little bit toward the center, just a little bit this time, try to make it even
on both sides. And now we will go
to free form folder. So let's tap on it and we will squish this whole shape
just a little bit. So we will go to word
soap and we will grab the central node and we will drag it just a little bit down. When you have
something like that, Let's deselect everything by hitting our heirarchy
one more time. And when we have
the base ledgers go and find the
approximate center. So the same way as before, we are creating one vertical
line and one horizontal. Let's start from
the vertical one, as always hold July and the eons to snap it
to a perfect shape. And if you need to adjust it, if you need to adjust
the placement, go over the top to Edit Shape, place it to approximate center. And when you are done, ledgers get back and create the horizontal line the
same way as before, just creating the line and
holding it at the yet, if you need to adjust it going over the top
to edit shape, let's find the right placement. And when we are done, Let's just tap on the screen
with one of our fingers. And now we are ready to move on to the top part and we will be starting to create the ears the same way as we
did with our folks. We will firstly go
and put some marks down ledger step a little bit
aside from the center line. And let's just go and
make a little mark. When we have the first mark, Let's go a little bit down
and let's put another one. You can play around with
the distance between these little marks and you can do whatever you think
will work for you. So now when we have
the marks on the left, Let's repeat them on the right. And we will do the
same way as before. We will go to this marks
and from them we will create the horizontal
line until we reach this line that we
have on our head to ledgers go to the top
mark and we will create the first horizontal line when you reach this line that we have for the hat ledgers
and hold our Apple Pencil. And instead of that, we will
put a little mark here. So when he did It's, Let's do the same with the bottom mark. We are going to the left mark. We are creating this
horizontal line and we are holding it until we reach the line that we have for the head when
needed, It's led. Just put another
mark right here. And when we have that
leg just go over the top and we will create
another horizontal line. That land will determine where we are going to be
finishing our ears. So let's just go a
little bit above the whole shape and we will create another horizontal line. When you have something
like that led just go to our marks and we
will create the ear. This time we will be creating
a very soft triangle. Or if you prefer, you can create just
half of the circle or half of the ellipse when
you haven't done one side. Let's move on to
the opposite side and let's do the
same thing here. Try to make the shapes
similar to one another. If you need to adjust
them, you know what to do. You need to go over
the top to Edit Shape. And when you are done, we will need to add
the inner parts. So let just tap a
little bit from these lines that
we just created. We will repeat this. Sheep do it on both sides
and when you are ready, let's move on and add
the facial features. So let's just go to this
horizontal line that we have. We will firstly go to the
intersection and we will go above our line that we have
on the horizontal axis. And again, we will start by creating a little
triangle for the nodes. Play with this
size and play with the distance from
this horizontal line. And when you are done, let just go and add
a little mouth. This time, we will go underneath our nose and we will
create the line like that. It will be just a very
simple vertical line. And from it, we will
step a little bit aside and we will create
half of the circle. Play with the shape
I go into the soap, adjust to your liking. And when you are done, we will tap on the
screen firstly, to get away from this mode
and we won't go to one of the sides and we will create
another half of the circle, but this time it
will be vertical. So let's create
something like that. And when you have it
alleged just adds our eyes. So we will go to the line
where we have our nose. And we will go and put
a little dot here, play around with
the distance from the center and play
around with this size. And when you are
done on one side, Let's move on to
the opposite side and let's repeat the same. I hear tried to put
it on the same line, try to keep the
same size and try to keep the distance
between the eye and this line that we have on the center when we have
our basic facial features, Let's go underneath
the ice and we will create the cheeks the
same way as before. We are just going
under the ice and we are creating two ellipses, one on each site. And when you have
something like that, ledgers go to this cheeks and
we will add the whiskers. Again, we're arguing
to the side and we are adding two or three. Let's do it on both sides. And when you are done LED, just add one more
detail for our ice. We will do and we will
create the shapes like that. Firstly, do or our left part. And we will create the
big ellipse like that. Hold your Apple
pencil at the end. Adjust the size if you need
to adjust it even more. Let's go over the
top to edit shape. Let's just put it a
little bit above. And when we have
something like that, alleges go over our right side and we will try to do
the same thing here. So let's just go and
create an ellipse firstly, hold it at the end. And Lynn, just make
sure that it is similar to the one that we
have over the left. So let's just go over
the top to Edit Shape. And here we can move our new
Alps to the previous one. We can rotate it and
we can try to make it the same size as
we have on the left. So make it similar to
the one that you have on the left and
then move it toward the right and then
rotated by going to one of the nodes and just
moving it's due this set, Let's position it on one line. And when you are done, let just tap on the screen
with one of our fingers. And now we are
ready to move on to the Watson and create the body. But before that, let us make the whole shape a
little bit smaller. So again, we go into our
heirarchy on the top-left, we are using uniform method and we will go to
one of this size, to one of the nodes and we will scale the shape down. So e.g. alleges go over our top-right
corner and we will hold our Apple pencil on the nodes and we will move it
diagonally down. And when you found the
right size for you, let's just move it a little
bit more into the center. And when you are done, ledger, deselect everything by
hitting our arrow key. And now let us move on to the bottom,
underneath the head. And we will start by creating
two curves like that. The same way as we did. Folks. Let's just go to this
quarter firstly, and let's find the center of it. Let's mark it down. When you haven't done one side, Let's move on to
the opposite side, and let's make them
mark here too. And from this marks
we will go down and we will create
a curvy lines, play around with the curvature when you have it on one side. Let's move on to
the opposite side. And let's try to mirror this slide that we
have on the left. When we have the
base for our body, Let's add another element. We will add a little slice of watermelon and we will make sure that our cat is eating it. So firstly, let us
make some marks. We will go firstly to our heads and we will find a
little mark like here. Basically, it's one-third
of our bottom parts. When you have it
on the top left, just move on to the body. And again, we will find
one first right here. In this area, we will need to create a slice of
the watermelon. Slice of the watermelon will be half of the circle or
half of the ellipse. So let's just first go
over the top and we will create a horizontal line
going through this mark. If you want, you
can move it down, or if you want you
can move it up. So go to Edit shape or its job and find the placement
that you would like. And when you have
something like that, Let's just go down and we will
create half of this circle and this half of the circle should enter it
here on this mark. Let's just go for this
line and we will go from this intersection and create this half of the circle. Hold it at the end. And if you need to adjust it, you know what you need to do. You will need to go or
that soap to edit shape, edit the shape to your liking. And when you are done, we will just continue making
our little watermelon. Let's tap on earth green to
get away from this mode. And we will need to
repeat this curve that we have for our watermelon
two more times, going more toward the center. So let's just go inside
the ship and we will repeat this slide as always, hold this line at the ends
and if you need to adjust it, go over the top to edit shape. When you had the
second line ledgers go and create another one. This time, we will
stop a little bit closer to this line
that we just create it. Create this line and
adjust it to your liking. And when we have this shape over the watermelon ledgers
give or the top part. And we will make a little
cut with three circuits. So let's just do
something like that. If you want, you can grab an eraser tool and
erase this top part. Now the last thing
that we will need to do inside the shape of the watermelon is to go alone the whole shape and
create some seats here. We will do it just with
the lines like that. And when you have it led, just go and add our arms. Firstly, we will need to
create the guiding lights. And the same way as we
did with our folks, we will create the
lines like that. When you have this diagonal
line over the left, Let's repeat it on
the opposite sides. Try to keep this senior angle. And when you are done
with the guiding lines, Let's turn them
into the ellipsis, do it on one side and then
repeat on the opposite sides. And when we have
this ellipses for the bottom part
of the arms legis connect them with the hat. So firstly, we will
go to our left side, so this little part, and we will create
another curves. Ledgers go to this elbow
and we will create the curve and we
will connect it with the head when we
have it on one side, Let's repeated on
the opposite one. Now when we have the arm's leg, just add our final feature and it will be this
line for the tummy. So we are stepping
a little bit from this line that we
have for the body, and we will repeat in
them just in the center. And now, when you are done
with the whole sketch, Let's do the final adjusted. So we will go back
to our arrow key, we will go to the warp or
maybe to the Freeform Uniform, all this methods
that you can try out and we will adjust our
sketch to your liking. So let's just play around
with these methods. Let's find what works for us. And we will meet in
the next chapter where we're going to be
aiding the clean lines.
13. Cat: Clean Lines: Let's start our part with the clean lines by
changing the brush. So we are going back
to the Brush Library. We go into the
calligraphy folder and we are choosing
mono line brush. We will set its size at 2%. When we did it, we are getting
back to the layers and we will create one more layer above the layer with the sketch layer, just tap on the plus icon and let's rename this
layer as clean. Let's, while we're still
here in our layers panel, let us get back to
earlier with this sketch and we will change the
opacity level of it. So when I go into the
n icon and we are dragging these handles
toward the left part. Now let's get back to earlier
with a clean lines and we will go and start recreating
what we have on the sketch, just reminding you
that you don't need to recreate everything with
100 per cent of similarity. If you want to adjust
some places or if you want to try something
out, just go for it. All you need to remember is to make the clean and closed lines. That means that you don't
need to have any gaps. So now let's just go
and create this lines. When you are done with aiding the lungs to the main shapes, Let's just go to our layers and we will hide our
layer with the sketch. So let's just go to
this little checkbox and we will tap on it. Let's make sure that
all of our lines are clean clothes
and look in next, lets just grab our
eraser tool and let's erase all the things
that we don't meet. Also, we need to
remember that we need to close the shape of the
body on the bottom. So let us get back
to our layers. And just for 1 s, we will hide our
layer with the frame. And when we did it, we will get back to earlier
with a clean lines. We will go back to the
Canvas and we will create this horizontal line on the
bottom when you did it, let us get back to our layers. Let's unhide earlier
with the frame. And when we did
it, it means that we are done with
our aligning parts. And in the next part, we will be adding the colors.
14. Cat: Adding colors: Let's start our color in part
by creating a new layer. So we are going
back to the layers and we will need to
put this new layer between earlier with
the clean lines and with the sketch layer. Just select our layer
with the sketch. And we will tap on the plus
icon to create a new layer, and we will rename it as colors. Now we will need to get back to our layer with a clean line. So we will need to select it, we will need to tap on
it and we will need to choose reference when we did it, we are getting back to our
layer with the colors. Now we are ready
to drag and drop the colors to all
the needed places. So let's just get back to the color palettes and
we will select the color with the name
creates this color, we will put to the hat, to the outer parts of the ears, to the arms, and to the
main shape of the body. Now let's get back to
our color palettes and we will select the
color with the name browns. And when this color, we will go to the tummy and to the inner parts of the ears. And also we will add
the same color for this color in Paris that
we have around the eyes. If you can remember, we have them on the sketch. So let us get back
to our layers. We will unhide earlier
with this gauge and we will drag it above
earlier with the colors. Let's select it, Let's hold
it and let's move it up. Now with the same color, we will go and
create another layer between earlier with this
gauge and with the colors. So ledgers go there, select the layer
with the colors, tap on the plus icon. And now we can leave this
layer without a name, because later on we will combine these two layers with
colors together. So let just go to
this layer ledger, zoom in our Canvas and
we will go and repeat these circles that we have
for this part of the ice. The same way as before. Hold your Apple pencil
while creating your shape. If you need to adjust it, go over and it's
up to Edit Shape. When you did it on one side, Let's move on to
the opposite side and let's do the
same thing here. So we are recreating
these little ellipse, a jazz this size, adjust the placement
and when you are done, Let's increase the
size of our brush. And we will manually
go inside of these shapes and we
will recolor them. Now let's select the
same color that we have for the main
shape of the body. So we will go and invoke the
eyedropper tool by going to this color and hold in one of our fingers on the screen. So select the color. Let's increase the size of
our brush just a little bit. And we will go right to the eyes and we will
put just one dot here. When you have something
like that on one side, Let's repeat it on
the opposite sides. Now, while we are on
this layer ledgers go and change the color of our
brush to add the cheeks. So we are going back to
our color palettes and we are selecting the color
within the light pinks. Let's increase the
size of our brush and let's put the dots
for our cheeks. Now, we can grab an eraser tool and erase these
places right here. Or we can just do the following. We can get back to
our layers and we can click this layer
to a previous one. Let's just tap on it. It's
alleged choose clipping mask. And then we will merge
these two layers together. So let just tap on this layer and let just select Merge Down. Now we can continue aging the colors to the
rest of the places. But before that, let's just go and hide our layer
with the sketch. Now, let's make sure that we are on the layer with colors. And when we did it's ledgers. Get back to our color palettes, and let's select the color
with the name pinks, these color we will add to the inside part of
the watermelon. When we did it, we will get
back to our color palettes. We will select the color
with the name stamp, and we will go to the next
ring and we will add it here. And the last color that we
will need will be these green. Let's select it and let's
drag it to our last pieces. And when we are done
with the main coloring, Let's add our shadows. So firstly, we
will go and create one more layer above
earlier with the colors. So let's tap on
the plus icon and let's rename this
layer as shadows. Let's clean this lead
to a previous one. So we will tap on it and we
will choose clipping mask. Now we are going
inside our layer, so we are tapping on the
icon and we are choosing multiply blending modes
for the opacity level. Let's set it at 70 per cent. Now we will get back to
our Canvas and we will select the same color that
we have for our base. So let's select it by invoking our eyedropper tool when
we have this color, you know what we need to do? Firstly, we will go to the bottom part of
the hat and we will create the curve going through the whole shape of
the bottom hole July. And at the end, if you
need to adjust it, go over the top to aided sheep when you're
satisfied with your curve, let just tap on our screen with one of our
fingers and menu. We will go and recolor
the rest of the places. So when we have this main shape, ledgers go to the ears and we will put
them in the shadow. We can go and
increase the size of our brush and just variable, they go there and
recolor these places. Let's go now to the top parts of the arms and we will add
the shadow here as well. So firstly, let's zoom
into our right arm and we will go to the top part and we will create
the curve here. So adjust it to your liking and when you are done with it, Let's just go and manually
recolor the rest of the area. When we haven't done one side, Let's move on to
the opposite side and let's do the
same thing here. So we are go into this top
part of the arm and we are starting by creating
the curve a justice, and then manually recolor
the rest of the area. Now when it has
something like that, Let's go underneath our arms and underneath the piece
of the watermelon. And we will just repeat the sheeps and we will
create the shadow here. So let's just go and increase
the size of our brush. And we will go and
repeat these shapes. Let's decrease the size of our brush and we will
make these connections, this very street
corners more soft. And when you did it, It's time to grab
our eraser tool and erase all the shadows
that we don't meet. And when you did it, We are done with our
last illustration. Thank you for
watching this class. Leave a review if you
liked it and consider subscribing for more Kawhi
videos in the future, looking forward to
seeing your projects.
 Uni Corn, ⭐Kawaii Art Enthusiast⭐