Transcripts
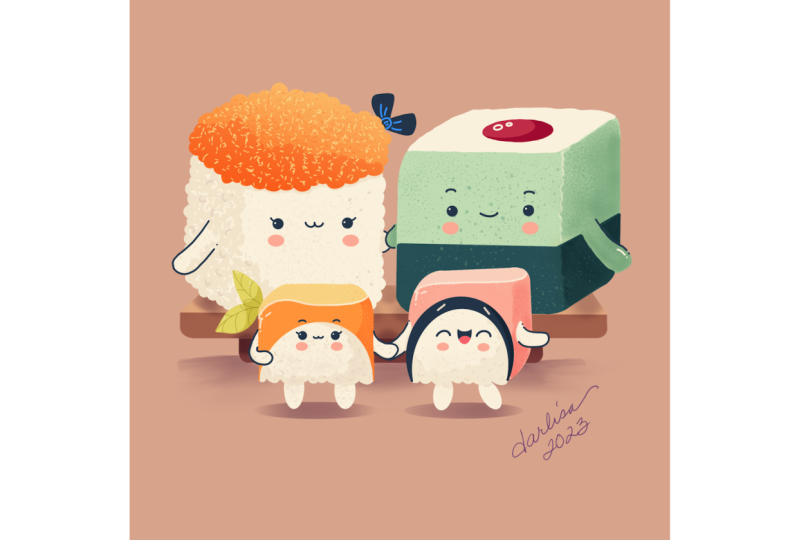
1. Introduction: Hello everyone, I am uni and eat this class we'll draw
a cute sushi family. This class doesn't require any prior experience
or fancy tools. We'll start from scratch
and we'll be using simple techniques
throughout the process. Everything you'll see will
be happening in Procreate. However, if you
have other software or one to try
traditional materials, you are welcome to join if
you are ready to start, Let's jump right into it.
2. Preparations & Wooden board Skrtch: Let's start our
class by deciding what kind of Canvas we
are going to be using. You can see it is a very simple square standard canvas because both pixel width and pixel
height are 2048 pixels. As for DPI, we are using
308 for the color profile. We are at SRGB with
this low number. When it's all done, let's
hit Done and we will be redirected to our new canvas. And now, if you would like
to use the same colors and the same brushes
that you could see for the whole class. You can go to the project and
resources tab and download all the materials and when
needed, Let's go straight. Let's color palettes and we will check out
what we have here. Here we have two options of
how we can use the colors, the compact and the carts. We will go under cars because here we have all
the colors, names, and it will be easier
for us to follow along while I still here
and our color palettes, Let's select our
first color that we will use for
this kitchen parts. You can select any bright
color that you like, or if you want to follow along, Let's just go and select this
color within the shadow. When we have our color, Let's just go and select our first brush that
we will use for creating a very simple shape that will help us
with our composition. We will go to our brush library and we will use this
branch that we have downloaded from Project
and Resources tab with the name Dao flat pencil. If you would like to use any other brush for your
sketching part, you are welcome to go under sketching and select any
brush that you like. So now when we have the brush
and when we have the color, we are ready to go to our layers and change
the background color. So let's just go to this layer with the name background color, and we will select the color
within the background. Now when we have changed
the background color, we are ready to start with our little scheme that
was mentioned before. We will use this
very simple shape to find the composition
that will work with our sketch and the
whole illustration in general before it starts in just a few words
about composition, simply composition is
some kind of structure. Once a your canvas, your objects aren't
scattered randomly. They are grouped in some way, and that makes it
more pleasing to the eyes without going
too deep into the theory, we can start with any
simple shape, a triangle, circle, rectangle, maybe square, anything that is simple. And when we have a guide in
the form of simple shape, we can position all of our elements in accordance
with the balance. Because composition
is all about balance, you don't want to end up
with something very big on one side and something very
small on the other side. That way everything
will be unbalanced and your eyes will be not very
pleased with the composition. So now, when we know just a little bit of
composition theory, just get back to our
Canvas and we will start by creating a shape
of a rectangle. We will need to position
it right in the center, and it should be quite big. But it doesn't mean
that we will need to go and create this
very big rectangle. We can start very small. So we will go to the Canvas and we will create the shape of the rectangle just with one line without lifting up
our Apple pencil, let us go and try to do that. At the end of the
line, we will hold our Apple Pencil and also
we can try to hold one of our fingers on
the screen and you will see that you snapped
your shape to a better one. You can make it bigger by moving your Apple pencil
from side-to-side. Worry, you can just
rotate it if you move your Apple pencil
in a circular direction. Now, Lynch's and hold
everything that we are holding right now and we will go
over the top to this option. They just popped up. For me, it is rectangle for you, it might be something different. We are going into
the editing mode. Here you can see that
you have some options. If you have rectangle goods, if you have a square, good too, if you don't have this options, you probably will need to
try it out one more time. Now, when we have our
option on the rectangle, we will need to go and
adjust this whole sheet. You can see when we are
at the editing mode, we have some blue dots. These are the nodes that we
can tweak, adjust our sheep. So what do we need
to do right now? We will just go to
the right side, the middle node, and we will
drag it over our right side. We will need to make
this shape going through the whole
shape of our canvas. So it will be quite
big and we will need to keep the similar
distance on this site. So for now let's just leave
it at something like here. And we will need
to keep the same distance from the opposite side. So let's just give it
to this node that we have on the left in the middle. And we will try to move it
more towards the right. So the distance
from this side is similar to the one that we
have over the right side. Now when you have
something like that, Let's just go over the top
or the bottom middle node. We will drag it up or down. So we are just making this shape bigger in a vertical axis. When you have it in a
syslog that alleges go and put it right in the
middle of our canvas. So again, we are keeping the
same distance from the sides and we will need to keep the same distance from
top to the bottom. When you have
something like that, when it is centered, we can just tap on
our screen with one of our fingers or with
our Apple Pencil. And in that way, we will get
away from this mode if you accidentally tapped
on your screen and to get away from the
mode of editing, don't worry, you can always
go to the transform tool, which is our arrow
key, or the top-left. Here we can use uniform
method or free form method. You will have the same nodes and we can adjust it from here. So don't worry if you skip this step with the editing mode. So when we have this scheme, we are ready to go
and do one more. I think we will need
to find one-third all the boards and parts and we will need
to mark it down. Firstly, let us go over
one of our sides and we will put a little mark
down. When we have it. We will go through the
whole shape of our free and we will create this horizontal line
going through it. So let's just go to
this little markdown and we will go to
the opposite side. And we will create this horizontal line
which we hold at the end. Try to make it very straight. If you need to adjust the angle, you can move your Apple
pencil from side-to-side. And when you're
satisfied with it, ledgers and hold everything. If you need to
adjust it even more, you can again go over the
top to this edit modes. When you have these, we are ready to move
on and we are ready to find the center of our shape. So let's just go over the
top of our sheep and we will create one line
that is going from top to the bottom,
The vertical one. So let's just go and
create this line the same way that we have
created our horizontal line. Again, adjust your angle by
moving your Apple Pencil. And if you feel that you are
not right in the center, let Jess and hold it and
let's go to the edit mode. Here. We will just drag
it to the center. To do so, we will
need to go and find some blank space over R canvass. Hold our Apple pencil there and just move it to that
needed, please. So approximately leg
just find the center. And when you are
done with this part, Let's just tap on the
screen and we are ready to move on to
our sketching part. But before doing that,
let us get back to our layers and we will rename
this layer as a scheme. Let's just tap on
it and let's choose Rename to make sure that we are not adding any more
details onto this layer, we will do one more thing. We will swap this
layer from right to left and we will choose look. But before that,
if you feel that it is to write for your taste, you can go and change the
opacity level of this layer. A positive means how
bright your objects on this layer are and how
transparent they are. So to do so, we will
need to go to this icon. Here you have the
opacity slider. We can just drag it over our left side and find
what works for us, what our capacity is good
for you when you found this, ledgers go to our skin layer and now we will just look
it one more time, swiping it from right to
left and choosing Lock. Now, if you try to add
something on this layer, you will have this message, and that's exactly what we need. Now, let us go and
create one more layer and we will start
adding our sketch here. We are go into our
layers and we are tapping on the plus
icon straightaway. Let's rename it as Sketch. So one more time, tapping on the layer and choose and rename. When you are done with creating your new layer and
rename minutes ledgers, get back to our Canvas and we will start going
from the bottom. We will begin by creating a little board where we can later on position
our associates on. So we will go to
this line that we have created, which
is horizontal. And from it, we will go on the bottom and create
one more line. So let just tap a little bit aside and we will make
a little mark here. When we have this mark, we will go to the opposite side and we will create
the parallel line to the one that we already have tried to make it straight, age as the angle if you need to, if you need to adjust
it even more good, or it's up to edit modes. When you have it, we will go and we will make the corner right here very soft. So I go into the top and we are creating a curve
going like that. You can play around
with the curvature. You can play around with
how this whole shape looks. You can hold your
Apple pencil at the end of the line and you can snap it to a better shape. And also you can go over
the top to edit mode. And here you can
see that you have some nodes that you can
tweak, play rounds, find what works for you
when you are Daniella, just tap on the screen and let's move on to
the opposite side. We will do the same thing here. So let's just go and
create the curve. Try to make it
similar to the one that you have on
the opposite sex. If you need to erase some parts, always go to the Eraser tool and erase them straight away. And now when we
have this top part, Let's move on to the
bottom and we will create another horizontal line. And we will turn it into something that this
board is standing up. Then just go a little bit
down and we will create another horizontal line going
through the whole shape. We will hold it and the ends, and we will try to
make it parallel to the lines that
we already have. When we have this line,
if you need to adjust it, always go to the Edit mode or the top when you
have this line, when you're satisfied with it, Let's just go over our left side and we will make a little mark. We will step from the
side maybe an inch, maybe a little less, and we will just
put a little mark down when you have
it on one side. Let's move on to
the opposite side and let's do the
same thing here, stepping from our side
and trying to keep the same distance that we
have over our left side. And now we will do the
same thing as we did here. We will turn this
side into the curves. So let's just go and if
it's easier for you, you can always start by
creating the straight lines going down and then turn
them into the curve. If you feel very confident
that you can just go and start by
creating the curves. Hold your line and the end. Go to the Edit Mode
if you need to, and go over the opposite
side and try to do the same thing as you
did on the previous set. Now, Linda's grab the
eraser tool and we will erase all the lines
that we don't meet. When we are done with
our boards and parts, Let's move on to
the top and we will adjust our board a
little bit more. If you think that this
part is too thick, you can always go
and shorten it up. E.g. we will go over the
top part and we will create another horizontal line going
through the whole shape. And from it, we will just go and create the rest of our board. We will go to this
line that we have right here to this intersection. And from it, we will need to create a diagonal lines going. So worried the inner
parts of our canvas. Let's just go over
our left side. Firstly, we will go to this intersection and from it we will create a
diagonal line like that. You can play around with the angle and with
the size of it. For now, let's just leave it as something not too
big, not too small. And when you have
it on one side, we are ready to move on
to the opposite side and we will need to
mirror this line. Let us go to these intersection
and from it we will create another line going toward the center of our canvas. Try to keep this similar angle. And when you are done, we will go and
connect these slides. We are going over
one of our sites and again we are creating the
horizontal line going through the whole shape hold
Julian and the ends and try to make this line parallel to the ones that you already have. And now we are done
with the words. If you want to play around and if you want to work on say, these two corners, you
are welcome to do it. You will need to go and
create the curves like here. If you don't want to do that, you are welcome to
leave it as it is, because probably later on
these corners won't be seen because here we will
position our associates. So now when the board is ready, let's move on to our associates.
3. Papa Sushi Sketch: Before starting our sushi part, let's decide whether we
want to continue making this gauge on the same
layer or create a new one, as well as whether
we want to change the color of the brush so it is more clear which lines belong
to sushi and which not. So if you want to do that, alleges Gil firstly to
our layers and we will create one more layer above
our layer with the sketch, we will tap on the plus icon. And if you want to go
and rename this layer, you are welcome to do it. If you don't want to do that, just leave it as it is, because later on we will combine everything together
and it won't matter. So now when we have a new layer, we will go straight
to our color palettes and we will select
the new color, e.g. let's just go with
this dark pink, red. If you're comfortable working on the same layer with
the same color, you are welcome to do it. Now when we have
prepared everything, alleges go and start
creating our sushi. So firstly, we need to go
and create a rectangle. We can do it in the same
way as we did before, or we can use one option
that Procreate has. So let us go to our wrench
icon over the top-left and we will go under
canvas here in the list, we will select Drawing Guide
layer, just toggle it. And she will see that
now you have the cells going through the whole
shape of your canvas. This option is what we need, that we will need to adjust
it just a little bit. So let's just go under
Edit Drawing Guide. You will see on
the bottom we have a panel we are using to degrade option and we will need to go to the bottom right corner and
select Assisted Drawing. When we are selecting
Assisted Drawing, we will be working only according to this cells that
we have onto our canvas. We won't be drawing
our alliance freely. So when we're done with
this Assisted Drawing, toga ledgers go and he'd
done over the top-right. Now we will go over the top of our boards
to the right side. And here we will
create a rectangle. Let's just go and
create dislikes. You can see how easily you can create them with this option. When we have our rectangle, we will need to add
some volume to it. And we can go to our
top-right corner. We can go to our site and we can create another
line going there. But before that, let us go and use another option
here, another moot. One more time. We will go to our
wrench icon and we will again go to
Edit Drawing Guide. Here we can see that
we use to degrade before and we will go and
turn on isometric right now. Now you can see that
the layout is changed and now we can go to our
top-right corner and hit Done. And now when we are
at our Canvas ledger, zoom in it and we will go to our top-right corner of a new shape and we will create
a diagonal line like that. You can play around
with its size. When you are done
with the first-line, Let's move on to
the next corner, which is on the top-right. And we will do the
same thing here, suggests create a line
going from the corner. When you are done
with this line, we go into our bottom right
corner and from it again, we are creating a diagonal line. When you are ready
with this task, we will get back to
our wrench icon. And again, we will go
under Edit Drawing Guide. We will go again
and select 2D grid. When we are done, we are hitting
down over the top right. Glenn, just connect
these diagonal lines. So again, go in there and connecting them with
the streetlights. And when we have these shape, we are ready to get back
to our wrench icon. We are ready to toggle
drawing guide off. And also we will
need to check out whether our layer is
assisted right now. Because even though you toggled off your drawing assist
from the wrench icon, if you go to your Canvas, you will see that
you are creating straight lines instead
of creating them freely. So we will need to
do one more thing. We are going back to our layers. As you can see that
our layer number three is now assisted. We have this little title underneath the
title of the layer. So we will need to tap on this
layer and from this leaf, we will need to select
Drawing Assist. Now, Ethan, go back
to our canvas. We can freely create our lines. So now let's just
grab our eraser tool and we will erase all the
lines that we don't meet. Let zoom out our
canvas and let's look at whether we want
to move the sheep. If you're satisfied with the
position of your elements, you are welcome to
continue just like that. Or if you think that maybe you want to move it
out, we'll be done. Or Elizabeth AP ledgers
go to our arrow key on the top-left and we
will use uniform methods. You can see we have
the bounding box and similarly to
the editing mode, we can just go to some
free-space onto our canvas. We can hold our
Apple pencil there. We can move our shape. So e.g. let's just move
it a little bit down. And if you feel that your elements is a little
bit too small or too big, we can go to one
of the corners and we can drag it to
adjust the size. So e.g. let's make
it big and let's connect it with this line
on the scheme that we have. When you have something
like that's led, just tap on our arrow key
to deselect everything. And now we will
work on the shape. We will go and we will
make all the corners soft. So firstly, it going over
our bottom left corner and just turn in our street
corners into the curves, similarly to what
we have right here. As always, you can play
with the curvature. You can make them very soft. You can just go to the tip of the corner and
make these stuff. It's all up to you. When you're done with
one corner, ledgers, go to the rest of them
and let's make them soft. When you add down ledgers, grab the eraser tool and we will erase all the things
that we don't meet. When we are done, Let's just go to the
top of our sheep and we will add a little
ellipse here. And later on we will turn this little olives do some
feeling of the sushi. So let's just go
to this top part and we know how to
make our shape. We will just go to this part and without lifting
up our Apple pencil, we will create the needed shape. And the answer on this shape, we will hold our Apple pencil. If we need to make it bigger, we will move it
from side to side. If we need to adjust it, we will go over the top
to Edit Shape Layer. Just go and put it right in
the center of our sheep. You can play around
with the position. You can put these
little olives a little bit lower or
a little bit higher. It's up to you. If you need to adjust
the size of it, just drag these nodes that you have in the editing
mode and adjust it. When you're done, let just
tap on the screen with one of our fingers or with our Apple Pencil and we will
get away from these modes. Now when we have this
top part, blend, just go and work on
the body of our sushi. Firstly, we will go and we will find one-third of the body. Let's just go and make
a little mark down. If you want, you can play
around and maybe markdown, not afterwards, but
one half of it, It's all up to you. What we're going to be
doing is going along the whole shape and creating
the line going there. So we will need to create
the parallel line here. Just go into that direction. You can just hold your
line and the end. And when you are
done, we will go to this side and we will repeat this line that
we have on the bottom. Let's just go and do that. All we need to do is to make these lines parallel to the lines that we
have on the board. If you need to
adjust your lines, hold them and the end,
adjust the angle. If you need to adjust
them even more, go over the top to Edit Shape. You can work once
this connection right here and make
it not straight, but turn it into a curve. It's all up to you
if you want to create this shape
is very soft thing. You are welcome to do it if
you need to erase some parts, grab the eraser tool
and erase them. And when we're done
with this little parts, let just go to the right side and from it
we will create a little arm. So we will give it
just a little bit about this new line
that we have created. And we will create an
elongated shape like that. You can play around
with its size. You can play around
with the shape. It's all up to you. When you are done,
just grab an eraser to erase all the lines
that you don't need. You can leave this
and on the left side as it is right now and make
a connection in that way. Or you can go and create a little curve
going in that way. So that way you will show
that this little arm has some volume and it's
not like playing and paper. If you want, just
leave it as it is. Work on the shape if you want. If you need to erase
and parents and grab an eraser tool
and erase that. When you are done with
this arm, if you want, you can go to the
opposite side and create a little
arm there as well. This time, we won't see that much of the body of
this little arm. So we can just go and create a little ellipse or a little half of the
ellipse like that. When you have it,
let just move on to our facial features and we will go to this part that
we have on the front end. We will need to find an approximate center
with a vertical line. So let's just go above
our shape and we will create a line going
from top to the bottom. We will hold it and the answer
snap to a straight line. And if we need to
position a differently, we will go over the
top to edit mode. We will drag it to the center. And when we are done, we will tap on the
screen and we will get away from our editing mode. Now, if you wants to find an approximate center
that will be horizontal, you are welcome to do it by creating a line in the same way, but now moving in
a horizontal axis. If you feel very confident, you can just go and use only one line that is going
from top to the bottom. All we need to do is
to go over one of the sides firstly and
create the first i. We can play with
different shapes, but for now let's just go
and create a circle there. You can play with the size and you can play with the policeman. Lynn just dab a little bit from the center and we will
create the circle like that. If you want to make it bigger, you are welcome to do it. Now when we have our first i, we will move on to
the opposite side and we will recreate it here. We will need to keep the
same size of our elements. We will need to keep the same
distance from the center, and we will need to
try to put the second, I own the same line that
we have our first ion. So let's just go and try to z. That's also here. You can create your eyes,
manually shade them, or if you feel more confidence by using
the quick shape tools, you are welcome
to do it as well. So all we need to do is
to create your shape, hold it at the end. And if you need to adjust your over-the-top to Edit Shape. Now when we have our
two eyes ledgers go between them and we
will add our little mouth. We will go very easily with half of the circle
on the bottom. You can play around
with the position. You can put this little mouth above the eyes in
the middle of them. You can go a little
bit lower and put your mouth
there, play around. If you want to try
it out even more, you can go to the
selection tool, which is our S ribbon
icon over the top-left. And use free hands methods. You can select
your little shape, just loop it around. When you have only
this shape selected, you will see that now
you can see it more clearly than all the
rest of the things. And when you have
this thing selected, you can go to the
transform tool, which is our arrow
key on the top left. Here you can see our familiar
bounding box and you can just drag this shape and find a position
that she like. When you are done
with this task, let's just deselect
everything by going to our S ribbon shape. We will tap on it and we
will deselect everything. Now, let us go above our eyes and we will
add later eyebrows. You can play with the shapes. You can just make
them very straight. You can make a different
angle of them. If you want. You can make half of
the circles there. It's all up to you. Play around with the
shapes of the eyebrows. When you are done
with the eyebrows, let just go underneath the ice and we will
add little cheeks. So we are going
over our left side. Firstly, we are
going under the eye. We will start by creating
a little ellipse here. You can hold it and the
hands adjust the shape. If you need to adjust the
placement, go over it. It's up to Edit Shape. If you don't want to create
an ellipse for your cheek, you can just go and
create a circle. It's all up to you. When you have your first
cheek over one side, Let's move on to
the opposite side, and let's do the
same thing here. Let just start by
creating an ellipse. We will hold it at the end. We can adjust the size. And if you feel that
you're a little olives on the right side is not looking similar to the one that you
have over the left side. We can go over the
top to Edit Shape and we can move this little Alps to the first one and adjust
the size by moving our notes. When you have the
similar shape, lead, just move it to our
place on the right. Let's find the policemen. Let's try to put it on the similar place that
we have on the left. And when you're done,
let just tap on our screen and we will
get away from this modes. If you want to add more details, you are welcome to do it. If you don't want to
add any more details, we are done with
our first sushi. Let's move on to the next
one in the next chapter.
4. Mama Sushi Sketch: For our second sushi
on the opposite side, we can do the same thing as
we did with the first one. We can go and use all
these options that Procreate has and start
from the very beginning. But why should we do
that if we already have our base ledgers
go and create a copy of this layer
and we will adjust it and create another sushi
by using these bits. Let us go to our layers and we will go to this
layer where we have our first sushi
and we will swipe it from right to left
and choose Duplicate. Now you can see that we
have the second layer with the same content
and we will just need to flip it on
the horizontal axis. So when it is selected, we're arguing to our
arrow key on the top-left and on
the bottom panel, we will select Flip Horizontal. Now we will move our shape
to the opposite side. And if you take a look at it, you probably will see that
it's not looking quite right. Don't worry, we can
adjust it very easily. Firstly, let's just go and make it just a
little bit smaller. So we are going to
one of the corners over the top and we add
dragging them down. Now let me just
move it closer to our first sushi and let's
work on the arrow left sets. We will go to this panel
that we have on the bottom, and we will choose the option
that is called distort. Now, if we go to our corners, we will be adjusting our shape. Now you can see
that if we go e.g. for the top-left corner
and if we drag it down, we will be adjusting the angle and the perspective
of our left sides. So let's just go and make
it pleasing to our eyes. We can go to any
node that we have on this bounding box and
adjusted to our liking. If you need to
rotate your shape, you can go over that
soap to this green node. You can hold your
Apple pencil there and you can move your
Apple pencil in a circular direction
when you find the placements and when you
found the look that you like, Let's just go and deselect everything by hitting
our arrow key. And now let's just grab our eraser tool and we will erase everything
that we don't need. We don't need this line
that we have in the middle. Let's just go and erase it. We don't need this thing
on the top that later on we will use for our
field in part on the sushi. And also, if you want to
leave these facial features, you are welcome to do it. If you don't want to
have them right now, you can erase them to. Also, we will go to our little
arms in the middle and we will erase this part that we
have from our left shape. So now we can see that they are somehow holding their hands. Now, let us go and adjust
our sheep even more. We will go firstly
over the top part, and this whole part, we will turn into a caveat. We will create some kind of they're fluffy hairstyle
with the carrier. Firstly, let just
go a little bit lower this line that
we have right here. And we will be creating
some fluffy pattern. So we won't be doing with
the lines like that. And she don't really
need to go with a similar size on
this little curves. You can play around and find the pattern that works for you. So e.g. you can go a
little bit higher, a little bit lower, make these
parts smaller or bigger. It's all up to you. All we need to do is to
go along this whole shape right here and create
this fluffy pattern. So let's just go and create
something like that. When you look to
your sheep around, let just take a look at it. And if we want to find some places that
we want to change, ledgers, go and change them. So maybe here where we
have Elizabeth dance, we will go Ellis little
bit higher and add another layer of
this little flaps. So the whole shape on the top will remain some
kind of the curve. If it's easier for you, you can create the curve, hold it at the end, and just go to your
fluffy parts and adjust them in accordance
with these little curves. Now when you are done, let's just grab our
eraser tool and we will erase everything
that we don't need. Now when you have
erase your lines, you can zoom out your
Canvas and take a look at your illustration from the
distance if it's looking okay, you are welcome to continue. If you want to add more details, you are welcome
to do it as well. So e.g. if you would want to work more once this
little curves, you are welcome to do it. E.g. let us go to the sides and we will
add a few more of them. When we are done with
our camera here, let's just go to
one of the sides. So e.g. to the right one. And we will add a little
accessory or maybe hat here, some kind of eutrophication. We will make it in a shape
of the tail on the shrimp, or maybe f of h. So let's just go there
and we will start by creating a guiding
line like that. You can play around
with the shape, you can play around
with the curve. When you have this guiding line, we will need to go to
both sides from it. And we will need to create
two shapes like that. So it is some kind of a drop. Let's just go to one side
and let's create it here. When you have it on one side, Let's move on to the
opposite side and let's create the similar shape. So basically at the end, we are ending up with
some kind of the heart. Let's grab an eraser to erase everything
that we don't need. Now, if you feel that
this shape is not working for you or if you want
to adjust it in any way, ledgers go to the
selection tool, which is our S ribbon icon. And we will select
this little shape, just looping it around. And when only the
shape is selected, we will go to our
Transform tool, which is our arrow key. We will use uniform methods
and we will adjust the shape in any way that we like
if we want to rotate it, We Are you into this green
nodes and rotating it. If we want to make it bigger, we are going to one
of the nodes on the sides and we are just
dragging it up or down, depending on whether we want to make it smaller or bigger. If we want to find a
different placement, we are just moving it to
the place that we need. Let's just play around and find the position
that works for us. If you don't want to
end this elements, you are welcome not to do it. When you're done
adjusting your shape. Let's deselect everything
by hitting R S ribbon icon. If you have some
overlapping shapes, like just grab our eraser tool and erase everything
that we don't need. When you are done
with this elements, let just go to the sides and
we will turn them into rice. We will need to go along the
sides and we will need to do a similar thing that
we have right here. So let's just go and turn
them into very wobbly shapes. Again, you don't need
to make them all of the same size so you can create a pattern that
will work for you. All you need to do is to
go in the direction of the lines that you have
when you aren't down leg, just grab the eraser tool and we will erase the previous lines that we had before eating it
to work more on the shape, you are welcome to do it. When you are done
adjusting your outlines, Let's just go and work onto our facial features,
Lynch as goo. And firstly, make the
eyes a little bit bigger. So let's just go to
this existing eyes that we already have and
we will make them bigger. So just go in there and create
another circle or ellipse shaded right away and move on to the opposite side and
make it bigger too. If you want to, Anyhow,
adjust the placement. We will need to go to
our S ribbon icon, use the freehand method
and select our little ice. We will select the whole areas
that we have right here. Let's loop it around. And when only this
area is selected, we will go to the
transform tool, which is our arrow key. We are using uniform methods. And with uniform method, we can drag them up or down. If you want to make
them even bigger, you can go to one of the
corners and make them bigger. But remember that you will
need to put them in a center. If you want to retain the eyes, you can go over
these green nodes, overdid soap and rotate that. When you are done
adjusting your eyes, let just deselect everything
by hitting R S ribbon icon. And now when we
have our eyes led, just work on them
a little bit more. We will firstly go
over our left side. We will go to the top quarter of our eye and we will
create a little eyelash. So we will just go and create
a diagonal line like that. When you haven't done one side, Let's move on to
the opposite one and we will do the
same thing here. Go into the top quarter and creating a little diagonal line. If you want to add the eyebrows, you are welcome to do it. If you want to work
more on the cheeks, maybe position them differently, or choose a different shape. Again, you're welcome to do it. When you're done with
these two pairs, we are ready to add
a little mouth. So let's just go to
this center just on the line that we have right
here for our center part. And from it, we will go
firstly over the left side and we will create a
little curve like that. You can hold it and the hands
and adjust the size of it. You can adjust the curvature
when you are ready, we will go to the
opposite side and we will repeat this
same thing here. So going from the center and
creating the same shape, try to make it
similar to the one that you have over
the left side. And then you can just go manually and adjust
them if you need to. And again, if you want to find a different
placement for it, led, just go to our S ribbon
icon free hands method. We will select this shape. We will go to the
Transform tool and we can play around with the
position of these elements. When you are done playing, Let's deselect everything
by hitting R S ribbon icon. And now we are done with
our second illustration. In the next part, we will
be Agent little kid sushi.
5. Salmon Sushi Kid Sketch: Let's do this fight
by firstly go into my color palettes and
selecting a different color. So it will be easier for us to distinguish where our
sushi is, our lead. Just go and select
the scholar within the dark cyan with
this color selected, we are going to our
layers and we will create one more layer
for our next sushi. Lay, just tap on the plus icon
if you want to rename it, go entry, name it. If you don't want to rename it, just leave it as it is. And now we will go
over our left side. And here we will create
a little kid sushi. So again, we will go
to our wrench icon. We will go under Canvas and we will turn
on drawing guide. We will go under
Edit Drawing Guide, and we will toggle assisted
drawing when we did it, when I go into our
top right corner and we are hitting Done. And now we will
zoom in our Canvas and we will start by creating
a little rectangle here. So let's just go, Elizabeth, down from our mama sushi and we will create a
rectangle like that. We will need to make it
smaller as our parents wishes. So let just go and create a rectangle a
little bit smaller. When you have
something like that, we will go a little bit above this new shape and we will create another horizontal line. So probably we can
go to this line that we have for our boards. We will just go and create
another horizontal line here. We will stop a little
bit from this side. And when you have
something like that, we are ready to move on
to our arrange icon one more time and we are ready to toggle off our drawing guides. Also, we will need to
go back to our layers. If our layer number five with
this new shape is assisted, we will need to
manually turn it off. So we will tap on the
layer and we will choose Drawing Assist
from the list. Now we will go to this top
part and we will connect our lens just manually go
into this corner firstly, and connecting it with the
line that we have over the top just creates an n
diagonal line like that. And when we have it on one side, moving on to the
opposite side and creating another diagonal line. Now when we have our main sheep, we need to go and storing this very straight corners
inside the curves. So let's just go and do the same thing as
we did right here. So go into our corners and turning them into
deck soft curves. We can leave these corners on the bottom as
they are right now, because we will
work on them more. When you solve in the
corners on the top left, just grab our eraser tool and we will erase everything
that we don't meet. Now let us go to
our bottom part and we will turn these boards
and parts into some rice. So we will go along this line and we will turn it into
something like that. Ledgers go and create
this very wobbly shapes connected with the lines
that you have on the sides. And when you are ready, ledgers, grab the eraser tool and erase the line that we
don't need anymore. Now let us go to our top part. We will go to this
main shape and we will find one further
width. Again. You can just go and mark it
down with a little dots. And when you have it, we will need to go to
our corners right here. And from them, we
will need to create a curve going along
the whole shape. And the points at the top
where our curve will be, will be this little mark down. So let just go and create
something like that. You can hold your
curve at the ends, just combine the
corners on the bottom. When you are done
with the curve, go over the top to edit shape. Find what works for you. Play with this little nodes. Adjust the size if you need to combine the dots
on the WhatsApp, if you think that you can go and maybe put it a
little bit down, you are welcome to do it. You can play around with the
shape as much as you want. When you are done
with this shape, Let's just tap on our screen. Let's grab our eraser to erase everything
that we don't need. And when you have it, we will go and create one line that is going
from top to the bottom. Hold it and the hands adjust
the angle, make it straight. If you need to find
the center even more, go over the top to Edit Shape. Find the center. When you are done,
Let's deselect everything by
hitting our screen. When you are done, We
will go firstly over the bottom part and we
will add little legs here. So we will go firstly over the left side and we will
create a shape like that. You can play around
with the size of your leg when you
have it on one side, we will need to move
to the opposite side and we will need to
add another leg. We will need to keep
the similar size. We will need to keep the similar distance from the center. When you have the legs, Let's move on to the sides
and we will add little arms. Firstly, going over
our left side, again, we can go and find one-third of our whole shape or just going by I and creating
a wobbly shape. Here, lenses firstly start by
creating a shape like that. When you have this curve, we will need to add
some volume to it. So we will just go a little bit lower and we will repeat it. And the bottom, we will
just create another curve. When you have it's led, just grab the eraser
tool and erase everything that we don't
meet on the other side. Let's go and find
this same placements. So you can just go and create another line that is
going horizontally. When you have it, we will
go to this intersection and we will create the similar
hands that we have right here. Play with the size
blade with a curvature. It's all up to you. And when you're done
with a hand slide, just move on to the
facial features. We have this line that
defining our center. So let's just go to one
of the sides and we will start again by
creating our eyes. Let's repeat the similar eyes that we have on our mana sushi. So firstly, go with
over one of the sides. And very conveniently
we have this line of our board that can help
us to position our eyes. Let's just go to this
line and we will start by creating our first circuit. Play around with the size, play around with
the distance from the center, shade the eye. And when you have the first one, let's move on to
the opposite side and let's do the
same thing here. Keeping the same distance
from the center, keeping this same size, and trying to put it
on the same line. Let's shade it. And when you have to isolate, just go and add our
little eyelashes. So similarly to the
previous sushi, we will just go to
the top part and we will add the diagonal
lines like that. When you are done with
this shape, if you want, we can go and add little
eyebrows about the ads. So let's just go and play
around with the shapes. E.g. ledgers do similar shapes
to the proper solution. When you have the eyebrows, Let's add our little mouth. We will go right
between the eyes. And this time we will go to
our land that we have in a center and we will go down
with the ship like that, hold it at the end. We are creating some
kind of the hook. When you have it on one side. Let's move on to the other side, and let's repeat the sheep, but we will mirror it. Again, hold it and the end. When you're done, if you need to adjust it
and go over it, it's up to Edit Shape. If you want, you can go and
manually adjust it even more. When you have the mouth. Let's add our little cheeks. This time, let's just go and
add the circular cheeks. So firstly, go in over one
of the sides and we are creating the cheek here when
you have it on one side, Let's move on to
the opposite one. And we will do the
same thing here. When you are done, we are done with
our third sushi. So in the next part, we will create
another kid sushi.
6. Tuna Sushi Kid Sketch: For IRLS sushi, let's go
to our layers and we will create one more layer if you want to rename it, go for it. If you want to change
the color of your brush, you are welcome to do it too. When you add down, we will
go to this bottom right part and we will recreate the shape that we have, our proper sushi. But of course this time we will make it a
little bit smaller. We can do it manually or
we can use the same tool that we use before
our assisted draw it. So let just go to
the Wrench icon. We will go under
Canvas and we will turn on the Drawing Guide. We will go to Edit
Drawing Guide, and we will turn on assisted
drawing using 2D grid. Firstly, let's hit
Done and let's just go to this place where we
need to put our new sushi. And we will start by creating
a very simple rectangle. Let's just go and do that. You can make it a little
bit bigger or the same size that we have for
our sushi on the left. When you're done with
your basic rectangle, ledgers go back to our wrench icon and we will
go to Edit Drawing Guide. We will change our
mode to isometric. And when you change this
Assisted Drawing is selected. We are heating done and we are going to the top
corners firstly, and we are creating
diagonal lines from them. When the diagonal lines on the top are ready
where I go into the bottom and we are creating
a diagonal line here too. When you have it, we will
go back to our wrench icon. We're going again to
our edit drawing guide, and we will change our
mode to two degrees back. Sec drone is selected, we are hitting down
and we will finish up our shade by creating the
lines that are straight. When you are done
with this task, we are again go into
our wrench icon and we will turn off
Drawing Guide from here. We will need to go to
our layers and make sure that our layer
is not assisted. Now it is, so we
will tap on it and we will choose Drawing
Assist from the list. Now, ledgers grab
our eraser tool and we will erase everything
that we don't need. When you are done
with this task, we will go to the top
part and we will turn our corners into
very soft corners. So again, we are turning
them into the curves. Let's just go there and
very quickly do that. We can leave our corners
on the boards and France as they are right now because later on we will turn
them into writes. Let us go over the
top and we will turn our corners
into the curves. Also, we will turn
this corner right here on the bottom
right to the curve too. When you add down ledgers, grab an eraser tool and erase everything
that we don't meet. When you're done, let just go to the bottom part and we
will turn it into right. So we are again going
alone the whole sheet. We will create this wobbly. Let's play around
with their amounts, play around with their size, just connect them
with the sight lines. When you're done, grab an eraser tool and
erase everything that you don't need to work
more on the shape, you are welcome to do it. Now Let's just go over
the top part and we will do something similar
to what we have right here, but we will add two
layers this time. So again, we're starting by
going to one of the sides and creating a curve going through the whole shape of
our front parts. Let's just go and create it. Hold your line and the answer
if you need to adjust it, go over the top to edit mode. When you have something
like that led, just get away from our
Edison mode by hitting our screen with one of our fingers or with
our Apple Pencil. And now we will go a little bit lower and we will
create another curve. So let's just go to this
corner and from it, we will create another curve. And we will ended up
on the opposite sides. When you have it, sledges hold our Apple pencil and let's go
over the top to edit shape. Let's try to make it similar to the curves that we
have on the top. If you want to, you
can go and move this corner a little
bit to the left. And when you're done, let just tap on the
screen and we can work on to our curve
right here so we can continue to make it go into the bottom and creating
the curve going down, try to make it parallel to the curve that you
have right here. When you are done,
grab your eraser tool and erase the lines
that you don't meet. Now when we are done with our main shape ledgers go
and find the center of it. So again, we're arguing
with our vertical line going above the shape
holding the line at the end. If we need to find a
different placement for it, we will go over the
top to Edit Shape and we will put it
right in the center. When we have this line, Let's just tap on
the screen to get away from the editing mode and we are ready to go and add our little legs and little arts. Firstly, let's go to the
bottom and we will add next, let's make them playful. And firstly, we are going
over our left side and let just till this leg a
little bit in that way. So basically it is similar to the leg that we
have right here, but it is just a
little bit tilted. When you have the
leg on one side, Let's move on to
the opposite side and let's add another leg. This time it will be a
little bit more tilted. So let's just go and create
something like that. Work on the shape, tried to make it the similar size as you have it on the left. When you're done
with the lag lead, just move on to our little arms, will go first to go over
our left side and we will repeat this similar thing
that we have right here. So this time we will
just mirror it. When you have it, you can
go to the Eraser tool and erase this little part
that is overlapping right now. When you are done
with the first arm, Let's move on to
the opposite side, and let's do the same thing
as we have right here. So let's just first look
guilty or arm that we have over the left side
and from it we will create another horizontal
line like that so that we know where we
need to put our next art. Now when you have this line, Let's just go and repeat
the similar shape to the one that we have
on the proper sushi. If you want to leave it as
it is right now, believe it, if you want to add
this little ellipse over the left side, you are welcome to edit. Now let's just grab
an eraser tool and erase this line in inset. Also, if you want, you can make this shape
right here on the left side, similar to the one that
you have or the left part. What I mean is
these little parts. So you can just make it a
little bit more protruding. You can go to this line that you have over the soap and you can continue it by going to the bottom and connects
it with the rice. Eating need to erase some parts. After these manipulation,
you can go and erase it. If you want to work
more on the shape, you are welcome to do it. And when you are done
with the main shape, let just go and add
our facial features. We have this line that is
represents an iris Center. Let's just go there and we
will start with the ice lay. Just go and create half of
the ellipses for our ICE. Firstly, going
over our left side and creating the
sheep like that. You can play with the size. So you can play
with a curvature. You can play with its position. You can hold your line
and the hands and adjusted by going over
the top to edit sheep. When you have the
shame that you like, we will need to go to the opposite side
and repeated here, keep the same size, keep the same distance from the center and try to
put it on the same line. When you have it sled, just go and add
our little mouth. So we will go right between
the eyes and we will create a little Smiley
mouth like that. After that, we will
go to the bottom and we will create an
open mouth like that. Now when you're done with
the main shape on the mouth, ledgers go to the inside
part and we will add a little time with the same shape that
we had for our eyes. If you want, you can go inside
and shade this part out. Now, let's move on
over the top of our eyes and let's
add little browse. If you want to play with the shape and play
with their position. When you are done
with the browser, Let's move on under our eyes and let's add a little
cheeks. Again. If you want, you can
go with just circles. Or if you want to
repeat the ellipsis, you are welcome to do it. When you are done
with this part, we are mostly done
with our sketch, but let's just zoom it out and let's take a look at
it from the distance. We can figure out whether we
want to change some parts, maybe adjust them in any way. Maybe it makes them far
is bigger or smaller, or adjust them even more. So e.g. let's just go and make these sushi that we have just created a
little bit bigger. So we will go to our arrow key and we will make it bigger. You also can find a
different placement for it if you want to
adjust it even more, you can firstly, go to distort and maybe
adjust it from here. If you want to
adjust it even more, we can do to the other
option that is called work. You can see that we still
have this bounding box, but also we have some intersection inside
this bounding box. And that means that we can
go to any intersection or to any line that we have wanted this bounding box and
we can adjust it. So e.g. we can go to the middle part and we
can move it to the site. You can play around
with this option. Or if you want to adjust
other shapes too, you can always go to the needed layer and
adjusted in the similar way. So now let's just spend a
bit of time figuring out whether we want to change some elements, lead change them. If we don't want to do that, we can move on and we
will add one more detail.
7. Additional Elements & Sketch Adjustments : When you are done a Justin, your little shapes
ledgers go and add a little leaf
over the left sides. So we can go and create one more layer over
all of our layers. And we will go right
here where we have the intersection
with our mama sushi and this kid sushi
on the bottom. And here we will
add little leaves. What we need to do here, if you don't want to edit, you are welcome not to do that. But if you want, we will go and create the first
shape like that. It will be a shape of dilemma. When you have the first shape, we will go and create the
similar shape or the right set. Now let's just
grab an eraser to, and we will erase this
overlapping parts. If you want to adjust the
placement of this elements, if you want to rotate
it in any way. Me just go to our
Transform tool, which is our arrow key. We will get back to
the uniform method. And if we want to rotate it, we will go to the green nodes. If we want to find
a different place, we will hold our Apple Pencil at some blank space on our Canvas. We will just move it to
this needed, please. Just play around with this
shape a little bit more. And when you are done, Let's deselect everything
by hitting our arrow key and Lynches go and add
the texture of the leaf. So we will go firstly and create the line that is going
from top to the bottom. And we will go over
the sides and we will add a few diagonal
lines like that. And we will do the
same thing with the leaves that we
have on the bottom. If you have some
overlap in fires and grab your eraser
tool and erase that. Now one more time. Let just take a look at the whole picture
that we have right now and figure out
whether we want to change some parts, e.g. let us move our
little kids sushi a little bit to the left because now there are more
to the right side. Let us go to our
layers and we will select all the layers that
belong to our little sushi. So we also can select this
layer with little leaves. And to select multiple layers. Firstly, we need to select
one layer and then we will go to the next layer and we will swipe it
from left to right. You can see now it has
this muted blue color. That's exactly what we need
and we will need to do it one more time with the last
layer for our little sushi. Now when we have these
three layers selected, we will go to our
Transform tool, which is our arrow
key on the top-left, and we will just drag them a little bit toward the left side. And again, you can play with
their size if you want it. If you want to make them bigger, go and make them bigger, just figure out where
you need to put that. Now let's deselect everything
by hitting our arrow key. And if you want to, we can do and merge all of our layers that belong
to this kitsch. If you don't want to, You
are welcome not to do that, but to make our
sketch very clean, we will need to go and erase the parts that
we don't need. So e.g. we will go to earlier with Papa sushi and we will need to erase this overlapping parts. Do It's only when you are completely satisfied
with your sketch. You can grab an eraser
tool and erase this part. Or if you don't want to do
that with an eraser tool, you can use another
tool that Procreate has that will be less drastic. We can go to our layers. We can tap on this layer with our papa sushi and
we can select mask. Now I can see that we have
this mask over the top of this layer and our
color changed to black. When we are using black color, we will be erasing the
pears on this shape. If we are using the white color, we will be showing the
parts that were hidden. Now, let's just go to our brush and we will
select a different brush. This time, we will go to the calligraphy folder and we
will choose monoline brush. You can increase the size
and we won't go over this overlapping parts and
we will just erase that. We are working with a brush. So basically we are
not erasing them, we are just hiding them. So if we go to our layers and if we go to this layer mask, you will see that we have
added some black color here. And if we just go to the
chat box on this layer, and if we tap on it, you will see that this
line will be shown again. So that's how this mask works. Now, if we want to make
our sketch very clean, we will need to go over
all of the layers, find all of these places
that are overlapping, and we will need to
hide them in that way. Let's just go to this
mama sushi layer and we will add the mask to it. We will tap on it and
we will choose mask. Again, we are using
the same brush, we are using black
color and we are going to this overlapping parts. And Nao Lynn just
go to earlier with the board and we will
hide it in that way too. So we are going to this
layer that is named sketch. We are tapping on it and
we are choosing mask, again, black color,
the same brush. And we are go into this
overlapping places and we are hiding them. For this layer that we have for our compositional
guidelines, we can just go there and hide it by hitting this little checkbox. And now we have our sketch done. In the next part, we will
be agent basic colors.
8. Coloring the Board: We ended up our previous
barred by creating a sketch. And now we will need to go to
our layers and we will need to decide how we want to
clean everything up here, we have two options. One is drastic, and it is to go and merge all the
layers together. And if you need to do that, you will just need to go and figure out whether you want to change some parts because
it is your last option. If you want to merge
all the layers, what we need to do
is to go to early on the top where our leaves are. And we will need to
put one finger there. And then we will need to go
to earlier on the bottom, which is earlier with
the name sketch. We will need to put
another finger here. And then with these two fingers, we will need to go and make
the movement of the pinch. And now everything
is on one layer. If you don't want to do that, we will just go and put
everything onto a group. And it has some advantages
because later on, if we see that we need to
figure out what we need to do, we can always go to our layers. We can hide some layers
that are overlapping. We can hide earlier
with the mask. We can see what we have on our sketch and we
can recreate it. So let's just go
with this option. We will need to
select every layer that belongs to our sketch, and we will need to
put it into the group. To do so, we will need to select one layer
and then we will need to go to
another layer and we will need to swipe it
from left to right. Now you can see that we
have two layers selected. And now let's just go and
select Everly that belongs to our sketch to go in and swiping the layers
from left to right. When you have selected
all the layers, we will go to the top-right
and we will hit Ungroup. Now we have the group. You can just go and rename
it similarly to the layer, we can just tap on it. We can choose Rename and we
can give it a name. So e.g. let's just go and
call it sketch to make everything clean
into our layers. We can just go to this
little v icon near the checkbox on this group
and we can collapse it. Now, it's all clean. And if we need to go and find the layer that we
want to recreate, we can always go into the group. We get uncollapsed it and we can use this
layer that we need. Now, let just start
from the bottom. We will be starting by
creating these boards. So we will go to
the group and we will find earlier
with these boards, you can see that we have a little mask over it so we
can just go and hide it. So in that way, it
will be easier for us to recreate what
we have right here. Now we will need to
create one more layer. So let just go to the plus icon. We will tap on it and we will rename this
layer as boards, like just tap on it and
let's choose Rename. Also further convenience,
we will need to put this layer underneath
our layer with the sketch. And as we have a group, we can do it very easily. Firstly, lead, just
collapse our group. We will select it and then we will hold it and drag it up. Now we won't go too early with the board and we will go and
select a different color. We are starting from the bottom because it
will be easier for us to overlap one object
over another object. So let's just go to
our color palettes and we will start
with a darker color. We will select boards dark. When you have
selecting this color, we will need to go to
our brush library. It will go to the
calligraphy folder and we will choose
monoline brush. With this brush, we will
go to this little part on the bottom and we will just recreate what we have
here with an outline. Ledgers go and try to do that. You can use all the options and all the tools that we
used before. So e.g. let just start by going to this horizontal line
on the bottom and recreating it with our brush called your line and the ants, if you need to adjust
the angle, move it. If you need to
adjust it even more, go over the top to Edit Shape. Now when you have this line, we will need to go
to this site and we will need to recreate
our corners. So very easily, ledgers
go over our left side. Firstly, we will just go
and recreate this corner. Go to your line. And remember that at this time, we don't need to have any gaps
between our little lines. We just need to have the closed shapes so very
easily and very accurately. We are going to the end of our line and we are
creating this little curve, hold it at the ends to
adjust it to a better curve. And when you are done, ledgers go and recreate
this vertical line. Again very accurately
go into the ends of our lives and creating
this straight line going up. When you have it on one side, Let's do the same thing
on the opposite side. So again, very
accurately go into the end of our line and
creating the curve, holding it and the end just
NaBr to a better shape. And then when you recreate the
corner ledgers go again to the ends of this
curve and we will create a line going
up now over it, It's all, we will create
another horizontal line. So let just go and
connect our sites. Remember that you don't
need to have any gaps here. When you are done with
your outline ledgers, drag and drop the
color insights. To do so, we will need to go
over our top-right corner, and we will just need to
drag this icon with a color. When you're done, let us check out whether we want
to choose some parts. And to do so, we will need to go to our layers and we will just hide our group with the sketch by going to
this little checkbox. If you're satisfied
with how it looks, we are welcome to continue. If you want to change some
parts or adjust some details, ledgers, guilt and adjust that. Let's try to make
everything very smooth. So let just go grab our eraser tool and erase all the parts
that we don't need. When you add down one more time, let us get back to our
layers and we will unhide our group
with the sketch. And now we can
continue by going to our color palettes and
selecting the different color. This time it will
be bored media. Let's tap on it to select. And let me show you another
option of how you can make your lines and how you
can recolor your objects. We will go to our S ribbon icon, and here we have the option
rectangle. Let's select it. We will use the option ads on the bottom and we will just go along the whole sheet
that we need to recolor and we will
make a selection. We will go to this intersection
over the left side, and we will just go and
creates these big selection. When you reach the
opposite corner ledgers and hold our Apple pencil, and you will see that
we've made a selection. Now you have two
options of how you can recolor this whole area. You can go to your bottom panel and you can just tap color fill. But later on, if you are going
to be creating selections, you will be recoloring
them from the beginning. So maybe it's not
very convenient. So let's just do, we will
tap on it one more time and we will go one more time
to our top right corner, and we will just drag and drop the color to the selected area. Now we will need
to go and deselect everything by hitting R S
ribbon icon one more time. We will need to work
on to our corners. So let just grab the eraser tool and we will just
go and cut that. With an eraser tool. We can use all the options
as we used before. It works the same way. So let's just go to
our corner and we will create a line with
our Eraser tool, which will hold at the end, adjusted if you need to, if you need to adjust it
even more, go over it. It's up to Edit Shape. When you are done,
tap on the screen and just erase this part
that you don't need. When you are done with one side, Let's move on to
the opposite one and do the same thing here. Go into our corner and creating the curve with our eraser
tool, hold it MAN, to snap it to EBITDA shape and
then if you need to adjust it go or did soap play
around with the curvature? And when you are done, Let's just go and manually
erase this part on the bottom. When you add down ledgers, go to our layers. Let's hide our group with
the sketch and checkout, whether we want to
change some parts. Let's just go and smoothing
up our little corners here. Grab your eraser tool and
smooth everything up. You can see that we haven't recolored this little
part right here. So we can go and do it manually. Ledgers go to this line that we have on the bottom
of our lighter part. And just by going there
with a straight line, we will recover these
little protruding parts. When you are done. One more time, we are
going back to our layers. We will unhide our
group with this sketch. And let's just see what
else we need to add here. We will need to
add this top part. So firstly, we are going back to our color palettes and we will select this board light color. When it is selected. One more time, we will
go to our S ribbon icon, and this time we will
select freehand methods. With this freehand method, we will just go to our corners and we will
just create a selection. So firstly, just going over
our left side and we are going into this intersection that we have or the left side. And we are just going by
our lives that we have on our sketch and just
tapping on the corners, loop it around and
make a selection. When the selection is closed. One more time we are going
over our top-right corner and we adjust dragging and dropping the color to this area. Now when you're done, let's just deselect
everything by hitting R S ribbon icon. And one more time
we will go back to our layers and we will hide
our group with the sketch. If we want to change some parts, we will go and do that. If on your sketch you have
these two corners scene, you can go and make them
into the curves too. If you don't have them seeing, just leave them as
they are right now. And when you are ready, we are done with
recoloring our boards. So in the next part, we will create our first sushi.
9. Coloring Papa Sushi: Let's continue by creating
the base for our papa sushi. So firstly, we, I go into
our color palettes and we are selecting the color
with the name grayish green. When we have it, we will need to get
back to our layers and we will need to go inside
the group with the sketch. We will need to find these
ones that are now hidden. So let's just go to
this little v icon and we will find this
layer and it's mask. You can see that here we have our layer three with the
proper sushi sketch, and above it we have
a layer with a mask. So let's just go and just
for this little part, we will just go and
hide this mask. Now when we have this
line that we need, we can go again to
our sketch group. We can collapse it, and we will need to
create one more layer. We will create an
about earlier with the Board's sets happen on the plus icon and straightaway, Let's rename it as
papa sushi base. And now we will need to
go all over this place and we will need to recreate the outlines
with this color. So similarly to the one that we have with our bottom
part on the board, we will just go and
create very straight, very nice outlines and
they should be closed. If you wants to create
better outlines. If you don't want to use these brush as you
are using right now, if you want to use the
method that we used before with selection tool, select everything here
and then recolor. You are welcome to do it if you want to recreate it
with just outlines. Remember that you need to
have the closed outlines. Let's just go and
very easily do that. When you are done with
recreating the outlines, lynchers go back to our layers and we will hide earlier
with this sketch, we will check out whether
everything is looking fine. And if we need to
change some parts, we will go and change them. Grab your eraser tool
or grip your brush, smoothing out the corners and make all the lines
nice and clean. Make sure that you
don't have any gaps. When you are done, we will go to our top-right corner and
we will just drag and drop the color to the
needed place so we will put it right
inside of our sheep. If you have this little
arm nods recolored, let just go and do
it one more time. We are just go into
our top right corner and we are dragging and
dropping the color. One more time checkout, whether you want to
change some parts, whether you want to
smooth and some parents, if you need to do that, go and do that. And when you are ready, we are again go into
our layers and we will unhide our group
with the sketch. Now we will need to recreate
these outlined on the board. And we will need to recolor
it with a different color. And we can do it very easily
by using our selection tool. And one more trick, we will need to add
the color only on the existing areas that
we have on to this layer. So we don't want to create any more details outside the borders that
we already have. We can go to this layer that
we have for our purpose, sushi base, we can tap on it and we can
choose Alpha Lock. Now, if we go to
our color palettes and if we select a
different color, e.g. for this part, we will
go with dark Sian. They just tap on it. And if we have this color in, if we go to our base, if you start creating
something with your color right
near your border, you will see that you are aiding the color only
inside this object. And that's exactly what we need. Now when we have this new color and when we turn on Alpha lock, we will go to our S ribbon icon and we will select
this bottom area. We will do it with
a freehand methods. So firstly, going
over our left side, just creating the first
dot when you did it, we will just go to
the opposite side. We will create this
selection and we will go over the right
side and recreate the selection here to firstly
make this straight line and then just go menu and create this little
part for the arm, lumen, this shape around. So we are going along
the whole shape and we are just connecting
our first do it with it. When you have this
area selected, we will go to our
top-right corner and we will drag and
drop the color inside. And you can see that only
these area is selected. If some parts weren't recolored, you can go and
manually recolor them. Now, let us go and
deselect everything by hitting R S ribbon
icon one more time. And now ledger, see how it looks without
our sketch lines. So again, we go into our layers and we will hide our
group with the sketch. Now let's just check out whether we want to
change some parts. So e.g. let's just go and solve in this corner that we
have in the middle, we have the needed
colors manually. Let just go and create a
curve here. When you aren't. Then we can continue by recreating the shapes that
we have on our sketch. So again, going back
to our layers and we will unhide our group
with the sketch. Now, we will go over
the top area and we will recreate this part
here with another color. We will need to create
another layer for it because later on it will be easier
for us to work with that. Now let us go and tap
on the plus icon. And straight away,
Let's rename it as top. And to make everything
clean into our layers, ledgers put these
two layers that belong to our papa
sushi into a group. Now go into our layers. One layer is selected, selecting the next
one by swiping and from left to right and then go over the top to group and straightaway renaming it
as Barbara Associate. And now we will need
to get back to earlier with soap and we will need
to do one more thing. We will need to clip
this layer to a previous 1.2 when we add clip in
one layer to another one. It will work similarly
to the alpha log, so we won't be creating
any new details. We will be working only
on the existing areas. And in that way we are creating
their own separate layer. So let just tap onto our top layer and we will
need to select Clipping Mask. Now let us go to
our color palettes and we will select the
color within the whites. When we have
selected this color, we can use one of the
options that we use before. We can go manually and create the outlines and
then recolor them. Or we can go to
our S ribbon icon and select this area
with freehand methods. So select any method
that works for you and lead us
recolor this area. When you are done one more time, we will go to our layers. We will hide our group
with this sketch and we will check out whether we
want to change some parts. If you want, you can
grab the eraser tool and soften this corner that
we have in the middle. If you want to play around
with the shape and maybe a jazz the angle that you have on the line
over the right side. You are welcome to do it. When you are done. One more time, we are
going back to our layers and we will unhide our
group with the sketch. We need to recreate
this little part, elliptical part over the top. So let's just go and create one more layer above
earlier with top, because it'll be
easier for us to create the objects in that way. Let's just go and we will
tap on the plus icon. We will rename it as fish. We will cleave this
layer to a previous one. So again, we are tapping on this layer and we are
choosing clipping mask. We actually don't need to
do it right here because we will be still doing
everything inside this shape. So we are not going beyond
the frames and it will be quite unnecessary
for us to clip it, but it is easier to understand
how it works anyway, clip or don't leave
it up to you. Now when we have this new layer, let just go to our
color palettes and let's select the color
with the name Rhett. When we have it, we will just
go over this area that we need to recreate and we will
create an ellipse here. Hold it at the ends, adjusted if you need to by going over the top
to edit shape. If you're satisfied
with your shape, ledgers go and drag and drop the color
inside of this area. Now let's take a look at it
without our sketch lines. So again, we're arguing
to our layers and hide in our group with Sketch if
everything is alright, Let's just go and create
our facial features. Now one more time,
we'll unhide our group with the sketch and we will
create one more layer. Again. If you want to clip
it, you can do that. If you don't want to clip it, just leave it as it is. Let's just tap on the layer and we will rename it
as facial features. Now, we will go back
to our color palettes and we will select the color
with the name dark blue. With this color, we will just go and recreate our
facial features. So firstly, let's just
go and create our eyes. We will increase the
size of our brush just to put two
dots for the eyes. If you have a
little problem with visibility of your elements, you can do these things. We need to go to our layers. We will need to go to our
group with this sketch, find this layer that
we are working on now and we will need to adjust
the opacity of this layer. Opacity is how transparent your objects are
onto this layer. Again, I go into
this little n icon. We are go into the
opacity slider and we will just drag it
over our left side, Find the amount of opacity
that works for you. And when you are done, we will just get back
to our facial features. Now when we have our ice sled, just decrease the size of
our brush and we will add the rest of the features
for our cheeks ledgers, get back to our
color palettes and let's select the
color either red, dark red, pink, or
tuna pink media. One of these color
will work for you. Find which one. And when you have selected
the color ledgers go and recreate
our little cheeks, create the outlines firstly, if you need to adjust them, go over the top to
aided sheath and then just drag and drop
the color insights. When you add them, ledgers
go back to our layers. We will hide our layer
with the sketch. We will check out how it looks if you want to
adjust some elements. So e.g. you find out that your mouth is a little
bit not in the center. You can go and select
this element by using your free hands method
and air stream and icon. Just select this element, go to the Transform tool and put it on the
place that you need. And when you are done, we can go and add some details. So firstly, we will
start by adding a little highlights to our ice. We will need to select
the white color and we can do it in two ways. The first one is to go back to our color palette and
select it from here. But if we already have the
color onto our canvas, we can use the eyedropper tool. To do so. We will need to
hold one of our fingers on the screen and you will
invoke this little too. If you move your finger, you will see that
the soap little part of this too is
changing its color. And when we have
the needed color here on the top
part of this too, we will just on hold our finger. Now, if you take a look at your top right corner,
the color changed. And that means that we can go and put our little highlights. We will do it on the same layer
with our facial features. And we will do it in that way. We will go and increase the size of our brush just a little bit. We will go for slip
over one of their eyes. So e.g. the left one, we will go over one of the
sides or the top part, and we will put a little
dot here. So e.g. alleges go over that
soap left quarter of our eye on the left and we will put a little
highlight there. When you have its own one, I, we will move on to
the opposite one and we will do the
same thing here. We will try to put it
on the same place. So go into the top-left quarter of our eye and putting the dots. When you are ready, we are ready to add
some more details and now we will work
on the shadows. So let's just get back to
our layers and we will go to our layer with the
base for our papa sushi. When it is selected, we will create one more layer, tap on the plus icon, and you will see that it is snapped on the previous layer. That's exactly what we need, but we will need firstly
to rename it as shadow. So let just tap on it
and choose rename. And when you are done with this, we will need to go and change the blending mode on this layer because we would
want to add the shadow. Blending modes are
different ways your layers can interact
with each other. So with blending modes, you can add different
visual effects. To change the blending mode, we will need to tap on the icon. And here you can see
we have a least, we will need to select multiply blending
mode for our shadows. Multiply blending
mode multiplies the calories over the blending
layer and the base layer, so a resulting color is darker. Now, if we wanted to
change the opacity, we can do it later on, because now we just
want to see how it will look with the color
that we will put on it. Let us go to our
color palettes and we will select the color
with the name blue-green. With this color, we will go over our right part on the sushi and we will
add the shadow here. And the first thing
that we will do to create the shadow is going back to the list and unhide
in our group with the sketch. So in that way we know where the start of our right part is. So now we are at earlier with the shadow and we will
do one more thing. We will go to our S ribbon icon. We will use free hands
methods and we will go to this line that we have to
represent our right part start. And we will go and create
some peculiar shape here. So let's just go and create
some wobbly shaped like that. Loops around and
make a selection. When you have it, we will need to go to our brush library and we will
go to airbrushing folder. Here we will select
Medium blends. If you want to use sold blends, you are welcome to do it. We will need to
change the opacity on this brush to something
like sand, maybe 15%. We will go over this
little area that we have selected and we will
add the shadow in that way. So let's just go and
pay more attention to the bottom parts and
two are right parts. And we will add a slight
shadow over the left side. When you did it. We will need to go and
select one more brush. You can find this brush in the
Project and Resources tab. And this brush is
called small grain. With this brush,
we will go and add some texture to our part here. If it's too bright, you know what you need to do. You will go to your slider over the bottom part and we will change the opacity
on this brush. So let's just go and add some texture that
you already did it. You can go and select
this same brush for your eraser to
erase some shadow here. To do so, you will
need to firstly select your brush and then just go to the areas are two
and hold it there. You will see that eraser now is the same shape that we
have for our brush. So let's just go and add a few more grades
with our eraser tool. And when you are done, we are ready to
deselect everything by hitting R S ribbon
icon one more time. When you have the
result that you have, ledgers go back to our
layers and we will change our opacity
level of the shadow. So if you want to
see it clearly, we will go and hide
earlier with this gauge. Then we will just get back
to earlier with the shadow. We will go to our m icon and we will go to the
opacity slider ledgers, go and maybe find out
what works better for us. If you want just
a slight shadow, you can go and use
something like 40%. If you want a more
permanent shadow, go somewhere near
70, 75 per cent. When you are ready
with this task, we will go and we will
add a few more details. So now let's just go and
create one more layer. But we want to change
the blend and motivates. We will add just a grain to the main part of
our sushi ledgers. Go tap on the plus
icon, it is cleaved. We can just go and
rename it as green. I already have are needed. Brush, small green. And we can go over these areas that we have on the
top, on the front. And we can just go and add
some splatter with this brush. If you think that
you overdid it, we will need to go and
grab our eraser tool. But remember that now
your eraser tool is the same shape that we
have for our main brush. So firstly, we will
need to go and select our normal eraser tool. Now go over your little
green and erase some parts. And if you want, you can just go and use the normal brush to
adjust some places. And if you want,
you can go and add manually a few more
greens over bigger sites. Let's just go back to our brush. We are again selecting
our mono line brush. We will go decrease
the size to almost minimum and we will
just put a few dots. If you feel that it may
be a little bit too dark, you can always go and adjust
the opacity of the brush. You can change the
size of your brush to add this little dots
of different sizes. And when you are
ready with this task, ledgers go and work
on our fish elements. We will go back to our layers. We will find our
layer with the fish. We will go and to
use Alpha Lock here. So again, go in and tapping on the layer and
choose an Alpha Lock. Now let's select our brush
mono line and we will go to our color palettes
and we will select the color with the name
dark being correct. With this color, we will go to the bottom right area and we will add a
little shadow here. You can start by creating some wobbly shaped or if you want, you can just ends up with
creates an L, it'll curve. And when you have a curve, we will just go to
the bottom of it and we will add the color here. When you have it, we will
go and select white color. So we already have
it onto earlier. So let's just go and invoke our eyedropper tool by holding one of our fingers
on the screen. You have your white color. We will go and decrease the size of our brush and we will go to the opposite side from our little shadow and we will add a few highlights this time. These highlights will
look very simple. They will be just
empty ellipsis. Just hold it, snap
it to a bell-shape, adjust the size if you need to, and create a few more of them. In the line is too thick, you can select this
color that you have for your main
shape on the tuna. And you can just go inside
and a jazz this little part. We don't use the eraser
tool here because we are working on one layer and
it is set as alpha lock. If we just go grab
our eraser tool, we will be erasing our
details on this layer. So now we have everything that we need for our papa sushi. If you want to adjust
one more thing, let's just go and do that. It will be a little
elements over there, right part where we have the
connection with the arm. We will just get back
to our brush library. Select our brush, which
is more than one. And we will select this color, which is called dark blue. With this dark blue color, we will go alone this
size of our arm, and we will just create
a little outline. We can do it e.g. on the layer
with our facial features. So let's just go to this
layer and we will go to the top part and we will
add a little line here. Also add the same layer. We can add a little
highlights to these aren't. We will go and select this white color by using
our Eyedropper Tool. And we will go right under
this line that we have just created and we will add
a little line like that. If you want to add
more highlights, e.g. on the main shape
of our papa sushi, you are welcome to do it. We can go and add a
little highlight to this area that we have right here where we have our shadow. So you can go and decrease the opacity of your
brush and just go along this little line that
we have for our shadow. The same way you can go and
add a few more doors for the whole shape of our body with the same white
color on the same layer. Or if you want, you can
get back to your LEA with the green and to
do it onto this layer. When you are done
with this task, we are done with
our first sushi. In the next part, we will be
recreating our mama sushi.
10. Coloring Mama Sushi: Let's begin this part
by going to our layers. And firstly, we will
unhide our layer with the sketch and we will collapse are grouped with Papa sushi. So we are going to
this little v icon and we're just tapping on it. Now, let us go and find where our mama sushi bottom
part finishes. So let's just get back
to our sketch group. Let's find the needed
layer and we will hide our mask layer here when we
aren't done with this task, Let's just one more time, go to our group and
we will collapse it. Now, we will select
our group with Papa sushi and above it, we will create our first layer by just tap on the plus icon. Let's select it,
and let's just go enter name it as
momma sushi beats. Now we will need to grab
our mono line brush. We will need the
whole opacity of it, 100 per cent, and we will
need to use white color here. So we will go to
the bottom part and we will recreate our outline. And then we will just drag and drop the color inside of it. You can just go and
increase the size of your brush to create
this outline, Let's just go and do that. When you are done with
recreating your outline, Let's just drag and drop
the color insights. And when you are done, we will just go to our layers
and we will hide our group with a sketch to check
out how it looks like. Just go and work more
on our outlines and make these grains of rice a
little bit more prominence. When you are done one more time, we are getting back to
our layers and we are unhide in early with the sketch. Now we will need to
go over the top and we will need to recreate
our caveat part. So again, we are
creating one more layer. So tap on the plus icon, rename it as caviar. When we have these two layers, let us create a group for them. So we will select both
of them and we will go over the top-right and
we will hit group. Let's rename it
as man associate. Now getting back to earlier with caveats and we will go to our color palettes and select
the color either yellow, orange, orange, or red orange. So e.g. let's start
with the basic color, which will be orange. We will grab this color
and we will recreate the whole outline that
we have for our caviar. So let's just go and do the same thing as we
did for our rice part. When you are done
with the outline, Lynch's grab our color and drag it and drop it
inside this area. And one more time we will
just go back to our layers. We will hide our group, we this gauge and we
will check out how it looks and whether we
need to change some parts. Let's just go and make this
carrier part more prominent. So we will just go and add a few more dots
for our behavior. So in that way, it is
looking more like a caveat. When you are done
defining your shape, alleges work a little
bit more on the color. We will firstly
go to our layers, and we will turn this
layer into an alpha lock. So let just tap on it and let's choose Alpha Lock from the list. Now, we will go to
our color palettes and we will select the color with the name yellow, orange. With this color, we will go over the top area and we will
just add the color here. So just like that at a
bit of a color here. When you have it, we will go to our color
palettes one more time and we will go and select the color with a neighbor, red orange. With this red orange color, we will go to the
bottom part and we will add the
color in that way. Now when we have
three colors here, we will need to go and make it like a very smooth gradient. And we can do it in that way. We will need to go to our
magic one tool and we will need to select Gaussian
blur when it's afternoon. You will see that the
option on the top pops up and it says Gaussian blur 0%. Now we will need to go to our Canvas and we
will need to hold our Apple pencil there and
move it toward the right side. You can see that now it blurs and we will need to make
it very, very smooth. So something about 35 per
cent will work for us. If you want to add more bluer, you are welcome to do it. Now when we have this result, let's just deselect
everything by heating our magic one tool and we will
go and work on our shapes. We will need to get
back to our layers and we will need to unhide
our layer with the sketch. Because here we have one
more element at ledgers, go and edit, right, between these two layers
that we already have, we will go and select our
layer with mama sushi bees, and we will create
one more layer. We can rename it as
a little accessory. Onto this layer, we
will just get back to our color palettes
and we will select this color with the
name dark blue, where the scholar
we will just go and recreate the
shape that we have. Now, let's take a look at it without our lines
for this gauge. If you want to adjust
it in any way, just grab an eraser
tool and adjust it. If you are satisfied
with the result, ledgers get back to
our layers, lead, just unhide our group
with this gauge. And let's work on to
our facial features. So we will go to our
layer with carrier, we will create one
more layer and with the same color, dark blue. We will go and add our
facial features again, firstly, starting with our eyes. And before that
alleges go and change the opacity level of this
layer or this kitchen. So that way it will
be easier for us to see where we are
putting our dots. Let's just get back
to our layers. We will do to our sketch group. We will open it and we will find this layer with mama sushi, but we will go to the icon and we will
adjust the opacity level. Now when you still see what's happening once a year earlier, we will get back to our layers. We will collapse the group with this gauge and we will get
back to our new layer, which by the way, we will
rename as facial features. So I just tap on it
and let's choose rename this layer with
our monoline brush. We will go and put the
two dots for the eyes. Firstly, when you are done, decrease the size
of your brush and repeat all the rest
of the elements. When you are done
with the main lines, let just go back to
our color palette and select one of these pink
colors for the cheeks. You can go with any pink
color that you like. And when you have
selected the color, Let's just go
underneath the eyes and we will add
our little cheeks. Now let's take a look at our facial features without
our lines for this gauge. And if we wanted to
change some parts, if we need to move them, we will just go and
select the part that we need to move
with our selection tool. And then we will just go to the Transform tool
and we will move it, deselect everything,
and then we will go and put our little
highlights for the ice. Let's select the same
color that we have for the main shape,
the white color. And we will go and put
little dots the same way as we did with our
partner Sushi eyes. So e.g. this time, let's go to the quarter that
we have on the top right. Here, we'll put a little dot. You can play around with
the size of your brush, find what works for you, and when you have the
first highlights, Let's move on to
the opposite eye and let's do the
same thing here. We will need to
put the highlights on the same top-right quarter. And when you are done, ledgers get back to our list. We will unhide our
group with the sketch and we will check out
what we need to do next. Now while we're still here once the early with facial features, let just go and add a little
line for our little arm. So we will need to select
the same color that we used for our facial
features, dark blue. And we will go to
the bottom part of this arm and to
the top of it to, and we will add
little lines here. When you are done arguing
that the earliest we will hide our layer with the sketch and we will check
out how it looks. If you want, you can create
the whole line for this part. When you are done
with this task, we are ready to go
and add some shadows. So firstly, ledgers get back
to our layers and we will add our shadow firstly to our
layer with Mano sushi base. So let just select it and we will create one
more layer above. We will rename it as shadow, and we will clip it
to a previous layer. Now we will go to the icon and we will need to select
multiply blending mode. For now, we will leave
it at 100 per cent. And later on, if we
would like to change it, we always can get
back and change it. Now, when we prepared earlier, Let's get back to
our color palette and let's select
this color within the grayish orange with
this grayish orange color. Firstly, we will get
back to the list and we will unhide earlier
with this gauge. So that way we know where we
need to position our shadow. And we will just go
and we will create the shadow in a
peculiar way as well. So this time we will
go and we will be creating the grains
of our rights. So we're not creating
our shadow just with straight lines or
with simple curves. We will go with this little bumps and we will create the
shadow in that way. So similarly to the thing that we did for the
main shape and for the caviar ledgers go over the left side and let's
create this little bumps. Make it very bumpy. And when you have
the main shadow, let just go underneath our caviar part and we will go entropy the outlines
that we have here. This way we will create the shadow underneath
this little part. Now let's get back
to our layers and we will change the opacity
level of the shadow. So let's just play around
and find what works for us. Maybe this time we will
end up with something like 30% to make it less prominent. If you want to see how it looks
without the sketch lines, go to the group and hide it. And now we can work on to this shadow the same way as
we did with our papa sushi. We can add some green here. So let's just go and select this brush with the
name small gray. And we can go along the sides, we can add the green, we can add grain to their facial features
to this front part. Or if you want to use
it as a little eraser, you can do it in that way too. So let's just go and
work onto our texture. When you are done
with this part, we can go and add a few
more towards just manually. So similarly to what we
did with our proper sushi, we can do it at the
same layer with shadow, or we can create another layer and add the green in that way. Let's just go and
create one more layer. Let's rename it as gray. We can clean this layer
to a previous one. So let's tap on it. Let's select clipping mask. Let's select our monoline
brush and we will put some dots with a different
sizes to our shape. Also, you can go to this little shapes that you have created
with your shadow. And you can add little
lines to define them more and to show that they
are some kind of rice parts. Now, if you want, you can go and select the
white color and with it, go and add a few more dots. And when you are ready, we are ready to move on
to our caviar parts. Lead, just go and
select this layer and we will create
one more layer above. We will rename it as shadow. Let's clip it to
your previous layer. So it's happened and
choosing clipping mask. And now we will go and change the blending mode to multiply. For now, let's leave it at 100%. Now going back to
our color palettes, and let's select the color
with the name red, orange. With this color, we will
go to the bottom part. And again we will be creating
a bumpy shadow layer. Just go and create the shadow. When you have the
main shape ledgers go and define the little grains. So again, just go
into some parts and maybe making them a little
bit more around it. When you are done, we are getting back
to our layers. We go into our MI can and we
will play with the opacity. Find the opacity
that works for you. Maybe something 25-30%. If you want to make
it more prominent, Just go and do that. When you have the
shadow that you like. Let's just go and
add some green. Again at the same layer, we will go back to
our brush library. We will select our brush
with a name small green, and we will go and add some
grain to the whole shape. And now when you are ready with the shadow and with
the scatter brush, Let's just go and add a few more things over the
top part of our Caviar. We will firstly go and
create one more layer. And when we have it, we will rename it as
particles or seats. They just tap on
it and rename it. We will need to clean this
layer to a previous one. So let just tap on it and
let's choose clipping mask. Now we will need to go and
select a different brush. So we are going to open brush
library and we will select this brush with the name
rounded rectangle scatter. You can find this brush in a
project and resources tab. When you hand this brush, we will go back to our
color palettes and we will select the color with
the name yellow orange. With this yellow
orange brush color, we will go above the whole shape and we will add a few particles. So just go along the
whole shape with different directions and
add this little green. If you want to end
the singular parts, just go and put some doors. If you think that maybe you
want to erase some parts, grab the eraser
tool and erase them when you are adjusting
your little particles. We are done with
our second sushi. So in the next part, we will be creating
one of our kid sushi.
11. Coloring Salmon Sushi Kid: Let's continue our class by
going back to the layers. And firstly, we will collapse
the group with Bauer Mm-hm. Associate. So let's just hit this
little icon and then we will go and we will unhide
our group with the sketch, go into our little
checkbox, tapping on it. And that way we know
what we need to do. Now when our group with
mama sushi is selected, we will go and create
one more layer. So let just tap on the plus icon and let's rename it as
sushi k number one. Now when we have this layer, we will grab our white color and we will go and recreate
this bottom part. So again, similarly to what
we did with our mama sushi, we will just go with
this wobbly lines and we will try to recreate
the grains of rice. Let's just go and start
creating the sheep. We are using monoline
brush and we also will go and recolor
these bars that we have for the legs
on it so you can go and overlap these
bar that we have there, Ellis little bit
with this color, just loop around your shape. And also let's
recolor the arms two. Now when we have
the main outline, Lynch's drag and drop
the color insight. Now we will get back to our
layers and we will hide earlier with this gauge to make sure that everything
is looking fine. And we will go and define more clearly our grains on the rise. So let's just go and make some of them a little
bit more prominent. Some of them a little bit, maybe a peculiar shape. And we will just go
and define these ages. If you need some parts
that you need to adjust, grab the eraser tool
and adjust them. When you are done. One more time, we are
going back to our layers and we will unhide our
group with the sketch. Now let's create one more layer and we will be working
on the top part. So let's just go and tap on the plus icon to
create this layer, Let's rename it as top. Now, as we have two layers
for these concrete sushi, Let's select them both. And ledgers group that we will rename the group as
sushi keep number one. And now we are going back to
earlier that we called Top. And we will go to the
color palettes and select the middle
orange color ledger. Select it. And let's just go over
the top and we will recreate the shape
that we have here. Try to be accurate
and try to make nice connections with
the previous shapes. If you need to see what you
are doing more clearly, you can go back to your layers. You can go to the group
with a sketch, open it, find this layer with
this sushi kids and adjust the opacity level of
this layer when you are done, just get back to you earlier
that you called soap. And let's recolor
these little parts. As always, you can use
all the options that we use before you can hold
your land and the ends. And if you need to adjust
your line even more, go over the top to Edit Shape. And also you don't need
to repeat everything that you have on your sketch with 100 per cent of similarity. If you want to
adjust some parts, you are welcome to do it
when you have the outline, just drag and drop
the color inside. And now let's just go
and hide our group with this gauge and we will check out whether we want to
change some parts. If we need to create
some minor elements, just manually, let
just go and do that. E.g. let's work on the smoother connection
between two sheeps. And when you add down, we are again going
into our layers. We will unhide our group with this gauge and we will check
out what else we need to do. So now, let us go and create one more layer for
our facial features. We will tap on the
plus icon and we will rename our Lee
as facial features. Now Lynch's get back
to our color palettes. We will select the color
with the name dark blue, and we will repeat all of our facial features
that we have learned. Just go and start from the ice, increase the size of
your brush and just put two dots when
the eyes are done, Let's decrease the
size of our brush and we will work on
the facial features. So firstly, we will
go and we will add our eyelashes on the sides, hold your line and the hands and adjust the angle if you need to. And when you are done
with the eyelashes, ledgers go and add our
little browse here again, you can hold your
line if you want to play around with the
shape of your browser, you are welcome to do it. When you are done
with the browser, Let's remake our mouth. Now while we're still
using this color, Let's just go over our
left side and we will define our arm by
creating an outline. So let's just go and do
something like that. You can go and create
the whole shape, or you can just go and define this part that we have
right here on the bottom. If you think that maybe
your minimum size of the brush is too big, you can go and do these things. We will go to our brush library, we will go to our
mono line brush, and we will go under properties. Here we can see that we have the option brush behavior and
we have the minimum sites. We can just go to this slider and tweak it to
where the left side. And that will mean that our minimum size
will be a little bit smaller if you need to do
it one more time later on, if you are not satisfied
with the minimum size, you can always get back to this option and so we
get one more time. Now let's just hit Done and let's try it out one more time. As you can see, the minimum size of the brush now is smaller. With your little arm
or the left side. Let's get back to
our color palettes and lead select one
of the pin colors. Ledgers go select any
color that you like. And when you have it, we will go and recreate our little cheeks. If you want, you can go with
an ellipsis, or if you want, you can just go
increase the size of your brush and put two
dots for the cheeks. Now let's select
the white color. And with it, we will put
the highlights to the eyes. We can select the color
again by going to our color palette
and do it from here. Or we can invoke
the eyedropper tool by using one of our fingers holding on the screen and involve this little tool and
select the needed color. So select the white color
in any way that you like. When you have it. Let just go to one
of the sides of our eyes and we will
put little dots here. Let's go over the left side and we will put in
the first dot here. When you are done, we are moving on to the
opposite eye and we are trying to put the
dots to the same quarter. When you are done, let us
get back to our layers and we will hide our group with
this kitsch lead checkout, how it looks without the lines that we
have for this gauge. And if everything
is looking alright, we are ready to move on. If you want to move
some elements, go to select this
element that you want to move with
the selection tool, which is our S ribbon icon, and then go to the
transform tool, which is our arrow key, adjusted to your liking. And when you are done, ledgers go and start
aging the beautification. We will start by going
to our sushi kid number one body and we will
create one more layer above. So let just tap
on the plus icon. We will need to click this
layer to a previous one. We will need to
rename it and we will need to change the
blending mode to multiply. For now, let's just leave
the opacity at 100%. And then if we
need to adjust it, we will get back and
we will adjust it. Now we are going back to
our color palettes and we will select the color with
the name grayish, orange. With this color, we
will go and create this structure that we had
on our amount of sushi, this little shadow,
we will be creating it again with a peculiar bumps. Ledgers go over
one on the sides. We will go probably to the
left one or to the right one. And also we will need to put this little shadow
on the bottom part. So let's just go and
create a few bucks. When you are done
with the main sheep, just increase the size
of your brush and define the greens
a little bit more. If you want, you can go to the little arms and you can add the shadow to the bottom parts. Now when you are done
with the main shape, let's get back to our layers and we will change the
opacity level. So we are again go into this
little m I can own earlier. We are going to
our opacity slider and we are moving it toward the left side until
we're satisfied with the transparency
of our shadow. When you find the amount of
capacity that works for you, Let's get back to
earlier with the shadow and we will add a
few beautification. So again, we can go and we can add our little texture here. We can do it manually
by putting some dots, or we can get back to our own
brush that was small gray. And with it we can go
and add a few speckles. When you aren't done. Let's get back to
our layers and we will create one more
layer and own it. We will add some
manual green LED. Just tap on R plus icon. Let's just rename this layer as green and we can clip
it to a previous layer, or we can very carefully
work on it without clipping. It's all up to you. So now let's get
back to unbranched. That was monoline ledgers
go and put some dots. Or if you want, you can repeat something that we have on our mommas sushi, and we can add
some little lines, play with the size
of your brush, play with the opacity of
the brush and just go over these little parts
that you have for the main shape and
add some speckles. If you want, you can select the white color and add
white speckles too. And when you are
ready with this task, let's get back to
our layers and we will go on top of our
layer that is called soap, and it will create
one more layer here. Let's just tap on the plus icon and let's rename
it as highlights. We need to clean this
layer to a previous one. So let's tap on it and lead
to choose clipping mask. And now we will go and unhide
our group with this gauge. So we will need to
recreate this top part. We will go back to our
color palettes and we will select the color with
the name yellow, orange. We will go over the
top part and we will recreate it by creating
a different shape. So let's just go and do that. As mentioned before, you
don't really need to repeat everything with
100% of similarity. So in that case, LEN
just go and create a different shape from the one that we have
only our sketch. We will start by going over
our left side and we will go a little bit down and create the first
curve like that. When you hand this first curve, we will go along this line
that we have on this gauge. And on the right side, we will create a
little rounded shape. You can play around
with its curvature. You can play around with how
it looks on the right side. When you are done
adjusting this curve, Let's increase the size
of our brush and we will go above it and we will
manually recolor this area. When you are done, let us get back to our
layers and we will hide our layer with the sketch
to check out how it looks. If you're satisfied
with the results, we are welcome to continue. If you want to adjust
it in any way, grip and there are two or grab
your brush and adjust it. Let's just make it
even on both sides. And when you have
something like that, Let's just go and
add a little shadow. So firstly, we will add the
shadow to these main shape. We will need to go back to our top layer and we will need to create one
more layer above. You can rename it as shadow. We will go to our
N icon and we will select multiply blending
mode for the opacity. Let's leave it at 100%. When we are done, we
are going back to our color palettes
and we will select the color within
the red, orange. With this color, we will go to the right side and
we will create a shadow going underneath our shape that we
have just created, which is our highlights. So let's just go and create this shape going
in that direction. As always, you can play
around with the curvature. You can play around with everything that you
want to play around. And when you have
the first outline, Let's grab our brush. Let's increase its size
and ledgers, gear, menu and recolor the
rest of the area. When you are done,
Let's do one more. I think. Firstly, we will go
to our brush library and we will select our
small grain brush. We will go and maybe add some
green on the bottom part. But mostly what we want
to do is to go and select similar brush to our eraser tool and erase that bottom
part just a little bit. So when you have your main
brush set as a small green, we will go to our eraser
tool and we will hold it until we have this little
option that pops up on the top. When you have your eraser
is set to small grain, we will go and we will adjust the opacity of the brush and we will go to
the bottom part, and very likely we will add some green with our Eraser tool. When you are done, let's get back to our normal
brush for our eraser tool. And we will go and adjust
the opacity of this shadow. Go into the layers, go into our layer with this
gentle go into the M, I can end adjusting the opacity by moving our slider
towards the left side. When you are satisfied with
the amount of opacity, ledgers go and add some
additional elements. We will go firstly to
earlier with highlights, and we will create
one more layer above. Let's rename it as green. Now let us get back
to our main brush, which is mono line,
and we will go and add some speckles manually. Adjust the size of your brush, a jazz the opacity over it, and ledgers go and
add a few speckles. When you are done
with this task, let's select the white color. And firstly, if you want to add some white speckles
to the main shape, ledgers go and do that
when you add down with it. Let's move on to
our opacity slider. Once our brush, we will set
it at something like 30%. We will grab our white
color and we will go to this border that we have between the highlights and
the main shape. And we will add the halide, go in alone the whole shape. Let's just go and do
something like that. 30% of opacity is not
enough for the highlights. We can always go and adjust it. So basically what we are doing is adding a little outline, right between these two shapes. Try to make it as
smooth as you can. And if you need to
adjust some parts, you know what you need to do. You will need to grab
your eraser tool and erase the parts
that you don't need. And also, if you want, you can move on to
the opposite side from where we have our shadow. And you can add a little
highlight here too. You can go with a
very straight line. Or if you want, you can
create some peculiar sheep. And when you are done
with the highlights, we are done with our
third illustration. In the next part, we will
create our last one.
12. Coloring Tuna Sushi Kid: Let's continue by go into
our layers and firstly, we will collapse our
group with Sushi. Good number one. So go to this little
icon on our group. It's happening, it
closing the group. And then we will go to R group with a sketch and
we will unhide it. When you unheated, we
see what we need to do. So let us go and create one more layer above
our group with Sushi. Keep number one, Let's
rename it as sushi kids too. Within this layer, we
will go to the bottom and we will start by
recreating our erase part. Similarly to that time, we did it before
ledgers go and did it eating it to see
what's happening onto your layer more clearly, we will go back to our leaves. We will go to our
group with the sketch. We will find our layer with this character and we will adjust the opacity
level of this layer when you add them collapse
in our group with the sketch going back
to our layer with Sushi kid number
two and continuing creating our bottom
part with the rice. When you have the outline, drag and drop the
color inside and land, just recolor our little arms. So again, go into these places and creates an
outline's firstly, when you have the
outlines layer, just drag and drop
the color insight. Now let us go to our layers and we will hide
earlier with this gauge. So in that way, we will know where we need to
adjust some parts. If you need to adjust anything, you are welcome to do it. Let's just grab our brush. Let's maybe make it
a little bit bigger, and let's make the greens a
little bit more prominent. If you need to
smoothen up anything, you are welcome to do it. When you are done
adjusting your shapes. Again, we're going
back to our list. We will unhide our
group with the sketch and we will go and
continue a1 r elements. So let's just go and
create one more layer. We will rename it
as middle part. So let's just tap on the
layer and choose Rename. Now we will go to this layer, and when we have it, we will go to our color
palette and we will select the color with
the name dark blue. With this color, we will
recreate this middle part. So let's just go and do that. Make nice connections with
the main shape of the rise. And when you have the outline, just drag and drop
the color insights. If you need to
adjust some parts, you are welcome to
go and do that. If you need to see how it looks
without the sketch lines, go to your layers, hide your group with a sketch
and take a look at it. It just some parts, if you need to adjust that. If you see that some parts
are looking quite weird. So e.g. this arm on
the left is floating. We can get back
to our layer with the white outlines and we can go and adjust it here as always, try to make smooth connections
with the main shape. And when you are done, we will need to go and create one more layer to finish
up the whole shape. So let's just go to the layers. And this time we will need
to create a new layer and we will need to put it
under our white shapes. So let's first go and
tap on the plus icon. We will rename it as pink. We will grab this layer. So we are holding our
Apple Pencil and we're just dragging it under
our sushi kid number two, when we had this
layer underneath, we will go back to our
color palettes and we will select the color within
the tunica media. When you hand this color, we will just go and recreate these side that we
have to recreate. If you don't see the lines
that you have on the top. That's because we have the
same color for our papa. So she's bought some parts. We can just go to
our layers and we can hide the whole group
with our papa sushi. That way we can see what's
happening on to our layers. So we will just go
grab our brush, we will grab our new
color and we will go and recreate the whole shape. Remember that to recolor
the whole shape, we will need to
make the outlines closed so you can just go and very easily create the line going through
the whole shape. You don't really need
to make it precisely by repeating all the lines
that you have on this gauge. On the bottom part, just close the shape
and when you are ready, drag and drop the color. Now let us get back
to our layers. We will firstly go back and we will unhide our group
with Bubba sushi. And now if we want to see how it looks and whether we want
to change some parts, we will need to go to R group with a sketch and we
will need to hide it. Now let us work
on to our shapes. Let's adjust them. Let's move them, them up. And if you need to
adjust some parts, you know what you need to do, just go and do that. When you are done
adjusting your shape, let's get back to our layers. We will unhide our group. We this gauge and we will go and work on our facial features. So we will firstly go to our layer with the
name middle parts, and we will create one
more layer above it. Let's rename it as
facial features. Now let's select the
same color that we used before for our all
facial features. It was dark blue. And let's just go and
recreate our elements. Let's start from the ice, just repeating the shapes that
you have onto your sketch. And when you are
done with the eyes, Let's move on to the mouth. Firstly, we will start
by going to the top of it and recreating
this curve here. Hold it at the ends
and when you have it, we will do underneath it. And we will create these
boards and part of the ellipse connected nicely
with the shape on the top. If you need to adjust it, go over the top to edit shape. When you're done,
tap on the screen and if you want to
adjust it even more, grab the eraser
tool and adjust it. Now let's just put this same blue color
to the inside part. We will just go to
our top-right corner, drag and drop this color
to the needed place. When you have it,
we will need to add a little tongue insights. We know how to do that. We will need to
go to our layers. We will need to tap
on earlier with facial features and we will
need to choose Alpha Lock. Now let us get back to our color palette and select
one of the pink colors. When you have it, we will
go to the bottom part and we will add our little
tongue inside the mouth. When we are done with this part, we will need to get back to our layers and we will need to turn off the Alpha Lock so we
can add our little cheeks. Let's just tap on the layer and choose Alpha Lock from the list. Let's go and repeat our cheeks. You can notice that on this case we have the lines
for the eyebrows, but their own, this place that is colored with a
dark blue color, which we're using for
our facial features. So if you want, you can just leave them blank. You can just don't use the
eyebrows onto these elements. Or if you want, you can go and select
a different color and create the eyebrows with
these different color. E.g. let us go and select the color with the
name grayish, orange. And with this color, we will
go and add our eyebrows. When you aren't done, let
us get back to our layers. We will hide our
group with this gauge and check out how
everything looks. If you're satisfied with it, we are ready to go
and add the details. Firstly, we will go to our
sushi kid number two layer, and above it, we will
create one more layer, which will turn into
a shadow layer. So let just tap on it. Let's rename it as shadow. Let's clip it to
a previous layer so it's happening
it and choosing clipping mask and now go into the icon and select and
multiply blending modes. For now, let's leave
it at 100 per cent. We are using the color for the shadow that is
called grayish orange. And we are doing the same
thing as we did before. We are going in and
create an epic, your shadow with little bumps. Where just go and do that. When you are done
with the main shape, increase the size of your brush, and go and define these little
grains a little bit more. If you want, you can
add the shadow to the bottom part of the arts. When you are done
with the shadows, Let's move on back to our layers and we will adjust
the opacity of this layer. So let just tap on the
icon and we will adjust the opacity by moving our
slider towards the left side. When you're satisfied with
the opacity on this layer, let just go and
create one more layer on which we will
add some green LED. Just tap on the plus icon. Let's rename it and we
will call it green. You can click this layer
to a previous one, or if you want, you can just work very
accurately without clipping it. Now, let us go and manually
add some little dots. If you want to add
some green with this brush with the
name small gray, getting back to your LEA with the shadow and very
accurately edit. Continue by going back to
your LEA within green, grab your previous brush
and add some speckles. Manually. Adjust the opacity
of your brush, adjust the size of your brush, just add a few grades. If you want, you can go
and add little lines. If you want to select
the white color and add the speckles with it, you are welcome to do it. And when you are
done with this task, let's just get back
to our layers. We will go to our layer
with middle parts and we will create one more layer
above for a little shadow. Just tap on it and let's
clip it to a previous layer. Let's get back to this, an icon and we will choose multiply blending modes for now, leaving it at maximum per cent. And we'll just get back
to our color palette. We will select the same color that we use for the main shape. It will be dark blue and we will go over
one of the sides, probably to their right one. And we will add a little shadow, go with L on the site. When you have it,
we will get back to our layers and we will
adjust the opacity. So tapping on the
icon and adjusting our opacity by moving this
slider to the left side. When you are done
with the shadow, we will need to work
on to our pink shape. So firstly, let's just go and
select it on to our layers. And we will create
one more layer above. And we will start not from the shadow but
from the top part, similarly to what we did
with the previous sushi. So let just clip it
to a previous layer. Layer, just tap on it
to use clipping mask. And also we will rename
it as highlights. Now when we are onto this layer, we will get back to our sketch group and
we will unhide it. We will go back to
our color palette and select the color with the
name to NetBeans light. With this color, we will go over the top parts and we will do something similar to what we
did on our previous sushi. We can go and repeat the
lines that we have on this gauge or we can soften them up and work
on them even more. So let just go and
start by using IM brush and creating
a soft smooth line, starting from the left side
and creating the first curve. And then it will just repeat the line that we
have on the sketch. And we will go over
the right side and create a curve instead of
this very straight line. Now, if you want to
take a look at how it looks without the
lines on this gauge. Just get back to our layers and let's hide our group
with this kitsch. Let's go and recolor
these two parts. When you have recolored it led just work on to aid smoothness. So let's just go and adjust it. And when you have
something like that, we are ready to get
back to our layers. We are ready to
unhide our group with this sketch and we are ready
to add our little shadow. Let's do the similar way as
we did with our papa sushi. So firstly, we will go
to our layer with being, we will select it and we
will create one more layer. It is already clipped, so let's rename it shadow, and we will need to change the blending modes when
you have renamed it, we are going back to our icon. We are selecting
multiply blending mode, and for now, we will
leave it at 100%. We are going back to
our color palettes and selecting the
color within the rat. When you have it, we will
go to our S ribbon icon. We will use freehand method, and we will select this
part on the right. You can do it with a
very straight line or you can create
some peculiar shape, as we had right here, loomed the shape around. And when you are done, we will go to our brush
library and we will select Medium blend brush either
in the airbrushing folder. With this brush, we will go over this area that is
now selected and we will pay more attention
to the boards and parts and to this
side on the right. When you have added the shadow, allege us get back
to our brush library and we will use this
brush with small grain. With this brush, we will go to the bottom parts and we
will add the grainy shadow. Just go along the
whole shape and pay more attention to
the words and parts. When you are done, we
can just go and grab our eraser tool and make it similar brush to what we
have for the main brush. So when you have your small
green for your main brush, we will just go to
our Eraser tool. We will hold our
Apple pencil there until we have a little
message pops up. We will just go along the selected shape and we
will erase some parts. When you're done erasing
urine little parts. Let's get back to the Brush
Library for our eraser tool, and let's select the
regular brush for it. Now let's deselect
everything and we will see how it looks
without the selection, we will go to this S ribbon
icon over our top left. We will tap on it and we
will go now for our layers. We will hide our
group with a sketch. If you like how it looks, you can leave it as it is. If you want to adjust the
opacity of the shadow layer, ledgers go to it. We will tap on the icon
and we will adjust the opacity by dragging the slider towards
the left sides. If you want to adjust
it any way you can grab an eraser tool and adjust it if you want to adjust
it with your brush, you are welcome to J2. Now Lynch's get back to our
layers and we will create one more layer
above our layer for the highlight that we
have for this pink shape, we will create one
more layer and we will rename it as green. You can clip it to a
previous layers or you can leave it as it is
and work very carefully. Now let us get back to
our monoline brush. We can use the same color
that we use for our shadow. Or if you want, we can go and select some different color. We will just go and
manually add some speckles. Let's just go and do that. As always, play around
with the size of your brush and play
around with its opacity. If you want to use the white
color for your speckles, just select it and use it. And when you are ready
with your speckles, we will need to do the same
thing as we did right here. So we will go along
this line where we have two shapes connecting and we will add a little highlights. So adjust the opacity
of your brush. If you want, you can
go with a lower value. If you want, you can go
with a higher value. And we will go along this line and we will
add our highlights. Try to make it smooth
if you need to adjust, to grab the eraser to adjust it. And also we will go to this side where we
have our shadow. We will decrease the opacity
on the brush and we will repeat similar thing that we
had on to our Puppet sushi. So we will just go along
this line that we have for our shadow and we will add a
little highlight here two. Now, if you want to go
to the opposite side and repeat something similar
to what we had right here. You are welcome to do it. And when you are
done with this task, we are done with our
main illustration, but we will meet up in the next part and
we will finish up the whole illustration by adding some shadows and
additional elements.
13. Final Touches: Let's try this part by
going to our layers. And firstly, we will
clean everything up here. We will need select
Everly that belongs to this sushi and we will need
to put them in the group. So when they all are selected, we are heated in group. Let's rename it as
sushi k number two. Let's collapse this group and we will go to our sketch group, we will unhide it and we will check out what we need to add. As you can see, we had little
leaves or the left side. So let's just go and
create one more layer. We will tap on the plus icon, we will rename it as leafs. And onto this layer, we will get back to our
color palettes and we will select the color with the
name yellow, green light. With this color, we will go
and repeat the shapes of our leafs to see more
clearly what we are doing, we will get back to our layers. We will go to R group
with this gage. We will find this
layer with the leafs and we will adjust its opacity. Now collapse the
group one nighttime, get back to your layer with the leaves entropy, the shapes. When you are done
recreating the shapes, just drag and drop the color. Insight's work on this
sheet if you need to. If you need to see how it
looks without the lines, you always can get
back to your lease and hydro layer with
this gauge here, we can see if you need to adjust some parts or if you need
to add some elements, work on the shapes and
when you are ready, we will get back earlier
with the sketch. Let's just go and add
these little lines. So we will go to our
layer with the leafs, we will tap on it and we
will choose alpha lock. We will go back to our
color palettes and we will select the color with the
name yellow, green, dark. We will decrease the
size of our brush and we will go and add
this little lines, whole Julian and the ends. And if you need to adjust it, go over the top to editing mode. And here you can see you
have the option line or arc. Again, select arc and
create a nice curve. Continue adding the lungs. Also, you can separate
the leaves by creating the line going through the
shape of one of the leaves. When you are done, we are going back to our layers
and we will hide our layer with the
sketch layer chicken at how our leafs Luke, and whether we need to
add some more lines. If you want to add
some more lines, you are welcome to do it. If you need to
adjust some lines, just select the same
color that you used for the base and adjust the parts
that you need to adjust. And now when we have
the leaves done, ledgers go and add
a little shadow. So we will go to our
layers and we will create one more layer above
earlier with the leaves. Let's rename it as shadow. Let's click this layer
to previous ones. So tapping on it, choose clipping mask and go into the icon and selecting
multiply blending mode. We will use the color with
the name yellow green media. With this yellow
green medium color, we will go to the bottom part of our leaves and we will
create our little shadows. Now let us get back
to our layers and we will adjust the
opacity of the shadow. So go into the MI again and a
jazz in our opacity slider, find the opacity
that works for you. And if you want to add
some highlights, ledgers, go back to earlier
with the leaves, Let's select a
different color, e.g. yellow, orange. And we will go above these little lines or to
one of the sides that is opposite to the
side where we have our shadow and we
can add a few lines. Or if you do it for our highlights or if
this yellow color, it doesn't work for you, you can go and select
this white color. When you are done
with the highlights, we can go back to our
layers and if you want, we can put these two
layers into a group. So let just tap Group and
let's rename it as leaf. So now we will need
to collapsing groups. So go into this little v
icon near the checkbox and we will need to find the
placement for this group. So it is behind our sushi
that we have on the bottom. So let's just hold these
group with a leaf and we will drag it under our group with
Sushi keyed number one, Nao Lynn, just take a look
at the whole picture from the distance and we will decide whether we want to
change some parts. E.g. let's make our mama
sushi a little bit smaller. We will go and select
the whole group, and then we will go to our
arrow key on the top-left, we will use uniform method and we will drag one of
the corners down. If you want to change
the placement, you will move it to the
place that you want. We will do the same thing
with all of our elements. If you feel that maybe you
want to change something, if you want to make them smaller or if you want to
make them bigger, if you want to find the
different placements, let just go and do that. So e.g. let us put these two switches that we have on the bottom,
a little bit down. We will go back to our layers and we will select both groups. When they both are selected, we will go to our arrow key and we will just move them down. Find the placement
that works for you. And if you want to adjust
some other elements, you are welcome to do it. Also, if you want to
adjust some parts, e.g. mix, some of the ai's bigger. You are welcome to do it. All you need to do is to
find the Indian group. You need to find the layer with facial features and a
justice onto this layer. When you are done with adjusting your elements on your Canvas, we will do one more thing. We will add a few shadows. Firstly, we will need
to put the shadows under our elements that
are sitting on the boards. So let just go to the board and we will create one
more layer above it. We will rename it as shadow. Let's clear this layer
to a previous one. So tapping the next choose and clipping mask go into the n, I can change it to
multiply blending modes. Now we are going back
to our color palettes and we will select the
color within the shadow. When we hand this color, we will go back to
our brush library. We will go to airbrushing folder and we will
select Medium blends. If you want to use any
other brush, soft, bland, or heart blends, you are welcome to do it. All we need to do is to
increase the size of our brush. Maybe play little bit with
our opacity on this brush. And we will go under these objects and we
will add little shadows. So firstly, going
over the left side and agent a little
shadow like that, try to make it a little bit darker closer to the object that casting the shadow
and a little bit lighter at the end
of this shadow. When we hand the shadow
near one of the objects, Let's move on to
the opposite side and we will do the
same thing here. So we will add the shadow underneath every object
that we have on the board. If you overdo digest
a little bit, you can go to the
Smudge Tool and you can smudge it
just a little bit. Remember to make the shadow
a little bit darker near the object and a little bit
lighter on the H. Similarly, we will go between
these two objects and we will add the
shadow here too. When you have
something like that, we will go to this
shape that we have on the bottom and we will create
a little shadow here too. So we will go closer
to the end and we will create just a shadow
going through the whole shape. Again, if you already did just a little bit and grab the
smudge tool and smudge it, so it is not that dark. Now when you are
done with this task, we will need to put the
shadow underneath our boards and underneath are elements that are sitting on the ground. So firstly, we will need
to go to our layers and we will need to create
one more layer. Layers. Tap on the plus icon
and we will need to drag this layer
underneath our boards. So lets just grab it
and just drag it down. Let's rename it as main shadow. We will go to the icon and we will select
multiply blending mode. We will use the same brush, so it is airbrushing, medium blends or soft
blend the same color. And we will go and start
adding the shadow in that way. We will firstly go to our S ribbon icon and we
will use rectangular sheep. So when we have this
rectangular selection, we will go to our
boards and part of the board and we will
create a selection like that. So making this size
on the boards. And when you have it, we will grab our brush, we will grab our color, and we will very easily
add a little shadow here. Again, we are adding
the darker shadow near the elements and we are making it lighter at
the ends of the shadow. When you are done,
Let's deselect everything and
take a look at it. If we want to adjust
it in any way. If we want to go to our layers
and adjust the opacity, we can go and do that if we
want to work on so the edges, we can wrap our smudge tool and just match this list of parts. And when you are
done with this task, we will go to our S ribbon
icon one more time. And this time we will use
elliptical selection. With the Elliptical selection, we will go underneath
our first sushi that is sitting on the ground and we will create a
selection like that. Just go a little bit behind the legs and try to make it
just a little bit bigger, the whole shape of the body. When you have it, we will just drag and drop the
color into this area. Or again, we can
use our own brush and add the shadow with a brush. And when we are done
with the first shadow, we will do the same thing
by going underneath the second sushi
that is sitting on the ground and aiding the
shadow underneath it. We are doing our S ribbon
icon one more time. I use it an elliptical
selection and we are creating this selection
underneath this sushi. Try to make it similar to the selection that
you created before. And when you have the
sheep ledgers go grab our brush and very softly we will create this
second shadow. When you are done, Let's
deselect everything by hitting R S ribbon
icon one more time. Now let's just take a
look at what we have. And if we're satisfied with
everything that we have here, we are done with our class. If you want to
adjust some parts, if you want to make
something bigger, something smaller,
adjust the placement. You are welcome to do it. When you're done
adjusting your elements. We are done with our class. Thank you for
watching this class. Leave a review if you liked it, and consider subscribing for more takeaway videos
in the future, looking forward to
seeing your projects.
 Uni Corn, ⭐Kawaii Art Enthusiast⭐