Transcripts
1. Introduction: Hello everyone, I am uni
and enter this class. We'll throw it romantic
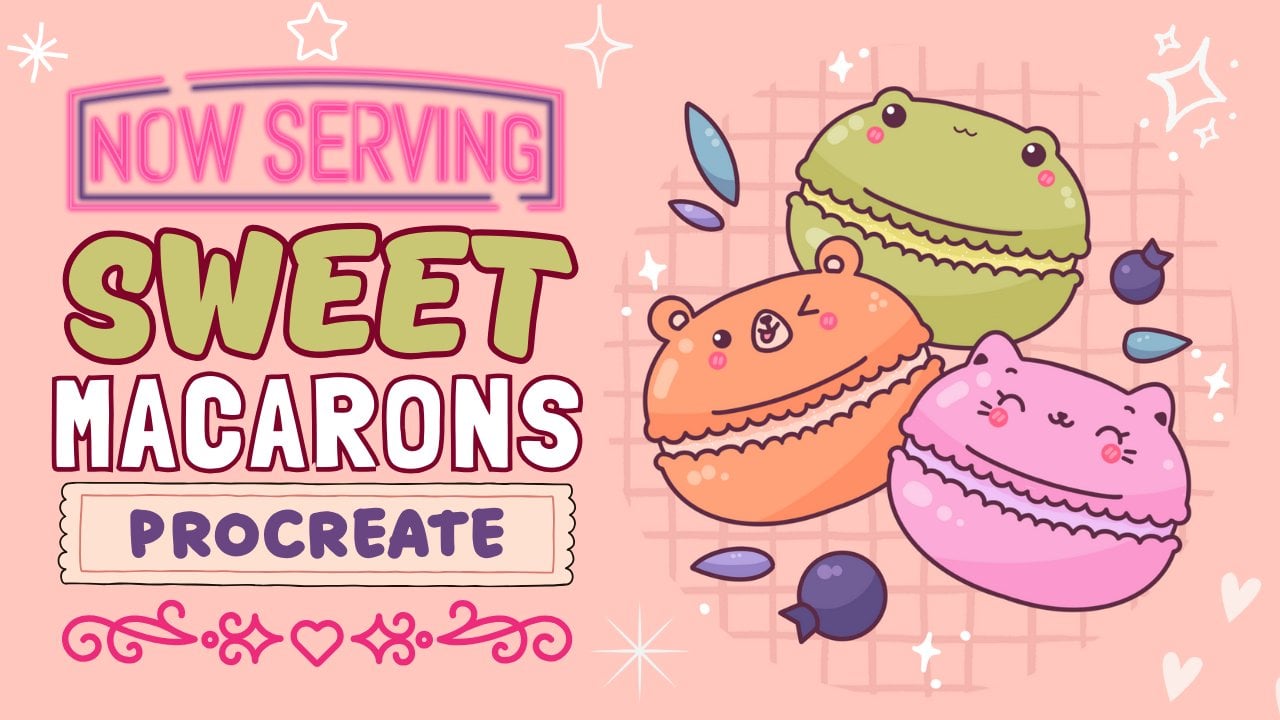
foods stickers. This class doesn't require any prior experience
or fancy tools. We'll start from scratch
and we'll be using simple techniques
throughout the process. Everything you'll see will
be happening in Procreate. However, if you
have other software or wants to try
traditional materials, you are welcome to join if
you are ready to start, Let's jump right into it.
2. Toastie Sketch: Let's start our
class by deciding what kind of Canvas we
are gonna be using. You can see it is a very simple squares standard
canvas because both pixel width and pixel
height, or 2048 pixels. As for NCBI, we are using 300 and ask for
the color profile. It is set as SRGB
with this low number. When it's all done, let's
hit Done and we will be redirected to our new Canvas. And when we are at our canvas, we need to decide what colors
we are going to be using. If you want to use
the same colors that you will see
throughout the whole class, please go to the project and resources tab and
download them materials. And when he did it to
let go straight into our color palettes and we will check out what we have here. Here we have two options of
how we can use the colors, the compact you and the cards. Let's go to the cars because here we have all
the colors, names, and it will be easier for
us to navigate through them while we're still here
and our color palettes, Let's select our first color, and this color will be sketched. So let just tap on it and our icon on the top right
will change its color. And that's exactly what we need when we have our new color. Let's just go and select
the brush that we will use for our first illustration
and for the whole sketch. In general. Ledgers go to the Brush Library and we will go into this kitchen folder. You can select any brush
that you like here. You can try it out. If you don't like it, get
back to it and find out what brush you want to use when you found the
brush ledgers. Get back to our Canvas. And we will start by creating our little scheme that we will use to create our
first illustration, which will be alittle to see. Firstly, we will need to
go and create a rectangle. And we will do it very easily by using the
quick shape tool. When we are using a
quick shape tool, we are creating the
shape just with one line without lifting
up our Apple Pencil. So let's just go to our Canvas. And with one line, we will start
creating our shape. And the ends of the line, we will hold our Apple
Pencil and we can unfold it and go over the top to this option
that just popped up. For me. It is polyline for you. It might be something different. Let's just tap on
it and you will see that here we have a few options. If you have the option
square or rectangle, tap on it and we
will go and adjust our shape a little
bit more. So e.g. we are selecting square
and let's just go and make this whole shape
a little bit bigger. To do so, we will need to
go between the nodes and we will need to hold our Apple pencil there
and drag it to this site. You can see that we are changing the size
of our elements. And if you move
your Apple pencil in a circular direction, you will see that you are
changing the rotation of your objects to go and put
this shape in the center, we will need to go to some blank space that we
have onto our canvas. Hold our Apple pencil there, and just drag it to
the needed place. So e.g. let's leave it
at something like that. We will try to make
it straight on top and on the bottom
and on the sides. So the rotation will
be just standard. And when we have the
element that we like, Let's just tap on the screen to get away from the editing mode. Now when we have these sheep, we will need to go
over the top of it and we will create
another shape, which will be an ellipse. So let's just go to
the left side firstly. And from this left side, we will, again the
same way as before, go along the whole shape and create the shape
of the ellipse. At the end of the line, we will hold our Apple Pencil. If you need to make it bigger, move your Apple pencil
from side-to-side. If you need to rotate, it
moves in a circular direction. Try to put these elements on the top of your element before. And when it is straight, straight leg, just get over it. It's up to edit the shape. So we will need to try
to put it in the center. So the elements on the left and on the right are similar size. Let's just go and
adjust the shape by going to the
nodes on the left. And we will just hold our Apple pencil there
and we will drag it. So we will need to keep the
distance from our lines of the rectangle to this lines that we
have on our ellipse, on this side, similar
on both sides. If you want to adjust
the size of the hole, elements, just go and
play with the nodes. This part on the top will be the top part of our tools loop. So when you are satisfied
with the whole thing here, we will again tap on the screen and get
away from this mode. And now when we have
this shape like that, ledgers go and find an
approximate center of it. We can do it very
easily by firstly creating the line going
from top to the bottom. This line will be vertical and then go into
one of the sides and creating a horizontal line going through the
approximate center. So firstly, let's
go above our shape and we will create a line
going from top to the bottom. So very easily just create the line and hold it at the end. You can see if you move
your Apple pencil, you will be changing
the angle of your line, tried to make it straight. And when you have it straight,
ledgers get over-the-top. To live into the editing mode, we will need to put this line
to the center of our shape. So if you need to move it, just hold your Apple pencil and some blank space and try to put it somewhere
in the center. Now when you are done with
positioning this line, Let's just tap on the screen and get away from the editing mode. We can now go to the
site and we can create a horizontal line going through the approximate center
of the whole shape. Not only the rectangle, but the whole shape in general. So let's just go firstly
over one of the sides, e.g. to the left one. From here we will create a line going through the whole shape. At the end of the
line, we will hold it. We will adjust the angle of airline trying to
make it straight. And when you're done with it, ledgers give over-the-top
to edit and modes. Now consider the whole sheet that you have on your screen as one mass and try to put this horizontal line
in the center of it. When you're done with this task, Let's just tap on the
screen and we will get away from our editing modes. Now we have this
scheme and we can go and create our
sketch for this part. We can do it on the same layer, or we can go and clean everything up and
create one more layer. Let us go to our layers and
we will tap on the plus icon. Let's just tap on
it and we will go entering in this layer
as sketch to see. To do so, we will need to tap on the layer and we will
need to choose Rename. If you want, you can go
back to your LEA number one where you have your
scheme and rename it to. So e.g. let's just do enter
name it scheme to stay all set to make error even
more clear on your canvas. And to make this scheme
less transparent, we can go and change the
opacity level on this layer. So we still will be seen what's happened in,
onto this layer. And we still can use our scheme, but it won't be that bright and it won't be
that disturbance. To do so, we will need to go to our N on the layer
with a scheme. We will go to the opacity slider and we will drag it
towards the left side. You can see that now it
is more transparent. And when you have the
opacity level that you like, when it's not disturbing, we will get back to our
layer with the sketch. So now we'll need to
go to earlier with this gauge and we will
need to turn this scheme into a whole illustration
so we can do it manually just by repeating
the lines that we have, adjusting them and so on. And we can do it on both sides, or we can use one option
that Procreate has. This option is called
the symmetry. Draw it. So we can create elements only on one side and they will be automatically showing
on the opposite side and they will be just mirrored. Let's just go and do that. We will need to go to Arrange
icon over the top-left, we will go under
Canvas and firstly, we will toggle drawing guides. So let just tap on it and
you will see that we have these cells going through the
whole shape of your Canvas. That's not the
option that we need. So we will need to
go and adjust it. So we are doing under
this Drawing Guide to toggle into editing
Drawing Guide. Now we are at the drawing
guides menu and we will need to go to the bottom
panel and select symmetry. Now you can see that you have only just one line
which has two doors, one blue and one green. And we will need to
put this line right in the center that we have
created onto our scheme. To do so, we will need to go to our blue node onto this line, hold our Apple pencil there and just drag it to
the needed place. When you found a position
that works for you. Ledgers go over our
top-right corner and we will hit done. Now, we can go to our layers
and you will see that our layer with Sketch
Tools is now assisted. And that means that if we
go to one of the sides, everything will be mirrored
on the opposite side. That's exactly what we need. With this option turned on, we will go and start
creating our toolset. So firstly, let us go
over one of the sides. You decide which
side you prefer. So e.g. let's go over our
left side and we will start by recreating this line that we have or the top part. Just go over this
line very manually. Or if you want, you can hold
your line and the answers. Snap it to a perfect shape when you have this
line over the top, ledgers go and recreate this line that we
have on the left. So firstly, we will repeat
the curve that we have. And if you want to
play around with it, you are welcome to do so. E.g. you can make it a
little bit more around it. When you have
something like that, we will go over this side and we will create
a straight line. So let's go to the bottom part's not go into the concrete bottom. We will stop a little bit aside from this intersection
of two lines. When we have this straight line, we will go and create the curve. So we are creating
a very soft corner. Again, you can do it
manually or if you want, you can hold your Apple pencil
at the end of the line. Now when you have this
very soft corner, lead, just go to the bottom part
and we will repeat this line. Let's just go and try
to connect our sites. If you want to maybe try out to make not a straight
line but a curve, you are welcome to
do it if you want to play around with the
sheep in general, e.g. if you don't want these
very straight lines, you are welcome to go and
play with this lines to two. If you want, you can go and
create the curves and stats. So play around with the shape
adjusted to your liking. If you feel that maybe
the top part is to curvy, you are welcome to adjust
it to play around, spent a little bit of time
on creating your shape. If you need to erase some parts, grab an eraser tool
and erase that. And when you have the
shape that you like, we will need to go inside of this shape and we will
need to repeat it. So in that way, we are
creating some kind of crafts. Let's again get
back to our brush and we will just
stop a little bit aside from our sites that we just created and we
will repeat that. Try to be consistent
with the line and try to keep the same
thickness on this crust. If you need to
adjust some parts, if you need to erase some
lines that you don't need, grab the eraser tool
and erase them. We are trying to
make our sketch as clean as possible because
in today's class we are not creating the clean
lines and we will need to see clearly what we
have on to our sketch. So let's just go and try to
clean it up at the maximum. When you are done with
recreating your grass, let just go to the
middle part and we will create a little cut in
the shape of the heart. Later on we will put a little
egg inside of this shape. So we will go to
one of the sides again and we will try
to create a heart. We will go and firstly create
a beak shape like that. You can play around with
a curvature on the line. You can play with everything. And then we'll go
to the bottom and create the descending
line like that. You can make a very soft
connection on the bottom. You can play with the sheep
in whatever way you want. Just create a cut of the heart. If you need to erase some parts, grab your eraser tool and erase the lines that
you don't need. Now when we have
these cats ledgers go over it and we will
create the facial features. Firstly, we will go to one of the sides and we will
start by creating a circular shape for the
ledgers go above our hearts, find the position that you like. You can play around
with it and let you guys go and create
our first shape. You can make it as big
or as small as you like. You can play with
the distance from the center when you have
the shape that you like, ledgers go inside and
we will shade it. If you feel that maybe
from the first try, it doesn't look right goods, you can always go back
to your eraser to erase this shape and
try out one more time. You can create the
ice manually just by going and trying to
recreate the shape. Or you can use the
quick shape tool so you will need to go
and create this shape. Hold your line and the end
snippet to a better shape. But now you can see that it is an ellipse and
not the circle. Without an holding
your Apple pencil, you will need to hold one of
your fingers on the screen and you will snap to a
perfectly round circle. So here you can play
around with the size. You can play around
with the rotation. I don't know whether you
need the rotation or not. So when you are done with
adjusting your shape layer, just go inside of it. And again, she did. When you are done with
creating the isolette, just go above them and we
will create a little eyebrow. You can play around
with the shape. You can play around
with the position, with curvature, with everything. So e.g. let's just go and create a little
eyebrow like that. When you have the eyebrows, we will go right between the eyes and we
will create a map. So firstly, let us go over
one on this side and we will create an ellipse
tilted toward that center. Again, you can play
around with this shape. You can play around with
this size on this element. And when we have the sheep of the heart or something
similar to a heart, we will go inside of it
and we will shade it. If you need to play around with the whole shape in general, you are welcome to do it. When you are done, we will go underneath the ice and we will add little cheeks. So we will go underneath the
eye, as mentioned before, and we will start by
creating a little ellipse. So let's just go
somewhere to the right. Hi, and we will create
this shape like that. Again, we will hold
our Apple Pencil at the ends of the line. We can adjust the rotation, we can adjust the placement
of these elements. We can adjust the
curvature of it. If you need to
adjust it even more, we will go to the
top to editing mode. We will play with the shape and find the position
that we like. When you are done with creating
your cheeks leg just tap on the screen and we will get
away from our editing mode. And now when we have
this shape like that, we don't really need our
symmetry drawing anymore, so let's just go
and turn it off. We will again go to Arrange
I can over-the-top last. And firstly, we will toggle
Drawing Guide from here. But again, if we go to our Canvas and if we try
to create some line, it will be mirroring
once our canvas. So we will need to get
back to our layers. You still can see that our
layer with sketch is assisted. We will need to turn it
off manually from here, just tap once to earlier. And from the list we will
select Drawing Assist. And now it's time to play with the elements inside
of our toasty. So e.g. we can go to
this heart elements. We can make it
bigger or smaller. We can position it differently, putting it up or down. We want to go and play
with our facial features. We can do that too. So e.g. ledgers go and we will adjust our
facial features by making them a little
bit smaller and putting them a little bit lower
to our little hearts. To do so, we will need to select these elements and
we can do it by going to our top-left corner
to our S ribbon icon. On the bottom panel, we will need to select
freehand method. And with a freehand method, we will just go to
our Canvas and we will select the shape by
creating this big loop, we will loop it around. We will close this sheet. And when this area and only
this area is selected, we will go to the
transform tool, which is our arrow
key on the top-left. On the bottom panel, we will select uniform methods. And when you did it, you
will see that you have the bounding box
around your elements. That's exactly what we need. If we want to adjust our size of this element
from the center. So we would want to keep their
position on this element. We will need to go to one
of the nodes that we have, either on top or on the
bottom from the center. And we will go and move our Apple Pencil by holding
it onset these OneNote. So e.g. let's just go
to the bottom nodes. And if we want to make
our shape smaller, we will hold our Apple pencil there and we will go
toward the right side. If we want to make it bigger, we will do the opposite. We will go to the notes and we will drag it towards
the left side. So find the size of this
element that you like. And if you want to move it, we will need to
do the same thing as we did in the editing mode. We will hold our Apple pencil on some blank space and we will just drag it to
the nearest place. So play around with
the facial features. Find what works for you, find the position that you
like when you are done. We can do the same with
our little hearts. So we will need
firstly to deselect everything by going
to our S ribbon icon. Let's just tap on it. And when you have
deselected error event, we will go again to our S ribbon icon free
method and we will select our hearts Loom
this election around. When this area is selected, we will go to our arrow icon. And again, by using
a uniform methods, we can drag it down, drag it up, make it
bigger, make it smaller. It's all up to you. If you want to play around with the shape, just play with it. When you are done, Let's
deselect everything by hitting R S ribbon
icon one more time. Now we can get back
to our layers and we can hide our layer
with this scheme. So let just go to
this little checkbox near the icon n and
we will tap on it. Now you can see your toes in a whole glory and we will need to add one
more thing to it. We will go inside
this little hard that we have created and we
will create a yoke. Let's just go and
create the shape of this circle the same
way as we did before. We're just go in there
and creating the shape, holding it and the hands. And we will need to hold one of our fingers on the screen, snap it to a perfectly
round circle. Adjust the size to your liking. And if you need to
adjust it even more, go over the top to edit modes. Try to put it somewhere
in the center. And when you are done
with this shape, just tap on the screen to get
away from the editing mode. Now we have the base for R2 C, and that means that
we are ready to add some thickness to the loaf. Firstly, we will need to
go over one of the sides, e.g. the right one. And we will need to recreate this line that we
have on this side, and we will need to put it more. It's a word that
h of our Canvas. We will go firstly and create a few lines that will
help us to do that. Firstly, go into our
bottom corner and from it, we will create a
diagonal line going up. You can play around with
the size on this slide, as well as you can play
around with the angle of it. When you found that
works for you, just hold your Apple
pencil and let's go to the top and we will create
two more diagonal lines. We argue in to this little soft corner
that we have already told. We will go underneath
it firstly and from it we will create the same line that we have on the bottom. We will need to
keep the same angle and we will need to try to keep the same size on this line that we
have on the left. When you are done, we will
do to the top on this corner and one more time we will create another line going
diagonally up. Try to keep the same
angle, the same size. When you have
something like that, we will need to connect
these lines with the curve that we have for our
side of the toasty. So we're just going there
and repeating the line. Play around with
it, make it smooth, make it similar to what you
have on your main shape. Only toasty if you need to spend some time on
it, just go for it. Remember that we are trying to create a very clean sketch. So if you need to
erase and lines, grab the eraser tool
and erase that. When you add them, recreating your shape over the right side, we will need to connect it with the top part
of our toolset. So firstly, let's just mark down the center of the whole shape. And when you have it, we will go a little
bit more toward the left side and we will
create a very smooth curve. And with this curve, we will connect it with the shape that we
have on the right. If you need to hold
your Apple pencil at the end of the line and if you want to snap your
curve to a perfect curve, you are welcome to do it if you need to adjust it even more, go over the top to edit mode, try to make a smooth connection. When you are done,
we will just tap on the screen to get away
from the editing mode. If you want to adjust your
sheep in any way, e.g. maybe you want to make this whole loaf size
a little bit smaller. You are welcome to do it. Just play around and find the
sheet that works for you. And when you are
done with this side, Let's just go and add a
little bit of thickness to our little card that we have in the shape of the heart. Because we have the
thickness here, we will need to add some thickness to
these little elements. Firstly, we will go
over our left side, the opposite side that
we have on our right. We will go to the top
part of our heart and we will start by creating the curve going down like that. When you have these curves, we will need to
repeat this line that we have for the
sight of our hearts. So just go in there and very
easily creating the shape. We will go with
this new curve to the bottom of our hearts and we will connect
it with the shape. So basically you
will end up with a similar shape that you
have for your heart, but a little bit shifted. So we're the left side. If you need to erase some parts and grab your eraser
tool and areas. Now, the very last
thing that we will do is adjusting our shape
just a little bit. If you want to, e.g. we can go to our arrow
key on the top-left. We can firstly make
this shape smaller, position it onto our canvas, and then we will play around with the whole
shape in general. So firstly, Lynch's go
to one of our nodes that we have and we will make the whole shape a
little bit smaller. When you have this
size that you prefer, we will go and find the
placement of our elements on the Canvas today we are
creating for illustration. So find one corner and position your elements
onto this corner. If you want to rotate
your object in any way, you will need to go to the
green node over the top and move your Apple pencil in
a direction that she wants. But before I teach
in our elements, lead, just go and play
with it a little bit more. We will go to the warp
option on the bottom panel. You can see that we still
have the bounding box and the nodes outside
these bounding box. And also we have some
lines inside the shape. And that means that we
can go to any place here and we can hold our
Apple Pencil and drag it. So e.g. ledgers go toward one of these little nodes and we will just drag it
a little bit down. You can see that we are adjusting the whole
shape in general. And in that way,
we can go and play with our shape and
adjusted to our ligand. So if you want, you can play around
with your sketch, maybe make it a little bit different from what
you have right now. When you are satisfied, we will get back to
our uniform methods. When you played in half and found the shade
that works for you, ledger step on the
uniform methods and we will get
interrupted our sheep. So again, we're arguing to
our green nodes over the top, we are holding our
Apple pencil there and we will fight the
rotation that we like. If you want to find a
different placement, just go to some of
the blank space onto your canvas and move your
elements to the needed, please, when you're satisfied
with everything here, let just tap on our arrow key one more time to
deselect everything. And so when you are
done with this task, we are done with
our first sketch. So in the next part, we will create another elements.
3. Strawberry Sketch: This part, we will draw a
sketch of the strawberry. So firstly, let us go
back to our layers and we will tap on the plus icon
to create a new layer. We will rename it as
strawberry sketch. When we had this new layer, we will go to some blank
space onto our canvas. We will grab our brush
and we will start very easily by creating the
shape of the ellipse. Let us go and with one line, we will create the shape. Hold your line and
the ends adjusted. If you need to adjust the size, move your Apple pencil
from side to side. If you want to
make it more open, a little bit more chubby, you can go over this soap to
ellipse and adjusted from here when you are satisfied
with your shape layer, just tap on the
screen and we will go and adjust the shape
a little bit more. So again, we're arguing
to our Transform tool, which is our arrow
key on the top-left. And we will do under warp
on the bottom panel. We will go to the
bottom nodes on the sides and we will move
them toward the center. So let's just go
firstly over r, right? One, we will hold
our Apple pencil on the nodes and we will
drag it to the center. We will do the same
on the opposite side. So again, go into our notes, holding our Apple Pencil and
moving toward the center. If you want to go over the soap and make this shape
over the top, Ellis little bit more rounded. We will do the same thing
as we did on the bottom, but we will inverse it. So we will go to the
nodes on the side. We will hold our Apple
pencil there and we will drag them toward
the opposite side. So we are dragging them towards
the edges of our canvas. Let's do it on the left, and we will do the same
thing on the right. If you want to play around
with the shape even more, you are welcome to do so. E.g. we can go to
the middle part on the top line and we can
drag it a little bit down. When you have the
sheep like that, we are ready to go to
our arrow key on the top-left and we are ready to tap on it to
deselect everything. When we have our shape
on the strawberry, we will go over the top part
and we will add firstly, some guiding lines that later on we will turn
into the leaves. So let's just go to the top
of our strawberry and we will start creating the guiding lines in the shape of the curves. You can play around
with their size. You can play around
with their directions. You can play around
with their amounts and with everything that you
want to play around with. When you have
something like that, we will need to turn our
curves into the leaves. And for the leaves, we are going to be using the sheep like that. It will be some kind of a drop. But instead of the various
street corner on the bottom, we will have a various
software ledgers go above the shapes. We will turn them into beliefs. These slides that we have as a guiding lines shouldn't
be somewhere in the center. You can play around
with the shape. You can make it straight or you can bend it to your liking. Let us go towards one
of the lines that we have and we will create
their first leaf. When you have the first leaf, ledgers go alone all of these lines and we will
turn them into the leaks. So we are repeating the
shape we are playing with, their size and their angles. Make nice connections
between these little leaves. And when you are done, we are ready to move on to our main shape, to
our strawberry. We are ready to add
some facial features. Firstly, allege us find an approximate center
with a vertical line. We will go to the top of our strawberry and
we will create this guiding line going from top to the bottom and the ends. We will hold it, we
will adjust the angle. We will try to make it straight. If we need to put it
more toward the center, we will do to our editing mode and we will adjust it from here. If you want, you can go and
create one more line this time horizontal to find an approximate
center of the shape. But also you can
keep it as it is. All we need to do is to create our eyes and our little mouth. We can do it manually
or we can use this same option that
we use with our toasty, which was our Symmetry tool. Let us go to the wrench
icon over the top-left. We will do under Canvas and we will toggle drawing guides. We will go to Edit
Drawing Guide, and we will move this little
line that we have to wear, this line that we
have just created. When you add down, let just
tap on Done on the top-right. Let's make sure that our layer is assisted by going
to the layers. And if it's not assisted, we will need to turn
it on manually. We go into our layer
with Sketch strawberry. We will tap on it
and from the list we will select Drawing Assist. When we did it, we will go to one of the sides and we will start by creating
the sheets of ice. It can play around
with their size. You can play around
with their placement. It can play around with the
position from the center. So let's just go and create the first sheep on this circle. And again, you can make the ship manually just by
creating the shape. Or you can go and hold
your line and the hand, hold one of your fingers on the screen and snippets
about a sheep, find what works for you
according to your vision. If you want to adjust
your shape even more, go or the top two circle and play around with the
position on the eyes. Play around with their size, with everything that you
wanted to play around with. To change the size
of your object, enter the editing mode. You will need to go
right between the nodes. And to make it even easier, you need to zoom in your
Canvas and do term here. When you found this size and the position of your
elements to your liking, lead, just tap on the screen
and get away from this mode. When we aren't done
with this part, Let's just go inside the
ice and we will shade them. Now, if you want to go above the eyes and add some
little eyebrows, or if you want to
add the cheeks, you are welcome to do it. If you don't want to do that, let's just go and turn
off our assisted drawing. Firstly, we go into
our wrench icon over-the-top plants and who will toggle Drawing Guide from here. Now we will get
back to our layers. We will go to our layer with Sketch strawberry,
world's happiness. And from the list, we will
select Drawing Assist. Now we will go right
between the eyes and we will add our
little Smiley mouth here. Let me just go and create
the bottom part of the eyelids or the bottom
part of the circle. You can play around
with the curvature. You can play around
with this size. You can hold your
line and the end. You can go to the editing
mode and adjusted from here, find the position
that works for you. And when you are done, let's go away from
our editing mode. Now when we have
something like that, led, just add some beautification
to our little strawberry. We will add a few seats. We will be creating
this seats just by creating little ellipsis. But firstly, ledgers go grab our eraser tool and we will erase this line that
we have in the middle. So when you are done cleaning
up your illustration, let's just grab
our brush one more time and let's go alone the whole shape of
our strawberry and we will create a few
ellipsis like that. Try not to overdo it. We won't be adding
Irish seats on the bottom part
because on the bottom, we will create some chocolate. So firstly, let's
just go a little bit lower than the horizontal center of our strawberry and we will create a wavy line like that. You can play around
with this shape. You can make it more wavy or
you can make it less wavy. It's all up to you. When you have this shape, we will continue creating
the line going a little bit beyond the frames
of our little strawberry. So just go and L
AND gate this line. And when you have it, we will need firstly to go and repeat the shape that we
have for our strawberry. So let us go firstly
over the right side and we will go and create
something like that. When you've created
the first curve, let just go to the opposite side and we will create
another curve here. So again, we are
starting by creating the similar shape that we
have for our strawberry. And when we have just a
little space on the bottom, we will create a
little dripping part. So let's just go and
connect these two parts, these two sides by creating
a little curve like that. Again, you can play
around with it. You can make it more drippy. You can make it less driven. It's all up to you. If you want to create
some peculiar shape, you are welcome to do it. When your habits lead, just grab our eraser
tool and we will erase all the lines
that we don't need. If you need to
adjust some lines, maybe soften them
up or erase them, you are welcome to do it. And when you are done
cleaning up your lines, Lynch's go inside
this chocolate sheet and we will add a few
more lines there. So e.g. let's create a few wavy lines on
the bottom parts. Later on, we will color
them differently. And when you're done
with this shape, ledgers go to the
Transform tool. We will adjust the
size of our elements. We will rotate it if you want to play around with it
by going to the warp, you are welcome to do is to, firstly, let's make it
a little bit smaller. And then if you want, go to the warp
tool, play with it. And if you are satisfied with
the whole shape in general, we will go and rotate it and
position it onto our canvas. If you want to flip your
shape horizontally, you can go to your
panel on the board Sam, and choose this option. So play around with the
position of your elements. If you want to flip it, flip it, if you want to
rotate, it's rotated. Find the position on your
Canvas that you like, and leave some blank space on the bottom for two
more illustrations. When you are satisfied
with the position of your elements and
with everything, let just tap on to our arrow key on the top-left to
deselect everything. And now we are
ready to move on to the next part where we will
create our little glass.
4. Glass Sketch: Let's start our third sketch
by going to the layers and we will create
one more layer above all the layers that
we already have. Let's just tap on the
plus icon and we will rename this layer sketch glass. So we are tapping on the
layer and choose Rename. Now when we have a new layer, we will get back to our
Canvas and we will start very easily by creating a
shape of the ellipse. We know how to do that. We will need to go just
with one line without lifting up our Apple pencil
and create this shape. At the end of the line, we will hold it to snap it
to a better one. And if you want to
adjust the size, move your Apple Pencil, find what works for
you when you are done, we will go over the
top to edit mode. Here, we will need to make this shape a little
bit less open. So we will go either to the top node or to
the bottom one, and we will drag it
more toward the center. Let's end up with
something like that. If you want to find a different placement
for this element, you are welcome to do it. Leave some space on the
bottom because here we will be aging and other
elements for our cup. When you are done
ingesting your ellipse, let just tap on the screen to get away from the editing mode. And now we will need to go and find an approximate
center of the ship. And we will do it by creating a vertical line going
from top to the bottom. Ledgers go above our
shape and we will start creating our
Align adjusted, tried to make it straight
edge as the angle. If you need to, if you need
to adjust it even more. If you need to put it more
towards the center and hold your Apple pencil and
you're over the top two lines, try to put it right
in the center. When you are done
with this line, we will tap on the screen to get away from the editing mode. And now we will go
to the sides of our ellipse and we will be working on the body of our cup. So firstly, let us go to our left side and from
our site on the Alps, we will just go down and we will create the line going
in that direction. You can play around and
make this line is straight. You can make them a
little bit tilted toward the center
or if you want. So you can play
around and make them even curve's not
the straight lines. It's all up to you. As for the size,
again, it's up to you. If you want to make it big, you are going to make it big. If you want to make
it small and make it small when you have the
first line on one side, Let's move on to the
opposite one and we will repeat the
same thing here. Tried to keep the same
distance from the bottom part, try to keep the same anger or if you are
creating the curves, tried to make it similar to the one that you have
over the left side. When you are done
with these lines, let's just get to the
bottom and we will connect them by creating
a little curve. So let's just do over
one of the sides and we will start by
creating the curve, going through the whole
shape of our gloves, hold it and Lean's and let's go over this soap to adjust it. We will try to make it
even on both sides. So let's just go to
this node that we have in the middle
and we will drag it until we see that both of our SIs are similar
to one another. When you are done, Let's tap on the screen and we will go to this corner is that we have on the bottom and we
will soften them up. Instead of this very
street corners, we will create the curves. Firstly, ledgers go over our
left side and we will create a little soft curve there
when you have it on one side. Let's move on to
the opposite one and we will do the
same thing here. Try to soften these corner app. When you are done, let's just grab our
eraser tool and we will erase everything
that we don't need. If you want to adjust
your lines in any way, you are welcome to do it. Try to make these corners
even on both sides. And when you're done, we will go to the
bottom and we will create a stem on the gloves. So firstly, let's just go
over one of the sides, e.g. the left one. And we will stop a little bit from airline that we
have in the center. And we will create a curve like that when you haven't
done one side. Let's move on to
the opposite one and we will do the
same thing here. We're just mirroring this line. Try to keep the same
distance from the center. When you are done
with this step, we will need to create a little element that
our glass is sitting on. So we will end up with
creating another ellipse. Let's just go to the
bottom and let's create this L is
just with one line, hold it at the end, snap it to a better shape. If you need to adjust
the size, adjusted. If you need to put
it more towards the center ledgers go to
the top to editing mode, try to position it nicely over the bottom part and try
to put it in the center. When you're done, let
just tap on the screen and we will erase all the
lines that we don't need. And now we have the
base of our cap. Again, if you want to adjust
your shape in any way, make it smaller or bigger, maybe work more on to the
main shape of your glass. You are welcome to do it. If you don't want
to do anything, if you're satisfied
with your sheep, just go inside of it and we will create a
wobbly sheep here. So firstly, we will go and step a little bit
from this side, and we will repeat
this shape that we have on the bottom
and on the sides. Let's just do
something like that. Try to make this thickness even on both sides and
on the bottom too. So you are not creating
some super wobbly sheep. And when you are done with
the sheep on the bottom, we will go to the top and we
will create a wobbly line. So what we need to do is to
create something like that. You can play around
with the shape. If it's not happening
from the first try, you are welcome to
try it one more time. When you are done, we will go grab our eraser tool and we will erase all the
lines that we don't need. If you want to adjust
your shape in any way, you are welcome to do it. Now when you are
done with the shape, we will go to the soap
to our ellipse there, and we will create
a rim of the glass. So let just go to our left side. Firstly, we will create
a line going like that. So we are finding that
approximate center of the shape that
we have on the top. If you need to adjust
the angle, adjusted, if you need to put it
more towards the center, you are welcome to do it. Now when you have
this guiding line, we will firstly go over
one on the side so you decide which side is easier
for you to start with. We won't go under this line that we have just created
the guiding line. And we will go and repeat this curve that we
already have owns art. So part, you can hold
your line at the end, adjust it if you
need to adjust it even more and go up
to Edit and mode, all we need to do is to create the same line that
we have already saw. So it should be
parallel to this line. Play around with the nodes, play around with the
position of this element. If you want to make
a bigger room, you are welcome to do it. If you want to
make it very thin. Again, it's up to you. Play around, find
what works for you. And when you're done,
let just tap on the screen and we will get
away from our editor mode. Now, let us go to our Transform
tool and we will make the whole shape a
little bit smaller so we can add more details. Let's just go to the arrow
key on the top-left, we will go to the uniform method and we will go to
one of the nodes, either on the top or on
the bottom, in the middle. And we will make this whole
shape a little bit smaller. If you want to find a
different position for it, you are welcome to do it. And when you're done
adjusting your little cap, Let's just go and
deselect everything by hitting our arrow
key one more time. Now, let us go over the top part and we will add
some additional elements. So e.g. ledgers go over our left side and we will
create a little padlock here. We will go and make it in
the shape of the heart. So let's just go to our left side and we will
start creating our hearts. You can play with its shape and you can play
with its rotation. So basically we are creating
just a little hard. And if it's easier for you, you can go and use this
method with symmetry. Just put it in the center to the shape that you
wanted to create, graded on one side. And then you will automatically edit on
the opposite side. Or if you want to try
it out just manually, you are welcome
to do just try to create an even on
both sides elements. When you are done, ledgers
grab our eraser tool and we will work on to these
lines that we don't need. If you need to adjust
your shape in any way, grab your brush and adjust it. And when you are ready
with the main shape, we will go over this soap and we will create a little
curve like that. So find the center of the curve that you
have on one side, on the heart and do the
same on the opposite side, market down and then
connect these two dots with half of the circle or half of the
ellipse on the top. You can play around
with this shape. You can hold your
line and the ends. You can go to the Edit
Shape and adjusted. When you're satisfied
with the shape. If you want, we can go
and seek in this part up. So we will just go inside and create the same line
that we have right here. When you have
something like that, ledgers go inside of
this little heart. We will go right to
the middle part and we will start by
creating a circle. Hold your line and the hands hold one of your
fingers on the screen. If you need, if you need to put it more
toward the sensor, go to the editing mode. Try to put it right
in the center. And when you have it, we will go to the bottom and we will create a triangle here. You can start by going
to the medial part of your little circle that
you have just created. And from here, we will just create a little
triangle like that. When you have it,
we will need to go to the sides and we
will need to soften them up so we are creating
curves instead of the various street corners
right between the shapes. When you are done, we will grab our eraser
tool and we will erase all the lines that we don't
need to adjust the shape, go and adjust it. And when you are ready, we will do inside the shape
and we will shade it. The padlock is done
and let's just go to our opposite side and we
will add a bit of splatter. Firstly, we will go to the right side and we will
create a shape of the drop. Go into the right side, will create something like that. You can play with this shape. We are doing something
similar to what we did with our little
petals on the strawberry. But this time our bottom
part is more pointed. When you have the shape
like that's ledgers Gil, between these two shapes
that we have on the top. And we will create
another splatter, this time, a little bit smaller. So again, similar shape, just a little bit smaller. You can play with the
curvature of the shape. You can play with this size. You can play with the direction
of this bladder itself. When you are done, we will grab the eraser tool and we will erase all the lines
that we don't need. She needs to work
more on this sheet. Please go and do that. If you want to add more
additional elements, you are welcome to do it too. And when you are done with
a1, your additional elements, ledgers go and work on
to our facial features. Again, if you want, you can go and manually
add the facial features. Or if you want to use the symmetry tool
that we use before, you are welcome to use it. Again, let us go to our wrench
icon over the top-left, we will toggle
drawing guide here. We will go to Edit
Drawing Guide going under symmetry and we will move
our lines to this center. When you are down
leg just hit Done. And we will go to our
layers to make sure that our layer with Sketch
glass is assisted. If it's not assisted, we will tap on the
screen and we will select Drawing Assist
from the list. Now, we will go to this little wobbly shade
that we have in the middle. And from it, we will start
by creating our ice lenses, go over one of the sides. And again, we will
create a sheet of this circle in the
same way as always, we can do it manually
or we can hold our line and the hands and hold one of
our fingers on the screen. Play around with this size, play around with the position. If you want, you can go
over the top to Edit Shape. Now find the position of the
eyes that works for you. You can put them a little bit higher or a little bit lower. It's up to you. When you are done,
we will just tap on our screen and we will get
away from this editing mode. We will go inside the shape of our eye and we will shade it. If you want to end the eyebrows, you are welcome to do it. So e.g. let's just go over our eyes and we will create
some curves like that. If you want to play around
with a different shape, you are welcome to do it too. If you don't want to
add the eyebrows, You are welcome not to add them. So find what works
for you and when you are done adjusting
your eyebrows, Let's just go underneath the ice and we will add
our little cheeks. So again, you can play
around with the shape. You can end up with
creating the ellipsis. Or if you want, you can create just the circles the same
as we have for our ledgers. Go and create this shape. Again, play around
with the size, play around with its rotation. If you want to find a
different placement, go over the top
to editing modes. Find what works for you. And when you add Dan Lai, just tap on the
screen and let's go between our eyes and we
will add our little mouth. Let's create the
similar amount that we have for our little toast. So let's just go and start by creating an ellipse like that. You can tilt it differently. You can make it
bigger or smaller. And when you're done
with the whole shape, ledgers go inside and shade it. If you want to adjust
your sheep in any way, grab your eraser
tool and adjust it. When you are done late, just go against our range. I can overdo it. So plats and two will toggle
Drawing Guide from here. Don't forget that we will need
to get back to our layers. We will need to go to our
layer with the sketch glass. We will need to tap on
it and we will need to turn off drawing assist. And now let's just
zoom out our canvas. Let's take a look at
art illustration. If you liked it, We are ready to move on to our next sketch. Or if you want to adjust it, we can go to our arrow
key on the top-left. We can go to uniform method, find a different placements, find a different rotation, and also we can go on their work and we can play around with
the whole shape in general. So spend a bit of
time here playing with your shape and
when you're satisfied, we will move on to
the next chapter where we will create
a little muffin.
5. Muffin Sketch: Let's start our Alaska
page by going to the list. And again, we will
create one more layer above all the layers
that we already have. Let's just tap on the
plus icon and we will rename this layer
sketch Moffitt, tapping on the layer
and choose and rename when we have our last
layer for this gauge, ledgers, get back to our Canvas. We will go to this
last blank space. And again, we will
start by creating a little ellipse
that we did before. So again, go into our
Canvas just with one line, creates an arc shape, holding it at the end. Adjust the size if you need to. When you are done, we
will unfold this and we will go over the
top to edit shape. We will need to put the ship firstly more to the
bottom because now we are creating the bottom
part of our muffin and we will need to make the
whole shape less open. So if it is very open
right now for you, you will need to go
to one of the nodes, either on the top
or on the bottom and move it more towards
the center when you have the result that we will go and tap on the screen to get
away from the editing mode. Now the same way as
we did with our mock, with our cup, with our glass. We will go and create one line that is going to
absorb to the WhatsApp. Again, let's just go and
query this vertical line. Hold it and the Yan's
a jazz the angle. We will need to go over
the top to editing mode, and we will put this
line to the center. When you are done,
Let's just tap on the screen and we will do again the same thing
that we did for our glass. We will go to this side and we will create two
descending lines, but this time they
will be quite smaller. So firstly, legislature
over one of our sides, e.g. the left one, and we
will create a line here. Let's make it that big. If you want again, you can go and turn this very straight
line into the curve. If you don't want to make
it a little bit tilted, you can go and create a very straight line going
from top to the bottom. When you are done
with this slide, Let's move on to
the opposite side and we will do the
same thing here. We will just mirror this line. We will try to keep this same angle and we will
try to keep the same size. So let's just go and do that. When you are done, we will
go to the bottom and we will connect these two diagonal
lines with the curve. So again, the same way as
we did with our cup layer. Just go and create this curve, hold it and the yen. So we will know that we are ready to go over the
top to editing mode. Let's play around
with this curve and let's make it similar
on both sides. When you are Deanne Lynn, just tap on the screen and let's go and soften
these corners. So again, I go in there
manually and creating the curves instead of the
various trade coordinates, do it on one side, do on the other side. Then grab the eraser tool and erase these lines
that you don't need. If you need to adjust
the lines even more in grab your brush and adjusted. Now when you have these
base on the bottom, we are ready to move
on to the top and we are ready to add
some whipped cream. Again, we will go firstly to our ellipse that
we already have, and we will go above it and we will create another ellipse. So let's just go step a little bit from the lines
that we already have. And this time we will
make this ellipse a little bit smaller in
the same way as before, just creating the shape with one line and holding
it at the end. If you need to adjust
the size, adjusted here, if you need to put it
more towards the center, Let's just go over the
top to edit modes. Let's drag it to
where this center, and this time let's make this shape a little
bit more open. So again, I go into
one of the nodes, either on the top
or on the bottom, and we will end up with
something like that. If you want to put it more down, you are welcome to do it. If you want to keep it
a little bit higher. Again, you are welcome to do it. When you have the
shape like that. We will do a band this little Arabs that we have just created. We'll create another ellipse, this time, a little bit smaller. So the same way as we
did the previous one, go and on the top, making this more and creating
the shape like that. Hold it and the Yan's
a jazz the size. If you need to adjust it and put it more towards the center, go into the editing mode, find the position
that works for you. If you want to put it higher, you are welcome to do it. If you want to put it lower. Again, it's up to you. Basically what we need to end up with is something like that. When you are done with
creating the shape layer, just tap on our screens to get away from this editing mode. And now we will need to turn these ellipses into
the whipped cream. So firstly, we will go
to R1 of this size, e.g. the left one, and we will go to this intersection right here. We will need to create
another curves to combine it with a
second ellipse. So we will go and create a curve like that when you have it here, we will do the same thing
on the opposite side. And now we will go to the top and we will do
the same thing here. So again, we are going through the intersection between
these two lines, the one that we just created
and the second Ellis, we will create
another curve here. Try to make a nice connection between this line that you are now creating and the line on the ellipse that you
have on your screen. When you have
something like that, we will go to the opposite side and we will do the
same thing here. And when you have this second
layer on the whipped cream, we will go over it,
it's soap and we will need to create a
peculiar shape here. So firstly, we will
start from the left. We will go entropy in this line that we
have for our Alice. Then we'll go to the top and we will create a world like that. When you have it, we will go to the opposite side. And here we will create
just a little curve. We will connect
it with the shape that we have for our ellipse. We have this main shape ledgers. Grab our eraser tool and we will erase all the lines
that we don't need. Here. We will need to understand what part is overlapping
another, so e.g. this part on the
top will be seen. And this little part
that we have right here, we will need to erase the same thing on
the second ellipse. If you want to work
more on the shape, e.g. you can go to your first
ellipse and you can go and create the curve similar to the curves that we
have on the top. So we can make it more
curvy ledgers go over one of the sides and we will create the curve in that way. Let's connect it on
the opposite side. Let's adjust the curvature by going over the top
to editing mode. And when you're satisfied
with your line, we will grab our
eraser tool and we will erase the line
that we don't meet. Now we have the
base of our muffin, and that means that we
are ready to go and add some decorative
elements, e.g. let's start by going
to the bottom layer of our width, cream and Android. We will create a little
rope with a book. So firstly, we will go entropy
in the same line that we have for our layer
just underneath. And we are creating
another curve. Hold it at the end, adjusted if you need to
adjust it even more, go over the top to edit mode. Try to make it parallel
to the line that you have for your last layer
of whipped cream. And you're a little bit beyond the frames on the muffin body. So when you are done
ledger step on the screen, we'll get away from
the editing mode and we will go to this site and we will create
a little curves there when you have
it on one side. Let's move on to
the opposite side and we will do the
same thing here. So just creating the curve, we will grab our eraser tool and erase all the lines
that we don't meet. And now we will go
to one of the sides to these Rome that we
have just created. And we will create two loops that will represent the bool. So e.g. ledgers go to the left side and we will create the first loop like that. We are creating the shape on
the lemon or on the drop. It's up to you. All you need to do is to
create something like that. When you have this first shape, ledgers go underneath
it and we will create another
curve the same way. You can move them around. You can make them smaller
or bigger if it's not happening from the first try
to write out one more time. Try not to overdo this. When you've created the
sheep like that's ledgers go inside of these two loops and we will add some
thickness to them. The same way as we did with our padlock ledgers go inside the shape and we will
repeat the whole shape. We will do it on this
second loop two, and we will then grab our eraser tool and erase all the lines
that we don't need. Basically, we will
need to end up with a similar thickness that we have for our rope
underneath our muffin. When you've worked on
the shape ledgers go to the whole rope and we will create some diagonal
lines like that. So in that way we are creating some stripes and later on we will recolor
them differently, go alone the whole shape and try to create parallel lines. We will do the same thing for our little loops for the boat. And when you are ready, let just go and add
our facial features and additional elements
for the muffin buddy. Firstly, we will go and create
the lines go in like that. We will give it and create something like
this muffin paper. So we will go along
the whole shape and we will create a few
diagonal lines like that. You can play around with their distance and
with their amounts. You can play around with their angles and
with everything. If you don't want
to end this lines, you are welcome note to end up. When you are done, let just go and add our facial features. Again. You can start creating
them manually or if you want to make it very clean and very nice and very similar, we will give it to
our wrench icon. Over the top-left,
we will toggle drawing guides and who will
go under Edit Drawing Guide. We will drag are aligned to
the center of our muffin. And when you're done, we will hit done over the top right. Now let's make sure that
our layer is assisted. If it's not assisted, we will go to earlier
with Sketch muffin. We'll tap on it and we will choose Drawing Assist
from the list. Now when we have
hourly assisted, we will go to this
bottom part of our muffin and we will start
by creating the ice again. If you want to play
around and find different options for
your facial features, you are welcome to do it
if you want to keep it. Simple. Ledgers go and add just
two dots for our eyes, will go to one of the sides and we will create just one dot. And the second one will
be automatically added. I just go and create
something like that. As always, you can play
around with the size, you can play around with the
position of your elements. You can hold one of your
fingers on the screen to make sure it is a
perfectly round circle. Find what works for you if you need to
adjust it even more, go over the top to edit modes, play with the position or your elements and with
distance from the center, you can put them a little bit higher or a little bit lower. It's up to you when you're satisfied with
this shape layer, just tap on our
screen and we will get away from our editing mode. And now let us go inside the shape of our eye
and we will shade it. If you want to add the eyebrows, go above the eyes and
create the shapes, play around with
them if you want it. When you're done
with the eyebrows, ledgers go underneath the ice and we will add
our little cheeks. If you want, you can play
around with the sheep. You can create the
circle or an ellipse. Play with their size, play with their position, play with everything
you want to play with. When you are done with your little cheeks
ledgers go between the eyes and we will add
our little math here. We will start the
same way as before by creating a sheep or
a tilted ellipse. If you want to end up
with a shape like that, you are welcome to do it if you want to go and create
a different shape, Let's just go and create this straight line
over the top part. You can work onto the corners of this elements on the top if
you want to make it bigger, go and do that
bigger when you're satisfied with the
whole shape in general, alleges go and turn off
our symmetry, draw it. We will again go to our orange
icon over the top-left. We will toggle Drawing
Guide from here, and then we will go
back to our layers. We will go to earlier
with Sketch, muffin, tap on it and choose
Drawing Assist from here. And now let's just go and add some additional elements
to our whipped green. We will add some hearts here. So again, let's just go firstly, somewhere to the center, to the second layer
of our whipped cream. We will go more toward the left side and we will
create a little heart here. Again, you can play
around with the angle. You can play around with
the size of these elements. Play around with the
shape and adjusted. If you need to erase all the
lines that you don't need to try to make the sheep
even on both sides. And when you are done
with the first heart, Let's move on to our right side between the two layers on
top and in the middle. And we will create
another hard here. Let's tilt it a little
bit differently. This time, we will move
it toward the center. Again, just create this
shape, play with it, try to make it similar
on both sides, areas, all the lines
that you don't meet. When you are done,
Lynch's go inside these little hearts and we can
write something down here. So e.g. let's just
write down me and you, if you want to add some
additional elements, some sparkles or
something like that, you are welcome to do it if you don't want to
add anything here, we are ready to go to our
Transform to make it smaller, make it bigger, find
the position for it. And if we want to
adjust it even more, we will go to the world option
and we will play with it. So let's just go to our arrow key and play with our shape. When you add then a jazz in your shape with the
warp option lunges. Get back to our uniform methods. Let's rotate it and find a
different placement for it. And when you are done, ledgers go to our arrow
key one more time. Let's deselect everything. And let's take a look at the whole illustration
that we have right now. So let's just zoom
out our Canvas and take a look at our illustrations
from the distance. If you want to
adjust some parts, if you want to adjust
some illustrations, find the different
placement for them, maybe find a different
angle of rotation. Let's just do it right now. We will go to Arles, we will go to the needed layer. We will go to our arrow key and we will transform
our elements. E.g. ledgers go to our Tuesday and we will put
it a little bit higher. Wages go tap on our arrow key. We are going to the
uniform method and we are finding a different
placement for it. So now it's time to
position your sketches on your canvas in
a more wise way. Let's just go and play
around with them. When you've positions
you are elements. Ledgers go back to
our layers and we will need to merge all this
sketch layers together. To do so, we will need to go to the top layer that
we have right now. In this case, muffin. We'll put one finger on the top layer and we will
put another finger on the bottom layer
with our sketch to see and we will make
a pinch movements. Now we have everything
on one layer so we can go and rename this
layer, just a sketch. So let's again tap on our
layer and choose rename. And if you want to go and add
some additional elements, you are welcome to
do it right now. So e.g. you can go to this blank spaces that you have and you can add some stars, maybe some sparkles, maybe some hearts, some
additional elements. So if you want to do that, ledgers go and do that. And when you are
done with this part, we are done with our sketch. In the next part, we will
start recoloring our objects.
6. Toastie: Adding the Base Colors: Let's try this part. Firstly, we go into our brush
library and we will change the brush sets up and onto
our little icon with a brush, go into the calligraphy folder and we will choose
monoline brush. And we will need to adjust
our brush just a little bit because we want all of
our lines to be very smooth. Let's just tap onto this brush. And on the left into
the brush studio, we will go under stabilization. Here on the top you can see that we have the option streamline, and this option has
the slider amounts. If it's at the lower value, it will be following your
natural floor on the hands. If we go to our drawing pads and if we try to
create some lines, you will see that it is
a little bit jagged. We don't really want to
make the lines like that. We want everything to be
as smooth as possible. So we can go to this amount slider and we can
increase their value. You can play around
with the amount, but e.g. legislative at maximum. Once again, we will go back to our drawing pad and we
will try to create a line. And you can see that you are losing a bit of control over it, but you are creating
a very smooth line. If you are moving with
your hands very slowly, it will be very nice. Now play around
with this amount. If you want to go with the
natural flow of your hands, if you want to create
natural lines, you are welcome to
use the lower values. If you want to create
smoother lines, you are welcome to increase the amount of streamlined
to your liking. So play around, find what
works for you and when you are done ledgers he'd done
over the top right corner. Now when we have
prepared our own brush, Let's just go to the
list and we will play with our layers
just a little bit. Firstly, we will need to go
to our layer with the sketch, and we will need to change the opacity level of this layer. Opacity means how transparent your objects are on your canvas. We still need to see what's
happening onto this layer. We still need to see airlines, but we don't really need
them to be that bright. So we will go and adjust the opacity ledgers go to
earlier with this gage, we will tap on the icon
near the checkbox. On the top we have
this lighter opacity and we can grab it and move
it toward the left side. Find what works for you when you found the opacity that
you're satisfied with. Tap on that sketch
layer one more time and we will go and
create one more layer. Select, just tap on the
plus icon and we will need to drag this layer underneath
our layer with the sketch. So in that way, we will see
clearly what we have on the, earlier with the sketch
and we can repeat it. Let's hold this layer
with our Apple Pencil and we will drag it underneath
our layer with the sketch. When we drag this layer underneath earlier
with this gauge. And before starting to
work on to our tools, just go to our background layer and we will change its color. So let's just tap
on it and we will go under palettes on the border. And we'll also add the color
within in-band grounds. Now you have changed
the background color. So let us get back to our layers and we will get
back to our new layer. Now, as mentioned before, we will be starting
by recreating the colors onto our toasty. And we need to start thinking
a little bit strategically. We need to understand which shapes are overlapping
and other sheets, and we will need to
start from the bottom. So you can see that we have
this part on the side, which is our thickness
of the tools, and we will start from it. So let's just go and rename
this layer as to the bottom. Now when we have this layer
rename to let us get back to our color palettes and we will select the color for this part. We will go and select the color with the name dark red, orange. Let's tap on this to select. And what we need to do right
now is to go to our toes, zoom in our Canvas, go to this part that we
have on the right and recreate the lives that
we have on our sketch. We don't need to repeat everything with
100% of similarity. If you want to adjust the lines, you are welcome to do it. But what we need to do is
to create the closed lines. So when you are
creating the lines, this is not closed. We won't be able to
add the color inside. Everything will be
filled with color. This is closed so we will
need just to close the shape and we don't need to have
any gaps between our lines. Now, very easily ledgers go to this part that we
have on the right and we will recreate it as always
as we had on our sketch. You can use all the
options that we use there. You can hold your life at the
end and you can snap it to a better shape if you need
to adjust it even more, you can go over the top to
edit shape very easily. Just go in there and
creates an airline. Try to make smooth
and nice connections between your lines. And if you have
something like that, you can always grab your areas are two and adjust your lines. We need to pay more attention to the outside lines because
in the side parts will be recolored when you reach
the bottom and when you don't have any more lines that you need to
repeat for this part, we can very easily go and create the line like that and
connect our shapes together. When you have this
shape like that, we will go to our
top-right corner and we will drag and
drop the color insights. And now when we are
done with this part, we will go back to our layers. We will firstly go
to our layer with the sketch and we will hide
it just for one seconds. We needed to make sure that our outline is smooth
and clean and nice. And if we need to
adjust some parts, we will grab our
eraser tool or we'll grab our brush and we
will adjust the lights. Let's work onto the
connections and we will adjust the
parts like that. Try to make very smooth lines. When you are done adjusting your shape ledgers get
back to our layers. We will unhide our
layer with this cage. So again, we go into our checkbox and three
ads happened in it. Now when we get back
early with the sketch, we will go and create
one more layer. Let's just tap on the
plus icon and we will rename this layer as
two-state middle parts. So again, ledger step onto
early and let's choose Rename. Now when we have
two leaves for R2, see ledgers go and put
them in the group. It will be a little
bit easier for us to navigate for our layers. It will be much cleaner. So to select two layers, we will need to
do the following. One layer we already have
selected, it is blue. We will go to the next layer
that belongs to our toasty, and we will swipe it from left to right with our Apple pencil. When two layers are selected, we will go to our top-right
corner and we will hit Group. Now we have a new group which
we can rename as Tuesday. So let just tap on the group
and let's choose Rename. Now again back to your
LEA with middle parts. When it is selected, we are going back to
our color palettes and we will select
another color. This time it will
be brown layer. Just tap on this color
and we will go and repeat this shape that we
have in the middle parts. We will need to go and do the same thing as we did
with the previous shape. Just go in and creating
the closed plants. You can repeat the
whole shape here. Just repeating the lines that
you have onto your sketch. If you want to adjust them, you are welcome to do it. If the amount of opacity
is not working for you, you can always get
back to your Layers, go to your layer
with the sketch tab on the icon and
adjusted from here, then get back to
you needed layer and start creating your lights. Also, if it's easier for you, you can go again to your layers and literally with
toasted water. Maybe it in that way it will be easier for you to
recreate the lines, find what works for you, and when you are done, let us go and recreate these lines that we
have onto our sketch. When you add down with your
outline where it is closed, we will go again to our
top-right corner and we will drag and drop
the color to this shape. Now lenders get
back to our layers. We will unhide earlier
with two-step water. Now we will go again to our layer with the sketch
and we will hide it. We will go alone our shapes
and we will try to make nice connections between
these two shapes so they are smooshed together. And also what will go along
the sheep with Joseon, middle part, with our
eraser or with our brush. And we will adjust
our lines again. When you are done
adjusting your lines, we are one more time, go into our layers and we will unhide our layer
with the sketch. So let's just add one to our little checkbox and we will get back to
our group with it. So C and we will create
one more layer above, we will call it the top parts. When we have a new layer, we are going back to
our color palettes and we will select the color
with the name beach, with this color, we will go
to this part that we have on the job and we will recreate
it the same way as before. We will go to the
slides that we have on this gauge and we
will recreate that. We will make them
close and smooth. When you have the
closed outline, we will drag and drop
the color insights. And when you have this shape one more time we're going
back to our layers. We will hide our layer
with the sketch and we will work on
the whole outline. We will grab our eraser tool, grab our brush, and we will try to create very smooth lines. When you are done, adjusting your outline
ledgers get back to Arles and we will unhide
our layer with the sketch. We will create one more layer
of what our middle part, which is our egg cell
ledgers DO and tap on the plus icon and we'll rename
this layer as egg whites. When we have this new layer, we are going back to our
color palettes and we will select the color
with the name whitish. With this color, we will go and recreate the shape of the heart. When you have the outline, drag and drop the color insight when you are ready with
this task ledgers get back to our layers
height earlier with this gauge and we will
work on the outline. Let's just grab our
eraser tool and let's make everything
nice and smooth. And when you are done, we will get back to our layers. We will unhide earlier with this gauge and we will see
what else we need to add. We will need to recreate the shape that we have
for the egg yolk. So let's just go and create one more layer and we will
rename it as egg yolk. When we have the needed layer, we are going back to our
color palettes and we will select the color
within the orange. With this color, we will go and recreate the shape
of the circle. Hold your line and the end. Hold one of your
fingers on the screen. Adjust the size. If you need to adjust
the placement, go over the top to edit shape. When you are done
with the outline, drag and drop the
color insights. And when we are
done with our egg, all we need to add is
our facial features. So one more time, going back to our layers and we'll
create one more layer. We will rename it
as facial features. Now let's get back to our
color palettes and who will select the color with
the name dark purple. With this color, we will go and recreate our facial features. Firstly, ledgers go and
increase the size of our brush and we will put
two dots for the eyes. Again, you don't really
need to repeat everything that you have on your
layer with the sketch. If you want to
adjust some parents, maybe make the eyes
bigger or smaller. You are welcome to do it. When you put two
dots for your eyes, let just go to the mouth
and we will recreate it. We will do it in that way. We will go firstly
to our left side and we will create one
line going diagonally down and then straight
line we will go up and we will create
the shape of the hearts, hold your land, and the hands. And we will go over the top to edit mode to adjust the shape. You can see here
we have our nodes. We can go and tweak
them to our liking. Find the size and the
position that works for you. And when you're done, let just tap on the screen to get away from our editing mode. Now we will need to go
and decrease the size of our brush to recreate
our little eyebrow. So let's just go and do that. And we will go over Irish shapes and we will recreate
our eyebrows. When you are done
with the eyebrows, Let's just get back to
our color palettes and we will select the color
with the name hot pink. With this color, we
will go and recreate our cheeks the same
way as before. We can start by
creating the outline, then drag and drop
the color inside. Or if you want to
experiment a little bit, you can go and increase
the size of your brush, putting the doors or create the lines with a bigger brush. When you are done
with the first cheek, let's move on to
the opposite side and let's repeat the
same thing here. Hold your lines at
the end and we will adjust the size by moving our
Apple pencil to the site. If I want to make
sure that the size of this element is similar to the one that we
have on the left. We can go to the editing mode. We can drag our cheek to the opposite side and we can play around with its size here, move the nodes, and when you
are satisfied with the size, Let's just drag it to the
perfect place on the right. And when we are done with it, we will tap on the
screen and we will add the color inside the shape. Now let's work on our facial
features a little bit more. We will add a little
tag inside of our mouth and we can go
and try to do it manually, but it will be quite difficult. So we can use one option
that Procreate has. We will get back to our layers. We will tap onto earlier with facial features and we will select Alpha Lock from the list. Now, if we go to our shapes, we will be creating
additional elements only on the existing shapes that we
already have owns earlier. So let just see how it works. We will go to our
slider on the top-left. We will adjust the size of our brush and we will go inside the mouth on the bottom part and we will create our
lethal Tom here. You can see that we are
aging our color only inside the ship when you're satisfied with the
shape of your tongue, with the sides of it
adjusted if you need to. And when you are done, we will go and add our little
highlights to the eyes. We will need to
select the same color that we use for our egg white, so we can do it from our Canvas. We will need to go to this
color and who will need to hold one of our
fingers on the screen. You will see that you
invoke some little too. That is called eyedropper tool. If we move it, we will be changing the color
on the top of it. So we will need to go
to this white color. And when did to change
its color on the top, we will just on hold our finger. You will see that
you have changed your color on the
top right corner. And that's exactly what we need. Now, we will do to our
eyes on the one I firstly. So let's go over our
left one and we will put just one dot
to the top corner, either left or right. Just go and edit. If you need to adjust
the size of your brush, you are welcome to do it when you have your
first highlight. Let's move on to the
opposite eye and we will try to put this highlight
on the same place. So we are going to
the top-left quarter and we will try to put
the highlight there. If you want to add
more highlights, you are welcome to do it. Ledgers go back to our layers
we will hide earlier with this gauge and we will check
out how everything looks. If you liked it. We are ready to move on
to the next part where we will add our highlights
and shadows.
7. Toastie: Adding Shadows & Highlights: Let's start our highlights and shadow parts by
going to the layers. And we will go to
our boards and Leah are toasty bottom and we
will start from here. Let's just select this layer
and we will need to create one more layer on which we will start by creating the **** up. So let just tap on the plus icon and we'll rename this
layer as shadow. Now we would want to clean
this lead to a previous one. And that will mean that we
will be adding the details only on the areas that we
have on the previous layer. So it works similarly to the alpha log that we
use for our tongue, but it will be on
the separate layer. To do so, we will need to go
to earlier with the shadow. We will need to tap on
it and we will need to select Clipping
Mask from the list. Now, if we go to this layer and if we try
to create something, you will see that we are
adding our details only on these areas that we
have on our toasty water. That's exactly what we need. Now, when we have cleat earlier, we will need to go and
change the blending mode. Blending modes are
different ways that leaders can interact
with each other. You can add different
visual effects. And for the shadow,
we will be using multiply blending mode
to the multiply mode multiplies the colors of
the blending layer and the base layer and the resultant is always
a darker color. This mode is very useful
for color and shadows. To change the blending modes, we will need to go to our icon and from the list, we
will need to find, multiply and select it for the positive for now let's
leave it at 100 per cent. And if we feel that maybe
it is too dark for us, we can always get back to this option and
we can adjust it. So now when we said earlier, ledgers get back to
our color palettes and let's select the color
with the name Brown. When you have this color, we will go to our toaster element that
we have on the right. We will go underneath
our little sheep that we have only soap and from it we will create
a line like that. When you have it, we will go to the bottom part and we will
recolor the whole area. So let's just go and increase
the size of our brush. And we will go and manually
recolor these bottom parts. If you feel that the streamline
value is slowing down. And if you don't want
it to be that smooth, if you want to have more
control over your line, you always can get back
to your brush library, go to your monoline brush and adjust the amount
of streamline. So now let's just go
and recolor this part. We will go to the
top part and we will turn this straight
line into the curve. Let's just grab our eraser tool and we will work on
to this element. Tried to make it
nice and smooth. And if you want, you can go a little bit
to this side that you have on the right and
make a little loop here. When you are done, let's
get back to our layers. We will go to our
layer with the shadow and we will adjust the opacity. Just tap on the icon, go to the slider opacity and
find what works for us, e.g. something 40-55%
will work perfectly. When you are done
with this part, we will get back to our layers. We will go to our layer
with toasted soap. It's above it, we will
create another layer. Let's just tap on the
plus icon and again, we will rename it as shadow. Let's clear this layer
to a previous one. So tapping on it and
choose clipping mask. And then we will go to
our icon and change the blending mode to
multiply for the opacity, Let's leave it at 100
per cent for now. Now we will get back to
our Canvas and we will select the same color that
we used for these elements. Let's invoke our Eyedropper Tool holding one of our
fingers on the screen. When we have the unit
color on the soap, we will unfold our finger. When the color change on
our top-right corner, we will just grab our brush. We will increase the size
or decrease the size. It's up to you. We will go over at
one of our sites. In this case it'll be
the right side and we will just repeat the line
that we have on the right. So basically we are
stepping from and just a little bit and we are creating
something like that. If you want to play around
with the size of the shadow, you are welcome to do it when
you have your first-line. Let's go and increase the
size of our brush and menu. We will go and
recolor this area. If you need to adjust
your shadow in any way, grab your eraser
tool and adjust it. When you are done with your
first shadow onto this layer, we will need to add one more. So we will go back
to our layers and we will unhide our
layer with the sketch. You can see we had
this little shadow to our left side from our app. So we will need to go
and repeated legend, grab our brush and we
will go along this line that we had owns our sketch
and we will repeat it. When you have the outline, just go inside the
shape and recolor it. When you are done, ligers
get back to our layers. We will hide our layer with the sketch and we will
work on the outline, make it nice and smooth. And when you are ready, let's get back to our
layers and we will change the opacity of the
layer with our shadow. So again, we're doing
to our m Eigen, we go into our slider and we are finding
what works for us. Again, something 40-55% will work perfectly fine the
amount that works for you. And when you are done, we will go to the next layer and we will add our next shadow. Let's just go to our egg whites. We will create one
more layer above, will clip it and we
will rename it shadow. Let's go to the icon and change the blending
mode to multiply. Now, we will select
the same color that we use for our egg whites. So let just invoke
our eyedropper tool. We also have the color that we need and we will go
to the right side and we will try to repeat the outline that we
have on the right. So let's just go there and
create something like that. Make it nice and
smooth if you need to adjust it and grab your
eraser tool and adjust it. If he wants to play around
with the size of the shadow, again, you are welcome to do it. And when you are ready
with the shadow, we will get back to
our layers and we will adjust the
opacity of this layer, go into the m Eigen, go into our slider
and finding what works for us when you are done, we will do the same thing
for our app, York ledgers. Go and select this layer. We will tap on the plus icon, we will clip the LEA and
we will rename it shadow. Go into our icon and select
and multiply blending modes. Now we will go and select the same color that we
had for our egg yolk. Let's again invoke
our eyedropper tool. Select the color, and
we will go again to the right side and we will
create the shadow here, starting by creating
a little outline, you can hold your
line and the ends. If you need to adjust your
audit soap to ellipse, adjust your ally, and
when you're unsatisfied, we will go to the bottom
part and we will recolor it. When you are done, we are
going back to our layers, we are going to our icon and we are adjusting
the opacity, find what works for you. And when you are
done with this part, we are done with our shadows. And when we are done
with the shadows, it's time for the highlights. Firstly, let's get back to
our layers and we will go above all the layers that
we have for our Tuesday. We will create one
more layer above and we will rename
it as highlights. We will need to change
the blending mode. So we will go to our
N icon and this time we will select Blending
Mode that is called screen. Screen blending mode creates
the opposite effect of the multiply mode and
the resulting colors will be brighter than
the original colors. So now when we
have said earlier, ledgers get back to
our color palettes and we will select the color, either whitish or background. You decide with this color, we will do firstly
to our egg yolk and we will do to the opposite
side from our shadow, we will create a
highlight of this shape. You can hold your land at
the end or you can manually create this line if you want
to adjust it in any way, you are welcome to do it. If you want to add
additional highlights, e.g. some doors, you are
welcome to do it to find what works for you. And when you're done, let just go to this
top part of art. So sit over the left
side and we will add a few dots of
different sizes, just create some
nice pattern here. When you are done
with this part, Let's move on to the
top of our toes, to this area which
is brown right now. And we will add a
few seats here. We will just add some dots. Try not to overdo it. And when you are ready, ledgers get back to our
layers and let's adjust the opacity of this layer with
our screen blending modes. So go into the Saigon and
bleed with our opacity slider. Again, find the amount
of opacity that works for you and take a look at
your illustration in general, if you want to
adjust some parts, go and adjust that. And when you like the
result that you have, we are done with our
first illustration. In the next chapter, we will start creating the colors for our
little strawberry.
8. Strawberry: Adding the Base Colors: Firstly, let's get
back to our layers and we will unhide our
layer with the sketch. Now we will go to our
layer width to see, and we will go to
this little v icon near the chat box
and we will collapse the group by just tapping it and everything will be
clean, owns our layers. If you want, you can
go to your layer with scheme toasty and you can
put it on the same group. Now when we have
this group selected, we will need to go and create
one more layer above it. So let's just tap
once a plus icon and we will rename
this layer as leaks. Again, we're starting from
the bottom and we are choosing what elements will
overlap and other elements. So let just tap onto
this new layer. We will rename it as lifts. When you are done with
renaming your LEA, Let's get back to our
color palettes and we will select the color
with the name green. With this color, we will go
and repeat the shapes of our leaps very easily
the same way as before, just creating the outlines, closing this outlines
and adding the color in sets the same way as before. If you need to make your
lines a little bit smoother, you can get back to
your brush library and a jazz the amount of streamline when you have the outlines drag and
drop the color insight. When you are done, let's
get back to our layers. We will hide earlier with
this gauge just for 1 s to check out whether we
need to adjust some parts. If we need to smooth and
airlines in any way, or if you want to
adjust some parts, we are ready to grab our brush, to grab our eraser tool
and a jazz this parts. When you're done and when you're satisfied
with your leaves. Let us get back to earlier with this gauge and we
will unhide it. We will create one more
layer for our strawberry. So let just tap on the plus icon entering in the
layer as strawberry. Now when we have two layers, Let's select them both and
let's put them in the group. We will rename the
group as strawberry. Get back to your LEA
with strawberry. Now, let's get back to
our color palettes and let's select the color
with the name hot pink. With this color, we will go and recreate the shape
of our strawberry. When you have the main
outline ledgers go to the boards of n
connected with the line. When you have the closed shape, let's just go to our
top-right corner and we will drag and drop
the color insight. And now let's just get
back to our layers. We will hide our
layer with this gauge and we will work
on to our sheep. Grab your brush,
grab your eraser and try to make
the lines smooth. When you are done, we are
going back to our layers. We are unhide in earlier
with this gauge. We will go above this layer with strawberry and we will
create one more layer. Ledgers, tap on the plus icon and let's rename
this layer as seats. I wanted this layer. We will get back to
our color palettes. We will select the color with the name whitish if you want
to use another color, e.g. yellow or background or base, you are welcome to do it. Now with this new color, we will go a long, these little shapes that we have onto our sketch and we
will recreate them. You can create them
manually or you can snap them to ellipsis and
recolor the middle parts. When you are done
with this part, we will get back to our
layers and we will create one more layer above the
layer with our seats. We will call it chocolates
when we haven't Yulia, where I getting back
to our color palettes and we are selecting
the color we, the name Brown way
this color we will go and recreate the shape that we have for the chocolates. When you are done with
the closed outline layer, just drag and drop
the color insight when you have the shape. Let's just get back
to our layers. We will hide earlier
with this gauge and we will work more
on to the sheep, tried to make it super smooth. When you're done with the shape ledgers go to
our layer with the sketch. We will unhide it and
we will need to add these wobbly line onto
our chocolate ledgers. Go firstly to earlier
with chocolate, we will tap on it and we
will select Alpha Lock. When we did it, we
will get back to our color palettes and we will select the color
with the name pink. With this color, we
will go and adjust the size of our brush
and we will repeat these lines that we have on our sketch if you want to
adjust them in any way, if you want to create more
of them or less of them, you are welcome to do it. When you are ready. Let us get back to our
layers and let's create one more layer on which we will create our facial features. So let just tap on
the plus icon and let's rename this layer
as facial features. When we hand this new layer, we argue index our color
palettes and we are selecting the color with
the name dark purple. This color, we will increase
the size of our brush, and we will start by recreating our eyes
on the strawberry. Again, play around
if you want to make your facial features
smaller or bigger, or if you want to experiment
a little bit with them, you are welcome to do it. When you are done with the ice, decrease the size
of your brush and create this little mouth again. You can hold your
land at the end. You can adjust it
to your liking. If you need to go to
the editing mode, you are welcome to do to two. Now, let's select this
white color and with it, we will add our highlights
to the eyes ledgers, Guo zoom in our Canvas, invoke our eyedropper tool, select the color that we need, and we will go to our eyes and we will add our highlights. You can play around
with their position. You can play around
with their sites. Just try to put them on the
similar place on both eyes. If you want to add
multiple highlights, you are welcome to do it. Now Let's just take a
look at our illustration. We will get back to our layers
we will hide earlier with this gauge and we will check out whether we want to
change anything. If we are satisfied
with how it looks, we are ready to move on to our part with
highlights and shadows.
9. Strawberry: Adding Shadows & Highlights: The same way as before. Let's start by going to our layers and we will
start from the bottom. We will go to earlier
with the lease, and above it we will create one more layer ledger
step on R plus icon. We will rename this
layer as shadow and we will clip it
to a previous layer. Now let's go back to our icon and we will select
multiply blending modes. If you want to leave
it at 100 per cent, you are welcome to do it. If you know that you
will end up with something like 50% of opacity, you are welcome to
adjust it from here. Now when you have set
your layer ledgers, get back to our canvas
and let's select the same color that we
had for our leafs layer. Just invoke our eyedropper tool and change the color from here. Now we will go to one
side of our leaves, to all of the leaves, to
one side of all the lists. And we will go and add our
shapes for the shadows. Firstly, let us start from the leaf that
we have on the left. Ledgers get to the
bottom part and we will create the
shadow like that. You can see that we have some overlapping leaves and we don't really see
where they went. We can go back to
our list and we can unhide our layer
with this gauge. And in that way we will know where we need to put our shadow. Now, let's get back
to this next leaf and we will go and add the
shadow to the bottom parts. We will need to repeat the
whole shape of the leaf. When you are done, we will go back to
our right side and we will add the shadows
again to the same site. You can play with a
thickness on the shadows. You can play with their size, with their curvature,
with everything. And when you are done
with this shadow, Let's move on back
to our last leaf and we will add the shadow
again to the same site. If you feel like you want
to adjust your shadows and grab your eraser tool and areas
the parts that you don't. Or if you want to work
more with your brush, you are welcome to do it all. So we will get
back to our brush. We will decrease its
size and we will create these lines that we had
for our guiding lines. So let's just go and
create this slides. When you are done with
this task one more time, we are going back to our layers. We are going to our
icon on the layer with the shadow and we
will adjust the opacity. If you feel that you need to hide your layer
with the sketch, go and do that. Find the opacity
that works for you. And if you want to adjust
your shadows in any way, you are welcome to
go and do that. E.g. we can go to the bottom of the lease and we can create
the curves on the bottom. When you are done with
this part one more time, going back to Arles, going above early with strawberry and we are
creating one more layer. Let's tap on the plus icon. Let's click this layer
to a previous one and let's rename it as shadows. Now again, you into RNI can change our blending
mode to multiply. If you want to play with
opacity straight away, you are welcome to do it. Now we will go and
select the color that we already have
onto our canvas. It will be this pink. So let's invoke our
eyedropper tool, select the color that we need. And again, we will
go to the same side where we have put our
shadows on the leaves. We will start creating this
shadow on our strawberry. So we are going to the left side and we are repeating the shape of our strawberry start by
creating a little curve. Play around with it, play around with its curvature. If you need to hold
it at the end, you are welcome to do it. If you need to go to
the editing mode, again, please go and do that. When you are satisfied with your line ledgers
Gill and increase the size of our
brush and manually we will recolor the
rest of the area. If he wants to add more shadows, you are welcome to do it. E.g. we can go and
decrease the size of our brush and we can repeat this line that we have
for our chocolates. Make a smooth connection
between these two shapes. If you need to adjust them, grab the eraser tool
and adjust them. If you want to add the
shadows underneath the seats, again, you're welcome to do it. Just try to be consistent with your shadows and put
them on one site. When you are done, we
are getting back to our layers and we will play
with opacity of this layer, find what works for you
and when you're done, we are ready to move on to
our layer with chocolate, we are ready to create
one more layer, clip itself previous one, rename it, and change the
blending mode to multiply. When you need it, we will select the same color that we
had for our chocolates. So invoke your eyedropper
tool, select the color. We will go again
to the same site and we will start by
creating the shadow here. Also, we can add the
shadow on the top parts. When you have the
line like that, Let's increase the
size of our brush and manually we will recolor
the rest of the area. If you want to adjust
your life in any way, grab your eraser
tool and adjust it. Try to make your shadows smooth. And when you are done, we will get back to our list. We will go to our icon and we
will play with our opacity. When you are done
with this task, we are done with our shadows. So that means that we
will go above Arly with facial features
and we will create one more layer and we
will call it highlights. Now one more time we will
go back to our N icon and we will select the blending
mode screen one more time, getting back to our color
palettes and you decide what color you want to
use for your highlights. Backgrounds, whitish,
may be beige, something very bright, e.g. let's select the color whitish, and we will go to
the opposite side from our shadows and we will start aiding our
highlights the same way as we did on our toes. So firstly, let us
go to the chocolate. We will go to our
right side and we will create a very big and
bright highlights. You can play around
with the shape, but try to make it very smooth. If you want to add additional
highlight with little dots, you are welcome to do
it when you are done with this part led you
to our strawberry again, where I go into
the opposite side from our shadow and we will add a little highlight there to play around with the shape. And when you are done, we will go back to our leaves and we will add little
highlights there too. So let's decrease the size of
our brush and we will go to the opposite side from our shadows and we will
add a few highlights. If you want, you can create
a few dots on the lips. And when you are
done one more time, we're arguing back
to our layers. We go into our layer
with highlights. We go into our S icon and we
will play with the opacity. Find the opacity level
that works for you. Take a look at your
illustration from the distance and
if you liked it, We are ready to move on to our next part where we will
create our little glass.
10. Glass: Adding the Base Colors: Let's start making our third
illustration by going to the layers and first a little collapse are
grouped with strawberry. So we will go to
our little v icon near the chatbox and
we will tap on it. Now when we're I still here into our layers ledgers go
to our sketch layer, we will go to our
little checkbox and we will unhide this layer. When we did it, we will go to R group with strawberry
and above it, we will create another layer. Let's just tap on
the plus icon and let's rename this
layer as glass base. When we have a new layer, we are going back to
our color palettes and we will select the
color within the pink. We are using the same
brush as before. And all we need to do
is to go and recreate the slides that we have for
the main shape of our cup. Let's just go and create the
clothes and clean lines. When you have the outline
for the whole shape layer, just drag and drop
the color insight. Now just for 1 s, Let us get back to our layers and we will hide earlier
with the sketch. We will get back to earlier
with the glass base. We will grab our eraser tool or we will work with our brush and we will try to make all the connections between
the lines very smooth. If we need to adjust something, ledgers go and adjust it when you are satisfied
with your result. Let us get back to
our layers and we will get our layer
with the sketch back. We will need to go and create one more layer for
our middle parts, like desktop onto our plus icon, and let's rename it as liquids. Now we will get back to
our color palettes and we will select the color
with the name hot pink. With this color, we
will go inside of our cup and we will recreate
this wobbly shapes. Let's just go and do that the
same way as we did before. Just creating the outlines. Make the whole shape
smooth and close. And when you are done, ledgers guilt and drag
and drop the color in site one return, we will get back to our leaders. We will hide earlier with
the sketch and we will check out whether we need
to adjust some places. If you need to do that and
grab your areas are two and adjust that end-to-end
your eyes down. We are again going
back to our layers. We will unhide our
layer with the sketch. Let's create one more layer
above early with liquids. And on this layer, we
will be working owns our padlock and
displeasure in parts. So let's create one
more layer and let's rename it as padlock and splash. We already have the color that we need for
this fleshy part. So let's just go and
recreate the lines that we have on our sketch the
same way as always, just creating smooth
enclosed shapes. When you hand the lines layer, just drag and drop the color
insights one more time, going back to our layers and hiding the layer
with this gauge, the checkout, whether we
need to adjust some parts. If you need to adjust
some elements, grab your eraser tool
and adjust them. When you are done, again, we're arguing back
to our layers and we will unhide our layer
with the sketch. When we did it, we will get
back to our color palettes and we will select the
color within the magenta. With this color, we will go and create this shape
for the padlock. When you have the lines let just go and increase the
size of our brush. And we will create
these shapes on the soap just with
a bigger brush. As always, hold your
land and the ends. And if you need to adjust it, go to the editing mode. When you are done, like
just tap on the screen. Let's go back to our leaves. We will hide our layer with
the sketch and we will work on to our outline
if we need to. When you're satisfied
with the shape layer, just drag and drop
the color inside this heart shape one more time. Take a look at your outlines. If you need to adjust something, go and adjust it, and if you are satisfied with
the whole shape in general, ledgers get back to our layers. We will unhide our
layer with the sketch, and we will go and recolor this top part of our
padlock with another color. We will do it very
easily by selecting another color and by
using Alpha Lock. Firstly, let us go to this
layer with padlock and splash. We will tap on it and we
will choose alpha lock here. When we are done,
we will get back to our color palettes and we will select the color with
the name yellow. And now very
accurately we will go to the top part and
who will recolor it? Check it out one way term
without the sketch layer, if everything is looking fine, allege as guilt again
to earliest and we'll create one more layer
for our facial features. When you have your layer
for the facial features, we will get back to our
colored palettes and we will select the color with
the name dark purple. With this color, we will
go to our places that we need to recreate and we will
create them with this color. Again, legis firstly, start
by creating our eyes. We will go and increase
the size of our brush. And we will put two dots for these places where we have
our eyes on the sketch. As always, you can play
around with the size of your brush and with the size
of your facial features. If you want to make
them bigger or smaller, or if you want to
change the placement, you are welcome to do it. For the mouth. We will increase the size of
our brush just a little bit, and the same way as we
did it on our toast, we will firstly go inside with the shape of
the diagonal line, and then we will go
strictly up to create this shape of the hearts
whole Julian, at the ends. And if you need to
adjust your shape, ledgers go into
our edited modes. Let's put it in the center and if you need to adjust
it in any way, you are welcome to
play with the notes. When you're satisfied
with your mouth, let just tap on the screen
and with the same color, we will go to our
padlock and we will recreate this shape
of the keyhole. So let's just go and
create this shape. You can do it manually
just by recreating the lines and then
adding the color inside. Or you can increase the
size of your brush. Firstly, putting the dots into the middle part and then recreate this part
on the bottom. If you need to adjust
the shape in any way, grab your eraser
tool and adjust it. Now when we are done with
the padlock, ledgers, go and select the
same color that we use for our main
color for the crop. So we are invoking
our Eyedropper Tool. And with this color,
we will go to the cheeks and we
will recreate that, makes sure that both cheeks
are similar to one another. So when you are creating
the second one, just move it to the first one, adjust its size and when
you're done, move it back. Now, Let's just go and add our little tongue on the
bottom of our mouth. And again, we will do it
with the help of alpha lock. So let us get back
to our layers. We will go to the layer
with facial features. We will tap on it and we
will choose Alpha Lock. Now with the same color, we will go to the bottom and we will create a curve there. Let's recolor the
bottom error manually. When you are done, we can go
and select the white color, either whitish or backgrounds. And with this color,
we will go and put the highlights to the eyes
the same way as before. You can go either to the
right or to the left side on the top and add one
dot for the highlights. Try to put the
second highlights on the second eye in
the same place. When you're done, let
us go to our layers. We will hide earlier
with this gauge and we will check out how
everything looks. If everything is looking fine, we are ready to move on
to our next part where we will be aiding our
shadows and highlights.
11. Glass: Adding Shadows & Highlights: Let's start this part
firstly by go into our layers and we will unhide
our layer with the sketch. We will get back to our layer with glass base and above it, we will create another layer. Let's just tap on
the plus icon and we will rename this
layer as inner part. Let's click this layer
to a previous one. So we will tap on earlier and we will choose
clipping mask. We will go again to our icon and we will select
multiply blending mode. For now, let's leave
the opacity at 100%. We will get back to our
color palettes and we will select the color
with the name hot pink. We will go inside
of our glass and we will recreate this line
that we have there, and we will add the color
to this middle part. So what do we need
to do is to create another ellipse
hoarded and the ends, if you need to adjust it, go over the top to edit shape. When you have that neither
cheap ledgers tap on our screen and we will add
the color inside of it. Now we can go back
to our layers and we can play with the
opacity of this layer. So let's just get
back to the m Eigen. We will go to our slider
width opacity and we will find the opacity
that works for us. When you are done
with this part, we will create another
layer above this layer with inner parts and
we will be adding our shadows to the
glass ledgers, tap on the plus icon and let's rename this
layer as shadow. Let's clear this
layer and we will also change our blending
mode to multiply, play with it a positive straight away or leave it for the later. Now we will go and select
the same color that we had for our main
part on the glass. And we will go to one of
the sides and we will start creating the
shape of our shadow. So firstly, let's just go over the left side and we will be creating our shadow there by repeating the
shape of our gloves, we will step a little bit from this line that we
have on this gauge, but we will try to recreate
its angle and its curvature. When you are done, we will
go down and we will create another curve going through
the whole shape of our glass. By creating another curve, you can play around
with its curvature. You can play around with
the position of it. If you want to make
it smaller or bigger, it's all up to you. When you have it. If you
want, you can go over it. It's up to Edit Mode. Play with it, play with the
curvature, with everything. And when you have it, we will need to tap on the
screen to deselect it. And we will grab, our
brush will increase its size and we will be
recoloring this part manually. Work on the shape of this curve on the
bottom and try not to put your shadow on the stem of the glass here we'll
add another color. Now when you're done
with this part, we will go over the
top of our glass behind our padlock and
our little splashes. And we will add the
shadow here too. We will start again
a little bit from this line that we have
right here onto our sketch. And we will be going
and recoloring this area the same we
will do on the left side. Don't worry, if you
are going a little bit beyond these frames on
the previous shadow, we can fix it very easily when you are
done with this part, Let's just go and erase this little parts that
are beyond the frames. We will go back to our layers. We will go back to our
layer with inner part. We will tap on it and
we will choose Select. Now you can see that
we have selected only this area that
we have wanted, this layer, and that's
exactly what we need. We will now need to go
back to our layers. We will go back to our
layer with this shadow. We will grab our areas
or two and we will go along these lines
and we will erase that. When you are done,
Let's deselect everything by hitting
R S ribbon icon. Now we will go back
to our layers. We will hide our layer with
the sketch and we will work onto the opacity
of our shadow. So let's just go to our MI can and play with
the opacity slider. When you find the amount of
opacity that works for you, ledgers go again to this
layer and we will select the same color that we have for this splash and for
the inner part. And we will add the
shadow to our stem. So here are just
doing underneath our cup and creating this
shadow with this new color. Try to repeat the curve that you have for the bottom
part of your glass. And also we can go over
one of the sides, e.g. the left one, and we can create a little
element like that. We can connect it smoothly with the top part by creating
elite cell triangle. When you have the
sheep like that, we will also go to
one of the sides. This time it will
be the left one. Again, once they are little
elements on the bottom. And we will create
the shadow here to starting from behind and go along the whole shape or the left side
creates an R curve. When you are satisfied
with the curvature, we will go and manually
recolor the rest of the area. And now we are done
with the shadows onto our main shape ledgers
go back to our layers. We will go to our
layer with liquid, and we will add our
shadow here too. So let's just create
one more layer. Let's rename it, Let's clip it, and let's change the
blending mode to multiply. Now, either with the
same color or we the color with the name
magenta or dark magenta. We will go again to the left side and we
will create our shadow, repeating the shape
of our splash here. Create the curve firstly, adjusted if you need to
by going to the top to the editing mode and then manually recolor the
rest of the area. When you are done, let us get back to the
layers and we will play with the opacity
of our shadow. When you're satisfied
with the opacity, we will go to our layer
with bad luck and splash, and we will add the
shadow to this layer two. So again, we, I created
one more layer. We are renaming it coordinates and changing the blending
mode to multiply. Let's start by adding the
shadow to our splash parts. We will use the same color as we use for our main
elements in the middle. So if you use the
magenta, use magenta. If you use the same color that we have for the main shape, you are welcome to use
it to let us go to the bottom part of our splashes and we will add our shadows. Try to be consistent with your shadows and try to
put them on one site. When you are done
with this task, if you need to
adjust your shadows, wrap your eraser tool
and adjust them. If you are satisfied with them, we will grab another
color and we will add the shadow
to our padlock. For the padlock, we will get
back to our color palettes and we will select the color
with the name dark magenta. With this color, again, we will go to the bottom
part of our padlock to the left side and we
will add the shadow here. Start with a curve,
a justice curvature. Adjust its position
if you need to, and then let just go and manually recolor
the bottom area. When you are done, we are
going back to our layers. We are going to earlier
with the shadow and we will change the opacity
level on this layer. Play around with
your opacity slider and find what works for you. And when you are done with this task ledgers go
above earlier with facial features
and we will create one more layer which will
rename as highlights. Let's get to our icon and we will change
the blending mode to screen play with opacity straight away or if you
want to do it later, ledgers go back to our
color palette and select some of the white colors,
backgrounds or whitish. We will go to the
opposite side from our shadows and we will start aging our highlights
the same way as we did on our
previous objects. So firstly, let us go
to our main shape, and here we will create a
big highlight like that. You can play around
with the shape and when you find what you like, you will need to go and
edit the color inside. And if you want to
play around and add maybe different shapes
for your highlights, you are welcome to do it. Now when we have the highlights onto our main shape layer, just move on to the bottom part. We will decrease the
size of our brush. Again, we will go to
the opposite side from our shadow and we will create
another highlight there. Let's create a curve like that. As always, hold your
land and the ends. If you need to adjust it, go to the editing mode. If you want to add
additional highlights, you are always
welcome to do that. When you have the highlights
on the bottom parts, let us go to our splash
part and onto our padlock. And we will add little
highlights there to play around and find
what works for you. If you want to add some doors, you are welcome to do it. When you are done, let us
get back to our layers. We will go to our layer
with the highlights. We will tap onto our S icon and we will
play with the opacity. Find the amount of opacity
that works for you. And when you are done, we are done with
this illustration, but we will need to
clean up our layers. So let just go and select all the layers that
belong to our cup. And we will put
them in the group. When all of them are selected, we are heating group. Then we go into our new group and we will rename it as glass. Now let's tap on the arrow
icon to collapse this group. And now we are ready to move
on to our last illustration.
12. Muffin: Adding the Base Colors: As always, let's tie
this part by going to our layers and we will
create one more layer. Let's unhide our layer with
the sketch and we will rename this new layer
as Marfan water. When we have renamed earlier, we will go back to our
color palettes and we will select the color
with the name magenta. Now, again, we will go to the
bottom part of our sheet. We will decrease the size of
our brush and we will create the outlines that we have on
our layer with the sketch, Let's make them close
and when we are ready, we will just drag and
drop the color in sight. When you've recolored
your shape, ledgers get back to our layers. We will hide our layer
with the sketch. We will grab our
eraser tool and we will work on our sheet
if it's knitted. When you are done, we are getting back
to the layers. We are unhide in our layer with the sketch and we will go
and create another layer. Let's rename it as rope. For this layer, we
will get back to our color palettes
and we will select the color with the name pink. We will increase the
size of our brush. And just with one line, we will create these curves
that we have for our rope. Whole Julian and the Yan's
a jazz the curvature if you need to by going over
the top to edited modes. Tab on your screen
when you are ready and with the same
size on the brush. Let's just go to our little bar on the left and who
will recreate it? Now, again, we're arguing
back to our layers. We will hide earlier with
this gauge and we will check out whether we need
to adjust some parts. If we need to, we will grab our eraser tool and we will erase the parts
that we don't eat. And when you are
done with this task, we will get back to the lease. We will unhide our layer
with this gauge and we will work on the
pattern onto our rope. So let's just tap on the row player and we
will choose alpha lock. We will go then to our color palettes and we
will select the color within the whitish with this color and with the same
size on the brush, or a little bit smaller
or a little bit bigger. It's up to you. We will go and create
these diagonal lines. They just go and do
that very accurately. We will do the same thing once they are loops on the boat. When you are done,
let just take a look at it without our
layer with this gauge. And if we need to
adjust some parts, we will go and adjust them. When you are done
adjusting your shapes, we will get back to our layers. We will go and unhide our
layer with the sketch. And if you want to clean up
all your layers from here, we will go and select
these two layers that belong to our muffin. And we will go and hit group, entering in this
group as muffin. Now let's get back to our
layer with a rope and from it, we will create
another layer that we will call our top parts. When we have this new layer, we are going back to our
color palettes and we will select the color with
the name hot pink. With this color, we
will go and to remake these elements that we
have onto our sketch. Again, Let's decrease
the size of our brush and let's start by
recreating the lights. When you are done with creating your closed
outline slide, just drag and drop
the color in sight. Now as always, we are getting back to our layers
and we will hide our layer with this
case to check out whether we need to
adjust something, we will go grab our eraser
tool and we will work on to our sheep by making
it smooth and nice. When you are done adjusting
your sheep, again, where I go into our and we are unhide in our layer
with the sketch. Now we need to go and add this
heart elements on the top. So let's just go and
create one more layer. Let's rename it as hertz. Now let's get back to our
color palettes and we will start by selecting the
color with the name pink. We will go to one of these hearts and we will
recreate the sheep. When you hand the sheep led, just drag and drop
the color insights. If you need to adjust
your shape in any way, go to your LEA is
hydrolase with this gauge, work on the shape
is you need to, if everything is looking fine, we will get back
earlier with this gauge and we will move on
to the next hearts. Let's go firstly to our color palettes and who
will select another color? So e.g. let's select the
color within a magenta. If you would like to
use any other color, you are welcome to do it when you have
selected your color. Let's just go and do the
same thing as we did before. We will just recreate
the shape of our hearts. When you have the outline layer, just drag and drop
the color inside. And if you need to adjust your shape in any way, Hi Julie. With this gauge, take
a look at your shape. If you need to adjust something, grab your areas are still as
a jazz they needed places. Now let's get our layer
with the sketch back. We will go back to our
color palettes and we will select either whitish
or background color. With this color,
we will go inside and we will recreate
our handwriting. When you are done, again, where a given vector earliest, we will hide our layer
with the sketch. We will take a look at
what we have right now. And if everything
is looking good, we are ready to move on to the next layer where we will
add our facial features. So firstly, let's just go and unhide our layer
with the sketch. And then we'll create
one more layer, which we'll call
facial features. And again, we're going back
to the color palettes. We are selecting the color
with the name dark purple. We will go and increase the
size of our brush firstly, and we will put two
dots for our eyes. If you want to experiment, you are welcome to do it. Now, let's decrease the size
of our brush and recreate the shape of our mouth
and the color inside. And when you are done, we will go to our color palettes and we will select another
color for our cheeks. Let's allow the color
with the name hot pink. With this color, we will go to our cheeks and we
will recreate that. Makes sure that the
cheeks are similar to one another by going or that
soap to edit modes, moving your cheek to
the opposite side, adjustment if you need to, and then moving it back when you add Dan and
the color inside. And let's add our little
tank with the same color. We know how to do that. We will need to go
back to our layers. We will go to our layer
with facial features. We will tap on it. We will choose alpha lock. With this Alpha Lock turned on, we will go to the bottom part of our mouth and we will create
a little curve there. Play around with the size
of your little tank. And when you're done, Let's go to the bottom and manually recolor the
rest of the area. When you are done with
the tongue click, just add our highlights
to the eyes, again, going back to the
color palettes and we are choosing between whitish
and background color. Select any of them. And we will do to the top part, either to the left
or to the right. And we will put one dot for
our highlights in each eye. So when you are
done one more time, going back to our layers
Haydn earlier with this gauge and taking a
look at our illustration, if everything is looking fine, we are ready to move
on to the next part where we will add our
shadows and highlights.
13. Muffin: Adding Shadows & Highlights + Final touches: As always, let's
start by going to our layers and we will
go to our boards and later we will selected
and from it we will create another
layer for the shadow. We will clip it and we will
change the blending modes. When we prepared earlier, we are getting back to the
color palettes and we will start by selecting the
color within dark magenta. With this color,
we will firstly go underneath our rope and we
will recreate this curve. Let's just go and do that. When you are done, we will add a little shadow
underneath the ball. So just repeat the shape
of it when you have it, we will go to the
opposite side and we will create a
big shadow here. Step a little bit
from your side, and let's recreate it by
creating another curve. Hold it at the end, a jazz, It's curvature. Adjust its placement
if you want to, if you need to adjust it
even more, go over it. It's up to Edit Mode, play with your curve
and when you are ready, ledgers go to this
right side and menu, we will recolor this area. Now Linda's get back
to our layers and we will unhide our
layer with the sketch. We will go and decrease the
size of our brush and we will recreate these lines
that we have owns our sketch. So very easily just go
into this line holding the airlines and the ends
to create this trait once, Let's just go alone all of
them and recreate them. When you are done
with this task, we will get back to our layers. We will go to earlier with the shadow for the muffin boats. And we'll play with
the opacity slider. Find the opacity
level that works for you and when you're
satisfied with it, Let's continue by going to our top part layer
and above it, again, we will create another
layer for our shadow, doing the same things as
always clipping this layer, changing the blending
mode, enter in a minute. When you have this
layer, ledgers, get back to our color palettes and we can select the color for our shadow from
magenta or hot pink. You decide what color you
would like to use here. So e.g. let's select the
color with the name magenta. And we will start by creating the shadow on the right side. We will firstly go to this bottom part and we will
create another curve here. Let's just do
something like that. When you have the
curve like that, we will need to
make sure that we have some space
between our layers. So we will need to put
our shadow to this part. We will go to this line
that we have right here on this gauge and
we will just repeat it. Hold it and the ends adjusted. And if you need to
adjust it even more, we will go over the
top to Edison modes. What we need to do right now is to go and thicken this slide. So we will go and create something that we
have right here. Let's just go above this line and create another
curve going up. When you have
something like that, we can go and manually
recolor this area. Let's do the same with the shadow that we
have on the bottom. Now, let's go to this connection between these two
shadows on the right. And we will turn this very street corner inside the curve. So just softening
up this corner. Now when we have the
shadow like that, we will do underneath
this little hard that we have
on the job and we will repeat it shaped by going to our shape of
the whipped cream. So we will need to add a little shadow underneath
our little hearts. Again, you can go to
this little connection that is very straight. We can go and turn
it into the curve. Now we will go above
our hearts and from the very tippy top of our
little whipped cream, we will go and create another
curve going like that. Hold it at the end, adjusted if you need to, if you need to
adjust it even more, you know what you need to do. You will need to go over
the top to edit modes. Play with the curvature
of your life. And when you're satisfied, we will go and create this line that we have
right here on this gauge on the bottom of the top part of our whipped cream when you
have something like that. So let's manually go to
the right and we will recolor this area if
you want to work on. So the engine parts only
shadows you can grab your eraser to and make them
a little bit more pointed. When you are done
with the right part, we will go to the left part and we will do the
same thing here, but this time we
will go underneath our layers and we will
add our shadows here too. So firstly, let's
start from the top. We will do underneath
our shape on the top of our whipped cream and we will create a little
shadow right here. We are doing the same thing
as we did on the right part, but this time the shadows
will be a little bit smaller. If you want to make
them more pointed, grab your eraser tool
and do what you need to do when you are done with the
first shadow on the left. Let's move on to
our second layer. And underneath it, we will
create another shadow. Again doing the same thing, just repeating the
line that we have onto our sketch and then create an L little curve underneath it, manually recolor in
the rest of the area. And if you want to
work on the shape, if you want to make the ends
Part a little bit pointier, you can go and grab your arrays or two and adjust these parts. Also onto this left part, we can go and create a
little curve like that. So when an app onto the
connection and manually recolor the rest of the area
that we have on the left. When you are ready
with this task, we will need to go underneath our second heart and under it, we will add a little shadow to just repeat the shape of it. When you are done,
we are going back to our layers and we will hide
our layer with the sketch. Let's take a look at
our illustration. And if we would like
to change some parts, we are ready to do that. So e.g. ledgers, Gill, and soften our shadows
over the right side. We will go to this second layer and we will make the shadow
a little bit smaller. If you want to do the same
thing with the bottom layer, you are welcome to do it. If you want to work more
at once at your shadows, again, you are welcome to do it. If you want to add a
little curve on the left, on the second layer, you are welcome to do
is to basically play around with your shadows and
find what works for you. When you are satisfied
with your shadows. Ledgers go back to our
layers and we will play with the opacity
of this shadow layer. I've been on the icon
and playing with the slider when you find
what works for you, if you want to go to your shadow layer and add
some additional elements, may be some doors or
something like that. You are again, welcome to do it. If you don't want to do that, we will go to our hearts and we will add the
shadow to them too. So let's create one more layer above earlier with the heart. We will rename it,
will cleave it, and we will change
the blending modes with the same color that
we are using right now. We will go to our
hearts in the middle, we will go to the bottom left part and we will create
the shadow here. So again, start from
creating a little curve. Adjust its position,
adjusts its curvature. It's all up to you. When you are done,
just repeat the sheep that you have on the left
with the same color. When you have the
shadow that you like. Let's get back to our
color palettes and we will select the color with
the name dark magenta. With this color, we will go to our second heart and we
will add the shadow to H2. So again, I go into the bottom parts and
created our curve, play with its position. And when you are done, ledgers go to the bottom and manually recolor the
rest of the area. When you are done, we are ready to get
back to our icon onto this layer and play
with the opacity slider, find what works for you
and when you are done, we are ready to move on above
all of our layers and we are ready to add our final
touches with the highlights. So let's go to our layer with a facial features and above it, we will create another
layer with highlights. Let's tap onto airplanes. I can let go and
rename this layer as highlights and change the
blending mode to screen. Now we are going back to
our color palettes and selecting either backgrounds
or whitish color. With this color, we will
go to the opposite side from our shadows and we will
add a little highlights. So e.g. let's start with the top part that we have
owns are whipped cream. We will go and increase the
size of our brush and we will do the same thing as we
did on to our toast. We will add a few dots, all the different size. So create some pattern here
and when you're satisfied, we will continue by adding the
highlights to other areas. Let's move on to our second layer and we will
do this same thing here. Maybe this time add a
little less highlights. If you want to end the
highlights to the last layer, you are welcome to do it. If you want to add
just little dots, that will be some sprinkles. Again, you are welcome to do it. Just find the pattern
that works for you. And when you are done with
this main highlights, Let's move on to
our little hearts and we will add the
highlights here too. Go into the opposite side from our shadow and aging
our highlights. Also, we can decrease
the size of our brush. And very easily we can go to these intersections that we
have between our layers. And we can add just
little tiny lines between these shapes. When you are done with
aging your highlights, we will go back to our layers. We will go to our S icon onto the layer with highlights and we will play with the opacity. Find what works for you
and when you are done, we are done with our
fourth illustration. Let's clean everything
out into our layers. So we will go to our group
with the muffin and we will collapse it by going
through this list of V icon and tapping on it. Now take a look at your whole
illustration in general. If you want to
adjust some parts, you are welcome to do it. If you want to
leave it as it is. Again, you are welcome to do it. They're very last
thing that we will add and this part is optional. We can go and create one
more layer and we can go to this blank spaces that we
have on our background. And we can add some
additional elements such as heart, maybe some sprinkles, some sparkles, some splashes, anything that you
want to add, e.g. ledgers, go and
select some color, and let's add a few hearts. You can go and unhide your
layer with the sketch. Because here we have the outlines that
we need to recreate and let just go above them and create this little elements. When you are done, Let's hide our layer
with the sketch. Let's grab our eraser tool and let's work on to our shape. If we need to. When you are done,
you can go back to your list and rename this
layer as miscellaneous. If you want to add highlights and shadows to this elements, you are welcome to do it. And when you are done
recreating these elements, we are done with our class. Thank you for
watching this class. Leave a review if you liked it and consider subscribing
farm worker. Why videos in the future, looking forward to
seeing your projects.
 Uni Corn, ⭐Kawaii Art Enthusiast⭐