Transcripts
1. Introduction: Hello everyone, I am
unit and into this class we'll draw a cute illustrations. These class doesn't require any prior experience
or fancy tools. We'll start from scratch
and we'll be using simple techniques
throughout the process. Everything you'll see will
be happening in Procreate. However, either
have other software or one to try to
traditional materials, you are welcome to join ECR, ready to start, Let's
jump right into it.
2. Preparing the Canvas & Making an Egg sketch: Let's start our
class by deciding what kind of Canvas we
are going to be using. You can see this is a
very simple square canvas because both pixel
width and pixel height, or 2048 pixels as for DBI there, 300 and S for the color profile, it is set as SRGB
with this low number. When it's all done,
we are heating Dan and we are at our Canvas. Now we need to
decide what kind of colors we are going to be using throughout the whole tutorial, you can go to the project
and restaurants app. You can download the
color palette and you can follow along
with this class. And when you did it, Let's go strictly to our color palettes. And we will see that we have two options of how we
can use the colors, the compact view and the cards will these are cars because
they have all the colors, names and they are
ready for you to be. Our first task for today is
to change our backgrounds. We won't be adding the
solid color to it, but we will be adding
the grades and it will be edited
by using the brush. And again, you will need
to get back to the project and restaurants app and you will need to download this brush. And when he did it,
just go and select it. Now with our new brush, we are getting back
to our color palettes and we are selecting the color with the
name background grid, let-7 as deselect. And we will get
back to our Canvas. We will zoom it out. And without an holding, our Apple pencil will go along the whole size of our Canvas and we will add this
grid in this size of the cells is a little bit too
big for you or too small. You can go and change it. So you will need to get back to your brush library
and you will need to tap onto the brush. You will get into
the brush studio. And here you will need to go to grade into the grain behavior. You can find a little
slider with the names kill, and you can move it to
the side and you can find the size of the cells
that you would like. So if you change the
size of your grid, you can just go over your Canvas one more
time and adjusted. But if he didn't lie, just continue by adding our first sketch and our first illustration
will be a little egg. But before starting,
we will need to do some preparations for asleep. We go into our layers
and we are tapping on the plus icon to create a new
layer for our first sketch. When we did it, we will
need to get back to our brush library
and we will need to go to this kitchen folder. It's the sketching folder. We are selecting
procreate pencil. If you want to use any other
brush for sketching part, you are welcome to do it. Now with your new brush. Let's get back to our
color palettes and fled. Select the color with the
name sketch and clean lights. So we will tap on it to select, and we will go to our Canvas. And we will start by creating a very simple shape,
a perfect circle. So let's just zoom in
our canvas and let's try to create the best
shape that we can. Don't. And hold your Apple pencil
at the end of the line. And she will see that
the shape that you are creating now is looking
a little bit better, but still it is an
ellipse and we will need a perfect circle for
the yolk. Ledgers. Go to our screen with one of our fingers and we
will hold it there. You can see now we
have a perfect circle. And also you can
notice that if we move our Apple pencil
from side-to-side, you will be scale your object. For now. Let's just leave it as something not too
big, not too small. And when we're satisfied
with the size and hold everything that we
are holding right now and now we have the base. And that means that we
can go alone the sheep, and we can create a wall blue
shape for our egg white. So let's just go
and try to do that. You can be creative
and you can find the shape that works for you when you have
something like that, we are almost ready
with our illustration. As we act creates an
acute illustration. Let's just go and add the face. And before starting,
we will need to find an approximate center of our shape that we
have in the middle. So our circle. So let's zoom in our
Canvas and we will go and create one vertical
and horizontal line. They approximately, we'll
go through the center. We don't need to
be very precise. So let's just go and start
with a vertical line. You can hold your
Apple pencil at the end to snap to
a straight line. And when you have the
first-line ledgers go to our horizontal axis and we
will create another line. And now when we know
where the center is, we can go a little bit above it. We can create our face, and we will start by creating
two dots for the eyes. Firstly, let's go over to the left and we will
put the dot here. You can vary its size and
you can vary its placement. And when you have
the first door, we will go over the right and
we will try to recreate it. So we will need to
keep the same size and we will need to put
it on the same line. And also we will need to
keep the same distance from the eye to this line that we have
going through the middle. So let's just go
and try to do that. Now when we have two
dots for our eyes, ledgers go between them and we will put a
little Smiley mouth. Let's zoom in our Canvas and we will create a simple
shape like that. You can hold your
Apple pencil at the end of the line to
snap it to a better shape. And when you are done, LED, just add a
few more details. These few more details
will be just cheeks. So we will go underneath our eyes and we will
put two ellipses, one on each side as always. Firstly, go into the left
and creating the shape here. And as before, you can adjust the size of your elements
when you have the first one, Let's move on over
the rights and we will try to
recreate it there. And now we are done with
our first illustration. But let's make it a
little bit smaller and let's find it
a better place. Firstly, we will need to go to our top-left corner and we will need to select
this arrow key. You can see now we have
a bounding box and also that on the bottom we
have a little panel. Into this panel, we will need
to select uniform methods. And these uniform
method will let us make this illustration
a little bit smaller. So we will go to one
of the sides too, one of the sides of
our bounding box, and we will drag the corner. So for example, we will need
to go to the bottom right, and we will drag this
corner diagonally up. So now when you have
this size like that, ledgers drag it down and let's find it a
better placement. So when you have
something like that, Let's rotate it a little bit. For rotating, you
will need to go over that soap to
this green note, you will need to hold
it and you will need to move your Apple
pencil to this site. So now you can find a better placement and
the better rotation. And when you're satisfied, let's just deselect everything
by hitting our arrow key, and we are done with
our first illustration. In the next part, we will
create a little strawberry.
3. Strawberry Sketch : For our second illustration, Let's create a little
strawberry and we'll start by going
to the layers and we will tap on the plus icon to create a new layer for
our second sketch. When we have this new layer, Let's zoom in our Canvas
and we will start by creating a very simple
ellipse or a circle. This time we don't need
to be very precise, so we can manually go
and create the shape. When you have the shape, we will need to go underneath it and we will need
to put a dot there. And we will need to connect these dots with the
sheet that we have on the top by adding two
diagonal lines on the sides. So let's go and try to do that. Now when we have
something like that, we will need to go
to these two sides. And we will need to turn
this straight lines into the curves and we will need to connect them with the
shape on the top. So firstly, let's go over our left and we will try to do that. When we've reached this corner, we will need to turn it into
something very soft too. So instead of this trait corner, ledgers go and create a curve. And now when we have the
first curve and this corner, Let's move on over
the rights and we will try to
recreate it there. And this is the shape
of our strawberry. So that means that
we can go over this soap and we can
add some leaves. So let's go to the center,
the approximate center. We will create the very
elongated ellipse like that. So don't create the whole
ellipse, just create that. So part of it. Now when we have this, we will go over our sides and
we will repeat this shape, but we will tell them a little bit and we
will make them smaller. You can vary their size, you can vary their placements, and also you can
vary the amount. So let's just go and do that. And when you have
something like that, we are ready to add our face. And again, you know
what we need to do. We will need to find
an approximate center of our strawberry. And we are doing it by creating one vertical line
and one horizontal. So let's go and try to do that. When you know where
the center is, we will give it a
little bit above it. And we will start by adding
two dots for our eyes. So firstly, I go into the left and creating the first dots. Again, you can play with the size and plate
with its placement. When you have the first dots, will need to go over the rights and we will need to
recreate it there. So we will need to
keep the same size, the same distance
from the center, and we will need to put
it on the same line. Let's go and try to do that. And now when we have two eyes ledgers go between
them on the same line, we will add a little
Smiley mouth, but this time it will be a
little bit more curvier. Let's go and try to do that. You can hold your
Apple pencil at the end of the line to
snap it to a better shape. When you have this little
mouth ledgers go underneath our eyes and we will add two
ellipses for our cheeks, one on each side. Let's go and do that. And as before, you can play with their size and with
their placements. And now we are almost
ready with our strawberry, but we will need
to add some seats. So we will go along
the whole shape. And firstly, we will create
the lines like that. So let's go and add these seats. You can leave these
lines as they are, or you can make them a
little bit more interesting. So for example, we
can go and create a very soft triangles. Let's go alone all
of these lines and let's turn them
into these triangles. And now we are done with
our second illustration. So let's go and find a
better placement for it. And let's maybe make
it a little bit smaller and rotate it. So we will need to go to our
arrow key on the top-left. We will need to
select it and we will need to use uniform methods. So now let's drag it down
and let's rotate it. If you want to play with
its size, go for it. If you want to
adjust it even more, you can use the word methods. We can select it. And you can see that now we have not only the handles
on the sides, but we have some great insights. And that means
that we can adjust every corner of this
grid that we see. You can play around with
this little handles here and find what works for you when you're satisfied
with how it looks. Let's just deselect
everything by hitting our arrow
key on my time. And now we are done with
our second illustration. In the next part, we
will add a banana.
4. Banana Sketch: Let's start our third sketch
by creating a new layer. So we are going to
the layers and we are tapping on the plus icon. And when we have a new layer, Let's get back to our Canvas. We will zoom it in and we will
start creating our banana. And we will start by
creating a guiding of curve. So let's get over this up and we will create a curve like that. Now when we have the curve, we will need to go
to the ends of it, and we will need to
put two ellipses. So firstly, let's
go over the top. We will create a tilted
ellipse like that. It will be vertical
and it will be not too big when you have
it over the top. Let's go to the bottom. And here we will create a horizontally aligned ellipse and it will be tilted
more to the right. So let's go and try to do that. You can play with
its size and you can play how much tilted it is. When you have these two shapes, we will need to
connect them together. So firstly, we are going
to our right and we will need to create a
very smooth curve there. So let's go and try to do that. When you have this curve
over there, right? Let's move on to the
left and we will connect these two shapes
together on the left. Here we will need to
create a greater curve. That means that we can start by creating one vertical
line like that, going down and one horizontal
line going like this. And now we can go above them and we can connect
them with a curve. Let's go and try
to do that a jazz, the shapes, adjust the curve, try to make it very rounded. And when you are
satisfied with it, we'll go over the top and
we will add a little stem. So very easily go in there, finding an approximate
center and creating a very rounded
rectangle here. And now when you have it, we will need to go
and add the fees. We already have the line
going through the center and it is going along the
whole shape of our banana. And that means that we can
go to this intersection. Here. We can go and start
adding our facial features. And we will start as
always from the ice. So let's go to the left and we will put the first dot here. Now when you have
it on the left, Let's move on to the
right and we will put the same dot
on the same line. So let's go and try to do that. Remember that you need to keep the same size and the same
distance from the center. And when you have it, we are
ready to add a little mouth. So let's zoom in our Canvas and we will go right
between the eyes. And here we will create
a peculiar shape. We will start by creating a
tilted ellipse like that. When you have it on one side, we will go to our right and we will mirror it one more time, creating an ellipse here. So we have a shape of the heart, and when I have it, we will go underneath our
eyes and we will add two dots for our cheeks or to an
ellipsis. It's all up to you. Let's go and try to do that. It can vary their size, you can vary their placements. It's all up to you. So now when we have the face, Let's add a few more details. We will go and we will recreate the line
that we have here, but we will move it a
little bit to the sides. So let's go and try to do that. When you are reaching the face, you are skipping it
and then you are continuing it over
the bottom parts. Let's add two lines like that. Now we can go over
the bottom and we can add a little
stem here as well. So we will go to this part and we will create
a shape like that. So it is half of the circle
and we will just synsets. And now we are ready
with our shape, but we can adjust that
just a little bit. So firstly, we
will need to go to our arrow key over
Arab top-left. And we will need to use
uniform method so we can make the shape a little bit smaller by dragging the corner. And also we can
rotate it by going to the top and dragging
these green note. So find the placement,
find the size. If you are satisfied with it, you can just deselect everything or if you want to
adjust it even more, Let's go to work. And here we can adjust
everything that we have here, not only the outside corners. So let's go and play
around with these two when you are
satisfied with it, Let's deselect everything by hitting our arrow
key one more time. And we are done
with our 3D sketch. And in the next part, we will create a bubble tea cup.
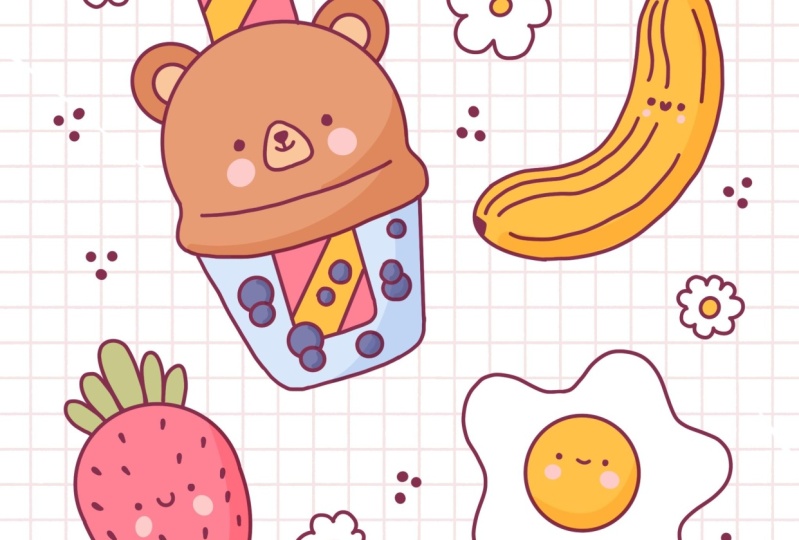
5. Bear Bubble Tea Sketch: Let's start our less gauge by creating a new layer
to go into the layers, tapping on the plus icon
and when we have it, let's zoom in our Canvas. Do this last space that we have and we will be
creating our bubble tea, but it won't be just
as simple bubble tea. We will have a cute illustration and we will put a bear on top. So let's just go and
start by creating a cup. We will need to go
and create a shape of the cup by creating two
converging lines going down. So firstly, let's go
and try to do that. They just slightly convergent. And when you have that, we will need to connect them. So we are going to
the bottom and we are creating one
horizontal line there. Also we can go to
the top and connect the lines here with a
horizontal line as well. And we will need to turn these lines into very
cute and smooth curves. So firstly, we will go to these two corners and we will
turn them into the curves. Let's go and try to do that. And when we have the
shape of our cup, we will go over the top and we will put a little circle there. And you know how to do that, we will just need
to go manually and create the best
circle as we can. So as guilt and try to do that, hold your Apple pencil
at the end of the line and you will see that you
snap it to an ellipse. But we will need to create
a perfectly round circle. Without an holding
our Apple pencil, we are holding one of our
fingers on the screen. And we will mean this
size on this Alps to be just a little bit bigger
than r cap on the bottom. For now, ledgers and hold everything that we are
holding when we are satisfied with the size and we will go over the
top to Edit Shape. You can see that here we
have some handles and also here we can just drag our
shape to other places. Now alleges put it on our tab and let's position
it right in the center. So when you have
something like that, we can tap on our
screen with one of our fingers to get
away from these modes. And we will need to connect
these two shapes together. So firstly, we will go to these two sides and
two, these two places. And we will need to
add little rows here. So firstly, let's go over
the left and we will create a role here when you
have it on one side, Let's move on to the right
and let's repeat it there. And now we will need to connect
these two rows together. So we are going to
the bottom firstly, and we are creating a curved, they're very smoothly
connecting them together. And when we have
the first curve, Let's go over the top and
we will recreate it there. So creating this same curve over the top when we have
something like that, Let's adjust these two places. We will need to create
a curve here as well. Let's go over the left and let's create a smooth
connection here. And when we have it on the left, Let's move on to the right
and do the same thing. Now when we have it, we are ready to add our beer. So we will go to
this soap and we will find an approximate
center here. And again, you know
how to do that. We will firstly need to go
and create a vertical line going down just for the
center. Approximately. Don't need to be very precise. And when we have it here, let's create a horizontal line. When we have them, Let's add two more lines and we will add the
ears with them. So we won't go to
this intersection. And from this
intersection we will go with the lines that
will be 45 degrees. When you have the first one, let's just go over the left and we will create another one. So now when we have
these two lines, we can go over the top and
we can create our ears. And our ears will have the
shape of half of the circle. And this line that we have here will go right
through the center. So let's go over the left first, and we will create half of the circle here for
our first year. You can vary the size and
when you're satisfied, let just go over the rights and we will recreate it there. Try to make it the same size and try to keep the distance
from the center similar. And when you have these
two ellipses for the ears, let's add the inner parts. So we will stop just a
little bit from this line. We will add this same line that we have for the
shape of the ear. So let's just go
and try to do that. When you have it on one side. Let's move on to the right
and we will repeat it there. And now when we have our ears, we are ready to add our face. And we will firstly start
by creating a little snout. We will go to this
intersection that we have in the middle and we will
create a shape like that. So it is more like a
very rounded triangle. Let's go and try to do that. You can vary its size
and you can vary it roundness when you have
something like that. Let's go over art. So part of this shade, and we will create
a little nose here. So again, go in and
creating a little triangle. You can play around with its
size and with its roundness. And when you have this triangle, Let's create a vertical
line like that. And also at the
end of this line, we will create a little smile. If it's easier for you to erase the lines here,
you can do that. Grab an eraser and
erase these slides. So when everything is clear, allege as gill underneath this line and we will
create a little smile here. You can vary the
curvature as well. So just very easily
creating a shape of half of the circle
or half of the ellipse. When we have it, Let's just
go and create our eyes. We will go just a little bit
above our line that we have horizontally and we will put
the first dot over the left. Again, you can vary its size and you can vary its placement. And when you have
it on one side, Let's move on over our rights and we will recreate it there. So again, we will need to keep the same size and
we will need to keep the same distance
from the center. Let's go and try to do that. And when we have
our eyes alleges go underneath them and we
will add the cheeks. So one more time, go in there
and creating two ellipses, one on each site. You can vary their size and
you can vary their placement. When we have our bear on soap, ledgers continue adding
our bubble tea elements. And we will start by creating
a straw very easily. We will go over the
top and we will start creating the vertical
line going down. So just step a little bit aside and start creating
this vertical line. We will stop at somewhere in the middle part of our cup
or a little bit below it, you can hold your
Apple pencil at the end of the line to
snap to a straight line. And when you have this line, Let's go over our rights and
we will recreate it there. And you can vary
the thickness of this trough when you have
these two parallel lines, let's connect them together. So firstly, we will go
over the top and we will start by creating a
horizontal line like that. When we have
connected our lines, we will need to turn this
trait corners into the curves. So let's go over them and
turn them into the curves. And now when we have the
curves over that soap, Let's move on to the bottom and we will do the same thing here. So we are starting by creating
a horizontal line and then we are converting our
corners into the curves. So when we have this soft straw, let's add more details. We will go over the top firstly, and we will add a few
diagonal lines like that, a couple of these lines. And then when you have
them over the top, Let's move on to the bottom and we will do the
same thing here. So try to keep this same Ingo. You don't need to
add this line here where the beer is
overlapping our straw. And when we have our stroke, Let's move on to our cap and
we will add a few bubbles. So very easily manually go
in there and creates an FU, an ellipsis, or a few circles. They can be various sizes and they can overlap each other. So create a few of them
and try not to overdo it. And when you are ready, we are done with
our last sketch. And in the next part, we will put everything
nicely onto our Canvas and we will
add a few details.
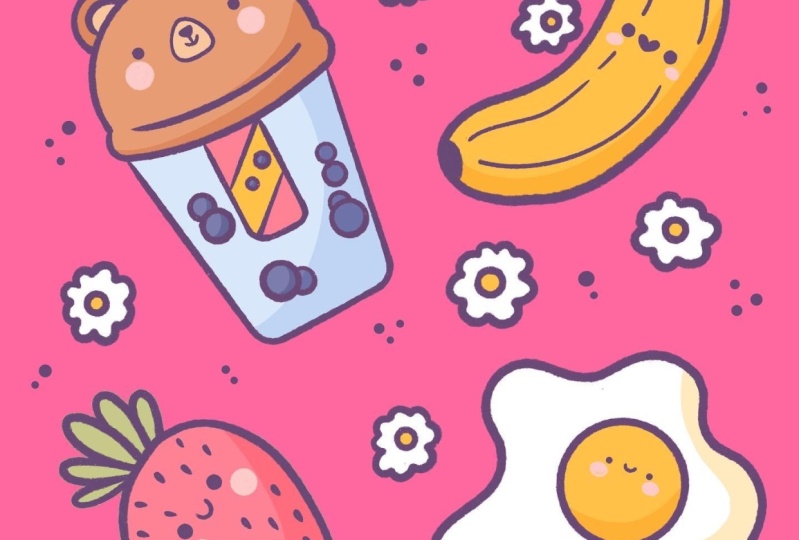
6. Positioning the Elements & Adding Details: Inside this list
of parts will be playing around with our
little illustrations. We will be making them
bigger or smaller, will be rotating them, finding a better placement
for them onto our canvas. As we have each illustration
on a different layer, it will be very easy
for us to do so. Firstly, let's deal
with our bare. We'll go to our layers
and we will select this layer that
belongs to our bear. Then we will go to our
arrow key on the top-left. And here we are ready
to play with it. So let's make it bigger
and let's rotate it. Let's find a better
position for it. And when we are done, Let's deselect everything
by hitting the arrow key, and we will do the same thing
with our other elements. So let's go and select
another elements and let's start rearranging
them onto our canvas. And when you are
done with this task, let's go to our layers and we
will create one more layer. Above this layer, we
will add a few details. So firstly, we will go to
someplace that is blank, and we will start by creating
a little ellipse like that. Now we will go along the shape and we will
create some petals. So we are creating
a little flower. It's up to you how many
petals there will be, and it's up to you how the
whole shape will look. So when we have the
first elements, let us go to our layers one more time and we will
create one more layer, and we will have another
illustration of the flower. So let's go and try to make
a different looking flower. And when you have
these two flowers, we will need to make the
copies and we will need to put them onto the blank areas. So how we are going to
be making the copies? We will go to the
layers and we will select the layer
with our elements. For example, it will be
our second little flower. We will need to swipe this
layer from right to left. You can find the
options applicants and you will need to select it. Now we have another layer with the same elements and
we can just go to our hierarchy on
the top-left and we can move it and play around
with these elements. So let's go and try to do that. You can play with the size, you can play with the rotation. It's all up to you when you are satisfied with editing
these elements, Let's deselect everything
by hitting our arrow key. And we will do this same
thing a few more times. So go into earliest and
selecting the layer that we want to duplicate
when we select it, it allege a swipe
it from right to left and we will
choose Duplicate. Now with this new layer, where I go into our
arrow key and we are finding a different placement
for these elements. Play around with the size and play around with the rotation. Now let's do it a few more times and we will feel
are blank spaces. And when you're done
with this task, we will need to merge all the layers with
our sketch together. And we will do it
by selecting them all and putting
them into a group. You can see that one layer
is already selected. And to select another one, you will need to go
to it and you will need to swipe it
from left to right. You will see it is now tinted
and we will need to do the same thing with
all the layers that belong to our sketch. So let's go and try to do that. When you've selected all
ears with our sketch, Let's go to the top-right
and we will hit Group. Now, everything is on the group and we will
need to select it. So tap on it to select and
subunit one more time. You will see the option flatten. And if you tap on it, you will see that
now everything is on one layer and that means that we are ready with our sketch in the next part will be
aiding the clean lines.
7. Making the Clean Lines: Last or this byte from
some tiny preparations. Firstly, we will
change the brush. So let's go to the
Brush Library. Let's go to the calligraphy
folder and we will choose monoline brush while
we're still here. Let's tap on to this brush and we will
go into brush studio. Here. We will need to go
to the stabilization and we will adjust the
amount of streamline. So let's just drag this
little slider to the maximum and you can see how it works onto
the drawing pads. And it will let us draw
more smooth lines. If it's not working for you, you can change the amounts to your liking when you're
satisfied by Jesse Dan. And we will go and create one more layer for
our lining parts. Go into the Layers and
tapping on the plus icon. And while we are still
here into our layers, Let's change the opacity level of our layer with the sketch. We will make it a little bit
more transparent and it will be easier for us to create
the lines above it. So how we are going
to be doing it, we will get back to
earlier with the sketch and we will tap on to this icon. You can see there is a list with some titles and also
that here we have an opacity slider which we can grab and which we can
drag to the left. You can see now it
is looking more transparent and
that's what we need. It will be easier for us to
create the lines in that way. So now when we are satisfied
with the transparency, Let's just get back
to our new layer. And our main goal for this part is to create
the closed lines. So we will be going along
this shapes and we'll be recreating what we have on
our layer with the sketch. But it doesn't mean
that we will need to do it with a 100 per
cent of similarity. If we think that something
works better right now, we can just adjust our elements. So now very easily,
very quickly, ledgers go and create
our clean lines. But firstly, let's adjust the size of our
brush to our liking. Something like 3, 4%
on the size will work. And now let's just go
and create our lines. You can use this same
method as before by creating the lines and holding
them at the end of it. When you have the basic lines, alleges go to our layers
and just for 1 second, we will hide our layer
with the sketch, will go check out whether
everything is closed and we will adjust some elements
that we want to adjust. So grab an eraser tool
and adjust some places. When you are done with
this ledgers go to our layers and unhide our
layer with the sketch. We will go and continue adding the lines for
are the elements. When you are done lining
the other elements, let's one more time, go to the layers and hide
our layer with the sketch. We will check out
whether everything is looking nice and closed. And when you made
sure that everything is nice and close
ledgers get back our layer with the
sketch and continue adding other elements.
One more time. Let check out whether
everything is closed by going to the list and hygiene
earlier with the sketch. If everything is looking nice, Let's just get this layer
back one more time. Let you got whether
everything is closed and if it is ledgers, get back our layer
with the sketch and let's add our flowers. For the last time. Let's go to our leaves and let's hide our layer with the sketch. We'll check out all of our elements if they
are closed or not. If we want to adjust some
fun with our Eraser tool, we are welcome to
do it right now if everything is looking
nice and close, Let's move on to
the next chapter where we're going to
be adding the colors.
8. Adding Colors & Shadows: Let's start our coloring part from some tiny preparations. So firstly, we will
give it to our layers and we will create
one more layer. Let's tap on the plus
icon and we will need to drag this layer underneath
earlier with the labs. So while it is selected, we will hold it and
we will drag it down. And now we are going to be using the color drop method of
recoloring how it works. If we go to our color
palettes and for example, select the color with
the name yellows. We will just go to this
top icon on the top right. We can just drag it
to the places that we want and it won't work onto this new layer because everything will be recolored
and it's not what we need. We want only the areas that
we want to be recolored. So how can we solve it? Let's just go to our layers and let's go to earlier
with our lines. Let's select it,
Let's tap on it, and let's choose reference. Now, if we do the same thing
by going to our new layer, we can just drag it to our egg yolk and you
will see that it works. So now with this method, we will go to our banana and
we will recolor it as well. So let's just drag
and drop the color. And also here on the top you can see continue
feeling with Recolor. We can tap on it
and how it works. You can see there's
a little handle here which we can
move to other places. We can just go to our middle
parts of the flowers and we can tap on them and they will be recolored with these two. So let's just go over all
of our flowers and do that. When we are done
with the flowers, Let's add a few stripes
with this color. So going over there
and tapping on them. Now to deselect everything, we will need to tap onto this Selected icon
on the top left. So let's tap on it. Let's step ahead one more time. Let's go to our color palettes and select a different color. This time, it will be white and we will
do the same thing. So let's start from
our egg whites. Let's just drag and
drop the color here. And it's now continue
feeling with recovering, moving this little handle
to the different place. And this differently
will be our flower. And we will go over
all of the flowers and we will add the
color in that way. When we are done with this task, let's deselect everything by
heating this magic one tool. Now let's get back to
our color palettes and select the color
with the name pinks. And with this color, we will recolor our
strawberry firstly, and then we will end the same color to the
rest of the stripes. Let's go and try to do that. Let's deselect everything by
hitting our magic one tool. And we will get back to our color palettes and
select the different color. This time, let's go with
Brown's with this color. We will recolor our bare, recolor the ears as well. And when you are satisfied, let's just deselect everything by hitting our magic wand tool. Now going back to our
color palettes and selecting the color with the
name greens with this color, we will recolor our
strawberry stamp. If you have some minor places that is easier to
recolor manually, go for it and recolor
them with the brush. Let's get back to our
color palettes and we will select the same color that
we use for our lines. So sketch and clean lines, we will recolor
these little parts on to our banana to lie. Just drag and drop
the color here. And when it's done, again, going back to our
color palettes and selecting the color with
the name lights Brown. We will recolor the snout and the inner parts of the ears. Just go and drag
and drop the color. When it's done, we
are getting back to our color palettes and selecting the color with the name blues. With this color, we will recover the water or the t inside R can. So when we have it, the last thing that we
will need to recolor are these little bubbles go
into our color palettes, lots in dark blues and
recoloring our bubbles. You can use continue
feeling with recolor. Now let's deselect everything
by hitting our magic wand. And we will need to add
our cheeks so we can go very boldly and put them
right underneath the eyes. Or we can reference our
layer with the sketch. So let's go and do that. Firstly, we will go
back to our layer with the sketch and
we will drag it up, we will unhide it, and we will see where
our cheeks were. Now let us go back to
our color palettes and we will select the
color for the cheeks. Now, increase the
size of your brush. And let's go over all of our shapes and we
will add our cheeks. But don't forget to get back to your layer
with the coloring. Wanted this layer just go over the places and
add the cheeks. When it's done, Let's
get back to our layers and we will hide our
layer with the sketch. And the last thing
that we will do here is adding our shadows. So what we're gonna be doing, we will be doing them
once a day differently, but we would want to put them on the areas that we already
have on to our layer. So what we need to do, we will need to go
to our layers and we will need to select our
layer with the coloring. Here, we will tap
on the plus icon. We will need to tap onto this new layer and set
it as a clipping mask. With a clipping mask, we can go over r
elements and you can see that we are not
adding any other elements. We are drawing onto the inside areas that we already have on the
previous layer. So that's exactly what we need. We also will need to change the blending mode of this layer as we are
creating shadows, we will need to have a different option of how this layer will interact
with our previous one. And we can go to this icon and you can see this list here, we will need to select
multiply blending modes. And if we go with the 100%
of opacity on this mode, it will be too bright for us. Let's just go and set
it as 35 per cent. We can do it by dragging
the slider to the left, or we can write down the
amount that we need. So now when everything is
done, all the preparations, we will go back to our
Canvas and we will be selecting the same color that
we have for our elements. So we can do it by going back-and-forth to
our color palettes, but also we can use
the eyedropper tool. To use the eyedropper tool, we will need to go to our Canvas with one of our fingers and we will need to hold it there until we see this
little tool here. If you move your finger, you will see that
the color sheets. So we will need to
start from our banana. For example, Let's select
this yellow color. Let's increase the size of
our brush and we will go over one of the sides and we
will create our shadow here. So very easily just
create a curve. And at the end of the line, hold your Apple pencil there. It will snap to a better shape. If you want to
adjust it even more, go to Edit shape over the top. And here you will have
some handles to tweak. So find what works for you and when you're satisfied, lead, just tap on our screen
with one of our fingers and we will continue by
adding other shadows. Now let's deal with
the same color to our egg yolk and we will
add the shadow here. You can go a little bit beyond
the frames of the yolk, and then you can just
grab your eraser tool and erase everything that you don't
meet with the same color. Let's go to our egg whites and let's add the
shadow here as well. Now let's go to our strawberry. Let's select the color that
we have for our strawberry. And the same way as before, we are going to one side and we are creating
this shadow here. Hold it at the end of the lines
to create a better shape. And if you need to adjust it, just go for your eraser
tool and adjust it. Now let's move on to our bear. Let's select the color of
the shape of the bear. And let's create a little shadow here on this little role. So let's go and do that. Let's add a little shadow
to the fault as well. So here we go and creating a
little curve here as well. Now let's manually
recolor the rest of the areas,
soften the corners. And if you need to
adjust the lines, go to Eraser tool and erase everything that you don't
meet with the same color. Let's recolor our upper
parts of the ears. Now let's get back to our
color palettes and we will select the color with
the name blue shadow. And we'll, we'll go
over one of the sides and we will create
the curve there, manually recolor the rest
of the area and now with the same color or with another color that is
called dark blues, we can go over our
little bubbles and create the
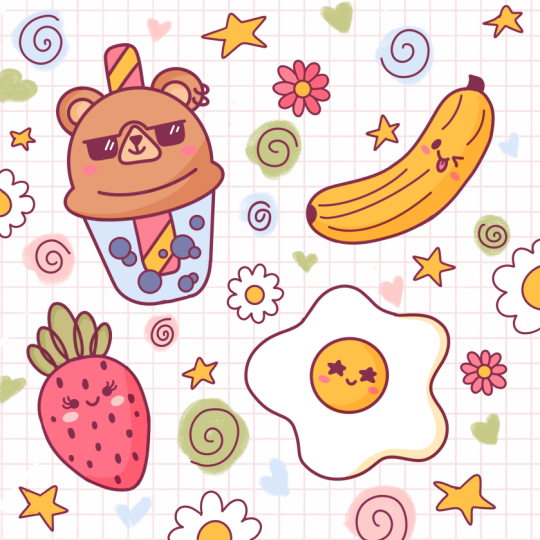
shadows here as well. We are almost done with
the whole illustration, but the very last
thing that we will do is go into our
layer with the lines, going back to our color palettes and selecting the
color with the name, sketch, and clean lines. And now we will go to
some places and we will add a few dots there
just for the details, try not to overdo it. And when you are done, we are done with
our illustration. Thank you for
watching this class. Leave a review if you like this, and consider subscribing for more Kawhi videos in the future.
 Uni Corn, ⭐Kawaii Art Enthusiast⭐