Transcripts
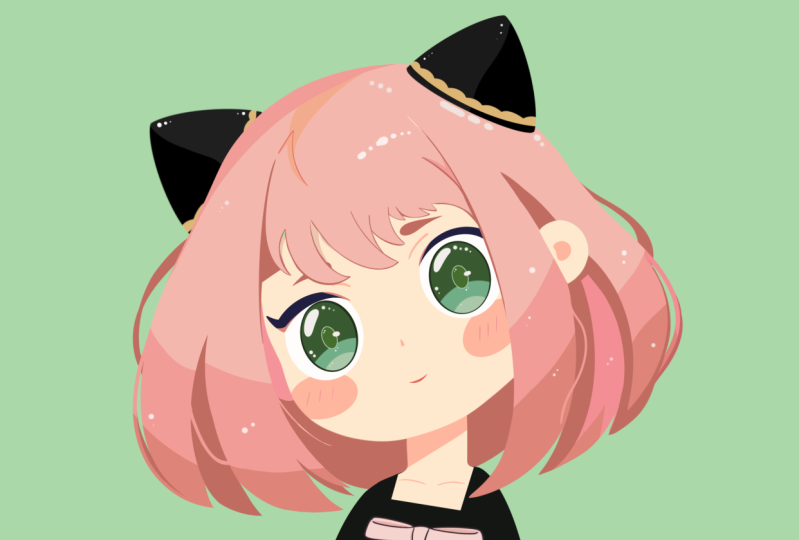
1. Introduction: Hello, everyone. I'm Uni, and into this class, we again to draw this
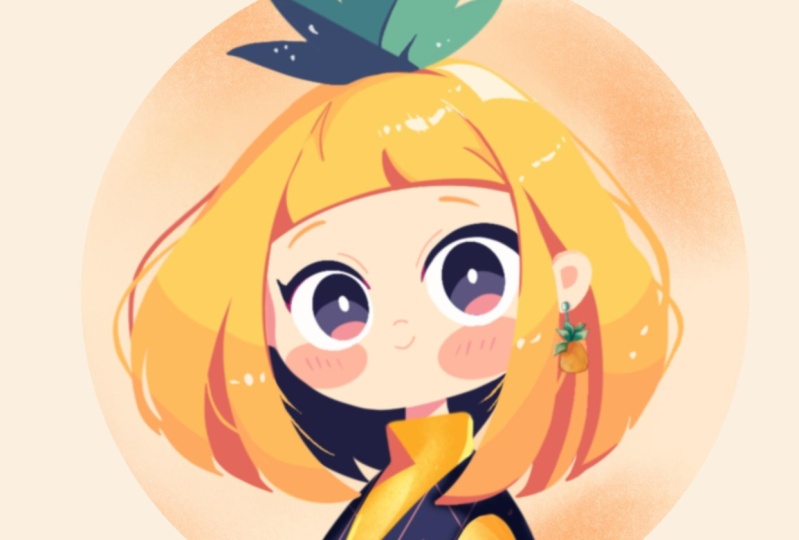
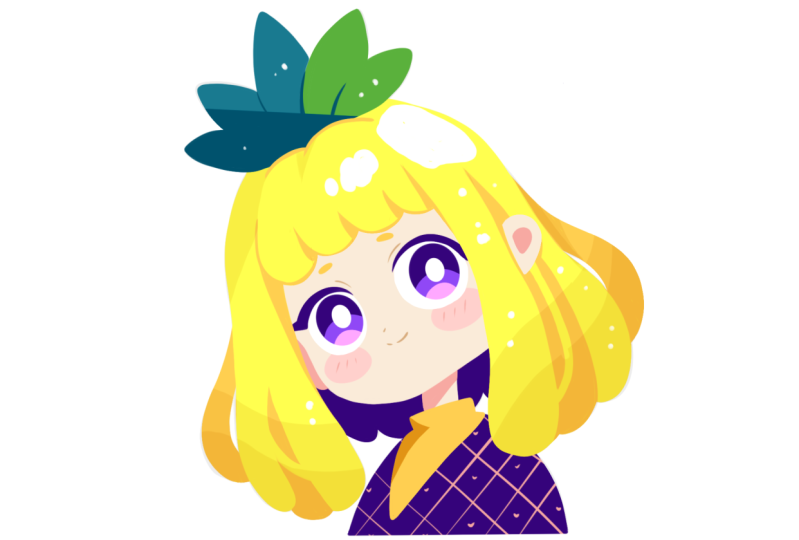
cute Kawhi illustration of an adorable pineapple
girl in procreate. During this class,
you'll get familiar with a lot of useful features
like liquefied tool, Alpha log, clipping masks, and blending modes, and learn the basics of drawing
in procreates. By the end, you'll not only draw an adorable illustration
you'll be proud of, but also feel super
confident using procreate. And now let's spend
some time drawing.
2. Basic Scheme: Let's begin by deciding what kind of canvas we
are going to be using. Today, we're adding a
standard square canvas that you can find in Procreate, both our pixel weed
and pixel height are set at 2048 pixels. Our DPI are at 300 and our color profile is set as
SRGB with this loan number. When it's all done,
let's just hit down, get redirected to Arne Canvas, and then let's just go under the project and research
staff and download all the materials
mentioned in this class. When you did it, the
first thing we need to do is to go to our layers. We will go to the
background color. We will go under
cards and we will select the color with
the title Background. When we did it, let's just go to the brush library and let's just use some
sketching brush. You can just go into
the sketching folder and select some brush from here. Or if you want to use the
same brush that I'm using, you can go again to the project and Rust step and
download it from here. When we are done with a brush, let's just get back to our
color palette and let's just go and select some contrast
color to a background. For example, let's just go
with dark purple color. With this color, we will
start creating a sketch, a little scheme
before this sketch. Let's just go and start
doing the thing like that. We will go to the center of
our cenas and with one line, we will create a
shape of the ellipse. Hold your line at the end and
create something like that, tilted a little bit, and when you are
satisfied with the size, let's just lift up our Apple
pencil and we will go to the stop option that popped
up this is our editing mode. Into our editing mode, you can see we have some nodes, and we also can hold our Apple pencil at
some blank space, and we can move this
shape more toward the center or if we want
to move it somewhere else, we are welcome to
go and do that. Now let's just go to this
node that we have right here on the bottom and we will drag it a
little bit higher. So we will have
more rounded sheep. When we have something like
that, let's just tap on the screen and we will go
away from our editing mode. When we have the
shape like that, let's go and create
another shape that will go in that way. We are going to the top and we are creating just
one line like that. We are holding it at the end, and then when we have
the direction like that, let's just go to our
editing mode and we will adjust the placement
of these elements. So firstly, let's
just go to one of the nodes either on the
top or on the bottom, and we will just go and adjust the rotation of this
element just a little bit. And then when we have
something going in that way, let's just go and
position this line, not in the center, but a little bit more
toward the left side. So our parts of
this little element that we've created before
are not quite equal. Our part on the left is
a little bit smaller. So for now, let's just go
with something like that, and when we have the
result like that, let's again tap on the screen
to get away from our mode. Now when we have the
little scheme like that, let's go and choose
a different color. Everything will be
contrast and we will have no problem with all the lines that we are
creating right here. For example, let's just go with some other contrast color. You can pick any color that you prefer and when we have
something in that way, let's just go and create a curve going through the whole
shape of our canvas. And maybe not the canvas, but the shape that
we have are ellipse, and we will go find the
center with this curve. And when we have
something like that, let's just lift up our
Apple pencil and go to our editing mode and
adjust adjust a little bit. Let's just make it
a little bit more curvier and with this line, we are making a
center of the shape. So if you need to move
it, go and move it. And when you have the result
that you need right here, let's just tap on
the screen and let's again go away from
our editing mode. Now, when we have the
result like that, let's just go and write
down that it is our center. When we derate, let's again
go and switch the color to something bright and then from this line that we've
created in the center, we will first go a little bit higher and create a
parallel curve here. Again, just hold ir line
and the end and trying to make a similar curve than we have right
here on the bottom. So just go a little bit higher. If you want, you can go
just a little bit higher, go into the 18 mode, so position it in that way. When we hand the
results like that, let's just go away
from this mode and let's write down fringe. When we have this line, let's again go and switch the color. Select some brighter color, and this time we will go
underneath the center line, and we will create one
more curve right here. Again, just holding
our line in the end and if we need to
move it a little bit, this line will be a little
bit higher and it won't be quite equal to this line that we have
right here on the top. So we will just need to
have less space in between. Let's just go and move it and we will position
it in that way. When we have it, we
will write down ice. And now we will just need to
create one more line with the same color to
figure out where we want to finish
creating our eyes. So let's just go to this part that we have right
here on the bottom, and we will create
another curve right here that will go through
the center of the sheet. So again, try it out
a couple of times, create a curve similar to the one that you
have on the top. If you need to move it
so it is in the center, just go and do that. Basically what we need
is something like that. When we have the
results like that, let's just tap on the screen, and then let's again go
to our color palettes. Let's select another color. With this color, you can
choose anyone that you prefer. We will just go from this
central line that we have in the vertical
axis and from this line, we will go to the right. We will step a bit from it, and we will just go and create
another line like that. Create a line going in that way. If you want, you can just move it slightly toward
the right part. When we have something
going in that way, just tap it on the screen
to accept our changes, and then we will go
more toward the right, and we will create
another line like that. Let's just go and create one more vertical line like that and we will
position it in that. So with this line, we
are paying attention to this little intersection
right here to this little area where we
are going to be creating i. So we will need to have
some space over the right. And when we handle
results like that, let's just go and do the same
thing on the opposite side. Firstly, we will
just go a little bit closer to this line that
we have in the center. So the distance from this
line to the center is a little bit smaller than the distance right
here on our right. Again, if you need to move it, you are welcome to go to the
editing mode and move it. When you are done, let's just
go to the opposite side to the left and we will create another line going
down in that way. So for now, if
it's not happening from the first right
right out one more time, go to the 18 mode, try to make this line
straight and try to make the distance similar to the area right here
for the opposite side. So when we have
something in that way, let's just go and tap on the screen to
accept our changes. Now when we have
this crazy scheme, let's also go and add
a few more elements. Let's just get back to
our list and create one more layer on top
and when we have it, let's just go again
to our color palette and select some darkish color. For example, we can go with the same dark purple color
or if you want to can switch it to something a little bit less dark and when we have
the result like that, let's just go and create another element right
here on the top. We will step a bit
from this line that we have right
here on the top, and we will create another
curve going in that way. When we have this curve, you can make it similar
on both sides so you can just elongate
this line a little bit. When we have it, we
will go and create a couple of lines
going up in that way. Let's just go and
create five of them. When we have the
result like that, let's go to the sides
and let's start creating the additional elements for
our future girl right here. Firstly, we are going over
our left side and we will go down with a curve or a
straight line like that. Create the first line
going in that way, you can go and maybe create
it in a more open way. We will just need
to go and create it a little bit more
toward the left. If you see that
maybe you want to adjust some lines or
erase some lines, you are welcome to
go and do that. When you have the
result like that, let's just go to
the opposite side and create something
similar here. Again, just create a
line going like that. Create a couple of them, make them ugly as you want, if you want to go and maybe erase some lines so
they are not very ugly, you are welcome to
go and erase them. When we have the
result like that, let's go to the bottom and we'll connect these two lines
with a curve like that. You can just go and create
a curve going in that way, create it a couple of times. Just make something in that way. When we have the
result like that, let's just go to this line that we have right
here for our eyes. We will step a bit
from it and we will go down with a line
going in that. Just going down, creating straight line or not so straight
diagonal line like that. When we have it, we
will go to the bottom, create a straight
line like that, it will be parallel to
our canvas right here, and then we will go up with a
curve going up in that way. When we have the
scheme like that, we are almost ready to
start creating our sketch. Let's just go and
do the following. Firstly, we will
just go to our list and select both on the
list that we have here. When the first
layer is selected, we will go to the second one and we will swipe it
from left to right. We can also go and
hit group right here, so it will be easier
for us to navigate through our layers right
here and through our scheme. And if you want
to select both of these layers when they
are at the group, you can just go and select
the group right here. And when we have the
results like that, let's just go to our Ero key, uniform method and we also will turn on snapping right
here into the settings. When we did it, we will go
back to our canvas and we will be looking for the
center of our canvas. To make it in a center, we can just go and look for these two orange
lines, one vertical, and one horizontal if the second one is
not appearing right here or if you think
that maybe it's not the center and you don't want
to position it right here, you are welcome to find
the position yourself. If you want to go and maybe
make it smaller, gradually, you can go to one of the
nodes either on the top or on the bottom and adjust it by dragging it more
toward the center. Just create the elements in a way that you would
like to see them. And when you found the
position and the size for your illustration for
your first scheme right here, let's just go away
from our error key just by tapping on it. Now when we have the
results like that, let's just get back to
earliers and we will go to this layer where we have our
second layer right here, we will go to the N icon and we will adjust the
opacity of it, we still can see
what's happening here, but it's not that bright. And we will do the same
with this layer on the top. So just finding the opacity
that works for us so we can just go and easily
start creating our sketch. Now when we have
something in that way, let's just at a group and we will create one more layer
by tapping on the plus icon. When we did it, let's just go
again to our color palettes and select the darkish color or any color that
you prefer it here, and we will be starting
to create a sketch.
3. Sketch: Let's go firstly to this line
where we have our fringe. This is our pinkish line, and we will just go and
repeat this line with a more bold line with this
color that we picked. When we have it, we will go to this little line that we
have right here on the top, the second line right
here, the inner line, and from this line, we will be just going down and creating the first curve going as it
is the part of the here. So let's just go firstly and create a big
curve like that. When we have the line like that, let's go to this line that we have right here as
the outside line and we will go again
right here and start creating the
shape of the here. Basically, what we
need to create is a more rounded shape on the bottom and flatter
shape on the top. Don't worry if it's not
happening right now, we can fix everything later. Now we just need to
figure out what we are creating and what we are
going to be fixing later on. What we need to do right now
is to go to the bottom and start creating these
little parts of the here. Let's just go with more
triangular shapes like that, and we will be creating
something in that way. Again, don't worry right now. If it's not looking
quite right right now, we can fix everything later on. So if you want to go and
maybe erase some elements, you are welcome to
go and do that. If you want to go and
maybe make this line a little bit closer to the
overall shape of the face, again, you are welcome
to go and do that. If you think that maybe
the lines that you have as the scheme are a
little bit too bright, you are welcome to go and adjust the opacity one more time. And then just get back
to your layer and let's continue creating
the rest of the lines. Now let's just go
to the other side and we will go and create
another line right here. Again, going from this
top line on the top and just creating the line in the same way as we did
before just by going down. We are again creating some
kind of a flow effect by creating a rounder shape on the bottom and floating
the shape on the top. Let's just go a
little bit closer to this line that we've
mapped out onto our sketch as our line of the R here onto the right and then
just go down and again, go to the opposite
side and start creating the flowy shape right
here to create the here. So go in there,
repeating the shape, just go in with the
very rough lines right here and creating
something in that way. Then just go in and erasing the parts that we
don't need, and again, going toward the bottom part
and creating these parts of the here with these
rounded triangular lines. Let's just go with something
like that for now and then let's just go and start
creating additional elements. Firstly, we will go
to this line that we have on the bottom.
This will be our chin. We will start recreating it right here onto
the right part, just repeat the line that
you have right here, and then we will go more toward the left side and we
will continue creating the shape of the head in a more flat and a
bit rectangular way. Then we will go to
the side on the left, and we will be creating a line
that will go in that way. So we are creating some cheek and creating the line
going in that way. So for now, when we have
something like that, let's just keep it as it is. And when we have
it, we also will go toward this little part that we've created right
here between the hair and our little cheek
right here or chin, and we will put a little line right here that will
represent the ear. So just going toward
this intersection on the left and just creating the
line going up in that way. When we have it, you can
just go and try to make this line a little bit
more flat on the bottom. So just continue creating
this line right here. And when we have the
result like that, let's go toward this
right part where we have this shape right
here for our eyes, and we will continue creating
a little E right here. We will go a little
bit lower than this line that we have
right here for our eye, and we will go and create just around the shape like that. You can go with a smaller
shape with a bigger shape. It's all up so you can
go and maybe adjust the shape that you are creating
for your hair right here. So just create a shape
like that and then go inside the shape and create
another line like that. So we will have some kind
of the ear right here. When we have something
going in that way, just make sure that you
went a little bit beyond this frame that you
have for your eyes. And when we have the
result like that, let's just go and start
creating the facial features. Just go to the right part
first and we will go to this little element that we've created onto our
very crazy scheme, and we will go and start
creating the shape for the eye just by creating half of the ellipse or half
of the circle like that. Just going over the top part, just creating a couple
of lines like that, and creating the line that will be a little bit thinner on the inside part and going a
bit thicker on the outside. So just creating
this line like that. If you need to maybe thin
it up or adjust the shape, just grab your eraser
and adjust it so it will look something
similar to what you right now see
on your screen. And when we hand the
result like that, let's just go a little bit lower than this line
that we've created. We will step a bit from
this yellow line and we will start creating
the shape of the ellipse. So just hold your line at
the end, adjust the size, go to the 18 mode and
start adjusting the shape, so it is rounded. It is quite big and
it is positioned in a way that it goes with this line that
we have right here. Our middle line and our little
yellow line right here. When we have the
shape right here, let's just go toward
the bottom and we will continue creating
some lines right here that later on
we will recolor differently and they will
be a part of the eye. Just go in there and creating
the shape like that. Very slightly curve
on the bottom. When we have the
results like that, let's just go inside this eye, and we will create another shape of the ellipse right
in the center. You can make it
bigger, you can make it smaller, it's up to you. When you have the
shape like that, let's just go to
the opposite side and create something
similar here. Again, going into this
little part that we have right here and
start in the same way as we did on the
opposite side just by creating the curve
going up in that way. Again, making it a
little bit thinner in the inside part and going
wider with the outside. Just creating something in that way and as
this line that we are creating right now and as this eye is a little
bit in perspective, let's just go and
show it just by creating a little
line on in that way. It is some of the eyelash
right here or maybe eyeliner, something in that way. Create a pointy little shep like that when we have
the results like that, you can also go a little bit lower and continue creating
the line right here. And then when we have
the shape like that, let's again go to this line
that we have right here and continue creating the
similar shape that we have on our opposite side, so just the shape
of the ellipse, trying to make it similar to the shape that we have
on the opposite side. If you want to make sure
that the size is the same, when you are at
the editing mode, you can just move this shape and match it with
your previous shape. Go there adjust it by going to this little node and just move it back
when you are ready. Let's just position it
closer to this line that we have right here
as our guiding line. When we have
something like that, let's just tap on the screen
and let's just go inside the shape and let's create
this similar shape, similar iron shape that we
have on the opposite side. Now, when we have
something like that, let's again go to this side on the bottom and we will create a couple of lines right here to connect it with our
shape of the eye. For now, just go with
rough lines like that. We will fix it later on
if we need to if you see that maybe you want
to fix it right now. Are welcome to go and do that. You can also go to
some of the areas and adjust the lines
if you want to maybe just go with the
thicker lines or with the thinner lines or adjust the overall shape of the lines, go with the thicker
shapes or thinner shapes. You know what you need
to do, just go and create nice elements right
here to your liking. When we have the
result like that, let's also go to this line
that we have right here for our hair and we will go a little bit closer to the eye area, and we will go and erase
this little part right here that is going beyond
the frames of our hair. Let's just go and
thin up these lines, clean them up and
then we will just go to this line right here where
we have the intersection. We will go a little bit
higher and we will put a little dot right here that
will represent the nose. When we did it,
just go underneath this line that we have for
our eyes and just go in with a little shape of
half of the ellipse or half of the circle to
create a little mouth. Again, we are making the shape
a little bit bigger over our right part and a little
bit smaller on the left. When we hand the
result like that, let's just go underneath our eyes and let's create
little checks here. Just map out two ellipses on those sides to create
these little shapes. When we hand the
result like that, let's go a little bit higher than these
eyelids that we've created and let's create the lines that will
repeat the shap, but they will be recolored
differently and they will show that we have some of the
leads on the top of the ice. When we have the
result like that, let's go to this line
that we have right here, and we will just go a little
bit above it and we will create little shapes right
here for our little eyebrows. You can just go with
simple shapes like that. You can go with a
different direction, different size, and everything. So just try out a couple
of times to create these elements and
then let's just go and refine the lines that we have
right here for the here. Again, just going in
there, creating our lines, trying to create
something nice here. When we have the
result like that, let's go and create the
shape right here on the soap and we will be just going and
refining our lines. When we have the
result like that, let's work a little bit
onto our shape of the here. So we will be just
going there to the ends of our hair and we will be
creating the lines going up. So let's just start
from our left side and we will create a couple
of lines right here. As we have some
kind of a dynamic here and some kind of
a tilt in the hat, let's just go to this side and let's create some
strands of the here that will continue creating this additional effect
of the flowing, and we will be just going and creating some kind of
the lines going in that. When we hand the
result like that, we also can go and maybe create some strengths
going in that way. We can go to this side and maybe create a rounder
shape right here. Just go and refining the lines. Then we will go up and we'll
hide a piece of this ear. Just creating the
lines right here, just creating
something in that way. When we have
something like that, if you want to go to the
outside shape and again, create a few strengths here, you are welcome to
go and do that. Just create the shapes that
you would like to see here. When we have the
result like that, let's also go to our
fringe right here. We'll go more toward the center and we will just go and create a couple of lines right here that later on will
recolor differently, and we can just go and refine these lines that we
have right here on the top, maybe adjust the
direction a little bit, take a look at everything
and decide whether you want to manually right now,
adjust some parts. Now when we hand the
result like that, let's just go over the top
to this area where we have these additional lines and let's just go and start
creating the leaves here. We'll be just going with
little shapes like that. First, go into the center and creating a big shape like that. Just try to make it
even on both sides. When we have it just go into the sides and just creating more of the shapes just by following these additional lines that
we've created onto our skin. So just go in there and creating the lines
going in that way. If you want, you can
straightly go and adjust these intersections that you don't need right here. So just go with the
direction like that, and then just go to
the opposite side and create something
similar here. So again, just go and create the similarly sized
elements over this side too and create the
last one when you are ready. Just create these
very flowing lines right here and when you
have the results like that, let's just go and
repeat this line that we have right here
onto our scheme. So just create something
going in that way, erase the lines that
you don't need. And when you are
done with this task, let's just go to the
bottom and continue creating our little
girl right here. Let's just go to this line
that we have right here and we will continue creating
our little neck right here. Let's just go to this line that we have in
the center and we will just start by creating two lines going
down in that way. You can try it out
a couple of times. You can maybe change
the direction a little bit and create
something going in that way. We will have a nicer
tilt in the head. Just go with a bit
of the slider curve or slider direction change
right here for our neck, just go with something
going in that way. Then when we hand
the neck like that, let's just go and start
creating the sweater. Firstly, creating a
little curve like that, then going down with two
lines going in that way. So just go a little bit
beyond the frames of our little neck right here when we hand the
result like that, let's just go over our left
side and we will just go and create the similar curve to
what we have onto our skege. Just go in there repeating
shape right here, and then let's go to
this little line that we have for our little
sweater right here. And if you want to
maybe go and refine it, make it a little bit bigger, you are welcome to go and do that. We will go to this little
line, and from this line, we will go down with a
curve going in that way. You can try out it
a couple of times, just create the little curve
going down in that way, and then just continue
by going over the opposite side and create
a neck cut like that. If you want to experiment and
create something different, you are welcome to
go and do that. Let's just go to
this little part that we have right here and just create a line similar way to what we have onto our scheme, and then we will finish
up everything just by creating the closing shape
right here onto the bottom. For now, we have
something like that. Let's just go and take a
look at everything without the lines that we have for our scheme and sketch
and everything. Let's just get back
to our list and we will go to this group
that we have right here and we will tap on this little check mark to
see what we have here. Now, let's just go and start
manually adjust some shapes. If you see that maybe you
want to adjust some parts, you are welcome to
go and do that. For now, just manually going and maybe adjusting
the shape of the head, maybe adjusting the shape
of the hair right here, just making it a little bit
more rounded on the bottom, just making the overall look of the hair a little bit
bigger maybe or just go into the shape that
we have right here for the head and adjusting it too. Just take a look at everything, decide what parts you
don't really like right now and just go to
them and adjust them. When you've adjusted it
manually, let's one more time, take a look at
everything and decide whether we want to
adjust it even more. If we want to do that,
we can do it very easily just by following
the next step. Let's just go to
our magic one, two, let's just go to liquefy and we will go and find the
option push right here. We have this slider with
apasit so we can just go and adjust the size
of the elements and we can just go to some
of the places and we can sculpt our sheps so
they will look better. For now, let's just
spend some time here and adjust the
shapes to our liking. You can go to all of the areas that you have right
here and it's really good to just go when
you are at the editing mode, when you are at the stage, when you are just creating a sketch right now and
adjust everything here because if you are
supposed to do it after you are just
creating this sketch, you will change the
quality of your lines. For now, one more time,
let's just go to all of the elements that
we have right here and adjust them to our liking. Also, if you see that maybe you want to go and play around
with the proportions, you can just go
and select some of the areas and adjust
them just one by one. For example, let's
just go and make the overall shape of the heads a little bit bigger and
we can do it very easily. Just first go into the S
ribbon icon, free hand method, and just selecting
the shape right here with the neck or
without the neck right here. Go and making a
selection like that and then looping this
whole shape around. And when only this
element is selected, we will go to the Ero
key uniform method or freeform method and just go in there and
adjusting the shape. So for example, let's just
make it very, very big. When you've adjusted the shape, if you feel that
maybe you just need to go and maybe
adjust some parts, you are welcome to
go and do that. For example, if you missed some little pieces while you
were adjusting the shapes, just go manually to
the areas and adjust them just with your brush
and with your eraser. So now let's again go and refine the lines if we need
to if you see that maybe you want to move the
overall shape a little bit lower or a little bit higher
or adjust it in any way, you are welcome to
go and do that. But for now, when we are
done with these parts, let's again get back to our
adjustments, liquefied two, and if you still want
to change some parts, let's just go and do that. Using our push option
and changing the size of a brush that we are pushing
with if we need to. When you're mostly done
with everything here, if you don't want to
liquify anything else, let's just go away
from this mode by tapping on the
adjustments twice. Then let's just
get back to Abush if we have some elements
that we still need to go and just manually
aja just refine the lines or just create
something in a different way, we can just go and do that. Don't worry if your lines are looking not very
nice right now. Later on, we will create everything in a nice
way if we need. So for now, let's just go and mostly just refine the lines. So later on, it will be
easier for us to just go and find the needed lines
that we want to recreate. If you want to go and maybe
adjust some parts manually. So for example, we can
just go to this eye that we have right here onto
the side, on the left. We can just go and
adjust it if we need to. So for example, we
can just go and maybe thicken this
line a little bit over the left side and just create a different
shape right here. So if you have some
little lines that you want to adjust or
erase or refine, now is the time when you
can just go and do that. If you accidentally
erase some lines or they mystically disappeared, you are welcome to go and
make them one more time. Just for now, keep
everything as it is, or if you want to adjust
everything a little bit more, you are welcome to spend
more time right here. For example, we can just go and maybe create bigger
shapes right here for our cheeks or adjust some other places if you
want to adjust them. For now, just having
our time to create a nice and very detailed skeue that later on we can
adjust if we want to. But for now just mapping out everything as we want it to be. And also, let's just go to the bottom part where
we have our hair, and let's just go
and add a few lines there just to make sure that we have some
hair at the back. So just create a couple
of lines like that and just create
something in that way. So now when we have
this sketch like that, if you don't want to
adjust anything else, you are welcome to go to the Aoki uniform method
snapping zone, and again, find the center of the canvas to just position your girl right at the center
of the canvas. So now when we have
the result like that, let's just tap on our r key. Let's take a look at everything from the distance one more time, decide whether we want to
adjust some parts or not. If we are satisfied. We will move on to the
next part where we will start creating
our clean sheets.
4. Face & Eyes Coloring: Let's begin this part firstly
by going to ear layers, and we will go to this layer
where we have our sketch, we will tap on the icon, and we will make the opacity a little bit smaller,
a little bit lower. When we have the
results like that, when we are satisfied
with everything here, when it's pretty
much transparent, we will just go and
create one more layer on. Let's just hold this lay and drag it underneath
our layer with the sage so it'll be easier for us to just see
what we are doing. When we have the
results like that, let's first go to our brush library and we will
go to the inking folder. We will go and select
either technical pen brush or studio pen brush depending
on your preferences. If you want to make your lines, very smooth, you are welcome
to tap on the brush, go inside the brush studio, stabilization right here
onto the left and play around with the
amount of streamline and amount of stabilization. Write out right here
onto your drawing pad, decide whether you want to adjust the options
in any other way. When you are satisfied, just
tap down over the soight. Now when we are done, let's just go back to
our color palette and let's just start by recreating
the shape for the fish. Let's select the color with the title fees and
let's just go and start creating the shape
that we have right here where we just need
to create our fish. You can rotate your canvas
to make it easier for you to recreate the shapes
and with this color, it's a little bit
hard because we cannot probably see what's
happening right here. If it's easier for
you, you can just get back to the layers and hide your layer with
the background color, and you cannot see your lines
right here because they are similar with the color that you have on the background. You can just go back to
this layer where you have the sketch lines. And then when this
layer is selected, just go to the adjustments, use attron and
brightness and here, you can just go to
the slider brightness and adjust the
brightness right here. You will see what you
are doing right here. When you are done,
just go away from this mode and continue
creating your lines. We will just need
to make sure that our lines are pretty
nice and pretty smooth. When you are done with it, just make sure that you get
back to this layer where you started to create the line and let's just go and
continue create very, very smooth and nice lines. As you want to use the
color drop method, we can just go and
loom this shape around where we have
all the elements for the face and then just drag
and drop the color inside when we don't have any
gaps inside the sheeps. The same thing we will do
for the neck right here, so just go and
create an element, drag and drop the color
inside and make sure that this shape for the ear that will be seen is nicely shaped. So if you need to go and erase some parts or
adjust some parts, let's just go grab
our eraser and just cut this little part right
here to create our ear. With the eraser, you can use all the options that
we used before, so you can just
hold your line at the end and go to the
18 mode if you need to. Just go and erase the rest
of the areas that you need and make sure that everything
is looking nice right here. So just continue erasing the
parts that you don't need. And when you are
done with this task, we can go again to our last and turn on our background
color one more time, so we will see everything
that is happening right here. Now when we have our skin layer, let's just go and
create one more layer on top and onto this layer, let's just go and start
recreating our eyes. So firstly, let's just
go to our color palette, select this dark purple color. And with this dark purple color, we will just go to this
little eye lash line right here and we will start
recreating it here too. Let's go and adjust the sides of our brush and just
with one line, we will just go and
create the first curve. We will adjust it through
our editing mode, and when we have
this first element, we will just go to
the top and just add the thinness or thickness to this element just by creating
another curve right here. Close the shape. Don't worry if you are going
lttle bit beyond the frames that
you've created right here on the layer
with the skeuge. When you are done
with this task, let's just go and drag and
drop the color inside. If you have some miscolord
places like that, you are welcome to go and
manually adjust them. A look at everything
from the distance, decide whether you want to maybe adjust the
shape a little bit and maybe make it a little bit thicker on the bottom
or on the top. Just create something that
you would like to see here. When you are done
with this task, let's just go and recreate
the shape that we have right here for our iris
and for our eye. Let's just go and repeat the
shape that we have right here the same way as
before just with one line, creating R shape if
we need to adjust it. Holding our Apple pantil and
go into the editing mode. It's always good to take a look at everything from the distance to decide whether you want
to adjust some parts or not. You will see more clearly
what you are doing. So just take a
look at everything from the distance and
decide whether you want to adjust it and
make it a little bit different from what you see
right now onto your sketche. When you are satisfied
with the position of this element and with the
size and with everything, let's just tap on the screen, get away from our editing mode, and then let's just drag
and drop the color inside. When we have these
elements on one side, let's just go to
the opposite side and create the same thing here. Again, starting from the bottom, just creating our first
curve right here. Again, you are not supposed
to create everything with 100% of similarity to what
you have onto your sketch. If you want to adjust
some elements, you are welcome to
go and adjust them. Again, take a look
at everything from the distance to decide whether you like it or not or whether you want to
adjust some parts or not. Just find the curve that works for you and
when you are done, let's just go and end
the thickness just by going over the top and
creating another curve here. Again, hold it at the end, adjust it, take a look
at it from the distance. Make sure that you've created
a nice curve right here. When you are done, let's
just go and recreate this little eyelash right here just by creating a
triangular shape like that. You can play around with the
thickness of these elements and with the straightness
of the lines right here, if you want to go maybe with a different shape or with
a different direction, you are welcome to go and
try out different things. You can try out a
couple of times. Again, take a look at
everything from the distance, decide whether you want to
adjust some parts or not. When you are overall satisfied, make sure that the
shape is closed. Then just drag and
drop the color inside. If you have some extra
elements that you need to erase or on the contrary add, you are welcome to go and
fix these little places. Take a look at everything
one more time from the distance and when we
have the results like that, let's also go to this
little tip right here and we will go and continue
creating a line going down. Create a curve and then just
add a bit of thickness right here just by going up and creating the closure
for the sheep. If you think that maybe
you want to go and create a thicker shape
right here onto the side, you are welcome to
go and do that too. Just make sure that
you don't have any gaps inside your lines. Now when we have the
result like that, let's just go and repeat the shape that we have
right here for our eyeball. Let's again go with one line, create the shape,
hold it at the end, and then we'll go
to our editing mode and adjust the size, adjust the direction, adjust everything that
we want to adjust here. So let's just make it similar size to what we have right
here onto the opposite side. So if you need to
go and match it, you know what you
need to do go there, drag the shape to
the opposite side and just make sure that it is a similar size to what we have onto our previous site. Position your shape
to your liking. When you are done, just
tap on the screen, and then just drag and
drop the color inside. Again, take a look at
everything from the distance. When you are satisfied
with everything, let's just go and continue
creating some other details. For now, let's just go to our layers and create
one more layer on top and we will just
hold this layer and drag it underneath
our previous layer. Let's just go to
our color palette and select the white color, and we will just go
and continue creating the shapes that we have
right here for our eyes. Basically what we need is to continue creating the
shape right here, just by going and creating half of the ellipse or half of
the circle right here. If you want to go with a more
peculiar shape for the eye, you are welcome to
go and do that. You are welcome to adjust it by going to the editing mode. And mostly what we
need to achieve is to match the line right here or just have just a slight tip right here with the eyeline. And when we have the
shape like that, let just close it, and then we will just dragon drop
the color inside. Again, don't worry if you are going a little bit
beyond the frames, we will have the layer
with the hair on the top of our eye so
it will be hidden. When we are done
with the first eye, let just go to the
opposite side and again, we will just go and create a similar shape right
here onto this side. Again, if you want
to hold your line, you are welcome to
go and do that. You are welcome to adjust it
through your editing mode. If you want to just go a little bit thinner
with the shape right here onto this side and just try to match the line right here
onto the opposite side. So when we hand the
results like that, let's just go and
close up the sheep, and we will just go and drag
and drop the color inside. So for now, let's just go
and hide our layer with the sketch to see what
we have right here for the eyes and if we
need to go and adjust it. So let's just tap on this
little check mark right here. And then if we want to go and
maybe adjust some shapes, we will just go grab our eraser and adjust the shapes
to our lichen. Again, I'm reminding
you that you can use all the options
that you are using with your brush
with your eraser. You can hold your line, you
can go to the editing mode and do everything that you
are doing with your brush. Let's just go to this little
line that we have right here and we will thin this
little part a little bit. Then we will go to
the opposite side and see what we have right here. Maybe we want to go and not create a very soft
curve right here, but instead create
a little bit of a flatters so it's up to you what you want
to do with the ice, with the shape of them. When you are done, and if you see that maybe you
overdid something, you are welcome to go
grab your brush and adjust some other
parts if you need to. When we hand the
result like that, let's just get back
to our leas and hide our layer with our sketch. And let's continue just by going a bound this layer where we have our ice and creating
one more layer on top. So for now, let's just tap on this new layer and let's
select clipping mask. That way we will be
able to add the colors only on the errors that we
have on our previous layer. Now when we know that, let's just go to our
color palette and let's select the color
with the title purple. When this color is selected, we will go to the bottom of our black elements onto our eye and we will go and
create the first curve. You can go and adjust
the size of your brush a little bit and go and
create the shape like that. A little bit lower than the shape that we have
right here for our iris. If you want to go
and maybe adjust the shape to your and you are
welcome to go and do that. Basically, what we
need is to go and recolor the shape on the bottom. When we are done
with the first site, let's move on to
the opposite one and create something
similar here. Try to make the same
curvature right here and just feel the area on
the bottom with this color. Take a look at it
from the distance. When you are done with it, let's just go again
to our color palette and select the sin color. With this color, we will
go a little bit closer to the edge and we will create another similar
shape right here. Again, you can hold
your line at the end, you can go to the 18 mode and adjust the
curvature right here. Let's just go and create
something like that. Then again, we will
go and manually recolor the rest of the
area with our brush, and we will do the same
on the opposite side too. Try to repeat the curvature and the size and then just
manually add the color inside. When we have something
going in that way, let's get back to
our color palette, like the white color. We will adjust the size of
arach something a little bit smaller and we will go and create these irises right here. Let's again go to
the middle part and create the shape of the ellipse. Just make it as big or
as small as you want. Go to the editing mode, make sure that you are
right at the center. If you need to move it,
just go and do that. Try to use the same
direction that you have for the mean shape right
here when you are done, let's just go and manually
recolor this area inside. If you have some little
miscalord places right here on the outlines, you are welcome to go and adjust them with your brush and with your eraser to achieve a
smooth look right here. When we are done
with the first eye, let's move on to
the opposite side and create something
similar here. Again, just creating
the similar shape right here, adjusting it, making sure that
it is similar in size to what we have
on our opposite side. So if you just
need to adjust it, just move it to
the opposite side. When you are done, just move it back, position it correctly. And when you have the
result like that, let just again go inside the shape add the
color to this area. When you are done
with this task, again, take a look
at the outlines, whether you need to go and maybe refine them a little bit, grab your brush,
grab your eraser, work onto the outline. When you are done, let's just take a look at everything
from the distance. Now when we hand the
results like that, let's continue by
going to our layers and creating one
more layer on top. Let's just start creating these additional facial
features right here. Firstly, we'll go back
to our color palette, select this color with
the title red orange, or if you want, you can
go with the pink color. When we have this
color selected, let's just go and recreate
this little nose right here. We will just go
with a little dot like that, and when we have it, we will go and
recreate the sheet that we have right
here for the mouth. Let's just go and
just create it with one thin line if you want to
go and adjust it in any way, you know what you need
to do, just go to the 18 mode and
adjust it from here. When we have it, we also will
go with the same color to these little elements that we
have right here on the top, and we will create these leads. If it's not happening
from the first try, try it out one more time. Just create shapes,
nice curves right here. When you have the
result like that, let's again go back to our layers and create
one more layer on top. Once this layer, let's just start working onto the
shape of the here.
5. Hair, Sweater & Top Base Colors: Let's first go to our
color palettes and let's select the color with
the title yellow orange. With this color, we will go with a bigger size of our brush, and we will go and start recreating the lines
that we have right here. Again, using the same
options that we used before, hold your line and the end, create the curves the
same way as they are onside your little sketch or
adjust them to your liking. Just let's go to the outside and we will create these
outlines right here. Again, if you want to maybe
change the curvature of some of the lines or change the size of some of the curves, you are welcome to
go and do that. For now, let's just go with a slightly smaller shape right
here for this little part. We will go to the
bottom and create maybe a rounder shape right here
for this first curve. You can just again
hold your line at the end and adjust the
curvature of this element. You can always take a look at everything from the distance. When you are done,
just tap on the screen and let's just go and
continue creating our shapes. Let's just go to
this little part right here and create a
little cut right here. Again, if you want you
can just hold your line and the end and create
something in that way, then let's just go
with a bigger shape, then we have it onto our
skege then let's just go a little bit lower right here and create the smaller
shape right here. Let's just go with something
going in that way. Again, take a look at
it from the distance, and here, let's just go with
a round shape like that. Again, hold your
line and the ends, you don't need to
go full size right here to the top and create
the langon in that way. We can just play
around right here and create some peculiar
shapes right here. Also we can just go
outside and create a little strength
of he like that, and again, connect it nicely
with the overall shape and create a nice overall
silhouette for this element. If you want to add some
thickness to this little part, let just go and do that. We will need to maybe make a
little bit thinner shape on the bottom and create a
rounder shape on the top. Then just go there and continue creating the
overall shape that we have for our he just going
up with this little line. Again, to achieve this
bounce a little effect, we can go with a little
dent right here somewhere closer to the bottom and
create the langon in that way. Let's just go toward the top and we will go
a little bit behind the shape that we have for this pineapple leaves
over the top part, and then let's just go
and continue creating the similar shape right
here on the opposite side. Just closing the shape the
same way just going a little bit beyond the frames as
we did it with the face, and then continuing
just by going to some other areas and creating
the rest of the lines. Just go in there, create curve. If we need to go to
our editing mode and adjust the curvature, we are welcome to
go and do that. Let's just go to this side and maybe lift this little line a little bit and maybe move it a little bit more
toward the left. We will have nice
curve right here. When we have
something like that, let's again go and continue creating these additional
elements right here to create nice connections between the sheps and create
nice curls right here. Make sure that you
are closing the ship strictly when you are
creating just little parts of the here let's just go
and continue creating these additional
elements going a little bit smaller with the
cuts right here, going with more rounded
shapes over the bottom parts. Again, holding our lines, making sure that
we are connecting everything nicely and smoothly. We have these tips on
the bottom parts of the he go in with a
smaller cut right here, creating a similar curve
right here if we want to and just creating the
last rounded shape right here on our right part. Again, you don't need to go full size right
here over the top. Just go with the curve until you have this
little curve right here and then let just go and continue creating the shape
that we have right here. Decide where you want your
hair to end and where you want to create maybe some
of the strength right here. Let's just go with something
going in that way, but we will go right here to this little part and we will create a little dent
right here too, similar way to what we did
onto the opposite side. Connect it nicely right
here onto the bottom, make a nice connection so you don't have some
gaps or anything. Then let's just go to
this additional element right here and let's just go and add some thickness to it. Or we can just go and create some peculiar shapes inside
to create some strength. So let's just go
and maybe create something like that.
You can go alte bit. Beyond the frames, you can add a bit of thickness
to the lines. So just create something
going in a very nice way. Let's end the color inside to
these additional elements. Let's just go with
rounded chips right here. If you need to refine your
line, go and do that. Again, making it a
little bit thinner on the bottom to create a
nice flowing effect. If you see that you miscolor some places, go and color them, and then let's just go and drag and drop the color inside, making sure that we have
all the lines closed. Then if you want to go again and add some additional strands, you can just go and maybe
change the brush so we can just go to the brush library and we can use Studio Pen brush, for example, or if you want, you can go with the
syrup brush right here. Select one of these brushes
and let's just go over the sides of our here and let's just go and create a couple of strands right here. You can just go in a
more free way right here and just create
the peculiar shapes, connect nicely them with the overall shape that
you have right here. Go with the strands more
toward the bottom part, but connect them
nicely with the shape that you have for the
oral shape of the here. Again, if you want to go
to the opposite side and maybe create some different
shapes right here, again, you are welcome
to go and do that. Take a look at everything, decide whether you need to go and maybe adjust some parts with your eraser to maybe connect the shapes nicely or to
make smoother shape. If you need to take a look at everything without the
lines of the gauge, go hide this layer, take a look at everything. If you want to
adjust some parts, you are welcome to
go to the liquefied to push option and maybe let's just go and create a more flat shape
right here on the top. Go a little bit inside and creating this peculiar
dent right here. Try not to overdo this part. And when you are done, let's
just get back to the canvas. And one more time, let's take a look at everything
that we have here. Let's just go and
refine some line, so we will have a nice outline
right here for our here. Again, if you see that maybe you have some miscald places or the outside parts are not very thin or not
very nice looking, you are welcome to go and
adjust these little parts. It's all up to you. Take a look at the strengths that
you have right here, decide whether you want to
do something with them. So for example, we can just go and thicken up this
little part right here onto the top and maybe the overall sheet that we have right here
for the strands. You can play around
with some elements, maybe add a few more
little strands. Just go along the overall
shape of the hair and add a few additional
little strands following the natural direction. Work with your brush, work with your eraser, create nice silhouette
for the hair. When you have the oral
shape that you like, let's again get
back to our layers. Let's unhide our layer
with our sketch lines, and let's just go and
recreate the shape that we have for our
little eyebrows here. You can just go on
the same layer and use the same color
or straight away, we can just go and
switch the color to this orange one and go and
recreate these elements. If you don't want to
recreate them as they are inside your layer
with the sketch, you are welcome to
go and do that. You are welcome to try out
different things right here. Also, let's just go again and switch eyebrush
to technical pen, so we will have the
smoother lines right here, and you are welcome to go
and find the sheps for these little eyebrows
and the placement for them and everything
that you want to find here. Let's just go and refine
the lines if we want to and let's just go on both sides and create our little
eyebrows here. Just creating the
shapes like that, making them a little bit
thinner on the outside part. If you need to take a look at everything without the
lines of the sketch, you are welcome to
go and do that. If you want to move your little shapes or try
it out one more time, you are welcome to
go and do that. Let's just go and
maybe start creating them on one line and just create some of the curve of our little elements that we are creating for our
little eyebrows. You can go a little bit further
away with your eyebrows. You are welcome to go and try out a couple of
things right here. So just find what works for you. But try to make the lines
even on both sides. So they have similar shape and they have similar curvature. So play around with
everything here, decide whether you like
everything or not. If you want to go to
the liquefied two and maybe play around with
these elements here, too, you are welcome
to go and do that. Just make sure that
you are adjusting only these little parts
with the eyebrows because we are at the
same layer with our here and we are quite satisfied
with our here right here. So when we are done
with our eyebrows, let's get back to the layers and unhide our layer
with the sketch. So now when we have
the result like that, let's just go and recreate
the sheet that we have right here for our ear because now it's
hidden under the hair. To do that, we will
just need to get back to our with our face, tap on this lee and
select the option select. Now, when this is selected, we will get back to our. We will go to our L with our hair and we will
grab our eraser. We will go very, very nicely to only this area that
we need right here. It is our little ear and we will just need to make
sure that we are cutting enough and not
too much because we will just need to go and create a
strength of hair right here. For now, let's just
keep it as it is, and if we will need
to go and maybe adjust some parts later on,
we will go and do that. For now, let's just go and
deselect everything by hitting our ribbon icon and
then let's just go and continue recreating
other elements. So firstly, let's just get back to our
list and let's just get to the previously
where we have our here. So we will just go underneath
our layer with the here. We will create one
more layer from here, and we will go back
to our color palettes and we will select our
dark purple color. Let's just get back
to our technical pan brush and let's just go and create some here
right here on the bottom. For now, let's just go and start creating some
strength right here, very pointy, very nice, just creating the
curve right here, going closer to our
ship for the sweater, creating nice connections
with our ship, and then just go into this area and closing
the ship like that. Don't worry that you are
going to the face right now. We can fix it later on. Just make sure that the
shape that you are creating is closed and then dragon
drop the color inside. Let's just go to the
opposite side and create a bit of the here right here to just go there and close the shape like that,
dragon drop the color. When you hand the
result like that, let's just go again to Ayers. Let's hold the lay and drag this layer underneath
our ear with the face. Now when we have the
result like that, let's continue by going and creating the shape
for our sweater. We will go above this
layer where we have back here and also we will just need to go above the
layer with the face. You can just go straight above
the layer where you have the skin elements or just go right underneath the
layer with the here. So you create one more layer and let's just start by going to our color palettes and let's use the same yellow orange color for the top part of our sweater. Let's just go and recreate
these lines right here. So just go in there
with rounder shape or with more angular
shape, it's up to you. With this color,
we are recreating this triangular
shape right here. Let just go close the shape. You can hold your
line in the end and create the lines
going in that way. Just create the lines, close the shape and drag
and drop the color inside. Work onto the shape
if you need to. So maybe you want
to go to this area right here and adjust
the angle right here, maybe make it a little bit going on the opposite
direction, so it's up to you. Just go and create the shape that you
would like to see here. If you want to go
with a bigger shape of the sweater on the top, again, you are welcome
to go and do that. If you maybe want to go and go a little bit
down with the shape, you are welcome to go and cut this little part right here. So it's up to you what you
are creating right here. Find what works for you, find that you like
what you are doing. When you are done
with this task, let's just go to the corners and soften them up
just a little bit, and then we will
continue by going and recreating the rest of the
area that we have right here. Also, if you want you can go to this little area right here and maybe play around with it too, maybe let's just go and cut this part a little bit and make this additional
element that we have inside our sweater a
little bit narrower. So when we have the
shape that we like, let's again get
back to our layers, create one more layer on top, go back to our color
palettes and let's select this color with the
title dark blue right here. With this color selected, let's just go and recreate
the rest of the area. So just go and creating
the shape like that. So just repeating what we have right here if
we're going else with beyond the frame of this element that
we've created before, you can get back to your layers, hold this layer where
you have the sweater and put it underneath the layer
with the yellow part. Now, let's just go and
continue creating the shape. Let's just go and create a
straight line on the bottom. To create a straight
line, firstly, hold it with your Apple pencil and you also can hold one of your fingers on the
screen and you will see that you are creating
a straight line here. When you are done with it, let's just go and continue creating the rest of the
shapes right here on the top. Just close the sheep,
make nice connections, close the shape
over the top part, and then drag and drop
the color inside. Now when we have something
going in that way, let's just go and put this little additional part
right here on the top. Let's just go above
our layer with the here and create
one more layer here, and we will go again to
our color palettes and let's just start with this color with the title blue green. With this color,
we will go toward the right part and we will
recolor these two leaves here. Let's just go and
recreate the outline so you can again hold
your lines at the end, create the shapes right
here, create them nicely, connect them nicely
over the top, so you will have this
pointy element right here. If you need to adjust
the curvature, go to the editing mode. Recreate these two leaves with
these very pointy curves. If you are holding
your line and it snap into the line if you
go to the 18 mode, you might have the option arc
here and you can adjust it. If you don't have it, just
get back to your canvas, try it out one more time with a more curvier
curve right here. When you have it,
let's just go to the bottom and recreate
the last line right here. Connect it nicely, make a nice
pointy element on the top, adjust the curvature
if we need to, and then we'll go to the
bottom and we will start recreating the shape that we have right here
for the top part. Let just go boldly with
the shape like that. Hold your line and the end, connect it with the overall shape that you have right here. Just continue creating the line like that and then just go grab your eraser and erase this extra part
that you don't need. Try to make nice connection
right here so it is seamlessly and smoothly
going toward the shape. Close the shape right here
onto this part and then drag and drop the color to the whole area that
you have right here. Now, when we hand the
results like that, let's just go and switch
the color to the next one, which is our CN color, and we will continue doing
the same things here. Let's just go and recreate these two little leaves that you have right
here on the top. Let's just go again
the same way, just creating the curves, holding them at the end, just going closer to the
shape that we have right here onto the side with
a different color, adjusting it through
our editing mode, if we need to just go in there and recreate in this
little line right here, so we will have a
nice little change of color right here and then just go and recreating the next little leaf that we
have on the opposite side. The same way as before, go, creating it, just go and enclosing the shade
going down in that way. When we have the
result like that, just drag and drop
the color inside. Firstly, make sure that
you close the shap. Then when we are ready, let's just go to our
color palettes and let's select this dull blue
color and with this color, we will go and recreate this shape that we have
right here onto the side. Again, just creating our shape in a way that we did before, and then we will just go
right here on the bottom. Close the shape like that. Just go to the pointy element
that you have right here, close the shape by
creating another line like that to just make sure that we are
creating it in that way. Close the line at the bottom,
drag and drum the color. If you have some
miscolord places, just go and recolor them. Then just go and
make sure that we have a nice connection
right here on the bottom. If you need to go
and refine the line, are welcome to go and do that. And also, let's just go and add the second color
right here on the top. But firstly, to not
go beyond the frames, if we are satisfied
with everything here, we will need to do
one more thing. But before doing
that, let's just go to this little leaf
that we have right here on the side and refine it a little bit and make it
a lt bit more pointy. So just with the
eraser, adjusting it. If you have some other leaves
that you need to adjust, you are welcome to go
and adjust them too. Just make nice pointy
elements over the top parts, and when you have the
result that you like, let's just go and
do the following. We will go back to our leaves. We will tap on this leaf
where we have our leaves, and we will choose Alpha
k. When we did it, we will get back to our brush, and let just go to this leaf
that we have right here, and we will go and create
a little anon in that way. So just go to the bottom part and then just
drag and drop the color to this area or just go and try to close it and then try
it out one more time. If it recoloring everything
that you have right here, you can just not lift up your
Apple pencil and just go to the left side and adjust the threshhold
that you have right here. So you have this option
right here on the top. If you are moving it,
it is leaking out. If you are moving it toward
the left, it behaves nicely. Or if you don't like it, you are welcome to go and
maybe try it out manually, just go there and recolor
this area with this color. Also, let's just go and
take a look at everything without the lines that
we have for our sketch. And also, let's just
go and maybe add a few more details right
here onto this side. For example, we can go with
the same color and add a kind of interest to some of
the connections right here. So for example, we
can go and create a line like that and then go to this little part and create maybe a thicker
element right here. So just create something that will add more
interest to the picture. Try not to overdo it, try to follow the
natural direction of the line that you
have right here. So go from this little
curve right here, just create a
little element like that and end the color
inside if you want to. If you overdid it or if you want to fix
something right here, if you see that maybe
some places are not colored or you have
something like that. You don't use the eraser when
you are using Alpha Lock. You just need to pick the color
that you have right here. So if we have the color that we already have
onto our screen, we can just hold
one of our fingers, invoke this. I drop a too. If we move it, you will see that the color on the top of
the tool is changing. We will just need to go to
this color that we need to cover our little
places right here. With, and we will just
lift it up when we picked it and then you will see that you have the color
change right here, you can just go to these
areas that you need to adjust and just go and
recolor these little pieces. Now when we have the
results like that, we are done with
our flat colors. Let's just move on
to the next one where we will create
some details.
6. Face & Sweater Details: Let's begin this part firstly
by going to our layers and let's just go and unhide
our layer with our sketch. Firstly, let's just go and recreate the shapes that we have right here for our cheeks. Let's just go and
find the layer with the skin and create
one more layer on top. Let's tap on this layer
and select clipping mask, and then we will go to
our color palettes and select this red orange color
right here on the top. We will just go right
here and recreate the shapes just with one
line the same way as before, just holding it in
the end and go into our editing mode if
we need to adjust it. Take a look at it
from the distance, decide whether you
want to go with a bigger shape or
with a smaller shape. When you are done, tap on the screen and drag and
drop the color inside. Do the same on the
opposite side too. Let's just go and start
creating our shape, hold it at the end, go to the Edit mode, adjust it, try to make it quite similar to what you have
on the opposite side. But of course, on this side, it will be a little bit smaller. So let's just go and adjust it. If you want to lift
it up a little bit, you're welcome to
go and do that. Take a look at it
from the distance, decide whether you
like it or not. When you are satisfied, tap and then just dragon drop
the color inside. Now, if you want,
we also can go to our color palettes and select the spin color and
win the spin color, we will go inside the cheeks
and we can just go and add some blush just by creating a couple of parallel
diagonal lines like that. Add a few of them. If you want to just try to
make them parallel to one another and just add the
similar amounts on both sides. If it's not happening
from the first try, try it out one more time, go and add them in a thinner
way or in a thicker way. It's all up to you just create a few of these
little elements right here. Now, with the same color that we are using right
now, the pinkue, we will go to this sheet
that we have right here for the neck and we will
add a little shadow here. Firstly, let's just go right underneath the line that we have right here for our face and we will just go
and recreate it. We will have a
difference in color. When we have it, we will
just go to the bottom part. We will create a triangular
shape like that, and we will add the
color going in that way. Just keeping a bit of the natural color right
here on the side. And when we have the result like that with the same color, let's just go over
this part and we will create the shape that
will represent our ear. So just going up with the
curve like that and then just manually going into
this area and recoloring it. Just go like that, making
sure that we've made a nice connection
if we just need to go and maybe adjust some parts, make the curve a little
bit curvier or something, we will just go and do that. Let's just go make a very, very soft curve
right here and make sure that the overall shape
of the hat looks nice. If you overdid it a little bit, you are welcome
to go and fix it. If you want to take a look at it without the lines
of the sketge, take a look at it without
the lines of the skate, adjust it if you
want to adjust it. For example, we can go
right here and maybe make this part a little
bit more rounded. When we have the
shape like that, let's again get
back to our leas, find our leave with our sketch and go to
this little part that we have right here
for the ear and let's just go with the
same color and edit here. Let's just go and start by creating half of
the circle like that, and then we can go and create the line like that and drag
and drop the color inside. Want to add some accessories, you are welcome to
go and do that. When we are done with this task, we are done with these
facial features. So let's just get back to
our layers, and actually, let's just take a look at
this little shed that we have right here for our little
inner part of the ear, and maybe let's recolor it with a slightly not so bright color. For example, let's just
go with red orange and just drag it right
here to this area. That looks a bit softer, so let's go and continue adding
the rest of the elements. Let's just go again to
our layers and let's go to this layer that we have
right here for our eyes. We will go to this clip layer
that we have right here and let's just go and again add a bit of interest to the lines. Let's then go to our
color palettes and let's go with this very
bright dark pink color. With this color, we will just
go right here to the edges, and we will add a
bit of interest just by adding this
additional color right here. You can just go and create some peculiar shapes right
here or if you want, you can just go and go inside
these shapes right here and add the different color
right here to the corners. Just do it on both sides and create some peculiar
shapes here. When you are done with
this task one more time, going back to our layers, go into our next layer where
we need to add the details. It is earlier with this
bottom part of our sweater. Let just go and create one
more layer on top of it. Let's tap on this layer and let's select our clipping mask. When we did it, let's go and hide earlier with the lines
so we are not distracted. Then we will go to
our color palette, and again, we will
select this pink color. With the spin color and with the smaller size of the brush, let's just go and add some
pattern to our little sweater. Let's just go with peculiar
pattern of the pineapple. We will be just going
there, creating the diagonal lines like that. Firstly, you can go with a full size going through
the whole shape right here, or you can just go to
some of the areas. Just create the parallel
lines like that, go to this side too. And when you have
these parallel lines, let just go and create the lines going on
the opposite side. Again, just go and creating
some pattern like that. Add a few lines, go with bigger shapes or with
a smaller shape, go to the editing mode to adjust the placement of these elements and create a different
pattern if you want to. When you are done,
you can go inside this little angular
shapes that you have here and add some
peculiar shapes right here to add some
interest to the sweater. You can just go with little dots or little V shapes like that, add a few of them and create
something in that way. When we hand the
result like that, let's add a bit of shadow
right here onto the sweater. So we will just go to our lease and create one
more layer on top, tap on the least,
select clipping mask, and then let's just tap on the icon and select
multiply blending mode. Let's go with 50%
of opacity for now, and let's go again to our color palettes and select
the same dark purple color. Let's just the size of brush and let's go
to this area right here and we will just go and add a bit of shadow right
here to this area. It is nicely melting with this color that we have
right here for our hair. When we hand the
result like that, let's just go to the next layer, which is our layer
with this little part. We'll create one
more layer here, tap on this layer and
select clipping mask. And then let's just go again to our color palette
and let's select either the pink color or any other maybe
red color right here, and we will go to this
little part right here, and we will add the
shadow here too. Let's just go and adjust
the size of our brush, and let's just go with the
shadow going in that way. Let's go and add
the color inside. Take a look at it
from the distance, decide whether we
want to maybe go with a bigger shape or maybe
with a more angular shape. Take a look at it, decide what you want to do here
for this shadow. Basically, what we need is to create something
going in that way. When we have the
result like that, let's just get back to our list. If you think that maybe
this element is too bright, you are welcome to tap
on the I can go to the apathi later and
adjust it slightly. When you are done with it, let's just go and start
working once I here.
7. Hair Details & Final Touches: Firstly, select the
elements of the here and let's just go and
create one more layer on top. Let's tap on the layer and let's select
our clipping mask. Now, if you want, you
can just go and turn on the layer where you
have your sketch lines, so you can just go and recreate some of the lines right here. If you don't want
to do that, you are welcome to just work on the plane here element
that we have right here. But basically, let's
just go and turn it on. When you have this new layer, let's just go again to
our color palettes, and probably let's start
with the dark color. Let's just go with
this red color. And with this red color, we will first go to these little lines that
we have on the top, and we will start creating
some peculiar lines here that we will use as the
dividing lines for our here. So firstly, let's just go and adjust the size of our brush, and we will first go to this little element that
we have right here, and we will go up with
the curve like that. Recreate what you have right
here for your sketch lines. Try it out a couple of times, go a little bit beyond the
line that you have right here, so it will go a
little bit lower. And with the same brush
with the same color, go into the bottom part of our little fringe right here and just repeating the line
that we have right here. Again, you can hold your line if you want to you can go with a peculiar shape right here
with not so even line. You can just try it
out a couple of times. You can go maybe with a
thinner line right here onto the left side and a thicker line right here
onto the opposite side. Make sure that you
don't have miss colored places right
here on the edge. So if you need to
zoom in your canvas and go closely to
these elements, just go and recolor this part
and do what you need to do. And then let's just go to
the opposite side and again, create the similar line to
what we had onto our sketch. Just go in there, trying it
a couple of times going a little bit beyond the frames
that we have right here. So just creating some
kind of the outline for the hair that we have
right here onto the face. So creating some distinction
with this color. If you need to go and
thin up some lines, you are welcome to go grab your eraser, work with it here. When you have the
shape like that, let's also go and add a bit of interest to the picture
just by going firstly to the fringe and adding a bit of the dividing lines right
here for the fringe. You can go with epicular
shapes like that. You can go and repeat what you have onto your layer
with the sketch or try out a couple of different things right
here, so it's up to you. But let's just go and repeat
this triangular shape right here that we have onto our
layer with the sketch. Try to create it in a nice way. If you want you can go and
try out different shapes, of course, if you want to just create something
going in that way. Try to have a nice
outline right here, try it out a couple
of times if you need to just try to create
something peculiar. When you have this little shape, let's just go to this
corner and create a big shape of different
color like that. Go and create the first curve right here and recolor
the rest of the area. Make sure that you
are not going to the little shape
that you have right here for the little eyebrows. If you miscolor some places, if you recolor it some places, just go and erase this little
part with your eraser. If you want to go and
thin up some lines, some little corners right here, some little tips, you are
welcome to go and do that. Also, we will just go
to this little part right here and we can
just go and continue creating a line going up in
that way and go a little bit down with some kind of a division right
here on the fringe. Just creating a curve
right here like that, just a very smooth curve, just creating
something in that way. If you want, you also can go to the opposite
side, for example, right here and add a bit of the shadow with this
color underneath our little line that
we have right here for our little green
part over the top. When we have the
result like that, let's continue by
going and adding this additional color right
here on the bottom and making some division with the color on the bottom
part of our here. Firstly, let's just
go to this part over our left side and we will start creating the strength
of the here right here. Just going up and creating
the continuation of the line, trying to make it very nice
and very thin like that. In the end, we will just go
and thin up this little tip, just creating
something in that way. Then let's just go and
put this little part, the second little shape that we have right here for the
here completely in a shadow. Let's just go and continue
creating these little part. Naturally just go in there and creating this flowa
element right here. If we need to go and adjust it, just go into our editing
mode and adjusting it, taking a look at it
from the distance, making sure that these strands
that we have in front are looking nice and connecting it nicely right here with
the previous one. So take a look at it, make this very tippy
tip on the top, and then let's just
go to the bottom and create this shape right here. So we will just close it and drag and drop
the color inside. If you over did it and if you just went a little
bit beyond the frames, you are welcome to grab an eraser and adjust the
shape to your lichen. When we have these little parts, let's also grab a eraser
and we will go with a smaller size of the
brush and we will add a bit of interest to this little strand that
we've created. Firstly, let's just go and maybe thin it up a little bit
right here over the top. Creating a curve going up from the strand
that we have in front. If you need to go and maybe adjust it through your editing
moo, just go and do that. Erase some parts
that you don't need with the eraser that you
are using right now. A, let's just go to this
little part that we've created and we will go with our eraser and we will cut a
little part right here. So let's just go and
create something going. In that way, let's just go with something around
3% of brush size. Let just go to this little part and create a strand like that. Just try it out a
couple of times so you will have some kind of
a nice flow right here. When we have it in that way, let's go and continue adding
this additional color. So getting back to our brush, and you can just go to this little strand that
you have right here outside the shape and
recolor it completely, put it in the shadow. So let just go and continue edging the color right
here on the soap. So just going in
there going toward the soup part where we have the connection with the
mean shape of the here, making a nice line right here, connecting it nicely
with the strand, and we will just put this
part completely in a shadow. When we have everything
in that way, let's just go to the
opposite side and start adding the
shadows right here. Let's first go to
this little part. We didn't recolor it, so we will just go and put
the color inside this shape and then we will go right
here where we have our ear. And from this ear, firstly, let's just go
to this little line, and we will just go and create the line going
down in that way. When we have it, we will
also go right here onto the opposite side
and we will try to create a strand
going in that way. You can try out a
couple of times, make it thinner, make it
thicker, it's up to you. Just create something going
in that way, firstly. Connect it nicely with this first sheep that
you have on the top, close the sp and the
color inside the sp. If you have some
miscolord places, just go and recolor
them manually, and then let's just
do the following. Let's just go and start creating this
strength right here. So just go underneath our little ear and
creating a curve, similarly to what we
have onto our sketch. Just creating a nice curve
right here that will connect our little sp with the top part and creating
something in that way. When we have this first
curve on the bottom, let's just go and
put this little part that we have right
here on the bottom completely in the shadow. Just continue creating
the line right here, going a little bit closer to the shade that
we have for the ear, closing up the shape, making sure that it's
closed on the bottom, dragging out the color inside. Make sure that this
line that we have right here is nice and smooth. Let's just go and refine them with our brush or
with our eraser. When we have something
going in that way, let's also take a look
right here where we have our first little strand
on the front part. If we want, we will
just go and recolor this little piece right here on the ear part that we
have right here on the top. And if it's going a bit beyond the frame right here,
our little shadow part, we will go and again, with our eraser create a
nicer shape for this strand. Again, holding it if we need to go and creating something in that way and then let's just go and create it in
a different way. What we need to do is to go
right here on at the bottom, and we will go and thin on this little part just by
creating something in that way. Let just get back to our brush
and in just go right here underneath our ear and we will create a little shadow here too. Just creating the
part like that. When we have something going
in that way, if you want, you can go and maybe thick up this little part right
here on the top. Then if you also want, we can just go and create another strand with
color like that. So play around if you
want to if you want to go to this little part right
here onto the first strand, we can go and add a bit
of a shadow here too, just by creating some
kind of a line like that firstly and then either manually or just by looping
the shape around, dragon drop the color to the
rest of the area right here. When we have something
going in that way, let's also go and
continue creating a little strength right
here onto the bottom part. So firstly, let's just go if you created this additional
line right here, let's just go from
it a little bit higher and create a
little V shape like that. Close the shape,
dragon drop the color. Then if you have some
miss colored places, manually just go
and recolor them. Let's just go lttle
bit higher and create a bit of the
separation right here too. We can just go else
bit behind the ear and create some little
shape right here, or just go and create
something in that way. We can thicken this little part right here on the top and just go and continue creating little
strands with this color. You can just drag and drop
the color to these areas. You can try it out a couple of times if you like
the result or not. You also can go
and take a look at everything without the
lines of the sage. Check out whether you want to add this additional
elements or not. If you want, you can just go and clean up this overall shape
that you have right here, create some peculiar shapes, go to the bottom maybe and create a few more
on these elements. Just go and create something that you would like to see here. When you are done
with this task, make sure that the
strength look nice. If you need to go and maybe
adjust it in any way, you are welcome to go and grab
your eraser, for example, and make this part a
little bit more fluid, so a little bit
wider right here. Just again, take a look at
everything from the distance and decide whether you want
to adjust some parts or not. If you are satisfied
with everything here, let's just go and add a bit more colors to
some other areas. Firstly, let's just get back to our list and let's just get back to our lit
with the mean sheet that we have for our here, and we will create one
more leaf from here. Now, let's just go back to our brush library and this
time, the same ink folder, let's just go with syrup
brush, and when we have it, we will just go back
to our color palette and we will go with this
light orange color. With a light orange color, let's first go toward
the left side. We will go and start creating some peculiar
sheets right here. So mostly going toward the bottom part and adding
the second color right here. Let's just go and start
recoloring these elements. Creating something in that way and when we have the
result like that, we also can go to some of the areas right here on the top. For example, right here
where we have little cut right here and we can add
a bit of shadow right here. For example, we can go to this little part and add
a bit of shadow here. We can go to some other
places, for example, right here on the top and
add a bit of color here, follow the natural direction
that you have for the here and add a bit
of the shadows. Just go into these little parts. You also can go to
this little triangle and add nice shadow right here. If you want, you can just go to these little
parts that you just have created and create nice connections right
here on the bottom. Flow lines and note
the lines with the straight corners or something weird
looking right here. If you want, you all can go to the right part right here and start eating the similar
shape right here too. Actually, you don't need to go with a straight
line like that. You can go and maybe add
a bit more interest to this little
additional color just by going with little
parts like that. So when you have
something in that way, let's just go to the opposite
side and let's just go and start creating these
peculiar shapes here too. So just go on and creating this first shape onto
this little part and then moving on to the
next ones right here onto the opposite side and creating something
similar here, too. Let's just go a little bit lower and create the same thing here. And also, we can just go to these little additional
elements right here and put them in the shadow. Now let's just take
a look at what we have right here and decide whether we want to add more
additional peculiar shape. So for example, we can
go and edit right here. Firstly, let's just go and adjust just a little
bit just by going to this area that
we have created our additional parts
with a darker color, let just go and select
our eraser and we will go a little bit lower than our
little shape for the ear. We will start cutting
this part right here, just creating something natural with this little cut right here and just going down and creating the differently shaped
element right here. Again, take a look at
it from the distance, decide whether you
want to go with a different direction
maybe or something. When you have the outline, just adjust the
size of the element and continue erasing
this part right here, just to create a
differently colored element right here with this
different color. Try to make nice
connection right here, try to just go and create
something peculiar. If you overdid it
with the eraser, you are welcome to get
back to the brush. Select the color right here that we are using
onto this layer and just go and create nice
shadow with this color. Again, if you want to go to some other areas and maybe
refine some of the lines, you are welcome to
go and do that. You can go with the same brush that you are using
right now or you can just switch it to the familiar
brush that we used before. So just spend some time here, create nice elements right here, and when we hand the
results like that, let's just get back to our list. Let's just go above this layer where we've created
these additional parts, and let's create one
more layer here. Once this layer, we will
go to our color palette, select the next orange color
that we have right here, and we will go toward the
bottom parts firstly, and we will just step a bit from this first color
that we've added, and we will just go
and continue just adding the color right
here to these places. Just go to these two elements. If you want to add
more interest, you can just go and
maybe add some strengths of color with this
color. It's up to you. You can just go to the
corners and maybe create some peculiar shapes like
that to connect them nicely. Go to the tips, create
nice shapes here, go to the opposite
side and start creating these additional
color right here too. Recolor this part that
we've cut right now. And then let's just go
to this little part and we will recolor the
bottom part of its tip. Just go there and
the first curve, go to this opposite
side right here. You are welcome to go to the bottom part of
this little elements, create some distinction
right here between the shaves and maybe add a bit of color right
here to the bottom. You can go with peculiar
curves like that. You are welcome to try out something different
if you want to. When we have something
going in that way, let's also go to left side
right here and we will go and start creating the big shadow right
here over the top. You can just go firstly and
create the shadow going from here and just go with a big shape going
in that direction. Just try to make nice
connection right here and create it
going over the top. If you need to erase some parts, just go and erase them. When you are done
with this task, let's just go and maybe add a bit more interest
to the picture. Just by going again to our
main shape with our here, let's select the same color that we have right here
for our main color. Let's just go again, either
with this brush that we are using right now or
with a different brush, and let's just go and create this strand that we have
right here on our sketche. Let's just go with the
simple shape like that. Or if you don't like this brush, you are welcome to switch
it to something different. Just go in there and
add in some interest just by creating some
pculos trends of here. If you want, when you've
created this one, for example, to go maybe to the color that you have right
here as the color of the shadow and use the eraser and add some strands of here
right here as an interest, you are welcome to
go and do that, too. For example, we can just
go right here and add some little gaps like that or something going in that
way to add more interest. When we have the
result like that, let's just go and start
eating the highlights. Firstly, we will be just
going to our layers. We will create one
more layer on top. You can go on top of this layer with the here or on top of the layer that we have for our little part of
the green elements. Let's just drag this
layer a little bit higher if we use this
layer right here. So when we have this layer, let's just go to
our color palette and select the white color. With the same brush that we are using right now, syrup brush. Let's just go adjust it a
little bit the size wise, and we will just go
to this part first over the opposite side
from our shadows, and we will be just
going there and put in some little dots right here
to create some highlights. You can try out it with a different shape of the brush with a different
size of the brush. So you can try out
a couple of times, just create a few peculiar
shapes like that. And mostly you just
need to follow the direction of the shape that you have for the head
right here and for the hair. So we will just need to go and create something
on in that way. Again, try it out a couple of times to achieve some
peculiar result. When we have a couple
of these little parts, you are welcome to maybe
go and adjust them. If you want to
just a little bit. You are welcome to go and continue creating this
little line right here with the shape and with
the color of the highlights. You can just go and
erase it a little bit, have a little gap between the lines right here to
create something peculiar. And then when we have
something in that way, we are welcome to
go and maybe add a few little dots all over
the places right here, you can go either to the bottom And to other areas
and add a couple of these little highlights
with this white color. Just try not to overdo it, add just a couple of them. You also can go to this shape
that we have right here for our little leaves on the top and add a couple of
highlights here too. You are welcome to go maybe and create the different shape
right here for the highlight. You are welcome to go and try
out some peculiar shapes, for example, something in a triangular way or
something like that. So just create something in that way when you have
the result that you like, let's also go grab our
brush one more time, adjust the size of it, and we will go to this side
opposite from our shadow, and we will create a
big highlight here. Let's tap a bit from the overall shape that we
have right here for our head, and we will just go and
create the shape in that way. When we have the
result like that, let's just go toward
the bottom part right here and we will just
continue creating the shape, similar to what we have for
our mean shape of the hair. Then let's just go and continue creating a big
highlight right here, going to the top and creating
a triangular shape here. Let's just go and create
something in that way, and then we will close
up the shape and create some peculiar little curve
going down in that way. If you have some extra lines
that you need to erase, grab an eraser and erase the
parts that you don't need. If you over did it a little bit, you just need to go
and close the sheep, drag and drop the color inside. Make sure that you
like the shape, or if you want to go and
maybe adjust it in any way, you are welcome to
go and do that. Just try to make it nice and
try to make it triangular. If you are satisfied with it, we also can go to our list. Go to the icon on
dislay and adjust the apace just a little bit
to something around 80%. To create a nicer look for these highlights so
they are not that bright. Again, take a look at
everything from the distance, decide whether you maybe
still want to go and adjust the highlight right here to create a softer little
shape right here. You are welcome to
go and do that. Take a look at some other areas if you already did something
or if you see that maybe you just not
colored some parts or if you have some little shapes that you need to go and clean. Let's just go and do that. Let's just find the layer where we have these little parts. Probably let's start
with this layer where we have our main shape
over the here. Let's just go and erase some parts that are not
supposed to be here. Clean up the sheep if you have some little parts that
you need to clean up, if you see that you just
not recolored some places, you are welcome to
select the brush, select this main color
that you have right here and go to these areas
and recolor them too. If you want to go and
refine some other areas, maybe the tips, you are
welcome to work with them too. If you want to maybe
add more strengths of hair with the brush
or something like that, you are welcome to
go and do that, too. Just try to create something
very, very nice here. When you are done
with the main sheep, you are welcome to go and take
a look at everything where you didn't color some
parts or on the contrary, just overdid some parts. Let's just go find
the kded layers and go and recolor the parts
that we need to recolor. And when you are
done with this task, take a look at everything
from the distance, decide whether you want to
adjust some parts or not. If you are satisfied
with everything here, we are done with
our illustration. Thank you for
watching this class. Let review if you
liked it and consider subscribing for Mokai
videos in the future. Looking forward to
seeing your projects.
 Uni Corn, ⭐Kawaii Art Enthusiast⭐