Transcripts
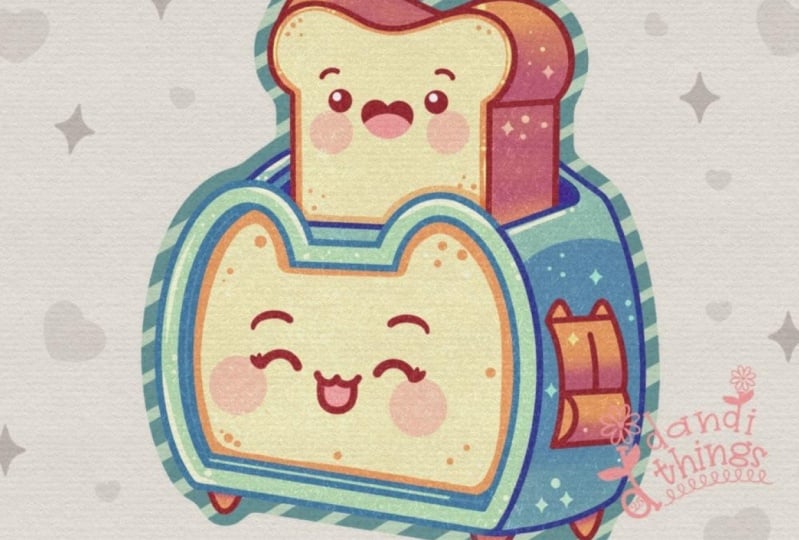
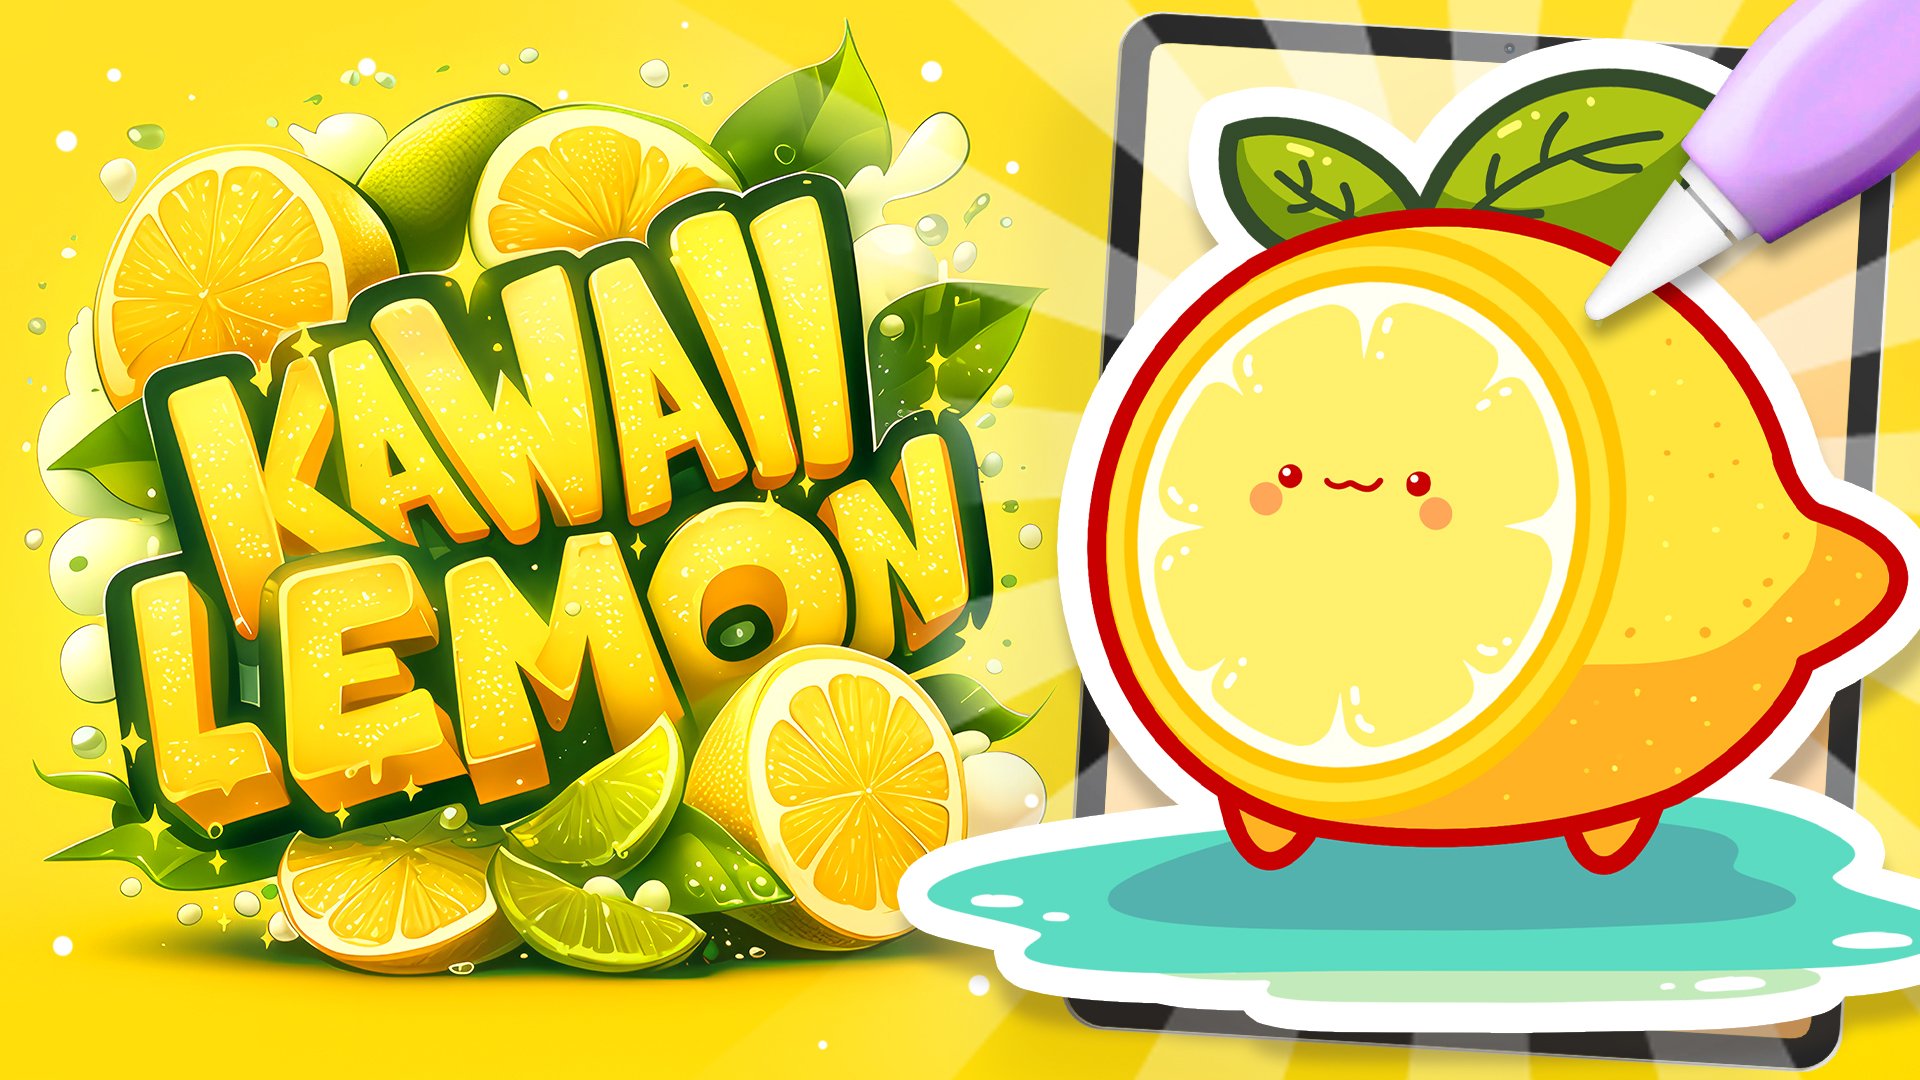
1. Introduction: Hello, everyone. I'm
Yuni, and in this class, we again draw this cute
Kawhi illustration of an adorable
toaster in procreate. During this class,
you'll get familiar with a lot of useful features
like quick Shape two, Gaussian blur, clipping masks, and blending mode, and learn the basics of drawing
in procreate. By the end, you'll not only draw an adorable illustration
you'll be proud of, but also feel super
confident using procreate. And now let's spend
some time drawing.
2. Toaster Sketch: Begin by deciding what kind of canvas we are going to be using. Today we're using a standard square canvas from Procrite with pixel weed and Pixel
heights at the 2048 pixels. Our DPI are at 300 and color profile is at a SRGB
with this loan number. When it's all done,
let's hit done. Let's get to our Nick
Canvas, and firstly, let's go under the
project and to stop and download all the materials
mentioned for this class. When you did it, let's begin
working on our sketch. Firstly, let's go to our color palette
that we downloaded. We'll go on the color
palette right here and the cards on the top
to see the colors names, and let's pick
some darkish color that will be suitable
for this sketch. For example, dark blue. With this color selected, let's go to our brush library. We'll go to the sketching folder and you can pick any brush from here that is working for you
for the sketching parts. For example, six B Pencil. When we are done with it,
let's do one more thing, so it will be easier for
us to create our sketch. We'll go to the ring
icon over the top left. We'll go on the Canvas and we
will toggle drawing guide. We'll be using these cells
that we have right here and when we have the cells
created onto our canvas, let's begin working on some basic shapes that we will create for
our illustration. Firstly, let's go and
create a little box. We will define the shape and the size by going to the cells
that we have right here, for example, let's go and create a line going
down in that way. When we have it, we will go
to the opposite side and we will find the same
placement right here and it is very convenient for us to
have the cells so we can go and count the amount of cells that we need
to use right here. For example, creating
something in that way, and then we will go
toward the bottom. Again, we will go and create the line that will be
horizontal right here and it will be positioned on the same level that we have for the lines
that we have outside. When we have the
result like that, let's go and work
a little bit more on it and turn it into a tosser. Firstly, going toward the right, and we will need to have a
bit of the volume right here. So let's go and count
to, for example, the same distance
that we have outside to the volume part right
here for our toaster. Now, when we have the
results like that, let's create a bit of a
perspective right here, and we will go towards this little intersection
that we've created, and we will go a bit higher
and create a line going to the right first like that until we do the same
onto the opposite side. Let's position it
on the same level, so we are creating another
line going in that way. Now when we have the
result like that, we don't need it to be
perfect or anything. We are mapping out what
part going to be creating. And if we need to
adjust something, we can grab our eraser and erase the lines
that we don't need. For example, let's select
our round brush for the eraser and go toward these lines that we
have on the bottom, and we will get rid of them. Now, when we have the
result like that, let's elongate the
lines slightly so we will have more space
for our illustration and we will go
over the left side first and we will create another line that
will go towards the middle part right here. Again, with our line, we are creating
something in that way. Parallel to what we have
on our bottom part, but maybe a little bit
more open right here. If you need to create
it in a messy way, you are welcome to create as many lines as you
need right here. When we have the
results like that, let's go toward
the opposite side and create something
similar here too. Again, creating a line
that will be quite parallel to what we have right
here once at the bottom, maybe a little bit less open or a ittle bit more
open. It's up to you. We can fix everything
later on if we need to. When we have the
result like that, let's go towards the back part and we will create
the lines here too. Very easily creating
something in that way. Now when we have
the box like that, let's turn it into
a more cute shape. What we're going to be doing is going towards the sides firstly, and we will turn them into the rounded parts right here instead of these
various straight lines. So let's go firstly
toward this part and we will create
a curve right here, and we will go to
the bottom and we will soften this corner
on the bottom too. Let's create a couple
of lines right here and create
something in that way. You can grab the
eraser and erase everything that
you don't need so you are not confused later on. Now, let's go to where this
landed we have right here. And again, we will turn it into a slightly curved
element right here. So creating something on in that way with a couple of lines, creating something like that. And when we have
it, we will go to the opposite side and create
something similar here too. Trying to create a
very soft curve, and we are connecting it
with the bottom part here too and trying to create
something like that. So when we have the
result like that, let's go to where
the top and we will create a little peculiar
detail right here. So firstly, let's go slightly lower than the
middle part right here, the line that we have
right here and create another parallel line to
what we have on the top. When we have it, let's turn these areas that we have on
the sides inside the ears. So we will go with
half of the circles or half of the ellipses and create something
on in that way. And, of course, we
are connecting it with our lines that
we have on the sides. So let's try to make it in a nice way and create
something on in that way. Again, if you want
to erase some parts, erase the lines that
you don't need, grab your eraser, and erase everything
that you don't need. Let's go through all of
these lines that we have right here and get rid of all the lines
that we don't need. Now when we have the
result like that, let's continue by going toward the back part right
here and we will continue creating
this rounded sheet. Then we will go towards the bottom part and
let's finish up with creating the overall shape of our toser by adding some
cute little legs right here. Let's go slightly from
the edge that we have right here from the side and we will create a
little leg like that. Then we'll go toward
this intersection on the bottom and create another
little leg right here. Can go a little bit bigger
with the shape onto this side. Now when we have it,
we will go toward the opposite side and we will again step a bit from the edge, and we will create another
little lack right here. If you need to adjust
something, go and adjust it. If you want to go with
different shape for the lags, you are, of course,
welcome to go and do that. I will soften up this
corner right here to create a rounder sheep and then we will go and continue
edging the details. So firstly, let's go inside the shape that we
have right here, and we will go slightly from the edges that we have right here and we will
repeat the shape. So we will have some kind of the shep that will be in depth. So let's go and very
easily recreate these elements the same way
as we have them outside. So going with our lines, again, we don't need
everything to be perfect. We are mapping out what we
have to create right here. So let's go very easily and create something
going in that way. Now, as for the bottom, let's add a bit of
thickness here too, so we will create
another line right here, so creating something parallel to the line that we
have on the bottom. And again, to make the
depth effect right here, we will go toward
the left side and we will add a bit of the
volume right here too by repeating
the line right here and moving it a little bit
more towards the right. Now when we have the
results like that, we also can connect it right
here with a little curve, and when we have it, let's
go and work on this part. As we are creating a toe serve, let's go and create
this little Thingi that is moving the toes down. Let's go toward the middle
part and we will first go and create two parallel curves to what we have on
the outside part. We are creating
something like that, and we are creating
parallel lines right here on the bottom
and on the top too. If you want to add
some interest, you are welcome to create maybe some little
ears right here or any other design elements. When you are done with
the overall shape, let's create a little
handle right here. So for the handle, let's first go slightly higher
and create, again, a parallel line to what we have on the bottom
and on the top, and then we will move
this line slightly toward the outside part and then we'll create a rounded
shape like that. Now when we have it, we
will need to go toward the opposite side
and we will need to recreate the same
thing right here, and that way we
will have a little protrudon little thinger
right here, a little handle. If you want to erase this part to see clearly what you did, you are welcome to
go and erase it. When you have it, let's
get back to our brush, and we will go toward the
middle part and we will again create another parallel curve to what we have on the side. Now, when we have the
result like that, let's go towards
the middle part, and let's finish up
with our toaster by adding some little
facial vitros. Firstly, we will go toward
the middle and we will create a cross like that
that will be parallel. Line wise to the sides part
that we have right here. Creating the langon in that
way that will be quite parle. Mine is not very parallel,
creating it one more time. When we have it, let's go
toward the middle part, and from the middle,
we will go to the side and we will
create the ice like that. So creating half of the
circles on both sides, creating them in that way. If you want to add some
details in the shape of the little eyelashes
or something, you are welcome to
go and do that. If you want to add little
eyebrows on the top, again, go and do what you
need to do right here. When you are done, let's
work on at the mouth. So we will go to
this line that we've created for our bottom
part with the eyes, and let's go and create firstly the kitty
mouth like that. The part on the right will
be slightly bigger than the part on the left because we have some kind of
the perspective, a very tiny perspective
right here. And then we'll go on the bottom and create an open
mouth like that. When we have it, let's
also go and figure out where we want to
position the checks. So for example, let's go with big shapes for the checks
and create them in that way. So map out the placement
for these elements, and when we are done
with this toaster, let's go and work on our toast.
3. Toast Sketch: Firstly, for the toast, let's go toward the right part. Firstly, we will step a bit from this line that we
have right here and we will create another
parallel line on top. Now, when we have it, we will make a little rounded
shape right here. So we are creating
this little container where you are putting
a little toast. And when you have it,
we will go toward the opposite side and we will
do something similar here. So if you need to
define this line a little bit more onto
the side, define it, and then let's step a bit from the edge
that we've created, and we will create another
parallel line right here. And then one more underneath
to add some thickness. You will need to go
with the thickness that you have right here
onto the left side too. Now when we have the
result like that, let's work on our toast. Firstly, going towards
this inner part and we will go with two
lines going in that way. When we have the
first line like that, let's go toward
the opposite side and let's create
something similar here. Stepping a bit from this
shape of the ear that we've created and creating a little line going
up in that way. To work on the thickness, let's go and add a bit of line
right here on the side too and creating it in a
parallel way to what we have on the opposite side. When we have the
result like that, let's go towards the
right part firstly, and we will create
another little line that will be parallel to what we have right here onto the bottom. If you want, we also can go
right here onto the top and create another guiding
line that will help us to build
up the top part. It's not necessary, but it
will help us a little bit. When we have it,
that's the base for our toast and we will go and work onto the
top part right now. What we need to do is to go to the sides that
we have right here, and we will start to create the rounded shape that will be parallel to one
another on this part. So when we have the
result like that, let's go towards the
last corner that we have right here and create another
little line like that. Now when we have the
result like that, let's go and continue
working onto the top part. Firstly, we will go and again, create another parallel line to what we have on the bottom. We will position it in a center, and then we will connect it with the lines that
we have on the side. You can go and turn this line
that you've created into a little curve and then connect it with the
opposite side here too. Try to make these band shapes quite similar to one
another on those sides. When you have the
result like that, let's go and add some
volume to this part. Firstly, we will go
toward this line that we have onto our
right and we will go a little bit closer to the edge that we have
right here onto the left. So find the center of this band right here
and go a little bit to the left and we will go and create a curve
going like that. Now when we have this curve, we will go toward
the opposite side. We will go and find the
center of this rounded shap, and we will need to
create a line, again, that will be parallel to this line that we
have right here. Let's go and create
the Langon like that, and when we have
it, we will need to repeat the shape that
we have right here. So let's go and try to do that. Connected with the sheet
that you have on your right, try to make it rounded,
try to make it nice. Take a look at everything
from the distance if you want to maybe work a little bit more on side the oral sheep, you are welcome to
go and do that. Erase all the lines
that you don't need. Take a look at everything
from the distance, decide whether you
like it or not, whether you want to go
and maybe adjust parts, go and do what you need to do. Let's grab our eraser and let's erase every line
that we don't need. So all the guiding lines and all the building up lines
that we don't need. Very carefully go like that and starting to erase
everything that we don't need. Now when we have the
result like that, let's get back to our brush, and let's go again
to our tot here, and we again will work
once our facial features. So let's go again and create
the line in the center, the little cross that will
be parallel to the lines that we have on the
bottom end on the side. And when we have this cross, let's go and create
the facial features. For example, this time, let's go and start with a little mouth. We will create the shape
of the heart like that. And when we have the
shape of the heart, we will go towards the side and we will create little
dots for the eyes. You can play around with the position of these elements
and with their sides, try to make them similar size
wise to one another and try to make the distance between the mouth and the eyes
even on both sides. If you need to create
something else, for example, little eyebrows, you are welcome to
go and do that. And when we are done with it, let's also go underneath the eyes and we will
create the cheeks. Now when we have the
result like that, let's take a look at everything. Let's also go and get rid
of these cells that we have right here by going to
our AEO key on the top left. We go again under Canvas and we will toggle drawing
guide right here. Now, take a look at everything, decide whether you want to go and maybe adjust some parts, and let's go and adjust it by going along the lines and
maybe adjusting some parts. We also can go and
make sure that we are right at the center
with our illustration. What we need to do is
to go to our Aoki on the top plat and we will
go under Union for method. We also will go under snapping and turn on snapping
into the settings, and then we will get
back to our canvas. We will hold our Apple
pencil and we will be looking for these
two orange lines. One vertical and one horizontal. When you found these two lines, you will know that you're
right at the center, and when you are
right at the center, let's go away from this mod
by tapping again on our Aoki. And now we have this sketch. So if you want to maybe add some details in the shape of
the sparkles or something, go outside the shapes and add a couple of details
right here that later on you will recreate to finish
up with our illustration. For example, let's go
with something like that. Let's add a couple
of little sparkles, little dots and everything, and we will finish up by creating a little
shadow on the bottom. For this shadow, let's go to the lex right
here and we will continue creating the line that will go through
the shape of the lex. So we are again
creating a parallel, little line right here. As for the bottom
part, let's go a little bit higher than
the leg right here, and we will again create
another parallel line. Now, when we have it, we
will continue creating the shape by creating a little
curve going in that way. And now when we have the
result like that, again, decide whether you
want to adjust some parts if you are
okay with everything. Let's move on to our next part. We we'll create the clean lines.
4. Clean Lines: Swing ta are clean lines
firstly by going to our layers, and we'll go to the icon ta this layer and
adjust the opacity. We are grabbing our slider with opacity and we are moving toward the left until we like how it looks until we can see
what's happening here, but when it's not that bright. When we are done with it,
let's tap ta the layer, and let's create
one more layer on. Now let's go again to our
brush library and you download the brush that you can find in the
project and rush stuff. This is the brush with the
title Double MonanTiker brush, and we will set the
size of it to 25%, and we will use the same color that we used for our sketch. We will start recreating
what we have for our toaster front part and
we will use this brush. What we're going to be
doing is going towards the bottom first and we will create a line
going like that. Can see we're creating two lines at the same time
we are quite lazy. We don't want to go and recreate the details
a couple of times. Again, you can hold
your line at the end. You can go to the editing mode over the top and
you can adjust it. If you need to you can
move it. You can maybe find a different
rotation all this line. When you found the line
that works for you, let's tap on the screen and you can see while working
with this brush, we have the ends of
the line right here. It's a little bit inconvenient, but it will be easier
for us to go and continue creating the
lines on a separate layer, later on, we can erase these
connections very easily. Let's get back to our list. We'll create one more layer
on top and we will go toward the rest of the lines and we will continue
recreating them. So again, will need to pay attention to the
connections that we are creating with the previous line and with everything that we
are creating right here. Again, we can go to the
Editing two on the top. We can go and work with our
little elements right here, with our little
connection we can go towards the note right here
and play with them too, so you can go and maybe adjust
the curvature slightly. You don't need to
recreate everything with 100% of similarity to what
you have inside your sketch. If you want to adjust
something slightly or if you want to maybe do
something else right here, experiment a little bit, you are welcome to
go and do that too. For now, let's keep this
line in that way and let's continue by going to
the opposite side and recreating the
line right here too. You can rotate your
canvas very easily, and it will be easier for you to recreate these lines
because the flow of the hands is a little bit going in one so you can go and again, adjust everything with
the editing tool. You also will need
to pay attention to the sites right here and to the curvature that
you are creating. Of course, you will need
to pay attention to the shape that you have onto
the bottom and on the top, if you have something
weird happening like I have right
now, it's okay. We can go and try
out one more time. Maybe it will work
better next time. Let's connect it with
our previous shape, trying to make nice connections, trying to make this curve pretty similar to what
we have on the bottom. And while looking right
now onto this curve, we probably will need
to go and add a bit of the volume right
here onto the bottom, a little bit more rounded shape. When we have
something like that, when we are satisfied
with the shape, let's tap on the screen, and let's again go
toward our layers. We can go either
to the new layer or we can continue not by
creating the ears right here, but we can create this
little part that we have right here in the middle and we can do it on this layer. What we need to do is to again create a little line
like that, hold it, try to make it
parallel to everything that we have right
here onto our layers. And when we have the
result like that, now we will need to go
and create one more layer on top to finish
up with our ears. Let's go again the
same way as before, and we will create nice
connections between the ships. Again, if you need to
go to the 18 tool, you are welcome to
go and do that. Try to avoid creating weird
connections because later on, you will have more work to do. Go and recreate
everything nicely and try to create nice connections
between the parts. When you are done
with this task, let's tap on the screen, and let's start getting rid
of all of these joint parts. So what we're going to be doing? We will be going
toward our layers, and we will be going toward the icon of the layers
that we've created, and we will be
adjusting the opacie. That way, you will know what
you need to go and erase. So when you reduce the opacity, let's get back to a and
we will go to all of these additional elements
that we don't need and we will go and very
easily get rid of them. Again, we are trying to
make nice connections. We are trying to remain the same line weight to every line that
we have right here. If you need to go
with your eraser and erase the parts
that you don't need, you will go and erase
the parts that you don't need to create the lines
that will look nice. So now let's go and erase every little detail
that we don't need and when we did
it onto this layer, let's go back to our layers. We will again get
back our full opacity and we will go to
our next layer. We will again reduce
the opacity right here, and again, we will
do the same thing. We will go alone these additional details
that we don't need. We will go with our
eraser and erase them. When we are done
with this layer, let's get back again
to our layers, Let's get back our
full opacity and let's go to our last layer where we have these connections, reducing the opacity, going to these little parts
that we need to get rid of and
getting rid of them, going toward the
opposite side when we already erasing these
parts here too. Now when we are done
with it, one more time, go into our list and getting
back our full opacity, taking a look at
everything, whether we need to adjust
some parts or not. If everything looks fine, let's get back to our
list and we will merge these three layers together
where we have our lines. We will put one of our
fingers on the layer on the top and another on
the layer on the bottom. Make sure that you
are connecting and merging only the layers where you have the lines without the layer with your sketch. Making a pinch movement like
that when you are ready, make sure that you
have everything on one. And on one layer. And when you have the
results like that, let's get back to our new brush that we will work on the
other elements right here. We are not going
to be using this double manline thicker brush. We will get back to
the calligraphy folder until we choose moon line brush. Also can go and
adjust it slightly so our lines look smoother. We can tap onto the brush, we can go inside
the brush studio. On the left, we can go
under stabilization and play with the amount
of streamline and amount of stabilization. You can send the settings the same way as
you see them right now onto your screen or you
can play with these options. You can try it out
onto a draw pad. If it feels good for you, you are welcome to it down or play around and find
what feels good. When we are done, let's continue by selecting the size
of the brush of 4%, so it will be similar to the size that we use
right here on the front. Let's continue by going and
recreating other elements. Firstly, let's go and maybe
deal with the tosert here. We will again go toward the top. We will create the lines
the same way as we have them onto our sketch or
if you want to experiment, go and experiment, of course. Let's continue by going
toward the bottom part, trying to make a parallel
line right here on this side, and then we will need to create another little thickness
line right here too. Now when we have
it, let's go and continue by recreating
the line right here. Going like that and
creating a straight line, you can hold your line in
the end to make it straight. If you want straightaway, we can go and work on
the toes right here, creating a straight line
like that and to make sure that you are creating
a super straight line. We can hold our line
first and then use one of our fingers and put
it onto our screen. That way you will create a straightly looking vertical line or if you're creating a
horizontal line, that will work. So now when we have
the result like that, if you have some gaps
into your lines, we will need to go and add
the color right here so we don't need to have any gaps into our clean lines
because later on, it will be a little
bit hard for us to add the colors if
we have the gaps. Now when we have
it, let's go and continue recreating
the lines right here. We will go toward this
little part right here, create a line that will be the continuation of
this line right here, and then we will create a
little hook onto the right. Connect it with the line nicely. So again, trying to make a nice connection if
you need to go to the editing go and use
the editing mode. And when we have it, let's go and work on these little parts. Again, creating a
straight line going down, holding one of our
fingers onto the screen, and creating another
straight line right here on the other side. Again, if you need to add something into the
gap right here, the color right here,
go and do that. When we have the
result like that, let's go and recreate the
part that we have ta right. We can go right here toward this line and create
it in that way, then we can go and connect it nicely with the little
shape right here, creating a lingon like that. Again, try not to make
any gaps into your lines, try to make everything super
nice and super smooth. If you want to maybe try out to create a little
curf red here, you are welcome to
go and do that and then create a
continuation red here. So you can see that creating the straight lines is not a super linear thing right here. We can go back and
forth to some of the elements and maybe
recreate some of them if we take a
look at them from the distance and maybe we
don't like some of them. For example, I
probably would want to go and adjust this little
line onto the top, but I will think about
it a little bit more. When we have the result
like that on the bottom, let's continue by going
toward this little part, let's try not to
make it too curvy, so we can go and create
something going like that, maybe a little bit rounder
but not too rounded. When we have the
result like that, let's go and create
the parallel curve to what we have on the left, and we will create something
going in that way. Again, you can hold
your line and the ends, try to make a nice
connection with the overall shape that you
have the previous line, erase everything with your
eraser if you need to, and when we have the
results like that, let's continue by recreating this little line that
we have in the back. So again, trying to create
a very rounded shape. If we need to work onto
the weight of the lens, we will go with
our eraser and we will adjust everything
that we need to adjust. Now, when we have the
result like that, let's take a look at
everything that we have right here
and let's work ons this thickness part that we
have inside the cat's face. So we will go a little
bit higher than this last line that
we have right here and create another
parallel line. So creating something
in that way, going quite to the
edge right here, but not to the edge, we will have a little
gap right here that we will connect with
our previous line. So trying to create a rounded
shape right here, too. When we have it,
we will go toward the opposite side
and we will try to recreate the same curve that we have right
here once at the top. So again, hold your
line at the end, maybe you will need
to have a couple of attempts into
mastering this line. When you are done with it, let's tap on the screen. Let's go and connect it
nicely with the top by creating something
similar to what we've created on
the bottom right. Again, trying to create
a nice curve right here. When we have it, let's
take a look at it. If you see that some lines
need your attention, you are welcome to
go to your eraser, go and erase every little
part that you don't need. When we have the
result like that, we have the thickness for our
parts and when we have it, let's go toward this
little handle fingi and we will recreate it. Let's go again with
two lines like that. We will try to create them in a parallel way to
what we have outside. So let's go and create
it in that way. Trying out one more time. If it's snap into
a straight line, you can try to lift up your Apple pencil and you can try to go right here
at the 18 mode. You might be lucky
and you might have the option arc right here,
so you can go and use it. If you don't have this option, you are welcome to try to create this curve one more time. When we have the
result like that, let's go toward this
little line and create a parallel curve
to what we have outside. Again, we will try
our lock by going to the Editing tool and we
will use the option arc. If we have it, if
we don't have it, we will go and recreate the
line one more time manually. Now when we have this curve, let's go tap on the screen
to accept the changes, and let's go and recreate this little part that
we have on the bottom. If we have some extra elements
go with our erasa and erasing everything that we don't need and do the same on the top. Let's go and create a line
that will go in that way. We can try to achieve the same line that
we have right here, so we don't need to
recreate it one more time. So we can a little bit cheat or something and create
something in that way. When we have the
result like that, when this line is
parallel to the top one, let's go and recreate
this handle thing. Again, we are starting by recreating this
thing right here. Let's create a rounder ship. Let's go and create a line that will go a little
bit outside the ship. Again, if we need to try
it out one more time, we will go and do that
slightly outside and then creating the similar
thing that we have right here. Try to make this line
parallel to the first one. If you have some elements
that you need to erase and you will probably have some elements that
you need to erase, let's go and erase them. Go on like that, trying to
make the lines very nice and very smooth and we are trying to make
nice connections. If we overdid it, we
will grab a brush and we will add to the
part that we erase. Let's go with our eraser
to this middle part and we will try to nicely erase
this line that we don't need. Now when we have
the handle done, let's get back to a brush, and let's create this line
right here in the middle. Again, if we need a
couple of attempts, we will go and do what we
need to do right here. Try lack to have the
arc option on the top. If we have it, we will use it. If we don't have it,
we will not use it. We will go and do it
manually one more time. Let's go toward the
top and maybe recreate these little ears if
you feel like it. When you are done with it, let's go and recreate the leg. So we will finish up
with our toaster. So let's go like that and create the little
leg right here. We're stepping a
bit from the side, and we are going toward this
part and recreating it too. Try to position the
legs on one level and try not to create
them in a weird way. For example, let's go
with something like that, and let's finish up by creating this leg that we have
right here on our left. Now when we have the
result like that, let's go toward the top and
let's deal with our toos. Firstly, we will go toward this line that we
have right here, and we will try
to make this line parallel to what we
have on the bottom. So again, starting to create a straight line,
holding it in the end. If we have some
extra lines or gaps, we will go and work on them with our brush and with our eraser. Get rid of everything
that you don't need and add to the parts that you
overdid a little bit. When you are done with it, let's go and start recreating
the top part of our toast. So firstly, let's go toward the outside part and let's recreate this thing right here, holding line and the end, creating a very rounded chip. If we need to adjust
the curvature of it, we are going to our
editing tool on the top and starting to
recreate this thing. One more time, you don't need to recreate everything with
100% of similarity. If you want to adjust
something, go and adjust it. Try a different things
if you want to. When you are done
with the first thing right here for the ban, go and create a
parallel curve to what you have on the right parts. So try try to match it with the thing
that you have right here. And when you are done with
it when it looks nice, let's go and tap on the screen and let's finish up
the shape on the top. We are creating a
line in that way. Again, trying to
make a smooth line, trying to make a nice
connection so we don't need to work on it
with our eraser. When we have the
thing like that, let's go and continue working on the band onto
the opposite side. What we need to do is to
position this little shape, the band that we
have right here on the same level that
we have on right. You can go and mentally make a line like that and probably we will need to start
a little bit lower than right now we have
the end of the line. Let's go and erase the
part that we don't need. And then we will go from this little dot that we've created, and we will try to create a similar shape to
what we have outside. So again, holding our
line and the end, trying to go to
our eating mode to adjust the overall
shape if we need to. So we will probably
need to go and create something slightly
longer on the top, and we will need to match
it with the previous size. So let's go and create
something like that. When we have the
result like that, let's tap on the screen
and let's continue by going and recreating the line that we have right
here in the middle. Again, you don't need to
recreate it with one line. You can go partially and
create it in that way. Try to make nice connections, try to have smooth line, and when you have it, go toward the gap that you have right here and recreate it here too. Now, when we have
the line like that, take a look at it from the
distance or on the contrary, close up and create the things that you need
to adjust right here. So go and erase
the parts or work on the parts that you
need to add to this part. When you are done, let's go
and finish up with this part. So go onto the top, starting to figure out
where the center is and starting to create a line going to the opposite
side like that. When we have it, we will need to kind of remain the thickness
that we have right here. So if you want, we can
go slightly more toward the inside part right here and create the similar line
to what we have right here. So let's first try to
create the line right here, and we will need to nicely
connect it with our shape, and we will need
to not go toward this intersection
that we have right here where we have two lines. We will need to go a little bit lower or a little bit
higher than this thing, so we are not creating the tension between the lines right here and the
viewpoint right here. Let's try to create
this perl curve firstly like that and we will connect
it with our first line, and then we will go and try to create a line going
toward this little part. If we feel that maybe we
can go a little bit lower, we will try to go and do that. You can see we can experiment a little bit even when we are creating the straight lines. For example, let's
go like that and we will get rid of this extra
line that we don't need. Now take a look
at everything and decide whether you want
to adjust something, make sure that you
don't have any gaps into your lines and when
you are done with it, let's go and work on the
artificial features. We will use the same brush, the same color for now and
we will go and firstly, with the same size of the brush, we will go and recreate
our little eyebrows. Let's go again to all of these
little parts where we have our eyebrows and let's recreate them on both
of our elements. So going like that,
recreating our ships, if you want to play
around with them, you are welcome to choose
any shape that you prefer. When you are down with it with the same size of the brush, let's go toward
this mouth that we have right here and let's
recreate it here too. So we can hold our lines. We can go to the 18 tool if
we need to adjust something. Again, trying to make the mouth a little bit in the perspective. So our ship on the left will be slightly smaller
than the ship on the right, but not too much smaller. When we have it, let's go toward the bottom part and create
this open shape like that. Honda line at the end, adjust it if you need
to go to the 18 mode, make it more open or less open, make it rounder, make it more
elliptical, it's up to you. Take a look at it
from the distance, decide whether you
like the position, the overall position of it. For example, you can go
and maybe position it a little bit more straight
on the vertical axis. When we have the
result like that, you also can move
it, for example. When you add down with it,
let's tap on the screen, and let's go and recreate
the rest of the details. So firstly, let's go toward the size slider and let's adjust the
thickness of the line. So for example, 9% we will use for these eyes that
we have on the bottom. Let's go and recreate the elements that
we have right here. So with one line, again,
holding it in the end, we will go and recreate
it on both sides, trying to match the
things on both sides. So if you see that you
overdid it a little bit, if you went a little bit beyond the size that you have
on the opposite side, you're welcome to go and adjust it through
your editing mode. When we have the
result like that, let's go and add our little
eyelashes right here. So very easily with
one line like that, let's go and create
these little details. Now when we have the result
like that on at the top, let's go towards
the top top part and we will recreate
the ice right here. So you can either go with a bigger size of the brush
and put the dots like that. You can try out a
couple of times. Maybe this size is a
little bit too small. We can go and try
it out a couple of times to find what
we are looking for. So for example, this
ice looks fine. We can go with even
bigger size of the brush, and we will go and recreate the mouth that we
have right here. So probably the size of 40, 45% will work
perfectly right here. And what we need
to do is to create a V shape like that and
hold it at the end. When we have it, we can go
to this option on the top. We can use either a
triangle or an arc option. Decide on your own
whether you want to the rounded shape onto the bottom or more
triangular shape. You can adjust the
curvature of it. You can adjust the size of it. If you need to, you can adjust the openness of it.
It's up to you. You can go full crazy right
here. It's again up to you. Hold your Apple pencil
and move the shape more toward the center when you are satisfied with the
overall shape. Take a look at it
from the distance to decide whether you
like it or not. If you are satisfied
with everything, tap on the screen to
accept the changes. And let's go and take a look at everything without our
lines of the sketch. We are going back to our
last and we are hiding our layer by tapping onto this checkmark onto
our previous layer. Now, take a look at everything. If you are satisfied
with your lines, make sure that everything is closed and you don't have
any gaps into your lines. When it is done, let's move on to our next part where we'll add our colors.
5. Base Colors: Begin our coloring part
firstly by going to the background
color layer and we will go to our color palette
that you downloaded. We will go and select the
background color from here. Now, when we've changed the
color of our background, let's get back to our
layers and we'll go to this layer where we
have all of our lines, we tap onto this layer and we will use the
option reference. Now, when we have this
option turned on, we will go on the layer on the bottom and we will create
a new layer from here. Now, when we have
this new layer, we will add the color
onto this layer using the lines that we
have on the separate layer. That's how reference works. We will go back to
our color palette, and let's start by selecting
the toaster base color. With this color, we will go and recolor these elements
onto the right. We can go and use the continued
elements onto the top, the option right
here, or we can go and manually recolor
everything like that. Let's go and add the color to all of these little details. And when we have the
result like that, let's tap onto the
check mark if you use the continue filling option, and we will go and
select another color. Goo ward our color
palette and we will use the color
with inner shadow, and we will add this
inner shadow color right here toward
the inside parts. Now when we are done with it, let's get back to our layers and we will create one
more layer on top. Onto this layer, we will get
back to our color palette, and we will select this
tosser front color. We will recolor these thing that we have for our front part. So we also will
need to go toward this little part right here and add the color
right here too. To make sure that you've
recolored everything, we have quite similar colors to what we have to
our background. So we can go to our list and see clearly
what we are doing. We can go and hide a background color layer to see whether we've recolored
everything that we need. If everything is recolord, let's get back our
background color layer, and let's create one
more layer on top. Onto this layer, we
will go again to our color palette and we will select the face front color. Let's add the color right
here to this little part. Also you can add it toward
the little mouth right here, and we will recolor the
front part of the toast too. Now when we have the
result like that, let's again, go
back to our layers. Let's create one more layer. We will change the
color to crust. And with this color, we will go and recolor the
crust right here. So let's go like that and
recolor these elements, and then we will go and recolor this little handle
part here too. So let's go like that, recolor everything that we have. So either use the
continued filling option or manually add the color. And we also with
this color recolor these little legs that
we have on the bottom. Now when the result like that we have when we have
the result like that, let's go toward our
layers and let's go and turn off reference
right here from our layer. Let's tap on the
layer with our lines and use the option reference from the last to turn it off. Then we also can go toward
this layer where we have our basic shape
for the front. We will create one
more layer here and we will use the color with the title pinks and we will recolor manually what we
have inside the mouth. With a smaller
size of the brush, you can go and recolor this
little thing right here. Now when we have the
result like that, we also straightaway can
go and add the checks. If you need to see where you've put them
onto your sketch, you can get back to your layers, grab your layer with the
sketch and hold it and drag it above everything
that you have and hide it, you will see what
you have right here. Let's get back to
this layer where we have our little tank element. We'll create one more layer
on the top of it and with the same color that
we are using right now with the bigger
size of the brush, let's go and put the
dots for our cheeks. Right here to the toaster, let's go like that and put very big little
checks right here. And when we have it, we are
trying to put them on one. So if you need, again,
a couple of atoms, you are welcome to go and have
as many atoms as you need. And for the toast,
we will go with slightly smaller
size for our checks, and we will go and put
the dots here too. When we have the
result like that, let's get back to our layers. Let's hide our layer with
this sketch and let's go to this layer where we have the checks where we've put them. We'll tap onto the N icon, and we'll reduce the
opacity slightly, so it will be very nicely
looking checks right here. When we have the
result like that, let's tap onto this
layer to close it and let's go and
add some details. Firstly, we will go
towards this layer where we have these little
elements, the front parts. We'll create one
more layer on top. We will tap onto this layer and we will use the
option clipping mask. That will be able to
stay inside the sheep. Now, changing the color
to crust one more time, and with the bigger
size of the brush, we will go toward the edges that we have right
here and we will be adding the additional
little details right here, very easily. Let's go toward these parts and let's add a bit of
the crust right here. We are just repeating the lines that we
have for our lines, and we are going along all of these elements and starting to create these
additional elements. Very easily and very quickly,
let's go and do that. When you are done
with the bottom part, let's go toward the top part where we have the actual toast, and we will do the
same thing here. Going toward the
edges and starting to add this crust element
right here too. Do the same way as before, work with your brush,
work with your eraser, if you need to adjust something, go along the edge and create
these additional elements. When we are done with it, let's get back to brush. Let's adjust the size
over to something small, and let's go and add
a few details towards the inside part of the toast and also to the little part that we have right
here on our toasters. You can go with some dots. So we occur in some kind
of bubbles right here. You can go and make them bigger. You can make them
small. It's up to you. Go toward this little
part here and add some texture elements onto the front part of
our toaster, too. So try not to overdo it when
you are done with this task. Let's go and work
Ota the shadows.
6. Shadows & Highlights: For the shadows, firstly, let's get back to our layers, and let's go and work on our shadow right
here onto the toast. We will create one more layer on top of this layer
that we were on. We will tap onto this lay and we will use the
option clipping mask. Now, tap onto the
icon on this layer and let's adjust the
blending mode to multiply. Let's set the opacity to
something around 50%, and by using the same color, we will go toward the
bottom part where we have our toast and we will go and create a little
shadow right here. You can go and repeat the
shape that you have for this front part of the toaster and create a nice
little shadow like that. When we have the
result like that, let's continue with our shadows, but we will go and do
it on a separate list. We are continuing adding
shadows on our toast. Let's get back to our list and create one more layer on top. We will tap on it and use
the option clipping mask. Now, go toward our
color palette and we will use the toast
shadow color right here. With the bigger
size of the brush, we will go towards
the edge right here. We are not on the layer
where we need to be, so we will need to go to
the layers one more time, and we'll grab this layer that we've created
and we will actually need to put it toward this
little element that we have. So it's very easy. We have this layer selected. We have it. We will grab it and drag it above the layer that
we have for the toast, and one more time,
we'll tap on it and use the option
clipping mask. Now, with a bigger
size of the brush, let's go towards this side, and let's recolor the whole area that we have right
here on the right. As for the top part, let's change the size of
the brush slightly, and we will go toward the top, and we will create a peculiar
little shadow like that. Continue ding the
shadow to the bottom, so go on like that and manual adding the
shadow to this part. Try to avoid creating some
dots or something like that. And when we have the
results like that, we also need to go toward this part and add
the shadow here too. Let's start by creating some peculiar little
shadow like that and continue edging it right here
towards the middle part. If you want, you can go and make a nicer connection right here. So also right here too. When we have the
result like that, let's go and work
a little bit onto this part by reducing
some opacity. What we're going to be
doing is going into our erasa and we will set the medium blend brush from the air brush and
folder to our erasa. When we did it, we will set
the opacity over to something around 25% or so with the
bigger size of the brush. We will go towards the
top right here and very, very softly, we
will start to erase some of the apased here. If the 25% of
opacity is too much, you can go even lower
with the value to create a nicer reducing
opatert here too. We also can go toward the bottom part and reduce
a bit of opacity here and a bit of apace it here onto the top to create a nice
transition between the colors. Now when we have it, we
also can go right here to this part and adjust
the opacity here too. So we're creating a very smooth transition
between the colors, and when we have the
result like that, let's again get back
to our brush and do the same with the handle
that we have right here. Firstly, let's go with the
bigger size of the brush. Let's create the shadow gone,
for example, like that. And we also will go toward the bottom part of our handle and create
a shadow go in that. Don't need a shadow right here, so we can erase it with the normal eraser
that we used before, or for now, you can go with the eraser that you
picked right now. It is our medium blend brush. We can go and reduce
the opacity and make nice transition
between the colors, and then we can erase
everything that we don't need later on with a normal
brush for our eraser. Start to create a nice
transition between the colors. Let's go toward this little part and create something
in that way too. Let's go and try to
reduce some opacity of this element and make
a nice transition between the shadow
and the light part. Now when we have the
result like that, let's get back to
our normal eraser. So I was using the round brush from the
painting for our eraser. Let's go and erase the
part that we don't need right here for
this little handle. And when we have the
result like that, let's get back to our brush. And let's go and add a bit of a shadow right here
toward the legs closer to the shape
that we have for our overall shape
of the toaster. Again, if you want to erase
some of the parts right here, some of the shadows, you are
welcome to go and do that or you can use the
smudge brush here too. It will work perfectly. Again, to create some kind of the very soft transition
between the colors. You decide whether
you want to use the smudge two or the eraser. When we have the
results like that, let's continue by going towards the toaster and add a
bit of shadows here. Firstly, let's go and find the layer where we
have the toaster. So we'll go toward this part. We will create one
more layer on top, top on the leer, and use
the option clipping mask. Going towards the color
palettes and using the color with the
title toaster shadow. And with this toaster
shadow color, we will go with a
smaller size of the brush toward the right
part of our toaster, and we'll go and create a nicely looking
shadow right here. So let's go and create
something like that. When we have it, we will go and make the closed shep going
toward the bottom like that. Again, creating the shep and
then we will drag and drop the color inside
it when the sp is closed right here
onto the bottom. If you want to adjust it in any way with your brush
or with your eraser, you are welcome to
go and do that. Also, we can go toward the
bottom part again with either our medium blend
brush for our eraser or with the smash tool and adjust the opacity on
the bottom slightly. So very, very softly erase
the parts on the bottom, so we will have some of the reflection from
the ground right here. And when we have the
result like that, let's continue by going to the front part right here and create a new
layer on top of it. Tap onta the layer, use the option clipping mask, use the same brush
that we used before. And let's go toward this part
and we will add a bit of the shadow here to add some volume to
everything that we have. Now, when we have the
result like that, we also can go toward
this little part and add a bit of
shadow right here. If you have something
that you need to erase, go use your eraser and adjust the parts
that you don't need. Accidentally erase these parts, so I will try to create
it one more time. When we have it, we will go and work on the bottom
part right here. So we will need to find where we have these
additional elements. We have it on the
previous layer. So let's go to the
layer that we used for the shadow for the main
shape of the toaster. And let's go right here toward this part and add a bit of
a shadow right here too. Now when we have the
result like that, let's go and add
some highlights. For the highlights, firstly, we will go toward
our lays and we will go above all the layers
that we have right here. Let's create one more lay here. Let's go towards
our color palettes and let's first use
the face front color. We also will get back to the
lay that we've created and we will change the
blending mode to overlay. Now when this is done,
toward our toaster. Let's go and add a
few little dots, a few little additional
elements right here. When we are done with
the inside part, we will go with the
smaller size of the brush towards the outside parts
toward the left first, and we will go and start to
add some highlights here. So we are using the dots. We are using a bit of the
like lines right here. So we are going along everything that we
have right here like that and starting to add the highlights toward
this little part. We also will go toward
the top right here. We'll add a bit of the highlight
right here on the top, going toward the opposite side, adding a bit of highlights here. You can go with simple shapes with dots with something gone. In that way, also can go
and add some sparkles. You can go with even smaller
size of the brush and go to some random places and add a bit of the
sparkles here too. Now let's get back
to our toaster. So for example, let's
continue by adding a bit of the highlight right
here onto the top. Let's go toward this little
part at a bit of a highlight. When we have it,
we will go towards this side and we will add
a highlight here too. Now, when we have this, let's go toward the toast and let's
add the highlight here too. So going again towards the left side and we are starting to add a bit
of the halt right here. Going along the whole
side right here, you can use all the options
that we used before, so you can hold your line. You can create it in that way. You can go toward the top and add a bit of the
highlights here too. Repeat the shape, add a
few of these details, and everything will look very, very smooth and very, very nice. For example, we
can go right here and add a bit of a
highlight here too. When we have it, we again can
go and add some sparkles. So go and add a couple of dots, a couple of simple elements
towards the side right here. You can go toward the
toast right here, too, and add a couple
of these details. Here, create a couple
of these elements, and when you are done with it, let's go and add a
bit more details by changing the colors that we have right
here for the lines.
7. Final Touches: What we need to do is
to go to our layers. We will go and find our
layer with the lines, and we will create one
more layer on top. Tap on this layer and use
the option clipping mask, and then let's go to
our brush library, and we'll go to the
airbrush and folder to select the soft blend brush. With the soft blend brush, let's go toward
our color palette, and we will use this
dark red lines color. With this color, firstly, let's go and recolor
the facial features. So we will go like that
and very boldly, erase, but add some color, the different color
adhere to these elements and everything will
look even nicer. Then we will go to
some brown elements. So for example, firstly to the toast with the smaller
size of the brush, let's go and recolor the lines
that we have right here. Very carefully, try not to recolor the lines that you
have on the separate elements. So if you need to go
and erase something, go and use your eraser to this. Continue adding the colors going along this
whole shape that we have for our toast and
finish up on the opposite side. When we have it, let's go and recolor the elements that we have right here
onto the handle. With the same color going like that and recoloring
these elements, with the same color going
toward the legs that we have right here and
recoloring them too. Then when we are done
with our little legs, let's again go to our
color palettes and let's change the color that we will use for our lines that
we have right here. Let's go with our
cast shadow color, and we will go toward the
lines that we have right here and we will
recolor some of them. So for example,
let's go outside, and let's recolor these lines
that we have right here. Try not to go too close to
already recolored elements. You can play around with where you want to
recolor the elements. So you can play with the amount of pressure
that you are using and maybe create some additional
little color transitions with different
colors right here. So it's up to you,
you can go and maybe create a bit of
a color right here, a different color, and maybe leave these elements
with the darker colors. When we have the
results like that, what we need to do next is to go and add the sparkles
toward the eyes right here. Let's first get back to our calligraphy folder,
moon line brush. We will select the white color. We will go toward our
lays and we will go and create one more layer on top of this layer that we wore on. We will go toward
these little parts. We will create the
highlights inside the ice, change the size of the brush and go to one of the sides for your eyes and let's create these additional little
highlights inside the ice. When we are done with
it, let's also go toward the mouth and let's add a
little tongue right here. What we need to do
is to go back to our color palettes and
use the same pink color. We will go very boldly toward this bottom part and we will
create the tank like that. Don't worry that we are going le bit outside the
sheep, add the color, and then we will get back to
our leas and we'll tap onto this layer where we have the
sparkles and the tank on, and we'll use the
clipping mask right here. Now when we have the
results like that, let's finish up with everything
by going outside and adding our shadow and some sparkles that we had
onto our sketch. So firstly, let's go and
work ones our little shadow. So we will go back
to our layers. We will go to the bottom, go to the layer that you have for the shadow right
here and from here, create one more layer, hold it and drag it underneath
everything that we have. And let's go to the ribbon icon. With the Etraban icon, we will use the
free hands method and we will go
toward the bottom, and we will need to create
the shadow on like that. So we are going from the lag, and we are creating a
parallel line to what we have right here for our whole
bottom part of the toaster. So again, if you need
a couple of attempts, you are welcome to
go and have it. Let's finish up creating this thing by creating a
little shape like that, and then we will go
toward the bottom and create the parallel line to
what we have on the bottom. So try it out a couple of times. Close the ship when
you are ready, and when you are ready with it, let's go and select the cast shadow color and
drag it toward this part. Now tap onto the S ribbon icon to get rid of the selection. And then let's go first
and reduce the opacity of this element to something around 50%, so it looks nice. And then, again, we will
grab our eraser with this medium blend brush
and very, very nicely. We'll go from the bottom, and we will start to reduce
the opacity right here. So we don't need to see the
edge that we have right here. So go like that and start to reduce the opacity
of this element. So for example, let's end up
with something like that, and when we have the shadow, let's go and add some sparkles. So one more time, we will go above all the
layers that we have. We will create one more layer. We will switch the
color to white, and we will go to
this folder that you downloaded with the stamps. So simple stem brushes, we will go with
sparkle thin, full, and we will go and add some sparkles outside and
maybe inside the sheeps. So adjust the size
of your brush. You can go with bigger elements
with smaller elements. It's up to you. Try
add enough of them. Try not to overdo it. If you want to overdo it,
overdo it, of course, go towards some of the
elements right here inside the sheeps and add a
couple of sparkles here too. When you are done with
adding the sparkles, we are done with
our illustration. Thank you for
watching this class. Let review if you
liked it and can see subscribing for Mirkai
videos in the future. Looking forward to
senior project.
 Uni Corn, ⭐Kawaii Art Enthusiast⭐