Transcripts
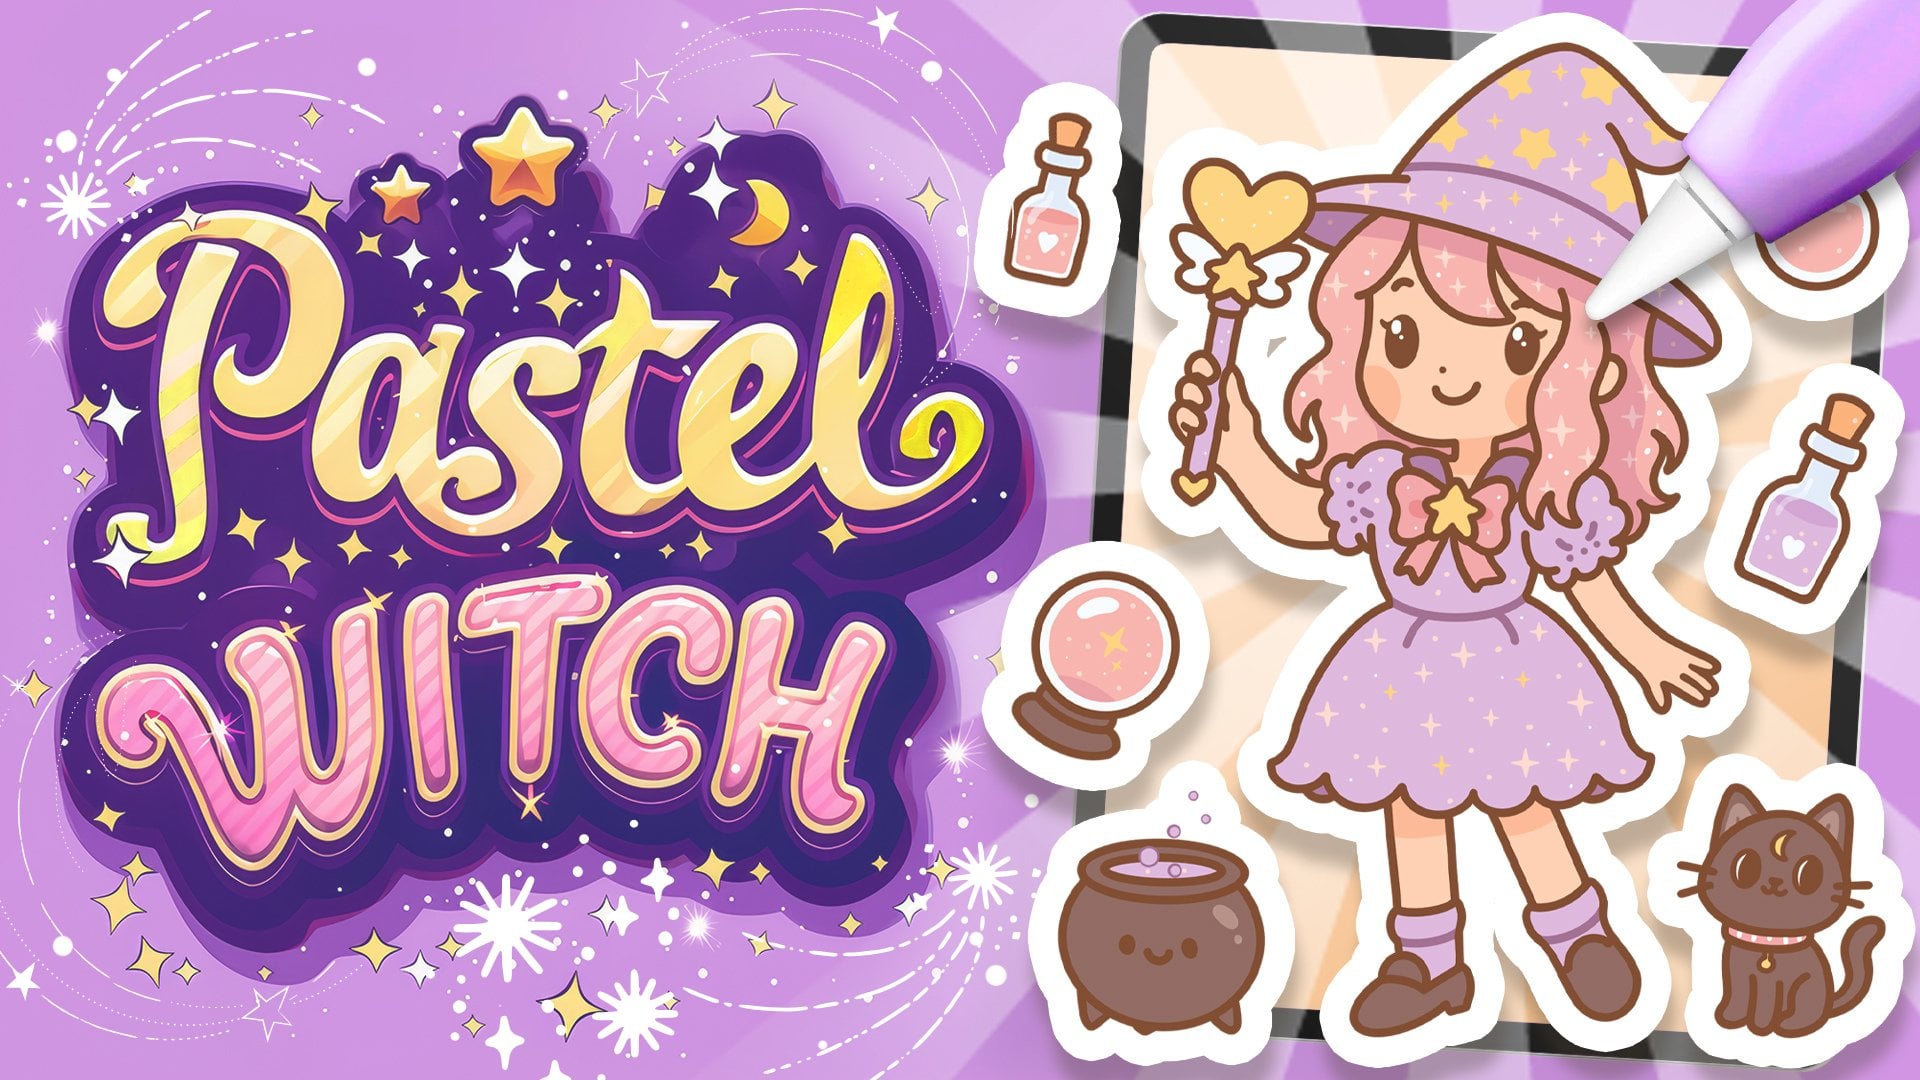
1. Introduction: Hello, everyone. I'm uni
and into this class. We'll draw simple
and Pute avatars. This class doesn't require any prior experience
or fancy tools. We'll start from
scratch and we'll be using simple techniques
throughout the process. Everything you'll see will
be happening in Procreate. However, if you
have added software or want to try
traditional materials, you are welcome to join. If you're ready to start,
let's jump right into it.
2. Base: Begin our class firstly by deciding what kind of
canvas we are going to be. Today we are using
a simple standard, square canvas that you
can find in procreate, both our pixel width
and pixel height are set at 2048 pixels. Course, if you'd like to use any other dimensions for
your canvas, just go for it. As for DPI, we are using 300 and our color profile is set as
S RGB with this low number. When it's all done,
let's just it down over top pride and we will be
redirected to our new canvas. The third thing that we will
need to do is to go and decide on the colors that we are going to be using
throughout the whole class. First, if you would like
to use your own colors, if you want to pick
them on your own, you are welcome to
go and do that. But if you want to
follow along and use the same colors that you will
see throughout the class, please go to the project and res sap and download
all the materials. Firstly, let's just go to our color palette and we will
go under cards right here. We have all the colors names and it will be easier for us
to navigate through that. The first color that we
are going to be using will be this color with
hot pink title, and we will just tap
on it to select. When we did it, we will
go to our brush library, and we will go to the
calligraphy fold. Into the calligraphy folder, we will select
more a line brush. Also, if you want to make
your lines very smooth, we will just go and tack
one option on this brush. Let's just tap on it and we'll
go inside the brush taser. On the left, we will go
under stabilization, and we will be adjusting
the amount of streamline. You can just go when it's set at a very low value
to the drone pad, try out how it works. If you like the look
of the natural lines, you are welcome to
use it in that way. But if you want to adjust it, just go to the slider amount and adjust it to your liking. Right out onto your drone pad, you can go back to your
canvas right out there. Always, you can get back to this brush studio and adjust
it later on if you need to. Find the amount that works
for you and when you're done, js he done over our top right. Now when we are all set, we will use one option that will help us to build up our scheme. So firstly, let's just go under range icon over the top plate, we'll go under Canvas, and we will total drawing guide. Now you can see we
have these cells that are going through the
whole shape of via Canvas, and it's not the
option that we need. We'll just need to go
under 80 drawing guides, and here on the bottom, we will use the symmetry. Now we have just
one line that is going through the
center of via Canvas, and that's exactly the
option that we need. We are not touching anything. We are just heating down
over our top prize, and now everything that
we are creating on one side will be mirrored
on the opposite one. When this option is on, let's just go and start
creating our scheme. Firstly, what we
need to do is to create a shap for our hat, and it will be a shap of the
very, very soft rectana. Let's just go over one
on the side and we will start creating
our sheep in that way. Just starting from
the center and going to the bottom
with the sap like that. You can create it
just with one line and connect it nicely
on the bottom or on the top or in any place that you are starting or
ending your line. When you hand the
result like that, let's just go and adjust
it just a little bit. We'll just go to our
magic one tool over the top plat and we'll
go under Option liquefy. On the bottom, we have a lot
of options, but don't worry, we will just need to
use the option push, and we will be
adjusting the size of the brush that we are
going to be pushing with. Let's just go make it
a little bit bigger and when we are using
our symmetry tool, even with our liquefied tool, everything that we
are doing on one side will be mirrored on
the opposite side too. We will just go and
adjust our lines. We can just go over
one of the sides. We can just push our line, adjust it to our liking, and it will be mirrored
on the opposite side too. Let's just spend
some time here and create the shape of the
hat that we will like. You can adjust the size of your brush if you need to go to some little places and adjust them with the smaller
size of the brush. For example, let's just go
with something like that, or if you want to
spend more time here, you are welcome to
go and do that. When you are overall satisfied, let's just tap on our magic
one tool one more time, and let's just go and
continue creating more elements that we
will add to our head. Again, we are going
back to our brush, and let's firstly go to the bottom part and we will
create a little neck here. Let's just step a bit from this line that we
have in the center, and we will just go down with
a straight line like that. Hold your line and the end and you can see that
when you are holding it, you can adjust the position on this line and the
direction on this line. Let's just go with
something very straight. If you need to
adjust it even more, just lift up your
apple pencil and go over the top to
the edited mode. When you are in
the editing mode, you can see you have
some nodes here. You can just go to them
with your apple pencil, hold it at the plate, and adjust it to your liking. Let's just make this
line very straight. If you want to adjust
the size of it, you can go to this node and
drag it a little bit down. When we have the
result that we like, let's just step on
the screen and we will get away from
our editing mode. Now when we have
the neck like that, let's just get back to
our brush and let's create a little connection
right here on the bottom. We'll just go with a
line going in that way. Try to make a nice connection
on the middle part. If you have some elements that you would like to
adjust, for example, maybe smoothing up these
little connections right here with a straight line and
the curve on the bottom, you can just go grab your eraser and adja
these little places. If you have some other areas that you would like to adjust, you are welcome to
go and do that too. Now when we have
the neck like that, let's just go again
to our brush, and let's create a
little shoulder here. We will again go over one side. For example, let's just go to the middle part of our neck. We can just go and make a little mark down if you need to. Or if you feel very brave, we will just go straightly to the spiddle part and we will go over the side and create a
line going down in that way. Again, you can hold
the line at the end, and you can go over the
top to the een mode to adjust the curvature
of this line. Adjust this line to your liking and when you
are overall satisfied, let's just tap on the screen to get away from the editing mode. You can make this element bigger than your hat or smaller. It's all up to you. When you are done
with this line, let's again get back
to our brush and let's connect the
shape on the bottom. We will just go and create a straight line
going to the center. Let's connect it
nicely and smoothly. If we need to adjust
it, we are again going to our Ein mode and
adjusting it from here. Take a look at your line, make sure that you don't
have any gaps in your line. When you're satisfied,
let's just go and work a little bit
more on our head. For example, let's just go to the sides and let's
create a little ear. Let's just go a little bit lower than the middle
part of our head, and we will just go and create a little ear going in that way. You can play with
the size of it, you can play around with
the overall element, overall shape of it. It's all up to you can
go with a smaller sheap, you can go with a rounder sheap. It's all up to. If you
want to adjust it, in any way, you are
welcome to go and do that. If you want to try
it out one more time and create a different
shape for your ear, again, you are welcome
to go and do that. When we have the general
shape for the ear, let's just go inside of it and let's create two
lines like that. The first one will be
going up in that way, and then we will go to the
middle part on this new line, and we will go with a little curve going down in that way. We're just creating a little
t element right here. Now when we have
something like that, we are ready to go
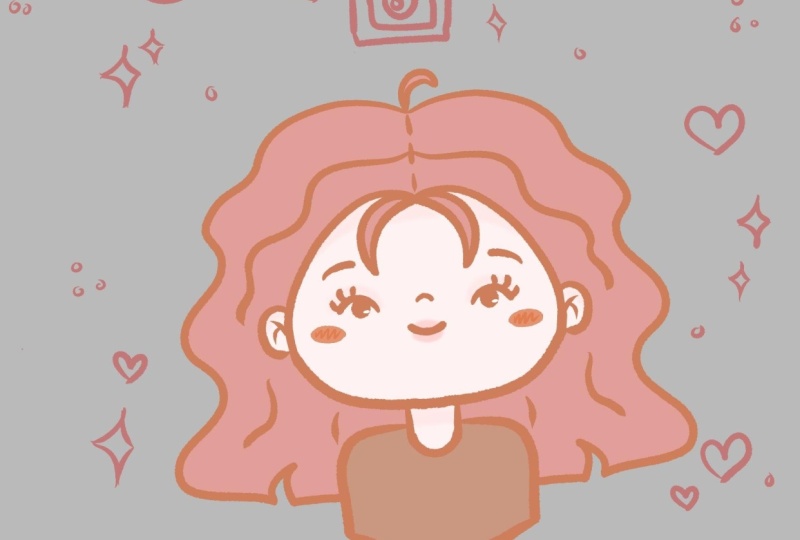
and add the eyes, the eyebrows, the little mouth, all of facial features. Firstly, let's just go
and create the eyes. We will go and increase the size of our brows
just a little bit. Let's just go with
something around 8%, and we will go to
one of the sides. We will go to the area
where we have the ear, somewhere in the middle, and we will just go and put a dot. If you want to try it
out one more time, or if you want to increase
the size of your brush, even more, you are welcome
to go and do that. For example, let's just go
with something like that, and when we have our yes done, let's again go and decrease
the size of our brush, and let's just go right
between the eyes, and we will create a
little smiley mouth. You can just go with a
simple shape like that. Hold your line and the ends, if you need to adjust it, go to the edited mode and
adjust it from here. You want to adjust the
curvature, go to the nodes, if you want to adjust the
placement of this element. When we are in the editing mode, we can just go hold
our Apple pencil at some blank space and just move our element to the
place we want it to be. Spend some time here and adjust
the shape to your lichen. When you have the
result like that, let's just go above our eyes, and let's create little eyebrows in a shape that
you would prefer. For example, let's just go with something simple like that. Again, we will hold
our line and the ends. Again, if you want
to, we'll go to the tin mode and
adjust it from here. If you want to adjust
the curvature, you are welcome to
go to the nodes. If you want to adjust
the placement, hold your Apple pencil
at some blink space and adjust the placement
on these elements. For now, we are creating
just a little scheme, so don't worry if
you want to create different shapes
for your eyebrows later on, we can do that. So when you are overall
done with these elements, let's just tap on
this screen and we'll go away from
our editing mode. Now, let's just take a look
at the overall shapes and let just go and add little
cheeks underneath our eyes. Firstly, let's just get
back to our color palette, and let's select either
light grayish pink, beige or of white color. Select one of these
colors and let's just go right
underneath the eye, and let's create a little cheek in the shape of the lives. Again, create the shape, hold your line and the end, adjust the position
of it if you need to. Go to the editing mode
and adjust the curvature, the size, anything that you
want to adjust right here. Find the placement for
these elements two, and when you are
overall satisfied, let's just get away
from our editing mode. Now, let's just go
inside the shape and manually we will add
the color to this area. Now let's just zoom out our Canvas and take a look at everything
that we have here. For example, let's just go and select all of our
facial features, and we will drag them down to make the whole phase a
little bit more cute. What we need to do is to go to our S ribbon icon on Do plus, and we will use the
free hand method. When we're using
freehand method, we will just go to the areas
that we want to select A. We will loop it around when only these elements
are selected, and then we will go to
our key on Do plat, and we will use the
uniform method. Also, we will just go
under snapping right here on the bottom left
and into the settings, we will select snapping to. Now, when we have
this bounding box around our official features, let's just hold our Apple
pencil at some blink piece, and let's just drag it down going along this orange
line that appeared. When we are going along
this orange line, we know that we are right at the center and we are not moving our facial features somewhere to the side or somewhere that
we don't want it to be. Find the position
for these elements, and when you are done, let's just go and hit the first option that
we were selecting, and it was our S ribbon icon. Again, take a look at your illustration
from the distance, and if you want to do it
one more time and move your facial features a
little bit down even more, you are welcome to
go and do that. But if you are
overall satisfied, let's just go again
to our error key, and you can see now we
have the bounding box. We can just go and make
this whole illustration a little bit smaller or
position it differently. When our snapping is selected, let's first go and make it
just a little bit smaller. We'll go to this snow that we have in the middle on the top. We'll hold our apple
pencil there and we will just drag the whole
shape little bit down. When we have the
result like that, when you are overall satisfied
with your basic shapes, let's just deselect everything
by heating our error key. Now when we have
something in that way, we are ready to move
on to our next part, where we'll be creating
our first illustration.
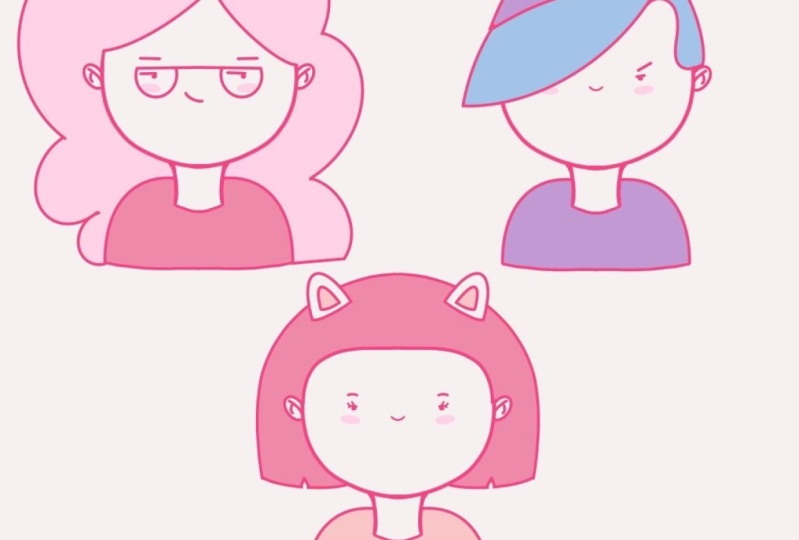
3. Girl with Cat's Ears: Let's begin this part
firstly by going to our color palette
and we will again go and select our hot pin color. When we did it, we will
go under our layers, and you can see now we have just one layer that
is now assisted. Let's just go and rename
this layer as scheme. We will need to tap on the layer and choose rename from the list. When we have it in that way, let's just go and make
a copy of this layer. We will just need to go to
this layer and swipe it from right to left and we
will choose duplicate. When we have it in that way, let's just go and rename
it as girl with the ears. And when we have it in that way, let's just go and start
eating the details, T A our overall shape, and create a unique avatar. What we need to do
firstly is to go and create the hair element. Let's first go and
create it in that way. We will create one
more layer on top, and when we have
these two layers for our new illustration, let's select them both and
put them in the group. When the first layer is
selected, the new one, we will go underneath to our layer with girl
with the ears, and we will swipe it
from left to right. When two layers are
selected, we will hit group, and we will go to
this new group, and again, we will rename
it as girl with the ears. Now let's just get back to this new layer lay number three, and we will need
to make it as 62, so it will be easier for us
to use this tool that we are using our symmetry to and create our
additional elements. We will just tap on this layer and we will choose
drawing assist. Now, let's just go to the top part where we
have our fore hat, and we will just go and create a straight line
going in that way. Adjust it if you need to by
going to the editing mode. If you want to
adjust it even more, if you want to adjust
the placement of it, you are welcome to
go and do that. Overall, what we need is a straight line
going in that way. When we have it in that way, let's just go to the
sits and we will turn these corners into the
soft soft little corners. What we need to do is to
go right here and create the similar line to what
we had before on the top. When you have this little line, if you need to adjust it, go to the editing mode and
adjust it from here. When we have it in that way, let's just go grab our eraser and erase this line
that we don't need. Try to make the connections between the lines very smooth. When we have the
result like that, one more time, let's
just go to our brush, and then we will go
a little bit higher, then we have the
top of our head, and we will go to the sides with a curve going in that way. Again, if you want to hold
your line and the end, go to the edited mode to adjust the overall
sheep if you want to. When you are done with
the overall sheep, let's just tap on the screen to get away from our edited mode, and then we will get back
to our brush one more time, and we will go again and create the straight line here on
the bottom of our hair. If you want to adjust it, you know what you
need to do, go to the editing mode and
adjust it from here. Try to make the connections
smooth and nice. If you want to go to these
little corners right here on the bottom on
the here and adjust it, make it smooth, you are
welcome to go and do that. If you don't want to
do that, let's just go to this middle part right
here on the bottom, and let's add a little
beautification here. We'll just go there and create a little elements like that. Just with one line create a little triangle
going in that way. If you want to adjust
it, even more, go to the top and
adjust it from here. When you have it in that way, let's just go to our erasor tool and we will adjust
this little part. We will just cut it and make
a nice cut into our hair. You have the result like that, we will need to go and erase this line that we have
right here on the top. Let's just go to our layers, and we will go to
this layer where we have our girl with the ears. We will grab our eraser
and we will just go along this line on the top
and we will just erase it. You can see now when we are
doing it, nothing happens. That's because we have
our scheme layer on. Let's just get back to our list and we will go to our
layer with the scheme. We will go to this little icon
right here near our icon, and we'll just tap on it. When you have it in that way, get back to your girl
with the ears layer, and let's just go and
continue erasing this line. When you have it in that way, let's just get
back to our layers and we will merge these
two layers together. We'll just go to this layer
that we have on the top, where we have our hair, we'll tap on it, and we
will choose merge down. Now, if you have
some little elements that you need to
aja, for example, maybe some colored places
that you don't want to see, let's just grab our
eraser and aja them to. If you want to adjust
some other lines, if you want to work more
on the overall shape, you are welcome to
go and do that. Find what works for you
and when you are done, let's just get back to
our brush and let's just go over the top and let's
create little ears here. What we need to do
firstly is to go to this area that we have
on the top of our hair. We will go a little
bit lower than it is, and we will just go with a
soft triangle shape like that. You can hold your line
and the end as always. If you want to adjust
it in any other way, you are welcome to
go and do that too. On the bottom, we will
connect it either with a straight line or
with a little curve, and we will just need to make sure that all of our
lines are connected. When you are done, let
just grab our eraser and as this line that
we have in a Meda. When you have it in that way, let's again get back to a brush, we will go inside this ear shape and we will create an
inner part of the ear. You can hold your
line and the end and if you have
this weird shape, don't worry, you
can go over the top and you can have the
option arc here. If you don't have
the option arc, just try out one more time
and create a nice shape here. When you have the top sap, let's just go and create
the line on the bottom, try to make it parallel
to the line that you have on the
bottom of the ear. And when you are overall
satisfied with it, let's just work le
bit on to face. What we need to do is to go and create a little
elements for our ice, for example, or if
you want to go with any saps and additional
elements that you like. For example, let's
just go to our ice and we will firstly go and create
a little lid like that. Go over these little elements
for our eye that we have. We will create a little curve
and then we will go up and we'll create a few lines that will represent the eyelashes. You can adjust the
size of your brush. If you want to, if you want
to adjust something else, you are welcome to
go and do that. When you have the
result like that, let's just go and recolor it. What we need to do is
to go to our layers, and we will go and
create one more layer into our group with
girl with the ears. Let's just top on the plus icon, and we will just
need to go and put this layer underneath our
layer with the lines. Let's just go to this layer
where we have our lines, we will select it,
we will hold it, and we will drag it higher
than our new layer. When we have it, let's
just use these lines to recolor everything that we have right here on
a separate layer. What we need to do is to go to this layer where
we have our lines, we need to tap on it, and we will choose
the option reference. Now we can use these lines onto this layer and we can go to any other layer and
use these slides on it and recolor our elements. When we have something
in that way, let's just go to
our color palette, and let's select this pin color. When we have it selected, we will just go and drag it to this middle part that
we have for our hair, and then we will just go
entry color other areas too. For example, let's just go to our color palette one more time and let's select
this beach color. With a beach color, we will just go entry color this
little sweater. If you want, you
can go to the ears to the inner parts
and adjust them too. When we have the
result like that, we have our first very,
very simple avatar. Let's just move on
to our next part, we will create another one.
4. Boy in a Hat: Let's begin this part firstly
by going to our layers, and we will go to this group where we have our
girl with the ears. We will go to this little
V icon near our checkbook, and we will tap on it
to collapse the group. Also, we will just go and hide it by going to this
little checkmark. Now, we will go
to our layer with this scheme and we will
make another duplicate. Let's just swipe it from right to left and choose duplicate. Then we will grad this
new layer and we will drag it higher than our group with the
girl with the ears. Now let's just go
firstly and unhide it, and we'll go and name
it as boy with the hat. Now, one more time, let's
create one more layer on top. Let's select both of these layers and let's
put them in the group. We'll go to our new
group, and again, we will rename it as
boy with the hat. When we are done, let's just get back to the
layer number six, and also we will
just need to go to our color palette and
select our hot pin color. When we did it,
let's just go and start creating some
additional elements. Firstly, let's just go and we don't want this layer
to be assisted, so we are not touching
anything here. We will just go and start by creating the sheep on the here. Let's first go over
one of the sides and let's create a
big fringe like that. We will just go and
create it going in that way. Hold it at the end. If you want to, you can go and hide one on the ie, for example, when you have
something in that way, let's just go and continue creating our shape going on top. We will just go to
this little element on our left and we will just go higher somewhere on top and we will create our line
going in that way. When you have it in that way, we will go to the
opposite side from our line that we have
right here on the left and we will start by
going on the top and we'll go and start creating
a little cut like that. When you have it, we will
go with another curve going toward our ear and we will connect
it nicely right here. If you need to adjust
it and connect these two parts together
in a more nice way, let's just go to
our editing mode and adjust it from here. When you have the
result like that, let's just go over our
right part and let's connect our ship with a
smooth curve like that. Again, if you want to
adjust it in any other way, you are welcome to go and do that and find what
works for you. Now when we have the
elements going in that way, let's just go and connect
them nicely on the top, just go and create a
curve going in that way. You don't need to be very
accurate because on the top, we will have a little hat and we will hide all of these
lines completely. But if you have some elements
that you want to adjust, maybe some parts, you are
welcome to go and do that. Now when we have the
result like that, our hair is done, and let's just go to our list and we will create one
more layer on top. Now we will just go and
create the shape of the hat. We will go to the top
part a little bit higher than we have this little dent
right here on our right, and we will create a
curve going in that way. Just create a curve like that. If you need to adjust it, go to the editing
mode and adjust it, adjust the curvature,
if you want to, and when you are done, let just tap on the screen with our one finger or with our Apple pencil to get
away from our ten mode. Then we will just go to
the left side and we will just go higher and we
will create a shape like that. Connect it with the
overall sheap on the hair, and when you have
it in that way, we will go to our right part, and we will again connect it with our sheap that we
have on the bottom. If it's hard for you to
see what's happening here, you can always go to your lays
and hide some of the ers. For example, you can go and
hide the layer with the hair, you will see what you are
doing right here on the top, or you can just go and hide the layer with overall
shape for your head, and maybe that will help
you to build the head too. Decide how you want to work right here and
when you are done, let's just go and connect this little part right
here to create a head. Now when we done with it, let's just go and erase some of the lines
that we don't need. Firstly, let's just
get back to our lease and we will go to our
layer with the hair. Let's just go and
grab our eraser, and we will erase the
overlapping parts that we don't need on the top. All the parts that will
be underneath our hat. When we did it, we will
go again to our lays and we will go to our
boy with the heat layer. Let's just grab our
eraser, and again, we will erase all the lines that we don't need that
are overlapping. Also, as we are using
our symmetry tool, if you are erasing
some parts that you have on your left that you
don't want to be here, you will just need to
go to your layers, and we will just go to this
layer with boy with the hat. We will tap on it, and we
will turn off assisted drawing just for 1 second to erase these parts
that we don't need. When you are done, as in the
parts that you don't need, let's just get back
to our layers, and let's combine all of
these three layers together. Again, we are going on the top, tapping on the layer, choose and merge down and doing
it one more time. Now, let's just go again to this layer with
boy with the hat, and let's just go and work a little bit onto our
ficial features. For example, let's just
go and erase our brow, and we will create a
different shape here. Let's just go with
something like that. If you want to play around
and find something different, you are welcome to
go and do that. Also, let me just go
and work onto our eyes. We will just go above our sheep and we will create a
line go in that way. Of course, if you would like to experiment and create
something different, you are welcome to
go and do that. If you want to work more
onto the facial features, or if you want to work
more onto the mouth, you are welcome to
go and do that. When you are overall satisfied
with everything here, let's just go and recolor it. Again, we are going
to our layers, we will go to our boy
with the hat layer, we will tap on it, and we
will choose reference. We will create one
more layer on top, we will grab our layer
with boy with the hat, and we will drag it higher
than this new layer. We will get back to
our new layer and let's just get back
to our color palette, and let's start
recoloring our elements. For example, let's just
go with beach color and we will drag it
to our hair elements. Then we will go again to our color palette and we
will select either pink or any other color that you
have here and we will drag it to our head and
to our little sweater. Also, if you want, we can go and very easily change our colors by using one of the options
that Procreate has. We will just go under our magic Quanto and we
will go under gradient map. Here, you can see that we have some additional gradient
library elements. You can just go through them. You can have
something by default. For example, this
gradient, mystic, breeze or any other things
that you have here, you can go through
them, or if you want, you can just go and
create your own. For example, let's
just go to one of these gradient map elements, and you can see now we have this little
two on the bottom. Can go to the colors and
you can adjust them. We are going from
the darker to the lighter one and we are
adjusting our colors. You can just tap
on these elements, find the color that
works for you. For example, here we have our
colors, not very contrast. We will just need to work with these two colors that
we have on our right. Let's just go for example, in that way and you
will see that you are changing your
colors in that way. You can go to the color wheel and find what works for you. You can go and adjust these
colors to your liking. Play around with
this little tool if you want to or if you
don't want to do that, you are welcome not to. When you're done
adjusting your colors, if you were adjusting then just hit done right here
on the bottom, and then just hit this
magic tool on the top. If you like the
result in that way, you are welcome to keep it, you are welcome to adjust
it in any other way. If you don't want to do that, you can just go and go back to the original colors
that you had before. Now when we record
everything here, let's move on to our next part, what will create our
last illustration.
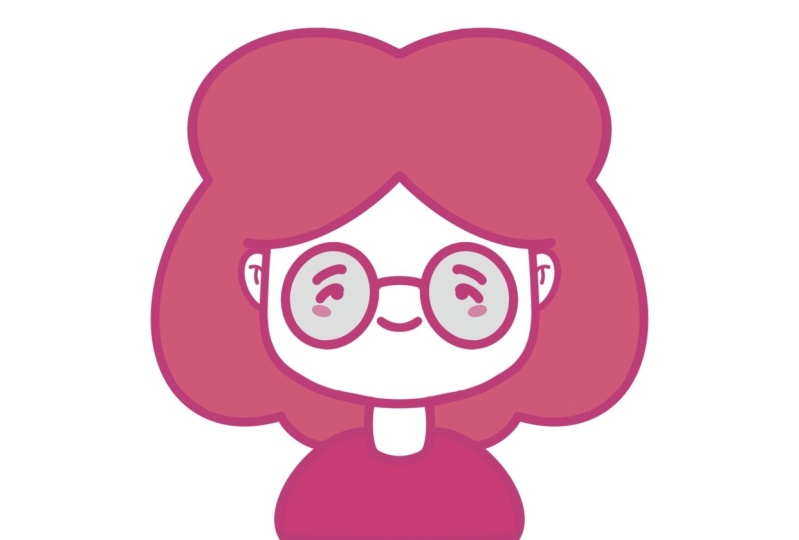
5. Grumpy Girl: Let's begin this part firstly
by going to our layers, and we will go to
the little V icon on our boy with the hat group. We will collapse our group and we will go and also hide it. When we did it, let's just
get back to our scheme layer, we will swipe it from right to left and we will
choose duplicate. Let's just hold it and we will drag it above our group
with boy with the hat, and when we did it, we will
just go and unhide it. One more time, let's just go and create one more layer on top and let's select both of these layers and put
them in the group. Let's just go and rename this group as girl
with the glasses. When we did it, let's
just get back to this layer that we have
created our layer number nine, and then we will get back to our color palette
and one more time, we'll select our hot been color. When we did it, let's
make sure that we are on our new layer and let's just go and start creating
our hair element. Firstly, let's just go to the top part somewhere
where we have our forehead, and we will go to the side with little elements like that. Again, we are not
using our symmetry to. We are just creating a little
element going in that way. When we have it in that way, let's just go to the
opposite side and let's create another part
of our fringe. Of course, if you want to go with the
symmetrical elements, you are welcome to
use the symmetry tool into these little parts. Now when we have
something in that way, let's just go over the top and let's start creating
some curly here. Let's just go over one
of the side firstly, and we will go with
something going in that way. You can go just with one
line or if you want, you can hold your
line at the end and adjust it by going
to the editing mode. When you have the result
like that on one side, let's just go and
connect the sheep for our hair with the line that we have on the
bottom of our body. Just create the line that
will go on a horizontal axis and that will be continuation of our line that we
have for our body. If you have some parts that
you need to erase manually, just go and erase them. Now when we are done
with our first side, let's just get back
to our brush and let's just work onto
the opposite side too. Let's just go with a
different pattern here, so we will just go with a
bigger curve going in that way and create a few little
elements going on the side. Again, on the bottom, let's just make
this straight line and we will connect it
with the shape of here. Try to make a nice smooth
connection and go through all of these little parts and if you need to
adjust some elements, grab eraser and adjust them. When you are done with
the hair elements, let's just go to our layers, and we will go to our
layer with this scheme. If you want, you can go
and rename it as girl with the glasses T. When
we are in this layer, let's just go and tap on it and we will choose drawn
assist from the list, so now we can go over the top and erase the parts
that we don't need. When you are done
with this task, let's just get back
to our layers, and let's combine these
two layers together. We'll just go to the slayer on the top where we have our hair, we will tap on it, and we
will choose merge down. When we did it, let's just go and work on our
official features. Again, let's just go and tap on the slay and we'll
turn on our drone as, so it will be easier for us to create our additional
elements here. Let's just go to our
brush firstly and let's adjust the shapes for
our little eyebrows. We'll go and erase
them completely, and then we'll go and create the straight lines like that. Again, if you need
to adjust them, go to the 18 modes and
adjust it from here. When you have the
result like that, let's just go and work on the additional elements that
will create for our glasses. You can go to this layer or you can go and create
one more layer, so it'll be easier
to erase some parts or maybe adjust this
little elements. Let's just go to our list, we will create one
more layer on top, we will tap on it, and we will choose drawing assist
from the list. Now, let's just go over
one of the sides and let's start by creating a
straight line like that. When you have the
straight line done, let's just go to the
bottom and let's create this bottom
part of our glasses. Just create half of the
circle or half of the apse, play with the shape, if you want to adjust it to your lichen. If you want to make the
overall shape smaller when you are at the edited mode and if you want to
make it gradually, you can go right
between the nodes, hold your apple pencil there and drag it a little bit higher. Spend some time here and adjust the shape to your liking
and when you're done, let's just get away
from our edited mode. For example, let's just go
with something like that, and we will go out from our sin mode by
tapping on the screen. When we have the sheaps
for our glasses, let's just go right
between these parts, and let's create this
middle part of our glasses. If you want to adjust
your sheaps in any way, for example, maybe you have some color places that you
don't want to be here. Let's just go and erase
them with our eras. Now when we have
something like that, if you want you can go and
adjust it to your liking. For example, you can go
underneath your adjustments, liquefy to adjust your
glasses from here. When you're satisfied
with the saps, let's just tap on
our major quan two, and let's just go again
to our layers and we will merge these two layers
together if you want to. What we need to do is to tap on this layer and
choose merge down. Now, let's just go again to this main layer with our
girl with the glasses, and let's just tap on it. We will turn off our
assisted drawing and we will go and
work onto our ys. Let's just get back to
our brush and let's just go and create the
ice going in that way. We will just go above our eye and we will create
a straight line like that, and we will do the same
on the opposite side. When we have it in that way, let's just grab our
eraser and we will erase our little mouth to create
a different shape for it. Get back to the brush,
and for example, let's just go with
the shape like that. Of course, if you
want to experiment and create something different, you are welcome to
go and do that. If you want to
adjust the glasses, even more, maybe
make them thicker, you can go along these lines and adjust them and add
some thickness to that. If you are overall satisfied
with everything here, let's just go entry color
our little elements. When we are done with
the overall sheep, let's just tap on our layers, Let's create one
more layer above our layer with the
girl with the glasses. We will go grab
this layer and we will put it higher
than our new layer. We will tap on it and we will choose reference from the list. Now, let's just get
back to our new layer. We will go to our color palette
and select the pin color. With the pin color,
one more time, we will go entry color
our little sweat. Then let's just get back to our color palette and
select either of white, light grayish pink or any
other color that you prefer, and we will put it to our hair. When you're done and if you don't want to
adjust anything, let's just go and get rid
of this line of symmetry. We will just need to go to our range icon and total
drawing guide from here. Now you can go and create as
many of these avatars as you prefer by using this scheme that you have right
here on the bottom. Just hide these layers,
just collapse them, create a copy of this scheme, and go with the flow, go with creating
something different. And when we are done creating
our last illustration, we are done with our class. Thank you for
watching this class, L review E Highlighted, and continue subscribing for more CI videos in the future. Looking forward to
senior projects.
 Uni Corn, ⭐Kawaii Art Enthusiast⭐