Transcripts
1. Introduction: Hello everyone. I'm Uni. And into this class we'll
draw some cute veges. This class doesn't require any prior experience
or fancy tools. We'll start from
scratch and we'll be using simple techniques
throughout the process. Everything you'll see will
be happening in procreate. However, if you
have other software or want to try
traditional materials, you are welcome to join. If you're ready to start,
let's jump right int it.
2. Sketch: Bell Pepper: Let's begin this
class firstly by deciding what kind of canvas
we are going to be using. Today we are using a simple standard canvas
that you can find. In procreate, it is square, so our pixel width
and pixel height are set at 2048 pixels, DPI are at 300, and our color profile is set as SRGB with this low number. When it's all done,
let just hit done over the top right and it will be redirected to our new canvas. The first thing that we will
need to do is to decide what kind of colors
we are going to vision throughout
the whole class. If you want to use your colors, you are welcome to
go and do that. If you want to
follow along and use the colors that you will
see throughout the class, please go to the project
and rest your Sap and download all the materials
when you did it. The first thing that
we will need to do is to go and change the
color of our background. So let's just go to our layers. We'll go to the
background color layer. And here we can see that we have our color palette on the Bota. For us, it will be
easier to go under color palettes and
here go under cards. So we will see all the colors, names and it will be easier for us to navigate through that. Now when we are here, let's
just hit Backgrounds. And we will change the
color of our background. When we did it, we will need
to go to our brush library. We'll go to the
sketching folder. And here you can select
any brush that you like. You can pick one brush, Get back to a canvas
straight out here. If you don't like it, get
back to your brush library, select another
brush and find what works for you when
you found your brush. Let's just go to
our color palettes. And here again, we
will go under cards. When we are here, we will
select dark brown color. Now when everything is set, let's just get
back to our canvas and let's start making
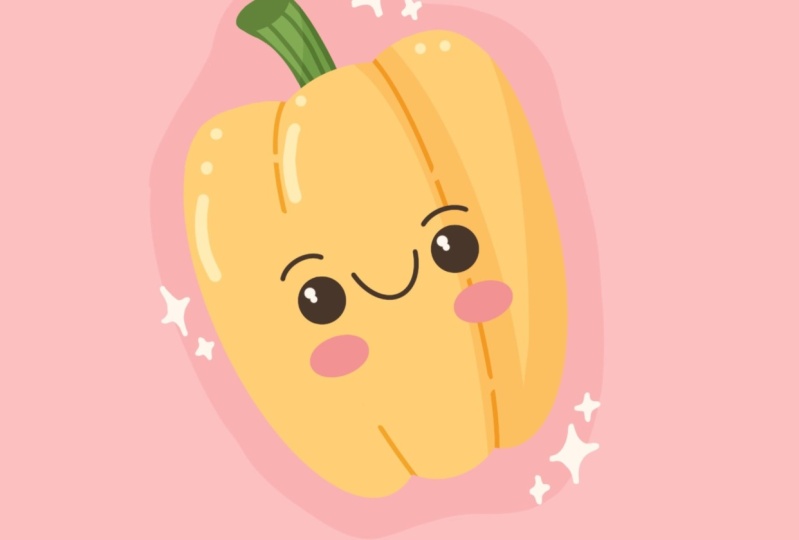
the first sketch. The first sketch that
we are going to be making will be a little pepper. Let's firstly go
over the top left, and we will start by
creating a sheep like that. Just manually, we are
creating a sheep at the ellipse and we are
just working on the sheep. When you have
something like that, let's just go over the sides
and let's create the wages. Firstly, let's just
go over the left, we'll step a bit from the top, and we will create
a similar sheep, and we will continue
making it till the end, and we will connect it
with our first sheep. Let's create
something like that. Now we are creating
a simple Skage. So you don't need to be very
precise and very accurate. If it's not working
in a way that you would like it
to look, it's okay. We can adjust it later on. Now when we have this
first site on the left, let's move on to the right and
do something similar here. Let me just go and create
a little bit bigger shape, the same way we are
starting a little bit from the top and then going down and creating
a shape like that. Let's connect it on the
bottom with a little dance. Let's just work on
the shape right here, working more on the
ship on the sides. These sides should be a little bit more
flat than a curve. Let's just make them more flat when we have
something like that. Let's work more on the ship. If you need to erase some parts, you are welcome to go grab an eraser and erase all the
lines that you don't need. Now when we have
something like that, let's just get back to
our brush and we will go to the top to
create a little stem. Just go in there and creating
two lines like that. They should be quite
parallel to one another. Maybe a little bit
more narrow on the bottom than they
are on the top. When we have these two shapes, let's just go over the
top and we will connect them together with
a little allpse. Now if you want, we can go and adjust our shape a little bit more so it will
look more like a pepper. What we need to do is
to go to our error key. Firstly, we will go
under uniform method. Right here on the bottom, you can see we have
this bounding box so we can adjust our shape. If you want to make it smaller, we can just go to one of the corners, Hold
our apple pencil, and drag it up or down if
you are on the top corner, If you want to rotate it, let's just go to
this green note. We'll hold our apple pencil
and make a circular movement. Let's just find the
position that we will like. If you want to find a different placement for your elements, just hold your apple pencil at some blank space and move it to the place that
you want it to be. Find what works for you. And if you want to
adjust it even more, we can firstly tab on our aero key to
desolate everything. And then we will go to our magic quanto and
we'll go under Liquefy. On the bottom, you can see we have this panel with
a lot of tools. We don't need to
touch anything except our push option and
the slider size. Let's adjust the
size of the brush. And when we have it, we can always get back to
it and adjust it. We can just go to the
sides and we can push them so it will look more
like we want it to look. Let's just go spend some time here and create a
shape that we will like when you have the
shape that you like. Let's just desalate
everything by heating our magic
an to two times. And then we'll get to our brush and we will work more
onto the two part. Let's just go to
these intersections and we will make
them more visible. Let's just work and do
something in that way. Now when we have
something like that, let's just go and add
artificial features. We will go firstly and find an approximate center on the whole shape by creating
a cross like that. When you have this cross, let's just go and start
adding artificial features. Firstly, we will go
over the left side, right on this horizontal line, and we will create
a shape like that. It is our first eye. You can vary its size. You can vary its placement. It's all up to you. When
you have this first shape, let's just go inside
and shade it. When we did it, let's just
go to the opposite side. We will try to keep the same
distance from the center and we will try to keep the
same size of the element. We'll put it on the same
line and we will just create a similar shape
when you have it's one more time going
inside and shading it. When we have something
in that way, we will go right between our eyes and we will
create a little smile. Let me just go with
something simple like that. Now when we have this shape, let's just go above
the eyes and we will create a little
curves for the eyebrows. You can vary the size
of these elements. If you want to experiment
with facial features, you are welcome to
go and do that. You can create any facial
features that you like. Now when we have these, let's just go underneath
the eyes and we will create another shapes
for our little cheeks. You can go with simple circles
or with some ellipses. When we have the
shape like that, we are done with
our first skitch. Let's just take a
look at it and decide whether we want to
adjust it in any way. For example, we can go
again to our liquefied zoo and we can adjust some areas
that we want to adjust. When you are satisfied
with the overall look, let's just go away from
our liquefied zoo and then we will continue by
creating another skitch.
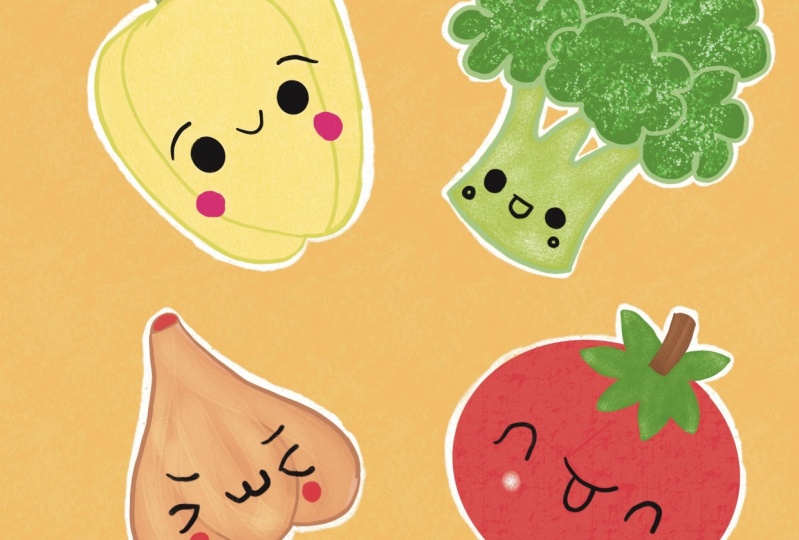
3. Sketch: Broccoli: Let's just go, firstly,
again, to our layers. We will tap on the plus
icon to create a new layer. On this new layer, we will grab our brush and we will go to the right side from our pepper to create a little broccoli. Firstly, let's just go and
create two lines like that. When we have these two lines, we will go underneath and we will connect them with a curve. You can go with a
very curvy curve, or if you want, you can just go with something
like a flat line. It's all up to you when
you have this shape. Let's just go to the top and
we will work onto our stem. Firstly, we will step
from these lines that we have on the sides and we will create quite
parallel lines, just going a little bit inward. When we have something
in that way, we will go to the
middle part and we will create another
shape for this stem. Let's create something
in that way. When you have it in that way, let's just go and connect these stems together with
little curves. When you have the
shape that you like, let's just go over the
top and we will be creating these bushy
shapes for our broccoli. Firstly, let's just
go to the right side and we will start by
creating a shape like that. We're creating some
kind of a cloud. You can vary its size. You can vary the amount
of this little element. It's all up to you. When you have this
first element, let's just go to
the opposite side and create something
similar here. Let's just go and
create a similar shape. You can overlap one
ship over another. When you have these two, we can just go to the
middle part and create another ship like that when
you have it in that way. Let's just grab our eraser and erase the lines
that we don't need. We will see more clearly
what we have on our skitch. Now when you have the
result like that, let's just grab our brush one more time and we
will go over the top and we will create two more
of these ships very easily. Just go in there and
creating the ship like that. Firstly, then going over the opposite side and
creating a similar ship. Again, you can decide
how big you want the parts to be when you
have it in that way. Firstly, let's just
go to our arrow key. We will adjust the placement and tradition and the
size of this element. Spend some time here
and adjust it to your liking when you are satisfied
with everything here. Let's deslect everything by
heating on our arrow key. And then we will go to our
liquefied tool one more time. And if we want to
adjust something here, let us go and adjust it. When you are done with
your liquefied tool, let's just tap on our
magic one tool twice. We'll get back to the
brush and we will go and add our facial
features again. If you want, you can go
and create this cross. Or if you feel very bold, you can just go without it and start creating your
facial features. Let's just go and
create a similar shape for the eye that we
have on our pepper. When you have the first eye, let's move on to
the opposite side and create something
similar here. Again, try to put them
on one line and try to remain the same
size when you have it. Let's just go and
create a little mouth. Firstly, we will create
a little line like that, and then we will go
to the bottom and create a little curve
going in that way. When you have these
facial features, let's just go above
and let's create little eyebrows.
Again, if you want. You can play around
with the sheets, you can play around
with the position of these elements.
It's all up to you. When you are done
with the eyebrows, let's just go
underneath our eyes and create a little elements
for the cheeks. Now we are done with
our second sketch, so let's move on to
our bottom part, and let's create another sketch.
4. Sketch: Garlic: We will start by going to our layers and create
one more layer above. When we did it, we
are going underneath our pepper and let's
create a little garlic. Firstly, let's just go and create a triangular
shape like that. When you have this
triangular shape, we will need to soften
it up and we will need to turn it into
some bumpy shapes. Firstly, let's just
go over the left side and we will start creating
the shape like that. When you have it, we will do something similar on
the opposite side. Now when we have the sides done, let's just go to the bottom. Firstly, we'll go
to the middle part and create a bump like that. Now when you have
it, we will need to connect our sides
with this element. Let's just go and elongate
our lines on the sides. Now if you want, you can
go to this middle part and continue creating the curves
going up in that way. Just very easily create little curves going
up from the center. When you have
something like that, let's just grab our S and
all the lines that we don't need when we are done getting back to our brush and
let's just go over the top to create a
little stem Here we are just going and elongating
the lines that we have on the sides and creating
straight lines going up. When you are satisfied with
the sizes on these elements, we will connect these two lines. A similar way to what we have
right here on our pepper. Again, creating a
little ellipse here. Work more on the
shape if you need to. If you want to adjust
it in any way, start from going to
our error key A, Just the size, A. Jaz rotation. A, Just displacement
if you want to, when you're satisfied
with everything here. Let me just go again to our liquefied tool and
adjust our shape from here when you have the
shape that you like, let's desalect
everything by hitting twice on our magic one, two. Then let's just go and start creating our
facial features. Firstly, let's just
zoom in our canvas. We will go again to
this middle part if you need this cross, so you know where you need
to put your facial features. You are welcome to go
and put it firstly. Let just go over our one side, for example the left one. And we will create a
little I like that we are creating a triangular shape like that when you have
it on one side. Let's move on to
the opposite side and create a similar shape here. Again, trying to put it on the same line when you have it. Let's just go between the
eyes and let's create a little mouth that will
look like a kitty mouth. We will need to create a
digit three that will be positioned horizontally
when you have it. Let's just go above the eyes, and let's create little
eyebrows this time, let's just go with
simple lines like that. When we are done with this task, let's just go underneath
our eyes again. We will create little
shapes for our cheeks. When we are done
with the cheeks, we are done with
our third skitch. Let's continue by going again to our layers and create
another layer on top. When we have it, we
will go underneath our broccoli and we will
create a little Tama.
5. Sketch: Tomato: This time, very easily, we will need to
start by creating a shape of the ellipse
with one line. We are creating it,
and at the end of this line we will hold
our apple pencil. You can see we snapped it to a better shape.
We can rotate it. We can make it
bigger or smaller by moving our apple pencil
from side to side. Lynch, stop adjusting
it at something like that when you have the
result that you like. Let's just go over the top
to this option ellipse. You can see that when we
are at the edited modes, we have the nodes. We can just go with
our apple pencil. We can hold it at one
of these nodes and we can adjust the shape
that we have here. So if you want to
make it bigger, you will need to go
right between the nodes, Hold your apple pencil, and drag it diagonally, up or down, depending
on what you want to do. If you want to rotate it,
doing the same thing, but moving our apple pencil
in a circular movement. So let's just find what works
for us, adjust the ship. Try to make it a little
bit more rounded. If you want to move it, you can hold your
apple pencil at some blank space
and just move it to the place that you want it to be when you have the
result that you like. Let's just go away
from our editing mode. So we will need to
tap on the screen. Now when we had the ship, let's adjust it a little bit. So we will just go
to the top part and we will create
a little dent here. Let's zoom it in and
maybe tate it to make it more comfortable for
us to create this line. And we will just go over the top and we will
create a ship like that. Try to connect it nicely
with the main ship. And when you have it, let's
just grab our eraser. And as this part
that we don't need, if you want to adjust
the ship in any way, you know what you need to do. Let's firstly go to our Ero
Chey, adjust it from here. If you want to make
it bigger or smaller, rotated, do whatever you need
to do. When you are done. We will go to our
liquefied tool and if we want we will go and adjust
our ship from here. When you're satisfied
with your shape, let's deslect
everything by heating twice on our major an to. And then let's just go to the
M that we have on the top. We will grab our
brush one more time and we will start by
creating a little stamp, the same way as we did with our pepper and with
our little garlic. Let's just start by creating
a line going up in that way. When we have it, we will go to the opposite side and we will
create a similar line here. Let me just make it a
little bit elongated. And on the top we
will go and create the similar shape
that we had before. Now when we have
something like that, we will need to create
this leaf part. What we need to
do is to start by creating a little
cross like that. And then we will go horizontally and create another line
going in that way. When we have this cross, we will need to go
along these lines and we will need to turn
them in the shapes like that you can play around with the curvature of these
elements, with their size. If you want to create
very triangular shapes, very straight ones, you are
welcome to go and do that. If you want to create
the curves again, you are welcome to
go and do that. Let's just go along
the lines that we have and let's create our little
shapes for this leaf. When you have the
result that you like, you can grab an eraser tool and erase the lines
that you don't need. If you don't want to do that,
you can keep it as it is. And we will get back to
our brush and we will go to the middle part to
create our facial features. Again, if you need this cross, you are welcome to go and put it here if you don't need it. Let's just go over
our left side. Firstly, we will create
an going in that way it is half of the circle or half of the lips going in that way. When you have it,
let's just go to the opposite side and let's
create a similar shape. Again, trying to remain the
size and trying to put it on the same line when
you have it in that way. Let's just go right
between the eyes and let's create a little
smiley mouth like that. We are created not
a very curvy curve. We will go underneath them and we will create
a little tank. We will create just
a shape like that, very elongated bottom
part of the ellipse. If you want, you can go right in the middle and create a
little line like that. When you have these, let just go above our eyes and let's
create our little eyebrows. Again, you are welcome
to play around with these elements when you
have something in that way. Let's just go
underneath our eyes and let's create little
elements for our cheeks. Now when we are done, let's just take a look at everything that we
have for our sketches, and let's decide whether we want to adjust something or not. For example, we can work onto the placement
on these elements, onto the size, onto everything that we
want to adjust here. Let's just go and
do it in that way. We will go to our layers. We will be selecting the layer, for example, let's just
start from our Tama. When the layer is selected, we are going again to our key and we are working
onto the placement, size, and rotation
of our elements. Let's position it nicely. Let's just have some
blink space right around our elements when you have done everything to this object,
let's deselect it. Let's get back to our lis. Select another li and
do the same thing. Now let's just spend some time here arranging our elements. When you are done
with position of your elements and with
everything on your sketches, we are done with this part, so we can move on
to the next part, where we are going to be
creating our base colors.
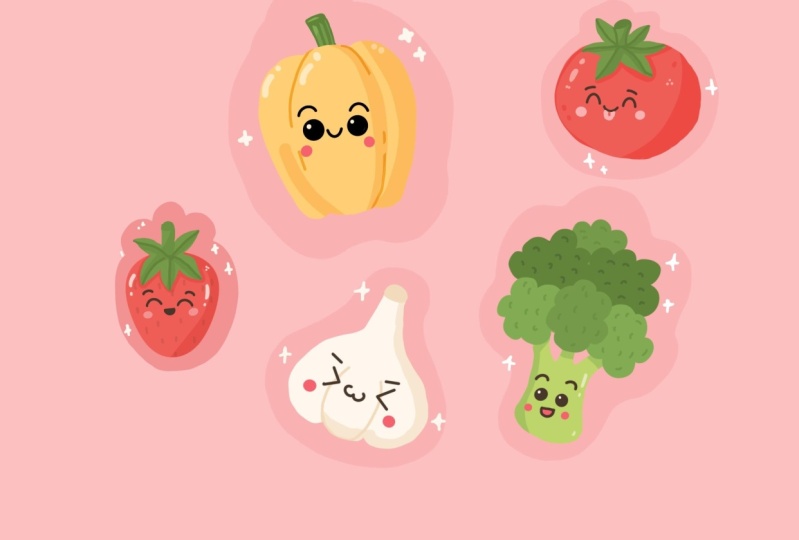
6. Colors: Bell Pepper: Let's begin this part firstly
by going to our layers. And we will need
to put everything that we have for our
sketches on one layer. Let's just go to the layer
that we have on top. We will tap on it and we
will choose merge down. Let's do two more times now. Everything that we have for
our sketches is on one layer. We can make sure of it by going to the little check
mark. We can tap on it. If everything disappeared,
everything is on one layer. Also, we will just
need to go and change the capacity of the
layer with our sketch. What we need to do is to go to our icon and we will go
to the opacity slider. You can hold it and
you can move it toward the left side until you still can see what's happening
onto this layer. But when it's not that
bright and distracting, find the capacity
that works for you. When you are done, let's
just tap on our layer. Then let's just go and
renin this layer as sketch. To do so, we will tap on the
layer and we'll choose Rene. Now when we did it, let's just go and create
one more layer. And we will need to put this layer underneath our
layer with this sage. Let's just hold it and
let's drag it down for now. We can keep the
name as it is right now or we can rename
it as bell pepper. When you have this new layer, we will also need to go
to our brush library. This time we will go to
the calligraphy folder and we will choose
monoline brush. If we want to make
very smooth lines, we will just need to go to our monoline brush and
adjust one option of it. We will just need to
tap on the brush. We'll go inside the brush
studio here on the left, we'll go under stabilization. On the top you can see we have the slighter amount
under streamline. If it's set at a very low value, we can go to the drone pad
and try out how it works. So we are creating a line, we have a lot of
control over it, but our line is quite jagged
if it's okay with you. And if you want to create
very naturally looking lines, you are welcome to keep it as it is at the very low value. If you want to create
very smooth lines, you can set it at maximum. And again, try it out
onto your drawing pad. You can see we lost a
bit of control here, but we are creating
a very smooth lines, you can play around
with the amount you can always get
back to the option. You can adjust it later
on if you need to. When you are done adjusting
the streamline value, let's just go and hit
down over our top right. When we are done
setting up our brush, let's just go to
our color palettes and select the yellow color. When we have this color, let's just go and adjust
the size of our brush. For example, let's just go
with 3% if you want. Later on. To get back to this option, we will just need to
do the following. When you found the right
size for your brush, you can see you can tap on this little slider and you
will have this little window. If you tap, plus you will see that now you have a
little mark down. If you later on just go and adjust the size
of your brush, make it bigger or smaller. You can always get back to this option just tapping
on it and selecting the size of the brush
that you were using before when you found
the size that you like. Let's firstly go to
our bell pepper body and let's recreate it. What we need to do is
to create smooth lines. We will need to recreate
what we have on this page. And you don't need
to be very precise. All that we need to do is
to recreate it in some way. If you want to adjust it, just go and adjust it later on. We just need to
create closed lines. We don't need to have any gaps between our lines very easily. Let just go and try
to create our ships. We can use the same option
that we used on our Tamera. You can hold your line in
the end and then you can go to the editing mode and
adjust your line from here. When you're done editing it, you can just tap on the screen. And if you have some areas that you need to
adjust manually, maybe add something here. You are welcome to go and edit
when you have the outline, let's just go to this
icon on the top right. We will hold it and
we will drag and drop the color to this area. If you have some
miscolored place like here where we were adding
a little elements, we can just go manually
and recolor these parts. Now when we have
this basic shape, let's just go to our layers. And we will hide our layer
with this age just for 1 second to check out
how our shape looks. Let's just go again to
this little check mark. We will tap on it. We will take a look at the whole shape and decide whether we need
to adjust some parts. For example, right here we have a little something
so we can just grab our eraser and make it very smooth. Get back to the brush. If you need to add some details or use an eraser to
erase some parts, just try to create nice shape when you have
the result that you like. Let's just get back
to our layers. And we will unite our layer with this cage by tapping on
this little check mark. Then let's just go again
and create a new layer. Let's just tap on the plus
I can n in this layer as stem we want to put our stem
behind our bell pepper body. Let's just drag this
layer underneath it. We are holding it and
dragging it down. When we have two layers
for these elements, we can select them and we
can put them in the group. When the first
layer is selected, we will go to the next one. We will swipe it from
left to right and we will tap on this
little option group. If you want, you can
go to this group, name it as Bell Pepper. Now let us get back to
our li with the stem. We will go back to
our color palette and select one of
these green colors. Let's just go with light green. When we have it, we will go
and recreate these elements. We will need to make sure
that our sheep is closed. Let's just go right here
or the top of our body of the bell pepper and let
just drag the color them. If you need to
adjust some parts, maybe era elements
go and adjust them. When you're satisfied with
the shape on the stem, let's start adding some
additional elements. Firstly, when we
are in this layer, we can go and select
another color. So we can just add
additional color to our stem and make some
beautifications here, we can do it on the same layer. Firstly, let's just go
to our color palettes. And we will select either
green or dark green color. Select one of these colors. And when you are done, let's
just get back to our layers. We will go to our
lay with the stem. We will tap on it and
we will choose alpha. Look now you can see we have this checkerboard
around your element. That's exactly what we need. We now can end the
elements only on the eras that we
have on this layer. What we can do is to go and start creating
additional elements. Let's just go and create this
ellipse on top very easily. Just go in there and recreating this part, mainly recoloring it. Then we will go along the lines and we will just
go and create the shape. Going in that way, you can
create a few lines like that If you want
to take a look at how it all looks without
the sketch lines. Go to the layers. Hide the layer with the skitch. Take a look. If you need to adjust something, just go and adjust it. Now we will do the same
with our bell pepper. Let's firstly unhide our skitch. Then we will go to
our bell pepper. We will tap on it, and
we will choose alpha O. And again, we have
this checkerboard around our elements
when we did it. Let's just get back
to our color palettes and we will select
this orange color. We will need to go and create
a few lines for our wedges. Firstly, let's just go and recreate this line that
we have on our right. We will just go and do the same way as we
did with our Tama. We will just hold our line at the bottom if you
need to adjust it. We are going over the top to the editing mode
and adjusting it from here when you have
the line that you like. Let's just get away
from our Edison mode. We will tap on the screen. Let's just go and work
more onto the sheep. We will go to the layers and we will hide our layer
with the skitch. We will just go over the top and we will work onto the sheep. We are working on the same layer where we have our base color. We can't use our
little areas or two, we will need just to use the same color that
we have for our body. We can pick the color
from the colors that we already have
onto our screen. To do so, we will just
need to hold one of our fingers and wait for
this little tool to appear. When you have the color
that you need on top, you can just lift
up your finger. Then you will see that here on the top right, our
color changed. Now let's just go to this place that we need
to erase and we will erase it with the new
color in this way. Let's just go and add
some gaps to this line. Firstly, let's just
go over the top and we will create a line
going in that way, we would want to make this shape on the bottom a
little bit more around it, so it's not just like
a shape like that. Let's just go and work on
the shape a little bit more when you have it. Let's just go and
create another cut. Let's go somewhere in the
middle and create another cut. This whole part we
will erase with our color work more on
the shape if you need to. And then let's just go to the bottom and let's
create another cut. Let's just make this piece
on the top very small. And then we'll go to
the bottom and create another cut like that when we
have something in that way. Let's just go to
the opposite side to this age that we
have right here. We will do the same thing here. Firstly, let's just
get vector our layers. We'll unhide our layer
with this gauge. We will then go and
we will need to select the same color
that we used before. We can do it very
easily by going to this icon that we have
on the top right. And we will just hold
our apple pencil until we have the needed
color when we did it. Let's just go to the left side and let's recreate the
line that we have here. Again, you can hold
your line in the end. You can just make a little
line like that and then create a little piece going on the bottom when you
have it in that way. Let's just go and take
a look at everything without our lines
for this sketch. If you like it, we are ready to go and add
our facial features. Firstly, let's just go to
our li, with this skitch. We'll unhide it and
we'll create one more lier above our lie
with the bell pepper. Let's rename it as
facial features. Now lent us get back to our color palettes and
select the same color, dark brown, that we're
using for our skitch. Let's set our brush size to something at a
very low value. For example, something like 5% And we will start with
our tiny elements. So let us go to our smile
and to our eyebrows, and let's recreate
these elements. When we did it, let's just go and increase the
size of our brush. We will just put the dot for the ice when you're
satisfied with your eyes. Let's just get vect
eye color palettes and we will go and
select the white color. When we did it, we will just
go and decrease the size of our brush and we will go to the ice and we will put
the highlights here. Let's just go to
one of the sides, to the top, for
example, to the left. And we will just put one dot
like that when we have it. We will go to the opposite eye and do the same thing here, trying to put it on
the same line and on the same please,
when you have it. Let's just go again to our color palette and we
will select the pin color. Or if you want to experiment, you can select any
other pinkish color that you have on your color
palettes When you have it, let's just go and
create the cheeks. You can go and create the lines and then drag
and drop the color inside. Or you can do the same thing
that you did with the eyes. Just increase the size
of your brush and put the dots when you are
done with this task. One more time, let's just
get back to our layers. Hide the lie with the cage. Take a look at everything here and decide whether
we like it or not. If we are satisfied
with everything here, let's just go and start
adding little shadows. Firstly, let's just go
to our stand layer. We will tap on the plus
icon to create a new layer. Let's rename it as Shadow. When we did it, we will need to attach this layer
to a previous one. We will be doing
something similar to what we did with
our alpha log, but it will be on
the separate layer. We will need to tap on the
layer with the shadow. And from this list we will
need to select Clipping Mask. Now you can see
this listl arrow. It is attached to
our previous layer. Now let's just go to the icon. And we will change the
blending mode to multiply. As for the opacity, we will go and set
it to something like 30 or maybe 50% We can always get back to this
option and adjust it later on if it's not enough
or if it's too much. When we did everything
to this layer, let's just go again to
our color palettes and select either green
or dark green color. Select one of these colors. And let's just go over
one of the sides, for example, to
the bottom right. And we will create a
line going like that. With a big brush, we can
create just one line. If our capacity is too much, we can always get
back to the sliers. We can go to the M icon and adjust the capacity
on our slider. Find the capacity
that works for you. When you are done, let's
just tap on the layer. And let's do the same for
our body of the bell purper. Let's just tap on the layer. And from here we'll
create one more layer. Let's rename it as Shadow. One more time, let's
just tap on the layer. Let's choose Clipping Mask. And then we'll go to
our icon to change the blending mode to multiply
again for the opacity, let's go around 30% When
you are done with it, we will go back to
our color palette. We will select the orange
color when we have it. We will go to the same side where we have our
shadow on the top. Let's just go to
the bottom right. We will just go along the line and we will create a
shadow going down. In that way you can
hold it in the end. You can adjust the curature
by going to the editing mode. Find what works for
you when you are satisfied with the
position on this shadow. Let's just tap on the screen if we have some miscolored area, let's just go and
manual recolor it. When you have this in that way, let's just go to the
wedge that we have on here in the middle part and create something
similar here too. We will put a little shadow, let's decrease the size of
our brows just a little bit. Again, starting from the top, we will just go there
and create a curve going down in that way when
you are holding it. In the end, we will
go over the top part. We will adjust the position and maybe the curvature of this element when you
have it in that way, let's just tap on the
screen and we will go and manually put this
part in a shadow. In that way, if you have some parts
that you need to erase, grab an eraser and erase them. Now if you feel that maybe the opacity of the
shadow is too much, we will go back to our layers. We'll go to the M icon and adjust the opacity
from our slider. Find what works for you.
And when you are done, let's just go and
add the highlights. What we need to do is to go to our li with facial features. And from here we will
create one more layer. Let's rename it as highlights. We will also go to the end icon. And we will change the
blending mode to overly, let's keep the capacity
at maximum for now. And then when we
have our highlights, we will just go and adjust it. Firstly, let's just get back to our color palette and
select the white color. When we have it, we will go
to the opposite sides from our shadows and we will be
adding little highlights. Firstly, let's just
go over the top and we will create
a line going in that way you can play around with the shapes
of your highlights. You can go with some dots. You can go with
some little lines. It's all up to you if you want to adjust the size
of your brush again, you are welcome to
go and do that. Let's just go over the top and let's add a few more
highlights like that. When you are done
with the highlights, let's just get back
to our layers. We'll go to our icon on the highlights layer
and we'll adjust the capacity to the
level that we will like. For example, something around
40% will work perfectly. Now let's just take a look at our illustration
from the distance. And let's just go
underneath it and let's create a little
background for it. What we need to do is to go to our layer with
shadow on the stem. From here, we'll create one
more layer if you want. You can rename it
anyway that you like or you can
keep it as it is. We will just need to drag
this layer underneath our lay with the stem
when we have it, we will just need to get back to our color palettes and let's
select this gray pink color. We will go along the lines of our sheep and we will
create a simple shape here. We can just go with
simple shape of an ellipse or maybe
some peculiar shape. You decide what you want
to create For this part, again, we are creating a
line that will have no gaps. If you want to adjust
something here, you are welcome to
go and do that. When you have the
line like that, let's just go and drag and
drop the color inside. If you want to adjust
something again, go and adjust it. For example, let's just
go over the top and let's smoothen up this top part. If you want to adjust
the shape with your liquefied tool or with the arrow key
on the top left. Again, you are welcome
to go and do that. Let's just spend some time here and adjust this little shape. When we are done with
adjusting these elements, let's move on to our next part, where we are going to be
creating our Brookla.
7. Colors: Broccoli: Let's begin this part firstly
by going to our layers. And we will go and unhide
our layer with the skitch. When we did it, we will go to our group with
Bell Pepper and we will need to tap on this little V icon to
collapse the group. When we've collapsed this group, let's just go about it and
let's create one more layer. Let's rename it
as broccoli Body. When we did it, we
will just go back to our color palette and let's select this yellow green color. When we have it. We will use the same brush that
we use before. We will go and recreate the body for our broccoli the
same way as before, just creating the closed lines. When you are done
with the outlines, let's just drag and
drop the color inside. If you need to adjust
some parts with an eraser or with a
brush to make them nice, let's just go and do that. If you want to
take a look at how everything looks without
the lines on this sage, let me just go and hide them. When you're satisfied
with everything here, let's just get back
our li with the sage. And then we will go
above our li with a Brockli body and
create a new layer. Let's rename it as top part. Now when we have the two layers, let's select them both and
let's put them in the group. Let's remain this
group as broccoli. Now getting back to
our top part layer, and let's just go and start creating our
elements from the back. Firstly, let's just get back to our color palettes and we will start with some dark elements. Firstly, let's just go with this green color
and recreate one of the broccoli parts on the
back When you have the shape, just dragon drop
the color inside. When you are done with
the first element, let's just go back
to our color palette and select dark green color. When we have it, we will go to the opposite side and create
the similar shape here. Let's just drag and
drop the color inside. If you have the overlapping
elements like that, let's just go and
manually recolor them when you are done. One more time, let's just get
back to our color palette. Select the same green color that we had right here
on the top right. We will go to this
element that we have on the bottom
left and recreate it, drag and drop the color, and recolor the
overlapping areas manually when you have it. Let's just get back to
our color palettes and select the same color
that we use right here, that is our dark green color. When we have it, we will
just go to this part right here and recreate it again, dragon and dropping
the color and manually recoloring these areas
that are overlapped. Now when we have the
parts one more time, going back to our
color palettes and let's select this
light green color. With this color, we will go to this middle part
and recreate it. Again, dragging and
dropping the color, and manually recoloring
all the overlapping parts to make sure that we've
recolored everything. Firstly, let's just get back to the layers and hide our
layer with the sketch. When we are done, let's just
get back to our layers. Let's unhide our lier
with this skitch and create one more layer
on top of our top part. Let's rename it as
facial features. Now let just get back
to our color palette. Select the dark brown color. Let's get back to our size of the brush that
we used before. And let's start recreating these elements that
have tiny lines. If you need to adjust something, go and adjust it. When you have the
lines like that, let's just go increase the
size of our brush and put the dots for our eyes
when you did it. We will go again to
our color palette. Select the white color, decrease the size of our brush, and go and put our
little highlights when you have it in that way. Let's one more time go back to our color palettes and
select the bean color. With this color, we will
go and put the dots for our cheeks also, let just go inside this mouth and we'll just drag and drop
the color right here. When you are done
with this task, one more time, let's just
get back to our layers. Hide our li, with this cage, check out how everything looks. And let's just go and start
aging our little shadows. Firstly, let's just go
to our broccoli body. And from here we will
create one more lier. Let's rename it as Shadow. Again, we will clean this
layer to a previous one. Go into our icon then. And selecting multiply
blending mode. Let's set the
apacity to something like 30% when we did it. Let's just go to our
color palettes and let's select light green
color With this color. Let's just start
adding our shadows. For example, let's just
go over our left side and we will create
a shadow going in that way when you have it. We also will go
to the top and we will recreate the shapes that
we have for the top part. The top part is
cast the shadow to the stem when we
have it in that way. Let's one more time
go to our layers. We'll go to our shadow
layer and we will change the capacity
to a lower value. For example, let's just set
it at 15% when we did it. Let's just go over the top part. We will create one
more layer here. Let's again rename it as Shadow. Let's clean this layer
to a previous one. Tapping, selecting,
clipping mask. Go into our icon. And changing blending
mode to multiply. This time let's just go
with 30% of opacity and we will go to our color palette and select the dark green color. Let's then go to our slider with the size of the brush and
make it very, very small. We will just go along the elements and we will
add some beautification. Let's just go and create a
few lines going like that. When we did it, let's just go and start aging.
Or highlights. Again, we are going
to our layers. We are going above our lay with the official features and we
will tap on the plus icon. And we will remain this layer as highlights one more time. Going to our icon and changing blending
modes overlay for now, keeping the capacity at maximum. Then we'll get back to our color pallets and we
will select the white color. Let's just go and
increase the size of our brush and we will go to the opposite sides and we will start aging or
highlights for example, Let's just go to
the body firstly. And then we can go
over the top of our Busche parts on the top and we can add a
few highlights there to. When you are done with this, let's just get back
to our layers. We will go to the icon and we will adjust the
opacity to our liking. When we are done with it, let's just unhide our
layer with the sketch, and we will go behind our broccoli and create
these additional elements. We are going to our
layer with broccoli. We will go to the layer with the shadow so it's not clipped. We will just tap on the plus icon and we will
drag this layer underneath. Or you can just select
these two layers on the bottom and drag them up above this new layer when we have this new
layer at the right place. Let's just get back
to our color palette. Let's like this green in color. And we will do
something similar to what we have read here
on our bell pepper. Let's just go and create a cute and random shape
like that when you have it. Let's just drag and
drop the color inside. If you need to adjust something, let's just go and adjust it. When you are satisfied, let's just go and continue creating our new elements
in the next part.
8. Colors: Tomato: Let's begin this part firstly
by going to our layers. We will go to our group with broccoli and we
will collapse it. When we have it in that way, we will tap on the plus icon and we will rename it as Tama. When we have this new layer, let's just get back
to our color palette and select the red color. Let's just go and recreate
the body of our Tameta. When you have the outline, just drag and drop
the color inside. If you need to adjust
it in any way, let's just go and adjust it when you're satisfied with
the body on the Tama. Let's just go back to our layers and let's
create a new layer. Let's rename it as Stem. Now let's select both of these layers and we will
put them in the group. Let's rename this
group as Tametaow. Let's just get back to
our layer with the stem. We will get back to
our color palette and select one of
these green colors. Let's just go either with
light green or yellow green. When you have
selected the color, let just go and recreate
our stem elements. Drag the color inside
when you are done. If you need to adjust something, go and adjust it. When you have the stem ready, let's just go and create our leave the same
way as before, just creating the shapes as
we have them on our skitch. Or adjusting them if you
want to adjust them, make the overall shape closed, and then let's just drag
and drop the color inside. When you have the
shape like that, let's just go and add a few elements inside the
same way as we did before. We will just need to
go to our layers. We will go to the
layer with this stem. We will tap on it and we
will choose alpha lock. Now let's just get back and
select a darker green color. For example, let's just
go with dark green. We will change the
size of our brush, something like two or 3% We will go and add this little lines
in the middle of the leaves. Let's just go and create
something in that way. You can go with straight lines or you can create little curves. You can connect them nicely in the middle by creating a
little curve like that. Also, we can just go
to the top part right here and create the
shape with this color. When you are done,
let's just go and start creating artificial
features One more time. Go into our layers and creating a layer on top of our
layer with this stem. Let's rename it as
facial features. Let's then go back to our color palette like
the dark brown color. Let's pink the same size that we used before for
artificial features. And let just go and
start recreating our elements when we have
something like that. Let's just then go to our
color palette one more time. And select the pink
or red, pink color, the color that you were using
for your cheeks before. Let's select it and
let's just go and recreate our tongue
and also our cheeks. If you want to make sure
that you are creating a nice tongue and you don't need to go and erase
the parts later on, we can just go back
to our layers. Go to the layer with
the stem from here, create a new layer. Just keep it as it is right now. And then let's just go and recreate this element
for our tongue, this little line that you have in the middle
if you want to, with a darker red color. Let's then go to our layers and we will merge these
two layers together. We are going to the top plan typing on it and
select and merge down. When we did it, let's just go and start adding our shadows. Firstly, let's just
go to our Tama. We will create one
more layer above. We will rename it as Shadow. Let's clean this layer
to a previous one. Going again to our icon, changing the blending mode to multiply for the
capacity for now, let's go with 30%
We can then go to our color palettes and select one of these colors that
we have on the bottom. For example, you can go with
the same color that you used before for the main shape
or pick one of these ones. Let's just start with the
same color and if we need to, we will adjust it later on. Now we will go to
the bottom part, again, to the side that
we have on the right. And we will create a
curve going in that way, you can hold it at
the end, as always, you can go to the Symdes
and adjust the curvature. It's all up to you When
you have this first curve, let's just go and manually
recolor the bottom part. Also, we will just
need to go underneath our leaf and we will need to
add the shadows here too. Just go in there and recreating the shapes if you want,
with the same color. We can just go to some random
areas and put little dots. We will just have some
beautifications in that way. When you are done, let's
just get back to our layers. We will go to our
layer with this stem and we will create one
more layer above it. Let's rename it as Shadow again. Let's clean this layer. Let's go and change the
blending mode to multiply, set the apacity to something
like 30% Going back to our color palettes and selecting some of the darker green colors. For example, just green. Let's just go to the stem and we will create a shadow
going in that way. Then we can go to some of the leaves and add the
shadows to them too, trying to put the shadows
on the bottom parts. And also on the same side where we have the main
shadow for the Tamia. Now let's just take a look at it without the lines of the skitch. If we need to adjust something, let's just go and adjust
it when you are done. Let's just get back
to our layers. We'll go to our li with
facial features and we will create one more layer above
it to create our highlights. Let's rename this
layer as highlights. You can see when we merged our layers with facial features, it lost its name. If you want to, you can
go and rename it back. When we have our layer
with highlights, we will just go to our icon and change the blending
mode to overly. Let's go to our color palette. Select the white
color and we'll go to the opposite sides and we will start creating our
little highlights. You can also go and
add a few dots or some additional elements to other areas to
create some texture. When you have the
highlights done, let's just get back
to our layers and let's change the opacity
of our layer with the highlights to
what we would want it to look like when
we are done with it. Let's just go to the bottom, to the layer with the
shadow of the Tamera. From here, we will just go
and create one more layer. Let's just stop
on the plus icon. And then we will go and
select these two layers. And we will just drag them up above this layer that
we have just created. Now we are getting
back to this new layer and we will go back
to our color palette. Let's select our
green pink color. Let's increase the
size of our brush. And let's just go and create some peculiar shape
for these elements. When you have the shape, just
drag and drop the color. If you want to adjust something, just go and adjust it when you're satisfied
with everything. Here, let's move on
to our next part, where we'll create
our little garlic.
9. Colors: Garlic: Let's begin this part again
by going to our layers. We will go to the top. We will go to our group
with Tamata and we will collapse it when
we have it in that way. Let's just create one more layer above that will
rename as garlic. When we have this new layer, let's unhide our
layer with the sage, and then we'll get back to our color palettes and we
will select the white color. With the white color,
we will just go and recreate our shape
of the garlic. When you have the outline, let's just drag and
drop the color inside. Then when we have the shape, let's just get
back to our liers. We will tap on our
layer with the garlic, and we will choose alpha lock. When we did it, we
will get back to our color palettes and we will select this light orange color. Let's decrease the size of
our brush and we will go and recreate these lines that we have on the body of our garlic. You can make them
the same way as we have the lines
on our bell pepper. Or you can experiment
and create something different with the same color. We will go on top and we
will recreate these parts. Now when we did it,
let's just go and take a look at it without the
lines on this sketch. And decide whether
we need to adjust something or if we are
satisfied with everything here. If we are satisfied,
let's just get back our lay with the skitch then. Let just go and create
one layer above. We will rename it
as facial features. Now as we have two layers, let's select them both and
let's put them in the group. Let's rename it as garlic. Now let's just get back to
our li, with facial features. We will get back to
our color palette. Select the dark brown color. We will decrease the
size of our brush and we will recreate our lines
for our facial features. When you are done
with this color, let just get back to
our color palette and select some pinkish color. With this color, we will go and increase the size of our brush, and we will put the
dots for our cheeks. Now when you are done, let just get back to our layers. We will go to our
layer with garlic. We will create one
more layer above. We will rename it as Shadow. Let's clip it to
a previous layer. Let's just go to our icon, change the blending
mode to multiply. And let's send the
opacity to something like 15% When we did it, we are going back to our
color palettes and again, selecting our light
orange color. Now let us go again over one of the sides and we will start
creating our shadow here. Let's firstly go
to our right part. And we will start from this
little wage that we have. The second one. Let us go along these lines and
let's create the shadow. If you don't see your shadow
with that level of opacity, you can get back to your layers, go to the opacity slider and
set it to something like 30 or 40% when you have
the shadow on the bottom. Let's just go over the
side that we have on our right and create a big
shadow going in that way. If you want to
take a look at how everything looks without
the sketch lines, let's just go again to our lease and hide our lio
with the sketch. Let's just go and
adjust our shadow. We will just grab our eraser and adjust the
shadow in that way. When you're satisfied
with your shadow, let's just get back
to our layers. Let's just go to this layer. With our shadow, we will
create one more layer and let's select these
two layers on the bottom. And drag them up
about this new layer. We will go to this new layer. We will go again to
our color palette. Select this gray pink
color and let just go and create some peculiar
shape for our garlic. Drag the color inside the
shape if you need to. When you are done
with the shape, the very last thing
that we will do will be aging little highlights
along our shapes. Let's firstly go
over our layers. We will go to our
li with this sage. And from here we will create
one more layer if you want. You can rename it as highlights or keep it as it is right now. When you are done with
creating a new layer, let us get back to
our color palettes and select the white color. Now we will go near our elements and we will start aging
a little highlights. Let us go and start creating
little sparkles like that. Let us go and create
a few of them near every object that
we have on our canvas. When you are done, Linda, just take a look at our
illustration from the distance. And if you like
everything that you see, we are done with our class. Thank you for watching
this class leave, review if you like
this and consider subscribing for more Cai
videos in the future. Looking forward to
seeing your projects.
 Uni Corn, ⭐Kawaii Art Enthusiast⭐