Transcripts
1. Introduction: Hello everyone, I
am uni and into this class we'll draw
a cute flower recheck. This class doesn't require any prior experience
or fancy tools. We'll start from scratch
and we'll be using simple techniques
throughout the process. Everything you'll see will
be happening in Procreate. However, if you have other software or wants to
try traditional materials, you are welcome to join if
you are ready to start, Let's jump right into it.
2. Making a Scheme: Let's start our
class by deciding what kind of Canvas
we are gonna be. Then you can see it is a very simple standard
square canvas because both pixel width and pixel
height are 2048 big subs. If you would like to use any other dimensions
for your canvas, just go for it. S for DPI, we are at 300 and
aesthetic color profile. We are using sRGB
with this low number. When it's all done,
let's hit Done and it will be redirected
to our new canvas. Now, if you would like to use the same colors that you will see throughout the whole class. Please go to the project
and resources tab and download the materials
in 20 did it. Let's get straight into
our color palettes and let's check out
what we have here. Here we have two options of
how we can use the colors, the compact view and the carts. We will go straight into
the cars because we can see here that we
have all the colors, names, and it will be easier
for us to follow along. And while we are still here
under our color palettes, Let's select our
first color that we will use for this kitchen parts. You can select any color that will be seen onto your canvas. Or if you want to
follow along a ledger, select the color
within the lines, one, when you have
your new color, Let's just go and select the
brush for this kitchen part. So we are going to
Art Brush Library and we are going to this
kitchen folder here. We can select alien
brush that you like. You can just go through them, try them out on
say, your Canvas, find what works for
you and when you are satisfied with your
brush, with your color, we will start by creating a very simple shape that will help us to
structure our canvas, the beats, and find
the composition that will work with
our illustration. In general, we need some
structure because firstly, it might be a little bit overwhelming to start
from the blank canvas. And secondly, our
brains and eyes, while looking at the picture, tend to search for
familiar patterns. That means we don't
want our objects to be scattered randomly
along the canvas. We want them to be grouped
in some logical way. So it makes the picture
more pleasing to the eyes without going too deep into the
composition theory, we can start with
any simple shape. And now it's triangles,
circle, rectangle, etc. And when we have a guide in
the form of simple shape, we can position all of
our elements more easily. So let's just go
and start creating our illustration by creating
a shape of the ellipse, we will go to our Canvas. We will adjust the size of
our brush to our liking. If we want to adjust the
opacity of the brush, we will go to the
slider on the bottom. We will start very
easily by going to the canvas and create an
egg shape of the ellipse. And we will do it
just with one line without lifting up
our Apple Pencil. So let's just go and try it out. So go to the Canvas, loop your shape around, and hold your Apple pencil. You will see that you snap
your sheep to a better one. Now you have this perfect Alice. If you want to adjust the size, move your Apple pencil
from side-to-side. If you need to rotate
it a little bit, move your Apple pencil
in a circular direction. If you want to adjust
the shape even more, lift up your Apple
Pencil and lead you to the top part where we have
this little option ellipse. Let's just tap on it. If it's not saying
ellipse to you, you can just go there and find the ellipse in the Options. If you still don't have this option to write
out one more time, create your shape, and then
go to this Edit and modes. Here. In the editing mode, you can see that we
have some nodes. They are blue and we can just go to them and
we can tweak that. E.g. alleges go and make our little shape a
little bit more chubby. When you have
something like that, Let's position it
right in the center. So we will go to some blank
space onto our canvas, will hold our Apple
pencil there, and we will just move our shape. If you want to adjust
your ellipse in any way, you are welcome to do it. For this class. Let's just make it a little bit tilted toward the left side. When you write down
a linear shape, just tap on the screen with
one of your fingers or with your Apple pencil and you will get away from the editing mode. And now if you accidentally skip this part or if you want to
adjust your sheep even more, we can go to the transform tool, which is our arrow
key on the top-left. So then just tap on it
and let's explore it. When you tapped on
your arrow key, you will see that now you have a bounding box
around your object, and also you have
a little panel. On the bottom panel, we will select uniform methods and S for the bounding box, if we want to make our shape a little bit bigger or
a little bit smaller, we can go to one of the nodes. So e.g. the one that we
have on the top right, we can hold our Apple pencil there and we can
move it diagonally up or down depending on what we want to do with our shape. If we want to rotate our object, we will go to the green
node over the top, and we will hold our
Apple pencil there and we will move in a
circular direction. So if you need to rotate it, go to this green node
and adjust your sheep. If you need to move
your shape toward the center or somewhere else, you can do the same thing as
we did in the editing mode. So we will need to go to some blank space
onto our canvas, hold our Apple pencil
and just move it. Holding it. When you're
satisfied, adjusting your shape. Ledgers deselect everything
by hitting our arrow key. Now when we have
our first shape, we can continue by defining other areas that we will
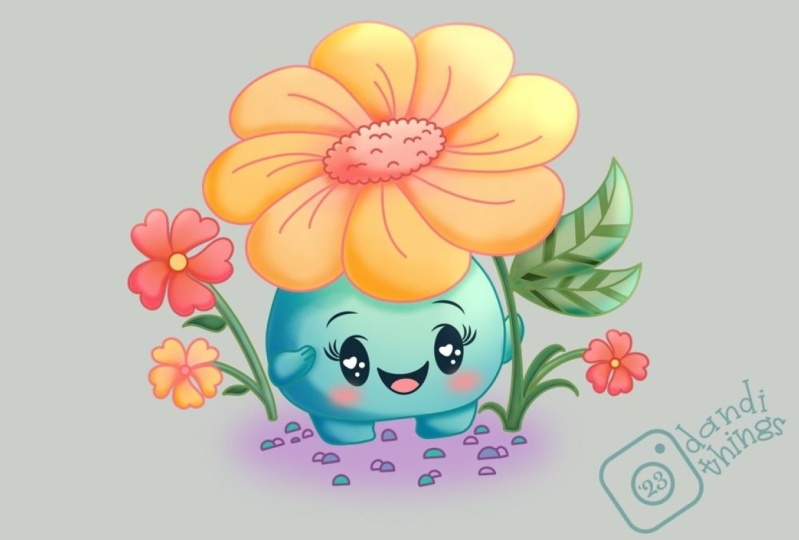
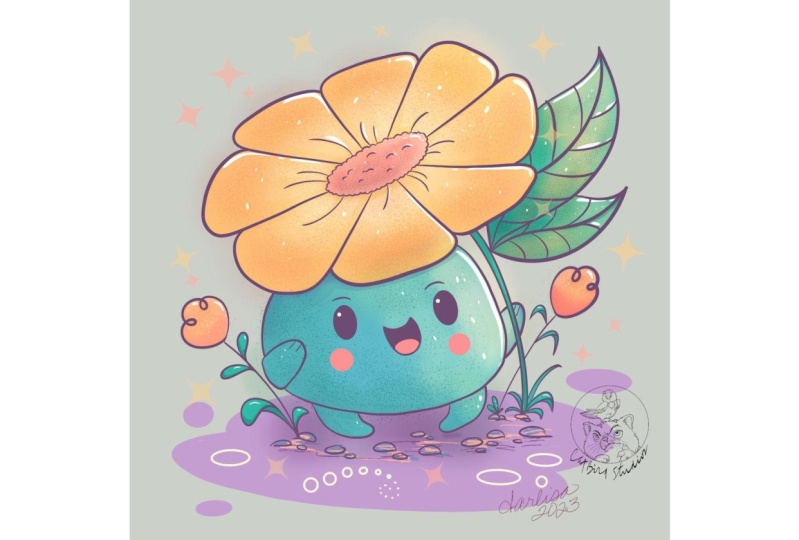
need to add to our sketch. And today we are creating a
very cute garden creature. And we will start by defining the place for our little flower. Let's just go to the top part and we will create
another ellipse. And this time it will be
aligned horizontally. We can create this new shape over this soap in
two different ways. The first one is just to go and manually try to
create this shape. Or if you want to adjust it, you can just go and try
to create it even more. You can play around
with the shape. You can explore
it if you want to do it in the same way
as we did before, we will just go
over the top and we will create the shape
just with one line. We will hold it at the end and we will go over the
top to edit shape. Basically what we need to do
is to create a tilted shape. And we don't really need
to be very precise with these lines that we have
created for our composition. If we are somewhere
near them and if we are somehow following
them, we are good to go. If you want to go beyond
the frames, Go for it. If you want to put them
right inside your shape, you are welcome to do it too. So what we basically need to do is to create a tilted sheep. And we will need to feel
one-third to one-half of the whole shape
with this new shape and this shape we will
use to create a flower. So play around with the shape, find what works for you. And when you're done,
let just tap on the screen and we will
get away from the smoked. When we have these sheep, we will need to find its center. So in that way, we can go
and create the petals. Ledgers go and rotate our
canvas so it is facing us and we will go and
create one line that is vertical and one line
that is horizontal, and they will go to the
approximate center. Let's just go firstly over the top and we will
create this line. Hold it and the answer, if you need to adjust the angle, just move your Apple pencil. If it's not in a sensory, don't worry, we
will go over that. So up to this line option and we will position
it in the center. When you are done with this
line, which is vertical, I just tap on the screen and let's go and create
the same thing, but this time it
will be horizontal. So hold your line and the
ants adjust the angle. If you need to,
adjust it even more and position it
more to the center, go over the top to editing mode, find the position
that works for you. And when you're done, tap on the screen
and now we have an approximate center
on this top shape. Ledgers go and create the
middle part of the flower. For now, we can just go and create another
ellipse like that. You can play around
with the shape if you want to create it with
the quick shape to just hold your land at the ends and adjusted even more if you're not satisfied with your sheep from the first try to write
out one more time. Try to position it
somewhere in the center. And when you are done, we will need to create
the guiding lines for our petals and we
can do it manually. So let's just get to the center. And from the center
we will start creating soft curves
along the whole shape. They will represent our petals. So you can try to create
as many as you like. When you are satisfied
with their amounts, we need to go and start creating our little creature that is hiding underneath this flower. We can do it on the same layer. Or if you want to explore some
tools that Procreate has, we can go and create
one more layer. I go into the layers
we are tapping on the plus icon to
create a new layer. If you want to rename it, you will tap on the layer
and you will choose Rename. Later on, we will merge all the layers
together more likely. So it actually doesn't matter if you are a naming your layers. Now when you have a new layer, we will go to the bottom left corner and we will start very easily by creating a shape of
the perfectly round circle. Let's just go and try it out. We will do it just with one line without lifting up
our Apple pencil. Hold your line and the hands and also hold one of your
fingers on the screen, you will see that you snap your shape to a
perfectly round circle. And if you need to adjust it, live just on hold
everything and we won't go over the top to circle menu. Now let's position it
a little bit higher. So our boards and part of this elements touching the
bottom of our main shape. And we need to overlap
our little shape on the bottom with the shape
that we have for the flower. So if you want to
adjust the size, you will between
these little notes that you have in
the editing mode, hold your Apple pencil there and just move it toward the sides. When you have the
size that you like, when you have the
position that you like, Let's just go away
from the editing mode. And now when we have
this perfect around circle ledgers go and
adjust the sheet. We will go to our arrow
key on the top-left, which is our transform tool. And this time we
will use the option where you can see when we
are choosing work option. Now we don't have this
bounding box slides, but we have some lines
inside these elements. That means that we can go
to any line that we have onset these Warp tool and
we can adjust our shape. So e.g. let's start
from the top. We will use to our notes and
we will go to the right one. Firstly, we will move it
somewhere in the center. You can see that
you are adjusting your sheep in a
more peculiar way. And when you have the
data on the right, let us move on to the left and we will do the
same thing here. So we are making that
so part a little bit squished when you are
satisfied with the shape, Let's move on to
the bottom and we will turn it a little bit up. So firstly, you went to the
middle part and just dragging it up and creating some
kind of a drop shape. If you want to adjust this size, you can just go to the
sides and adjust them. If you want to go to
the bottom and adjust this nodes on the bottom and make your whole shape bigger. You are welcome to do it. Now it's your time
to play around and find the shape
that works for you, the rounder you make it, the cuter it will be when you're satisfied
with the sheep, we can go to the uniform method. And if we want to rotate it
or make it bigger or smaller, we know what we need to do. So let's just play
around a little bit and find the position of this
element that we would like. And when you're satisfied with your shape, with its position, with its rotation, let's just deselect everything by
hitting our arrow key. And now we can
continue by going to the bottom on the shape
and creating little legs. Let's just go over
the left side. We will start by creating a
little element like that. You can play around
with its size. You can play around with this position if you want
to make it more smooth. And if you want to connect this in any way with the whole body, you can go to the side and make this line that you have for the leg a little bit more sloppy when you
have the first leg, Let's move on to the
opposite side and let's try to create another one. So we will basically
repeat the same sheep. Don't worry if now it
looks not quite goods. We will adjust, our shapes, will adjust the
whole sketch later on so we can fix some places. Basically now we are
deciding where we need to put our little elements. And when you are done,
agentless little legs, you can see that our whole illustration
is not looking balanced. That's because we have a
lot of visual weight over the left side and a right
part is pretty blink. So that means that we will
need to add something here and that way we can
balance everything out. So let's just go
to this right part and we will add some
little leaves here. We will start from
the bottom and we will create a guiding
lines going up. And when we have
this guiding line, we will just go to
the right side and we will create the
lemon shapes like that. You can make one big one,
a little bit smaller. All you need to do
is to visually make the similar weights that
we have on the left side. You can see that now
it looks better, but still we have
some blank space over the right part
on the bottom. So let's just go and add
something here, e.g. we can go and add some lines that later on we will
turn into flowers, Land jazz, go and create
another guiding line like that. It's over it. We will create some
sheet that will remind us over flower. If you want to make some
elements on the left side, you are welcome to do so. E.g. we can go there and mirror this element that we have for the flower and add
another one here. Now, when we figured out
what we're gonna be doing, if you want to adjust
some elements, you are welcome to do it. If you want to come up with
a different composition, again, you are welcome to do it. The last thing that
we will add here will be a little
elements on the bottom. And again, it will be
Alito ellipse that will represent the grounds where our little creature
is sitting on land. Just go to the bottom
and very easily we will just go and create
another ellipse here. Hold it and the Yan's
a jazz the angle, if you need to adjust it
even more and go over it, it's up to ellipse, play around with the shape, play around with the size of it. Play around with the openness of this little olives
that you are creating. It's all up to you. When you are done adjusting it, just tap on the screen and let us get away from
the editing mode. Now, if we take a look at the
whole picture in general, we can figure out that
maybe it is too big for us. So firstly, we will need
to go to our layers. And as we have two
layers for our elements, ledgers go and merge
them together. We will go over the top layer, we will tap on it and we
will choose merge down. And now everything
that we have for our little exploring of the
sketch is on one layer. Now we can go to our arrow key. We will go to the uniform
methods and we will make this whole illustration
a little bit smaller. Let's just go towards
our right corner that we have on the top
and we will drag it down. When you're satisfied
with the size ledgers, move it toward the center. And when you are
done with this task, we are done with our
preparations for the sketch. In the next part, we will
create an actual sketch.
3. Making a Sketch: Let's begin this part
by going to our layers. And firstly, we will
create one more layer for our actual sketch in parts. So let just tap on the plus
icon and straight away, we will rename this
layer as kitsch. So we will need to tap
on the layer and we will need to select Rename
from this list. Now let's get back to
our previous layer and we will rename it as scheme. So one more time we are tapping on the layer and choose rename. And while we're still here under our leaguers ledgers go to this layer with this
scheme and we will change the opacity
level of this layer. And that means that we still want to see what's
happening onto this layer, but we don't really
want it to be very disturbing and very bright. So let's just go to this icon onto the layer with this scheme. And here on the top
you can see that we have this slider
with opacity. We can grab it and we can
move it toward the left side. Find the opacity level
that works for you. You still need to see
what's happening onto the layer when you are down leg just tap on the skin layer to get away from these literalists. And now let us get back to
earlier with this gauge. And we will start
by going over the top and we will recreate
this middle part on the flower if
you want to go to the color palettes and if you want to select a
different color, so maybe it'll be easier for you to navigate through your sketch. You can go and select
any color that you like. So e.g. let's select
the color within the lines to when you have
selected here in your color. If you want, you can go
to your brush library. You can change the brush, you can adjust its size, you can adjust its opacity. It's all up to you
when you are ready. Ledgers go to this
middle part and we will create
another element here. So you can go and repeat what
you have onto your scheme. Or if you want to
adjust it in any way, you can go and do that. So e.g. you can not create your line just with
one straight line. You can go and
create some bumps. And in that way, you
will recreate this part that will remind us the
middle part of the flower. So work onto this element
when you are satisfied. If you want to
adjust some parts, grab an eraser tool
and adjust them. If you want to add some additional elements
inside the shape, you are welcome to do. So e.g. you want to add some
little lines like that. And it will be represented that this part in the
middle is not flat. It has some texture. When you are done with this
little part in the middle, Let's just go and
work on our petals. And we can do it
manually by going along the whole shape and creating our drop shapes of the petals. But also we're going to use one option that Procreate hats. Let's get to the Wrench
icon over the top-left, we will go under Canvas and
we will Togo drawing guides. When you did it, you
will see that you have the Greek going through the
whole shape of your canvas. And to be honest, it's not
the option that we need. So we will need to go
under Edit Drawing Guide. On the bottom you
can see that we have a panel and we will need
to go under a symmetry. When you turn the symmetry on, you will see that you
have just one line with two dots and we need to
adjust it a little bit more. So we are given under Options and we will need to
select radial here, you will see that
your scheme changed. And also we will
need to get back to our guide options
and we will need to turn on rotational symmetry. When you did it, we
will need to grab this blue dot that we
have in the middle and we will need to drag it to the intersection
that we have owns our flower we have created before with one
language is vertical, with one line which
is horizontal. So lets just grab
these little blue dots and we will drag
it to the center. If you want to
rotate your scheme, you can go to the green
nodes and rotate it. If you don't want to do that, we are ready to go to the top-right and we
are ready to hit Done. And now we will go
over the top of our flower and we will start
creating their first petal. And you will see
how easily we can create the rest of
them with these two. So what we need to do
is to go to the top or to any area that is
comfortable for you. We will start by creating
a shape of the drop. You can play around with its size and you
can play around how much you want to overlap it
with the other elements. If you want to hold
your Apple pencil at the end of the line and snap
it to a shape of the olives. You are welcome to do it. If you want to play around and maybe try it one more time, you are welcome to do it too. So when you are done with
creating your patterns, we will need to go and turn off our option of assisted drawing. So let's just go back to our orange icon
over the top-left, go and under Canvas and we are
turning of drawing guides. Not enough to be honest. So if we get back to our canvas and if we try to
create something here, you will see that we are
creating multiple sheets. So we will need to
go to our layers and we will need to turn
it off manually. We are going to earlier
with this sketch and you can notice that
now it is assisted. So let's just tap on
the layer and we will need to select Drawing
Assist from the list. If we get back to
earlier right now, you will see that we are not
created multiple shapes. So now ledgers grab our eraser tool and we
will adjust the sheep. You can play around with
how you want to overlap your objects and erase the parts that you
don't need to ledgers, grab the eraser tool
and very easily go and erase the parts
that we don't need. When you are satisfied
with your petals pattern, Let's just go and
adjust our shapes. So if we take a look at
our scheme right now, our flower is not fitting into the scheme that
we have on the top, so we will need to
go and adjust it. Let's just go to our
arrow key on the top-left and we will go
under distort option. Firstly, we will go over
the top-left corner. We will hold our
Apple pencil there and we will move it
a little bit down. You can see that now
we are adjusting their perspective and
we will need to go over all of the corners
and try to fit it in on the sheet that we
had on to our scheme. So let's just go and play
a little bit with it. If you want to
adjust it even more, we can do under Warp and we can play with our scheme right here. So e.g. let's just pull this
top part a little bit down. When you're done playing with your shape and
adjusting it changes, deselect everything by heating our arrow key one more time. Now we have our flower, but let's work on it
a little bit more. We will go to the bottom
part of every petal and we will add some
dividing lines, one or two. So let's just go for a
slit or the top one, and let's create a
few lines like that. Now we will go to
every puzzle that we have and we will go
along them and we will add a few
lines tried to keep the same angle that we
have for our petals. When you are done with this
task ledgers go and we will create one more leaf for our creature
underneath the flower. So we are going back
to our list and we are tapping on the plus icon. If you want to
rename this layer, you are welcome to
do it with actual. Later on we will merge
all those sketch layers together so it might
not be worth it. Now when we have our new layer, Let's just go underneath
the flower and we will repeat this sheep that
we have owns our scheme. You don't need to
repeat everything with 100% of similarity. If you want to
adjust some places, you are welcome to do it. When you are done
with the main shape, Let's move on underneath it and let's repeat the legs
that we have here. Again, you don't need
to repeat everything similarly to what you
have on your scheme, you can adjust the lines, you can make smooth connections, or you can add some details. So e.g. you can work
on the boards and parts and maybe add
some kinds of tos. Let us go and work
onto our left leg. Firstly, make a
smooth connection between the shapes and when
you have your first lack, Let's move on to
the opposite side and let's add another one. And when you are done with the legs ledgers go
to the middle part. And we will start by
creating our little arms. Before starting with the arms, we will need to go and find the approximate center
on the whole creature. We know how to do that. We will need to create
one vertical line and one horizontal. But as you can see, our creature is quite rounds. So these slides that we
are going to be creating, they won't be just
straight lines, they will be the curves. But the principle is the same. We are going over
the top and we are starting by creating
the curve, going down. When you have it, we will go to the middle parts and we
will create another curve. You can hold it and the hands, you can adjust it
in any way that she liked by going over
this up to Edit Shape, find the center and
when you have it, we will go over the left side. Firstly, we will create
a first arm here. Let us go and create this
shape of half of this circle, half of the ellipse, or maybe a little bit
more than a half, we will go in the
direction like that. You can start by creating
our cell guiding line and then turn it
into a little ellipse. Also, we would want
to go to these parts and we will want to extrude
it just a little bit. So let's just go a
little bit farther from this slide and
we will repeat it. Work on the sheep. If you need to adjust
it in any way, you are welcome to do it. If you need to erase
some parts, ledgers, grab our eraser tool and we will erase all the lines
that we don't need. Now we have the first
arm and let's move on to the opposite side and we
will do the same thing here. But firstly, let's find out where we need
to put this arm. So it is on the same
line that we have our first arm on
the bottom part, on this arm that we have
over the left side. And from it we
will just go along the whole shape and we
will create another curve. You can hold it and the hands, you can adjust the angle if you need to
adjust it even more. Go over the top to edit shape. Just put it under this arm
that you have on the left. And when you have this line, we need to go over
our right side and we will need to find the
direction of this second arm. Let's just go and create the line going in
that direction. You can play with the angle. You can play with anything that you want to play with here. And when you're satisfied
with your guiding line, ledgers go right to this intersection that
we have right here, and we will start
recreating the shape of the arm similar to what we
have over the left side. And this side are little arm
is overlapped by the body. You just need to figure out
how to merge it together. So it is looking not weird. We need to create just
half of the ellipse. If it's not happening
from the first try, try it one more time. If it's not happening
from the second time, just write out one more time. If you need to adjust
it in any way, just go and do that. If you need to erase some parts, just grab the eraser tool
and erase these parts. When you're done with
your little arms, you can go and add some
additional elements. So e.g. we can go and add
some lines that will be dividing our arm and will
represent some fingers. You can do it on both
arms, are on one arm. And when you are
done with your arms, Let's move on to our
facial features. And firstly, we will start
by creating the ice. We will go to this
horizontal line that we have near our arm and own it. We will start marking down where we are going to
be aiding our ice. You can play around with the
distance from the center. You can play around with
their size, with anything. When you are satisfied with the position of this marks down, Let's just go and turn
them into the ellipsis. You can play around
with the size. You can play around
with everything. You are welcome to create
any shape that you like. When you have the outlines layer just go inside and we will shade our little eyes both on both
sides when you have the eye. So let's just go over them
and we will add little brows. So you can again play
with the sheep, e.g. we can end up with
little curves like that when you have
your little eyebrows. Let's move on and we
will add little mouth. So we will go right
between the eyes. We will go to the same line that we used for creating this eyes. We will start by
creating a little smile, if you like how it looks
just with a smile, leave it as it is. If you want to adjust
it in any way, you are welcome to do it. So e.g. ledgers go to the bottom and we will
create the open mouth, play with the shape. And if you want ledgers go
to the bottom and we will add another curve that will
represent islet cell tank. If you want, you can go inside this shape and
you can shade it. If you want to adjust the
position of your elements, but they are on one layer, we can do it in that way. We can go to our selection tool, which is the S ribbon icon. Over the top-left, we can
use the free hands methods. And if we want to
select the area, we will just go
manually and select it. It's around until
only these shades that you want to
select a selected. And when you have it, we
will go to the arrow key, we will go to the
uniform method and we will adjust the position
of these elements. Or if you want to make
it bigger or smaller, you know what you need to play around with the position
of your elements. When you are done,
deselect everything by heating your S ribbon
icon one more time. When you are done
with this task, Let's move on underneath
the ice and we will add little ellipses
for the cheeks. So we will go firstly or the left side and we will
create a little element here. Let's repeat it underneath
the opposite eye. If you don't want to add this
elements, skip this part. If you want to adjust the shape, go and find the shape
that works for you. And when you are done, we will go over the soap parts and we will erase this
overlapping parts. Firstly, let us get back
to our layers and we will hide just for 1 s
earlier with the scheme, you will see clearly
what we need to erase. So let's just go to this layer
with our little creature. We will grab our eraser
tool and we will go over this top part and we will erase the lines
that we don't need. When you are done, let's
get back to our layers and let's unhide our
layer with this scheme. Let's move on to
the next element, which will be our little
leaves on the right. Let's start working
winter this element the same way as we did with
our little creature. So we will go through
the list and we will create one
more layer above. Let's tap on the plus icon. If you want to rename
it, go for it. And now let us get
back to our canvas and let's play a little
bit with this shape. You can make it a part of the composition
and put it behind. Or if you want, you can
play around and add these little stem to the
hand onto our creature. You decide what you want to do. Ledgers, getting back
to our canvas and let's repeat this line that
we have on to our scheme. Now let's add a little bit
of volume to this line. So we will go a little bit to the side and we will
repeat this same line. If you want, you can make it a little bit wider
on the WhatsApp. If you need to erase some parts, grab the eraser tool
and erase them. Now when we have this stem, Let's move on to the leaves. Let's repeat the shapes that
we have onto our scheme. And if you want to
adjust them in any way, if you want to add some twirl, maybe you are welcome to do it. Basically what we
need to do is to repeat the shapes of the limits. When you have the first leaf, Let's move on and
add another one. It's always better to go
and overlap one shape around another shape rather than go and glue them together. So e.g. if we go to
create the second leaf, it will be better to go
and create it in that way. So later on we will
erase this part, but it's better because
it won't be touching our previous leaf and it won't create some tension
between these two leaves. And it wants draw
attention to this area. So let's just go and
create another leaf. And when you are done, we will go and adjust that. Let's grab the eraser tool and erase the parts
that we don't need. And then we will go
inside of our lease and we will add some
dividing lines. Grab your brush, and
let's go to our big leaf. We will go to the bottom part
and we will just go through the whole shape
and we will repeat this line that we
have on the site. When he had this
slide in the middle, we will go to the sides and
we will add a few more lines. You can play with a
pattern on these elements. You are welcome to
do whatever you want when you have this dividing
lines on the first leaf, Let's move on to the second one and do the same thing here. Here we can start from
the top and again go to the bottom and repeat the line that we have near the sites. When you have this line that
is going through the center, Let's move on to
this side and we will add this side
divided lights. And so when you have this
dam with two leaves, Let's move on to
the bottom and we will feel some space here. So let's just go near this
term and we will start by creating a few
strands of the graphs. Just go along this stem
and create a few elements. You can play around
with their position, you can play around with their placement,
with everything. If you have something
like that's tried to avoid the touching, grab an eraser tool and
try out one more time. Eating, need to
erase some parts, just grab the eraser
tool and erase that. We have these grass trends. Let's go and add our little
flowers on the sides. Let us go. If you want to
create one more layer, you are welcome to do it. Ledgers go to our layers and we will tap on the plus icon. Let's create this first flower that we have over
the right side. You don't need to repeat how
it looks onto your scheme. We just want to go between
these two elements and we will want to end
this flower right here. So let's start by
creating a little stem. And when you have this term, let just go and
create some flour. So e.g. we can go and create
a few loops like that. Again, if you have some
elements touching each other, just go one more time
and try to avoid it. If you have some lines
that you want to erase, go and erase that. When you have your first
flower onto the right side, Let's move on to the
opposite side and let's add another flower here. You can repeat the same shape
that you have on the right, or you can play around and add something different as always, let's start from this term. And on the top, you can create
any shape that you like. If you want to add some leaves, just go and do that. If you need to
erase some details, grab an eraser tool
and erase that. If you want to add some
other elements, e.g. some grass, you are
welcome to do it. Now let's go to this bottom area where our little
creature is standing on. And we will add some
additional elements here. Firstly, let's go to our
layers and we will create one more layer if you want
to rename it, go for it. And basically what we
are going to be doing, we will be creating
the shapes like that. On the top, we have
half of this circle or half on the Ellis,
and it's on the bottom. We have a straight line. We can create singular
elements like that, or we can try to create some composition so we
can overlap our shapes. Let's just go around this little area and we
will add a few rocks, vary their size, vary
their placement. And when you're
satisfied with it, we will continue by
adjusting our layers. So when you are done, agent here, little
rocks allege us, get back to the
layers and firstly, we will hide our layer
with this scheme. We don't actually
need it anymore. We will need to go and adjust our layers in accordance
with their position. So we will need to go to
our layer with the leafs. Firstly, let just find it
and we will need to erase the parts that are overlapped by our flower because our
flower is on the top. Ledgers grab our eraser tool and erase all the lines
that we don't need. Now, we will go and do the similar things to
all of our layers. If you see that some
elements are overlapping and other elements find the
layer and adjust this part. When you are done,
Let's take a look at our illustration
from the distance. So zoom out your
canvas and let's just figure out whether we want to add some additional elements. We can go e.g.
along the top part and add a few
additional elements, maybe petals, maybe
some sparkles, some flowers, anything
that you want to add. But we will need to keep
in mind that we are going in accordance
with our scheme. And our scheme was
just a little ellipse. If you need to go back to your leaves and if
you need to turn on your skin layers so you will go in accordance
with the line. You are welcome to do it. If you want, you
can go and create one more layer and add
this additional elements. Try not to overdo it. Just add a few of them. When you're done editing
your additional elements. One more time where I
go into our layers. We will hide earlier with
this scheme and we will take a look at our
illustration one more time. If you want to add
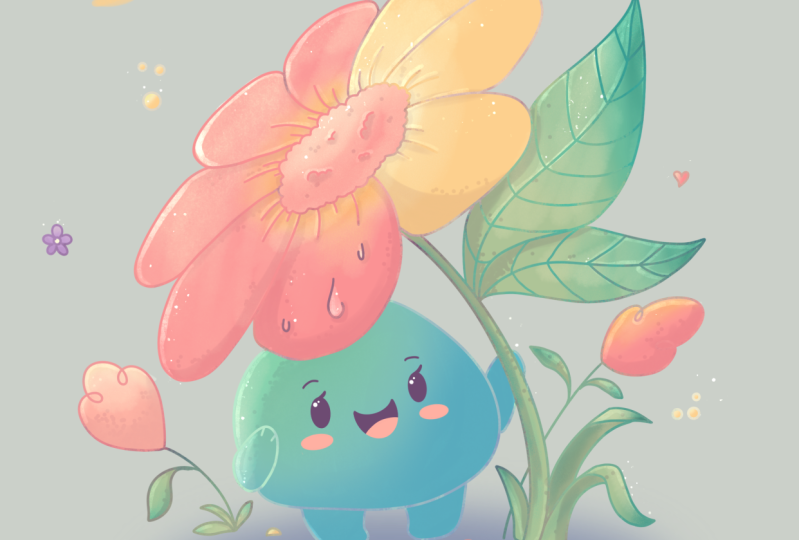
any more details, you are welcome to do it. So e.g. we can go to
our little flower and we can add a little
drop of water here. You can go to any
paddle that you like, and we will create
the shape like that. Now, we will need to go to
our layers one more time and we will need to
merge all the layers that we have for our sketch. And we can do it in
two different ways. The first one is to
go to the top layer, tap on it and choose merge down. In that way, we will merge
two layers together, but it is a little
bit time-consuming so we can go and merge every layer that we need to
merge just in one movement, we will put one of our
fingers on the top layer, and the second finger we will put on the layer on the bottom, which belongs to our sketch, and we will make a
pinch movements. And now everything
that we have for our sketch is on one layer. One more time. Let's just take a look at
the whole illustration. And if we want to
adjust some parts, we will go to our
Transform tool, which is our arrow key, and we will go to
the word option. If you need to play around
and adjust your escape, you are welcome to do it. If you want to make
your illustration bigger or smaller or
positionally differently, go to the uniform method
and do that from here. And when you're done
adjusting your escape, we are ready to move on
to airline in parts.
4. Adding Clean Lines: Less than satisfied by going to our layers and we will create one more layer for this part. We will tap on the
plus icon and straight away we will rename this
layer as clean lines. So let's just tap on it
and let's choose Rename. Now we will get back to
our previous layer with the sketch and we will go and change the opacity level of it. We will tap on the icon. We will go to our
slider with opacity. We will grab it and we will move it to where the left side. We still need to see what's
happening onto earlier, but we don't need it to be that bright when you are
satisfied with the opacity. Let's get back to our
layer with Glean lights. Now, if you would like to go to the color palette and change
the color of your brush. You are welcome to do it. So e.g. we can select the
color within the lines one, if you want to keep
the same color that you used for this cage, you are welcome to do it. Now when we have our new color or if we kept the previous one, we will go to the Brush Library and we will change the brush we are doing to the
calligraphy folder and we are choosing
monoline brush. And while we are still here
into our brush library, we will go and make one
change for our brush. Let's just tap on it. And on the left,
in the brush user, we will select stabilization. You can see on the top
we have the option streamline and it has
the slider amounts. We can go to the drawing
pad and we can play around with the low
value of amounts. You can see that when
you are creating a line, it falls your natural flow of the hands and it creates the
line with a little bumps. We want everything to be
as much smooth as it can. So we can just go to this amount option
and we can adjust it. So e.g. let's for
now centered as maximum and let's try it
out on our drawing packed. You can see that you are
creating a very smooth line. You are losing a bit
of control over it. But if you go in
a slower motion, you will have the
better results. So you can play around with
the amount of streamlines, find what works for you. If you don't want to use it, you are welcome not to use it. If you want to use it, find the amount and he'd
done when you are ready. Now let's just go to our
slider on the top-left. Let's adjust the size tried
out onto your canvas, try to make it not too
big, not too small. And too when you have the
amount that is working for you, we will go and repeat what
we have owns a sketch. You don't need to
repeat everything with 100 per cent of similarity. If you want to
change some parts, you are welcome to do it. All we need to do here is
to create the closed lines. Close lines means that we don't have any gaps between our lives. So very easily allege us go
and create our clean lights. If you have some objects that
overlap each other. So e.g. this flower and this little
hands over the right side, it might be easier to go to the Layers and create
one more layer here. Create your illustration
onto this little layer. Erase the parts
that you don't need and then merge two
layers together. When you are done recreating
your main elements, Let's get back to
our layers and we will hide our layer
with the sketch. We will check out
whether our lines are closed, smooth, and nice. If you need to
adjust some parts, go and adjust that. When you are done adjusting your lines when everything
looks smooth and clean, we will get back to
our layers and we will unhide our layer
with the sketch. We will create one more layer
for our facial features. So let's just tap on the plus icon and let's
rename this layer. We will go to the areas once our sketch and we will
recreate what we have there. Eating it to make the eyes the similar size and
similar openness, we can hold our lives
and the ants go over the top to Edit Shape and
then move the second i2, the first one adjusted in
accordance with our first i, and then move it back to the needed place
and the color to the inside part by dragging and dropping the color from
the top right corner. For the cheeks, we can go to our color palettes and select
any color that is pink, pink glide, or pink bright. And with this color,
we will go underneath the eyes and we will add
this color for the cheeks. Now while we are still
here onto this layer, we will add our little time and a few highlights
to the eyes. We can do it manually
or we can use one to let us go back to our layers. We will tap on earlier with the facial features and we
will choose alpha lock. When we are turning
on alpha lock, we are working only on the existing areas that
we have on to this layer. So if we have this
color is set as being, and if we go with this color to the bottom part on the mouth, you will see how easily we
can create our little tank. You will be adding the color
only to the area that you have on your layer and not
creating any more details. So let just go and add
the tongue in that way. Now when we have our tank, Let's add the
highlights to the eyes. We will use white
color for that, and we already have
white-collar onto our canvas. So we can invoke
the eyedropper tool to select this color. To invoke this tool, we will need to hold
one of our fingers on the screen and you
will see a little too. If you move your finger, you will see that
you are changing the color on the top of it. We will need to go and
select the white color. You can see that your color
changed on the top right. And when you have changed, ledgers go to our eyes and
we will add the highlights. So firstly, let us go and
increase the size of our brush. We will go to one of the quarters that we
have over-the-top part. Two, we'll just put
a little dot, e.g. alleges go over our left side. We will go to the top quarter and we will add a
little dot here. If the size is not enough, you can just go and
adjust the size of your brush one more
time and try to put the dot one more
time when you are satisfied with the size
of your highlights, Let's move on to
the opposite eye and let's do the
same thing here. We will put it on
the same quarter. If you want to add more
highlights for the eyes, you are welcome to do it. And when we have these ledgers
get back to our layers. We will hide our layer with
this gauge and one more time we'll check out whether
everything is looking quite nice. If everything is alright, we are ready to move on
to our next chapter, where we will add
our basic colors.
5. Adding Base Colors: Let's start our coloring part by changing the color
of our background. So we will go to, our layers, will go to the
background color layer. We will tap on it
and we will find the color with the
name Background layer, just tap on it and when
you have your backgrounds, we will get back to our layers. And now we will
need to decide how we are going to be
aiding aren't colors. We have a few options. The first one is
to add the colors on the same layer
with our clean lines. In that way, we are
just going over our top right corner
and we are dragging and dropping the color
to the needed place. But that might be not
convenient because what if we would like to change
the color of our lines? That will be quite problematic. So we will need to go and
create one more layer. And onto this layer we
will be aiding our colors. So let's just go to the
layers we will go underneath earlier with a clean lines and we will create
one more layer here. So let's just tap
on the plus icon. Let's rename it as
colors for flower. And now if we go and if we try to add the color
to this layer, nothing good will happen. We will recolor the whole area. It's not what we need, so we will need to adjust
our layers one more time. We are going back to the layers. We will go to our layer
with a clean lines. We will tap on it and we
will choose a reference. Now, if we get back to
earlier with flower colors, and if we try to do the same
thing as we did before, just by dragging and dropping the color to the needed area, you will see that it works. That's exactly what we need. Let's get to our color
palettes and we will start with the color
with the name yellow. Now, we will go over our top-right corner
and we will drag and drop the color to one of the petals that we
have on the bottom. With this color, we will
recover it two more petals. So again, we go into our top right corner and we
are dragging and dropping the color to the needed area or we can go over the top
to continue feeling. When you turned on
continue feeling, you can go to the area that you want to recolor and
just tap on it. Now that easily, we will
go to some other places. So e.g. the sparkles and who will recolor them
with this yellow color? Let's just go inside the areas that we want to recolor
and tap on them. If you want to recolor
some other areas, you are welcome to do it. When you write down the
Recolor and width this color, we will need to go to
the soap to color drop, and we will need to tap
onto this little checkmark. Now we are ready to select another color and recolor
other elements. So e.g. alleges go again to our
color palettes and we will select the color with
the name bright pink. With this color, we will go and recolor the rest of the petals. So again, similarly to
what we did before, we are firstly going over
our top-right corner. We are dragging and
dropping the color to the needed area and then hitting continue
feeling entry color and the rest of the areas. If you want to recolor
some other places, you are welcome to do it. When you are done
with this part, going over the top to color drop and hitting this
little check mark. Now let's get back
to our layers and we will create one more
layer for other elements. So e.g. we will go and
color or a little creature. Let's create one more layer. We will tap on it and
we will choose Rename, and we will rename it
as creature colors. Now, going back to
our color palettes, and we will select the color
within the light blue. With this color, we will recolor the main shape of our creature. When we did it, we are
going over the top to color drop little checkmark.
It's happening it. And then we are going
back to the list. We will create one
more layer and we will recolor the
rest of the areas. So basically we can
create and you leave for every new elements or
for every new color. Now let's just go to our
layer with flower colors. And from it, we will
tap on the plus icon to create a new layer and recolor the middle part of our flower. So you can go and rename
this layer as middle part. Now let us get back to
our color palettes. We will select this
pink light color and we will drag and drop
it to the middle area. If you would like to use this color for some
other elements, you are welcome to use it. When you are done
with this color, Let's just go over the top to color drop check mark
and we will tap on it. When we are done with it, we are going again
to our layers. We will create one more
layer for our leaves. Let's rename it as leafs. Now, going back to
our color palettes and selecting some
color which is green, CMY, see and dark green, any color will work. And when you have
selected the color, ledgers go over our lives and we will recolor them in the
same way that we did before. Firstly, go over our
top-right corner, dragging and dropping the
color to some area and then selecting continue
filling with this color. Let's recolor all of
our leaf elements. If you want to end this, go to some other elements. You are welcome to do it. And when you're done, ledgers heat are a little
check marks over the top. Now let's get back to our list and we will create
one more layer and we will recolor the rest of the
areas ledgers tap on the plus icon and let's rename this layer
as miscellaneous. Now go to the color palette, select some color and recolor
the rest of the areas. And when you are
done with this task, we are done with
our base colors. In the next part, we will beautified error vein. We will add some
highlights, shadows, some additional elements,
and it will look very nice.
6. Adding Gradients: Let's say this byte
by played with our colors just a little bit. Now they look pretty plain, but we'd want to make our picture a bit
more lively by adding some gradients or color blends to make it more
pleasing to the eyes. But firstly, let's go and decide what is our light source. Light source could we assign or some lamp or anything
that radiate slides? And depending on the
light source position, some parts of our
illustration will be exposed to the light and some of
them will be in the shadow. And we can help ourselves to be consistent with lights and shades by drawing a little arrow that will show the
direction of delights. Now, let us go to our layers. We will go above all the
layers that we already have and we will tap on the plus
icon to create a new layer. And when we have our newly, we will go to the top part, either to the left side
or to the right side. It's up to you and we will
create our little arrow. And when we have it in
accordance with this arrow, the elements that are closer
to it will be lighter and the elements
that are farther from it will be in the shadow. So let's start agent
are additional colors. Firstly, we will go to
our layers and we will go to our layer with
the name flower colors. We would need to set this
layer as an alpha log. So in that way, we know that we are adding the elements then you elements only on
the existing parts that we have on this layer. Let's just tap on this layer and let's select Alpha
Lock from the list. When we did it, we will
go and change our brush. So we are going to
the Brush Library. We will go to the
airbrushing folder and we can select either soft
blend or medium blends. If I select a medium blends, Let's go to our left side, to the slider is and
who will go to the bottom one and set
the opacity of this brush somewhere 10-15% and 20 are done with this task, we will go to our
color palettes and we will select the color
with the name yellow. When you have this color, we will go to our flower
petals on the top, which are pink right now, and buy goods from the center with a
very little pressure, we will start adding a
little gradient here. You can play around with how visible you want
this part to be. If you already did
just a little bit, grab this much tool and
adjust the Egypt's. For this match tool. You can use any brush from the airbrushing folder
or you can go to the project and resources
tab and download the brush that were
used in today's class. So now when we are
done with aging this blend to the
pink flower elements, ledgers go against our
color palettes and we will select the color
within a light yellow. With this color, we will go
to the rest of our petals, which are yellow right now, and we will do the
same thing here. Let's just go to them
from the center and let's add another
color to this part. And again, if you think that
you overdid it a little bit, just grab your smudge tool
and adjust the edges, make a nice blend
between two colors. And when you are done, we will do the same with
the rest of our elements. Firstly, let us get back to our layers and we will
go to our next layer, which are middle parts. Let's select it, Let's tap on it and let's select Alpha Lock. When we isolate an alpha lock, we are working only on the existing elements
that we have wanted. This layer. Let us go back to
our color palette. And if you want, you can select the color with the same name, white, yellow, and go over the top part and a
license or a tab. Or if you want to make it more interesting, on the bottom, you can select the
color with a name, pink bright and edit
to the bottom part. So it's up to you how you
will adjust this color. And again, if you overdid it, grab your smudge tool and adjust the blend when you are
done with these elements, let's again get back to
our layers and we will go to our next layer,
which is leaves. Let's tap on it and
let's select Alpha Lock. When we did it, we
are going back to our color palette and let's select the color
with the name green. When you hand this color, Let's increase the size of our brush and we
will go over that. So part of our leaves and we
will add some blend here, try to make a smooth
transition between two colors. If you want to add this color to other elements
that are green, you are welcome to do it too. If you want to try and
add the darker color, you can get back to
your color palettes, Alexia and dark color, and go over the bottom part. When you are done
with your leaves, Let's get back to our layers and let's go to our layer
with a creature. We will do the same thing here. We will tap on the
layer and we will choose alpha lock
when we did it, we are going back to our
color palettes and we will select the color within
the lights, blue-green. With this color, we
will go in accordance with our little arrow
going from top-right. And we will add that
color effect here, increase the size of your
brush and very likely go from the top right and
add this little transition. When you're satisfied
with this transition, you can get back to your
miscellaneous layer and adjust it to e.g. ledgers. Go tap on it, select Alpha Lock, and we will go over our
flowers and we will add additional guides that if you want to work
more once a year, little rocks or once it
is flowers on this side, you are welcome to do
It's to just go to the near that layer and I
add additional color. When you're done eating
your additional colors, we are finally ready
to add the shadows.
7. Adding Shadows: Let's start adding
the shadows in accordance with the
arrow on the top. So basically, we will just
go to the bottom part of our elements and we
will add the shadows here. Let just go firstly
to our layers and we will start from earlier
with flower colors. Let's select it and let's
create one more layer above it. So tapping on the plus
icon and straight away, we will rename this
layer as shadow. We will need to clip. This leads to a previous one. So we will know that we are
adding the details only on the existing areas that we already have on the
previous layer. So it works similarly
to the alpha log, but it is on the separate layer. So let's just tap
on this layer with our shadow and we will
select clipping mask. When the layer is clipped, we will go and we will change the blending
mode of this layer. Blending modes are
different ways your layers can interact
with each other. When you are changing
blending modes, you can add different
visual effects and we will need to select multiply
blending mode for our shadow. To select a different
blending modes, we will need to go to this
icon near the checkbox. Here you can see that we have
Alice and we will need to find multiply S for
the opacity for now, let's leave it at 100 per cent. If you want. We always can get back to this option and adjust it later. Now when we are done
with setting this layer, let us get back to our color
palettes and we will select the color within the magenta
when we have a new color, Let's just go and
change our brush. We will go to the
calligraphy folder and we will select either
mono line brush or a brush pen or script brush pen and screen brush are very
sensitive to the pressure. So when you are selecting
the brush like that, you will need to pay attention of how much pressure you are adding to your Apple pencil when you are creating this line. If you are doing
with high pressure, you will create
something very thick. If you argue in ads, just pushing just a little bit, you will create a
very fine line. You just said, what brush
you are going to be using. If you're using monoline brush, it probably will be easier to get back to the brush studio, go into this stabilization
and adjust the amount of streamline if you want
to do that, do that. If you don't want to do
that, just skip this part. When you add Dan ledgers, give it to this petal that
we have on the bottom left. And we will start by going
over the bottom part and recreating the land that
we have for the outline. So let's just go there
and very easily, we will try to
recreate this line. You can use all the options and all the tools that
we used before. So you can just go with a line, hold it and the yens. And if you want it adjusted your over-the-top to edit shape. Basically just start by
recreating the outline and then Lynch's go over the top parts and we will elongate
our little shadow. Now when we have
these two lines, let just go and manually
recolor the bottom parts. Now you probably can see that
this shadow is too bright. So let's just get
back to our layers. Ledgers go to earlier with
the shadow and we will go to this little icon and adjust
the opacity ledgers, grab our slider
and move it toward the left until we are
satisfied with the opacity. Probably something between 20, 25% will work best when you are satisfied
with the opacity. Let's get back and let's
adjust our shadow. E.g. we can create
something different. We just can go to the top of our shadow and we can
add some texture here. We don't really
need to go with a very straight, very soft line. We can go and create
something like that. In that way, we will show that our petal is not very straight. It has some texture. If you want to go and add
some additional elements, maybe some dots,
maybe some little lines you are welcome to do. It just creates a
very nice shadow. Also, you can see that
the petal that we have on the left is overlapping
our petal on the bottom. So that will mean that
we will need to add a little shadow underneath
it to show that difference. So let just go there and
create a little shadow. And also we will
do the same thing underneath our middle part. So let's just go there. Entropy, the outline. In that way we are showing
that some elements are higher and they
will cast the shadow. So now we can go
underneath this little drove that we have and we
can add the shadow to, we need to go in accordance with our arrow that we
have on the top. So probably our shadow
will be on the left side. And the same thing here with our little element right here. Ledgers go to the left side and we will add a little
shadow here too. And basically, that's what
we're gonna be doing. We are looking at
our arrow and we are creating our shadows in
accordance with this arrow. So let just go across all of our pink elements and we will add the shadows
in the same way. So firstly, let's just
go over our left side. We will go to this petal, we will go to the bottom
side and we will try to recreate the shade that
we have for the petal. When you have the first curve, just increase the size of your brush and
recolor these parts. If you want to make this line
not straight at some bumps, go with your brush and add that. If you want to add some
additional elements, some dots or lines, you are welcome to do it too. Now let's just take a
look at our little arrow, and let's create a shadow onto these two lines in the middle in accordance with
our light source, we will need to put them
underneath these slides. When you are done with
the second pattern, let's move on to the top and
let's add the shadow here. Where will be our shadow? It will be on the
labs and it will be a little bit here on
the bottom parts. Adjust the shape, add
some additional elements, add the shadow under this little line that
we have in the middle. Now we are moving closer
to our light source. So let's just give it to these
two are remaining petals. And let's figure out
where our shadow will be on these elements
that we have right here. Probably we will have the shadow only on
the boards and parts. So let's just go there and
create just a little shadow. Let's add the shadow to this little elements
in the middle, again, we are looking at
our little arrow and creating this shadow
in accordance with it. And let's go to the last petal and add the shadow here too. We are again going
over the left side and we are adding a
little shadow there. Play with the shapes
of your shadows, add the additional elements. Do what you need
to do when you are done with these
petals that are pink. Let's move on to our
yellow petals and we will go and change
the color of our brush. We will go to the
color palettes and we will select the color
with the name yellow. We will go again to
the bottom part of our elements and we will add our shadows the
same way as before. Let's just start
from the bottom. We will go underneath this part that we have for
our middle parts, and we will add the shadow here. We will go to the
bottom part and we will add the
shadow here as well. The shadow to this lines
that you have on this soap, look at your arrow and
create the shadows. Work onto the lines and add
the additional elements. Let's move on to the next petal, and let's add the
shadow here as well, looking at our arrow and creating this shadow
on the opposite sex. And for the last petal, ledgers go underneath
these petals that are overlapping it. And we will repeat the shapes, play with the curves and
the additional elements. If you think that maybe
your opacity is not enough, you can always get
back to the layers, go to the m, I can add a
jazz the opacity level. When you are done adjusting
your opacity level, we can do one more thing. We can solve shadows by going with a soft brush and
adding a different color. So the same way as before. We will go to earlier
with the shadow. We will tap on it and we
will choose alpha lock. When we have selected Alpha log, we will go back to
our brush library. We will go to the airbrushing
folder and we will select either so bland
or medium blends. When we have our brush selected, ledgers go over our
shadows and we will soften them with the same color that
we already have right now. This yellow one. We will give it to
our pink petals. We will go over the top of
our shadows and we will add the same color that we
have for our yellow parts. Soften the shadows in that way. Or if you think that you
want to change the color, you can go and do
it in that way. We will go to the magic
one tool or the top-left and we will go under hue
saturation and brightness. Here you can see that you have three sliders
on the bottom. And you can firstly
play with saturation. If you increase the
amount of saturation, you will see that your shadow
is now looking more bright. It has more vivid color. If you go to the opposite side, you will see that
now it looks great. So you can play
with this option, or if you want, you can go to
the hue and adjust the hue. You can see that if we are
moving from side to side, we are changing the
color of our shadow. Find what you like. If you want, you can play with the brightness slider to
make it darker or lighter. If you don't want
to play with hue, saturation and
brightness, it's okay, just keep this part when you're satisfied with your hue
saturation and brightness. Let's deselect
everything by heating iron magic one tool,
one more time. When you are done
with this part, we need to go and continue
edit our shadows. So let's just go to our layers. We will go to our
middle part layer and we will do the
same thing as before. We will create one
more layer above. We will rename it as shadow and we will clip it to
a previous layer. Now we are going
back to our icon and we will go and find
multiply blending modes. As for the opacity, you can leave it at
100 per cent for now. Or if you want, you can straight away go and adjust the value. Now, let us get back to
our color palettes and we will select the color with
the name pink bright. Again, we are using the brush from the
calligraphy folder, monoline, or any brush that
is brush, pen or scraped. And we will go to
the bottom part and we will add the shadow here. Again, we will go
with bumpy line. When you have your first-line, Let's move on to the bottom and we will recolor this area. If you want to add
additional elements, some doors or lines, you are welcome to do it. Now let's get back
to our layers and we will change the opacity
level of this layer. We are going to the
m, I can go into our opacity slider and
finding what works for us. If he wants to change the color, you are always welcome to
go to the magic one tool, to the hue, saturation and brightness and play
with the color. When you're done
playing with the color, deselect by going into your magic one tool,
one more time. If you want to
soften your shadow, again, you can get
back to your layers. You can tap on your Layer
and choose Alpha Lock. Go back to your brush library, go to the airbrushing, soft blend or medium blends. Select another color, e.g. yellow, and go above the top of this little shade
that you have created for your shadow
and soften it up. When you are done
with this part, we are going back to our layers and go into the next layer. It will be leaps. So one more time
selecting the layer, tapping on the plus icon, renaming the layer as shadows. Let's clear this layer
to a previous one. Tapping, selecting,
Clipping Mask you into an icon and select and
multiply blending modes, leave the capacity to maximum or adjust the opacity
streets away. Now when you are done
with adjusting your LEA, get back to your
color palettes and select the color within
the sea and dark. We will go in accordance
with our little arrow underneath our elements to the bottom part and
age in our shadows. Going again to our
calligraphy folder and choosing the
brush that we like. If we had the elements
on the tone that are overlapping or
elements on the bottom, we will add the shadow
underneath them too. When you're done
eating the shadow, Let's get back to our layers. And if you didn't change
the opacity level, Let's just go and change it. If you want to go and add
the additional elements, some dots or lines, you are welcome to do it too. If you want to soften your
shadows with another color, we are going back to our leaves. We are tapping on the
layer with the shadows. We are using alpha lock. We are going back to
our brush library, go into the
airbrushing folder and select and soft blend
or medium blends. We will go back to our color palettes and
select another color, e.g. yellow. With this color, we will go over the top of our shadows and we
will soften the color. If you want to soften
the color even more or change a different one, we can go over the top to our hue saturation and brightness and
adjusted here as well. And when you are done, just tap on your magic one tool to get away
from this mode. Let's continue by going to
our layers and we will go to the rest of our elements and we will add our
little shadows. So e.g. we miss our little
flowers on the sides. Let's get back to our
layer that we use. For the middle part, we will
go to early with the shadow. We will select the color
for the shadow and we will add them with
our little brush. If you're getting back
to the leaves with the shadows that have
Alpha lock turned on, you won't be able to add additional elements
to this layer. So firstly, you
will need to go to your layer and turn
off alpha lock. And then you can easily
go and add your shadows. When you add down with
some additional elements, Let's get back to our creature and we will create one
more layer above it. Let's rename it as shadow. Let's clear this layer to previous one tab and
choosing clipping mask, go into an icon and select
and multiply blending modes, change the opacity
straights away or keep it as it is right now. Let us get back to
our color palettes. And again, we will
select the color within the magenta when you have it, we are going into the
calligraphy folder. We are selecting our brush
and we go into the boards and parts on the left and we will recreate the shape of
our little creature. And again, we can start by
creating a simple curve and then turn it into some interesting
shape with the bumps. When you have the
first line ledgers go and recolor the
rest of the area. Now let's take a look at
our arrow and we will see that our flower is
overlapping our little creature. That means that we will need to add the shadow
underneath our flower. And the same thing
with our legs, because the body is
overlapping them ledgers go to the legs and we will
create little shadows to that. Just repeat the
shape on the body. And also we will go to one side, which is our left side, and we will add the
shadow to the legs too. We also will have a
little shadow once the arm on the right and it
will be on the bottom part. So let's just go and create a
little shadow here as well. As for the arm that
we have on the left. For now, let's just go and grab our eraser tool and we will erase this top part
of the shadow. Let's create a nice soft shadow and we will continue
it over the left side, LNG the line going over the right parts and erase
the rest of the area. Now let us get back
to our layers and we will adjust the
opacity of this layer, go into the icon and dragging our opacity slider
toward the left side. When you have the amount
of opacity that you like. Let's get back to our
layer and we will adjust our lives by turning
them into the bumps. Ledgers go along the whole shape and create some peculiar shape. If you want to add some
additional elements such as doors or little lines, you are welcome to do it. And now Lynch's
soften our shadow. We will get back to our layers. We will go to our
layer with the shadow. We will tap on it and we
will select Alpha Lock. Now again, we're arguing
back to our brush library. We are going to
airbrushing folder, selecting either so
bland or medium blends. When we have it, we will go
back to our color palette and we can start by selecting the color with
light blue, green. With this color, we will go over the top part of our shadow
and we will soften it. If you want to add some
different visual effects, maybe change the
color on the shadow. Again, please go to the
adjustments to hue, saturation and brightness
and play with the sliders. When you're done playing
with your shadow, ledgers, go and deselect everything
by hitting our magic one. So now if you want to add some additional shadows to
the miscellaneous objects, or if you want to play
around with another shadows, you are welcome to do it. And if you are satisfied
with how it looks, Let's move on to the next part where we will add
the highlights.
8. Adding Highlights: Let's start this part by
adding an additional effect that will lighten
up the areas that are closer to our arrow. We will do it in that way. Firstly, we go into our layers
and we argue in between our leaves with clean lines and shadow for this little creature. And we will create
one more layer here. Let's just tap on the plus icon, entering in this layer as light, we will need to go and
change the blending modes. And as we want to
lighten up some areas, we will use overlay
blending modes. Let us go to the icon
and find overlay. Now when we have said earlier, ledgers get back to the
color palettes and we can select any color
that is light, e.g. let's select yellow. We will go to our brush library and we will select a soft brush, either soft blend
or medium blends. When we did it, we will go and increase the size of our brush. And very lightly, we will
go over the top areas, the petals near this
arrow or leaves, and do the top part
of our creature. And we will go and
add the light here. Don't worry, if you are adding
the color and not only to your existing areas but
to your background too. We can fix it very
easily later on. If you already did some parts, always go to the smudge tool and adjust these connections
between two colors. If you want to add
this additional color to some other elements, you are welcome to do it. When you did it,
ledgers get rid of these additional color that
we have on the background. We will do it in that way. We are going back to our layers. We are going to earlier
with clean lines. And when we're at it, we will go to our
selection tool, which is our S remember icon, and we will select
automatic selection. Now we will go to
the blank space outside our lines and we
will tap onto our screen. When we have
something like that, we will go and find the places that we
want to select two. So we will do between our
little creature and the leaves, and we will tap
on this area too, when you have selected
everything except your creature and your flour and every little element that
you have on your screen. We will go back to our layers and we will go to our
layer with the light. When it is selected, we will get back to our Canvas. We will take three
fingers and we will make a scrap movement
to erase these parts. When you are done, it is
deselected automatically. And if you want to play
around with this slide, we can go back to
our adjustments. We can go to the hue
saturation and brightness, and we can play with
our sliders here. You can see when we are
moving our hue slider, we are adding different
visual effects. Find what works for you. If you don't want to do that, you can skip this part in total. E.g. let's leave it at
something like that. And when you're satisfied, let just tap once to our magic wants to
deselect everything. When we have this, we can go and
adjust its opacity. If we want to, we
can go to our layer. We can go to our little icon and adjust the opacity
on our slider. If you want to do that. If you don't want to do it, Let's leave it as it is. And we will go and
create one more layer. We will tap on the plus icon and we will rename this
layer as highlights. Now we will go and change
the blending mode, and this time we will
use at blending modes, it will add a very
bright white color. So let's just go
to the icon right now and we will find
at blending modes, Let's leave the opacity at 100%. For now, we will
use the same color, yellow, or we can select the color with the
name of light yellow. We will go back to
our brush library. We will go to the
calligraphy folder and we will choose
our monoline brush. Or if you prefer to use
the brush pen or script, you are welcome to use them too. Now, we will go to the
opposite sides from our shadows and we will
add little highlights. We can add them in the shape of doors or in the shape of lines. Basically we will just due
to the edge of our elements and add a little elements
with our little highlights. So e.g. let's start from this yellow pad cell that
we have on the right. And we will go to
this side of it and we will create a little
line with our white color. If you want to add some
additional elements, some doors or some little lines, of course you are
welcome to do it. And when you have
your first highlight, Let's move on to the next petal and let's add
another highlights. So we are moving to the
top and we will add the highlight to this
paddle that is pink. Similarly to what we
did with our shadows, we are looking at
our arrow and aiding the highlights to the areas
that are closer to our arrow. You can always play
around with the shapes and you can always add
additional elements. Now let's go through all
of our petals and we will add these highlights in
accordance with our light source, adding them to the opposite
side from our shadows. When you're done
with the paddles, move on to other elements and
add the highlights to them to take a look at your arrow and add them in
accordance with it. For our creature, ledgers go to this area that is
very bright and we will add our little
highlights or this area and some additional elements in accordance with your
leads, a light source. If you want to solve an app, this ethics of the highlights, you can go to your brush, to the opacity slider
and adjust it. And when you are done with
adding the highlights, Let's move on to the next
part where we will add a little shape on the bottom where our little
creature is sitting on. And also we will
recolor our lights.
9. Final Touches: Let's start by going
to our color palettes and we will select the
color with the name purple. When it is selected, we are going back to our layers, and now we can go and hide our layer with our
little arrow firstly, and then we'll go to our
Lydia with clean lines. And as you can see, it's still set as reference. So we will need to turn it off. Let's just tap on the layer
and let's select reference. Now when everything is clear, ledgers get back to the bottom on this
panel and we will go and create this shadow underneath our layer
width flower colors. So we will select our
layer with the sketch. And from here we will
tap on the plus icon. Let's rename this
layer as main shadow. Now when we have in Yulia, we can go and manually
select our soft brush and go underneath the creature and create this little
spot for the shadow. But also we can use one
option that Procreate hats, ledgers go to our S ribbon icon, which is our selection tool. And on the bottom, we will select ellipse. When ellipse is selected, we will go underneath
our creature and we will create a selection in
the shape of an ellipse. You can play around
with its openness. You can play around
with its size. If it's not happening from the first try to write
out one more time. When you have the
selection that you like, we will need to end
the color insight. Let's just go to our
top-right corner and we will drag and drop the
color to the selection. Now when we are done
with this task, we will go and
deselect everything by hitting R S ribbon
icon one more time. And we will adjust this book
by doing the following. Firstly, we will go
to our magic one tool and we will
select Gaussian blur. On the top you can see we have the option Gaussian blur, 0%. And if we go to our screen, and if we hold our Apple Pencil and move it toward
the right side, you will see that you
are aiding the bluer. So find the bluer
that works for you. And when you're satisfied, we are ready to go, hit our magic one tool
to deselect everything. If you want to adjust
this little sport, maybe make it bigger, maybe make it smaller, or find the position
that is better. We can always go to our
Transform so we can use free form method or uniform method and
adjusted to our liking. So play around with this tool. If you're satisfied
with transforming it, adjusting it, just heat your
arrow key one more time. If you don't like this color, you can always go
to your magic wand. So you can go to hue
saturation and brightness, and play with the sliders, find what works for you and when you're satisfied
with your result, ledgers deselect everything by hitting our magic one
tool one more time. And now when we have this little shadow ledgers
go and recolor our lengths, We will do it in the
same way as we have created our clipping
masks and our shadows. So let us go to the top. We will go above early with a clean lines and we will
create one more layer above it. Let's just tap on
the plus icon and let's rename this
layer as color lines. Let's clean this layer
to a previous one. So we will tap on it and we
will choose clipping mask. And now you have two options. You can go and select
a very soft brush, go into the airbrushing and selecting soft blends
or medium blends. Let's turn color that is closer to the color that you have once a your elements and go about this slide and add a
tint to the lines. So e.g. let's just go and
select some pink color. We will go increase the size of our brush and we will very softly go above airlines
onto this little flower. If you don't like these ethics, you can go and select
your monoline brush, select the color that you like, and go over the lines
and recolor them fully. So it is up to you how you are going to be
recoloring your lights. If you don't want to
recolor the lines, just skip this part. If you think that it is
too light or too dark, you can always go beyond
the color palette. You can go to the
disk and you can find the color that will
work for you. So e.g. we can go and not
create the color of the lines similar to the
color that we have inside. We can go and speak a
little bit darker color. You also can go and select different colors for
different elements. So e.g. you can select some magenta color
to the pink color, and you can go and
select some yellow color for this yellow
elements on the petals. To make the recoloring of your
lines a little bit easier. You can go and create as many layers for the
colors as you like. Don't forget that
you will need to clip them to a
previously and you can go and create the colors
on the different layers. We can use all the tools
that we use before. So e.g. if you recolor the lines for your leaves and if you
want to change the color, you can always go to your magic one tool
to hue saturation and brightness and play with a few or saturation or brightness. And when you are done
recoloring your lines, we are done with our class. Thank you for
watching this class. Leave a review if you
liked it and consider subscribing for mortal
eye videos in the future. Looking forward to
seeing your projects.
 Uni Corn, ⭐Kawaii Art Enthusiast⭐