Transcripts
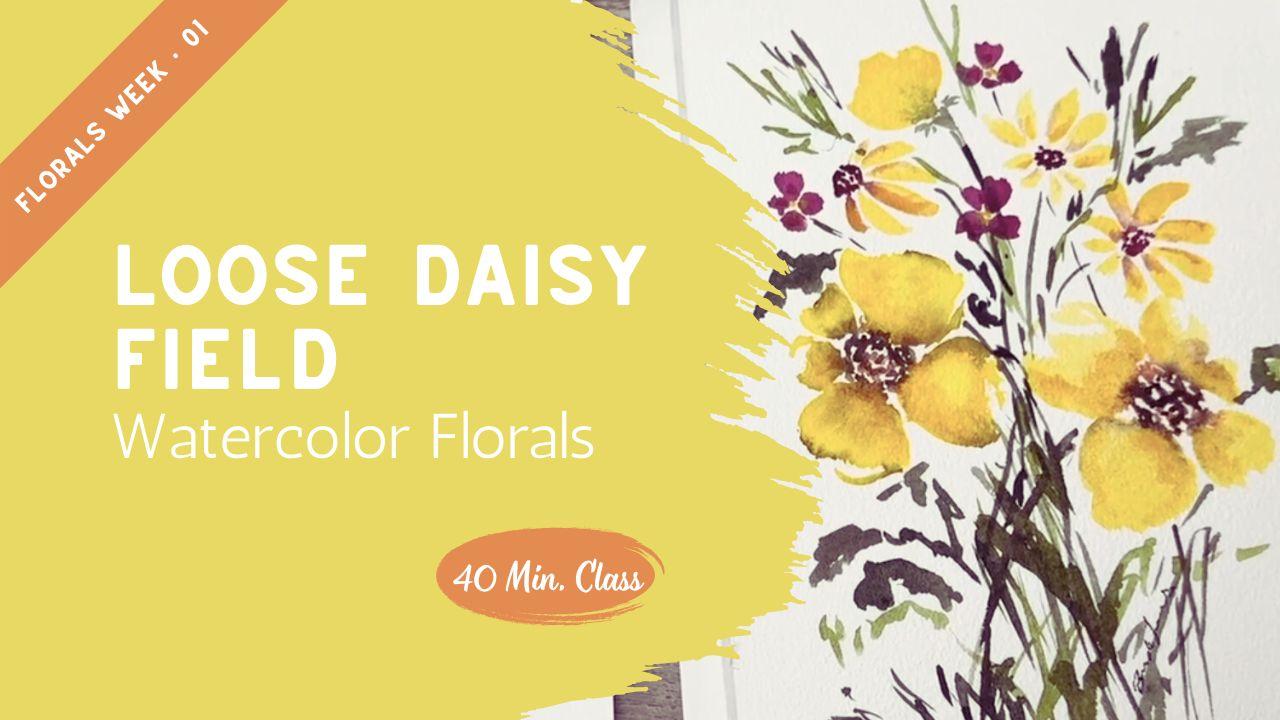
1. Welcome: Bringing Week 1 Together: This week, we've been exploring yellow and practicing
simple daisy shapes. Today, we're bringing
it all together. In this class, you're
going to create a loose watercolor
daisy field using just three main blooms and a
simple triangle placement. We'll focus on direction, spacing, and letting the paint
stay soft and breathable. This won't be about detail. It will be about flow. If you followed the
earlier classes this week, you'll feel how natural
this begins to feel. If you're jumping in
here, don't worry, I'll guide you every
step of the way. Take a breath, gather your
materials, and let's begin.
2. Placement First: Choosing Your Two Flowers: Lesson, I want to talk a
little bit about composition, about why I place
the flower heads where I place them on
here and also over here. So when I am going to be
painting in a very loose style, I usually do not use any kind of a pencil and predraw
out anything. I really want to allow just
the flow of the painting to happen that if I can make a decision on the
fly, I can do that. If I want to change
my mind, I can. So I want to encourage you
that in this particular class, you do something similar to
that where you are not using a pencil to draw out exactly where you're going to
be placing your blooms. If that really intimidates you, if that makes you
feel uncomfortable, one thing that I have
learned that you can do is draw a dot. So if you're thinking, I just am looking at this
blank piece of paper, and I have no idea
where to begin, if you just draw a simple dot, you know, something as simple as something as simple as this right here
where it's just a dot, and I say, I'm going to
put my biggest bloom here, and then I want to
have another bloom up here and make
another little dot. Then maybe to finish
out this triangle, I'm going to put another
bloom over here. Then that way you know you're going to put your
biggest one here, maybe a bud coming up here and a second value flower head here. That way, you're not
drawing them out, but you're also not staring
at a blank piece of paper. But if you are feeling
like you're ready to just go ahead
and start painting, what I typically do is I look at my blank piece of
paper, and I say, Well, what I would
really like to do is have something
major down here. I like to anchor my
flower arrangement by putting a larger flower
head near the bottom. And then I usually want to have one or two smaller flower
arrangement flower heads up near the top because I kind of like
dancing along the top, and then maybe I fill in
with some of the other ones. And so I just visually look at it and think about
it ahead of time, but I don't actually put
anything down on paper. So if you're ready to go
to that step, go for it. If you would like to
put your little dots on your paper, that's
also acceptable. When I am planning
out something, I do like to sometimes work in a triangle format where I
have my one, two, three. I have a little triangle. I know that it's
going to be the top. This is my anchor, and I want
to have it come over here. Here's another example of that. Here is a little
bit of a triangle. You can see that a
little bit clearer here. But same with this one.
This is also a triangle. So they don't always
have to be triangles, but that's a good way
of getting started when you are working
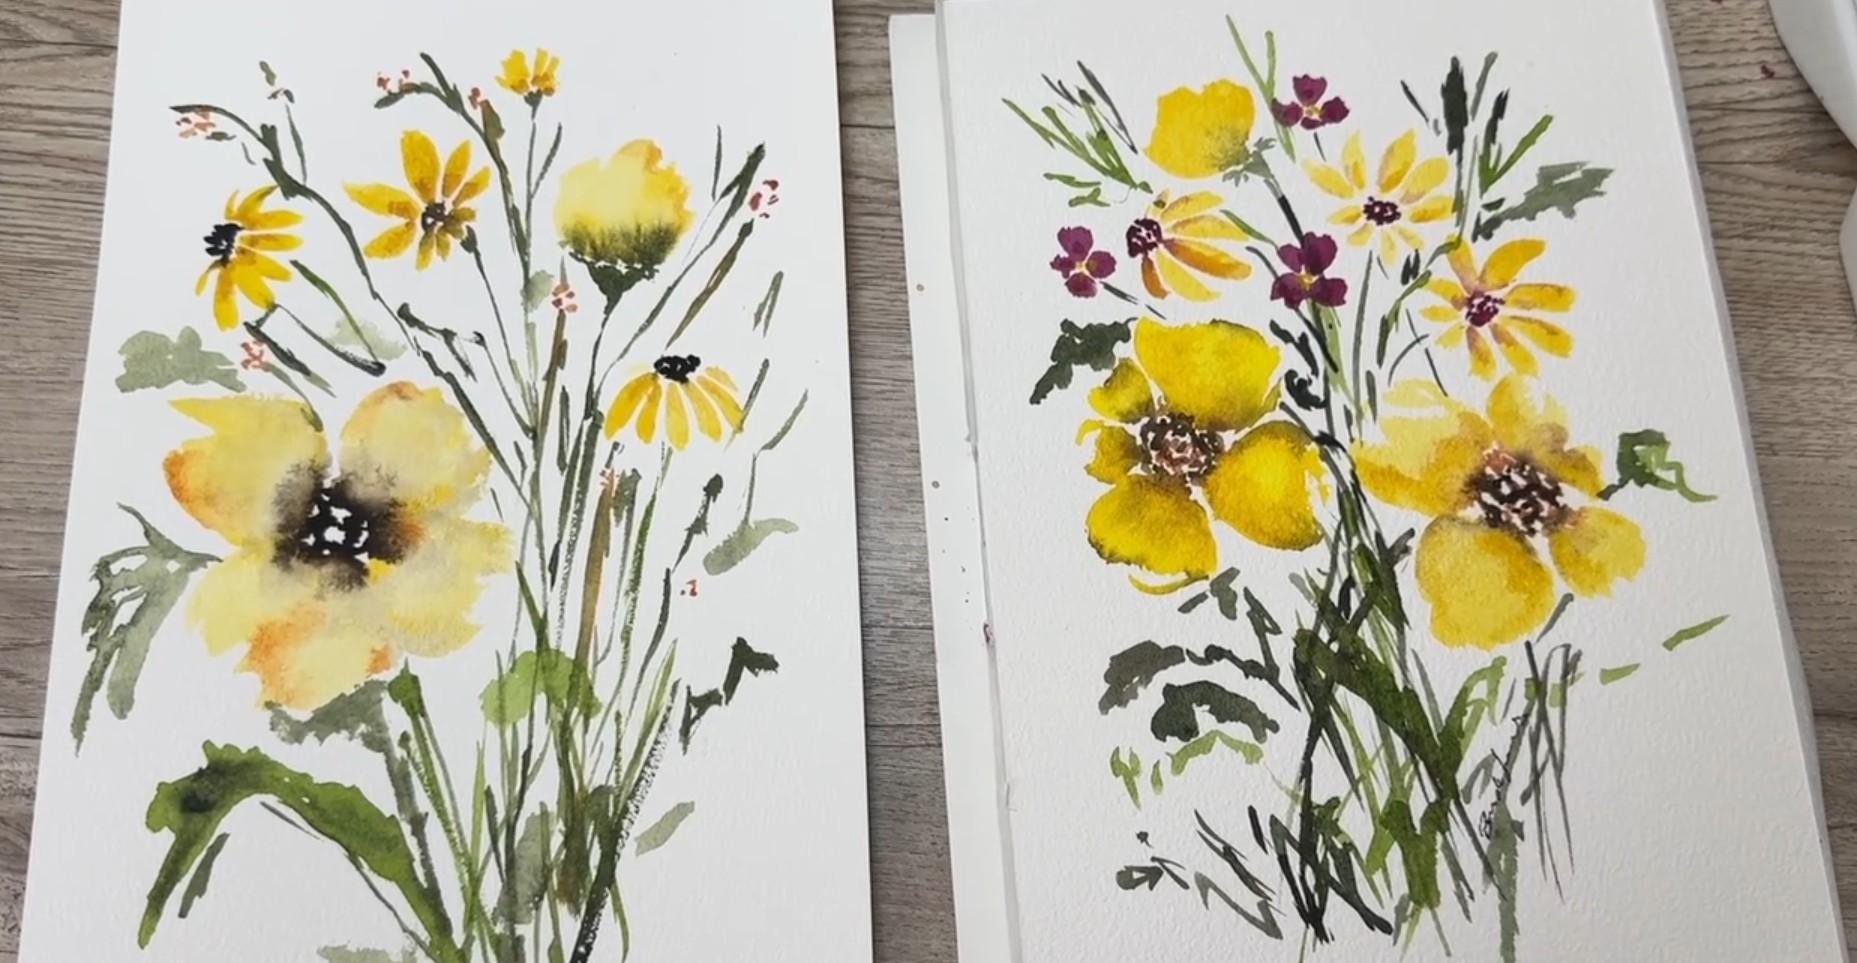
on your composition. I also like to play with figuring out where I'm going to place my first two blooms. The rest of it can kind of fill in depending on how it
all kind of works out. So when I was doing this one, I planned these two
first blooms first. I planned these two first, and then I decided where
I was going to put in the third little
secondary flowers. Same with on this sample. I knew I wanted to
have an anchor. I knew I wanted to
have its mate here, but having it looking more like on the side of it instead
of facing it straight on. And so I knew that
those two were going to be my first two flower heads. So go ahead and choose where you're going to position
your first two. And then after
those are painted, then decide where your
secondary flowers are going to go and then
if you're going to be adding in leaves
or little berries or a little a third
little flower, those can just be fillers where you just fill in
where appropriate. Make sure you leave plenty
of room for breathing space. Lots of white space. When you are painting
in this way, if you fill in every
single gap, if you go, Oh, there's a space here and oh, there's a space here, I have to fill in this
space right here. It can very quickly become
overwhelming and very heavy. I'm not talking
about a background. I'm talking about the actual
brush strokes of having more paint on top
of your painting. Leave some space. Let there be air moving through it and some
breath moving through it so that your eye has a
spot to land and to follow. Because as your eye
follows this around, it's going to bounce from
flower head to flower head, and then it's going
to start to see these things that are secondary. So make sure you leave
lots of white space, including white space
inside each flower. So even on this
particular flower, I painted the bud and I painted
the base of the flower. No, even left some
little white spaces in there so that there was
just a little highlight. It's very important to see
if you can start doing that. Depending on the level
that you are at. I'm not sure if you're one of my beginner students
or somebody who's been painting for years and just looking for
something fun to do. Depending on the level
that you are at, I want you to find a painting that feels comfortable to you. If you would like to paint
something like this, which is very, very simple, go ahead and paint that. If that's the way that's going to bring you
happiness and joy, if you want to feel a
little bit more pushed, a little bit more challenged, go ahead and combine
that one with the other flower that hopefully you painted earlier this week. Combine the two of them like
I did in this painting. Then in the third way, which would probably
be a little bit even more advanced from that is going to be what I'm
going to show you later on in this class. I am going to show you this, but probably with
several main flowers, maybe tilting
different directions and adding in maybe a
couple other flowers. So any of those
levels is going to be perfectly great and wonderful
for your class project. You choose your level, and we're going to meet
you where you're at. Come back to the next
lesson where we're going to quickly go over
the color yellow, adding in different
variation colors, and making sure that your heads of the flowers are tilting
different directions. So I'll meet you in
the next lesson.
3. Painting Soft Yellow Daisies Wet on Dry: Real quick, we're
going to discuss having flowers that face
different directions. Many times when we are
painting our flowers, they all are facing straight at us as if this flower head is looking straight at
us like this instead of on the side or on an
angle or drooping down. So in the class that we had
done a couple of days ago, we did go over all of
this, but in the meantime, make sure that when you are working on
your class project, you are putting those
principles into practice and that you
make some flowers that are tilting on the side
or looking straight up or bending over
or looking down. It's also fine to have some of them facing straight at you. I just want to have
a little variation instead of having
them all the same. We're also going to be
talking about yellow. Since this week we are
discussing yellow in general, I will be using several
different colors of yellow, anything from a very cool
yellow that is more of a lemon yellow to a more
golden warm color yellow. Then we can layer them
and add different colors, including adding in some blue that will mix
with yellow and turn green or we might use some brown to add some little depths
and highlights and shadows. So we're going to be
sure to get some yellow, so get your yellows out because that's
going to be where we're heading in this next
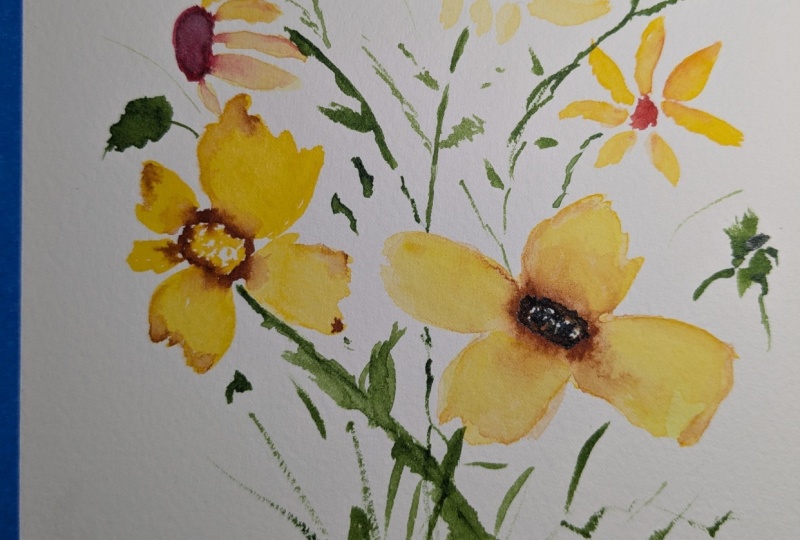
class for our project. And as you can see here, there's lots of different
variations of yellow, and I also have my flower heads tilting in different directions. So going up, some more
close, some wide open. So we're going to be working on that in the class project, and I'm so excited to see what you're going
to be working on. We'll probably keep our centers fairly simple so
that we don't get too much detail going on since that's not really the
main focus of this class, but you do yours,
however, you want to. So if you're more advanced
and you have a lot of skills for drawing in
and painting the centers, or maybe you don't want to draw and paint this kind
of a flower and you want to paint a rose instead,
that's totally fine. You do whatever flower, hedge, and shape
that you want to do. I'm going to stick with these two flowers and maybe add in a third flower just because that's what we've
been working on this week, and I want to stay consistent. In the next lesson when
we get our paints all ready and we dive right
into this new painting, I can't wait to see
what you've made.
4. Class Project Part 1: Establishing the Main Blooms: We're ready to start
our class project. I'll probably be using
these three paint brushes. This one is a grabby,
medium size squirrel. It's like a quill brush. It's nice and thick and floppy, so I'll probably be
using that when I need some big thick blooms. Then I also have these two. They're Princeton heritage. They're one of my absolute
favorite brushes. They're just round brushes. One is a size six, and then
this one is a size eight. I really like those
for the size, the tip and how pointy they are, and then also how
flexible they can be. Those will probably be my
three brushes that I use. I do have my fresh water. Might need to refresh that
up in the middle of this. I do have my paint palette here. I love this paint
palette by median. It's a 12 by 12. It has so much space here in the middle for mixing my colors. The paints that are around
the outside edge are from a tube paint and these
are Daniel Smith paints. It's probably my
favorite paint palette. I have several
different palettes of different sizes with
different paints in them, but this is my favorite. Like we talked about in one of the earlier lessons is when I go and I'm facing with
this big piece of paper, and I'm not sure exactly. What to do with it and how
I want to lay this all out. I will probably choose where my first two or three
blooms are going to go. On this paper, I think I'll probably put a bloom up here
that's a little higher. Probably put another
bloom over here, maybe one that's tilting out
facing away from the page. I might even put a third one up here that's more of a bud. That way, I'll get
my triangle shape right out of the
gate and I'll have that taken care of so that
I know that that's what I'm going to be working on
and then from that area, I can start adding in other
colors and other flowers. We are working in
yellow this week and so I am going to
stick with my yellow. I do want to do my
bigger bud first, bigger flower head first. I will use my bigger brush. This one is a size four. I think to get this started, I'm going to be using
my warmer yellow. I have a lot of water in
this paint bucket over here, and so I'm trying to keep it really almost transparent
when I am painting. I do want to have them
facing different directions, so I'm going to be
concentrating on that and remembering
what we talked about over here with the flower heads and how
you can get them to turn. I'm going to start
out with putting my one bud over here that's lower. Move my I'm leaving this one
here, I should mention that. I'm leaving this
one here because if you're painting along with me and you wanted to
paint this layout, I wanted to leave it here
so you could see it. Hopefully that
will help you out. I'm going to be
painting a flower here. I'm going to actually
be making maybe the bigger petals
down at the bottom, and then the smaller
petals up near the top and then having the stems coming
out this direction. Let's see how we do here. I'm just going to create
a bigger petal here. And then another one leaving
lots of space in between. I don't want to be having all of my petals touching all the time. I'd like to have some space, maybe another bigger petal. Lots of open space here. I'm fine with having some
white space in there. What's my second one.
Maybe getting a little smaller just to show that
this one's leaning away. See how that is showing that if I put my stem out
this direction, that it's pointing out that way. Let's use this flower again and show you
what I mean by that, that it's facing that way. Where you can barely see these petals because
they're tilted behind, but then these petals are laying out flatter so that
you can see them more. So that's the direction
that we're going to head. Kind of a golden color.
It's really pretty. I'll put that into the center
and go ahead and let it touch while this paint is
still wet on the blooms, on the little petals. Let those touch and
bleed a little bit. Just go around just
to show that edge. And then maybe get a
little thicker paint and add a little bit
more into the middle. Again, just little dots and poka dots here. Not
too much water. Otherwise, it'll blend all over, it'll bleed just enough. We can always come
back in here and add more or add
another layer if we want to or add another
layer of dark. I might add a little bit.
This is just a brown, I think it's actually
a sepia color. I'm just going to add
little bits here and there while that's still wet. Not too much. We're
going to let that go. Then I will paint another one, but maybe up here a
little bit higher. This one, I think I'm going to get and use a little bolder, more of my lemon yellow, and just add that one in here. One, two, gets more water. That's fine. We're
going to have this one facing this way. I'm using this yellow color that's more like a
sunshine yellow or lemon yellow because then
I have a little bit of a variegation in my yellows. But I'm going to add in
some of my other browns to this just to give
it a little depth. A little bit there. Maybe just add a little bit at the edges. I do have a RC here
that I keep drying off my brush because it's
not completely dry, but at least it's not dripping
and then I can come in and manipulate that paint at move
it around, smooth it out. Bring it down the edges. Okay. And then I'm
going to go back to that orangy amber color that we used before and
add some of that in. Before this is completely dry, I can come over and
move it around again. Get that paint to
move, lift it up. If you think it's too much, you can always lift it up
and dry it off on your rag. It's one of the good
things about working with cotton is it's
much more forgiving. You get a chance to move your
paint around a little bit. If you're not sure if you liked something
that you had done, you get to have that
opportunity to move it. Just adding a little bit
of that yellow back in. I'm just going to lift up. Some of that paint. I had a little bit too much water on my brush when
I laid that down. So I'm just lifting
some of that up. Okay. I just want you to realize how
slow of a process this is. This does not need to be
something that you race through. You should be taking your
time and enjoying it and relaxing into it and
come back over and say, Oh, that I really like, we need to do a little
bit more of that. Really take your time and enjoy. This is a very relaxing painting I find to be very relaxing. Sometimes I actually
think it's more relaxing than going to get a
massage or a pedicure. I just find painting
by myself in my room, maybe with a cup of tea, cat sometimes sitting next
to me, relaxing. Okay. We're going to leave
those two blooms alone. I'm going to come up here
and put in my little
5. Class Project Part 2: Completing the Triangle Layout: I'm going to come up here
and put in my little bud. Again, going back over
to my bigger one, picking up all that water and paint and just putting
in a little bud up here. Got to make it tilting that direction so that the
stem can come over here. Very simple. Just a little blob. So much of my artwork
is just very casual. I think that when
you are painting, things should just be casual. Just enjoy it. I do because this is the bud and you're looking at
it on the side. You're looking at,
let's look at this. Looking at the actual side of the bud instead of looking at this direction, you're
looking at it here. You usually see little parts of the underside of the flower
or the side of the flower. I usually has some
a thicker stem and sometimes even on this rose, you get to see these
little tiny leaves. We're going to be adding
some of that down here, just adding a little
thicker area, a little triangle with a stem, maybe even some little
leaves that come off of it. If you want, you can
even touch it right up into that green
and let that blend. That will look
really pretty too, like I did here, and let that just blend
right on up there. A lot of times brand new buds still have that green that's
wrapped around the bud. We're going to be
doing that. I'm not going to really worry
about where that stems going or where the stems
are going down here yet. We can always come back
in and fill it out. I just wanted to give
it an approximate just so I had a clue as to where that one's going. Same with this one. I know that there's going to be a u a stem that goes that
direction and over here, same thing, there's going to
be a stem that comes down. We're going to be going
and doing this work, but this at least gives
me some sense as to where I'm going to be
heading with those blooms. Now I have my triangle formed. Now I want to add in some
of these little daisies. Again, we're going to go with that daisy shape in a yellow because this whole week we've been talking about yellow. I'm going to use my
actually long brush. I'm going to be using
my size eight brush. I like to work with a larger
brush than a smaller brush. I find that to be
really helpful to feel like it holds enough
paint and water in there. Now when I'm working
on a composition, I'm looking at this and saying, I've got my triangle. I'm going into put in
my secondary flowers. Where on earth do
I try to put them? One thing I'm going
to try to do is contain them within
this triangle, which means I'm not going
to be putting a flower down here and I'm not going to be putting a flower
all the way up here. Not that this one has
to be the very top. But I do want it to
be about the top. I also don't like to put flowers that are right
next to each other. I like my flowers to
be slightly offset. So instead of putting these
right next to each other, I put this one slightly higher and this one
slightly lower. I'm going to put in a
little flower right here. Similar to this, where the flower is facing
out to the left. I'm just going to
put my paintbrush down and draw it down
and lift it back up. That's going to be the center. Going to do the next one and you can see that they
are not touching. See how they're not
touching at the top. They're leaving a little bit of space because we're
going to be filling in the centers there and we can leave that as
a little space there. But they do have a
little bit of a curve. So I'll add some smaller ones to give the illusion that it's
going around to the back. I'm going to instead
of rinsing that out, I'm just going to
hold on to that one and we're going
to put a center. For this time, I think
I'm going to use that fuchsia color as my center. It was really pretty
in the last class. Little dots, little dots. It's okay. If you touch the
wet paint, it will blend in. If you get too much there,
we can always pull it up. But sometimes it's
actually really pretty. I'm going to leave that
one there. I can use that. Then I'm going to
put another flower. Maybe I'll put one
similar to that, but having it looking up
so that maybe it's going this direction and
my larger petals are out to the back with the smaller ones
out to the front. So 12. But we're gonna
come all the way around, but they're just smaller here. Well. There we go. Alright. Then adding in my center with that future. And again, leaving lots of little white spaces
for that highlight. I'm going to come
back over here. I see that my fuchsia really
bled a lot down into there. I'm not really enjoying that, so I'm going to lift this up. This is a clean paint brush. I just washed it and dried it and I am okay with
it coming down in. I just didn't want it to come down in quite as far as it was. I'm also going to just
extend some of that over into the other blooms
just because it's pretty. Now, we're not going to worry about the fact
that this one here is purple because we're going
to be able to fix that. I also brought that
purple color over, so it's all going to
be very cohesive. When something like that
happens, we roll with it. We don't look at
that as a mistake. We look at that as
an opportunity. What I did is I ended
up drying that little petal there so
that I can fix it, so I'm just going
to go back into my yellow and I'm using a
little bit thicker paint. I'm just going to
lay it right on top. There we go. Perfect. Even even add a little
highlight over here. Okay. So I think I want to add
a third petal of yellow. I mean, a third
flower of yellow. Let's see. Probably
put another one here. Are you starting to see
what I mean about facing your flowers so that they are
facing the right direction? Because this one is
now facing a little bit more towards
you the observer, but maybe not quite because
these are a little bit smaller that flower head is still just tilted
that direction. Putting in these little dots, leaving lots of white space
for that. You know what? I want to bring in some of that fuchsia into
these petals again, just because I did it
for the other ones and I'd like to carry that through. Just along the edges
or through the center, something just to get another
little layer in there. This picking up just a
little bit of green, I'm going to use the
smaller paintbrush. Again, I'm just
going to be saying, well, my stem is
coming this way. My stem is coming that way
and my stem is coming down. Also take note that
I did not create any other larger real side view because all of these are
not from that angle. You don't actually
need to if I had drawn this all the way up
in here and connected it, that might actually look weird. For example, here, if I were to draw a stem that came all the way up and
touched that center, see how unusual that looks. That doesn't even look like
what a flower looks like. It's actually better to
leave a little bit of space and let the
illusion of what we think it might look like underneath
there instead of drawing it all the way up to
the top and then it starts to look a little
bit more like a lollipop. Only be adding that thicker base to your
flower if you think it's something that you might
actually be able to see from your point of view. I do think I'm going to
be wanting to add in a surge flower or maybe something a
little bit more wispy, but I'm not quite
ready to do that. I think I'm going to
move on to my green.
6. Class Project Part 3: White Space and Final Restraint: Okay. I do think I'm going
to be wanting to add in a third flower or maybe something a
little bit more wispy, but I'm not quite
ready to do that. I think I'm going to
move on to my greens. So again, using
my smaller brush, my size six, I am going
to move on to my greens. So all of my greens
are over here. All of my greens are over in this general
vicinity, over here. I have these sprayed
down and ready. They've been activated. I'll pick up some
of this yellow. Get it out of the way. So
I can mix my greens again. Here's a green that
I really like. This is a really
nice bright green. This one is a very dark green. And then these two greens here, this one is more of a really almost just a
brighter blue green. I might use that one. I usually tend to stay away from that. If I do use that one, it's usually because I've added in just a touch of brown
to it or a touch of yellow to it because I find myself gravitating to these
more olive colors. So using this brighter I
think it's a sap green. We're going to talk a little
bit about these leaves. The way I'm doing these leaves, it's very sketchy,
it's very loose. You can't look at this and say, Oh, that's a leaf
and that's a leaf. You might be able to identify
these things as leaves. In this particular art piece that we're doing for
this particular class, I wasn't planning on doing
this style leaf where it's a long skinny leaf
or a wide moving leaf. I was thinking of it being more of a field where you
just have a field and grasses and they're just
growing up naturally it's just wild and maybe we even add in a little bit of brown
to indicate some twigs. These are just flowers
growing out in nature. I am going to be holding my paint brush
on the second half, where I am just
going to hold it and just wiggle my paint
brush up and down. Dip back in when I need to. Then maybe I make a line like that
where it's like a squiggle, qigle
squiggle, squiggle. Wetting it down again. I
bring up and I wiggle, wiggle wiggle as I bring it up. Then maybe I want to add in something that actually
looks more like a leaf. Again, really holding it high so I have very
little control. I'm going to come off of
it and then just push my paintbrush down onto the
paper and wiggle wiggle, wiggle wiggle and lift up
that creates a leaf shape. But those are few
and far between. Those are not very
often in here. This is not the class for doing a leaf that's refined and
perfect and exactly like that. I'm trying to make them more sketchy. Hope
that makes sense. So with that in mind, I am going to pick up some of this brighter spring green
and holding it up high, dancing above, I'm going to drip because
I'm talking too much. Dancing above the paper, barely even touching it. Then just as I get
closer and closer, I go, Oh, there it is.
That's where it's touching. I do a couple lines, and then maybe I do
a little squiggle. Then I do a couple lines
that go that direction, cross the beams and see how
they don't even line up. They're not even
touching. It's okay. This is just the beginning.
They'll get there. Then as you can see, I even brought some things
up and above. So I'm going to come back over and I'm going
to bring some up here and maybe down. And then put some over there. I like to think about
flow when I'm doing this. I like to think
about the fact that all these flower heads are
heading that direction, so now I want to have
something up and above it and bring it down. I'm going to get some
of this darker color. Add in some of that. When I do painting of
flowers and I add in greens, I like to add in three
different green colors. Could be two greens and a brown, but three different
kinds of greenery. It really adds, if
you have ever taken a class in designing
your flowers, you got your flowers
from the grocery store, you would learn
that same technique that putting in three
different colors, three different textures
is really helpful to make your piece feel complete. So there, I thought I should
have a little flower, a little real leaf
looking thing. This is probably
the hardest part about doing this is
knowing when on Earth to stop so that you don't
overdo these lines. At least that is the
hardest thing for me. My thought was originally to put some kind of a little flower here and a little flower
here, a little flower there. But I'm not sure. So
what I'm going to do? Watch this. I'm going to
create a little flower. I was going to put it in
a center of some yellow. Basically just doing the
opposite of what was in my little daisies. And this is what I'm gonna do. This is just a scrap
piece of paper. Because I can't decide if I really want to do that or not, and I hate it when I go
and paint something and I wish I hadn't
gonna cut that out. I'm gonna lay it in.
I'm going to say, would I be happy if I put in
a little flower like that? Does that add to it? Does it just take away? Does it distract everything? I don't know, I kind of like it. I kind of like the color pop. If I found just a couple
places to put it in, Maybe I put one here. I squeeze one in here. So one and two, and three. Well, I think we're
gonna go for it. Hope we don't regret it. Um,
I'm gonna use my size eight. I'll put one here. Just
putting in four little petals. Four little petals. Four little petals over here. Really simple. Waiting for those to dry. I'll move this out of the way. Can always we'll use
it again to see if there's another spot
that I should add one. Then put a third one up here. So I quickly dried
those off with my heating tool so that I can come
in here because I didn't want them to bleed. I made them mostly dry. Just adding in a couple
of little dots of yellow. I'm going to not put it in. But I am going to add
in some little stems. Anytime you have
finished your painting, make sure that you sign it. It's very important
to sign your work. I like to incorporate mine
right into the artwork itself, but I will meet you over in the last class where
we wrap all this up and finish up our conversation about this painting and
what we learned this week. I'm so glad you joined me, and I can't wait to see you
next week when we dive into some new color or new paint brush that
we want to talk about. So many different things that I have on my
list to show you. So thanks for doing
this with me. Make sure you get that uploaded. But I'll see you in
the next lesson.
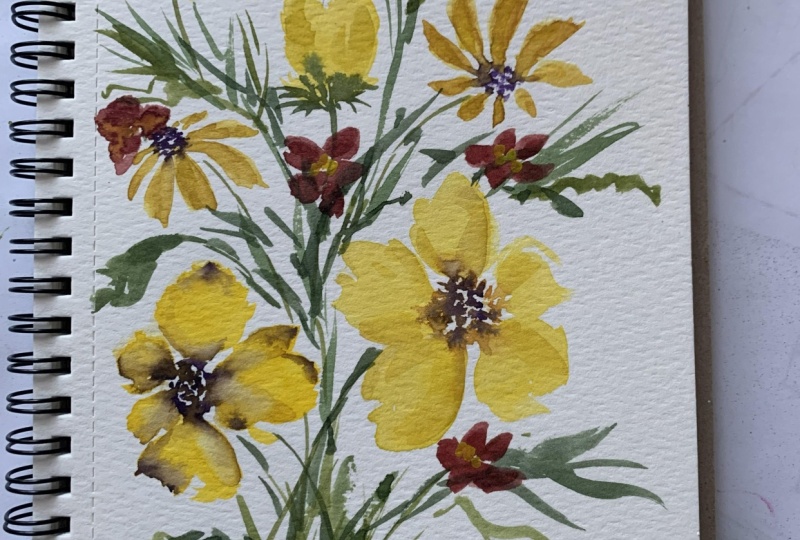
7. Closing Thoughts and What’s Next: Let's take a moment and really look at what
you just created. Notice how just three flowers can create movement
across the page. That subtle triangle placement gives your composition
structure, but it also still feels
loose and natural. Look at the white space, the breathing room
between the petals, the softness in the yellow, the places where you
stopped instead of fixing. Many watercolor paintings
are overworked, not because the
artist lacks skill, but because they don't trust
what's already working. If you felt the urge to add more or fix something,
that's so normal. Learning to pause is part of the growing and something
I still work on every day. Earlier this week, we practiced yellow tones
and flower angles. This class was about bringing those pieces together
into a complete scene. That shift from study to composition is where
confidence begins. When you're ready, please upload your project
to the gallery. I truly enjoy seeing your work and I want
to encourage you. This class helped you
feel more confident, follow me here and
leave a short review. See you in the next class.
 Brenda Jones, Watercolor Artist & Teacher