Transcripts
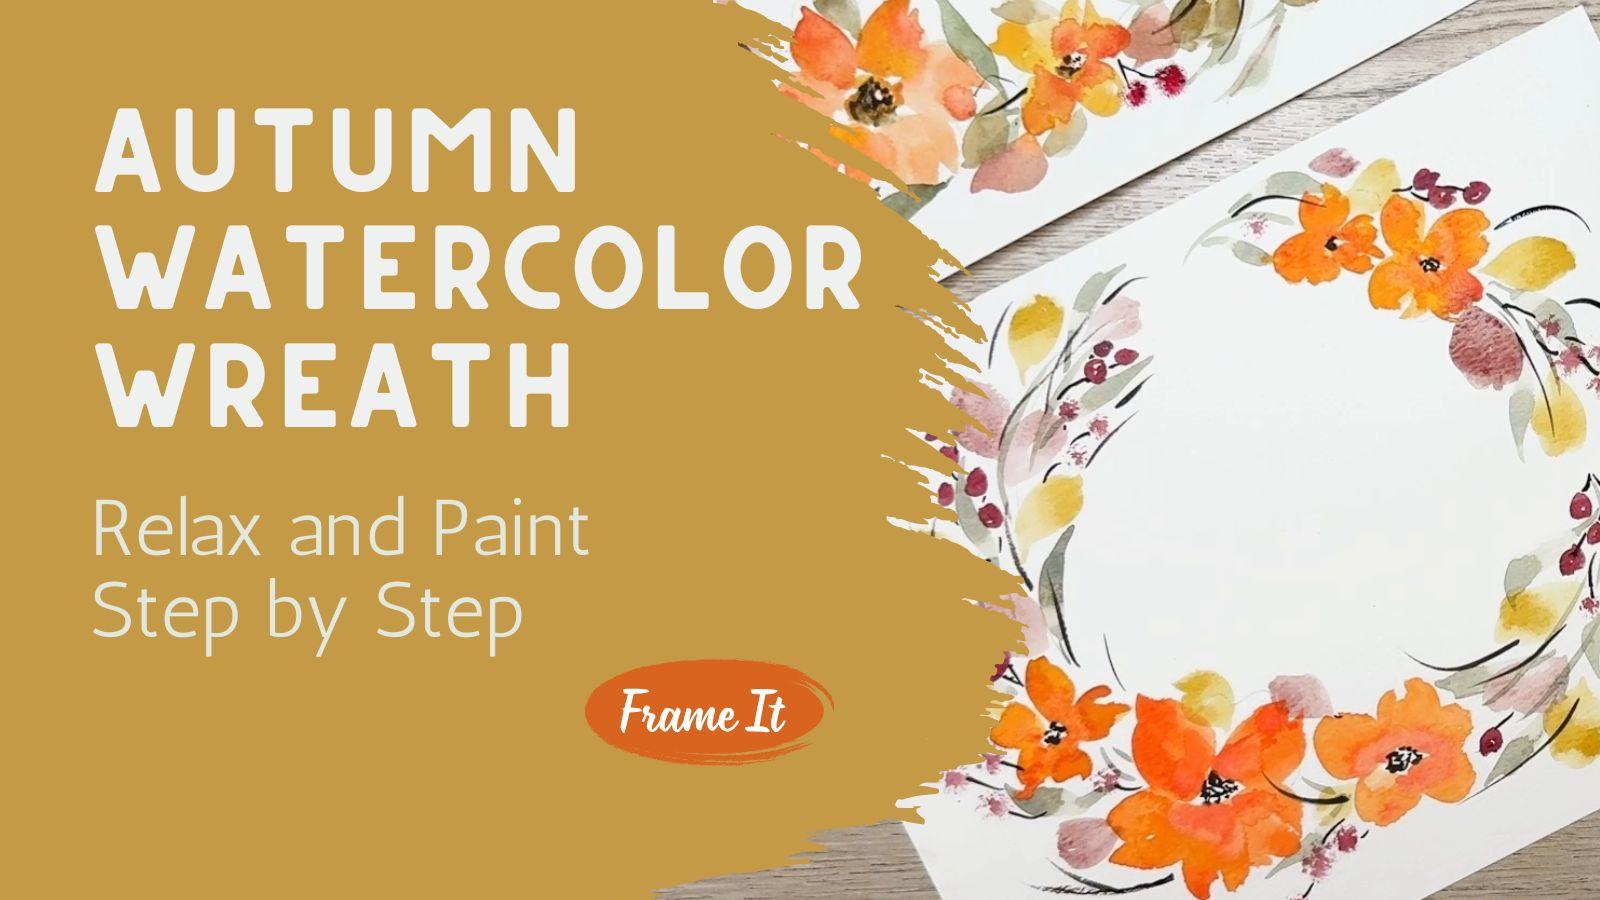
1. Welcome to the Autumn Wreath Class: Welcome to my watercolor
class where we will be painting a beautiful
autumn wreath filled with loose florals, berries, and leaves in
warm seasonal colors. In this class, I'll be walking
you through step by step, each element from practicing individual details to bringing everything together
into a finished wreath that you can proudly display. This project is perfect for beginners who want clear
guidance and practice, but it's also so relaxing and creative and fresh for the
more experienced painters. Here's another fun part.
Once you know the process, you can use the exact
same techniques to create wreaths
for any season. Try soft pinks and
yellows for spring, bold greens and reds for Christmas or bright
florals for summer. The possibilities are endless. Grab your paints, relax into
the flow of watercolor, and let's celebrate the season together by creating your
own watercolor wreath. I can't wait to see your
project in the gallery.
2. Gathering Supplies & Creating Your Outline: The supplies you're
going to be using today are going to be very
easy and simple. You're going to grab
yourself a couple brushes. Any paint brushes that
you have will work. These are the ones
I'll be using. You, of course, need some water
because it is watercolor. I'm going to be using a pencil to just draw a light sketch. Any pencil will work as long
as you can do it lightly and maybe even have an
eraser nearby so that you can lightly erase
what you've already drawn. I'll be using this palette here. You can see that I've
already used it in the past. I might clean that
up a little bit. I might not. I just sometimes I like having
a dirty palette. It adds a lot of neat texture
and everything and color. I probably will
not be telling you exactly what colors to choose because I want to
leave that up to you. If you want yours to be
more in the fall colors, go into these ranges and add a little bit
of a soft green. If you want it to be a spring wreath or a Christmas wreath, you choose the colors that are going to be working
for your wreath. Just because I'm making
a fall wreath in this class doesn't
mean you can't take the same concept and
make it into the kind of wreath that you
need for the season that you happen to be
watching this video. This will be my palette.
It's nice and big. I absolutely love this palette. It has everything. It's
like a color wheel, that will be my palette
that I'll be using. But if you don't have a
palette like that, it's okay. If you have something more like this where all your paint colors are in a container similar to
this, this will also work. This is a great way
to get a lot of different colors as an
option and get started. You can always find
these in my bio. There's a way to discover all my different
things that I enjoy using, all the supplies that I like. You can go to my bio for that. One of the things I like
to do when I'm going to be making a wreath
or something like this or an arrangement is
do a very light outline. My style of watercolor
painting is a loose watercolor and
when I draw something, it is just very
lightly done with some abstract concepts of where this might go or
where that might go. But I'm not actually
drawing out in detail. If you are also in that
style of painting, then you would follow
these instructions. So what I did is I found a picture on the Internet
and I said, Okay, I like that wreath kind of design and where those
kind of things were. So I went ahead and adjusted it and altered it to something
that would work for me. It's a round wreath, but it's not as you can see,
it's not perfectly shaped. I didn't use a tool to make
this perfectly shaped. I wanted to have a
very organic feel. Then what I did is you can
see that I've added in, maybe I'm going to put a flower
here and a flower there, and maybe these are
going to be some berries because I'm going to have
making a fall wreath. Again, I'm going to be putting
some berries up in here, some flowers and some berries. The rest of this I
just left open saying, these are the concepts of
where those things might go. Maybe I'll put some branches, maybe I'll put some
grasses or some leaves. I'm not really sure where
it's going to take me yet. So I'm not making
this too rigid. I'm just letting the paint flow when it comes
time to paint. I did take this and I photocopied it for you
so that you can download this if you would like to use this outline that I
made. Go right ahead. You can print that out and use that as a way of copying mine, or you can draw
something that is slightly different or a
completely different shape. I want you to have something
to go off of if you want to. Using carbon paper, you can print this out
on some copy paper, lay this underneath
and then have your watercolor paper next to you and you can stack
it up like this, like a little sandwich and put your watercolor
paper, your carbon, and then this down,
and then you can use your pencil and you can trace over where I put my
flowers and my berries. But I believe in you and I know that you can do this
without needing to do that. But if you would like to have that extra confidence,
go right ahead, I did supply that for you
so that you can do that, as well, if that's what
works out better for you. So I believe that's
really all the tools that we're going to
be needing today, and we will get started right away in the
next class. Hope you join me.
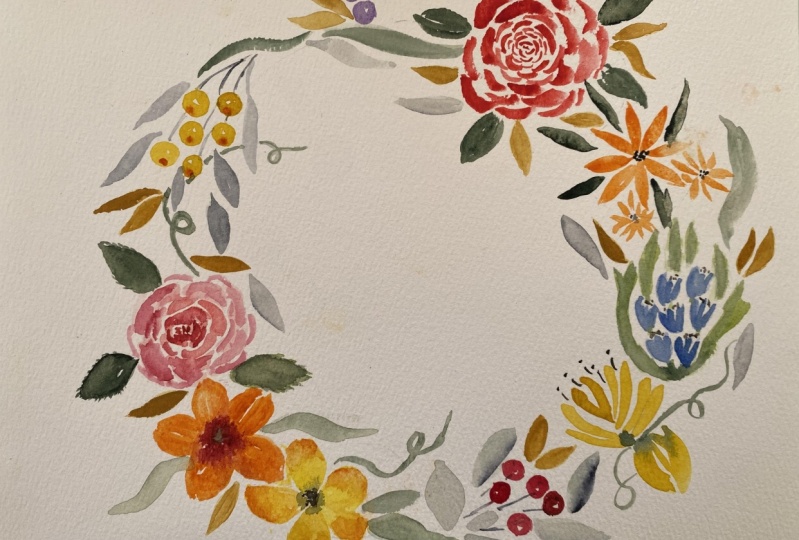
3. Getting Started with Seasonal Shapes: 's a sample of the work that
we're going to be making. We're going to be making
this wreath together. I think what I'm going
to do is break this down so that you can see the
different elements and then you can practice the
different elements on your own before you go to put it
all together into a wreath. To do that, I always like to
have a notebook next to me. I prefer these notebooks. I really like them.
They're spiral bound. I can keep all my
different practice things in here so that I can practice things and
have them as a record. We're going to start
over here on a new page. If you don't have a
notebook like this, I would recommend you find one. But they're great
because they are watercolor paper that's in
here. They're not expensive. These are cheap paper, but it's great for practice
and great for trying to figure out how to
make the shape, whether it's a flower
or a leaf or a berry. You can practice them in here without having to
use your good paper. So that's what I'm going
to be doing is in here, we're going to be practicing these different elements,
making flowers, making some berries,
making leaves, and even making the
little brown stems or branches that are
inside of this watercolor. So we're going to start by, I'm going to leave this over
here so that you can see it. Again, I have my
water and my brushes, and then I have my palette. And I did end up cleaning off my palette so that I
could start fresh. I'm going to set this up so that you can see all the elements and then we're going to get started in practicing the
different pieces.
4. Practicing the Details Leaves & Berries: Okay. The first thing
that we're going to work on are these berries. The berries are very
simple to make, especially if you have
something like this, which is a little short a
little short bristle brush, where you can use it
almost like a stamp. You don't have to
have this kind of a brush to be able
to make berries. I'm going to show you
two different ways. So is I would be dipping it into my paint just so to get a little bit onto the
paint brush itself, and then you use it like a stamp and you
can stamp it down. And make little berries. They're so fun
because sometimes you can make them really
light and other times you can add more paint and make them much
darker and rounder. That is one way of
making berries. The other way of making
berries is to use a brush. I'm going to just use
a simple round brush. This happens to be a size six, and using the same paint color, I'm going to fill
my paint brush up with that paint and then
just make a circle. It doesn't even have
to be a true circle can just be about circle, something that's shaped
similar to a berry. If you leave a
little white space, that's great because
that's going to give a little highlight to
your berry because eventually we're going to
come back through and add in a little dark spot for
the end of the berry. Those are your two different
options for making a berry. Now, as soon as those are dry, we're going to
come back through. I like to use a liner
brush or a rigger brush. You could call it
a script brush, something that's
very, very fine. It's very flexible. There's different
lengths for these. This is the one I prefer.
But I've used it so much. I don't even know what
size it is anymore, but this is the one that I like. I feel like I have a
lot of control with it. I would dip into probably
a brown color like that. Then I might add some branches. Almost like you're creating a branch for these
berries to come off of. Here I can do these. They don't even have to connect. They can just be an approximate of how this might have
worked if that was inside of a flower arrangement. With that same brown color, I like to come in and
just give a little tip. You know how berries have
sometimes like that, just a little tiny dot. I like to add these are too wet, so I jump the gun. I'm just going to use
a almost dry brush. I'm just going to lift that. I'm just going to lift that and create a little highlight there. Perfectly fine. Nothing wrong with adding a little highlight. Okay, these are pretty
much dry enough anyway. I'm going to come back
in with my brown and put just a little
dot at the ends. They could be in
different directions. They don't have to
be at the same spot, and that shows that those
are little berries. You can see in this one that I use this little stamping
tool which I like to use. But this berry is also
a fantastic option. You could even mix them.
Maybe when I go to make our final art
project for a class, I might do a little
combination of both and show you what
it looks like that way. So there's your simple berry. Go ahead and get
started on that. You can pause this video
at any point and practice and then maybe even replay it so that you
can come back and say, Okay, now, how did we
make those berries? Give that a try and
then when you're ready, come back and we'll move on to the next thing, which
is going to be a leaf. Okay. I hope you
practiced your berries. Maybe you filled up
an entire sheet. Maybe you filled up
several sheets until you felt like you had
mastered your berry. Now we're going to move
on and make leaves. As you can see in here, I have several
different style leaves. I have some long
leaves that are green. I have some oval leaves
that are more of a pinky color, peachy color. Then I even have some
green brown leaves in here of different tones. So I prefer to have at least three different
style leaves and three different
color leaves when I am working in an arrangement, whether it's for a wreath
or if it's just a bouquet. I feel like when you add multiple different
kinds of leaves, you're going to get
a lot more dimension and style and texture
and movement. So that's what I
would prefer and what I'm going to be
recommending that you do. We're going to make
these long leaves. So over here in my greens, move this over so you can
see what I'm going to do. I have my greens and I want to remake
something like that. I'm going to find these
have already been wet down. What I did What I did is
I used a spray bottle and I just wet down
my entire palette so that it was all nice and wet. Waited a couple minutes, and then I can go in here
and I can bring in some green and I want to make it maybe a little
bit on the brown side. I'm going to take the
smallest amount of brown and add it in and
mix my own color up. Add a little bit
of water so that it's nice and transparent. I like to have some just a
scrap piece of paper so that I can practice and see what color it's going to come out as and
see, do I like that color? Do I feel like that's
the right color? I do. I think that's
going to work out fine. We'll use that green. Move that back over
so I have some space. I'd like to have
some a rag nearby. It could also be a paper towel, but something that I
can use to dip off of brush my paint brush off
if I get too much on here. My paint brush is nice and
full and we're going to practice those leaves
to do those leaves, it's a small line and then I'm going to lay the belly of the brush all the way down. I lay it all the way down flat, and then I drag it and I slowly lift up as
I am lifting up, I'm making the tip of the leaf. Let's do it again. Line all the way down, drag it and lift it back up. That is going to be our leaf. You can see that
that's what I've made here, several
different leaves. Again, a line, push it down
slowly drag it back up. The longer you leave
that paint brush down, the longer that leaf will be. You could make some really nice long leaves if that's
what you wanted, or you could make a short leaf. It's up to you when
you're painting, you can decide what
shape leaf and how long you paint how long you
want that leaf to be. The other thing
you can do is make your leaves a different shape. You can make them arch. As you are painting them, if you make your little stem and then you want to
make it branch down, you just swirl your paint
brush down that direction. Then you have created
a bending leaf. You can also bend them up. Or you could put on two leaves. You have all different
options with that style leaf. I would want you
to take a moment, pause, again, fill
up your whole page, practice the style
leaf if you need to, and see if you can make your leaves longer,
shorter, bending. Practice your
different leaves and create an entire
page worth of those. Rwatch that part of the
video if you'd like to. Then when you get back
to here and you're ready to move on,
let's keep going. The next leaf we're
going to make here is this leaf right here, which is an oval shaped leaf. For that, I am
going to dip into, I'm going to grab some
almost pink color. Again, because I'm into
the fall leaves right now, we're just going to put a
little bit of brown in there. And so here you can see
that I've got that color. I'm going to use my little um, I think maybe I would like
it a little bit pinker. So I'm going to grab a
little bit more pink and throw that in there,
try it again. Oh, yeah, that's a kind
pretty color, isn't it? Neat. So yeah, I think that's
going to work out just fine. Using that that I mixed up,
lots of water in there. I want my paintbrush
completely full. I'm not just dipping it in. I am filling my paintbrush up. It's not dripping off,
but it is nice and full. If it does start to drip, you can always dab it off on your towel or your
rag that you have here. To make a leaf like that, what you're going
to do is again, start with a little stem. Then this time instead
of making one, you're going to make
two, one on each side. Let's try it again.
A little stem, one over here, and
then one over here. That makes it a nice wide leaf. You could make them coming down, stem half of it over here
and a half it over there. When it starts to get dry, just dip your brush
back into your paint. Now we'll make one
coming all the way down. You can see that I am making
just a two sided leaf, one side, two side. Again, it's it is
only just a stem, taking my paintbrush,
pushing it all the way down, basically doing the same
as that green up there, dragging it out, lifting up, but maybe a little sharper instead of dragging it
out to make it tail. I'm just picking it up.
Then we're going to do it on the same side over here and then just picking it up. Now I have one of
these fat leaves. They don't have to be perfect. You can see on these leaves that sometimes
there's white space, sometimes they're
different shaped. Because we're painting in
a loose watercolor style, that's the look I'm going for. I would want you
to pause here and make an entire page full of leaves that look like that in whatever color you
choose to make them. When you're done, come
back here and we will move on to the next thing which
is going to be the flowers.
5. Practicing the Details Flowers & Stems: You've made these leaves
and as you can see, I had made them also in
this brownie gold color. It's the same style leaf. It's just in a different color. We don't have to practice
those unless you want to find the gold color that
you would like to use. For me, I think the way
I would make that is use this mustard color here. Then again, because
I'm making fall, I'm just going to
take a tiny bit of that brown and add in some brown until I have a
color that is pleasing to me. Test it over here on my
sample and I'd be like, Yeah, that's a
really pretty color. I think that's
going to be great. If I wanted it to be
a little brighter, I could add in some brighter yellow and maybe I could
brighten it up a little bit. But yeah, maybe something
more like that, which makes it a little bit
golder instead of brown. Again, the colors are up to you, if you're making a spring leaf, you would probably not want
to be adding in that brown. Let's move on and we're
going to make a flower. These four flowers are pretty much identical in the shape. They're just different
sizes and I use different colors to make them
look slightly different. These are, I'm going to call them five or six petal flower. I don't personally like
to name my flowers. People often ask me, is that and then they
name a kind flower. I say, if that's what it looks like to you, then
that's what it is. I'm not trying to make a flower, look reminiscent most of the time to a flower
that you can name. I'm just making something
pretty that I enjoy. So that is up to you. You'll see that
here's a a petal, a second petal, a third one, fourth, fifth and sixth. But then here I only have four petals and here I have
five and here I have four. So it is what it is. The way I would do that
is I would be mixing up some of this peachy colored, so I'm going to use this
pretty orangy golden color, and maybe just add in
just a little bit of this other golden orange
brighten it up a little bit. Okay. Let's make sure that it looks good with everything
else and I like that. That's a really pretty
color. Especially for fall. Again, I'm going to fill my
paintbrush up with the paint, come over here and to
make these petals. We're going to make
one petal at a time. I'm going to do a one stroke, two strokes, and leave it
jag it up here at the tip. Let's try it again. I'm going
to put it down next to it, leaving a center,
leaving a white center. I'm going to lay it down and
make a a one and then a two, leaving it jagged at the end. Leaving a little bit of
separation whenever possible, 12. Now I have three petals. I'll make another
one here, one, two. Then maybe I'll just
leave that space open or maybe I'll just add a
little bit more like that. I think I like that. Now, before this dries, I'm going to come into a darker orange color
orangey red color. Put a little bit on the tip
of my brush before it dries, drop in some of this brighter
color, this darker color. Into where the wet spots are. Because I'm working
on cheap paper, it's drying very quickly for me. But when you're doing
it on better paper, you may not have that
problem, but that's fine. I don't mind that
that's what happened. We're going to make a
second one and this time, I think I'm not going
to talk as much. One of the things
you can also do is change up your
colors a little bit. Maybe you put your paintbrush into this orange and
then you just dip the tip into another
color that's nearby just to change
it up a little bit. You can see in here, they're
all different colors. So here I'm just going to
work a little bit faster. I'm going to dip
into a darker color and drop it in and
let that spread out. We'll see how that looks.
Let's make one more. I start with this
beautiful color that we had made earlier
a petal for a leaf. One, two, they're just
jagged. It's fine. They don't have to be perfect. It's such a great thing
when you're working with loose watercolor is that
nothing ever has to be perfect. It can just be the
way you made it. Now this is more brown, but I want to add in some of that orange color so
that it's all cohesive. I'm going to add in that orange. Instead of that pinky red color, I'm going to add in
the orange color into the center and maybe
into some of the ends. Drying my paintbrush off, I can even manipulate
it a little bit. Move it around a
little bit like that. Now we're going to
wait for that to dry and as soon as it dries, we're going to be
adding in centers. These are still a little wet. As you can see, they're
still a little shiny. I sometimes like to
add in a center while that is still wet because then it bleeds
just a little bit. I'm going to show
you what I mean. Or I can just add
it in little dots. This one's completely dry, so that's not going
to bleed at all. This one's very wet, so it'll bleed some. Just little dots, makes
the center really pretty. If you wanted to, you
could even come in with this darker color of
the orangey red color. You could even add in a
little bit more of that. Okay. Again, as you're practicing
your little flowers, you might make a page or two or four pages and
come back and practice these as many times as
you'd like to until you feel like you have a flower
that you are satisfied with. Once you have
learned how to make a flower and berries and several different
shapes of leaves, we can go back in here and look what else do
we need to learn the only thing else
that I've added in here is some little
branches in here. Again, I'm going to use
this rigor brush or liner brush for that also
calls a script brush. For that, I'm going to go
and use this darker color. It's a really dark brown. Get rid of any extra. For this, I want you to hold
your paint brush as far up as you possibly can
so this is not writing. You're not doing printing. You are doing a line that is
going to be very relaxed, very no control at all, which is what we're actually
going for is no control. We're going to just let nature happen and see what goes on. As you're holding it up here, you're going to just
wiggle your paint brush around and see what happens and it will go
in different directions. And that is how we're
going to be creating some of those lines that
you see in here. It's just a little wisp or a little squiggle or a
squiggle like that. Practice that. See how
that works for you. It's so tempting to sit here
and draw a perfect line, but it is so much
more organic when you make it quick and
without an intention. Give some lines a try. Rewatch this class as
many times as you need to this particular lesson so that you can practice
these different skills. Once you've learned
these skills, then we're going to go over
here and put it all together. Meet me in the next lesson
and we're going to be putting it together
and making it into a wreath. Hope you join me.
6. Autumn Wreath Project Part 1: Joining me again
when we're going to be working on your class project making this fall wreath or whatever season that
you happen to be in. So I went ahead and printed out our little the drawing
that I had made for you. As you can see, it's very
faint because that's what I want yours to eventually look like when you put
it onto your paper. I paint when you
draw that on there, I want it to be very
faint so that you don't see paint the pencil
marks very much. Okay, we're going
to get started on this class project
where we're going to paint this beautiful wreath, and we've practiced it. I hope that you have
a whole several pages full of all your practice work. And we're going
to get started on your little Wreath and can't wait to see
what it looks like. I'm hoping that you
will go ahead and upload your final project to the class so that
other class members can support you in telling
you how great you did, and we can share all of
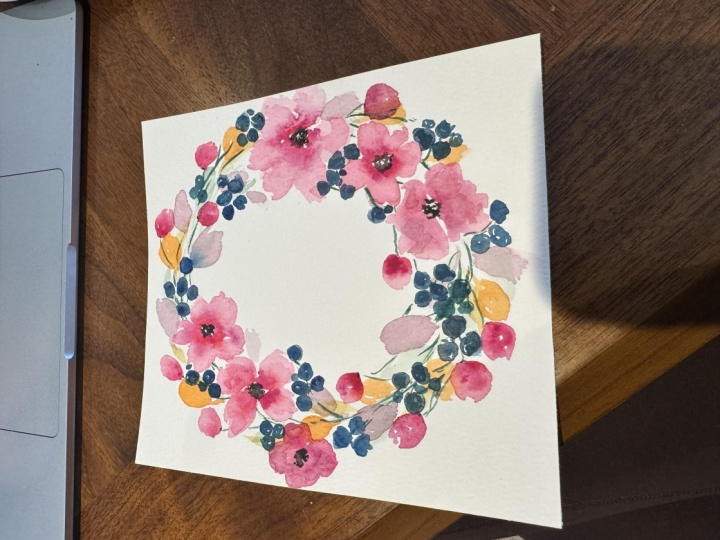
our creativity together. Yours is going to look
very different from mine. You might put in
different flowers, different leaves, maybe
not put in berries. Maybe yours is just going to be fall leaves and no
flowers whatsoever. Anything you decide to do
is going to be fantastic. Maybe yours are pink and yellow and purple
because yours at the start of spring and
that's the time that you're going to be watching my class.
That would be great too. You could even make this
into a Christmas wreath by choosing some darker
reds and greens. Clason whatever season you're in is going to be great for
you to be making your wreath. Here you can see on the
wreath that it's asymmetric. You have your wreath going like this and then there's
a little space and a little space with a little
side topper over here. I did that intentionally. If you would like your
wreath to be perfectly round and continuing
it, perfectly fine. You do it. However
you want to do it, you are the artist, and I
appreciate your creativity. I went ahead and put two
flowers here and two up here. I think when I make
it again today, I'll be putting three down
here and two up here just so that I have an odd number and help balance this
out a little bit. One of the reasons why I like
to paint something first so I have a sample and I can
take a look at it and say, now, what do I like?
What do I not like? What do I want to change when
I go over to make it again? So if you can make yours
however you would like to. I have it all drawn out down here and I am
ready to start. I think what I'm planning to do is maybe not talk through it. I paint better when
I am not talking. So please rewatch
this as many times as you need to pause it, start it up again,
rewind, watch it again. It's really important
that you get these steps down and
understand what I'm doing. If I'm getting to a
spot that's important, I will start talking again and show you and tell you why
I'm doing what I'm doing. I'm going to start
with the flowers. I always like to start with
my biggest things first. If you're making flowers, I would start with
putting in some of the primary flowers so that we make sure that we
have enough room for them. I'm going to start by putting in the three flowers down here
and the two flowers up here, and then I will start moving in and adding in things
like leaves and berries. We're going to start with some
of this beautiful orange. Now, before these
three get too dry, I'm going to go right
ahead in with some of this darker color and add that into the center
here so that it bleeds out. Maybe some of the tips. I might even add in a
little bit of yellow. Okay. Then again, before
it dries too much, add in a second color. I'll go ahead and add in some of that center with the dark brown. Okay. So now that I have my
flower bases figured out, I'll now start
putting in some of the larger leaves going in with my number six round,
these back up. I use this green that I had
made up for my practice. I'm going to start just figuring out what the
shape is going to be. I want to have a branch going that way and a
branch going that way. I'm not really making
anything in particular, just showing where the branches of the wreath are going to go. What direction. Just
creating the foundation. Now I will put in some
of these longer leaves. I want them to go into
the center and out, but not too far. I'll just add a leaf here and maybe add another one up here
and maybe one more up here. Then I'll put one going out this is just a
very intuitive kind of painting. There's no plan. You have to just
decide where you want these leaves to be
um, showing up, um if you feel like it should stop before the flower or under the flower
or behind the flower, you just need to figure that
out as you are painting. Now, while I am painting, I keep all my leaves going
in the same direction. I don't all of a sudden start making a leaf coming
this direction. I'm going to make them
all go this direction, like a clock, or you could
do a counter clockwise. But in this one,
I'm making them all start here and
working my way out. So when I get over to this
side, I'm going to continue. I'm going to make them
come out going clockwise. I'm going to leave a little hole here and a little gap there. Then I'm going to say
the base is there. I can always come back in and add more if I never need to, but I'm going to
say call that good.
7. Autumn Wreath Project Part 2: And now I'm going to
be adding in some of these golden brown leaves that we had made
in our practice. A little bit of brown in there, maybe a little
yellow. So pretty. Yeah, it's great. Okay. Now I have
my paint mixed up. I think actually I want to switch over and use
my larger paintbrush. This is a size
eight. Fill that up. And maybe I want
one here, one, two. Let me put one here, one, two. Again, picking up my paint brush faster so that I'm not
getting a tip at the end. It's just a fat leaf without
stopping on the end. I'll put one up here. Again,
the leaves are all going the same direction going
in a clockwise direction. I think maybe I need one in here and maybe I'll squeeze one
into this general area. Spreading them out a little bit, seeing where I'm missing one. Let's see what do we
think? Put one coming out of here. Like that. Maybe I need
something over here. Maybe it's coming from
in here. There we go. So it's nice and balanced. Now I'm going to move
on to this pink leaf. Got that pink going on here. Grab a little bit of that brown. We're going to add
that pink in as well. Again, making it
nice and opaque, not putting in too many. You can overdo it. I'm just going to
try to just make it so that it's just enough, adds enice texture and color
without adding too many. I can vary the size. Here I made a small one, where over here I made
some larger ones. Some of them are darker, some of them are very, very pale. You can even come back in
and you're like, Well, I want to be a little darker, you could add a little
bit more depth to it. You can make them all
different sizes in here. I feel like maybe I need a little bit of pink
over on this side, so I think I'll just put
something to turn this pink shi. Having it over here. Okay. I'm going to add
in my berries now. I'm going to use my size six. Go find that color
that I want to use turn it this way
so you can see it. I don't want it
to be too bright, so I'm going to find that
brown again and just add in some brown to make
it a little bit darker. Grab my swatch. See how it really
just now blends in and see how when I add
it in that darker color, it really makes it a dark, deep color which is
perfect for fall. I'll use that color. Okay. I want to put in my berries. Let's see, I want to
put in some berries. I'm looking for a space that's
where it needs something, where it needs some depth and
I can see that I'm missing some things here and maybe I
want to add it in over here. I'm going to make a circle. Remember, they don't have
to be perfect circles. If I get a chance to leave
a little white spice, I will because that's
where the highlight is. I'll do something like
that. I like things to be in odd numbers three, five, things like that. You could also just do a little one, just
put one in there, or you could put a couple
in down in helis area and just sneak them on in
there. That's perfect. Then I think I'll put
something up in here. Um, maybe I'll put the
whole grouping up there. Maybe I'll put some over here. Oh, I forgot I was going
to do the other brush. I do a little combination. Alright, we can still do
that. We will do that. Um, spread these big solid ones out. Something over in here. Now I'm going to switch
over to this little brush, my little stamping
brush and fill it up. I can always test it over
here on my scrap paper. So, yep, that works. I
like the way that looks. Just gives it a
little softer look. Maybe it's a different
kind of berry. Okay. So the next thing I want to do is add
in some of the brown, and I'm going to be adding in the little
branches where the um oh I'll be adding in branches now for where
the berries are attached. It's at this point
where things really start to come
together and you can really start to really see it because when you start
adding in the details, it makes such a big difference. Here I'm just going to add
in some little branches. Again, making sure that the stems are all going
in the same direction. You don't want all
of a sudden things heading counterclockwise
when everything else so far has been clockwise. Just little stems. Sometimes they tuck behind and you can't really
see them. You know, Again, all the stems should be going in
the same direction. Like that. Really starts to make things
have a cohesive feel. Now I'm going to add in some of the other
branches that we practice. Remember when we
were practicing, we held it all the
way up here at the tip of the paint brush and just really quickly and loosely added in
some little swirls. It adds motion. It shows movement. You don't want to
put in too many, but it really does seem
to add in a lot of fun. It could be a branch
that's coming out. Or in. This is your chance to fill in the spaces that maybe felt
like it was missing something. See if I can quick little swishes. You could even bring a
branch off of these. If you want to bring that make it feel like it's
coming back into it, you just bring that
little branch back in. Same this one, if I
want to bring that one back into the wreath, I'll just add a second branch. Brings it back in. So
there you have it. I'm going to let this dry completely and then
I'm going to trim it down and put it into a frame and show you what it
looks like framed. I hope you've enjoyed doing
this and I can't wait to show you what this
looks like in a frame.
8. Finishing Touches & Framing Your Work - Follow Me on Skillshare: Is that I forgot to add the
little tips to my berries, things that I really
like adding these. I feel like this adds such a fun little
dimension to my berries, makes them really feel
finished by putting just a little black dot at the top top or the side of
all the different berries. So if you like that look, go ahead and add yours
at this point too. Just at the top or the side. Sometimes you don't
have to add one on because maybe that's showing
that it's on the back side. I like to add them.
Here's a nice close up for you so that you can
see the different details. So we're gonna go
ahead and put this into a frame and show
it to you framed. No, I really should sign this. I never like to put something into a frame but that
hasn't been signed because you really need to sign your work so that you
show that you've made it and that you're
proud of it and shows the celebration
of your artwork. So I'm going to quick sign
mine before I put it in. So here is my frame. I'm going to show it. So here I can put it inside of this frame and show what
it's going to look like. Isn't that fun the way it
just takes up the whole area. Put the back of it
on. I sometimes I don't go to worry about that. There you go. It's all framed, ready to go onto my wall. Because it's a square,
you could make it hang into a frame that is square or you could
hang it this direction, or I have turned
the entire piece this way and made the
bottom over here. It's up to you, whatever
location you have it to go. You could also make this
entire painting much, much smaller and just make
it mini and then add it and make it a Christmas card
out of this or a fall card, um thank you card or wedding card, whatever
you want to make, or you could make
it and fit it into a five by seven frame if that's the size frame
that you have or need. I hope you've enjoyed making
this beautiful wreath with me and let me know which season you
decided to paint it for. Upload your picture
of your painting to the class so that
we can support you and celebrate with you
on your accomplishment. I really hope you
had a great time and if you'd like to follow me, I am available at several different social media accounts, and all that information is in my bio so that
you can find me. There's also a Link
tree where if you had any of the art pieces, if there was anything in my class that you really enjoyed, most of it is available
through my Link Tree. You can follow me on Amazon over there to find out what all
of my favorite supplies are. So enjoy it. Thank you so much and I hope
to see you at another class.
 Brenda Jones, Watercolor Artist & Teacher