Transcripts
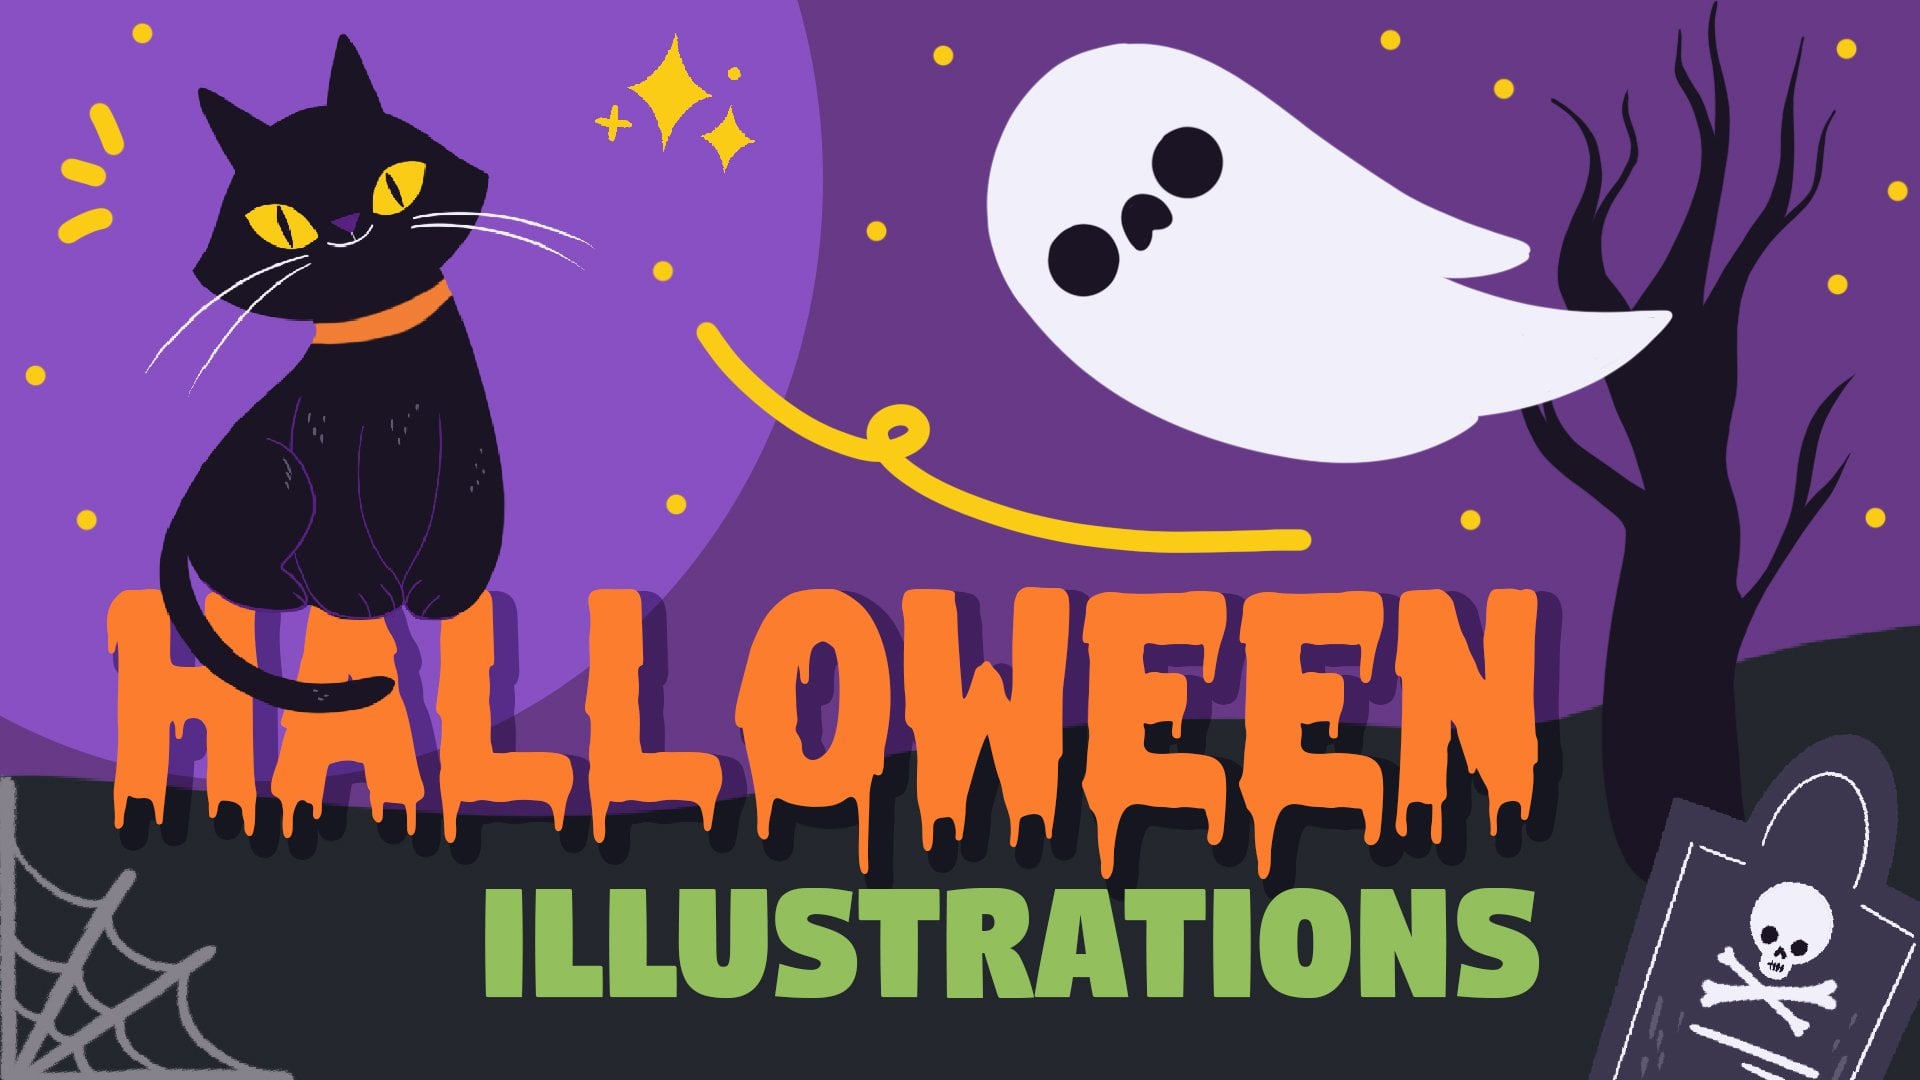
1. Introduction: Hello everyone. My name is Sonya and I'm an illustrator and graphic designer. Today we'll draw Halloween stickers. We're going to make all the pictures from scratch, starting from the sketches. And as a result, you have four full colored illustrations. During the class, we will be working with colors, layers, blending, mode, selection and transform, so and so on. You can use the final pictures as single stickers or a sticker pack, put them on the postcard, turn them into some digital products, and use them in whatever way you want. This class is for everyone. So don't worry if you have no prior experience, all the drawings are made in Procreate, but it doesn't mean that you cannot use any other graphic software or even traditional materials. So with that said, if you're ready, launch your software, and let's begin.
2. Preparing the Shapes: Okay, it's this time of the year again. So today we'll create four hello and stickers. And we're not going to be working in March with the clean lines. But anyway, we need to start from creating the sketch. So let me just take this off and we will jump onto our cameras. So the first thing that we will do today is create an elite. So map a little outline of the shape that we are going to be working on. So firstly, we will go to the selection tool and we will select the ellipse. So right here we will create a circle with the selection tool. Now grab the rectangle ends very accurately. We need to Ellen Gates at this circle that we created on top. And we need to add the outline of the rectangle on the bottom. So we need to connect the sides of our ellipse with that rectangle that we are going to be making right now. So very accurately finding the intersection and it's making there, It's NGO that big. So that's the shape that we are going to be working on today. So let just go to the color pallets which you can find in a project and restarts up. As always, Let's grab some color. So let's use the color field. And we will recolor our outline that we created with the selection tool. When it's done, let just deselect everything and we will make four copies of these elements. So firstly, let's go to the Transform tool. Let's maybe adjust the shape a little beads in accordance with our vision. But in general, it's should stay, stay like this. And when we are satisfied with these sheep, we need secretes, three more copies. So to make a copy, we need our three fingers and we need to swipe down. You will see little window here that this gold copy and past here we need to tap Copy when it's Colpitts. We need again with three fingers slide down and we need to choose Paste. When we have the COPI, we can move it to the side if you want to place them on one line, we need to turn on snapping. So let's toggle the snapping and both weekend toggle them magnetics. Now grab your transform tool and move your copy to that site. Now we can select them both. And to do so, we need to go to the layers and you will see that for each of these shapes, we have the separate layer. Let's select both these layers and go to the Transform tool. We will move these two copies a little bit on the soap. And when you are satisfied, just deselect them. Now let's go to the layers and we will make a copy of these two layers by sliding them down and replicating them. So one and another one. We'll move one of the layers above, and I will select these two layers together. I will go to the Transform tool and I will move these two copays and little bit down. Now when we have four copies of our shapes that we are going to be creating this stickers into. We need to go to that layers and we will merge all these four elements together. So with two fingers, select the first one on top, select this second one on the bottom, and just pinch them. Now when everything is on one layer, Let's continue creates in our stickers.
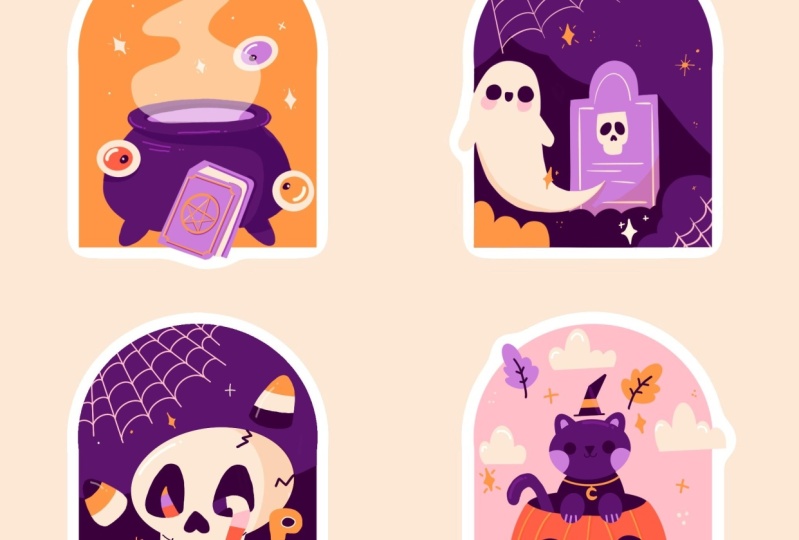
3. Making a Sketch for the First Sticker: So now let's create one more layer and put it above the layer with this little outline. Let's go to the color scheme and grab some color to start creating our sketches. So for example, I will go with these dark purple reps on brush. I'm going to be using some texture at one. You can use any brush you like. And let's start by creating our sketch. So for the first illustration, Let's create a cool drug. So for the cauldron, we will need to create one ellipse like this. So it is elongated ellipse placed horizontally. When you created this ellipse, we need to create the bottom part. For the bottom part, let's just step a little bit from these parts and we will be creating an ellipse like that. So if it's hard for you to create the shape like this, you can start by creating a circle and then erase everything that you don't need. Let's just make this think a little bit more even on both sides. So it should be a little bit more wider on the bottom than it is on the top. So let's just adjust the shape a little and maybe erase some places that we don't need. So just in general, work on the sheep and try to make the cauldron look like a cauldron. When you're satisfied with the shape, you can see that now it's not feeds into this shape that we created, but it doesn't matter. We will fix it a little bit later when we are done with the sketch. So now let's create the inner part of the cool drug. So we will go to the soap ellipse and we will repeat this shape right here. So just SAP little bit from the edges and create an ellipse inside. So let's go to the bottom and let's create those all sides or legs of the cauldron. We will need to create the sheep like that. So it is the bottom part of very LM Gates's triangle, but it is a little bit around, it's on the bottom. So let's just try out. One is going to be on this side and one is going to be on this side. So try to put them on the even distance from one another. So create a new one. Instead creating another on the other side, I will erase this mark that I meet. We also need to pay attention to the size of this legs and we need to make them the same size. So let's just measure where we need to put this leg. And let's measure where we need to create the bottom part of the slack. So let's just create the line like that. And also you can measure where you need to put the second leg by creating the line here and one here. So the intersection will show you where you need to put this lack. So when it's done, Let's add a few additional elements to make this illustration like wholesome and nice. So firstly, let's add some kind of the smoke go in from the cold drunk. So for this MOOC, we will go with the lines like that. Very subtle, very curvy lines go in from the cold run into, we will repeat the sheep on the other side. So it's not like we are creating these sheep, so we are not reflecting the shapes on the other side, we are repeating the whole sheet. We can add some sparkles, for example, or additional elements as well. So firstly, I will wants to add a few eyes, just like an eyeball. And we will do it just by creating the circle and pushing them randomly on the different sides of the cauldron and the whole composition in general. So I will go with three different eyeballs like that. So they all are going to be circular, but the position of the irises will be different. So when we created all three sheeps for our eyes, Let's create the irises ends at the pupils. So for the iris is just repeat the sheep insight. Go for all three sheeps and S for the pupils. Let just make them looking at one another. So when we have this composition, we can add a few sparkles. So you can go with these shapes or just the shapes like that. Just randomly put them somewhere, but try not to overdo this. You can even put them on this smoke. We can leave it as it is, but also we can add one more additional elements. And this time it's going to be a lid. So book, so for the book led just creates the sheep like that. And I'm sure that this shape is called Eric single. So try to make it even tried to make the lines parallel to one another. If you want, you can around a little bit the corners of the book ends. We will need to add a little thickness to this book. So let's create one more line right here. We will make it a little bit longer and we will connect these parts with the lines like that. And also we will need to create one more line right here is create a line here parallel to the lines right there. So the book is almost ready. Let's just work on its shape. So we can make the corners a little bit more rounded. We can work on the whole shape in general. Weekend adds one more line here to show that it has some pages and that we have that cover of the book right here, so I will shade it a little bit, but you cannot repeat myself. And also, you can see that's what I did spread here. One object is such an another object and it's not very nicely looking. So I will erase this. I, and I will put it a little bit to the sides, the way that objects are not touching each other. So let me just very quickly fix it. So I will just make it a little bit on top. Now let's add a few beautification for the cover of the book. I will erase the parts right here that I don't really need because they are a little bit disturbing me and I'm not seeing what I'm going to be doing right here. So for the cover of the book, Let's just create a circle in the middle and we will add a star right here. Also, we can add a few lines here and connect them nicely with the curves. Now you are creating a sketch and it doesn't really matter how nicely you are making your lines, because we will be working on it a little bit later. Now your goal is to map out everything nicely and position everything nicely. Ends, just have the general idea of what you are going to be working on. So probably their first illustration is ready. And now we need to put it onto this shape that we created. So let just go to the selection so we will select our objects. Firstly, I will set up the color fill and I will choose their free hands methods of selecting. I will select this object. I will go to the Transform tool and I will put it to this area. And also I will make this object a little bit smaller. We can go to the free-form methods and adjusted in a way it takes a little bit more space on. So this sticker, so you can just make it a little bit choppier or so. It doesn't really matter if the whole smoke that you created E's fit in right into the sheep. All you need to do here is to take maximum of this illustration and put it nicely onto the shape that we created for the background. So when you are satisfied, I'm not very satisfied right here. You can go with some little objects a little bit beyond the frame. So for example, with these eyes on the side and a little bit for the book on the bottom. You can make it work because later on we're going to be creating Alyssa outline. And that will look pretty nice when we combine it all together. So let just leave it as it is for now and move on to the next sketch. So let's deselect everything and move on to the right.
4. Making a Sketch for the Second Sticker: So we will take the brush and this time let's creates a little jumps tone with the ghost. So firstly, let's create the shape of the rectangle and we will add elite. So half of the circle on the top of this rectangle, Let's erase this part inside and let's add some modifications for this stone. So firstly, we will create as right here. So for this cow, Let's create the rectangle like that ends. We will create a little rectangle on the bottom. We will connect these two shapes together. Again, you can go with more smooth lines. Or if you don't like this move lines, you can just make the corners straight when you're satisfied with the shape. Let's add the ice and let's add the nose. So for the eyes, we will just go right here and create a little beads of a tilted recalls like that. And for the nose, we will need to create the sheep like that and put it right between the eyes. Now let's add a few lines like that. So we will think that something is, is written here and we will make a few beautification here. Maybe it's not the few beach vacations, maybe it's just one. We will just make the copy of the lines that we have for the inside of this tombstone and we will repeat them insight. Now let's create an ghosts floating from this tombstone. So for the ghost, Let's firstly create the trajectory It's flows in from this tombstone. So let's just create one line and let's say it's going to be like that. So it's the curve that we will turn into the ghost. Now we need to add a little beads of the flash to the Ghost to lead, just repeat this shape and create some kinds of there drop shape. You can make it as chubby as you like. Let's erase all the lines that we don't need. So this line that we used for the mapping out, we will erase as well. We can add a few attributes like for example, little arms for our ghost. And let's find the face and creates its onset, the body. So for the face, we will use just the eyes like that. Go as big as you like, go as round as you like. Let's create a little mouth. I will make it a little cute and put the mouth in the middle line of the eyes. So let's just find the middle and creates the mouth like that. And also I will add the cheeks here. Go with these shapes or if you want, you can add the cheeks with the circles. Probably I will go with the circles. It looks nicer. Now let's add few beautification. So for example, we can go with the shapes like that, so we won't have the empty corners. So here and here, we also can add the lines like that here to show that it's not like floating, but it has some grounds near the tombstone. Also, we can add the web. So let's create a few lines like that. And we will need to connect them by creating the concave lines like that. Let's add some sparkles, some stars maybe just go along the free spaces, that blank spaces and add some beautification. But of course, try not to overdo every fan when you're satisfied with everything that you have here, Let's select our object. I will go with the free hands and just selected in that way, we will go to the Transform tool and adjust our illustration by placements, making it chunkier. Just play little bit with the placements. Again, if you go a little bit beyond their frames, It's okay. So when you're satisfied with your illustration, with its size and with the whole placement of each. Let's move on to the next sketch.
5. Making a Sketch for the Third Sticker: This time we will create a little scowl with some sweets. So let's start by creating the ellipse like this. So it is more horizontal Arabs, neither than the circle or the ellipse that is going vertically. So when you have this shape, Let's create the jaw part so we can find the center of the skull by creating the line like that. Try to remember that we are creating it, albeit in the perspective and that it's not the plane elements. It has a little bit of the volume, so we need to create the line like that. Let's add the July, let's find the boards. And by creating the line like that, you can go with a curve or you can create a straight line. It's up to you and let's connect it with the curve like that. And the same on the other side here is going to be the cheekbones. So you can go a little bit further and adjust the shape. And also we will make the bottom part of the skull touching the ground so we will make it a little bit bigger. Let's erase everything that we don't need. I will leave this line that we created for the center to know where the center is, to add our eyes and select just adds this ice. Let's firstly finds where that top part of the eyes is going to be. So we will create the curvy line like that. And also we will create the curvy line right here. So here you can put the eyes. The eyes are going to have the shape of the candy corn. So something like that. And we need to tell them a little bit towards each other. So let just go to the skull and start creating the ice. I will make the corners rounder. And when we have the first eye, Let's move on to the next one. So you can copy this IN tilted a little bit, or you can create the second I manually. If you want to adjust the size or the position of the eyes, you can go to the selection tool and select one or both eyes and adjust them in a way that you like also to more free way of rotation or adjusting your elements and placing them, you can set the settings of the snapping and magnetics. Now when we have the ice, Let's create the nose. And again, we are going to be using the same shape that we had right here. Just let's find the placements is going to be a little bit above the eyes. And let's create it right here. So it is the shape of their hearts, but it is reversed. Now when they have the eyes and the nose, let's add little mouth. And I will put the mouth right on this line that we created before. So for the mouth, we will go with a curve like that. We will add some, some kind of teachers. So that is our butts to make it more nice, Let's add some Kansas here. And first of all, we will add some gummy worm go and through the ice. So again, let's start by maybe an hour. It's how it's going to move. So we will need that sale go in from here. And it is some kind of going on a curve. So let's say that this curve will work for us. We will need to add the second line to create the volume. So let just add the head here by creates an analogy. And let's repeat this line. So later on we will add some ice and stripes for the gummy worm. But now let's just go and erase all the lines that we don't need. Also, we need to understand how it moves. So for example, we want, needs the lines right here, so let's erase them. And it will show us that this gummy worm is some kind of traveling through the ice. Let's erase the rest of the needless lines and let's add and I here. So again, just with the circle ends, the iris here, you can map out the stripes that you are going to be aging later or leave it as it is. Also you can shade the elements that are needed to be in a sheet later on as well, when you have the skull and when we have this gummy worm, Let's add some beautification. So for example, we can add some Kenzie quarantine. We can add some stars, we can add some sparkles, some net, some web, something like that. So very quickly lead just creates the VAP right here. So again, starting from the lines like that, go in and create the curves. Let's create a few candy corns. So we will need again to repeat the shape of the eye. Let's just go here. For example, add some stripes, create a few more of them. Let's add some sparkles. Let's add maybe one more rep right here. Ends when you're satisfied with everything that you have here. Let's select it and let's place it little bit more wisely. Own cell the space that we have when you're done, deselect everything. And let's move on to our last sketch.
6. Making a Sketch for the Fourth Sticker: For the last sketch, Let's create a little kitty going from them, pumpkin, that Jolanta. So firstly, we will create the bottom parts and it's going to be the pumpkin. Again, we will need to create the shape similar to the cold drunk. So if you are struggling, you can start by creating the circle and adjustments a little bit. But again, we will need it to be a little bit more wider on the bottom, neither than on the soap. So create a shape adjusted, make it even on both sides, erase everything that you don't need. When you have the shape that you like. Let's create that. So part and we will go and creates the line like that. And we will make a little bit of the back parts right here. So let's work on the look of this pumpkin, and let's create the ISO little mouth, a little nose, and some attributes of the Jack olanzapine. So first of all, let's create the line like that going through the center. And also this line we will put our ice. So for the eyes, let go just with simple circles. So at one circle, if you want, hold down your Apple pencil at the ends of the line and create the perfect shape. You can edit the shape, for example, create a circle from it or get back and create the Alps. Let's create another ellipse on the other sides. If you want to create the same size, just map out where you need to find that soap and water and part by creating the lines like that edge of the shape if you need, when you have the isolette shade them. So we will know that we need to put the darker color right here. And let's add the nose and the mouth. So for the nose, we will go just with a triangle and we will put this nose somewhere here. So it's a little bit above the line that we created for the ice. Again, we will shade it ends when the nose is ready, let's add the mouth. So for the mouth, you can go with the shape like that. We can create the Watson part of an ellipse and we will make the line like that on top. So we're just connecting these two blinds together and we will add a few teeth. So one here, one here. You don't like the sheep go to the selection tool, select it and adjusted in a way that you will like it. I will make it a little bit bigger and I will put it near the nose. And again, the inner part is going to be cheated in a part is going to be dark. Also, while we're still here, let's create a few segments to show that it is a pumpkin. So just go along the shape and creates the lines like that. When you're done with this task, let's create the kitty. So for the QI team, we will need to start by creating a circle or an ellipse for the hat. So I will go with the LMS that big. So it is almost a circle, but it's shrink down through the top and the bottom parts. So when we have the ellipse, let's add a little ears. And for the ears we will just go and creates the little triangles like that. And again, I will make the corners rounded it. Let's map out where we need to put the second ear and create the ear on the other sides. And the inner parts repeat the shape of the ears that you just created. And let's create that face features. So for the face features, we will need the eyes, we will need It's a nose and a little mouth and some cheeks. Let's find the center of this ellipse that we created and we will put that ice on to this slide. So for the eyes, I will go just with two dots like that. They look a little bit tilted, but we can fix it a little bit later if we want. Now let's create the nose and the mouth. So at the same line we will create the nose. The nose we'll have the shape of elite, so triangle and from the nose we will create the mouth like that. So just draw the lines out and create 2.5 circles on the Watson. Adjust the nose or leave it as it is for now, it's up to you. We can work on it a little bit later. I can see that the ears that I created are not even on those sides, so I will adjust them. I will also connect them together with the shape of the hat. Maybe I will put this year a little bit on the site. And let's create a cheek. So for the cheeks, I will go just with the circles like that, somewhere near our eyes. You can add some whiskers if you want. You can add some additional elements if you want. It's all up to you when they have the hats. Let's create a little body. So for the body, Let's create this shape. Again, it's the shape of our JOCO lantern or the cold drunk, but a little bit shrink down when we have the shape. Let's create a post. So for the pose, let just go with the circles with the Alps like that. We will create them on both sides. Let's erase all the lines that we don't need. So this line we don't need Islam, we don't need and we can add little fingers. Let's connect the body with the pose. We can add some beautiful locations right here. So you can add solute. So bow here or something like a star or the moon. Lso color, just create something nice here, I will probably select that soap parts of the cats and I will move it's a little bit down to make it cuter, I will erase the lines that we don't needs. And also I want to make the hats a little bit bigger. So again, I will select it and we'll go to the transform. So as by using the free form, I will just make the hats a little bit bigger. So now it's your time to experiment a little bit. I will make the cats a little bit more chunky, will erase the lines that are not needed. And when we are satisfied with this, we can also add maybe that sale go in from here at any details that she like. But remember not to touch your objects with other objects. We can add a little hat on the top. So for example, let's create a line like here. Let's create the triangle, and let's create the line like that and the triangle like that. We can add some details. We can play little bit with the size of triangle on the top. Maybe play a little bit with its direction. If you want, you can make it smaller or bigger or place it differently. It's up to you. And when they have something like that, Let's add some additional elements, let's add some background elements and so on. So firstly, I will go to the corners and add some details here. Then maybe I will create a little clouds. So for the glass creates the line that is going horizontally and create a few curves like that. Maybe adds more clouds at some sparkles at, I don't know, maybe some leaves or something ends when we are ready with this illustration, Let's select it. Let's go to the Transform tool ends. We will adjusted on sir, our little canvas here to pay attention to little details. Pay attention. That's your illustration or not such in just the edge, leave a little bit of space or just put it down below this line that we are using for our, some kind of restriction. So that was our last sketch. And when they have ever felt, let's move on to the next part of the class where we're going to be coloring our objects.
7. Adding the Color for the First Sticker: So for the coloring, we will need to create one more layer. Let's go to the layers and tap on the plus icon here, we will put this layer under the layer with our sketch. As for the layer with the sketch, let's go and tap on the little icon n. And here we will have the capacity slider. We will adjust the opacity by moving the slider a little bit to the left because we still need to see what's going on on our Canvas, but we don't really need to bother us. All say here you have like the last chance to adjust everything onto your little canvases. If you want, just go to the selection, so go to the transform, so ends adjust everything that you need. So for example, I will readjust the placement of the coal drawn here. I want it to be a little bit more centered and maybe a little bit bigger than it was before. Whenever fan is done, let's get back to the layer with the sketch and we will slide from right to left, and we will choose lock that will prevent us from working on the wrong layer. Now let's get back to the layer that we created for the coloring, and we are going to be creating the colors for our illustration. So firstly, let's go to the brush library and choose another brush. I will use the technical pen and round brush because I want these illustrations to look clique. Of course, you can use some texture brushes if you like, but I want to use that color drop method of coloring and it will be easier to do it by creating the clean and smooth lines with the brushes like technical pan or round brush. So it's up to you what brush you will choose. So selecting the brush, I will make sure that the streamline isn't too high. And we will go and starts some kind of creates in the outlines and then color drop that color onset the area into this outline. Let me show what I am going to be doing once said the first illustration. So go into the cauldron, I will choose the right color that I'm going to be using for this whole illustration and for the cauldron, I'm going to be using these purple color. So I'm creating the outline, repeating the lines that we have on the layer with the sketch. Of course, you're not restricted to repeat the lines with a 100 percent of similarity. You can change things. So I'm creating the outline. I'm going to be using the different colors for the objects. So I am avoiding the book right now. I want to make the outline for the whole drum and recolor it firstly, if you want to make the smoother lines, you can go to the Brush Library and adjust the streamline value. Your lines will be very smooth. So now when we have the outline ready to recover our cauldron, we will just go to the color and just color drop it. Also. You can see that now I don't really see what's going on here with the eye. So I will go and I will recolor the lines of the sketch. So to do so, I will unlock it. I will go to the adjustments and I will go to hue saturation and brightness using the layer option, just moving the hue slider to be able to see the difference. So these green, for example, works for me and it works with this color, so it's perfect. So again, go into the layers and lock in this layer to prevent ourselves from working on the layer with the sketch ends, making a little mess. So get back to the layer with the cold runway, the coloring, and start recoloring other objects in the same way. So for example, for the liquids inside the school drawn, I will use these purple that is also a bit more pale, and I will just color drop it because we already have the line. We can do it without any problems. Let's continue outlining our objects and agent. The colors to them either is not enough colors for you into the color palette. Of course, you can add your own colors to your illustrations. You can check out whether you're doing all right with your coloring by hydrogen the layer with the sketch. So for example, if you want to add some details or if you want to work more on, say your illustrations, you can just hide the layer with the sketch ends. Work on your pictures here. So here you can work on the edges. Here, you can work on that clean list of your illustration. And when you're done with this, you can go again and unhide the layer with the sketch and continue working on your details. I will go to the Brush Library and I will adjust the streamline value to. I will go and create the lines that are a little bit more clean and not that jacket. When you are ready to add more details and hide the layer with the sketch and continue edge in your elements. When you have all your major elements done and when you have just the smoke, Let's go and create one more layer, will put it above our main layer, and here we will create the smoke. So for this MOOC, Let's just pick. The color and again, we will create the outline the same way as we created the outline for other elements. I will adjust, it'll, it'll make it smaller. And also, I decided that I don't want these smoke go in, in this peculiar shape on the bottom. And I wanted just to go from the cauldron, from the potion that is under the Kol Nidre. So I decided to adjust the boards and parts and to make the line going like that. When I have the outline, let just tidily with our sketch and let's color drop the color right here onto this area that we created for this MOOC. You can see that it is looking a little bit weird. Ends. We don't really need it to be, that's 30k. So let's go to this layer that we created. Let's go and SAP on the icon here and we can adjust capacity here, or we even can play little bit with the blending modes. So for example, we can use screen. It will have some effects even on the objects like the I here. Or we can go through this list and find what works with our illustration. Best way. I will probably leave it as the overlay blending modes. So probably the base colors for our first illustration is ready. I don't really like how it works with these color of the background. So let's go to the layer with our four beaches or something like that. And we will select the first one. We will go to this layer and we will tap on it and set it as alpha lock. When we are selecting Alpha lock, we are working only with the contents that we already have onto this layer. So now let's go to that color palettes and let's try out other variations of the colors that we have here. For example, this orange, you can see that it works better with the cold drum and some eyes right here, but it doesn't look good with our highlights. So let's go and fix this. We will deselect error event. We will get back to our layer with that basic coloring. We will hide the layer with our beaches for now and we will recolor our sparkles again. To do so, we will need to set this layer as an Alpha look. Let's grab the white color. I will grab another brush and we will just go over these sparkles and we will recolor them. Now let's get back our background layer and you can see that it works perfectly right now. Oh, so you can go and play a bit with the blending modes, play a little bit with capacity because we changed the background and it affects the backgrounds. I will go again with a screen blending mode because I don't like how it looks with this yellow smoke. So when we have the basic color, Let's add the shadows and maybe some highlights. So for example, let's create one more layer above the layer with the basic color it. So we will create one more layer. We will set it as a clipping mask. To set it as a clipping mask, we will need to tap on it and we will need choose the clipping mask from this drop-down menu. Clipping mask works the same way as an alpha lock, but it is on a different layer and it's not that dramatic. So when they have this layer, when we set it as a clipping mask, Let's go to the Lear. Let's set on the icon, and let's choose the multiply blend mode from this list. Right away, we can adjust the opacity or we can just leave it as a 100 percent for now and then change it when we need it. Now let's go to our colors. Let's grab some color. So for example, I will go with these purple ends. We will need to add the shadows to the places where the shadows should be. So for example, we will add the shadow underneath this top part of the cold drunk. Let's check out what we creates. It's on the layer with the sketch to make sure that we are aging our shadows in the right way. So I will unhide the layer with the sketch. I will choose another brush, and I will just go below and create the line here. And I will create a little bit of thickness for our cool drum. Let's color drop this shadow, and let's maybe add the shadow going on one side of our cool drum. Remember that we created everything on one layer and we need to be a little bit more accurate while recoloring the major objects, like here, for example. So I will go and I will hide the layer with the sketch to see what I'm doing. I will manually recolor these or maybe I will go and separates the eye. Also, you can see that when we are working with that clipping mask, we are not going beyond the content that we already have on the layer beneath. So let's continue adding our shadows. I will add the shadow here beneath the book. I will add the shadows here and on all the places where the shadow is needed. And this shadow under the eye right here, just a little wan to separate the objects from one another. So just create the shape and recolor it. We can add a little shadow here on the bottom part of the cold drunk. When you have all the needed shadows, let's create one more layer and we're going to be using it for the highlights. So go into the Lear, creating one more layer, setting it as a clipping mask, choosing the screen for the blending mode, Let's grab the white color. Let's grab the brush and let's add some highlights for their irises and just repeat the shapes and you'll be good. Maybe athletes highlights onset the pupils. If you want to add some highlights on the surface of the coal drawn, for example, use the different color not to make it very drastic to, for example, this purple, you can add some lines. So go along the shapes and add some highlights. You can highlight little beads, our sparkles. So if you want, you can just repeat the shapes or just recolor them like that. So that is how we are going to be creating our illustrations when the first one is ready, let's move on to recolor and the next one.
8. Adding the Colors for the Rest of the Stickers: We will unhide the layer with the sketch, and we will do the same things as we did with the previous one. Firstly, we will outline everything that we have. We will color, drop our colors to the needed places, then we will create the shadows. Then we're going to work with the highlights and add in some details and so on. So let's just quickly go through all of our illustrations and recolor them. So let's move on to our next illustration. And the first thing that we will do is go into the layers. We will unhide the layer with the sketches and we will go to the layer with our base color. Now this layer is set as alpha lock and we don't really need it to be in that way. So let just happiness, and let's choose Alpha Lock from here. Now we can freely start recoloring our objects. So go into that color palettes, beacon some color, and starting to recolor our objects as we did with the first illustration, we will need to create the outlines of our objects and then put the color by using the color drop to see better what's going on onto the canvas. Let's go and change the color of that background. So we will go to the layer with our backgrounds. It's already set as the Alpha Lock. And what we need to do is to go to the selection. So we need to select these elements, Use the color feel, or we can go just to the colors and use the color from the palette. Now let's deselect everything and continue adding our details. Get back to the previous layer and continue your work. If you don't see what's going on onto your Canvas, you can go to the layer with the sketch, you can unlock it. You can go to the adjustments and you can adjust the brightness of this layer. Now let's get back to the layer. Let's again swipe from right to left and choose Lock, get back to your colorant and continue your work. You can see that I'm not strictly fall when that bed grounds outline, we can fix it a little bit later so you can go and little bit beyond the frames right now. Now let's go to the layer with the sketch and hide it. We can check out what we did and we can fix everything that we need here. So let's again go to the layer with our coloring and let's quickly fix everything that we can fix. Now let's accurately go and get rid of all the places that are beyond the frames. We can do it in this way or we can do the following. We can go to the layer that is underneath that we are using for our background. We can select the area with the automatic selection like that, and we need to invert the selection. Now you can see that we missed that part of our ghost, but we will erase everything menu so we won't such what is going on right here. Now with this layer selected, let's get back to the layer without coloring. Let's grab the eraser tool and let's go here beyond the frames and erase everything that we don't need. Now let's deselect everything and the base colors for our second illustration is ready. The next step that we are going to be doing here is creating the shadows and highlights. So let's go to the layer with our shadows. Let's grab some color and let's add some shadows to the places. If you want to add some highlights or if you want to recolor some of the sparkles, Let's go to the layer with our highlights. Let's grab the brush and let's recolor some of the elements ends when it's done. Our second illustration is ready. Let's move on to the third one. Firstly, we will unhide the layer with our sketch, and we will do the same as we did with two previous illustrations. So I will tell you quickly what we're going to be doing and then recover it. So firstly, we will need to maybe change the color of the background. Then we will need to make the outlines for our objects. Then we'll need to add the highlights and the shadows. So let's just quickly go and do all this fix. I created this snake on the other layer, so it will be easier for us to recolor it. So I just added one color for these snake or warm, and I'm going to be recoloring it by 18 these stripes by using the alpha lock. So as it is on the different layer, I can select it. I can just choose Alpha Lock from that drop-down menu. I can get to our palettes and I can just start selecting the colors, entry, color it in this way. So when it's all done with the sneak or worm, we can get back to our main colors and continue recolor in here. Also, if you want to add the different color for the background, you can create one more layer above the layer with our main coloring and we need to choose the different colors. So for example, I will go with this purple ends. I will want to create the color like that right here, creates the closed shape. And I will put the color right here. Now by using the same method that we used for getting rid of that needless elements on the previous illustration, we will go to the layer with our little beaches. We will go to the selection, so we will choose automatic. We will select this area, we will choose Invert. We will go to this layer that we just created, and we will pick the eraser and erase everything that we don't need. And now we can merge these two layers together. The main coloring ends this layer that we created for the background. So tap on the layer that is upfront and choose merge down from the drop-down menu. So the basic coloring is done. Let's go to our layers with the shadows and highlights and add shadows and highlights. So when this part is done, let me quickly recolor the last illustration by using the same principles and we will move on to some additional elements.
9. Adding the White Outline (Die Cut) for the Stickers: So when we have all four illustrations, let's do the following. We will go to the background layer and we will hide it. Here you can see how the stickers will look without the background, so they are separate. And here you also can see what you need to fix or if you want to leave it as it is. Let's do one more thing. We will add the white outline near our illustrations. But as we don't really want to mess up with the final works, maybe we would like to leave it without white outline legis make the copy of all the contents that we have here on our canvas. With three fingers down, we will slide down and we will choose Copy. All. We will go to the first layer that we have here. So we don't really need to relocate our new layer with the whole content that we just copied with the three fingers. We will slide down one more time and we will choose Paste. You will see that we still have all our layers in case we want to change something or reposition or anyhow adjusted. And we have our whole pictures that we created all merge down, and it's all on one layer. So I will go and I will select oldest layers that we used for our illustrations. And I will group them. When we have the group, I will hide group. And so you can see that now we have only that layer with the inserted image, with all our four illustrations together on one layer. So when they have these layer, let's do the following. We will go and will create a copy of it. So sludge from right to left and choose duplicate. So when I have the two copies, we need to go to one of them underneath and we need to choose Alpha Lock. Now let's hide the first layer that we have above. We need to recolor everything that we have here with just plain white color. So you can do it by going with the brush like that and recoloring them. Or you can use the difference methods. Now we can go and we need to unhide the layer with our actual illustrations. Now let's go to this layer with white fill in, we will deselect the Alpha Lock and we will do the following. We will go to the adjustments and we will select Gaussian blur, choose that layer method. And to apply this Gaussian Lord, we will need to go with one finger and slide it through the Canvas. Now you can see that it is blurring the outlines. Let's say that for now we will use 11 something percent for this Bohr. And if we don't like it, we will go one more time and adjusted with the new knowledge that we will gain from this step. So when you have these, Let's do one more thing. We will go to the selection, we will choose automatic. We will SAP on our first illustration and you can adjust the threshold by moving your Apple pencil to the side. So for example, we need to do something like that. Let's do the same for the other illustrations. So just tap on it and that selection will be applied the same way as we created it for the first illustration, when you select an error friend, Let's just use color field. And what we have here is our outlines. It turns a little bit too thick. If you don't like it, you can do this one more time. I mean, that's, you can go and adjust this threshold when we work reads at the Gaussian Blur, make it a little bit smaller. So let's try this one more time. So I'm going to this layer, I'm going to the adjustments, I'm going to Gaussian Blur layer ends. I will make it, let's say it would be 9%. Now we are going to the selection. We are selecting the automatic, we are sapling on our illustrations and we use color field. If you don't like the color, you can go with a pure white to see what's going on right here with our little illustration of the ghost too, you can just choose the plane whites and see what's going on here. You can see that the edges are a little bit too sharp. You can blur them a little bit, or you can just manually go through all of them with the eraser or with a brush ends, adjust them and make them smoother so you can do it or you can leave it as it is if you like how it looks. If you don't mind the sharpness of the edges and when you are done with this or if you skip this step, that means that we are at the ends of our class. I hope you found this class helpful and if you liked it, please check out the other classes. Gita follow and leave your review. And thanks for watching.
 Xenia Sorokina, Illustrator & Graphic designer