Transcripts
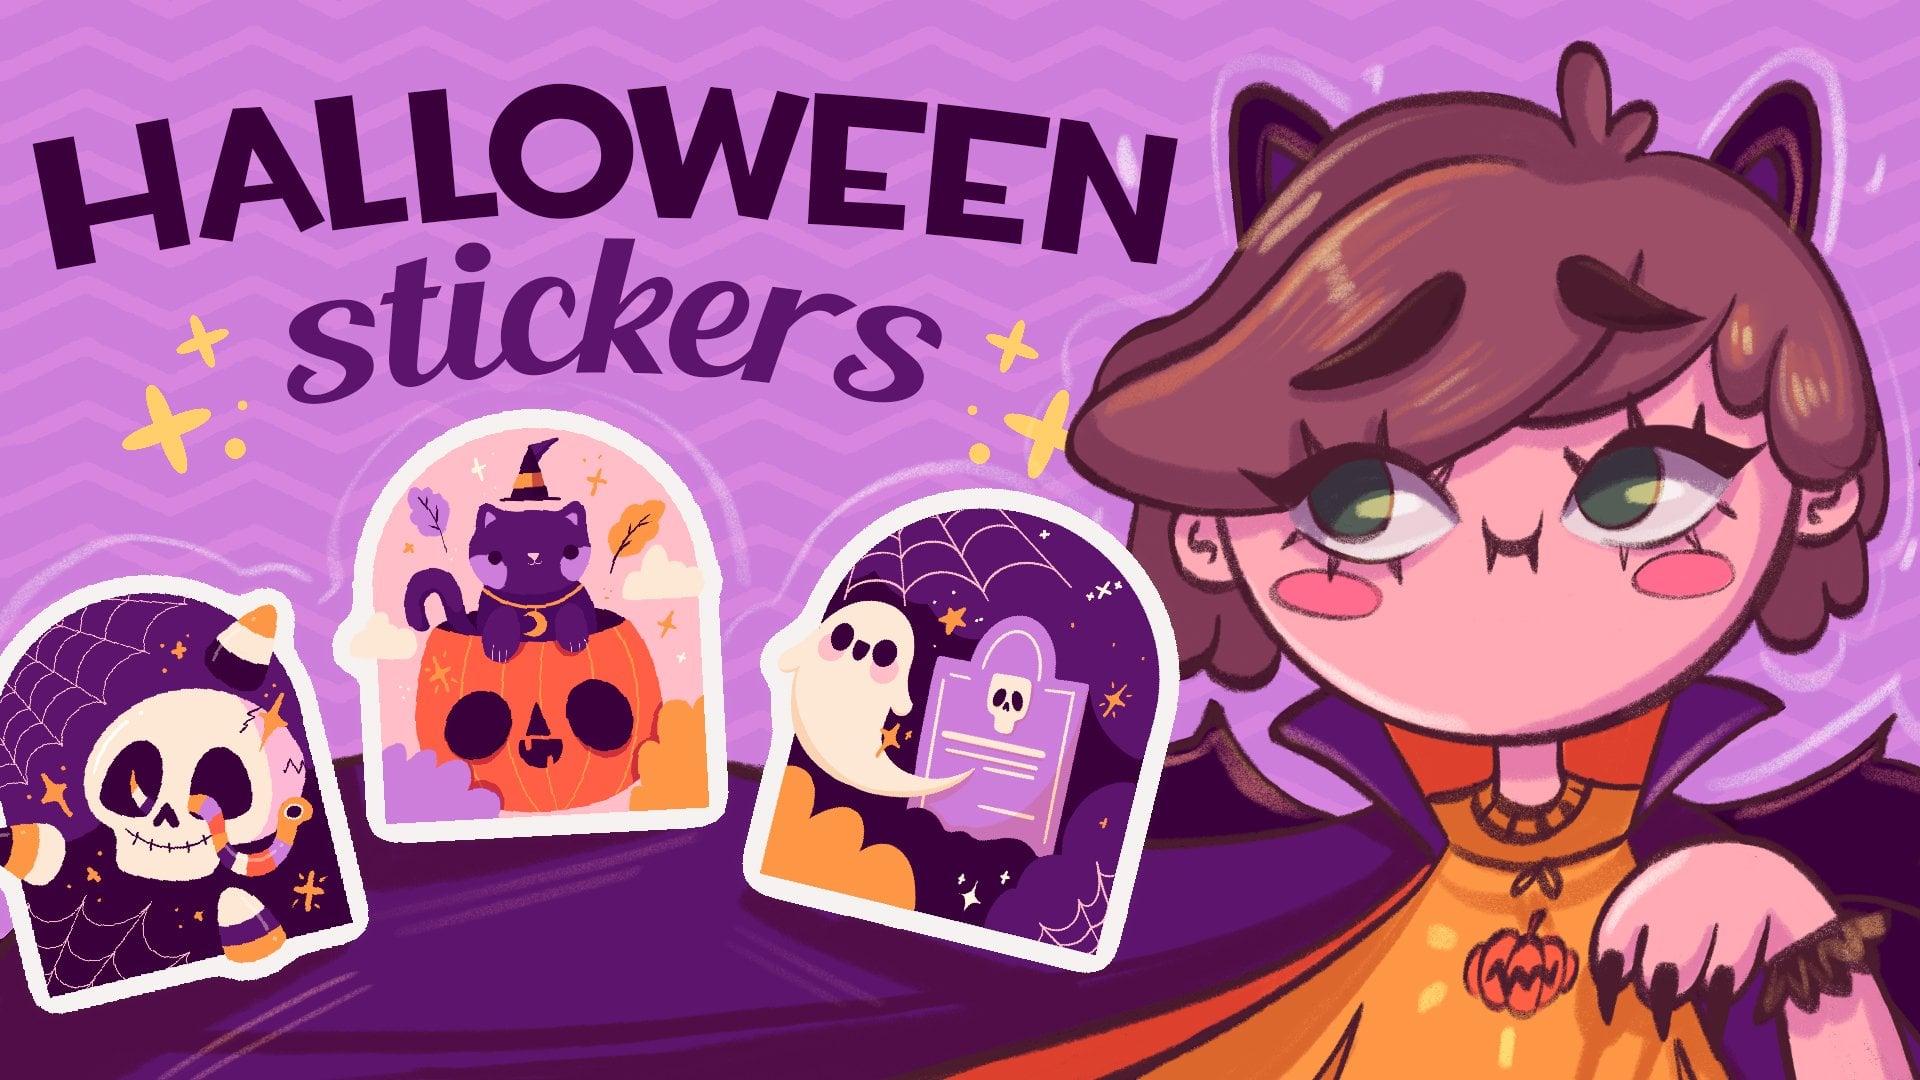
1. Introduction : Hello everyone. My name is Sonya and I am an illustrator and graphic designer. Today we'll draw a cozy full vibe sticker pack. We're going to make all the pictures from scratch, starting from the sketches. And as a result, you'll have five full colored illustrations you can use. The final picture is as single stickers or sticker packs, put them on the postcards, make a pattern from them, turn them into some digital products and to use them in whatever way you want. This class is forever one. So don't worry if you have no prior experience, all the drawings are made in Procreate, but it doesn't mean that you cannot use any other graphic software or even traditional materials. So with that said, if you're ready, launch a software and let's begin.
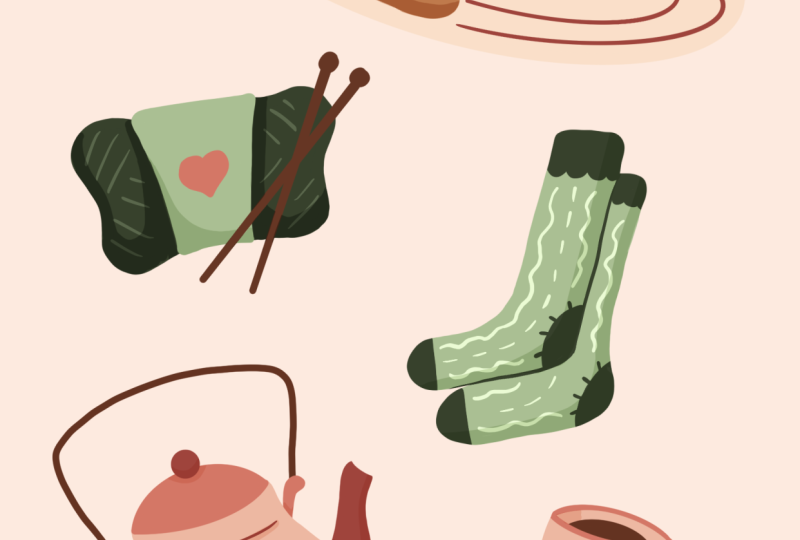
2. Sketching a cat: Today I prepared for you a few illustrations. They are all themes. They are connected together by the full wide time coziness and some cuteness. And that's what we're gonna be working on today. So let's just jump onto our procreate. Or if you're using any other graphics software, jump into it. If you are using traditional materials, join us and let's just go to our Canvas and start sketching. Today we are not going to be working much with a clean lines. We are going to be sketching firstly, and then we are going to be working with colors. So on today's agenda is creating five small illustrations. One of them is going to be a cat, It's going to be a t cap and the capsule is going to be a yarn with their knitting needles and it's going to be socks. So let's just jump onto our canvas and start sketching. I'm going to be using some textured brush. You can use any brush you like. And I will just grab some darker color to see what is going on onto the canvas. So firstly, let's just start by creating a sleeping cat. You can start by creating an analysis, but we need to make it more, more chubby on the top. So let just adjust that a little bit like that. And we will have some kind of a chubby brand shape or something. You can erase the line insight so you're not confused with the lines. And when we have this shape, Let's think about their hats. We need to put it somewhere so it's not like floating somewhere or look in any how weird we need to put it either on their feet or on the floor. So let's just start by figuring out what sheep is going to be and probably it's going to be something like a circle. So let's just start by creating a circle, that beak. So you can see that the head that I created is also bit floats in a had the floor. And I am supposed to put these hats on their feet. So I will create a little ellipse right here, and we will think that it is the feet. So I'm not connecting it with the whole sheep of ellipse. I'm just creating some kind of an elliptical shape. I will erase everything that I need. And I will make the connection between the body and this leg that I just created. So we have one leg and pleasures move on to the left sides and creates the backlog. So let's start by creating a circle like that. And it's going to be useful for us to create the folder that we have on the back leg of the cat. And under it we will create one more ellipse, but this time a horizontal one. So when we have these two shapes, Let's just connect them together. You can adjust them in any way you like. You can just make them bigger. You can use this line that you just created as a guidelines. And just create the lag that you like. Erase everything that you don't need, a just everything that you can adjust and try to make everything more rounder than it should be. Like for the lac. We will make it a little bit more rounder on the source side and 20 are satisfied with the shape. I will probably make it a little bit smaller. So when you're satisfied with the sheep, let's create that sale. So with It's a, we will some kind of repeat the shape of the body that we have below. But we need to connect it with the body and we need to go a little bit beyond the frames of the body. So let just start from somewhere here and we will just creates a shape like that. Let's erase everything that we don't need. So I will erase these parts. I will erase all the parts right here. And so let's move on to the hat. Will erase this line that is going from the body. And we will need to put on some face features. So let's find the center of the head by creating the line like these ends by creating the horizontal line. Here. Here we will put the eyes, the nose and mouth. Let's just start from them. Knows, knows will have this shape of a triangle. You can make it smaller, you can make it bigger, adjusted with your vision. Also, if you want to create more CUDA illustration, you need to put all the face features a little bit below this center line. So let's just try it out. Let's just try out the normal way of creating these elements. And then if we consider it's not working for our illustration, we will put them a little bit down. So we already created the nodes. Let just create a little mouth underneath. We will just creates 2.5 of the circles. You can again vary the size. You can vary the deepness of the circles and when you created them, let just go for the eyes. For the eyes, I will go just with some sleepy eyes like that. It's again half of the circles and they are turns down. Now our cat should have some whiskers. So let just creates three lines on one side and three lines on other sides. So if you think that it looks not so great, let just go to the selection so and select the face features. We will go to the Transform tool and we will put them a little bit down. We can see then we can adjust their placement. We can make them bigger error fin that you want, you can do right here. So I will put it a little bit down and I will make it a little bit bigger. Now let's add the ears. So the ears are going to have the triangle shapes and we need to put them one here and one here. So let just start. I will create the ear is with the soft corners, so one here and one on the other side. You can create the axillary line like that to understand where you need to put the second year in, just make a copy on the other side. Now let's erase the lines that are inside this year's. And let's erase this auxiliary line that we just created. Now we can add the lines insights. So it's going to be the inner parts of the ears. We are repeatedly shapes and just adding the lines like that, try to make the ears equal on both sides. So if you need just erase some parts, make them smaller. If you think that the hats is looking a little bit big, you can just create another line and some kind of shorten it. Erase everything that you don't need and the cast is sleeping. I will probably add one more legs here. So just repeating the shape for the leg that we already created. We can add some details right here. So I will add the lines like that. I will add a few stripes on the body ends, a few stripes on the head. So you can just go with something like that. Go along the sheep, create the stripes, create any other elements that you want to add to your cat. So when you are satisfied with the cat, let's move on and create another illustration, which is going to be the capsule.
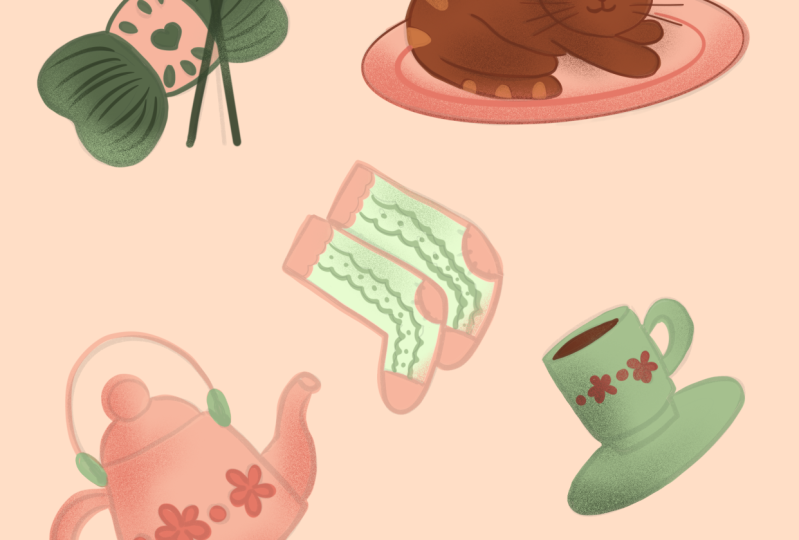
3. Sketching a kettle: So for the cattle, I suggest you to create some kind of trapezius. So it's not like a rectangle, It's more like the shape like that. So it is a rectangle, but it's more widen on the bottom and a little bit narrower on the top. So something like that. I created the line on the bottom that is not straight, it is curving because I want everything to look more soft onto these illustrations and the curvy lines. Do the good work. So I will select it and I will put it a little bit down. Maybe I will use that free form distort or warp options to adjust the shape. And when we are done with this, let's create the leads on the top. So for delete, we can just go with half of the ellipse and we will put a little thing on the top. We can add some beautification for the body of the cattle. So for example, we can create some concave lines like that on both sides and create the shape like that. Now when we have the body of the capsule, Let's create spouts. So for this part you can go with any size you like, and we will need to repeat the shape like that. So firstly, just map out the shape and we will just add some thickness to it connected with the shape of the body and erased some lines that we don't need. When we have this spouts, let's just create the handle. And for the handle we can go into different ways. The first one is to create the simple handle here on the other side. So just the half of the circle and creating an inner circle inside to just have this shape of the handle. Or we can go a little beads in a different direction and creates two handles on the sides and creates the shape like that up fronts of the capsule, I will go with this shape. You can add some beautification for the body of the cattle. So for example, you can go with some flowers or stars or any theme that you can think about. Like that's n, the cattle is ready.
4. Sketching a cup: So for the capsule, we need a little pair and we need to create a little cup that is resting on the saucer. So let just start from the saucer. We will need to create the ellipse like that. And when you created the saucer legis focus on that cap. So firstly, we will create the top part and again, we will go with the ellipse like that when the credit analysis led just creates the body of the cup. And it's going to be some kind of the bottom part of the ellipse. So connect them and put the cap on the little pedestal. Let's erase everything that we don't need, and let's work on that. So part a little bit. We will need to create the inner part of this cup, and I will make that back part of the cup less open. Let's work on this sheep ends. We will need to create a little bit of thickness on the bottom. So we will repeat the line on the back side, and that's our cup. So let's add the handle. We will go with the simple ones, so just creates half of the circle and add the inner parts right here. Again, you can go with some beautification for the body of the cup. So add some flowers or any other pattern that you want when you're ready. Let's move on to other illustrations. Also, I think that it will be nice to add something for the cats to lay on. So let's just go again with the circle or the ellipse like that. And we will say that it is some kind of Iraq. So I will erase everything that is not needed right here. Maybe add some beautification. So you can see that sketching is not a linear process. You can always get back to one illustration and get back to another illustration and add some details or maybe array some details, just see how everything looks together. And if it's looking okay, you just leave it ends if it's not looking okay. Just adjusted. So I will select the cats, I will make it a little bit smaller and will use uniform methods to save the proportions. Will put it here, and let's create our two last illustrations.
5. Sketching a yarn: The first one is going to be the yarn. And for the yarn lead just, let's go again with the trapezius, but it's not going to be that dramatic the signs, so just create the rectangle like that. And we will need to figure out what kinds of yarn we are going to be created. So I added two ellipses on one side and I will try to repeat them on the other side. Now, I will connect these ellipses together with the line like that. And also I'm connecting them with these trapezius that we created before, repeated on the other sides. Leave the lines as they are now or erase them if you want, try to make the bars even on both sides. Let's add some details to this tack, this trapezium place. I will add some heart like that and maybe I will add some petals on soap and petals on the bottom. Let's work a little bit more on the shape of this yarn. We need to make it look like it is going from these parts in the middle. And we need to connect them some kind of together. So let's just erase everything between zone needs, maybe make it more accurate. I will distort it a little bits. And when we are satisfied, Let's just add two knitting needles. So they are going to be looking like that. We will need a little ball on top and just the line like that going down. So it is more wider on the top ends, again narrower on the board. So let's create the second one. So the ball on top and the line like that. When we're done with this shape, Let's move on and create our last sketch and is going to be the socks.
6. Sketching socks & Rearranging the objects: So firstly, we will map out our socks, how they will look. So let just go with one straight line like this and one straight line like this. From these straight lines we will create two ellipses. We're Ellen Gates, it's rectangles. And we need to create the shape of the sock. From these shapes, we will connect them together with smooth lines. Don't forget about they heal and create a sock like that. You can go with a short stalks or with a lone socks, erase everything that you don't need, make the corners rounded if you want. And you can add some eutrophication for the SOC. So for example, let's mark out the heel may be at some beautification for the toes. Maybe add something like that and the texture of the meeting, meeting texture. Let's make the copy of the sock so we will go to the selection, so we will select it with three fingers down. We will choose copy. Again with three fingers down, we will choose Paste. Now we have the copy. Let's move it to the side. Let's adjust it rotates, it just puts it nicely. And when we are satisfied with its placement, lets just grab the eraser tool and we will erase everything that is intersecting with the SOC above. So we will erase all the intersection lines. Now, if we go to the layers, we will see that we have the new layer that we created for these copies soak into. We need to connect these two layers together. So let just tap on this layer and also this drop-down menu, we will choose Merge Down. Now everything is on one layer, and probably that's everything that we need for this illustration, for this sticker pack or just something in that way. And we will need to arrange it a little bit more nicely onto the Canvas. And we will do just by going to selection two ends. We will select separately our objects and move them, rotate them and arrange them onto the canvas. So let's just quickly do it. When you're satisfied with your arrangements. A. Let's move on and let's create one more layer. And we are going to be using the colors here to recolor everything that we have.
7. Adding base colors: So let's go to the layers and creating one more layer. For now, we will put it under the layer with our sketch so we can see what we are working with and how we will put our colors to the places that we need. We also can work a little bit onto the layer with the sketch. So for example, we can adjust the opacity. If you tap on the icon, onto the layer, you can see that there's a little slider and we can move it a little bit to the left, to some kinds of mute the lines onto it. Also, sue, make sure that we are working on the right layer. We can go to this layer with the sketch and swipe it from right to left. Here you can see elite, so I think that is called law. Now, we are not allowed to work onto this layer until we unlock it. So what we are going to be doing now, we will go to the layer that we created for our coloring. We will go to our palettes and we will start and the colors. So the palette that you can see right here, you can find in the Project and Resources tab and you can upload it into your procreate. And also there will be a file with just the colors. So if you are using any other graphics software, you can use these colors as well. So let's just start by picking some color and start recoloring our objects. So for example, I will go with this one and I will recolor the cat right here. You can go with the smooth brushes or you can go with that sexual brushes. It's up to you. I will probably pick some brush that is smooth and start changing the colors right here. You can start by agent just the basic colors. So you are some kinds of making the cells with the colors. And you can use the color drop like that and create just the sheeps with this one color. And when you have this one color, we can just work on the details a little bit later. To check out if your lines are smooth, you can go to the layers and you can hide the layer with your sketch checkout if everything looks fine, maybe adjust something right here. And when you are satisfied, just get back the layer with the sketch and continue agent the colors to your illustrations. Also, if you already created the color for the cat, for example, and she wants to add the color for the rock. You can create one more layer, put it under the layer with the cat grep, some other color. For example, this one ends creates the color underneath and you will just work with what you have right here. You won't be coloring the cats. So just work in that way. If it's easier for you later on when you want to put everything onto one layer, you can merge these two layers together and everything will look like it looks right now. So let's move on to other elements. Let's recolor everything. So the main goal here is to create the shapes and the silhouettes of the objects. When you have all this E, Let's, let just hide the layer with the sketch and go to this layer with the color and find some places that we need to fix and fix them. All you need to do here is to achieve a clean silhouette. When we have our basic colors, Let's get back our layer with the sketch and let's work on some details.
8. Adding details: So for example, we will start with the cats. To note, go beyond the frames of the coloring that we already created legis do one thing. We will tap on the layer with the coloring and into this drop-down menu, we will choose alpha lock. When we are choosing Alpha lock, we are working with only the things that already are into this layer. So to show how it works, I will grab another color and I'm going to be aiding the stripes, the hat. So you can see that I am going a little bit beyond the frames, but the lines are not appearing here. So everything that I can change here is only the places inside the coloring. So let's just use this option and go through all our illustrations and add the details in that way. S4, the lines that we have on the face for the whiskers and maybe some lines here that are dividing the parts from one another. We can grab another color for these elements. So I will go with the darker brown right here. I will grab some brush that is more theme. So for example, the technical pen and I will adjust the streamline value. So for the streamline, I will choose something between 80, 85 percent. You can see how it works right here. You are creating very smooth lines, but you are losing a little bit of control right here. So if you want more natural look for your lines, maybe tried to play little bit with the streamline value and find what works for you. So when it's done, Let's just hit Done. And let's go to our illustration and add some lines that will be dividing the parts one another and creating some details. Checkout how it worked out by hiding the layer with the sketch and see if you need to add more lines or maybe erase some of them. Don't use the eraser onto this layer because you will erase what you have here. Instead of that, just grab the color that you need and to recolor the places that you want to recolor. So I'm pretty satisfied with the cat and then just go through all of our illustrations and any details in that way accurately at the details for the rock and for this saucer. And when it's done, the last thing that we will do with these illustrations is adding the shadows.
9. Adding shadows: So let's go to the Layers and create one more layer above the layer with the color. We will tap on it and we will choose clipping mask. Clipping mask work the same way as the alpha log, but it is not that dramatic. We can always erase it, we can always delete it and we can start all over again if we don't like the results. So let's just work with the blending modes right here. For the shadows, we are going to be using the blending mode that is called multiplied. So tap on the little icon right here. And so let's find multiply inside this drop-down menu. Right away, we can adjust the opacity or you can play a little bit later with this option ledgers, figure out how it will work with the maximum capacity level. So when we have this, let's start, for example, with the cattle. Let's grab some color. I will go with the lights, one, I will grab the round brush. Or you can use any other brush that you like. And we will go along the shape and we are going to be agent, the shadows just create the shadows on the places that you think needs the shadow. So some places are overlapping each other. Some are working in some kind of a 10 dam. Just tried to find some places where you need to put the shadow on. Here. We can use just an eraser to erase the places that you don't need. When you're satisfied with the placement of your shadows. Let's play little bit with the blending modes. So let's go to this icon right here, and let's adjust the opacity. So you can see that something between 40 and 45 percent work best. I will probably leave it as 45 for now. Maybe I will adjust it a little bit later. So using this technique, Let's just go along all the shapes and add the shadows right here. You can go with just one color for the shadows, or you can adjust the color in accordance with the color that you have for your object. So once again, let's go to the layer with the shadows and play a beat with the multiply blending mode, you can go with more bolder view or you can go with more subtle view. It's up to you. I will leave it as a 45 percent. So when we added the shadows, that was the last step that we need to 2k right here. And that means that we are at the end of our class. I hope you found this class helpful and if you liked it, please check out the other classes given follow and leave your review, and thanks for watching.
 Xenia Sorokina, Illustrator & Graphic designer