Transcripts
1. Introduction: Hello everyone. My
name is senior and I'm an illustrator
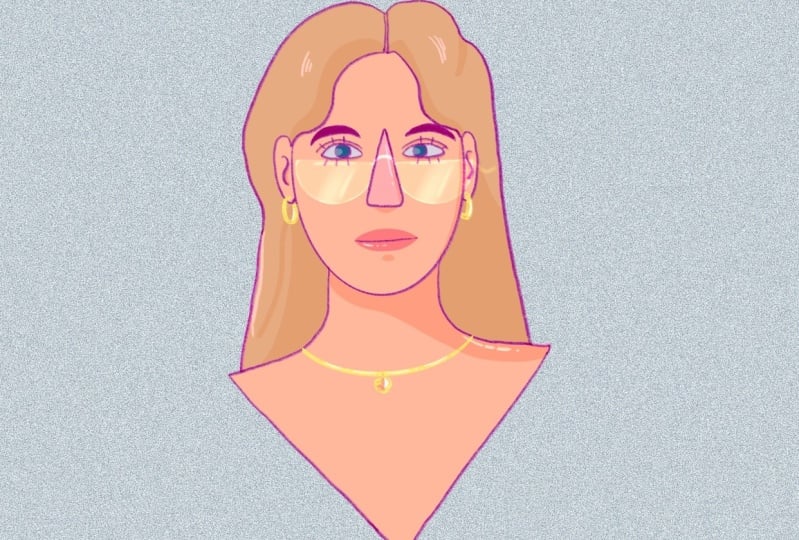
and graphic designer. Today we'll create a very
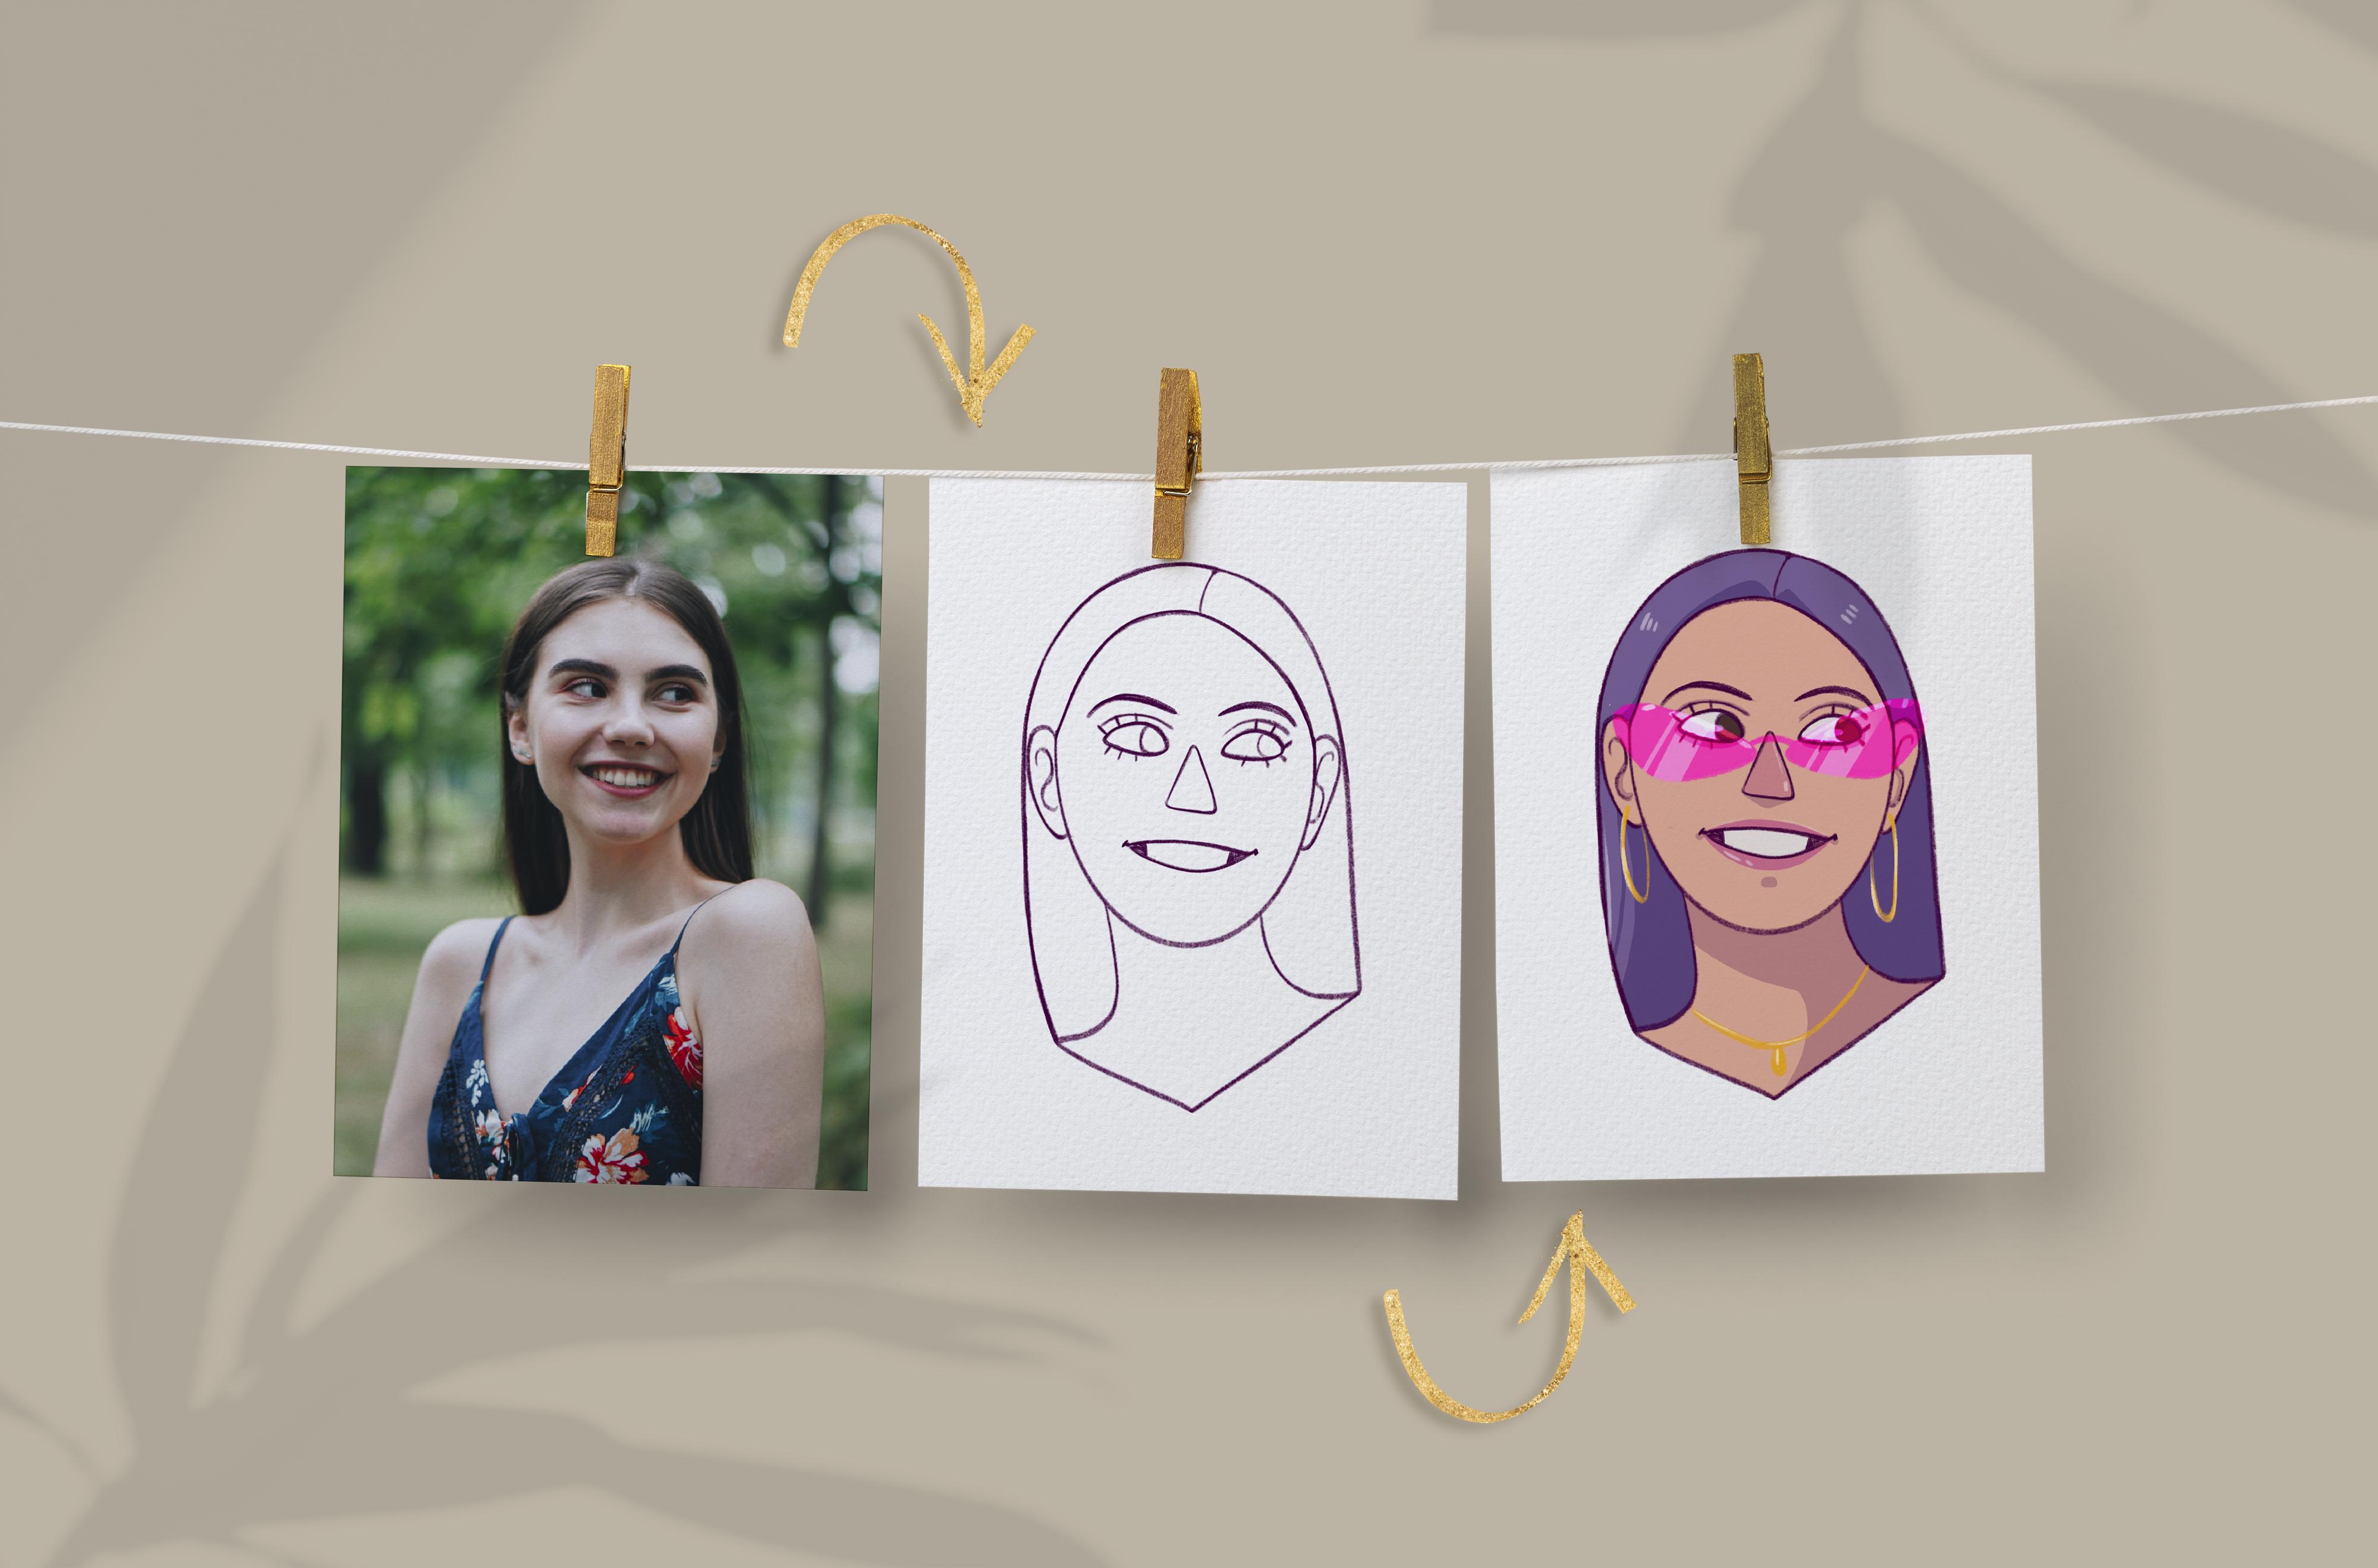
simple cartoon portrait. During the class, we'll turn a photograph into a
stylized picture. We will create a sketch, will be working with layers, colors, blending
modes, and so on. Upon completion,
you'll be able to create your own simple portrait, which you can find
the use in many ways, starting from making
your own profile picture or bringing the
character to life, to printing it out
on the stickers or cards and making a present
for your loved ones. These class is for everyone, so don't worry, if you
have no prior experience. Mostly it is suitable for
digital drawings because everything you will see will
be happening in Procreate. But it absolutely doesn't mean that you won't
be able to use the other graphic software or
even traditional materials. So with that said, if you are ready to launch
your software and let's begin.
2. Making the Sketch: The recreating a very simple,
cartoony looking portrait. For this class, you will need a photograph and she will need some kind of a graphic software I'm gonna be using Procreate, but if you want to choose
any other graphic software, you are welcome to do it
S for the photograph. Let's keep it very simple and let's grab something
where the face is looking straight
into the camera or is stilted a
bit to this side. If you pick something
with a very weird angles. So for example, the
head is looking down, the head is looking up. You won't be able to use the simple shapes
that we're gonna be using during this class. When I decided on
the photograph, Let's go and create the canvas. I'm using just the size
of the screen cameras. And I will grab the
photograph that I picked and I will put it right onto the canvas while we are
still here onto the layers. Let's create one
more layer and we're gonna be using them for
creating this sketch. Now we need to pick the brush and we will need to
select the color. As for the brush I'm
gonna be used in just its extra at one because I like
how it looks onto the sketch. And if you would like to use the same brush that I'm
using during this class. You are welcome to
go to the project and resources tab
and download it. As for the color, I chose a very bright
pink because I would like to see what's going on onto my sketch and what's
going on onto my canvas. And as it is contrast, it will be easy to do if I would like to change
the color later, I will just go to the adjustments
and I will change it. Now when we defined
everything that we need, Let's start creating our sketch. Firstly, I will zoom the photograph and the first
thing that I will need to do here is to create the shape that will
recreate the face. So let's go and create
an ellipse right here. If you're using Procreate, hold down your Apple pencil at the end of the line to
create a perfect shape. If you need to adjust it, go to edit the shape and
drag these anchors around. When we have the
shape for the heads, let's create the ears. For the ears, we are
gonna be used in just the half of the circles
or half of the ellipses. Let's go to the left side and create the first
year right here. Now we will need to create the second ear on
the other side. And we will need
to make sure that this ear is on the same line
with the previous year. And to do so, we
will need to create to axillary lines to help us. The first one will go above
the ear that we just created, and the second will
go below the ear. So let us go a
lonely shape and we will create these
two axillary lines. Now go to the other side
and create the second year. As we are creating a very simplified and
stylized illustration, we are not supposed to recreate every detail that we
have onto the face. For example, if we
would like to go and create the inner
parts of the ears, we won't go and recreated in
an atomically right weight. For example, let's simplify it and let's create
the line like that. Let's go to both of the ears
and recreate this line. When we are done with this task, Let's move on to the face and we start creating the
face features. And we will start by
creating the nose. As I mentioned before, we are creating a very
stylized illustration and we don't need to recreate
every detail on the face. For the nose, let's just create
a shape of the triangle. Let's go to the face and recreated by using
the straight lines. Now we don't really need this
auxiliary lines anymore. So let's grab an eraser
and get rid of them. When we did it, we can
move on to the ice. I will go along the
shapes and I will try to recreate the shape of the
eyes with a simple curves. We will need the
curve on the top and a little bit more flat version
of the curve on the board. So the general shape will
remain some kind of a lemon. Now when we have the simple
shapes for the eyes, Let's create the
irises and we will do it by creating
just the circles. Now we can work
more on the shape of the eyes and add
some beautification. So for example, let's
create the eyelash. Just go along the shape with a straight lines and create
a few eyelashes in that way. If you want to add more details. So for example, you
would like to add that. So please, you can go and do so. And we can do it by repeating the shape of the top
part of the eye. Now let's repeat the
shape of the brow that we have onto the
photograph on both sides. And when we're done with it, Let's move on to the mouth. For the mouth, we will
go just with two curves, one for the top lip
and one for the Botox. Go along the shape
and recreates it. Let's work on the inner
part of the mouth. And we will go to the
sides and we will repeat these dark
parts right here. Suggest create the
straight lines and shade these
parts right away. Now let's quickly
go and recreate the shape of the
hair and the neck. To close up the shape, we will create a very little
triangle on the bottom. Now when we are done here, Let's move on to
refining our sketch. Let's go to the
Transform tool and we will move our sketch as site. We will make it bigger. We are not creating the clean lines for
this illustration. We will need to make sure that our sketch is looking
clean and nice. So let's grab an eraser tool and erase everything
that we don't need, work on the lines and
make everything needs. If you want to
adjust some parts, for example, the nose, you can do it in that way. You can go to the selection. So you can go to the
free hands method, select this part, and then
go to the transform tool. With the transform tool, you have a few options of how
you can adjust your shapes. For example, in that case, I will go to the
free form method and I will make the nose
a little bit smaller. If you want to adjust
any other shape, you are welcome to do it. When we are done with this part, let's move on to the colorant.
3. Adding Colors: For the color and we
will need to create one more layer and put it under the layer with our sketch. Now you can decide whether
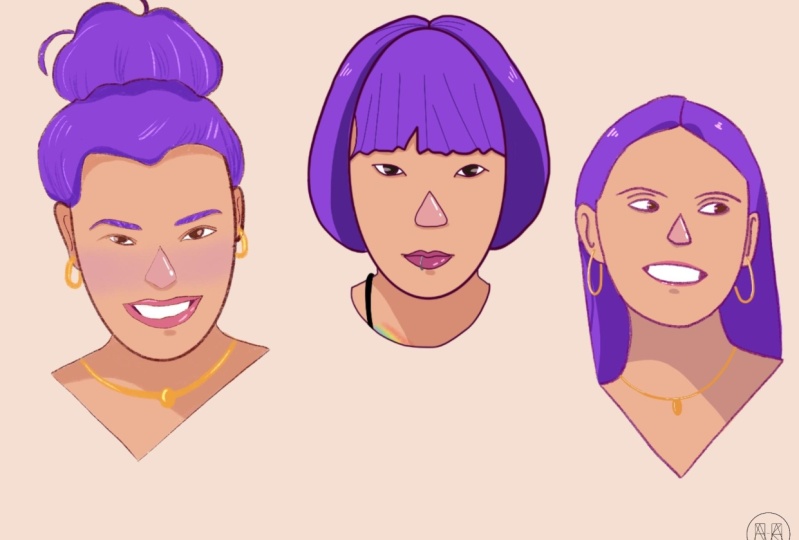
you want to create something that is very similar to the photograph
that you have, or if you want to experiment. As for the experiments, you can pick any
other colors not similar to what we have
onto the photograph. And it's up to you what kind of illustration you are
creating right now. How we are going
to be recoloring error event as we are
having the textured lines, we will probably have some issues with the
color drop method. We will need to do it manually. Let's grab the color and we will put it to the area of the face. If you would like to have the similar colors that you
have on the photograph, you can pick the colors
right from the photograph. Now, let's grab the
different brush. So for example, for this stage, I will be using the round brush and I will go to the face and I will just manually recreate
the colors inside the area. You can just go along the lines and create
some kind of a mask which you can easily recolor later with a color drop methods. If you wanted to have more
control over the colors. And by control, I
mean that you would like to change the
colors later on. You can create new layer for every piece of the element that you would like to recolor. For example, for the
eyes, different layer, for the hair, different
layer, and so on. So let's just quickly go over all the places and recolor them. So I ended up with
the colors like that. And what I can say, the pink color that we are using for our sketch is not
working right here. Let's go to this
layer with our sketch and we will change the
color of the lights. To change the color,
we will need to go to the adjustments and
we will need to use hue, saturation
and brightness. Here you have three sliders on the bottom that
you can tweak. Let's play with
color right here. Now when we have the base, we can play little bit with adding the shadows
and the highlights.
4. Adding Shadows & Highlights: Let's start by
adding the shadows to our layer with the skin. We will go to this layer, we will select it and we will create one more layer above. We will click on this layer and we will set it as
a clipping mask. With a clipping mask, we
are working only with the quantum that we have
on the previous layer. This layer we will set as
a different blending mode. Let's go to this
icon and we will choose multiply blending
mode right here. You can see that we have
the opacity slider. So let's put it to 50%. Now let's grab the
different colors. So for example, I will
go with something very purplish and I will go over the places that's supposed
to have the shadow you can peak on the
reference picture and the shadows under the eyes, under the leap and
to other places such as shadow on
the neck and so on. When we are done with this, let's add the shadows for the hair by using
the same methods. We will go to our layers, we will go to this
layer with our hair and we will create
one more layer above. We will set it as a
clipping mask and we will choose the
multiply blending mode, change the opacity rights
away or change it later. Pick the color and go along the places and add the shadows. Now let's create just one
layer for the highlights. We will do above
all the layers that we have and we will
create one more layer. Let's go to this icon and we will choose Add blending modes. We will reduce the
opacity right away, and we will pick the
very bright color. Now grab the brush and go along the places and add
some highlights. We are mostly done
with our illustration. And this is the time when we are ready to create
some accessories.
5. Adding Accessories: For example, let's
create one more layer. Above all the layers, Let's grab that golden color
and let's add the earrings. You can go along the places and create some
additional elements. Make sure to add some highlights on the accessories as well. The last thing that
I would like to add here is a lead sell glasses. So I will go and
create one more layer. I will grab the color. For example, I will go with this being that we used before, and I will create the
shape of the glass right here when you are
satisfied with the shape, Let's make a copy
on the other side. To do so, we will need
to use our three fingers and we will need to swipe
down from top to the bottom. Here we need to choose coping. And once against
wiping down from top to the bottom
and choosing paste. Now we have the bounding box and that means that we
created the copy. Now let's flip it horizontally and move it to the other side. Let us go to the layers and merge these two layers together. Zip on the top layer
and use merge down. Now let's add the color to the inner parts
of this glasses. And then we will change the blending mode to
create a nice effects. If you want to change
the glasses in any way, you are welcome to do it. Use the transform tool. When you are satisfied
with this shape, Let's go to the layer and let's go to the N icon right here. We will go through this
blending modes and we will find what works best
for our illustration. For example, I will leave
it as a vivid lights and maybe I will go to the
adjustments and change the color. When you are done, let's
create one more layer above and we will set it
as add blending modes, reduce the opacity,
grab the white color and go and add some
highlights to these glasses. I will go to the top
and I will create two highlights on the
top part of the glasses. Then I will go and
grab the round brush. I will reduce the opacity of the brush onto this little
slider on the left. And I will create
the line like that, and I will repeat it
on the other sides. Let's send this layer
as a clipping mask. And maybe we will add a little more of the highlights
to the glasses. And when you're finished
with this part, we are done with
our illustration. I hope you found this class
helpful and if you liked it, bliss checkout the
other classes. Give a follower and
leave your review, and thanks for watching.
 Xenia Sorokina, Illustrator & Graphic designer