Transcripts
1. Welcome: Let’s Paint Loose Wildflowers: Hi, and welcome to class. If you've been
learning how to paint loose watercolor flowers, but sometimes struggle
with how to turn those individual flowers into a complete painting,
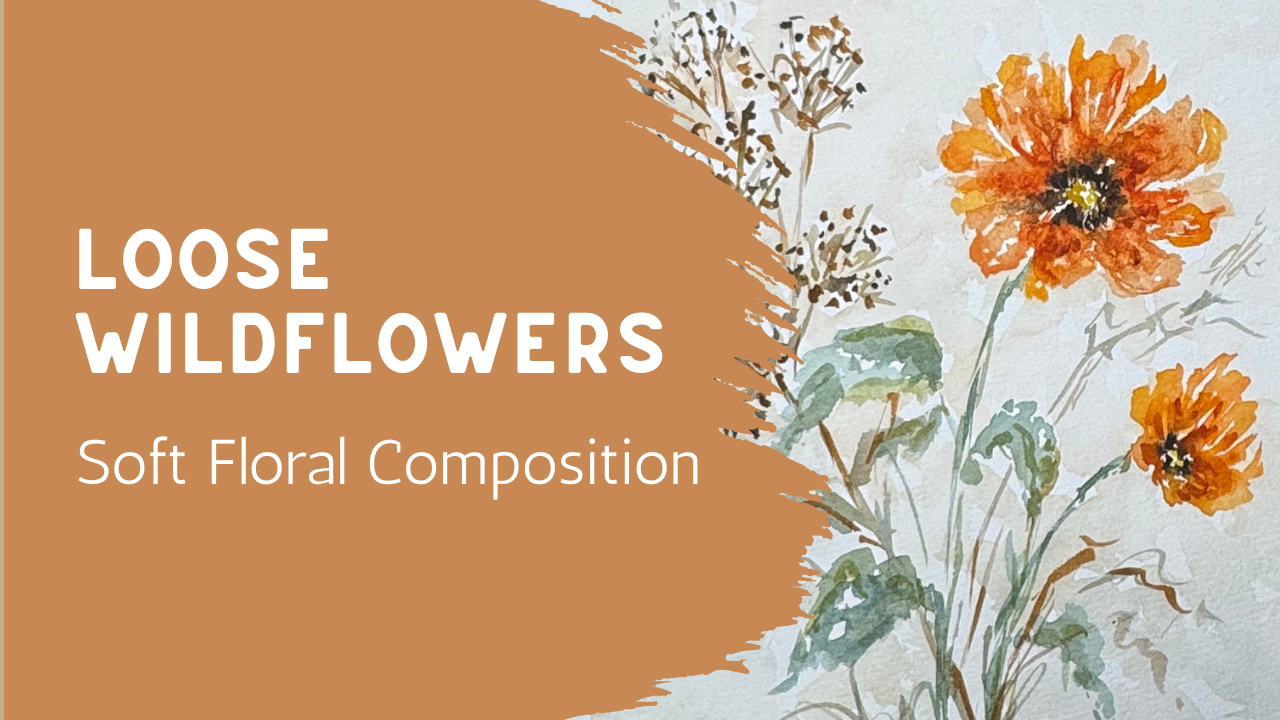
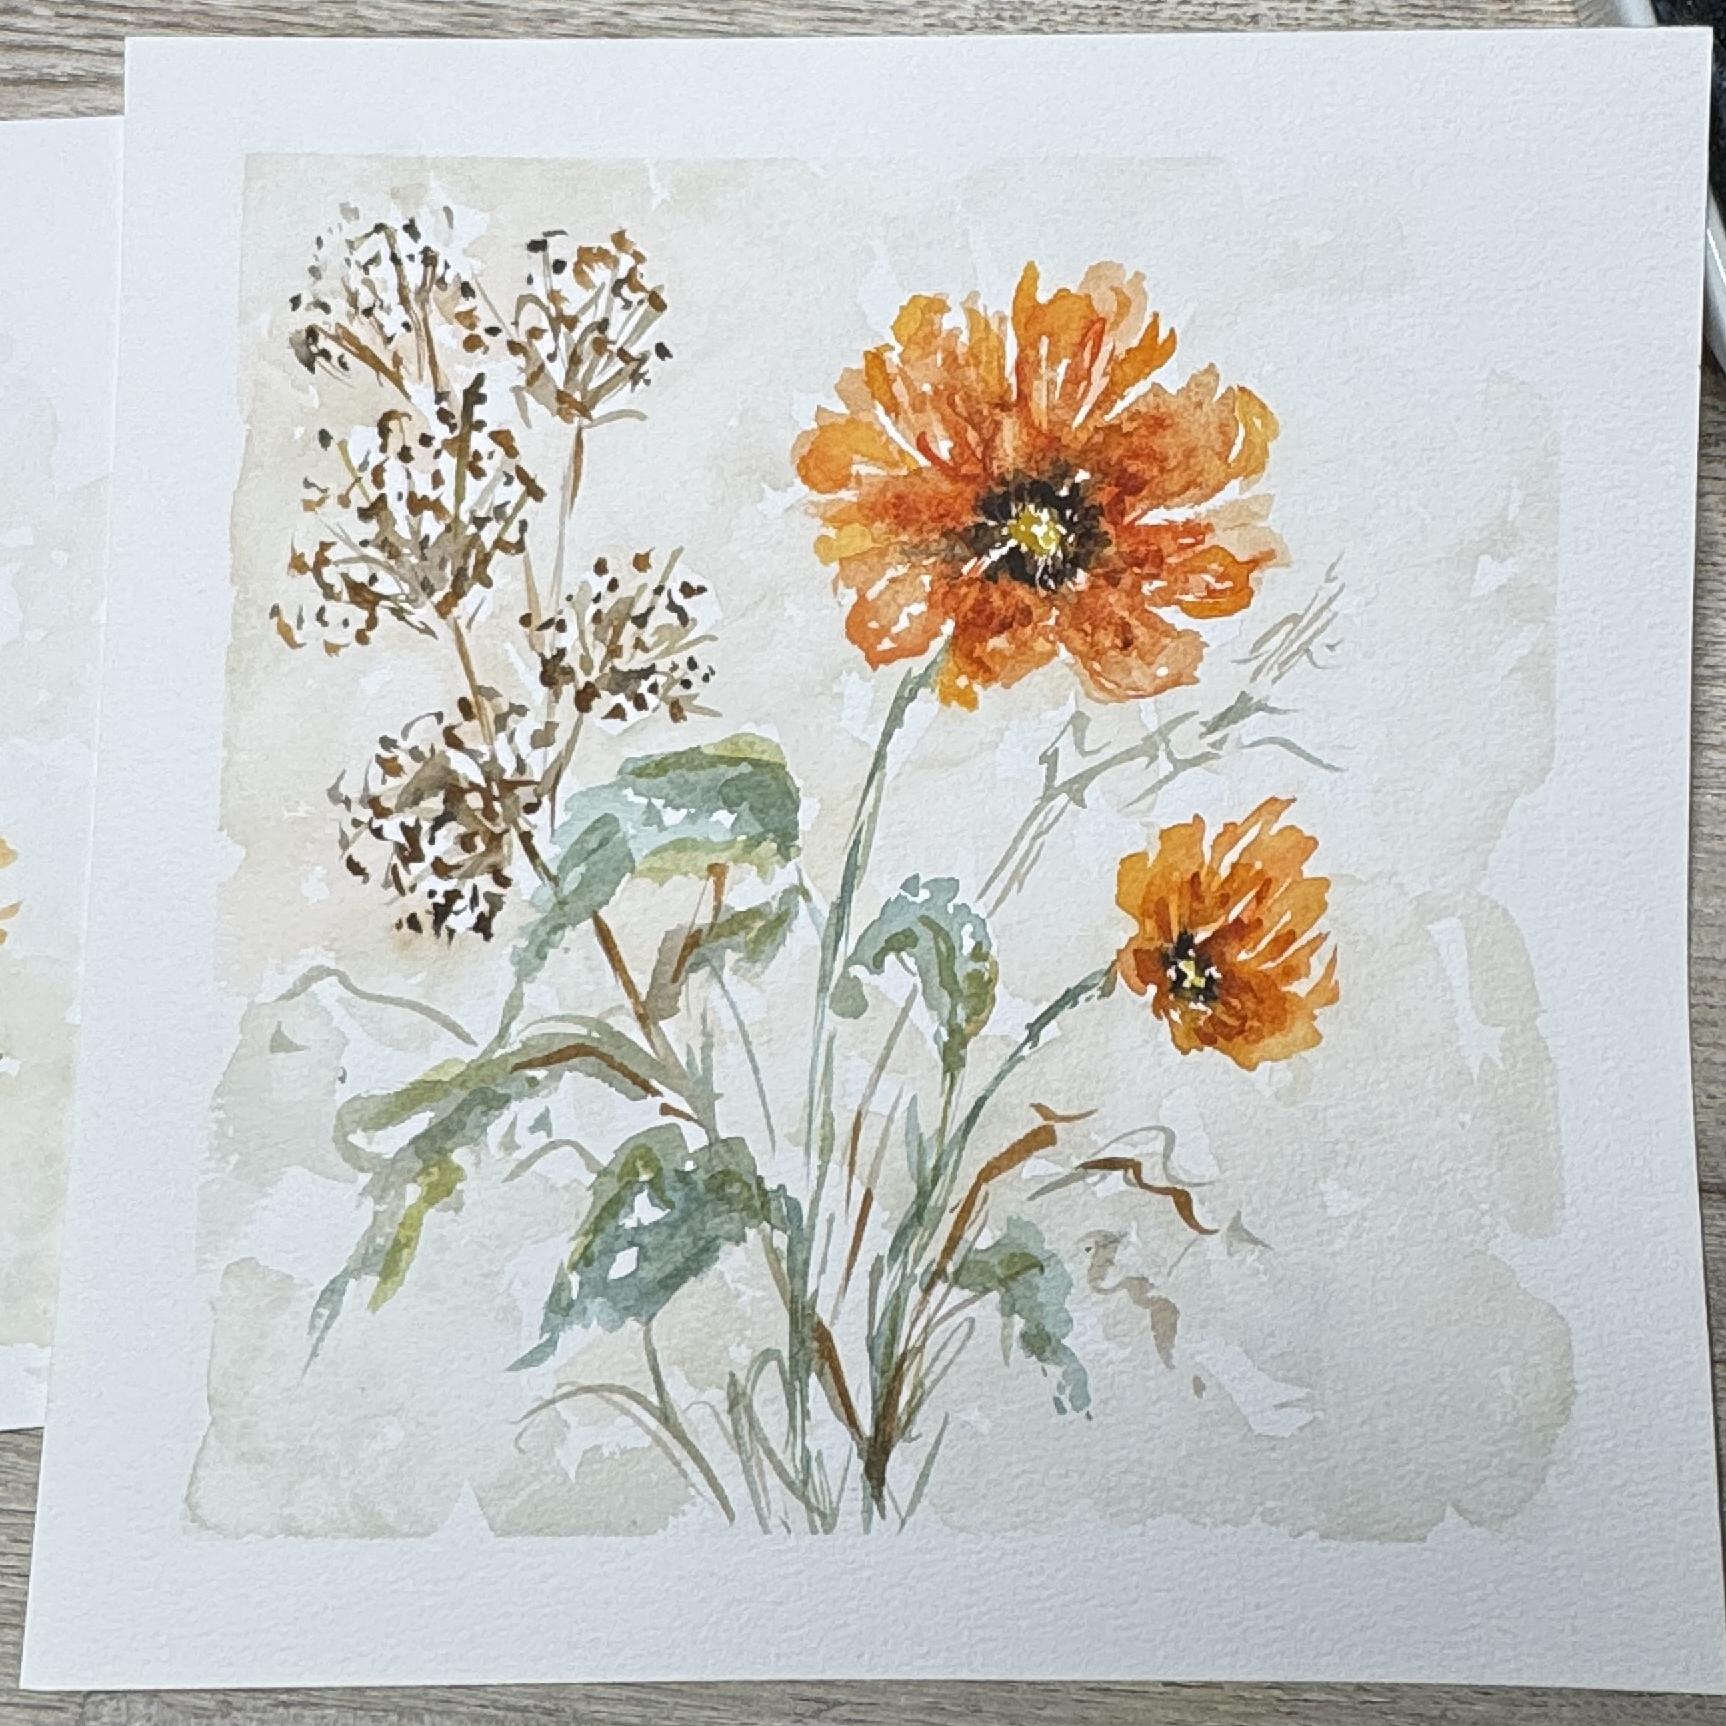
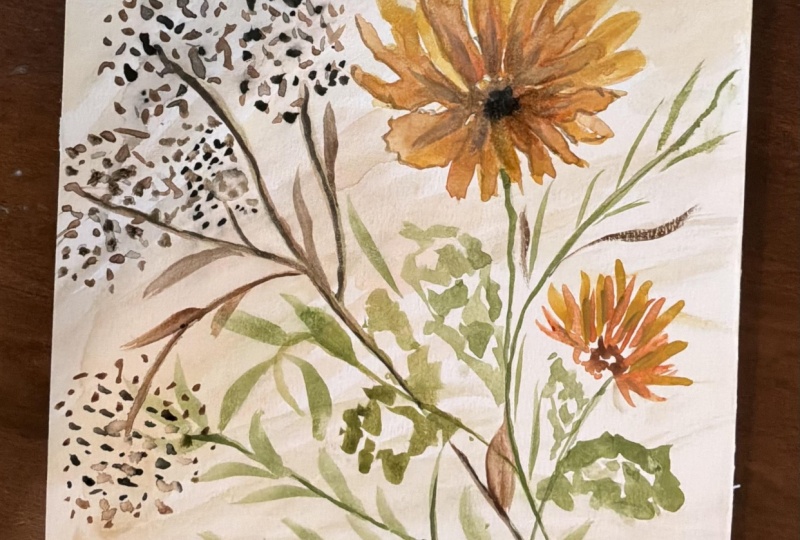
this class is for you. Today we're going to be creating this beautiful loose watercolor
wildflower composition together from the very first decisions about where everything
should go all the way through adding that soft light background
at the very end. And I think that middle step, figuring out how
exactly to build a composition is where
a lot of us get stuck. You might know how
to paint a flower. You might know how to
make leaves and stems. But then you sit down
with a blank piece of watercolor paper and
suddenly you're wondering, where does that first flower go? How many flowers should I add? How do I keep
everything from looking too evenly spaced or too stiff? And how do I know
when I have enough? That's what we're going
to work on today. But before we put any
paint to the paper, we're going to make a simple
plan for our composition. Nothing complicated
and definitely nothing that locks us into an exact plan with a finished painting as
to how it has to look. We just want enough
of a plan to give us confidence when we make our
very first brushstrokes. Then we'll begin building
our flowers and leaves, paying attention to individual
heights and sizes and shapes and the direction so that the painting develops
natural movement. Once our flowers are in place, we're going to do
something that can sometimes feel a little scary. We're going to add a very
light watercolor background. I'll show you how I approach
this without losing the freshness and
white space that makes loose watercolor
so beautiful. Also show a few little
decisions I make along the way, including when I decide to add
something and importantly, when I decide to
leave an area alone. Grab your supplies and
let's start painting.
2. Make a Plan + Gather Your Supplies: With fall fast approaching, I wanted to come out with
a fun little project for us to work on together. This is going to be our project. We're going to be discussing
making a focal point, maybe adding in a
little bit of extra, what I would consider
your accent piece and maybe even a little bud, along with some greenery and
very, very soft background. I'm going to bring
that up close so that you can see what
I'm referring to. So with my background, I have decided to put in
this wash after I painted, and I added this really, really soft background in a
very irregular format here. And we're going to
be making this piece or something similar to
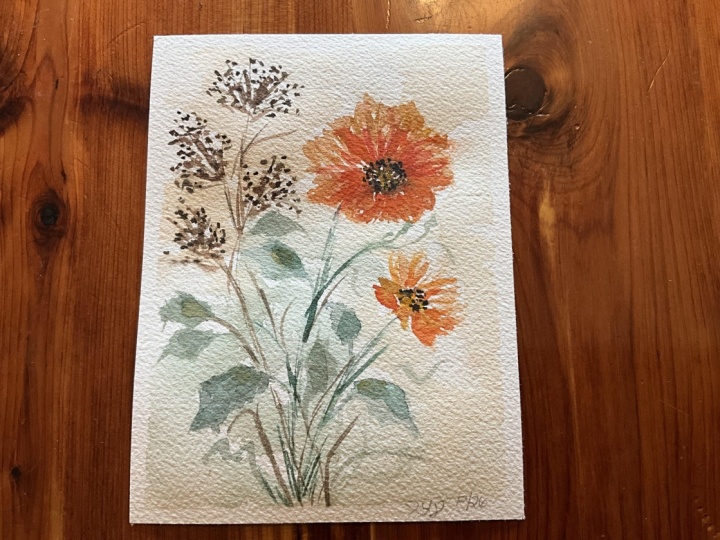
it in today's class. Now, as with all
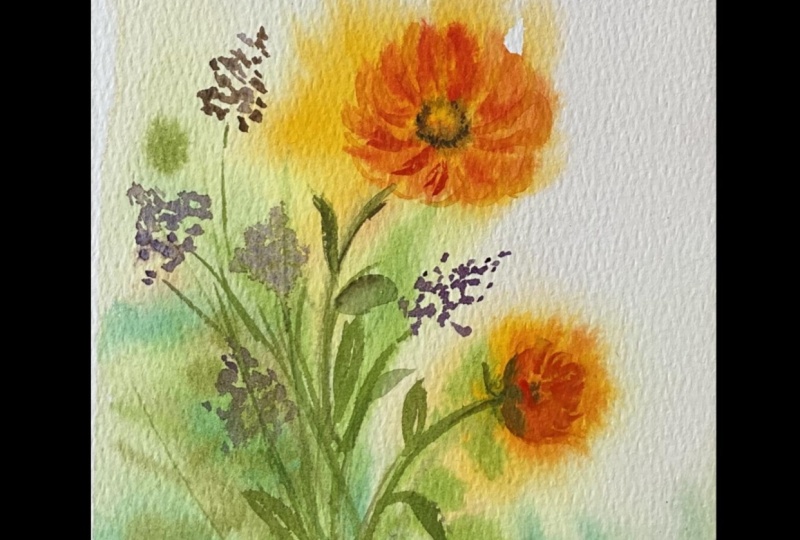
things, my first piece, this piece that I made as my sample is not
going to look like the finished piece
because it's really hard to reproduce and replicate
something exactly like this. This was my practice
sheet so that I could get my technique down and
know what I wanted to teach. So basically I'm saying is that this is going
to be our guide, and I'm going to leave
it off to the corner so you may be able
to see it at times. But more importantly, yours is going to look
different from my piece. Yours is going to look
different from my sample, and yours is going
to look different from the piece that we actually make here together when we are
painting at the same time. And that is really
important for you to remember that yours
is never going to look like mine and it's never going to look
like the neighbors that when they upload their
project to the class gallery, yours is going to
look different, and that is really special. I want yours to look different. I want yours to look like yours. I want you to put
your own spin on it. Maybe you're choosing
different colors. Maybe you choose a
different flower. Maybe you choose a
different angle. Maybe you're not quite as
familiar with watercolor yet, and so you're going to be
struggling a little bit. You may have to practice it and do it several times
until you have something that you're satisfied with that is great things to do. That is a wonderful thing to do. Go ahead and practice
it several times. I'm going to tell you
that this sample, this one that I just
quickly made is actually on the back of
another classes project. I just took a project that I
had done previously for you. I flipped it over and I use
the back of the paper because I don't really like to waste my paper. I like to reuse it. And if I decided I wasn't
going to hang something up and it wasn't something that I wanted to give as a gift, I just go ahead and I
consider that paper a practice paper and I flip it over and I use it
for another project. Here I have this really
pretty picture that I'm very pleased with
and I am just hoping that this next project
that we come out with together is just as good if not better because then I will have something
that I can go ahead and um put in my house
or give as a gift. So go ahead, find
your scrap pieces of paper, practice it one time, come back through,
watch the class a second time if you'd like to, and see what tips and
tricks you can pick up on. So we're getting ready to start. I just wanted to give you
this little background. I'll just quickly
run through some of the supplies that we'll
be using in this class. I will be using
my round brushes. I have a size six
and a size eight. These are my Princeton
Heritage round. You can use whatever round
size brush you like. If you have a different shape brush that you prefer to use, go right ahead and use those. I do have some extra
pieces up in here. I may play around with those. Sometimes I like to
have a fatter one like a 12 to do the background wash. I may or may not
use it depends on, um, how it all works
out at the end. I also sometimes like to have some of these long
skinny brushes, what I call liner
brush or script brush. This one is a
really special one. These I just got brand new, so I'm not sure exactly if
I'm going to use it or not, but it would be great for
making little wispy lines. So we may or may not use those, but feel free to just
use your round brushes. This will work
perfectly well for you. Then I have my palette. These are paints out of a tube, and these are usually
Daniel Smith. I think almost all of these
are the Daniel Smith brand. But you use whatever you have. If you have a tin, like a pan style,
these are also fine. It doesn't matter what
style paints you have. You just use whatever you have. And then, of course,
your paper is probably going to be
your most important. Having a good quality
watercolor paper is probably the most important, whether it is 100% cotton or a pulp is really up
to you and your budget. I prefer to have a watercolor
paper that is cotton. I like the way it works best. But to tell you the truth,
when I was first starting out, I did not use cotton very often. My budget just could
not afford that. And when I felt like I was
really just practicing, I didn't use it very often. Since then, I do I would say that I use
mostly this brand, and I prefer this brand. Um, it's a great price and
a really great quality. Just make sure that
when you buy it, you are getting the 300 GM
and not the 200 or the 250. That paper is too thin, and I would not recommend that. But as long as it's the 300, then you're going to enjoy that. When I first got started
with my watercolor, I used a lot of this paper
that's on a spiral bound, where the paper is
watercolor paper, so it is nice and thick, but it is pulp paper
and very good for sketching and practicing
my brushstrokes and even just playing around. If in this class, you're like, I'm not really planning
on making this into something that I
need to hang on the wall, I just want to play
around with it and you have a
sketchbook like this. This is watercolor paper, it is important that it's watercolor paper so that
it soaks in correctly and you'll appreciate something like that better than just
an all purpose paper. I think that's the list of my
paper suggestions for you. Come back to the next class and we're going to get
started right away. I'm going to be making it
in a square paper just because that's the
plan that I have for where I need to use this print. I mean, the watercolor that
I'm going to be making, and I'll be making it on a square piece of paper
and making it a little bit larger than what I did here for my little sample. See
you in the next video.
3. Build a Balanced Floral Composition: I'm really excited to
show you this piece. Fall is we're still in August here where I'm
recording this video, but you could be maybe making this next spring because I know these classes last forever. So whenever you're doing this, just adjust your colors to suit your needs
and your feelings. If you're in the springtime
when you're watching this, go ahead and make
it yellow or pink or purple and here in the fall, change it up to these colors and it'll just be so
warm and welcoming. So with fall fast approaching, I do feel like I'm
starting to see some of these colors starting to come on the roadside
and I'm thinking, it's time to start painting
something in this color way. On my palette here, I am going to be focusing
primarily down in here, which is in my yellows
to oranges, to mustards, and even over into my little reds that have
a orangey red color. Then I'll swirl up over here
into my greens and such. I think what I'm going to do, I think I'm just
going to clean up my palette just a little bit so that it's
easier for you to see, clean This is my sample that
I had done for my first one, just to test it all out. I think for your benefit, I'm going to spin my palette
like this so that you can see these colors because those are going to be
my primary colors here, and then I'll pull some of the green down in there as well. I will set this somewhere that
maybe you can see part of it while we go ahead and paint. I am going to use that
same format where it's a big flower with a little
bud and maybe add in some little tiny grasses or berries or something
because this time of year we are starting to
get a lot of that kind of look going on in our gardens. So I think that's pretty good. Oh, we're going to
get started here. I'm going to be using
my size eight brush for the most part and
every once in a while coming over and using my six and maybe some of
the other ones. I do like to have a rag
nearby or a paper towel or both so that if I get too
much paint on my brush, I can dab it off on my
paper towel or my rag. I also have, of course,
my fresh water, which I am using on a
regular basis here. I'm just going to
mix some of this up you can be using
whatever colors you have. I do like to have a
lot of water with my paints when I am mixing
so that it is not thick. When I'm just getting
started with all of this, I love to have a lot of water. It keeps it from
looking too stiff. I am not going to draw. I didn't supply a picture of this with the class
project for you to trace. So if you would like
to trace something, you're going to need
to draw it yourself. But I really feel like this
is just such an open, wispy, carefree style, very loose watercolor that
we're working on today. So I was not
intending to draw it. I was thinking this
would be something that we would just free hand. What I would do
is I plan it out. I have this great
big piece of paper, and sometimes I take my tape and I mark off
the edges and I say, I want to make sure
that I'm going to be painting within this area. I will go ahead and do that. This is just artist tape
that I like to use. You can get it at any
artists and then I just lay it down on the corners and
make sure that the inside, this edge that's
in between where your paper is and
where the tape is, make sure that edge has a nice firm seal there
so that you are not letting any of that paint and
water seep down underneath because that will be very disappointing if you get
a little bit underneath. All right. That's all I need
to do to prep my paper. My paper is dry. For the vast majority
of today's project, my paper is going to be dry. Only when I go to
do this background, will my paper become really wet? This is a wet on dry technique. You can use whatever
colors you happen to have. If you have a palette that
has a tin that has your pan, colors in and it looks
something like this. Just use whatever
colors you happen to have that work well
for your project. If you need to have
a little palette where you can get a plate
from your kitchen table, your kitchen cabinet and use a little plate to mix your colors that would work well too. I have a little bit of this
here and for laying it out, like to look at
this big piece of paper that I have in front
of me and pre plan it, but just in my head without
a pencil in my hand. I'm going to look at it
and I'm going to say, I want to have my flower here and I want
to have it fairly substantial because
I am going to be using most of this
square piece of paper. I want it to be
somewhere in this area, which will leave
me enough room for my grasses if I put
some grasses over here, and then maybe I'll put my
little bud over in this area. Then that's all I need to know. I don't need to draw
it all out because I preplanned it in my head. Big flower, little bud,
grasses over here. Now, if that is
concerning to you, you can always use a pencil with a very light touch
and draw a circle. You could just
very, very lightly draw a circle or an
oval and say, Okay, I think I'm going to
put a flower head here, and I think I want to have
my bud over in this area, and then I want to have
some grasses over here. I probably wouldn't
add the stems and the leaves because
I'm going to want to be fluid and roll with
it when it happens. But if having it in your head is too difficult and you
need to do some drawing, draws and ovals
are some circles, but use a very,
very light pencil. Then even after
you've done that, if you have an eraser, I have one of these bag erasers. I could sit here and
I can just lightly erase what I already
just drew on here, so I can see them. You may not be able to
see them on the camera, but I can see where
those marks are, W will just be a little guide to remind me what I'm doing. Okay, enough chatter.
Let's get started. We're going to dive right in and start making
this main flower. I want to do the big flower first because it is
the focal point. It's where I want all my eyes, everybody who looks at this, I want them to go right
here to my flower and to have the grasses is almost like a background
or the berries, whatever this ends up being
over here, and my little bud. Those are just little
accent pieces. They're the supporting actors, and I really want this
piece to be the main thing. I have my paint all the
way on my paintbrush. I have dipped my paintbrush
all the way down in filled my paintbrush
up with water and paint. I am not just
dipping the end in. We don't want to be painting with just the tip of
your paint brush. We want to paint with the full bristle all the way down in there,
the whole thing. Knowing that my circle is right in this general area oval, I'm going to start with
one of my first petals.
4. Project Part 1: Paint the Flowers + Leaves: So knowing that my circle is right in this general
area or oval, I'm going to start with
one of my first petals. And the way I'm going to do
that is I'm going to envision that I have a center here that
I am not going to fill in. This center is going to
be left empty or plain, at least for the beginning. Eventually, we'll
be filling it in. But while I'm doing the petals, I'm going to leave
that center here and go around my imaginary center. If you have to draw
a little circle, again, draw it very, very lightly with
your pencil just to make sure that you don't
go inside of that circle. But I think you can do
it without doing that. Now, to do my first petals, because we are going
to be working in a very loose style
for this flower, we're not going to be
painting a whole petal. We're going to be making
lines. Here we go. We're going to start it
and I am just going yeah, watch where my hand is. My hand is at least
halfway up, if not higher. Sometimes I like to hold my
paint brush up even taller. I never hold my
paintbrush down here. This is not a pencil,
this is a paint brush. I'm going to hold it at least here and I'm going
to make some lines almost dancing above the paper and just letting it fill
in where it touches. Maybe that's one petal. I just added some more
water because I don't want to have this be too dry. When I'm painting,
this is watercolor, so I want to make
sure that I have lots of water on my brush
and on the paper. I'm probably going to make
this side over here a little bit shorter so
that I show an angle. If you notice I did change
up my color a little bit. I added some of that
brighter orange just mix it up and show a different color here and there just so that you
have some variation. You can see that I did
not create petals. I created little lines and
lots of empty white space. I'm going to stop there. This is still wet and so I'm not going to
fill it in all the way. Some of them are more solid, some are more sketchy. Some of the petals are smaller over on this side
because this is going to be indicating where
the bottom side of my flower is so that the stem can come
out from over here. My bigger petals are over there because that's the
backside and it's fuller. I even come in now with a little bit darker
red and just add in just a little bit because it's starting to dry and I want to add in just a little bit
of this darker color red. Well, it's an orangey, it's a beautiful color. We'll just add in a little bit here and there, little lines. Let that swirl around and blend in with
what we already have. I don't want to put too
much down because I want to make sure that I have
lots of white space. But we're going to
be adding to this. I'm going to be adding
some darker and some more yellow and such.
I've got that going. I'm going to rinse out my
paintbrush with my water. I have I have several
different water bowls here, ones that are ready to go in case this one gets too dirty, I can always rinse
off in another one. But I got something
going here and I got to keep moving before this dries. Sometimes I talk too much
and when I'm teaching and I lose an opportunity to get my painting exactly the way I want it
because I'm talking. So this is not real wet
and I'm just decided I want to add in a little bit
of this darker brown color, just because I want to have
a little darker center. Again, although I have my whole paintbrush dipped
into this dark color, I am only using the tip of my paintbrush to dab in and add in that
little bit of brown. It's a very, very
dark brown, almost, I think it was called
Sepia when I bought that one, very, very dark. I ever it gets too much, you can always go in and pick
it up, you can dab it off. I've got my cloth right here, sometimes I dab off anything
that's gone too far, blended out too far. I can always dab it off
on my cloth over there. I will be wanting to put in a little bit of yellow as well, but I'm going to wait until
that dries just to hair. I might even go ahead
and extend this just a little bit to make it
a little bit bigger of a flower with having
certain areas more thicker and other areas having more the white
shapes showing through. I am intending to see
how I have my petals. I have one, two, three, four, five, six, seven, I have
my petals coming around. They're just not
real defined petals, just light loose petals. But see how I can
always add in and make it go bigger. It's harder. You can't really
make it go smaller, so you can always expand it and make it go bigger
if you want to. I would recommend being
just careful with making your petals too
big to begin with. You can always
make them a little bit bigger if you need it too. Again, just keeping that
lots of white space. I am trying to keep this side on the shorter side so that it
does indicate direction. If you need more help with that, go ahead and try some
of my other classes because I know I
have talked about that as well in other classes. That center is starting to dry, so I'm going to go ahead
and grab some yellow. And I think this
might just mix in just a little bit of
that brown that I have here just to make it a little bit darker so it's
not sunshine yellow. I'll just add in
just a little bit of that yellow here
to the inner center. It's okay if it bleeds
out a little bit, and I also am leaving in some white spaces because I
don't want to have it solid. I felt like maybe this piece over here got a
little too solid, so I'm really trying to focus on keeping this one not quite as solid as I had started
with my original sample. So I think I just want a little bit more of this browner color. I'm just going to add
in some extra in here. So beautiful. All those colors, all these fall colors, and they all work
so well together. It's almost like a second layer because it's not
quite completely dry, but it's starting to dry, so it's allowing that next
layer to just go up on top and then also blend in with the paint
that's underneath. So it's really pretty. Okay,
I'm going to call that done. I'm going to come
over and work on my little bud and my bud. Again, it's just going to be this little tiny
bud over here. It's just the side of the bud. Maybe I'm just seeing
into the center here. So you can just see this is
just the edge of that bud. I'm going to switch up and use a different color,
blend it all in. Again, keeping it nice
and open and loose. Grab a little bit of my
brown, touch that in. I'll save this center for the yellow to go in
here to the center, add a little bit of that brown. Maybe a little bit more
of this orange color. Okay. That's probably good. I'm going to come back and add
a little bit more brown to the center after that dries because right now that's
really, really wet. I'm not going to do these
berries or grasses yet. I'm going to go ahead
and put in some stems. So for my stems, I would like to have
a little bit of a green, and you know what? I'm going to grab a
little bit of a blue, too, just to lighten
it up a little bit. Let's grab some of that blue. Maybe a little too much. I can always where's my
scrap piece of paper. Yeah, see how that's got really kind of a
really pretty color, but maybe a little bit too blue. I was kind of going for something maybe not
quite that blue. Yeah, more like that.
You see how that I just keep mixing until I come up with a color that's going
to work well for me. Then I'm going to add my stem. And when I add my stem, I'm coming up into the center. It doesn't have to
actually touch the flour, and I'm just going to use
the tip of my paintbrush and I'm just going to
make it have a curve. I don't want it to be straight, it's not going to be a lollipop, it's just going to be a curve, it's okay if I have lines
in between where they skip. Because we're going to come back in and fix that up
in a little bit. Again, over here, I'm
just going to add in that stem to show
direction for that bud. Then I'm going to
come up and I'm going to add in little here, see how we have these
little wispy leaves, and I'm going to
add some of those little wispy leaves in here. I'm just going to come up and then I'm going to add a
little bit more water. And just kind of dot. See how I'm just push my
paintbrush in and kind of smush it around leaving lights on little white
spaces around it. And then I'm going to
come over here and do something like that and just drop that down,
that little leaf. That gives that direction. And then I'm going to come
over here and I'm going to do the same thing and just kind of jaggedly quickly moving
my paint brush so that my brain doesn't
have enough time to think about if that was
the right thing to do. Because if you give your
brain enough time to think, it actually works against you. I'm just going to quickly put this little happy leaf over there and let that just
hang out over there. I'm going to add in a little bit more yellow and a
little bit more orange into this green
just to change it up, and I'm going to add another
layer right up on top. Watch how I am just
going ahead and using makes a little bit
more that same stem, and I'm just going to go
right up on top of it, and I'm going to put
it right up on top. Right up on top of
that other stem. It's almost like a glaze. I'm just going to
put it right up. Maybe it comes out a
little bit further. And it's okay that the stem has lots of different
lines. It doesn't matter. We're just making
quick little decisions on where stems and
leaves and branches go. Doesn't always have to
make a whole lot of sense. You can just kind of put
it wherever you want to. And let's see. I want to my green dipped into my orange just a little bit
here, which is fine. I'm just going to lift it
up because it's still wet. Just go to use my clean paint
brush and just dab that up, and I'm going to grab some more of this orange and I'm just going to drop that back
in to heal that spot. And this is still pretty. Wet. I'm going to
see all that bled. It's a little too much right now, so I'm
just going to wait. I'll come back and
add that green and yellow in a
little bit later. I think I want to add in some of the little lines
for the berries. Over here on this side, I'm just going to add
some little lines so that I can add
berries to that. I got a little cluster there. Maybe I have another little
cluster of berries here. Maybe I'll add one more
cluster of berries up in here. See how it doesn't don't
have to be particular. We can just play
around with this. If you don't like it when you're done, you can call it practice. Then I'm going to pull this one down and pull a stem down. Then we're going to play around with this and I'm going
to bring it over this way. Maybe bring another
cluster over here. Grab some more of
that other color. This is where it just starts
to get you just play. Just see what happens. Put some paint down and
play around with it. You know which
colors you're using, so just keep playing around
with those extra colors. Using just the tip
of your paint brush to see where your paint
brush wants to go. It's best if you
don't think too much and you just let things happen because that's when
some really fun decor some really fun art happens
is when you don't preplan it. I'm trying to not pre plan it. Now I want to put
some little dots because these are
little berries, and some of them are
going to be dark and some of them are
not going to be dark. I'm just going to
use my dark paint right now because that's
what's on my paintbrush. I'm going to just go around and add just using the
tip of my paintbrush, do, do, do, do, do little
tiny dots real fast. Because if you start thinking, now I should put one here, I should put one here,
I should put one here. Besides the fact that
it takes forever, it really becomes very rigid instead of being organic
and more like nature. Nature it just lets things flow. I want to let things just flow. I'm going to also
come in with maybe this darker color add a little bit of brown to it
to darken it up a little bit. There we go. We're going
to add this brown. I'm going to come
right in over top of the darker ones. Just add it. It's almost like
it's a seed pod, everything's gone to seed
now that we're in the fall. Some of the seeds are bigger, some of them are lighter
and smaller and daintier. Even going to bring down some of this color just a little bit. To bring that color across
the page, All right. I want to come back in here. Yeah, we're bouncing
around the page, but I'm trying not to forget that I also need to come
in here and just add just a little bit of that darker color before
it completely dries. If you take notice, I'm
still using that size eight brush because
with a size eight, you have this whole body
and you have this tip, and so I am allowing
that to just use the whole brush for all of
its purposes. I love that. I think I'm going to come
in here and just add a little bit more darkness here to the center of this one. Little tiny dots and lines. I'm going to wait for that
to dry and then I'll add just a touch of yellow into the center like I
did with that one. I'm going to come back over
here and look at this, and I think what I'm going to do let's see what
we got going on. Got some of that. Just filling in some of that so it
doesn't look too sparse. Just because I put something here doesn't mean you need to. If you're looking at
yours and saying, No, I don't want
to do that, well, then please don't something
just because I added it. Pay attention to yours and see what your painting
is speaking to you. You have to really
listen to your art. I think I might. I'm debating as to if I
want to add I have four of these I don't hate for some people
are going to tell you that you can't
just have two flowers, you have to have three. You have to have an odd number. I just I am not a rule follower like that when it comes to art. I'm more of a speak to my
heart. What do I want? And then I have this
is even over here too. I feel like what I want to have is I feel like it's a
little too balanced. And although I'm not
a rule follower, I do feel like I
need to have just a little bit more of
something going on up in here just to
make a not even um, balanced so that it's just flows a little
bit better for me. Even though I am not
a rule follower, sometimes they do
have a point when they say to do things in odds. So I'm just going to add
that fifth one up in there. Not sure if it was
completely necessary, but, you know, I added it for
better or for worse. Um, your paper towel. I got a little too
much water there. It's right. I see, I just grab my paper towel and
I just dab it up. And I go, that's right.
We'll just fix that up. And I'm going to come in
with my darker color. And add something back in there. Okay now. This is not quite dry enough. Maybe it is. Maybe I can
add in a little bit more. I'm going to switch
over to my six. This is my size six. I'm grab some yellow. Whmemer we have
that yellow and I mixed in just a little
bit of a brown, just to tone it down so
it's not sunshine yellow. This isn't the time of
year for sunshine yellow. I'm just going to add in
just the smallest amount of yellow there to the center. I did bleed, as I
expected it would. That's okay. I'm just
going to come in and push it back and say, well, stay there in the middle. That's where I need you. Okay. I like my leaves. I like this little extra
thing over here. If I wanted to, I could
make another little bud, but I don't really want to. I want to leave it like that. It shows direction,
it shows movement. I've got this extra
little grassy thing come on over here. I really like my leaves. I think I do want to come
in using my size six. I'm going to come
in and just grab maybe add a little
yellow into that add another little layer
on top of some of these leaves just to add a little bit more
interest to them. Makes it feel like it
has dimension because it has some extra
colors right up on top. You can even come
outside over here, if you wanted to just
come outside the lines, you can Okay. Now, this bud, I feel like is just a
little on the weak side, it's almost all one color and there's nothing
wrong with that, but I was really looking for adding in just a little
bit extra color. I'm going to come in
and do that same thing like I just did with a leaf. I'm just going to add a
little bit more color into the middle once that dries, that'll look like another
layer on each petal. Okay. I'm going to dry
this off and come back. This is just my heat toll. I'm just going to dry this off. Come back in the next class
and in the next lesson, and we're going to put
in the background.
5. Project Part 2: Add a Soft Background: We are going to get
started on the background. This is now dry or mostly dry. What we're going to do
for the background is use an incredible
amount of water. I'm going to use the
colors that are already here in the center
of my palette. I might add some extra in, but mostly I'm going
to be using that. A lot of this has dried because of waiting for all that to dry. I'm just going to
go ahead and re wet this center area because that is going to
be our background. You can see here how
liquidy that is. That is just going to run
and pour but I want that because I know that these
are the colors that I used on this painting, and so I want to be able to use that on my background
so that it blends. I'm going to go ahead
and use my size 12 round because I have
such a large paper. If your paper isn't this large, you can use one of
your other ones. For my sample that I
had done over here, I just stayed with my size
eight, whatever works for you. I'm going to come in here
and just take a look. When I say really a tremendous amount of water and just a
little bit of paint, this is what I'm
talking about where it's almost completely
transparent, what I would consider
tea strength, iced tea or hot tea strength, where it's just barely colored. I'm going to go into
that orange and I'm going to go ahead
and just start putting some of that down here right
on top. But pay attention. I'm going to hold
my paintbrush up really high and just
swirl it around, come out to my edges where my paint the tape is
up against the edge. I'm not filling in every gap. I'm leaving more white
spaces than not. I'm not intending to
fill the whole thing. I'm now going to
come over into some of this green and I'm
going to add some of that green color that I had and just fill in some of
that space down in there, maybe put in some of this
green over here on this side. And again, just just flowing
every once in a while, might even add some extra water just to make sure
that I have plenty of water leaving lots of
white space around here. Sometimes I go right on top
of it, sometimes I don't, just to fill in and
flow over and around. I feel like maybe there's too much orange and
not enough green, so I'm going to come in here and add some more green
right up on top of that. Again, not thinking about this, I'm talking while
I'm doing this. I'm not pre planning it. I don't have a complete plan in my mind as to how this is
going to look when I'm done. I'm just putting it on
very softly, organically, holding my paintbrush
all the way at the top, so I have hardly
any control at all. I'm going to just
put this over here. I'm going to put very
little over there. I think I'm going to be done. We're going to just add
some water at this point, move some of that around. I don't want to add any more. I just going to
add some of this. Really loose and light. Lots of white spaces. Using just clean water, I'm going to put it over
here in that corner. Then I have my paper towel and I'm going to dab
some of this up. I'm going to say, I don't
want to have it all over, so I'm just going to
dab up some of it, make it lighter in some
areas, something like that. If I feel like it has too much, I can always add more
water and then dab it up so that it's very
light in the background. See you all that I've dabbed up? I definitely wanted
to keep this area lightest because
I'm feeling like that's where the
sunshine is coming from. I'm trying to keep that lightest and then darkest
over in this area. But it's really doesn't
have to be done that way, however you do it is
going to be perfect. Just have fun and
play around with it. I think I'm just using
water at this point. I'm not even dipping
back in there. I'm just using water to move
some of this paint around. Lots of white spaces, lots of white spaces,
lots of white spaces. And picking up the puddles and the mess because of course, I do make a lot of mess. There's watercolor
supposed to be. Okay. So I'm going
to dry this off, and then I'm going to
show you in the next lesson what it looks like.
6. Wrap It Up: Final Tips + Finishing Touches: Come back. So we are going
to go ahead and reveal this. So I have my tape on the edges
that I want to peel off. When I peel off the tape, if it ever starts to
stick to your paper, if you ever have that problem, just take your heat gun and kind of heat up
the tape a little bit. You don't have to
have it really hot. Nicely warm, run it
over a couple of times and then start
to peel it up. That activates the tape adhesive and will allow it to pull off of your paper a
little bit easier. The other thing that
I recommend that you do is when you start
to pull up your tape, pull it off at an angle. Instead of pulling it off, like straight up
and down like this, pull it off at an angle so that the tape is
angled like that. And then when you pull it,
it will come right off. So those would be my two
tips for removing tape from your paper is to angle
it and to warm it up first. So since I just heated
this because I was drying off the whole paint project, I didn't feel like I
needed to do that again, but I wanted to show
those two things to you. Okay, so here it is as
a finished project, and I'm very happy with it, but I do want to
show you that it is very different
from my original. So different colors, different background,
different grasses. You know, you never really know what your piece
is going to look like, and I am sure that yours
looks different from mine, and it's going to look fabulous. So I'm going to remove it from this board because I happen to have this kind of watercolor pad that is
glued on all four sides. What you do is you
look for the one spot. There's always at least one
spot where it's not glued. On this company, it's
here in the center. And then I take a tool. I have a it's called
a boning knife. So it's nice and long and
sharp, pointed, not sharp. You could use a putty knife. You could use a butter knife, whatever you happen
to have on hand, but to use something that
is skinny and pointy, find your one piece of paper, the paper that you have
painted on, and go ahead. And slip that in
here to the center. Sometimes it's on the corners. So if yours is on the
corner, that's fine. Put it on the corner and
then slowly pull it around. Sometimes you have to wiggle it. Sometimes you have to
bend it a little bit, crank it a little bit, just to release it from the glue
that's around all the edges. I just kind of
slice through that. So I'm being very careful so that I don't ruin my painting. So that is done, and now I have my
finished piece, and I'm very pleased with that. I think that's really pretty. Um, I think that'll
be something exactly with what I was looking for
for a project I'm working on.
7. Keep Painting + Share Your Project: Just like that, we finished our loose watercolor
wildflower composition. But before you put
your brushes away, I want to take a minute and really look at what
you've just created. We started with a completely blank piece of watercolor paper, made a simple plan, and then
slowly build a composition, one decision at a time. We varied the heights and
sizes of our flowers, added leaves and stems
to create movement, and allowed some areas to stay quieter so that the painting
still had room to breathe. Then we added that light
watercolor background, which can sometimes feel scary. But because we took it one step at a time, we didn't ruin it. We kept it soft and
restrained and it helped connect everything and gave the painting just a little
bit more atmosphere. Now, your painting probably looks very different from mine, and that's exactly
what we would expect. One of the best
things you can do as you become more confident
with watercolor is start trusting some of those little decisions that
happen when you're painting. Maybe your flower leaned
in a different direction. Maybe the colors blended in
a way you weren't expecting. Maybe you left something
out that I had added. Those little decisions
are what are beginning to make
your paintings yours. Instead of looking at your
finished painting and immediately finding those things that you wished you
had done differently, find a few things that worked. Maybe there's one
flower that you loved, a beautiful color that
blended or an area where the water and pigment did something that you could
never have planned, and then remember those things
the next time you paint. Would really love to
see what you created. Take a photo and share your finished painting
in the project gallery. Don't wait until you think
you've made something perfect. Share where you are right now. I hope you enjoyed
painting this piece and I hope to see you
again in the next class.
 Brenda Jones, Watercolor Artist & Teacher