Transcripts
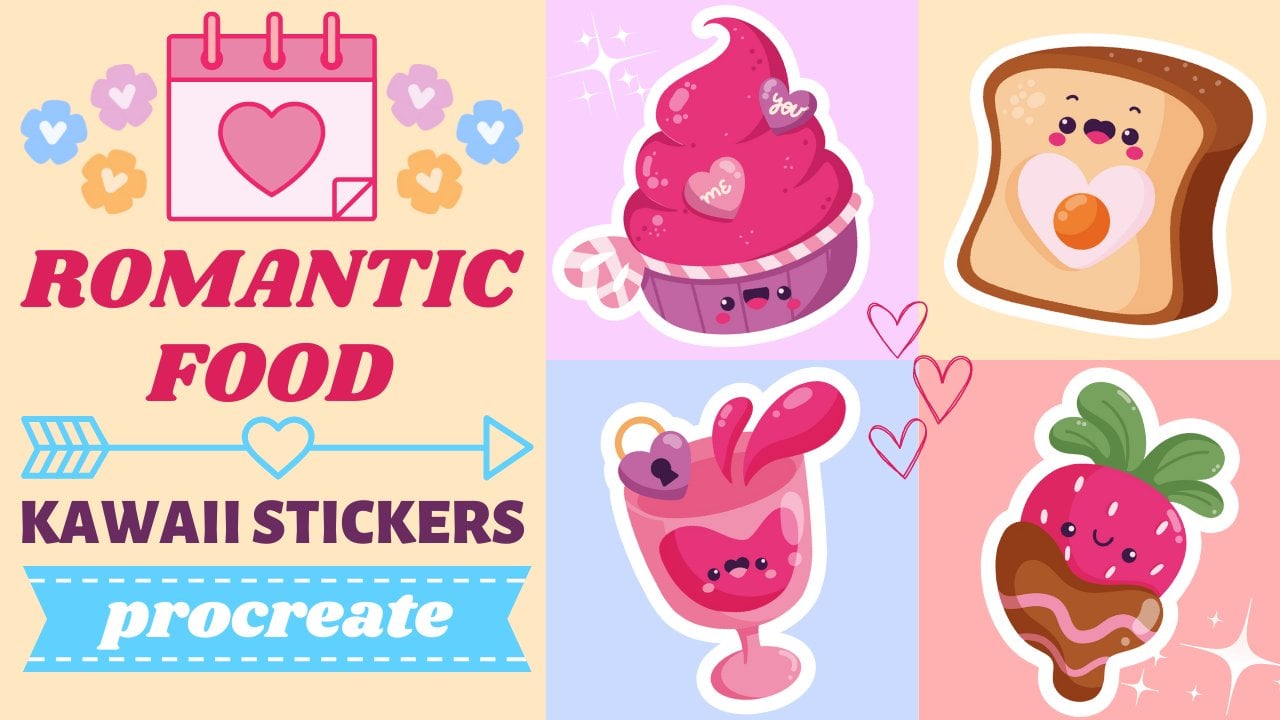
1. Introduction : Hello everyone, I'm unit and into this class will
drop if you can. Why is sweet illustrations? These class doesn't require any prior experience
or fancy suits. We'll start from scratch
and we'll be using simple techniques
throughout the process. Everything you'll see will
be happening in Procreate. However, if you
have other software or wants to try
traditional materials, you are welcome to join
if you're ready to start, Let's jump right into it.
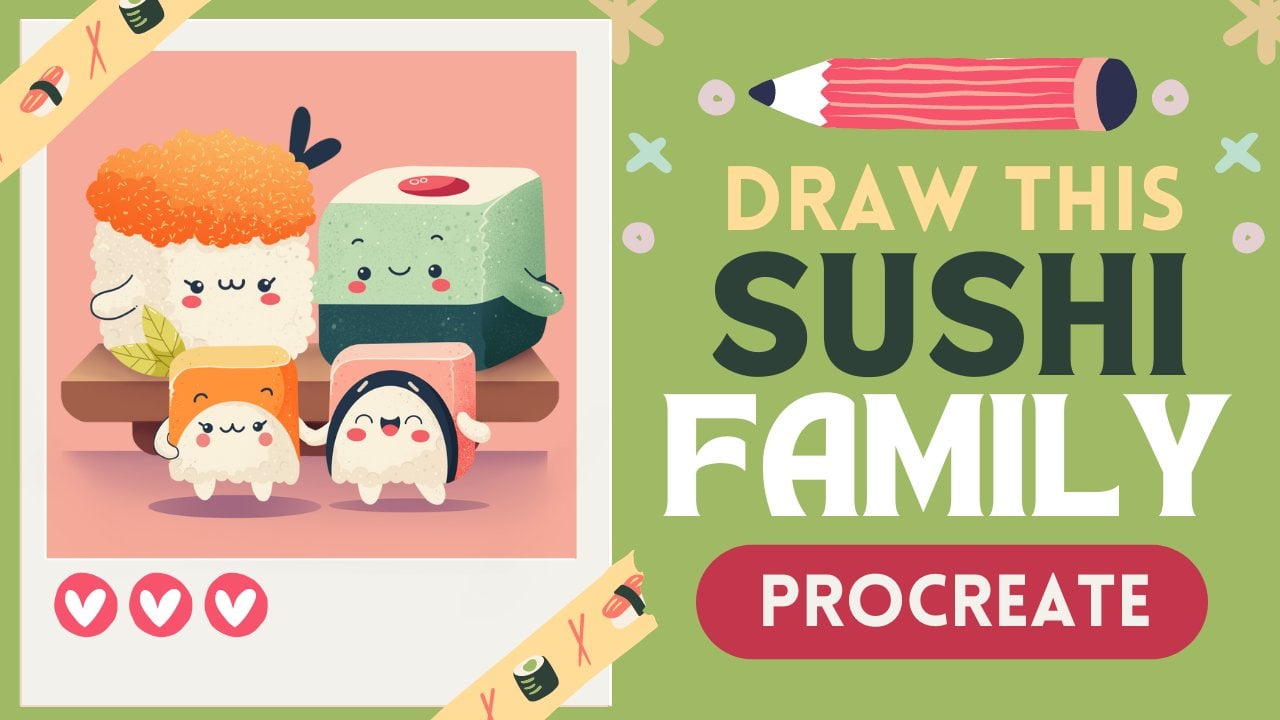
2. Bear Sandwich: Sketch: Let's start our
class by deciding what kind of Canvas we
are going to be using. You can see it is a very
simple square canvas because both pixel
width and pixel height, or a t 1048 pixels. As for dpi there, 300 and S for the color profile, it is set as SRGB
with this low number. When it's all set
where I heating down and we are at our Canvas. So now we need to decide
what kind of colors we are going to be using throughout
the whole tutorial. You can go to the Project
and Resources tab. You can download the
color palettes and you can follow along
with this class. When you did it, we will go to our color palettes and we will check out
what we have here. Here we have two options of
how we can use the colors, the compact view and the carts. We will be using the cards because they have
all the colors, names and they are ready
for you to be used. Now our first task for today is to change
the background color. Let's go to our layers, and let's go to the
background color layer. Here you can find your little color palette on the bottom, and we will need to select
the first color in a row. So let's tap on it. Now when you did it, you will see that you have
changed the background color. And that means that
we are ready to start making our
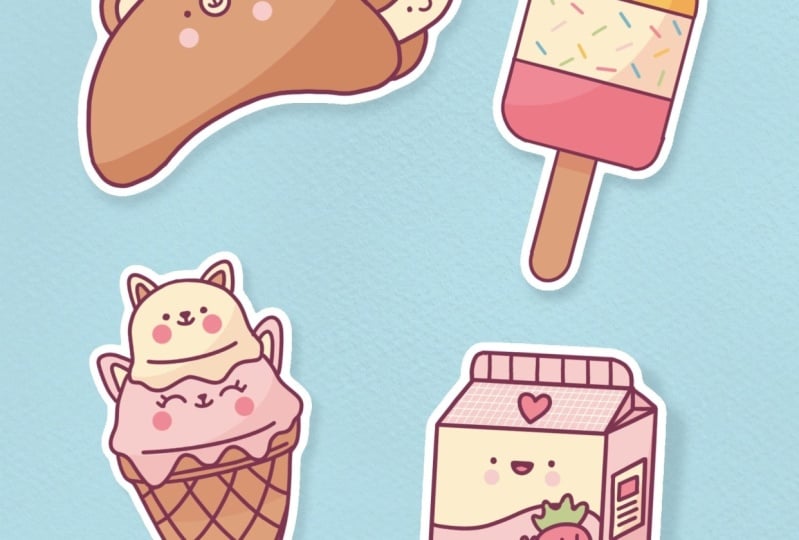
first illustration. And our first
illustration will be a very cute bear
sandwich cookie. Before starting, we will
need to select a brush and we will need to select a color for our sketching part. So let's start with a brush. We will go to the Brush Library, will go to this cation folder, and we will select
procreate pencil. If you want to select any other
brush for sketching part, you are welcome to do it. Now when we have the brush, Let's get back to our
color palettes and we will select the color
within the lines. And when all the
preparations are done, we are ready to move on and we are ready to create
our first shape. Our first shape will be a
very simple guiding line, which will have a concave shape. Let's zoom in our canvas and let's try to
create the shape. When you have
something like that, we will need to find a
center of the shape, but you don't really
need to be very precise. You can vary approximately, go and put a dot in the center. So when you have it, we will need to create
a vertical line going from this dot, and we will put one
more dot over that. So part of this slide, now when we have this
scheme like that, we will need to create
more elements that will further create our
shape for the cookies. So what we're gonna be doing, we will go to this
side and we will create two tilted ellipses. One ellipse on one side. And we will need to connect these dots that
we have answered, this line that we
created before, and also this vertical line. So let's go and connect
them with an ellipse. You can hold the Apple
Pencil at the ends of the line to make the shape that you are creating
a little bit better. And also you can
adjust the size of your elements by moving your Apple pencil
from side to side. If you need to
adjust it even more, you can unfold your Apple pencil and go to Edit
shape over the top. So for example, let's make this shape a little
bit smaller by dragging these candle on the
boards and a little bit up. Now when we have
that and when we're satisfied with these
little thing like SAP on the screen with one of our fingers to get
away from these modes. And when we have
our first ellipse, we are ready to move
on to the right and we are ready to
recreate on the right. This time it will be
tilted to the left. Let's go and try to do that. Hold your Apple pencil at the end of the line,
adjust your shape, adjust the size if
you need to adjust it even more and go to Edit
shape, for example, make it a little bit
bigger and try to connect these two ellipses
right in the center. So when you have
something like that, Let's tap on the screen and we will need to connect
these shapes together. So firstly, let's
go over the top. We will create a curve that will connect these two
ellipses together. You can repeat the
lines that you have, or you can do a little bit above them and create a better curve. Also, don't forget
that you can hold your Apple pencil at the ends of the line to create
a better shape. And if you need to
adjust it even more, go to Edit shape or the top. Now a jazz the lines
to your liking. And when you're satisfied, lead just tap on the screen
with one of our fingers. When we have this
first line on the top, Let's go to the
bottom and we will connect the shapes
together as well. So we will be repeating the line that we have for our guidance. We are trying to make
everything very cute. So try not to have
very straight corners. All the lines that you
are connecting with, try to make them soft. Now when we have this
shape like that, when everything is connected, we can grab an
eraser tool and we can erase every line
that we don't need. And the only lines
that we need is this little outline
of the whole shape. So let's go and grab
our eraser tool. And very quickly we will erase everything that
we don't need it. Now we have the base and as we are creating some kind
of a sandwich cookie, we will need the second cookie
a little bit on this side. So we will need to
create a duplicate of this shape and tweaking do
it by going to our layers. And we will slide this
layer from right to left. You can select Duplicate. Now we have two shapes
on different layers, and we will go and
select one of them. And then we will go to our top-left corner and
we will select arrow key. Now, you can see a little bounding box and we will need to use
uniform methods. So when you did it, lead, just drag this shape a
little bit to the right. If you want, you can make
it a little bit smaller. So to make it smaller, you need to drag one
of these handles up or down depending
on the corner. So try to do that. And when you are satisfied, Let's deselect everything by heating this arrow
key one more time. We will need only
the shape here, so everything else we can erase. Let's grab our eraser tool
and let's get rid of it. We have this shape like that. We will need to go to our layers and we will need to
combine these two layers together because we want everything that belongs to
the sketch on one layer. So to merge the shapes, we will need to go to the
top layer and we will need to tap on it and
enter this layer. We will need to
select Merge Down. Now everything is on one layer, and that means that
we are ready to move on and add more details. So firstly, let's
create some face. Firstly, let's create the ears. And to do so, we
will need to find a center of this piece. So we will go to the approximate center with one horizontal line
and with one vertigo. Let's start from
the vertical one. Now when you have this line, let's create a horizontal line. When you have these two lines, we will need to go to
the middle part and we will need to create the
diagonal lines like that. So we are remaining
45-degree angle, so we have the first
one and we will need to repeat it
on the other side. Let's try to do that. Now when we have these lines, we will go over
this so parts and we will try to create
the shape like that. It won't be as simple half
of this circle as always, you can hold your Apple
pencil at the ends of the line to snap it
to a perfect shape. If you want to adjust it, go to Edit shape over the top. You can make it bigger, you can position it differently
and when you have it, we will need to go over the right side and we will
try to repeat this shape. And this time we will
go to this shape. We are not going into
the bottom part. We are going right
between these two shapes. So let's go and try to do that. As always, hold
your Apple pencil, adjust your shade
by going to edit the shape and when
you are satisfied, Let's move on to add the
inner part of the ears. So for the inner parts, we will just repeat the same shape that we
have for the main ear, but we are going
inside the shape. You can vary the size if
you need to adjust it, go to Edit Shape and repeated
on the other side as well. Now we can grab an eraser tool and erase all the lines
that we don't need. And when we have the ears, Let's move on to adding some ice and some
facial features. So we already have these
cross going through our shape and we will go
just a little bit above it. And we will start by adding
the result for the eye. So for example, let's
go to the left side. We will put the dots and then we will try to repeat it
on the other side. So we will need to put it on the same line and we will
need to remain this size and the distance between this and this line that is
going through the center. When you have to do
it for your eyes, we are ready to
create some snouts. We will go right between the eyes and we will
create a circle. Hold your Apple pencil
at the end of the line, and you will snap
it to an ellipse. If you tap on your screen and if you hold one of
your fingers there, you will snap it to a
perfectly round circle. Now you can play around
with the position. So you can go to Edit
shape, make it smaller, make it bigger, puts it right in the middle between the eyes. And when you are
done, Let's tap on the screen with one
of our fingers. Now we can erase this line
that we have right here, and we will need to put
a little nose and mouth. Let's go and start
from the nodes. Go through the center of these little elements and
create a line like that, and create a little triangle
to make it even cuter. You can go above the eyes when
you have this little nose. Let's create a vertical
line like that. And we will create
a little mouth by creating just a
half of the circle. As always, you can hold your Apple pencil to
create a better shape. Now when we have these main shapes for
our facial features, Let's go under our eyes and we will create two
circles for the cheeks. If you see that
something isn't right. So maybe some elements
are not on one line. You can do the following. You can go to this S ribbon
icon on the top left, and you can use the
free hands methods with a freehand method, you can select the area
that you want to change. So go arounds, lipids
around, close the shape. You will have only
the area that you want to select, select it. And when you have
it, you will go to this arrow key on the top-left. You will use uniform
method and you will just drag this shape that you selected to the place that it needs to be when
you're satisfied. Let's deselect everything
by going through this S ribbon shape
one more time. And now we have a
very cute face. And let's add our final elements here for this gauge part, we will go to this part. Between these two shapes, we will create a
little paper Libo. So this will be a
little fortune cookie. We will go and firstly, we will create a line like that. So now we will go underneath it and we will try
to recreate it, and we will go and connect
them with a straight line. Now you can grab an eraser tool and erase the lines
that you don't need. And if you want, you can add a little face to this label to. So for example, let's
go and create two dots for the eyes and Alito
mouth like that. And now we are ready to move
on to our aligning part. So see you in the next chapter.
3. Bear Sandwich: Lines: Before starting an
airline in part, Let's do a few preparations. And the first thing that
we will do is change in the position of our
first illustration. Today we are having four
pictures on one Canvas. And that means that we will need to have some
place for that. And it's always good to make
some adjustments such as scaling or rotating and finding the different placements on
the layer with the sketch. Because every time we are
distorted in our picture, the quality of it getting worse. So once this layer,
when it's selected, let's make sure that it is
selected in the layers panel. We are going to this
arrow key on art. So plants, we are having a bounding box and we are
using uniform method. So to make your
illustration bigger, you will need to drag one of the corners to rotate
your illustration, you will need to go to this
green node or the top. You need to hold it and you need to rotate your Apple pencil. So find the position
that you like. Drag it a little
bit to the side. Think strategically,
we will need to have some space for our
other illustrations. And when you are satisfied
with what you have right now, let's deselect
everything and we will tap on this Arrow
key one more time. Now when we have prepared
our illustration, we will need to go
and change the brush. So we are going to
the Brush Library and we are going to the
calligraphy folder, the calligraphy folder, we
are choosing mono line brush. We are using the same color
as we used for our sketch. So we won't change it, but we will need to
go to our layers and we will need to
create one more layer. So we will need to
tap on the plus icon. And while we're still here, Let's change the opacity level of our layer with the sketch. Now, it is very bold and we don't really want
it to bother us, so we can make it a
little bit more pale. So let's go to this
layer that we have for our sketch and we will
tap on this icon. You will see that you
have the opacity slider. And if you just grab it
and drag it to the left, you will see that you still see what's happening
onto your canvas, but it's not that disturb
it when you did it. Let's get back to our new layer and we are going to be doing and repeating the lines that we already have on to our sketch. And it doesn't mean that
you will need to go and repeat the lines with a
100 per cent of similarity. Not at all. You can
change the lines if you think that something
works better right now, or you can repeat
them as they are on your sketch is up to you how
we are going to be doing it. We will go and our main goal for these concrete part is to
create the glow slides. So every element
that you have here, it should be closed. So for example, if
you are creating the lines for the
body of this bear, you will need to
make this close. We can go with our
lines manually, try to create the lines like we have on our layer
with the sketch. So holding our Apple pencil
at the end of the line, the same way as we
created on this gauge, making them in that way. Or we can make it
even easier for us. And we can go to
our brush library, to this brush that we
are using right now. So it is mono line brush. We can tap on it and we can
get in the brush studio. Into the brush studio, we can go to the
stabilization folder and we can change the
amount of streamline. For example, let's
grab it and let's move it to the right here
on the drawing pad, you can check out
how it will work. You can see that this line is getting a little
bit more smoother, but it is quite slopes. So you are losing a bit
of control over it. But in the end, it is making your lines a
little bit smoother. So it's up to you what kind of line making you are
going to be using. Ledgers go to our canvas and let's try to create
closed shapes. Also play with the
size of your brush. You might end up
with a thick lines. Or if you want to
make them thin, it's again up to you. When you have created
the first shape, we can go to our layers and we can quickly
just for a second, hide our layer with the sketch. So that way we can check out whether everything
is closed and we can check out the places that we can fix with
the eraser tool. So for example,
here we can go and grab our eraser and make
this line smoother. Now, very quickly, let's go over the whole shape and adjust
it with an eraser tool. Now let's get back our
layer with the sketch. So go into the Layers
and tapping on this checkbox and
continuing ed in the lats. As always, if you need to
adjust the shape even more, you can go to Edit shape
over the top and play with the handoffs when we
are done with the base, let's one more time, go to
the layers and hide the layer with our sketch to check out if everything is looking nice. If we need to
adjust some places, Let's do this with
an eraser tool. Let's get back earlier with this sketch and let's continue adding the details when we
have the main facial features, Let's move on to our
Alito paper sack and we will add the
face here as well. Start from the eyes, put the dots, and then
let's create the mouth. For the mouth, we
will go right between the eyes and we will create
a V-shape like that. You can adjust the shape. You can hold your Apple pencil
at the ends of the line. You can go to Edit
shape over the top and play with these little
handles here as well. Find what works for you, deselect it when you are done
and for the cheeks, lead, just leave it as it is
right now because later on weekend puts the color
right onto these places. One more time. Let's hide the layer
with our sketch. Let's check out whether
everything is looking okay. And if it is, we will see each other
in the next chapter where we are going to be
aiding the basic colors.
4. Bear Sandwich: Coloring: We can add the colors
in different ways. The first one very
obvious is to go manually and tricolor the places that
we would like to recolor. But that is very time-consuming and we don't really
want to do that. The second option is to go to this layer that we already
have for airlines. Go to the pallets,
select the color. For example, this time
it will be Brown's. Go to this icon that will
have on the top right and drag and drop the color to the needed area that is working. But it's not very
useful because what if we would like to change the
color of the lines later on? Or what if we would
like to change the color of our beer later on? It won't be possible to do separately because everything
that will be happening in, onto one layer, and it's
not what we want to do. We would want our current
be separate from the lines. So that means that we will need to create a
different layer. So let's go to our layers
and we will need to put the layer right between the two layers that
we already have. Let's go to our layer
with the sketch, and let's tap on the plus icon. Now, if we try to
do the same thing that we did before on the
layer with our lines. So go into this top right corner and dragging and
dropping the color. Nothing good will happen because everything that we have onto this layer
will be recolored. It's not what we need. We will need to use some trick. So we are getting
back to our layers. We are going back
to our layer with the lines tapping on it
and selecting a reference. Now, if we get back to our new layer that we
created for the coloring, and if we try to do the
same thing as before, so go into the top-right corner and dragging and
dropping the color, you will see a
miracle because now it's working and it is
on a separate layer. You can check it out
by going to the layers and hide in your
layer with the lines. You can see it's on
a different layer. So that easily by
using this method, we will go over all the places
and we will recolor them. So with that color, Let's go to our bottom ban and we will recolor
these places. If you have some
minor places that this method is not working for, you can go manually with
your brush and recolor them. Also, we will put
the same color to the outer parts of our ears. And then we will go back to our color palettes and we will select the color
with the name cream, and we'll pull this color
to the rest of the areas. So inner parts of the ears
withheld sac and the snapped. Now we still remember that on
the layer with the sketch, we had some outlines
for the cheeks. So let's go and check
out where they were. If we go back to our layers and unhide the layer with our
sketch, nothing good again, won't happen because earlier
with the coloring is overlapping our layer with the sketch and we don't see
what's happening there. So we will need to put this
layer with the sketch on top. Let's select it first, and then we will hold it
and we will drag it up. Now we have what we need, but we will need to get back to earlier
with the coloring. So select it, go back to the palettes and select the
color with the name pinks. Now let's increase the size of the brush and let's put
this little cheeks. Now let's get back
to our layers and we will hide our layer
with the sketch. Everything is
looking quite nice. And the very last
thing that we will add is gonna be a little shadow, and we will be adding it
on a different layer. So going back to our layers, onto this layer which
is now selected, we are tapping plus icon
to create a new layer. And this layer we will need
to set as a clipping mask. To do so, we will need
to tap on it and we will need to select Clipping
Mask from the list. So the clipping mask
works in that way. Everything that you are
creating onto this layer, which is clipping mask, will be attached
to a previous one. So to demonstrate to
you how it works, I will go over the places right here and you can see that
I am creating the lines, but I'm not going
beyond the frames. That is how that
clipping mask works. And also for this layer, we will need to change
the blending modes. Blending modes are
different ways that your LEA is going to
interact with each other. They are adding different
visual effects for the shadow, we are going to be using
multiply blending modes. To go into this
list of the modes, we will need to tap on the icon. Here we will select
Multiply Blend Modes. Now, as for the opacity level, we will set it as 40 per cent. You can do it manually by dragging this little
slider to the left. Or you can write down the amount here near the percentage. Now let's get back to
our palettes and we will select the same color as
we have for our bear. So brownouts. And we will go over one of the sides and we will
create a little shadow. Just create the curve
and then manually go and recolor the other places. To be honest, we
can just recover the whole band that
we have on the back. Also, we can add a little
shadow onto our little sack, but we will need to
go to our palettes and we will need to
select a different color. So this time it will be cream. Let's decrease the size
of our brush and we will create a little curve
for the shadow here. And then manually we will
go entry color this area, and we are done with
our first illustration. But before moving on, we will go to our layers
and we will select each layer that belongs
to these pictures. So you can see that one layer is already selected
because it is blue. And we will need to
go to other layers, and we will need to swipe
it from left to right. Now, two layers are selected, and we will do this same
thing with the remaining two. Now when all the
layers are selected, when I go into the top-right
and we are tapping group. Now, if we go to this V icon near the
chatbox and tap on it, we will collapse this group and also we can just
go and rename it. Let's tap on the
group and choose Rename for that illustration. Let's go with a name,
bear sandwich cookie. And now we can move
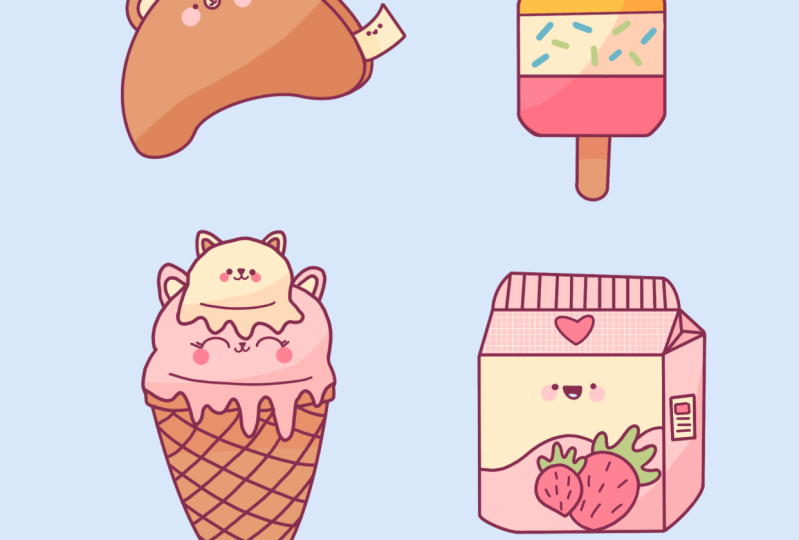
on to the next part where we are going to be
creating a little popsicle.
5. Chicken Popsicle: Sketch: Let's start our
second illustration from some preparations. So the first thing
that we will do is go into the brush library, go into the Sketching folder and selecting
Procreate band saw. When we did that, we
are getting back to our color palettes and we are selecting the color
with the name lines. Now when this is done, we are going back to our
layers and we are tapping on the plus icon to create a new layer for our
sketching parts. Now when every
preparation is done, we are ready to
zoom in our Canvas. We will start very simply
by creating a rectangle. So what we're gonna be doing, we will go to our Canvas and without an holding
our Apple pencil, we will create a shape
of the rectangle. So let's go and do that
at the end of the line. Hold your Apple pencil, and then we will go over
that soap to edit shape. Here we will need to
select a rectangle if you would like to adjust your
shape in any direction, you are welcome to
do it if you are satisfied with what
you have right now, let's just step on the screen
with one of our fingers. And what we will need
to do right now, we will need to go
over the top and we will need to create half
of the circle there. But we will start by
creating a full circle. And what we need to remember
that we will need to combine these two corners with this new shape that we
will put on the top. So alleges go very easily
and try to do that. Same thing. Hold your Apple pencil at the end of the line to
snap it to an ellipse and then hold one
of your fingers on the screen to snap
it to a circle. Now, we will go over that, so up to Edit Shape. And we will move this
shape a little bit down until we have 1.5 of this circle on top and one inside this little thing
that we have on the bottom. If you need to
adjust the corners and adjust the size
of your Arabs, You are welcome to do it. If you are satisfied with
what you have right now, just tap on the screen
with one of our fingers. And now we are almost
done with this shape. But we will need to go over these two corners and we
will need to solve them. So instead of these
very straight corners, we will put the curves. So let's firstly go over the left and we will
create a curve there. Now when we have one curve, Let's move on over
there right side, and we will try to recreate the same curve that
we have on the left. Now we have that so part
and that means that we are ready to move on and we
are ready to add a stick. But before starting,
we will need to find an approximate
center of our shape. Let's go and put the dots. When we have it, we will go
and we will create a line that will go through the center of the shape from the top, just creating a vertical
line like that. When you have it, we will go to the
bottom of this line and we will create a
lead, so an ellipse. So let's just go and do that. Hold your Apple pencil, hold one of your fingers
on the screen to snap to a perfectly
round circle. And if it's not in a
center on this line, we will go over the top to Edit Shape and we will move it. So this line that is
going through the center, is going through the center
of this little shape as well. When we have it, We are
tapping on our screen with one of our fingers to get
away from this mode. And we will need to
create one more sheep. This time, it will be
very elongated rectangle. Let's go here and let's
create this rectangle. So the same way as before, we are creating it without
on holding our Apple pencil, try to combine the corners
and at the end of the line, hold your Apple pencil to
snap it to a better shape. If it's another rectangle, you can go over the top to Edit Shape and select rectangle here if you want to adjust
it even more, go for it. Now when you're satisfied, Let's tap on the
screen with one of our fingers and we have the
whole shape that we need. So now we can go and grab an eraser tool and erase every
line that we don't need. Lead us very quickly, go and do that. We can leave these two lines and also we can do and create one more horizontal line over
that 1 third on the bottom. So let's just go and do that. Let's grab our brush and let's go and create
the line here. Hold your Apple pencil to
create a straight line. And the last thing that
we will do here is going over the top
part to this Leto, half of the circle. And here we will create a face. So we already have this line that is going
through the center. And that means that we are ready to start creating our first i. So let just go and put the dots. When you have the first dots, Let's move on to the
rights and we will try to recreate the
same dot there. We are trying to put it at the same line and
we are trying to remain the size and the distance between the
eye and this middle line. So let's just go and do that. Now when we have that, let's go right
between the eyes and we will create the
line like that. When we have the line, Let's move on to the bottom and we will create
half of the circle. Hold your Apple
pencil if you like, if you want to go to
Edit shape over the top and play little bit
with these handles. You can leave it as
it is right now. So it will be just
a very Smiley face. Or you can create a
little chicken here. So to create a chicken, you can go to the
top and you can create one more line like that. As always, go to Edit
Shape over-the-top. Play little bit with this little thing
that you have here. And when you're satisfied, ledger step on our screen
with one of our fingers. And when they have that, Let's go below our
eyes and we will create two circles
for our cheeks. And we are almost
done with our sketch. The very last thing that
we will add here will be some sprinkles
over this area. So very easily we will go and randomly create some
lines like that, try not to overdo them. And now our sketches
finally, Dan, so that means that
we will meet in the next chapter
where we're going to be creating the clean lines.
6. Chicken Popsicle: Lines: As always, we are starting a new part from
some preparations. The first thing that
we will do is changing the placement of our elements. So let's go to this heirarchy on our left and we will
use uniform method. We can make this shape
a little bit smaller. We can put it on a
different place. It's all up to you. We just need to
remember that we have two more illustrations and we will need to have
some room for them. So for example, let's
make this shape a little bit smaller
and let's put it up. When you did it, We are
ready to deselect everything by going to this arrow
key over our left, tap on it and we
are ready to go. So what we need to do now, we will need to
change the brush. We are going to
the brush library. I go in through the
calligraphy folder and we are choosing
mono line brush. And we will go to the layers and we will
create one more layer. Let's tap on the plus icon. Now we will need to change the opacity level of our
layer with the sketch. So let's get back to our
layer with the sketch. Let's go to this
icon and we will drag our opacity
slider to the left. Now when we are ready, we are getting back
to our new layer. We're keeping the same
color and we are going over our shapes that we have on this gauge and we are
trying to recreate that. Again, reminding you
that you are not supposed to create them
with a 100% of similarity. If you want to do
that, go for it. If you don't want,
don't go for it. What do we need to do? Our main goal here is to
create closed lights. And one more time, I will remind you how you
can make these slides. You can go the same way as before by going creating a line, holding your Apple pencil, creating the better shape, go into Edit shape over
the top if you need it, or you can go to
your brush studio. So go into the brush library. It's happened on the
mono line brush, go into the stabilization and increasing the amount
of streamline. So it's up to you what
way you will prefer. You can combine them
together if you like. All we need to do is to
create closed shapes. So very quickly, let
us go and do that. Also for straight lines, you can use one trick. We will go to this wrench icon and we will go to the Canvas. Here we will select
drawing guides. So when you have
this little grid, we will go over this
edit drawing guide. We will choose two degrees and we will choose assisted draw it. When we did it, we
are hitting done. You can see on the layers
that this layer that you are creating lines on
now called assisted. So that means that if we
go and create our lines, they will go just on these lines that we
have on the grid. So let's just try to do that. You can see very easily
without any effort, there are the straight lines. So let just go and create all the straight
lines in that way. To get away from this mode, we will one more
time needs to go to this wrench icon and we will need to toggle Drawing Guide. And the second thing
that we will need to do is to go to the layers, tap on this assisted layer
and select Drawing Assist. Now we can freely continue
adding our alliance. Let's leave the cheeks
onto this layer because we will go very easily and
add the cheeks later on, but we will go over our sprinkles and we
will add them here. For this sprinkles,
you can go and increase the size of your brush. When you are done
with the main parts, Let's go to our layers and we will hide the layer
with the sketch. We will check out
whether everything is closed and whether
everything is looking okay. And then we can move on
to the next chapter. So let's just very
quickly go over all the shapes that we have here and we will inspect them. If you want to adjust the
placement of the face, for example, you can
go to this S ribbon. You can select freehand method, select this area,
loop it around, and then go to this
arrow key on the top-left and move it until you're satisfied
with the results. Let's deselect
everything by heating this S ribbon icon
one more time. And when we are satisfied, we are done with aligning parts. In the next chapter, we
will be adding colors.
7. Chicken Popsicle: Coloring: Okay, Let's start
our coloring part by creating a new layer. We will go to the
layers and we will go to our layer with the sketch. Let's select it. And here we will tap on the
plus icon because we will need this new layer to be right between the two layers
that we already have. When we have this new layer, we will need to prepare
our layer with the lines. So let's select it, Let's tap on it and we
will choose reference. Now when we did that, we will get back
to our new layer and what we're gonna be doing. We will be going to
our color palettes. We will be selecting
the colors and we will be dragging
and dropping them too. They needed places. The first color that we will
choose will be ice cream. Let's tap on it and let's drag and drop it
over the top part. Now, when we didn't that
we are getting back to our color palettes and we are selecting the next color
with the name Cream. These cream color we will
put to the middle parts. Now getting back to
our color palettes, selecting the colors strawberry, and we are dragging it to the bottom and also to the beak, also while we're still here and while we need
the needed color, we can put our cheeks. You can do it the same way
as we did with the bear. So you can go to the layers. You can select the
layer with your sketch. You can unhide it, put it over the top. But yeah, it's too
much things to do. And just go very easily
increase the size of our brush and just put the
cheeks over these parts. Let's go and do that. So now when we have the cheeks, the last thing that
we will need to recolor is gonna be this thick. So let's get back to
our color palettes. Let's select browns, and let's drag and drop this
color to this tick. Now we have all
the colors that we need and we are ready
to add a little shadow. The same thing as we did before. We will need to create
one more layer. Let's go to our layers and we will select this layer that
we have for the coloring. Here, we will tap
on the plus icon. Now we need to set this
layer as a clipping mask. So let's tap on it and
choose clipping mask. And also we will need to
change the blending modes. So let's tap on this icon and we will choose
multiply blending modes. As for the opacity
level, these sand, let's go with twenty-five
percent S for the coloring. Let's get back to
our color palettes and we will select
the color strawberry. We will go over one
of the sides and we will create
their first curve. So let's go and do that. You can hold your
Apple pencil at the end of the line to
create a better curve. Or if you want to
adjust it even more, go to Edit shape over the top, play little bit
with these handles and when you are satisfied, ledgers get back
to our canvas and manually recolor this
area for the shadow. Let's put a little shadow underneath our
Popsicle to this tick. So one more time, just go in there and creating it manually. And when we are done
with the shadow, the last thing that we
will do here is recoloring our sprinkles and we will
do it by using Alpha Lock. Alpha lock works pretty
similar to the clipping mask, but you are working not on a separate layer but
on the same one. So let just go to our
layers and we will go to this layer that
we have as a reference. So hourly it with the
lights, Let's tap on it. We can deselect
reference firstly, then type it one more time
and select Alpha Lock. Now, only the areas that
you have onto this layer, so only the lines
can be recolored. So we will go to
our color palettes. We will be selecting
different colors and we will be recoloring
our sprinkles, ledgers go and do that. We can start with any
color that we want. We can combine them together. It's up to you with what you come up with when you did it. We are done with our
second illustration. In the next chapter,
we will be creating a little strawberry milk pack.
8. Strawberry Milk Pack: Sketch: As always, let's start our next illustration
from some preparations. Firstly, it will go
to the Brush Library. We'll go through this
kitchen folder and we will select procreate pencil. When this is done, we go
into our palettes and we are selecting the color
with the name alliance. Now when this is done, we are going back
to our layers and we will need to clean
everything up here. So we will be selecting
all the layers that belong to our Popsicle and we will
be putting them into a group. You can see that the first
layer is already selected. And that means that we will
need to go underneath it and we will need to swipe the remaining leaves
from left to right. So let's go and try to do that. When you've selected
all the layers, we will go to the top right, and we will choose Group. Now we can collapse this group. I go into this V icon
near the checkbox. Let's tap on it. And the very last
thing that we will do here is renaming this group. So let's tap on it and
let's choose Rename. Let's name it popsicle. And now we are finally
ready to tap on the plus icon to create a new layer for our
sketch in parts. So when we did it, Let's
get back to our canvas. Let's zoom it in and we
will go to the bottom. And we will start very easily
by creating a rectangle. You can go and start by
creating a very small shape. Hold your Apple pencil
at the end of the line. Tap on your screen and
hold one of your fingers there and then adjust your
shape to your liking. Now, if it's not
working for you, you can go to Edit
shape over the top. You can select square here. You can adjust it in any way, make it smaller, make it bigger. It's all up to you. We will need to put it on
the bottom because we will have some stuff to
create on its own. And also we will need to have some space over the right part. So when you're
satisfied alleged, just tap on the screen
with one of our fingers and we are going to be
creating a 3D illustration. That means that some lines
will be in the perspective. We will firstly go to these two corners and
we will need to create two lines go into the right and they will be in
the perspective. So we will go to the top. Firstly, we will create
a line like that. Hold your Apple pencil at the end of the line to
create a better line. And when you have the first one, we will go to the bottom and we will try to recreate this line there so it won't be parallel and it will have the same angle. Let's go and try to do that. Now when you have two lines, Let's connect them with
the vertical ones. And when they have
something like that, we are ready to move on to the top part and we will
go to these two corners. We will create two
parallel tilted lines. So let's first, let's
start from the left and we will create
a line like that. Now we will move on
to the right and we will try to recreate
the same line there. Try to make them
parallel and try to remain the same distance
from the corner. Now when we have
something like that, we will go over these
little corner and we will try to
connect our lights. Here we will have a little
triangle and you can see that probably you will need to make this line that we created
before a little bit longer. Now we are ready to
go over here and we are ready to create a
straight horizontal line. So let's go and do that. We have connected these shapes, and now we will go over these two corners and we
will create an Allen gates. It's rectangle there. So let's go and do that. Just creating one line, vertical lines that go into the rides creates
in the same line. And then we will go and create one horizontal line to
connect them together. And now we are ready
to add some details. So firstly, we will
go to this triangle here and we will try
a middle part of it. So let just put a dot. When we have these dots, we will create three lines, go into all the
corners that we have here as we are creating a
very cute illustration. Let's soften our corners. So we will soften this corner. This corner ends these
two corners very easily. Let's just turn this
very straight corners into soft ones by creating some curves very easily lead to guilt
and try to do that. Now, we can leave it
as it is right now. Or we can grab an eraser tool and erase all the lines
that we don't need. It's up to you. Let's continue by
going to these sites. And we will create
a little tag here. So we will go and
we will start by creating two parallel
lines like that. Now, we will go over that
soap and over the bottom, and we will try to recreate
the lines like we have here. Remember that they
should be parallel if you need to adjust some
places, for example, to erase some lines, go for it, grab an eraser tool, and do what you need to do when you have
something like that. Let's create one more
little rectangle. Insert this shape. We will go and try to recreate the same shape
that we have here. So all the lines again will
be parallel to each other. Underneath this little thing, we will draw a few
lines like that. So now we have this little sack and let's move on
to our main parts. So here we will start by
creating a wavy line like that. Go to the bottom part and
create the shape like here. When we have this line, Let's move on to
adding this trobaritz. So firstly, we will go a little bit to this side because
it will be easier for us to do them here and then move them to
our actual package. So let's start by
creating a little circle. You can create a circle or
you can create an ellipse. It doesn't actually matter. Then we will go or the buzzer
and we will put a dot. We will need to create a very rounded shape
of the triangle. So we are connecting arrow shape that we
have on the top or an ellipse or a circle with this dough that we
have on the bottom. So let's go and try to do that. Soften this corner. And when you have these shape, we will go over the top
and we will add the stem. And very easily, we will just go and create the wavy
lines like that. Now when we have this shape, Let's grab our
eraser tool and we will erase everything
that we don't need. And when we did it,
we will go along the shape and we
will add some seats. So very easily, just grab your brush and create
a few lines like that. If you want to
adjust some places, you are welcome to do it. Now when we have our
first strawberry, let's create one more
copy and we can do it manually just by creating the
same shape all over again. Or we can create
an actual co-pay. So let's just do that. How am I going to be doing it? And we will go to our top-left and we will select
this S ribbon icon. Let's tap on it. Here we will choose
freehand methods and we will need to
select these shapes. So let us go and try to do that. Just little bits around until
you see only this shape. And we will need to go alone, our Canvas alone our
screen with three of our fingers from top to
the bottom, just slide down. You will invoke the new window that is called COBie and paste, and we will need to select Copy. Now with COVID this elements and now we need to paste
it one more time, going from top to the bottom
with three of our fingers. Now into this window we
are selecting paste. You will see that now we
are using this arrow key. We are using uniform method
and we are having a copy, so we can do whatever we
want with this new copy. We can make it smaller, we can arrange it differently. It's all up to you. So for example, let's
make it a little bit smaller and we will rotate it. Let's drag it to
our big strawberry. Let's arrange them
together in a nice way. When we are satisfied with it, Let's deselect everything
by heating our arrow key. Now, if we go to the layers, we will see that we
have this new shape for our small strawberry or
that soap on a new layer. And we don't really need it. We will need to combine
these two layers together. So let's just go to this. So player with the
name inserted image, we will tap on it and we
will choose merge down. And now everything that we
have here is on one layer. Now, we will need to put these two strawberries
on the R package. So again, the same
thing as before. We are going to the top-left, we are selecting
this S ribbon icon. We are using freehand method. We are selecting this shape. We are going to this
arrow key over that soap. Now we can zoom out our canvas. We can rotate this elements, we can make it smaller. We can do whatever we
want and we will need to put it here onto our package. So let's adjust it nicely, Let's arrange it nicely. And when we are satisfied
with the placements, we are going to the
top-left and we are tapping on this S ribbon icon. When you did that, if you want, you can grab an eraser tool and erase all the lines
that you don't need. Or if you are okay with a
little mass right here, we can continue by
creating a face. So let's grab our brush and
we will go over this part. And we will start very easily by creating two dots for the eyes. If it's easier for you, you can start by
creating a cross. So you will know where the center of these
little elements is. Or if you are feeling confident, just go boldly and manually
put the dots for the eyes. Let's start from the left, creative first dot, and then
we'll move on to the right. And we will try to
remain the same size, and we will try to put
it on the same line. Let's go and do that. When you have the ice sled
zoom in our Canvas and we will go and create a little
mouth right between the eyes. So firstly, we are
creating a line like that. Then we are creating half of
this circle underneath it. You can vary the size, you can vary the distance
between the eyes. It's all up to you if you
want to adjust some parts, for example, they are
not very centered. You can go to this
S ribbon icon, select the elements,
use freehand method. Then go to your arrow key and adjust the placement
when you are satisfied, just go back to
your S ribbon icon, tap on it one more time, and let's continue by
adding the cheeks. So we are going
underneath our eyes and we are adding two circles. Let's add a little
sound to our mouth. So just half of the circle here. And the very last thing
that we will add for this sketch be a little
hard on these parts. So let's just go and try to do that when we have the heart, let's add the last element
for our sketching part. And it's gonna be the lines here going through the whole
shape over this little part. Just vertical lines like that
going over the whole shape. Try to keep the distance
between the lines equal. And when you are done, we are done with our sketch. In the next part,
we are going to be creating the clean lines.
9. Strawberry Milk Pack: Lines: Let's start our
learning part from some preparations as always. So firstly, we will go
to the Brush Library, we will go to the
calligraphy folder and we will choose
monoline brush. We are keeping the same color, but we will need to
create one more layer. So let's go to our layers and
let's tap on the plus icon. Now, while we're still here, Let's go to our layer with the sketch and we will
change the opacity level. So go into this an icon and dragging the slider to the left. Now let's get back to our IMU layer and what
we're gonna be doing, we will be using
our drawing guides. So to create this
straight lines, that will be very helpful. Let's go to this wrench icon. Let's go to the canvas and
let's toggle drawing guide. Next we will go to Edit
Drawing Guide and we will toggle assisted draw
it when you did it, Let's just tap Done. And now we are going alone
all of our lines that are straight and we're recreating them by using this technique, tried to keep the same size of the brush that you
were using before. And let's just go over these
places and let's redo them. When you are done
with this task, we will need to get back
to this wrench icon and we will need to toggle
drawing guide one more time. And also we will need to go to our layers and
we will need to turn off assisted here of
our layer with our lines. So let's tap on it and let's
choose drawing assist. And now we can manually go over the rest of the
places and redo them. Remember that your main goal here is to create
the closed lines. When you did all the lines, Let's go to our layers and let's hide the layer
with the sketch. Let's check out
whether everything here is closed and needs. And let's grab an eraser
tool to fix some places. And when you are
done with the lines, Let's move on to our
color and parts.
10. Strawberry Milk Pack: Coloring: Let's start our coloring part
by preparing the layers. So we will go to the layers and we will need to
create one more layer and put it right between the two layers that
we already have. Let's go to our layer
with the sketch. We will select it, and here
we will tap on the plus icon. And now we have this
new layer right between the two layers. Now while we're still here, we are go into our
layer with the lines. We are tapping on it and we
are choosing a reference. When we did that, we
are getting back to our new layer and then we
go into our color palettes. We are starting with
the color pink. Let's select it.
Almost everything here will be recolored with
this color and it will be very time-consuming
for us to go to this top right corner
and dragging and dropping the color
to all these places. So we can use one
trick just once. We will go to our top-right
corner and we will drag and drop the color to this area
where we have the heart. So let us just try to do that. When you put the color, go to the top and select, continue feeling
with recoloring. Now you can see that you have a little handle
that you can move. So let's move it to
this right part. And now we can go over all the places that we need to recolor and just tap on them. Let's just tap on
all these places. And when we are ready, let's go to this icon
that is now selected over the top-left and
we will tap on it. So we have deselected
everything, and now we are ready to select a different color and
drag it to other places. So let's get back to
our color palettes and let's select the color
with the name cream. With this color, we will go
to this area where we have the face and also we will recolor this result
sac on the right. Now one more time, Let's get back to our
color palettes and we will select the color strawberry
with this color, we will recolor our bodies on the strawberries and also
their heart on the top. And the last thing that we
will recover with this color is going to be this little
thing on our attack. So let's put the color
here one more time, going back to our color palettes and selecting the color greens. And you probably know where we are going
to be putting it. So let's just go
to our stamps and let's recolor them for
this little mouth, we will get back to our
color palettes and we will select the same color that
we used for the lines. So it's going to be once. Let's drag this
color to this area. And also, we will go back to our color palettes and we will select the color strawberry, and we will add a little tongue into our mouth with this color. So let's just grab our brush. Let's go to this part
and let's add a ton. Now one more time, going back to our color palettes and selecting the color pinks, we will increase the
size of our brush and we will put
the cheeks again. You can go to your Layers. You can select your
layer with the sketch. You can unhide it, drag it to the top and put your cheeks there where
they are on the sketch. Or you can very boldly go to your layer with the
coloring and put these cheeks manually when
we have all the colors, that means that we are ready
to create a little shadow. So let's go to our layers
and we will create one more layer above our
layer with the coloring. So let's tap on the plus icon. We will need to send this
layer as a clipping mask. So let's tap on it and
select Clipping Mask. And also we will need to change the blending
mode of this layer. So let's go to this icon and we will select multiply
blending modes. As for the opacity level, we will choose 25 per cent. Now let's go back to our color palettes and let's select the colors drove rate. Now we will go over
one of the sides and we will create
a little curve. So let's firstly decrease
the size of our brush, and let's create our shadow. You can hold your
Apple pencil at the end of the line to
create a better curve. And you can go to
Edit shape over the top to create a nicer curve. So a jazz the shape
to your liking and then go away from this
mode by tapping on the screen with one of your fingers and now
increase the size of your brush and manually recolor these plays that is
supposed to be a shadow. If you want, you can go over this little triangle here and add the shadow here as well. And the very last thing
that we will add to our illustration is going to be some texture over these areas. So firstly, let's go to our layers and we will
create one more layer. For now. We won't set it as
a clipping mask. We also will go to
our color palettes and we will select
the color accents. Now, if you go to the
Project and Resources tab, you can download the brush that will help you to
create this texture. So it is a very
simple grid brush. And if you need to make this
cells a little bit smaller, we can tap on this brush. We can go into the
brush studio and we can go to the gray
here into the green, we have this slider is scale. And if we move it to this side, you will see that
you are changing the scale of your cells. So when you selected the
cell size that you like, we will hit done. Now with this new color, we will go over
these shape here. We will add some cells. You can go a little
bit beyond the frames. It's okay. Now you can see that these
cells are two straight and we will need to put them a little bit into the perspective, how we can do it. We will go to this
arrow key that we have over the top-left. We will tap on it and
we will go to distort. Now we will drag the corners
to this sides and we will create the nice shape that we will need for
these concrete parts. Follow the direction
of the lines. Adjust the size. If you need to adjust
everything that you need and when you are satisfied, Let's deselect everything by hitting our arrow
key one more time. Now we will need to get rid of all the lines
that we don't need. But firstly, let's
go to our layers and we will select this layer
that we have for the grid. We will tap on it and we
will choose clipping mask. Now let's grab the
eraser tool and let's erase all the cells
that we don't needs. We will need to put them
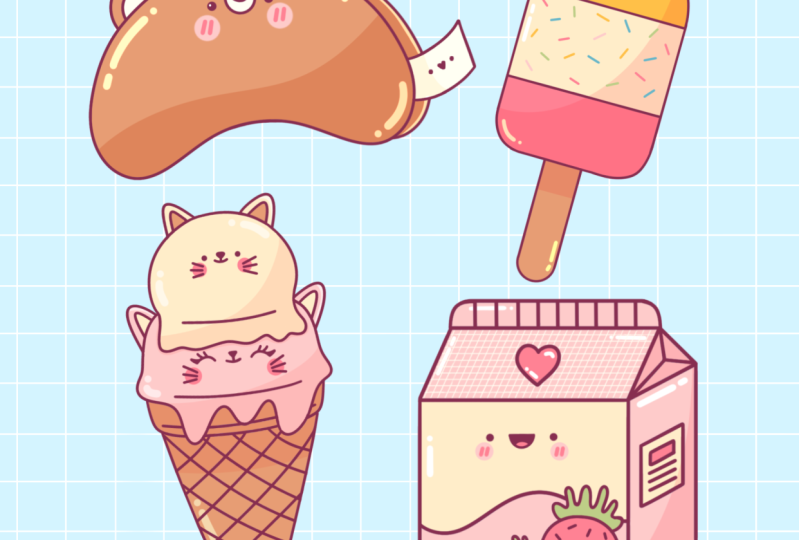
only onto the front parts. And when you did it, We are done with
our illustration. In the next part, we will be creating a very cute ice cream.
11. Kitty Ice Cream: Sketch: As always, we are starting our new illustration
from some preparations. So firstly, let's get
to our brush library. Let's go to the
sketch and folder and we will select
procreate pencil. When we did that, when I
go into our color palettes and we are selecting the
color with the name lights. When we did that, we are getting back
to our layers. And firstly, we will need to
clean everything up here. So we will be selecting
each fillet that belongs to our previous illustration and we will be putting them
into the group. So very easily, very quickly, let's just go and do that. When you've selected
all the layers, Let's go over the top-right
and we will hit Group. Now let's collapses, grew
by heating this V icon. And also let's
rename this group. So let's tap on it and let's
choose Rename for the group. Let's go with and the milk pack. And now we are finally ready
to hit this Plus button to create a new layer for our sketch in parts
and to unmediated. Let's get back to our canvas. Let's zoom it in and we will start by creating a
little triangles. So very easily without
encoding or Apple pencil, we will go and create this triangular shape
at the end of the line. Hold your Apple pencil, and then we will go to
Edit shape over the top. Here we will select triangle. Now we can play little
bits around with it, position with the size of it, with everything that we want. But for now, let's just leave
it as something simple, like what you see on your
screen when you are done alleged desktop on the screen
with one of our fingers. Now, as we are creating a
very cute illustration, we want everything to be
as round as possible. So we will need to go over
these two sides and we will need to turn these
straight lines into the curves. Firstly, let's go over the labs and we will
try to do that. When you've reached this corner, Let's turn it into
something soft too. So instead of this trait one, let's create a curve. When you have the curve, Let's move on to the right. And we will try to recreate the curve that we
have on the left. And when we have the
shape like that, we will go over these
two parts and we will firstly create
a concave curve. So instead of that
straight line, we will create a curve. Let's go and do that
with that curve. We are going a little bit beyond the frames of the shape
that we have on the bottom. And when we have
this first curve, we will need to go a little bit up and we will need to add the thickness bike recreating the same line that we
have on the bottom. So let's go and do that. Now we will need to
connect this shape. So we will stop a little
bit aside from these shape. We will create the same
line that we have here, so we will need to
follow these directions. Let's soften the corners. And when we have
this connection, Let's move on to the right and we will try to do
the same thing. And when we have
the whole shape, Let's grab an eraser
tool and we will erase all the lines
that we don't meet. So when we've cleaned
everything up, we will go and add some details. So firstly, let's go to this shade that we
have over the top. We will go to the bottom
of it and we will recreate the same curve that we have
for the shape with that line, we are just adding a
little bit of thickness. When we have it, we will
go over the board and we will be recreating the
texture of the wafer. So firstly, let's
rotate our canvas like that and we will go with
the curves like that. You can vary the distance between the lines.
It's up to you. Just go over the whole shape and create the lines like that. Try to make them a little bit, curve it when you
finish this task, let's rotate our canvas in another direction and we will try to recreate
the same pattern, but now going into another
direction, one more time, going over the whole shape and creating these
little curves. And when you are done, we are ready to
move on and we are ready to start making
our ice cream. Firstly, we will
go to our layers and we will create
one more layer above. We will go over the
top part of our wafer, of our cone and we will create
a circle or an ellipse. It's up to you. We will need to make it
the size of our cone. Let's go and try to do that. As always, hold your
Apple pencil at the end of the line and then go to Edit shape or that soap. Let's adjust its size and
placement and everything. When you have
something like that, Let's tap on our screen
with one of our fingers. And now we will go over
these two sides and we will need to connect our shape on the top with iris
shape on the bottom. We will be doing it by
creating a little roles. So let me show you what
we're gonna be doing. Firstly, let's go to the
left and we will go to our top shape and we will create a little
connection like that. When we have it on the left. Let's move on to the right and we will do this same thing. And when we have
these connections, let's go over the bottom part and we will create
some melt in parts. So very easily, you can, again vary the size
of these shapes. You can vary the
amount it's up to. You. Just go and create
something like that. Connect the shapes. And let's grab an eraser tool and erase everything
that we don't need. Also to make it easier
for us to erase all the lines that we don't
need on the previous layer. We can go to it without
merging these two layers and just erasing all the lines
that we don't need onset. So let's repeat the same step. We will go to this
layer and we will erase all the lines
that we don't need. As for this line that we
have as a top of our cone, we can go and erase the parts only on this site that we'll be showing that this shape on the top is not just
sitting on here, it's just some kind of melting. So when we have
something like that, Let's go to our layers and let's merge these
two layers together. So we are doing to the top one, we are tapping on it and we
are choosing Merge Down. And while we are still here, we will tap on the plus icon and we will create
one more layer. And again, we will create a little circle or an
ellipse over the top. It will be a little bit
smaller than the previous one. Let's go and try to do that. Hold your Apple pencil. Go to edit the shape
if you need to, and let just put it a
little bit down and also try to put it in the center when you have
something like that, Let's create the mountain parts. So firstly, we will go
over these two sides and we will try to create this
mountain parts one more time. The same thing as we did before. Just go in and creating the mountain parts
is again, up to you. What shape you
will come up with, and how many on this mountain parts
you will come up with. So let's just go and do that. Now when we have this shape
for the mountain part, Let's grab our eraser
tool and erase all the lines that we
don't need. One more time. We can get to the
previous layer and we can erase these
lines over the top. Now we can get
back to our layers and we can merge these
two layers together. So let's go over the top one. Let's tap on it and
let's choose Merge Down. And also we will go
over our top elements and we will try to recreate the line that we
have right here. So very easily Let's try
to find the connection between these two shapes and we will create
a curve like that. Now we are done with our bees, but it looks kind of basic. So let's turn this little
scoops into some key tips. So firstly, we will
go and we will find the centers of our shapes. Let's go over the
top and we will create one vertical
line like that. And then we will create
one horizontal line. The same thing we will
do over the board sound. Now when we have these crosses, we will go over the
top and we will create two lines
going up like that. So they are approximately
45 degrees. On the top of this lines, we will go over
and we will create some ears so very easily, they are the shapes of the
very rounded triangles. So when I have one on the left, Let's move on to the rights and we will try to
repeat this shape. Let's add inner parts by repeating the main
shape for our boards, MQTT ledgers go over these two sides and here
we will add the ears. So again, repeating
the same shapes that we have on the top. When you have the main shapes go inside and create
the inner parts. And now let's finish up
by aids in their faces. So firstly, we will go
over our top Katie and we will start by putting
the dots for the eyes. We will give it a little
bit above our middle parts. If it's easier for you, you can grab an eraser
tool and erase this line that you have here when
you have the first dots. Let's move on to the
right and we will try to recreate it
on then other sites. Try to keep the distance between the eyes and
this line that we have going through
the middle part equal when you have the eyes, Let's move on and we will
add the nose and the mouth. For example, ledgers grab our eraser tool and we
will clean up this part. We will go just a little
bit above our eyes line and we will create
a little triangle when you have this
shape for the nose, let's create a vertical
line like that. And also we will
create a little mouth, so it will be just
half of the circle. And now let's add the cheek. So we are going under our eyes and we are putting
into an ellipsis. Let's clean everything
up by grabbing our eraser tool and erase all the lines
that we don't neat. And now let's move on to the bottom and we will
add another face. Here. On the contrary, we will get
onto this line that we have horizontally and we will
add two lines like that. When we have the first
curve on the left, we will get all
the rights and we will try to recreate it. If you want. You can go over this side of your eye and you can
add a few eyelashes. And when we have that, let's add the same nose and mouth that we
have over the top. Let's clean up our shapes
and let's create the cheeks. So going underneath our eyes and creates into an ellipsis. And we are done with our sketch. In the next part,
we are going to be aiding the clean lines.
12. Kitty Ice Cream: Lines: Let's start our learning
powered by changing the brush. I go into the brush library, I go into the
calligraphy folder and we are choosing mono line brush. When we did that, when I go
into our layers and we are tapping on the plus icon
to create a new layer. Now while we're still here, let's get back to our
layer with the sketch. Let's go to this icon and let's
change the opacity level. When we did that, we
are getting back to our new layer and the
same thing as before. We are going alone our shapes and we are trying
to recreate that. As always, you don't need
to follow the path with a 100% of similarity of what you have onto your
layer with the sketch, you are free to change
anything that you want. All you need to do is to
create the close lines. So let's very quickly
go and do that. When you are done with
aiding the clean lines, Let's go to the layers and let's hide our layer with the sketch. Now we'll check out
whether everything here is looking clean, nice, and if everything is closed, so grab your eraser tool and adjust all the places
that you need to adjust. And when you are done, we are ready to move on
to our color and parts.
13. Kitty Ice Cream: Coloring: Let's start our color in part
by creating a new layer. I go into the layers were arguing right onto
our layer with the sketch where I selected it and we are heating plus icon. Now we have the
layer right between the two layers that
we already have. And now we need to go and prepare our layer
with the lines. Go in there,
selecting this layer, tapping on it, and
choosing reference. Now going back to our new
layer that we've created for our coloring and we're gonna be doing to
our color palettes. And we are going to be dragging
and dropping the colors. So firstly, let's start with the color with
the name cream. Let's select it and we will
drag it to our top kitty. Also, we will put this color inside the ears of our
acuity on the bottom. So let's go entry
color these places. Now let's go and grab the
color with the name pinks. And we will put it to
archae t on the bottom. And also let's recolor its ears. And the last color that
we are going to be using for our cone is
going to be brown. So let's select it and
let's recolor these cone. And also we will
put this same color inside the ears
of our top Katie. You can create just one
recoloring and then go to continue
feeling with recolor. Just drag your little slider to the area that you
would like to recolor. Then go over the other
places and just tap on them. When you are done the
recoloring with this option, Let's go to our
top-left and we will hit this icon that is selected. Now, if we have some minor places that we
will need to recolor menu, Let's go and do that. Now, let's get back to our
color palettes and we will select the color strawberry
with this color, we are going to be adding
cheeks if you need to go to your layers and if
you need to drag your layer with the
sketch and unhide it, you are welcome to do it. If you're feeling
very confident, Let's go and put these dots
for our cheeks manually. And now our basic coloring is Zan embed means that we are
ready to add a little shadow. So let's go to our layers
and we will create one more layer above
earlier with the coloring. Let's tap on the plus icon. We will need to save this
layer as a clipping mask. So let's tap on it and
let's select Clipping Mask. And also we will need to
change the blending mode. I go into this icon
and we are selecting a multiply blending
mode S for the opacity, we are keeping it
at 40 per cent. Now, let's go back
to our palettes and we will select the
color with the name pinks. And now we'll go
over one side and we are going to be recoloring
some of the parts. Firstly, let's go
over our top kitty. We will decrease the
size of our brush, and we will start by
creating a little curve. Hold your Apple pencil to
create a better curve. If you need go over
the top to Edit Shape and play with
these handles, find what works best for you
and when you're satisfied, ledgers go manually and recolor
the area on the bottom. We can go underneath
the shape and add a little shadow on our
kitty, which is pink. So we will just try to recreate the shape that we
have on our top. Now let's go to our bottom, Katie, and we will
do the same thing. So we are starting
from the curve. Hold your Apple pencil. Go to Edit Shape if you need to. If you are ready, let's go over the bottom and we will recolor these plates. Now let's go to our
cone and we will go under this little thing
that we have on the top. So we will create the
first curve like that. We will hold our Apple
pencil if we want, we can go to Edit
Shape and we will recolor the whole
shape right here. So let's just go
and try to do that. And we are done with
our last illustration. But before finishing
AP ledgers go to our layers and let's
clean everything up here. So we will select each
layer that belongs to this illustration and we
will put them in the group. Now let's collapse this group. Let's tap on it and
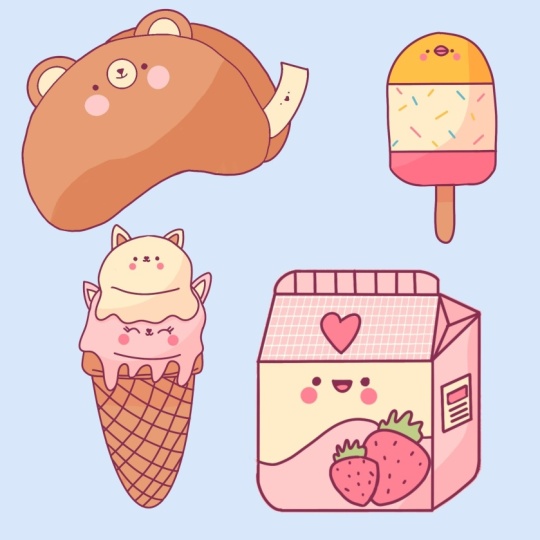
let's choose Rename. And let's name it Kitty
Cone. And that's it. Thank you for
watching this class. Leave a review if you
liked it and consider subscribing for more Kawhi
videos in the future.
 Uni Corn, ⭐Kawaii Art Enthusiast⭐