Transcripts
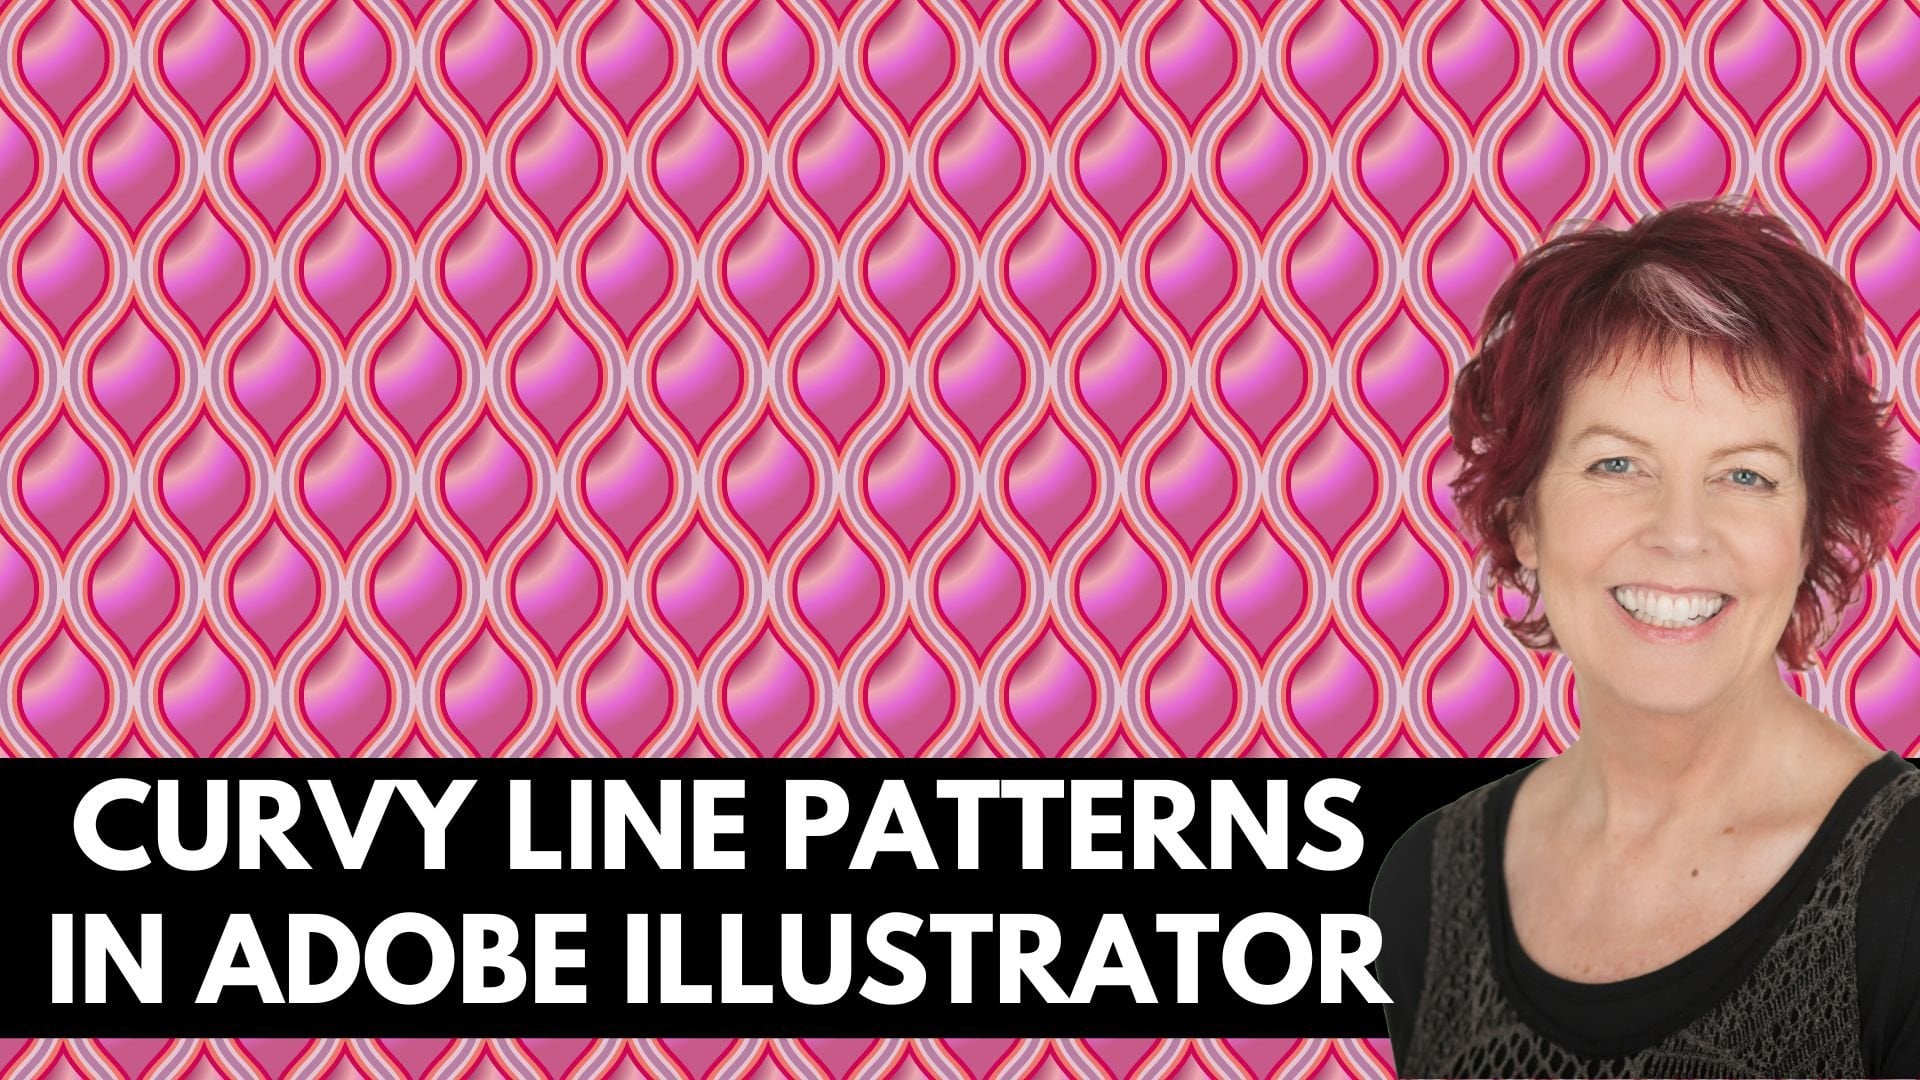
1. 4 handy Patterns in Adobe Illustrator Intro: Hello, I'm Helen Bradley. Welcome to this episode of Graphic Design for Lunch for Handy Patterns made in Adobe Illustrator. Today we're looking at creating patterns in Illustrator, and this is a companion class to the class I have on making just these exact same patterns in Photoshop. We're going to create a diagonal stripes pattern, a chevron pattern, multi-colored dots and plaid. Now as you're walking through these videos, you may see a prompt which lets you recommend this class to others. Please, if you're enjoying the class, give it a thumbs up. These recommendations help me get my classes in front of more people who just like you want to learn more about Illustrator. If you'd like to leave a comment, please do so. I read and respond to all of your comments, and I look at and respond to all of your class projects. If you're ready now, let's get started making patterns in Illustrator.
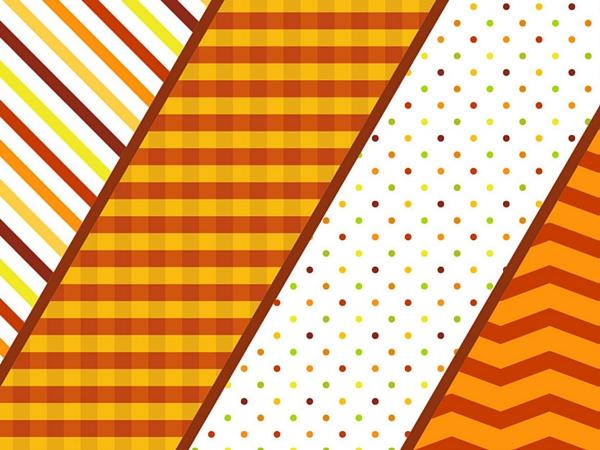
2. 4 patterns - Part 1 - diagonal lines: The first part, we're going to make an Illustrator is going to be diagonal lines. I'm going to choose "File", "New", and we're going to make a new document. It's 200 pixels by 200 pixels RGB color mode. I have align new objects to pixel grid disabled. That will just help me a little bit lining everything up if it's not checked, I'll click "Okay". Now, this is a fairly small document, but since we're talking vector patents, that doesn't matter because these can be scaled to any size. The process we're going to use here is going to be appropriate for any version of Illustrator so if you're still working with a really old version of Illustrator, you're going to be fine, as are people who are working with Illustrators CC. I'm going to flip these colors around because I want a blank fill and no stroke. If you wanted your stripes to be a different color, you can just choose a different color. We're going to the Rectangle tool. I'm going to drag out a pretty long rectangle. One, I'm looking for a couple of things here. One, I want it to be the width of my stripes. I'm concerned about the width of the stripe and the width of the gap between it. You can eyeball what's going to make sense to you in terms of your own aesthetics. The other thing is that once rotated, this thing needs to be able to stretch right across this art both diagonally. Just make it longer than it needs to be. It doesn't have to be accurate, it just has to go over the edges at either end. Now, I'm going to the Selection tool, I'm going to hold Shift as I just rotate this around. I want to rotate it 45 degrees, and let go. Now I'm going to move it into position. What I want to happen is I want the midpoint, the rotation point for this rectangle to be right over the top corner of the art board. We can check that by going to the Transform dialogues. I can just click on "Transform" here or I can choose "Window" and then "Transform". This dialogue is going to tell me where this little rotation point is because it should be selected as the middle of these nine little boxes here, as the reference point. The x and y values of the top corner of the art board as zero and zero. If they're not zero and zero, go and change them. You don't have to do anything about the width and height because that's got to do with your rectangle. What we're concerned about is where the rectangle is not how big it is. Once it's in position, I'm going to Alt, drag a duplicate away, and I want to drop this one in the exact same position, but in the bottom right corner of the outboard. Since the document was 200 pixels by 200 pixels, that makes this points x and y values, 200. You should see 200 and 200 here, and the middle of these nine boxes should be checked. If you've got that, you're off and running. Next up, we're going to make a blend. I'm going to the Blend tool, and I'm just going to click on each of these two rectangles, click on the first, click on the second, and I get a blend. Not particularly inspiring at this stage, but if we double-click on the Blend tool, we get the dialogue that allows us to configure it to do what we want it to do. Well, we want specified steps. I'm just going to start increasing number of steps until I get a diagonal pattern that suits what I want for my diagonal pattern. Now you can get closer lines or you can get them further apart. I'm just going for nine for this, and I'll click "Okay". Now what I've got here is a blend. First of all, I need to expand it. I'm going to choose "Object", "Expand". Now, let's have a look at the last pallet and just say what we've got here. Because I'm a big fan of clean and tidy layers pallets, well, we've got a group in our layers pallet, that's all. The group is this set of lines here. We could burst them out of here or we can leave them in here, that's just fine. But what we will want to do is we want to crop away the lines that we don't want. I'm going to the Rectangle tool, I'm just going to click once on a document, and I'm going to create a rectangle that is the exact same size as the outboard, 200 pixels by 200 pixels. It's going to be no fill, no stroke. It has to align with the outboard too. I'm going to select on it. I'm going to the Align options which are over here. I'm going to click on "Show Options", which is on the fly out menu because I want to align everything to the art boards so I want to make sure Align to Artboard is selected. Now, if I click on these two icons to vertically and horizontally align the center, this rectangle will be centered on the Artboard. Let me use this rectangle in two ways. One is going to become the base of the pattern, and secondly, it's going to be a crop rectangle. I'm going to make a duplicate of this. I'm just going to hide one copy away for now. I'm going to select one rectangle, the visible one, and the entire group. I'm going to the Pathfinder option here. In the Pathfinder, if you don't see it here, you'll choose "Window", and then "Pathfinder". To open it, we're going to select "Crop", which is just here, and we're just going to click on that once. What that does is it just crops all the excess lines away that we didn't need. Now to create our pattern, we're going to move this rectangle that we kept spare underneath our group. We're going to select both pieces, the group and the rectangle, open up the Swatches palette, and using this Selection tool, I'm just going to drag and drop this into the very, very top line of the Swatches palette. That is now my swatch. Let's go and test this. I'm just going to drag out a rectangle here. It's not actually on the outboard, but that doesn't matter because I can still test my pattern using it. I have my fill color at the front, so I'm just going to click once on my Pattern Swatch. You can say that the Pattern Swatch is working perfectly, we're getting diagonal lines in a rectangle. Of course, we can re-size this object transform scale. I'm going to Disable Transform objects so I don't want to transform the rectangle, I just want to re-scale my pattern. I'll click "Preview", and I'm going to start decreasing this value. You can see we can get very tight lines in our fill or I can increase this quite large and we can get very widespread lines. Before we actually leave this pattern in the next video, I'm going to show you how you can recolor the stripes in this pattern very easily.
3. 4 Handy Patterns - Part 2: Recolor the stripes in this patent. Let's just go back to the original patent paste. I'm going to view my Rulers because I've got beaten by this a couple of times. I think it might be easier if you just show you rulers. So choose View Rulers, Show Rulers. What I'm going to do is I'm just going to bring a guide across here to line up against the patent lines here. I wanted to go through one of these stripes just where it intersects the top of the art board. It will, by design, go through a stripe at the bottom end. That's what we're looking for because the stripe at the top and the stripe at the bottom are going to be the matching stripes that we need to recolor. I'm going to come in here. I'm just going to keep double-clicking on this until I isolate just this stripe. I'm going to color it, so I'm just going to choose this orange here. I'm going to press "Escape" to come out of isolation mode. That's this stripe, the matching pair is at the other end of the guide, and that's this one here. I'm going to continually double-click on that until I isolate it and I'm going to color it the exact same orange and press "Escape". Now we have a striped pattern that will give us a stripe that is mainly black but with one orange. Let's go to the last pallet because first of all, a guide is just a shape in illustrator. I want to turn this off so I can't see it because otherwise it's just going to get in the way. This rectangle here is this one over here. I don't want to see that right now either. What I do want to do is select my group and my bounding rectangle that allows me to create my patent swatch. I'm going to pick it all up with the selection tool, drag and drop it up here into the Swatches panel. Let's go and bring our rectangle back, the one that's over here, let's click on it, and let's fill it with our recolored patent swatch. This is going to move it over here. I'm just holding the space bar as I drag on it to move it over. Let's just test it by transforming this, so I'm choosing Object Transform Scale. Again, I don't want to transform the object. I do want to transform the patent. I want to bring the scale all the way down so that we can prove to ourselves that we have created a multi-colored diagonal patent in illustrator. So when you're looking for the lines that you want to recolor, I strongly suggest that you show your Rulers and just bring in a guide so that you can see what the matching pairs are. In this case, you'd be recoloring this line here and this line here. This makes it a little bit easier to see what's what. So there's the first of our patents, Diagonal Lines in Illustrator.
4. 4 Handy Patterns - Part 3: Next pattern is going to be a plaid pattern. I'm going to choose "File New", and I'm going to create a document 200 pixels by 200 pixels, which is square and easily divisible by 2, RGB color mode. Now because I wanted a test artboard as well, I might as well while I'm here, create a second artboard. I just want this to be side-by-side. So I'm going to arrange this by row and I'm just going to click "Okay". Nice, easy way of pre-preparing my situation. Going to click on this "Artboard Control 0" to zoom back into this one. Now I want a couple of rectangles that are going to be black filled with no stroke. But I'm going to put the fill at the front just because it's going to be easier. I'm going to grab my rectangle tool, click on the document once. I'm going to make a rectangle, a 100 pixels wide by 200 tall. I want this to be aligned into the top corner of my artboards. I'm going to the alignment tools and I'm going to make sure that it is set to align to artboard. You're not seeing the align options, just choose a line from the Window menu up here. I'm going to click it to align it to the left and to the top of the artboards, nicely in position here now. I want you to be partially transparent, so I'm going to set the opacity to 75 percent. This is a partially transparent rectangle. I'm going to alt drag a duplicate of this away. So I'm using the selection tool to just alt drag a duplicate away and I'm going to rotate it 90 degrees and place it down here at the very bottom of the artboard. So we click "Aligned to bottom" and then aligned to either left or right. It doesn't matter because it is the width of the artboard either would be fine. This is all I need for a very simple plaid pattern because it's got some transparency built into it. I could put a filled rectangle behind this pattern, and we can color it either black and white, or black and red, whatever we like. I'm going to create a pattern swatch from this. I'm going to select either all or paces. I opened up the Swatches palette and just drag and drop them into the Swatches palette. Which point some of you might be going, wait a minute. What happened to the rectangle that is the size of the artboard that has no stroke, no fill and which should be at the back of these shapes, to make the pattern from? Well, guess you do need that most of the time, but for this particular pattern, you don't need it. The reason is that these patent paces comprise the entire pattern is no bit that I need to lop off, or to remove from this pattern. Because of that, I can just drag and drop these paces into the Swatches palette, and Illustrator will make the swatch from it, and It will also add that no fill, no stroke rectangle behind the pattern swatch. We can test that by just dragging the pattern swatch out of the Swatches palette. This is the pattern swatch that Illustrator is storing. Let's have a look at the last pallet. Everything here from this swatch is in a group, and what we've got, is we've got one rectangle. Let's turn that off. Then a second rectangle, and here we've got a no fill, no stroke rectangle, that's 200 pixels by 200 pixels in size. So because we dragged and dropped their shapes into the Swatches palette illustrates gone. Wait a minute, you didn't give me a no field, no stroke rectangle, so I'm gong to give it to you automatically. I'm going to put it in there for you. If you don't put it there, illustrator will put it there, and in most instances you probably will want to do that yourself. But in this instance we technically do not need that. An Illustrator it will make it for us because all of these shapes are comprising a patents, no bit that we want to remove from it. Let's go and see what our pattern now looks like. Making a rectangle for my second artboard over here. I'm going to align it to that artboard. I have the fill at the front, so I'm just going to drop my new pattern swatch into it. Let's scale it down using the scale options here. So we can just check and see what it looks like. Well, there is our pattern swatch, and if we wanted a color with it, we can open up the last palette here, duplicate this rectangle. I'm just going to drop it onto the new layer icon here. Click on the bottom-most version, and then we can just put a color in here, say a blue color. Now we have a black and blue pattern, it's actually a black and transparent pattern with a blue fill underneath it. But if we want to be a little bit more technical about this, we can create this as a multi color pattern. I'm going back to the last palette. I'm just going to ditch the fill rectangle from that other artboard. I'm going to focus on these two pieces here. I'm going to select this leftmost one, and I'm going to drag a duplicate of it away. I'm going to fill it with a orange color. I'm going to place it on the right-hand side of this document. I'm going to make sure that it's nicely aligned, by clicking the alignment options. Now I've got a black 75 percent transparent pace on this side, and an orange one on this side. Let's go and get the horizontal pace, which is this one here. I'm going to drag a duplicate of this away. I'm going to fill it with the same orange color. This is going to sample it from here to make sure I've got the exact right color. Now I'm going to align this to the very top of the artboard. It's going to the top, and to the left side. Now you can say that when we actually make the pattern this way, we get a slightly different effect here. We've got all four squares, different shades. This one's more intense. This is the next most intense, and then over here, and over here, we're seeing a lot more yellowish orange through. Let's say this is a patent pace. Select everything, drag it into the swatches panel, because we know we don't need that rectangle technically. Select on this rectangle and let's fill it with this new pattern. This is a little bit more sophisticated high pattern than just doing the black one and dropping a color and behind it. So there's the second version of our plaid pattern.
5. 4 Handy Patterns - Part 4: Our next pattern is going to be a multi-colored dot pattern. I'm going to create a new document, it's going to be 200 pixels by 200 pixels RGB I want it to be a square document basically, and I want to disable the align new objects to pixel grid, and I'll click "Okay". Now I'm going to zoom out a little bit because I need to see a little bit of space around this document, and I'm going to create a filled circle. So I'm going to click on the ellipse tool. I'm going to make sure that my circle has no stroke and it has a colored fill. So I'm going to start with a blue color and choose this color now. I'm going to click once in the document and make a 20 pixel by 20 pixel ellipse, and click "Okay". Of course, because it's 20 by 20, it's going to be a perfect circle. I'm going to place this down at the very, very bottom of the document in the bottom corner, but I need to make sure that it is exactly in the right spot. So with it selected, I'm looking up here to the toolbar to make sure that it's at a position which is X zero and Y 200. If you're unsure, you can also open the transform panel and that will show you where the center point of the shape is located, and that's critical. Next we're going to choose Effect, Distort & Transform, Transform. I'm going to turn Preview on, and I'm going to increase the horizontal move to 50 pixels, and that's going to move this 50 pixels, and I'm going to make multiple copies. So I'm just going to press the up arrow key here until I create dots that extend all the way across the bottom of this document, and I'll click "Okay". Now, I'm going to repeat that. I'm going to choose Effect, Distort & Transform, Transform. We're going to apply a new effect. I'm going to turn Preview on, and this time we're going to move negative 50 pixels. So I'm going type minus 50, and then I'm going to start increasing my copies again. I want the last copy to be right along the top edge of the document, and I'll click "Okay". Right now, everything is still centered on this circle here, so I'm just double checking to make sure that it's still in the correct position, and I'm going to expand it. Object, Expand Appearance, and then Object, Ungroup, and I'm going to do that until ungroup is no longer an option. It's no longer an option. Now, let's have a look in the layers palette. Here we have a single path for every single one of these circles, which means we can do various things with them, including recoloring them to get our multi-colored dots. So I'm going to select this one and I'm going to recolor it to a pink color, and then I'm going to start removing some. So I'm going to remove this one, and this one, and these two, and then I'm going to remove these two up here and then the matching ones down each side of the document. The problem with trying to create multicolored dot patterns in Illustrator is that they're really hard to do with the pattern make tool in CS6 and later. So what we're doing here is we're actually creating our pattern tile, this will allow us to create lots of different colored dots. I'm going to select each of these dots in turn and I'm going to re-color all of them as I go. I'm a little short of colors in my swatches palette, so I'm just going to click on the color selector here to choose some colors that are just not in my swatches. Now, when it comes to re-coloring the ones at the very edge of the apple, we need to be a little bit clever here, because in the final patent, this dot here is only going to contribute a quarter circle. The other quarter of that circle is over here, the other quarter is here, and another quarter is here, which means that all four of these shapes need to be colored the exact same color or it's not going to work when we get to our pattern. So I am going to make all of these a turquoise blue. There are two other pairs of shapes here. This one and this one are each going to contribute half a circle. So we're going to need to make sure that both of these are colored the exact same color, and these two are a matching pair too. So now that we've got all of our circles recolored and the matching pairs or the four that are all going to make a single circle all recolored to the same color, we're ready to make our pattern swatch. For this one, we do need a rectangle because we're going to be cutting off pieces of this circles. So I'm going to click once on the document and create a rectangle or a square that's 200 pixels by 200 pixels. I want it to be centered on the art board, and it's to have no stroke and no fill, and it's also to be at the very back of everything. So I'm just dragging it down in the last pallet to behind everything. I'm going to select everything on this layer, which is all of the dots and the rectangle. The reason why we need the rectangle is because this part here and these corner paces are not going to be part of our pattern, so these bits that are outside the art board aren't part of the finished pattern swatch. That's why we create the rectangle that's no film no strike because we're telling Illustrator everything that is inside this rectangle is what goes to make the pattern. Anything that's outside doesn't. So we're going to click here on the swatches panel. I'm going to the selection tool. I'm just going to drag and drop this in to the swatches panel. I'm going to create a second art board. So I'm just going to the art board tool, just going to Alt drag a duplicate art board away. Delete everything that is on this art board. Add a rectangle that is the size of the art board. Make sure that it's aligned to the art board, and let's fill it with our pattern. Let's just scale down our pattern so we can see how it's going to look at work, and I'll click "Okay". There we have a multi-colored dot pattern created in Illustrator. To be able to create our pattern swatch, we had to mark up the basics of our pattern swatch. Make sure that we colored all our circles correctly, so that we could create a pattern swatch that is a multi-color pattern.
6. 4 Handy Patterns - Part 5: For our last pattern, I'm going to create a chevrons. I'm going to start with a new document, and again, it's going to be a square document. I'm going to make this 200 pixels by 200 pixels in size. It's going to be RGB color mode. I'm going to deselect align new objects to pixel grid. I'll click "Okay". We're going to start by marking out the midpoint in this document. For that, we need to say our rulers. I'll choose "View" "Rulers" and then "Show Rulers". I'm just going to drag a guide into the approximate middle of the document. Now, I can check up to see if that is the middle of the document up here on the toolbar, because I've got the guide selected here. At the moment the x position is a 106 and a few extra bits. It needs to be a 100 because my document is 200 pixels wide, and I want this in the middle. The y-value doesn't matter, that's not important at all. I'm just going to click away from this guide. Now guides in Illustrator are just shapes. They're just objects like anything else. They are going to be visible in the last pallet as this guide is here. I'm just going to lock it down because I don't want it to move. Next up, I'm going to create a rectangle. I'm going to click on the Rectangle tool. Let's just go for some default colors. I actually want this to be a filled rectangle with no stroke. I'm going to click once on the document and I'm going to make my rectangle a 100 pixels by 50 pixels. The 100 pixels means that it's going to be half the width of this document and 50 pixels is just going to be the height of my chevron. I'll click "Okay". Now I'm going to move this using the selection tool so that it aligns perfectly with the left-hand side of the document. We can check that by clicking the "Transform" option here and checking where any of these handles are around the shape. If I check the middle one on the left-hand side, it should be at zero. Doesn't matter what the y-value is, but the x-value is critical. If you don't see your "Transform" option up here, it might be in the bar down here. You can get to it here. Or you can choose "Window" and then "Transform". I want to skew this rectangle. I'm going to choose the direct selection tool here. I'm just going to select either the two anchor points at this side of my shape. Having selected them, I can now pull them upwards. If I add the Shift key, they are going to be constrained to moving in a perfectly vertical direction. So that's giving me one half of my chevron. All I need to do now is to flip it. I'm going to click on it to select it and choose object transform, reflect. Let's turn preview on. We're going to reflect either the vertical and I'm going to make a copy. I'm going to click "Copy" and now simply move the duplicate over to the other side of the document. If I add the Shift key as I move it, again, it's going to be constrained to moving in a horizontal direction. Again, just to be sure we can check exactly the position of this anchor point over here. I'm going to go to the Transform panel. Make sure that I have this anchor points selected here in the nine boxes, and just make sure that the exposition is 200, which it is. Now, if you're working on a version of Illustrator that has the shape builder tool, and from my recollection, that's. Illustrator CS5 and later, you can go to the shape builder tool over here, select it, and then just drag across these two shapes to combine them into a single shape. That unite command in the pathfinder menu doesn't do a particularly good job with the shapes when they're actually butted up against each other. If you're working with an earlier version of Illustrator, you really don't have to do this, but it can be handy, and certainly if you've got the shape builder tool, I would be using it. Now, I don't need my guide anymore. I'm just going to turn that off. I'm going to drag and drop this chevron into the swatches palette because that's going to create a chevron pattern. This is going to be the dimension of the space between the two chevrons from the top of the selection box down to this area here. Let's just drag and drop it in there. Going to create a second art or I'm just going to Alt drag a duplicate of this art board to one side. I'm going to remove this chevron from the second art board. Let's go and create a rectangle the size of the art board, which of course is 200 by 200 pixels in size. I'm going to center it on the art board. I'm just going to check and make sure that my option here under "Show Options for Alignment" is set to align to art board. I'm just going to center this on this second art board. Turn off the fill and stroke. With the fill in the full, I'm just going to add my Chevron pattern and we'll just scale it. Now, my chevron pattern right now is not showing any of those little fractures that sometimes we see in patterns in Illustrator. But you might also be able to say that it's got uneven edges. The reason is I've got anti-alias turned off. On a pacer, you choose "Edit" and then "Preferences". On a Mac, you'll go to Illustrator and then Preferences. You'll go to the general settings, over here is an option that says anti-alias artwork. If you turn that off, you'll see slightly different edges on your shapes in Illustrator, but you won't see those hairline fractures through your patterns match. You're going to enable it, and now we would expect that if we re-scale this pattern, we'll probably start seeing those little art effects in the pattern. But if you want to get rid of them, turning anti-alias off is always an option. Now, at this point, if you're using Illustrator CS6, you can get a little bit more control over your chevron patterns using the pattern make tool. I'm going to go ahead and work with Illustrator CS6, analyze this pattern making tool option. In the next video, I'll go through making slightly more complex share from patterns if you're using Illustrator CS5 or earlier and have to manually build your patterns. But for now, let's go to CS6 and later. With CS6 and later, I'm going to select my chevron shape. I'm actually going to zoom out a little bit cause I want to be able to see things around the pattern as I make it. I'm going to choose object pattern make. Click "Okay". The benefit of using the pattern make tool is going to allow us to re-scale the space between the chevrons. I'm going to go here and just check the settings. I've got the width is 200 pixels. I want to leave that because that's the width of my chevron. That's fine. It's the height, that's not. The option here is unlocked. The width and height can be independently changed. That's really important because while we don't want to change the width, we do want to change the height. I've got my dimmed copies down to 90 percent. This section down here is all about just what you see on the screen. It's got absolutely nothing to do with your swatch later on. it's only setting up the screen so that we can say what I chevron looks like. All I need to do here is to start working on my height. If I want the chevrons to be further apart, I can just come in here and increase the height. I can do that until they're as far apart as I want them to be. If I want to close up the gap, I just do the opposite and bring them really close together. When I'm happy with what I've created, I can just go ahead and click "Done". I've now created this pattern that's up here in the pattern swatch, even though we're not seeing it here, it's in the pattern swatch area. I'm going to re-select my rectangle over here and let's test out our second pattern. Not unexpectedly, it's showing some hairline fractures through it just because this is Illustrator and it tends to do that particularly with patterns like this. The key to looking at these headlines and working out if they really are a problem, to zoom in. If they disappear as you zoom in, then they're not really a problem with your design. If they continue to be there, whatever magnification you're working at, then they really are a problem. But these are coming and going depending on my magnification. They're not actually in the pattern swatch itself. It's just illustrator being just a little bit annoying. If you're finishing up now because you're using Illustrator CS6 or later, your project for this class is going to be to produce one or more of these patterns in Illustrator and then post an example of this in the project area. I hope that you've enjoyed this class and you've learned a lot about making patterns in Illustrator. If you did enjoy this class, when you see a prompt to recommend it to others, please give it a thumbs up. This helps others to identify this as a class that they may want to take. If you'd like to leave a comment, please do so. I read and respond to all of your comments and I look at and respond to all of your class projects. I'm Helen Bradley. Thank you for joining me for this episode of Illustrator for Lunch, creating patterns, diagonal lines, plaids, chevrons, and multi-colored dots. I look forward to seeing you in another episode of illustrator for Lunch soon.
7. 4 Handy patterns Part 6: If you're working in Illustrator CS5 or earlier and you want to create a different type of chevron pattern, then you're going to have to do that manually. I'm just going to show you briefly how to do that. I'm just going to zoom out a little bit here, and I'm going to select this shape here. I'm going to move it down to the bottom of the artboard. What I want to do is I want to make sure that it is covering the bottom edge of the artboard. It doesn't matter how far it is down. It just matters that it's covering the bottom part of the artboard. Next, I'm going to make a duplicate of this and I'm going to move it. So I'm going to choose object transform move. What I want to do is I want to move this up to here, 200 pixels so it's moved exactly from one end of the artboard to the other. I want to go in a 90 degree direction and I want to go 200 pixels, I'm going to set the distance to 200. This is where the second copy of this shape is going to go. All I'm going to do now is to click Copy. So I have one shape at the top of the artboard and one at the bottom of the artboard. Now, this of itself would make a chevron pattern that is very widely spaced. To do that though, I will need to create a rectangle the size of the artboards. I'm just going to do that now. I'm going to center it on this artboard. Remove it stroke and fill, go to the last pallet and just make sure to move it below the chevron paces here. I'm going to select the two chevron paces and the rectangle. Drag and drop this into the swatches palette. Let's just say it works. Well, there is a very widely spaced chevron pattern. That's one of the kinds of options you've got here. The second option is to make one that's very closely placed together. To do this, I'm going to the blend tool. Select the blend tool. Click on the topmost shape, click on the bottommost shape and Illustrator puts one extra shape in the middle. If I double-click on the Blend tool here, I can now add an extra shape. I'm going to choose specified steps, I'm going to wind this up to two. I don't think I'll make three. I won't make three on this design, but I can make two. I've got a thinner margin between these shapes and I'll just click Okay. I'd need to expand this with object expand. Here it is. Here's my group of objects, Here's my rectangle and I'll just drag and drop this into the Swatches panel. Click on my shape Here here is a closer chevron pattern. There's a way of creating closer together chevrons or further apart chevrons in Illustrator CS5 and earlier. Your project for this class will be to create one or more of these patterns in Illustrator and to post your designs in the class project area. I hope that you've enjoyed this course and you've learned a lot about creating patterns in Illustrator such as clades, multi-colored dots, diagonal lines, and chevrons. If you did enjoy this course and if you see a prompt to recommend it to others, please give it a thumbs up. This helps others to identify this as a class that they may want to take. If you'd like to leave a comment, please do so. I read and respond to all of your comments and I look at and respond to all of your class projects. My name's Helen Bradley. Thank you so much for joining me for this episode of Graphic Design for Lunch, and I look forward to seeing you in an upcoming episode soon.
 Helen Bradley, Graphic Design for Lunch™