Transcripts
1. Introduction to One Shape Many Patterns in Adobe Illustrator: Hello, and welcome to
this class one shape, many patterns in
Adobe Illustrator. My name is Helen Bradley, and I'm a Skillshare
top teacher. I have over 270
courses on Skillshare and over 185,000
student enrollments. In this class, we'll
create a single, very simple shape and use it to build some very
different patterns. We'll also look at ways
to give the patterns additional personality
with lines or backgrounds and color. In recoloring, the patterns will focus in particular on
some features which have been added to illustrator
recently and which offer some fun ways to find new color schemes for any
design in Illustrator. Now, this course is
taught step by step, and you can follow
along with me. If you do that, then by
the end of the course, you'll have a range of
finished designs ready to use. Along the way, you'll also
have loan some handy tips and techniques for working
in illustrator every day. Without further ado,
let's get started making patterns from one shape
in Adobe Illustrator.
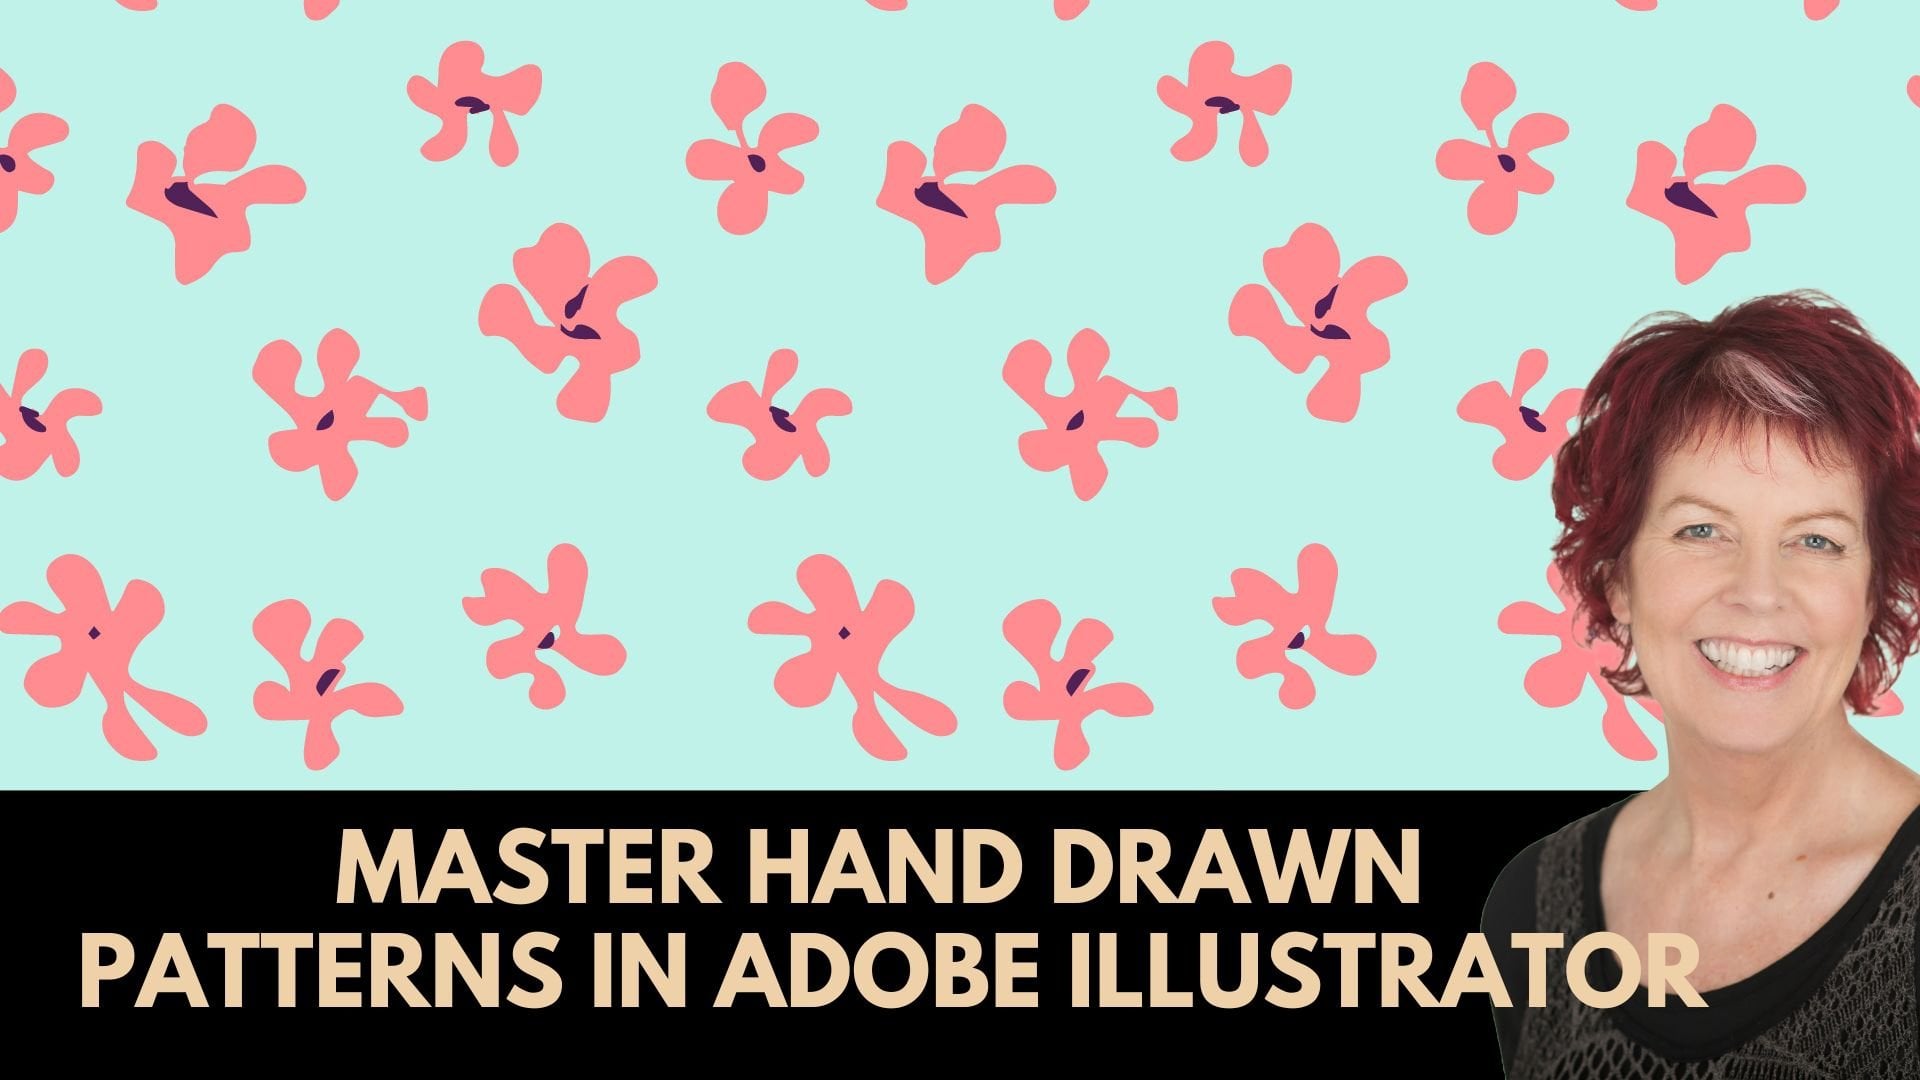
2. Pattern 1 A Flower Shape Pattern: The first of the
patterns that we're going to make is this one here, and in doing so, we're going to create the
foundation shape that we'll be using for the other
patterns in this class. I'm going to click
here on New file. I'll make a file, 1,000
pixels by 1,000 pixels. You can make yours,
whatever size you like. I'll click Create. Now, the foundation
shape is an oval. I'm going over here to the rectangle tool
on the tool bar, and underneath, this
is an ellipse tool, so we're going to select
the ellipse tool. I'm going to drag
out just a ellipse that looks something like this. You don't need to be too
fussy about how it looks. Now, it has a white fill, so I'm going to change
that to a color for now, and I'm going to remove
the stroke from it. Let's just remove the stroke. At the moment, this is an oval rather than
having pointe ends. To make the pointee ends, we're going here to the
direct selection tool. There are a couple
of tools here, the direct selection tool and
the group selection tool. We're going for the
direct selection tool. I'm going to select just
over this point here. You can see that this
point is selected. These two are not, and
neither is this one. They're hollow,
this one's filled. With this point selected, I'm going across here, to they convert
selected anchor points to corner and click once. Now I'm going to do
the same down here. I just want to pick
up this anchor point. It's selected, it's filled. None of the others are, we're going to do the same thing here. So this is the basic shape
we're going to work with. So if you want to
make any changes to how tall or how wide it is, you can do so at this point. Now we need six of these shapes. So selecting the shape with
the selection tool here, we're going to effect and then distort and transform transform. In this dialogue, we can
set the angle of rotation. There are 360 degrees in a
circle and we want six shapes. So we want them to
be evenly rotated. We can get illustrated
to do the math. We type 360, and then
the division sign, which is this forward slash, and the number six for the
number of shapes we want. If I just tab away, you'll
see that illustrator has calculated the rotation
to be 60 degrees. Now, as I said, we
want six shapes, so right now we need an
original plus five copies. So I'm going to type the
number five in here. The problem for me is that I wanted these to
form a flower shape. So the rotation
point is incorrect. You can see that these are all rotating around
the middle point, which is this point here. Of these nine points, I wanted to rotate around
the middle bottom one. I'm just going to click
on this and it reforms itself into the flower
shape. I'll click Okay. Now, from the pattern you
saw at the beginning, this doesn't look
quite like what we want because everything's
jammed up together. So we're going to
select over this shape. And if we have a look in
the appearance panel here, you'll see that
what we've got is a shape with a
transformation on it. This is the transformation,
this is the shape. If I turn the
transformation off, that's actually the
foundation shape. So this is what we
would call baked in. This is not actually six leaves. It's just one leaf
with a transformation. To fix it into six leaves, what we're going to do is go to object and then
expand appearance. So that now gives us six leaves. Here in the layers pallet, you can see that we've got
a group with subgroups. With everything still selected, we're going to choose
object Ungroup, and then continue to do that until ungroup is no
longer an option. It's really critical that you do that step that
everything is grouped. Because the tool
we're going to use next is going to
shrink these leaves. If you still had
everything as a group, it would be treated as a group and everything would be shrunk. We just get a smaller
version of this shape. What we want is a
smaller version of each of these six leaves, exactly where they
are right now. We'll select over everything. You can see all our individual
leaves are selected. We'll go to object transform
and then transform each. This tool allows us to shrink
these individual leaves, but each one of
them is going to be shrunk relative to
its center point, they're going to pull
apart from where they are. Make sure your
preview is turned on, make sure that your central one of these nine
boxes is selected, and we're just going to change the horizontal and
vertical values. I'm thinking probably something like 75% is a good
starting point, but you don't have to get
it right the first time. You can just type those values
in and see what you get. I'd like mine a
little bit smaller, so I'm going for 68. I'm going to do the same
in the vertical and horizontal so that I still
keep the shape that I had, just a smaller version of it. I'll click. Again, in the last palette
you'll see that we've still got six individual leaves. They're just smaller than
they were previously. Now we're going
to make a pattern out of this at this point, if you wanted to save the file so you don't have to create a leaf over next time
afresh, then you can do so. But I'm going to
just plow ahead. I'm going to select
over these shapes. I'm going to object and
then pattern, I'll click. In the pattern options dialogue, we can set the kind of
pattern that we want. I'm going to choose
a brick by column. Ultimately, what
I want to happen is I want this leaf
to go over this one, this one to go over this one, this one to go over this one, this one to go over this one. I pull the pattern
closer together. I'm going to make sure that
this has a slash through it. If it doesn't, if
it looks like this, you're just going to undo it, and then we're going to
start decreasing the width. The problem is
it's going to be a little bit difficult to see when these leaves are over each other because they're
fully transparent. But if I select over
all of my shapes here, just drag over these shapes. These are the only six
that you can select and adjust the opacity
down to about 50%. Then when they go over
the top of each other, they're going to be
more intense in color. So it's going to be easier
to see what happens. I'm just going to click
away from here and let's start bringing
the width in I'm holding the shift
key as I decrease this value so that I can
move a little bit faster. You can see that when these
shapes start to overlap, you get this more
saturated color, that's going to
give us a guide as to when we're in position. I'm bringing in the
height and the width. As soon as I finish my big move, I'm going to start doing
smaller moose and I'm doing those with
just the arrow keys. I'm also going to
zoom in a little bit. I think I've got it pretty
much in position right now. Your values are going to
be different to mine. So just use whatever values you need to place these shapes
on top of each other. I am going to increase
the opacity now. Well, firstly, I'm going
to select everything, and then I'm going to
increase the opacity to 100%. Now, what's happened
right now is that there are two leaves at each
one of these positions. So we can make our pattern a little less likely perhaps to fracture or a little bit more robust by actually
removing some leaves. I'm going to remove these three. I'm going to click on this
one and press delete. You can see that there's
a leaf underneath there. It's actually this one here. I'm just going to
undo that because I don't want to lose that one, but I can lose this one
and I can lose this one. But these other three layers are the leaves that are actually
creating the pattern. I want to leave them in place. I'm going to turn
off the tile edge. I'm going to zoom out so I can see what my
pattern looks like. You can always turn
off your art board with view and then
hide art boards, and you can increase the number of pattern pieces
that you see on the screen by just selecting a different number of copies. Nine by nine will give you the maximum number
that you can see. Now, none of these
settings here are going to have any effect on
your final pattern at all. They just don't
impact it at all. It's all about what
you see on the screen. I'm really happy with
this pattern right now, so I'm going to click
De and it's now a pattern that is added to
my swatches panel here. Now, while I'm here,
I'm going to make a three color version
of this pattern. So I'm going to take
my pattern and I'm going to drop it onto
the plus sign here, and that will give me a
second version of it. If I double click that now, I'm back in the Pattern
Options dialogue. I'm not sure where my
pattern pieces are, so I could select all,
select, select all. These are my three
pattern pieces. Now that I've identified them, I'm going to select
them one at a time, and I'm going to
change their color. Well, I'm going to change
the color of two of them. This leaf is making
up this one here, and these two are the exact
same leaf. And so are these. Now that I've got a different color version of my pattern, all I need to do
is to click done. Now, the other thing that
we can do is a version of the pattern that has a
background behind it. I'm just going to do one of
these, but you could do both. I'm going to take this
pattern here, the original. I'll drop it onto the plus sign. This is giving me
another version of it. I'll double click on it
to open that one up. I'm going to turn
on my tile edge so I can see where my tile is, and this is the size of
my pattern, 1903 by 223. What I'll do is come across
here to the rectangle tool. Now, before I do anything, I want to get rid of
this pattern here. I just want a solid color. It's a little hard
to do that because when you select color,
nothing happens. But if you select grade inch, you'll get something and
then you can set a color. That's just a handy tip for you. I'll click in my document
around about this tile area, and I'm going to type 1903
and 223 as my shape size. It needs to be
exactly that value. I'll click. I'll choose
object and then arrange, send to back to send
it behind everything. Right now, the color is being really difficult for me
to see on the screen. With the shapes still selected, I'm going to double click
on the fill and just change the color down so I
can see it more clearly. Now I need to move this shape so that I get these pieces back. You just need to move your
shape to wherever it goes. You're just going to move
it around and have a look in your pattern to make sure
that nothing is cut off. If nothing's cut off, then that's a good place for it and you're just
going to click done. So let's bring
back our artboards with view and show artboards. I'm going to move these
shapes out of the way. You can see that when you make a pattern in an illustrator, nothing happens to
the original shapes. You can recolor them,
you can resize them, you can rotate
them, or whatever, but you're still always
going to end up with the original shapes
on your artboard. The changed ones are
in your pattern. I'm going to make a rectangle, that is the size of my artboard. I'll square it up
on my artboard. The fill is targeted here, so I'll go to my swatches panel and let's see our patterns. Here is the original one. It is a pink flower over
transparency, be aware of that. It has no background, even though it looks like
it's white right now. This is the colored
one. Again, it has a transparent background, and here's the one that
has a background with it.
3. Pattern 1 A Flower Shape Pattern Recoloring: In the last video, we made
a series of patterns, so we're going to look
now at recoloring one of these because the process will be the same
for all of them. I have my field shape selected. I'm going to the
recolor artwork tool. I'll click on it once and
go to advanced options. I only have two
colors in this so I'm going to edit these manually.
So I'll go to edit. I'm going to click here when it says Unlink harmony colors, that tells me that my next step is to unlink them so
they were linked. So this will allow me to take the colors to wherever
I want them to be. As soon as I say a
color combination I like, I'll click Okay, and then if I want
another version of it, I'll just simply reopen the recolor artwork dialogue and go back to advanced options. Go back to edit and create
a different color version. You'll say that in doing that, the harmony colors have
been linked again, so I need to unlink them if I want to make
changes to them. Now, I can create my colors
by dragging around here, but I've also got
huge saturation and brightness available here, so I can adjust the
saturation of the colors and also brighten them or darken
them using this dialogue. Now I'm using hue
saturation brightness, but there are other options. You can click here
and use RGB mode. You can also do a global adjust where you can increase
the saturation of everything or increase
the brightness of everything or make
it warmer or cooler. You can also adjust
the luminosity. As soon as you see
something you like, just click so that will be
saved in the swatches panel. So we'll go back to the
original design we made, the three color design. And then these versions that come with their own background. There's also a new tool in Illustrator for
recoloring using AI. So I'm going to select
a different pattern. Let's just see if illustrator is going to
catch up with me here. I'm going to use the three
color design this time. I'm going to the recolor
artwork dialogue. Instead of recolor, I'm going
to use generative recolor. If you're using this
for the first time, you'll need to accept the
license arrangements. At this point, you
can click on a prompt here and just recolor your artwork according
to that prompt. You'll be given four options
and you can click on any of them to apply them
to your illustration. If you see something you like, click on it and
click away from it. That will add it as a
new color combination in your swatches panel. Let's go back into the
generative recolor, because in addition
to these options, you can also create
your own description. So I'm going to ask for something that is
based on watermelon. I'm hoping for some
pinks and greens. If you see something
you like, again, just select it and click away, and that will be added
to the Swatches panel. And you can always go back
and recolor this version. I'm going back to the
recolor artwork dialogue. I'm going to recolor
this manually. I'm going to advanced options, and then back to edit. I'm going to unlink
my harmony colors, and I'm going to look
for the red that I was looking for
in the watermelon. I'm actually reasonably happy
with that, so I'll click. So you have lots of options for recoloring the pattern
once you've created it. Every time you recolor a pattern using the recolor
artwork dialogue, Illustrator is going to add that pattern to your
pattern swatches, so you don't have to think
about making it yourself. It's going to be done
for you automatically.
4. Pattern 2 A Three Petal Flower Pattern: To create another pattern
using this shape, I'm going to leave open
my file on the screen, but I am going to create
a brand new file. So I'll choose file
new and create another $1,000 by $1,000 pixel image. I'll go back to the
file I was working with and select one
of these petals. I want one that's pointing upward so I'm going
to take this one, edit copy, go to
my new document, and just simply
select Edit Paste. For this one, I want
a three leaf shape. I'm going to increase
the shape size a little bit before I start. I'm just holding the
Shift key as I do this. We're going to use the
transform tool again. I'll choose effect
distort and transform and then transform. I
want three shapes. I'm going to click
here and type in two, that's going to be the
original plus two copies. Again, I'm going to be
dividing 360 by three. I can do the math in my head. I'm just going to
call that one 20. Again, we're rotating
around the center point. I want to rotate
around this point. I'll just click on
that point and I get this trefoil design.
I'll click Okay. Same principle here. We've got a shape that has
an effect applied to it, so we need to go to
object expand appearance. Then this is going to be group, so we're going to choose object ungroup until that is
no longer an option. That's critical because if we go and try and rescale
these objects, if they're a group,
they're going to behave as a single object, we want them to behave
as individual elements. I'll choose object transform
and then transform each. Now, I don't want them
to be 68% this time, I want them to be quite a bit
larger than they are here, but smaller than
they started with. Let's try 85. That's pretty good. I'm pretty
happy with that. I'll click. We'll select over these shapes and make
our pattern out of them. Object, Pattern, make. I'm going to zoom
out a little bit. I'm going to turn
off my artboard with you hide artboards. I'm also going to see
more on my screen, so I'm going to
choose nine by nine. For this one, I want things to line up a little
bit differently. I want this shape to
fill in over here. So I'm going to
choose hex by column, and you can see that that
automatically and very quickly pops everything into pretty
much the ideal position. What I am worried about
is this over here. You can see that the width and height are not whole numbers. If we can make
them whole numbers and if we can make
them even numbers, then life will be better. We're less likely to have problems with our
pattern later on. So I'll come in here and
just adjust each of these. They only have to be adjusted
by one or two pixels, that's all that they need. I'm going to use
3904 and three 50. Your size is going to
be different because your pattern starting shape
is going to be different, so don't be surprised if you
get different values to me. But whatever your values are, that's going to be the
size rectangle you need to create a background to this
pattern. Let's do that now. I'm going to choose
a different color. I'll be a bit more
strategic this time about the color that I choose so we can see everything a
little more clearly. I'll go to the rectangle tool, click once in the document. I need to use 3904 and three 50. I'll choose object
arrange, send to back. Then I'm going to
the selection tool. Going to pick up my
rectangle and just move it until I can see my entire pattern and
nothing is cut off. It needs to be moved somewhere where you move it to
doesn't really matter. The important thing is that nothing in your
pattern is cut off. If you've got that right,
then you're calling it good. I'll just click done. I'm going to bring
back my artboards with view and show artboards. I'll grab these shapes,
pop them to one side. I'm going to add my rectangle, the size of my artboard. Square it up on my board, make sure I have targeted
the fill for my shape. Go to my swatches panel, and here is my pattern. I'll choose object
transform scale because I want to see my
pattern at a smaller size. You'll see here that the shape has got smaller as
well as the pattern. I don't want that
to be the case, so I'm going to undo
transform objects. That gives me my shape
back at the same size, but the pattern at a
reduced size. I'll click. While we have our pattern
filled shape selected, let's go to the recolor
artwork dialogue. I'm just going to use
the recolor options. And just drag the colors
around until I find something that I like more than what I was seeing on
the screen before. Now, this pattern can also
be made in multiple colors. I'm going back to the original. I'm going to drag it onto the plus sign so we
have a duplicate of it. I'll double click on it. Drag over the tile shape here, I'll be able to see which
shapes are selectable and there are these three here, and this is the background. I'm going to leave the
background as it is, but I am going to recolor these leaves or at
least two of them. Again, as a starting point, it really doesn't matter
what you color them to provided you color them
to something different. So the background and each of the three leaves is
different. Just click done. We'll select our shape, fill it with our pattern, and now we can go to the recolor artwork dialogue
and do something with it. Let's go to generative
recolor this time, and let's go for some
lavender colors. Again, if you get something that you like or you half like, you can just select on it and click away from the document, then re select it and
you can go back into the recolor artwork
dialogue and make a change to any one
of these colors. Let's go to the edit tool. Let's unlink our
harmony colors here. I'm thinking this color in the middle is the one
that I want to work with. When you're happy with what
you've got, click Okay. This was the original
pattern, a recolored version, the multicolor version that we created in the
pattern make tool, and then subsequent
recolor versions of that version. Okay.
5. Pattern 3 Rotated Shapes pattern: For this next design, we're going to use
the same shape, but I'm going to use a
fixed size document, so I'll click here on New file. I need a document size that
is easily divisible by two. So I'm thinking 1,000 by 1,000 is going to work
perfectly for me. I'll click Create. So I'm looking at this document as being sort of four squares, so I want my initial shape
to fit in this area here. We're going to make the
shape this time again. So we're going back
to the ellipse tool. Just drag out a
nice ellipse shape. Go back to the top point here. If I hold the shift key, I can click on the bottom
point here and select it. So we have only these
two points selected, so we can change their ends
both at the same time. I'm going to turn off
the stroke outline, and I'm going to just
give this shape a fill. Again, it doesn't matter
what color fill we use. I'm going to drag a
second copy away, so I'm holding down
the old key as I drag a second copy away. I want to make sure both
these shapes are lined up. They're not right now, so I'm selecting over both of them. I have the align options
up on the panel here. If you don't have them, you
can go to window and align. And what we're going
to do is just make sure that they're
vertically aligned. I'm also going to group
them because I want them to travel and behave as a group
or as a single object, so I'm going to object group. Now, the other thing I want from these shapes is I want
them to be square. So I'm selecting over my two shapes with
their spacing here and let's go to the
transform panel and see how far out I am. Well, over here, we can read
off the width and height, and it's 3505 and three 70. So what I'm going to do is I'm going to make this three 60, and I'm going to make
the height three 60. So this is a square shape. That's going to help
me in just a minute. Now, my original board was
1,000 by 1,000 pixels. So that means that
this little piece in the corner here
would be 500 500. Let's go with the
rectangle tool, and let's make a 500 by
500 pixel rectangle. Now, it's got a pink fill. I'm just going to change its
fill to a different color, and I'm going to place it
behind everything with object, arrange, send to back. And then I'm going to place
it up here in the top corner. Now, if you're not sure
that things are in the top corner, you
can select them, go back to the
transform panel here and just check the location
of the top corner. These nine little
boxes are showing us the points on this rectangle and we want to know
where this one is. Here it's selected here, zero, zero means it's in the very
top corner of the document. This is in the correct spot. These two are not aligned
within the shape. Let me just dial down
this color a bit for you. So these are not centered. So I'm going to select
over everything, and I'm going to click
again on the rectangle. You can see it gets this
heavier blue line around it. That's telling me that when I center
everything in a minute, the rectangle is
not going to move, and these shapes are. So again, let's go back
to the align options. Mine are on the
toolbar over here, but you can't open
up the align panel. What I want to do is I want
a horizontal align center, so I want to align
these shapes within the center of this
rectangle horizontally, and then let's do it vertically. Basically, this rectangle now has these shapes exactly
in the middle of it. Let's go and grab
everything and group that. Now I'm going to take
a duplicate of this, hold down the key as I do so and move it down here to the
bottom of the document. Let's double check in
the transform panel. The bottom corner of this
down here should be at position 1,000 1,000 and it is. Let's go and grab another copy of this place it up
here in the top corner. Let's just make sure it's
in the right position. So it's top right corner, should be at 1,000 and zero, so it's perfectly aligned. But what I want to do is
I want to rotate this. So with this still selected, I'm going to choose object
transform and then rotate. I'm just going to rotate at 90 degrees because
this was a square, it's in exactly the
right position. Again, holding down
the alter option key. I'm just going to
drag this down, place it in the bottom
corner of the document, double check to make sure that its bottom corner here is at position zero on the x axis and 1,000 on the y
axis, which it is. Now at this stage, I've got four boxes behind these shapes. I'm going to turn this into
a really simple pattern, but it is going to behove me to make sure that all the
boxes are joined together. That would mean that they're not going to split
apart by accident, and it's going to reduce the possibility
that I'm going to get fracture lines
in my pattern. So I'm going to
select everything. So just drag over to
select everything. I'm going to ngroup everything
with object Ungroup. Now, I only have to do it once
to get my rectangles out. So let's go and select
on this rectangle. I could easily just
continue to control, click on the rectangles here in the layers,
palette to select them. But let's have a look at
another method where you can use it if it's not as
clear where everything is, select one of these shapes, go to select and same and
then choose fill and stroke. You can see automatically
everything that has the same fill and stroke. In this case, no stroke and sort of fan fill is being selected, so I could delete them or I
could join them together. I'm going to join them together, so I'm going to the
Pathfinder panel, and I'll click here on Unit. If you don't have a
Pathfinder panel, you'll find it by going to
Window and then Pathfinder. Now, it appears
everything's disappeared, but that's probably just a
layering issue, which it is. You can see that this rectangle here is above these shapes, so I can just grab it in the layers panel and
move it to the back. Double checking before I
go and make my pattern, I'm expecting this to be
$1,000 by $1,000 pixel shape. If it's not, I need to fix it. Let's go to transform. It's width and
height of 10001000. So everything's good
there. To make my pattern, I need to select everything that's going to be
in the pattern. And right now you can see that the rectangle is selected,
but these shapes aren't. So I'm going to re
select everything. Just make sure that everything I want in my pattern
is selected. Object Pattern,
make. Click Okay. I'm going to zoom out. Let's see more of my shape. I'm going to choose a
nine by nine shape. What I'm seeing here
is the artboard. If it's in your way, choose
view and then hide artboards. I'm pretty happy
with this pattern, so I'll click done. But I do want to make an additional version of
it while I'm here, so let's go to the
swatches panel. I'll grab the pattern and
drop it onto the plus sign, so I have a duplicate of it. I'll double click
one of these copies. Let's turn back on the tile edge so I can see which
shapes are selectile. What I'm going to do is
change some colors here. Now, at the moment, these
shapes are all inside group. So if we want to select
just one of them, we'll need to go up here to
the direct selection tool or where the direct
selection tool is and select the
group selection tool. Now, the group selection tool allows you to select
within a group, really, really
handy tool to use. So I'm going to change
the colors here. I'm just using the group
selection tool to do that. At the moment, I'm
going to be stuck with these shapes
all being pink. I want the option to do that, but not necessarily to be
forced into doing that. I'm going to do is
change these as well. Every one of these shapes here is going to be
a different color. When I'm happy with
that, I'll click done. I'm going to bring
back my artboards with view and show artboards. Let's go and grab
the current shapes, move them out of the artboard
and add a rectangle to it. That is the size
of the artboard. I'll press control or
command zero to zoom in. I want to scale down my pattern. So I'm going to object
transform and then scale. I'm going to turn off
transform objects and set the uniform to 50%, which is going to let me see
this pattern more clearly. In the next video, we'll have a look at recoloring
the pattern.
6. Pattern 3 Recolor the Rotated Shapes Pattern: When I designed this pattern, I split all these shapes
up so that they would have different colors in
the various elements. But you may want to put those
colors back together again. So let's see how we
do that first fall. I'm going to select the
rectangle, the square here, that is filled with my pattern, and go to the recolor
artwork dialogue and go to advanced options. In the advanced
options dialogue, we can see colors such as
the orange and the pink. Now, if I wanted those to
be the same pink color, even though I've separated
them when I made the pattern, it's easy enough to put
them back together again. What I'll do is I'll take the
orange here in this list, and I'm going to drag and
drop it onto the pink. And then to make
sure that these are the exact same pink because they're
probably not right now. I'll go across here to this drop down list
and choose act. And so what's happened
there is that the orange, wherever it was orange before, is now mapped onto the pink. So by splitting the colors up when you're
making the pattern, you can actually give
yourself more options when it comes to
recoloring the pattern. I'll just click. And
in the Swatches panel, we'll say that we have
the pattern that we had a few minutes ago,
as well as this new one. I'm going back to the one
we had a few minutes ago. Let's go back to the
recolor artwork dialogue. Now, in this particular dialogue at the very first screen here, we have an option for recoloring everything in this pattern. So if we looked at this
pattern and thought, we'd like to take it a bit
more towards turquoise. We could do so. What we'll do is just double click on
this color wheel here, and I'll go and choose
a turquoise color. Watch as I click,
what happens to the pattern because
everything's about to change. So I'll click and everything is taken towards
that turquoise color. Now, at this point,
you might look at some of these
colors and say, Well, I'd like to furness those a
little bit, or we can do so. This is linked, so the co many colors
are currently linked. When it's got a
slash through it, they're not linked anymore. So we could take this red, for example, and make
it a lighter color. And then we could take, for example, the blue
that's at the back here. That's this color here
and do something with it. So we could make it
much darker or we could take it somewhere
completely different entirely. You can change all the
colors in your image simply by selecting a different
color in this dialogue. Now, if I click away,
I'm going to have that pattern added
as a pattern swatch. But let's go back to
the previous one, the one that had everything
different colors, and let's try
recoloring it again. So again, back to the
recolor artwork dialogue, Now, another option you
have in this area of the dialogue is down here
with the prominent colors. And so we could say that we perhaps don't want so much red. So here there's a divider
either side of the red. And if I pull this divider
in this direction, we're going to minimize the
impact of red in the image, and you can see that it's
becoming more orange. If we wanted more of
the blue, for example, then we can go and drag the blue across and then we'll get
more blue in the image. This is a bit hit or miss, but it's also a really
interesting technique to play around with and see how you can affect the
colors in the image. Again, I'm going to click
away from this because I do want to save this
as a color option. Again, I'm going to
select on my pattern, go back to the recolor
artwork dialogue, and just finishing up
in this dialogue here. One other option we have is obviously to change the
color order randomly. So that's taking the colors
that we had a minute ago, but mapping them
differently in the image. When you see an
option that you like, just click away from it so that you can save that
as a new pattern. I'm kind of liking this, so
this is another pattern. Let's see what we've got. We've got the original pattern, a recolord version
that we were simply recoloring to have
something to work with. This version that has the
orange turned back into pink, and then some other
reclored versions using that first panel in the
recolor artwork dialogue.
7. Pattern 4 Four Petal Rotated Flower Pattern: Okay. For this next design, we're going to add some visual
complexity to the pattern, but doing it in a
fairly simple way. I'm going to click on new file. I'm going to make
a document 1,000 pixels by 1,000 pixels. If you're following along, I totally suggest for this
design that you use the exact same measurements
as I am because measurements are going to be
critical. I'll click Create. So we're going back to creating
our sort of leash shapes. I'm going to the Ellipse tool. I'm going to click on the
topmost anchor points. Shift click on the bottom one, and we're going
to sharp corners. I'm going to fill
this with a color, and I'm going to
remove the stroke. Okay. We want to make a
four la flower out of this. So I'm selecting on it, choose effect distort and
transform and then transform. We're going to rotate
around this point here, so I'm going to click
the bottom middle of these nine boxes. I need three copies
because I need an original plus three to
make a four petal flower, and dividing three 60
by four gives me 90, so I need a 90 degree rotation. I'll click. At this point, if you want your flower to
look a little bit different, you can adjust it,
so you can make it wider in the
petal or narrower, so that's up to you. Once you've got it the
way you want it to look, you're going to select
over this petal, which is the only one
that's selectable right now because this is
a transform effect. You're going to choose
object expand appearance. And that's just going to bake
the effect into the shape. You'll see in the last palette, we've got groups and
groups and groups, so we're going to choose object ungroup and continue to do that until ungroup is
no longer an option. And then having cleaned
up all of those groups, we're just going to
put this back in a group with object group. That's critical
because we want to shape it and move it around, so we want it to travel
as a single object. This art board is 1,000
pixels by 1,000 pixels, which means half of it is 500. I want this flower to
be less than that. With it selected, I'm going
to the transform panel. This is not locked right now, so I am going to lock
it because I want to make a change to both the width and height at the same time. I want this to be less than 500, so I'm going to choose
460. And just click away. Now I want a rectangle
to go behind it, but I'm going to use
a rounded rectangle. So I'm going to click
on rounded rectangle. I'll click once in the document, and I'm going to make a
rounded rectangle that is 480 by 480. In other words, slightly
bigger than the flower. The flower was 460. The rounded rectangle
is four 80. I'm going to change
the color on this, so I'm going to make
it a sort of gray. And then for the
rounded corners, I'm just going to drag in on the corner until I get
something that I like. The square is in front of the flower. We
need to put it behind. So with it selected, I'm
choosing object to range, center back, and
then I'm going to select over both of these
and just center them. Now, the rectangle is 480, and the width of the
document is 1,000. What we need to do
is to put this up, so it's ten pixels
in from either edge. So I'm just going to approximate where I think it should go. I'm going to the
transform panel, and I'm going to
look at the point for this particular selector. And if it's going to be
ten in from the x and y, this should read ten and ten, and it doesn't, so I'm just going to make it
read ten and ten. So it's in possession. We're going to put the
next one over here in set ten and ten from those
sides and here and here. And that will give us a
gutter down the middle of 20. So everything's going to line up perfectly in our
pattern later on. With everything selected here, I'm going to hold
down the old key as I drag a duplicate down to here. Now, the document is 1,000 by 1,000 and we want it
to be in set ten. So the bottom position down
here should be 990 990. With this selected, we'll
go to the Transform panel, and we'll click here to make sure that this is the
one we're talking about. It's not in the right position. So we're going to type
99990 and just click away. Now, this one is going to be at a position of ten
on the wire axis, and this corner would
be at nine 90 as well. Go to drag it up into position. Let's check its
top right corner, which should be at x is
nine 90 and y is ten, that's in a perfect place. Before I duplicate it down here, what I want to do is rotate
this particular flower. I'm selecting on the flower
and I'm going to choose object transform
and then rotate. I want to rotate at
around 45 degrees, so I'm breaking up the pattern
a little bit. I'll click. You'll notice that the
bounding box is a diamond. T square it up, I'm
going to choose object transform and
then reset bounding box. Now I'm going to reselect
over both of these shapes, Alt drag a duplicate down here. Again, thinking about where
we're positioning it. In terms of the y value, it needs to be at 990, and the x value, it
just needs to be ten. So we're going to check
this point down here. With the shape, I'm going to
click the transform panel. I'm going to click to indicate that this is
the one I want to check. It should be in ten pixels from the x and nine 90 on
the y, it's perfect. Everything is ready now for us to go ahead and
make our pattern. To make the pattern, we're
going to select over all of the objects and choose
object pattern make. Now, at the moment,
it's coming in with a width and a height of 980. That should be 1,000. What we want is to build back the extra spacing
in our pattern. We've got a gap of 20 down here. What we want is ten and ten
to make up the distance. So just be aware that the starting point
for the pattern here is not going to be correct. You're going to have to
put in your own values there to space
everything out properly. Now, what I want to
do is get rid of my artboard right now because it's not being very helpful, so I'm going to choose view
and then hide artboards. So this is my pattern. But this area here
is transparent. So if we want it to be not transparent so that we
would be able to recolor, we're going to have to put a
background on the pattern. So I'm going to the
rectangle tool. I'm going to click
once in the document. I'm going to create a rectangle
that is 1,000 by 1,000. In other words, the width and height of my pattern
tile. I'll click. I'm going to double click
here and we're going to give it a different color because we want it to be visible and distinguishable from other
elements of the pattern. I'll click Okay. I'll
choose object arrange and then sent to back so that we can send the background
to the back, and I'm going to
pick it up here. Just being really
careful to make sure I'm picking
up the shape and not other bits of the pattern and just
move it into position. Where it goes is where
it's not going to cut anything off so I can
see my entire pattern, and nothing is cut off, and everything is covered up, so all of these gaps
are covered up. If I'm happy with
that, I'll click done. I'm going to bring back in my art boards with view
and show artboards. Let's move these shapes
off to one side. Let's add a 1,000 by 1,000 pixel rectangle
into our document. Zoom into it with
control or command zero with the fill selected,
which I've got here. I'm going to click to
add my pattern to it. Let's transform the pattern
with object transform scale. I don't want to transform
the container down, so I'm going to turn
off transform objects, but I can scale down
my pattern itself. I'm going to bring it down
to about 35% and click Okay. So the pattern is looking good, but there are other things
that we can easily do to give it a bit more
visual complexity. What I'm going to do is
click on the pattern in the swatches panel and drag and drop it
onto the plus sign. So I'm going to
keep this design, but I'm going to give myself the ability to have
an edited version. So I'm going to double
click on new pattern. I'm going to zoom back out. So I'm going to the Zoom tool, I'm going to zoom back out. A couple of things
at this point, and one of them is
that I'm going to change the color
of these designs. I'm going to the selection tool, and that will allow me
to select these flowers. So I'm going to
actually select both and change the color of
both of those flowers. Again, I'm not really
concerned about what color I'm choosing
at this point. It's just that I've got different colors
for these flowers, and these two are going
to be the same color. So when I change
the color later on, they're both going to change. Now, the other
thing I want to do is something with
this rectangle. So I'm going to layers
palette because I need to pick up
these rectangles. So I'm opening the layers panel, and I'm going to click on
the first of the rectangles. And in the layers palette, I'm going to hold
the control key down as I click on
the other three. So all four of these rectangles, these gray filled
rectangles are selected. Going to the appearance panel, you can get to that by choosing window and then appearance. Now, you get a visual check
at this point because here, if you had something other
than gray rectangle selected, you would have an entry here, which would say
mixed appearance. So we're not seeing mixed appearance because we
don't have mixed appearances. Everything that
we've got selected has the exact same appearance, and that is as it should be. So what I'm going to do
here is go to the stroke, and I'm going to add a stroke. So I'm just going
to select a color. Again, it doesn't
matter what color, but just so it's
going to be visible. I'm also going to
increase the point size. So there is now a blue stroke around the edge of every single
one of these rectangles. I want it to be offset, so I want to bring it
inside the rectangle. With this stroke selected, you'll see here that you can select various areas
in this dialogue, we want to make sure that
this stroke area is selected. We're going to the FX icon. We're going to choose path
and then offset path. At the moment, the
offset path is operating to throw the stroke away from
the edge of the rectangle, so it's ten pixels outside it. Well, we wanted to
bring it inside it, so I'm going to give
it a minus value. You can see it's pulling
now inside the rectangle. Now you can add more to that so you can make it more
or less as you like. Now, in addition to doing
this with a plane stroke, you could also
change the stroke. So let's go to the stroke option here and let's add
a dashed line. So here you're saying dashes
along that stroke line. You've got a 12 point dash, and then you can control the gap by adding a point
value for the gap. And so if the gap
is really small, the lines are dashes are
going to be closer together. It's very large, then they're
going to be further apart. Now, if you want dots, you can make the dash zero. That's actually going to
give you little mini dashes. Let me just show you
what this is going to look like because this can
be a little bit confusing. If we increase the
stroke weight here, you'll see that instead of dot, we've actually got
vertical dashes. Well, the issue here is that we need to put
round caps on them. Obviously, we're going
to need to increase the gap to separate
the dots from each other and probably decrease the weight now that we've actually got something
that we can see. You can work around
these settings to get what it is that you like. I actually like the dashes more. I'm going for dashes. I'm going to use a two point and probably a little
bit bigger of a space. When you're happy with that, you can just save your pattern, so you're just going
to click done. Now you'll get a warning
because of this d stroke, or even if you had
a plane stroke, you'll still get a warning about that. You can just click. That's actually going to
be set into the pattern. You can see that the pattern
is now showing up here. Again, we can
recolor this pattern using the tools in the
recolor artwork dialogue, we'll have a look at
that in the next video.
8. Pattern 4 Recolor the Rotated Flower Pattern: To recolor our pattern, we're going to fill a shape
with the pattern and then select it and go to the
recolor artwork dialogue. One of the options
that I like to use for a pattern like this is
the neutral color scheme. When you do that, you get
some flat or neutral colors. Of course, you can always
take any of these colors and choose a different version
of the color for them. If you're happy with that, just click away from the document, and that is a new swatch that's added to the
Swatches library. Let's go back to
the original one that we were working with. Let's go back to the
recolor artwork dialogue, and let's look at
the possibilities of AIs regenerative color for this selecting on
regenerative color and looking at an option such
as trip disco lights. If we see something
here that we like, we can just click away
from the document, and this will be another one of our available pattern
color options. Now, as I'm looking at this particular coloring
of the pattern, I'm wondering if little dashes, little stitch
lines, if you like, might look interesting
on the flowers. So what I'm going
to do is grab the original pattern swatch and
drop it onto the plus sign. So I've got a
duplicate to work on, so I'm not going to
destroy the original. I'll double click on it to open it up in the pattern make tool. So I'm going to
select on my flowers. I'm going to click on
one and then shift click on all four of the
flowers that can be edited. I'm going to the
appearance panel, and you'll see that this time, the appearance panel
is a bit different because what we've got is a
group and we've got contents. These flowers are
not all the same. They're not the same fill. But if I go to contents
and double click on it, I can get to the area that I warned you about that you would get mixed appearances, but we can add a stroke here. We wouldn't be able
to work on the fills, but we can add a stroke because none of
them have strokes, they've both got the same
stroke, which is no stroke. So I'm going to click
here and add a stroke. I'm going for I really
want a white stroke. I'm thinking I'll just
go straight for white, and I'm going to make it a
couple of points with Now, again, I want to move
this stroke inside. So with the stroke selected, I'm going to the FX icon. I'm going to path
and offset path. And again, I want
to bring it in. So I'm going to bring
it in minus ten. I think that's going to
be okay for the stroke, but I do want it to be dashes. So let's go to our dash line. And I'm kind of ing that, so let's call that good
and just click Done. Again, we're going
to get that warning about things that
are active content, and they're going to be
baked into the pattern. Again, this is a
really good reason for working on a duplicate of a pattern that you kind of like. So that you're not
destroying it, having to unwind
things if you make a mistake or don't like
what it is that you see. So let's select
over the rectangle, make sure that we have
the fill selected here, and let's go and
see our new swatch. I'm kind of liking
that. Maybe it's a bit of a problem
with the yellow. I'm not seeing enough contrast, but that's an easy fix. We're going into the
recolor artwork dialogue, going back, into the
advanced options. And it's this yellow that
is causing us issues. It's probably easier to look
at it from the edit menu. Make sure that these are
unlinked, these harmony colors, and go and get this yellow and do something with
it so that we can actually see a bit more clearly those little
stitch marks, those little dashes in that
flower and just click Okay. So these little dash lines are adding some visual
complexity to the pattern. You can add them inside
the pattern make tool, but always think about working on a duplicate
of your pattern, particularly if you
have something that you like so that you
could always come back to it if the changes that you make in
the pattern make tool simply aren't
working for you. Okay.
9. Pattern 5 Pattern of Offset Flowers : For this last pattern, we're going to start with a new file. It doesn't matter what
size your file is. I happen to be using one
that's 1,000 by 1,000 pixels, but size is not critical
for this particular design. I'm going back to
my ellipse tool. I'm going to drag
out an ellipse. I'm going to the
direct selection tool. Click on the topmost
anchor point shift, click on the bottom
one so that I've got these two selected
and not the middle ones, and just make them
pointed shapes. I'm going to turn off my stroke, and I'm going to
apply a fill to this, we're just going to
choose a fill color. I need to make this
a six pointed flow, so I'm going to effect distort and transform and
then transform. Six into 360 goes 60 times, we're going to use
a 60 degree angle. We need six petals, and so I need five plus
the original sixth. Then I'm going to
click here on the bottom one of these nine points, these nine rotation
points so that my leaf shape is rotated
correctly. I'll click. Now, this is not quite
the shape that I wanted. I wanted it to be
more like this. I'm just going to size it
before I go to the next step. The next step is to expand this, with it selected, the only thing I can select is this
leaf right now. I'll choose object and
then expand appearance. If I were to look in the
layers palette at this point, I'm going to have lots
and lots of group. With the objects still selected, I'm going to object ungroup, and I'll continue to do that until ungroup is no
longer an option. Then I'll click group
to just group them back together again because
I do want them in a group, but I don't want lots
and lots of groups. Now, with this particular shape, I need to rotate
it at this point. I'm going to rotate
at 30 degrees, so that is half of the rotation that we used
on the leaves originally. Object transform rotate, and we're just doing 30
degrees and I'll click. The bounding box is now
at a very weird angle. So with the object
still selected, I'm going to choose
object transform and then reset bounding box. Now, before I go any further, the pattern that I'm going
to make first up is going to use the size of this shape
as the pattern tile size. Let's go and have a look
at how big this object is. I'm just going to
the transform panel. You can get to it by choosing
window and transform. And you'll see here
that it's four, well, for me, it's 492 point
whatever, whatever, whatever. So there's all sorts
of digits here. What we want is a whole number. So I'm going to
select over this, and I'm just going to make it the nearest round number,
which in this case, for me, would be 4902, and I'm going to make
the height 4206, which is the nearest
round number for me. Your values are going
to be different, but I'm willing to
bet you're not going to have even whole numbers, and what you want is
even whole numbers. We're knocking a little
bit off this shape. Nobody's ever going to
notice that we did that. So I'm just going to
click away from it. This is going to be our
first pattern piece, we'll select it and choose object pattern make. Click Okay. I'm going to use an
offset for this, so I'm going to brick by row and I'm going to
use a half offset, and this is the look that we're going to
get for this pattern. Let's just say it at nine nine, and let's turn off the
artboard with hide artboards. It's a cute little pattern. Now, you see here that
the patent tile width is, as I promised the exact same
size as one of these shapes. And that's why we made it a whole number and for preference, an even number before we came
in to make this pattern. Now, before I leave
this dialogue, I'd like to put a
background on this. Let's just click to show the tile edge so we can
see where we're working. Let's go up here and
select the rectangle tool. Click in the document where
you need a rectangle, 4902 by 4206 for me. You're going to make a rectangle that is the
size of your patent tile, whatever that happens to be. I'll click Okay. The color is not going to help
me at all here. So let's just make
it light gray, let's send it to the back with object arrange, send to back, and then let's go to the
selection tool and move it until we can see the
whole of our pattern. Wherever you move it to just as long as you can see the
whole of the pattern, that's good, and
we'll click done. So we've got one
pattern here already, and let me just quickly fill
a shape with this pattern. Now, because of the way that
we designed that pattern, these flowers are going
to be all the same color. We can't split them up easily. It's just not possible because they were all the same flower. We only had one flower
that made up our pattern. So let's have a look
at how we could make a pattern where we had
different colored flowers. We're going to start with
this particular shape, but we're just going to
drag a duplicate away, and we're going to line it up as if it were in the pattern. So what I'm going
to do is pop it where it would be in the
pattern that we just made. And I'm going to
change its color just by clicking on
a different color. Then I'm going to drag
another one away, and I'm going to position it, so it's just touching this tip here and make
it a different color. And then I want a third copy, so I'm going to drag a
duplicate away and put it here, and I'm making sure
that every one of these flowers is a
different color. Now, if you're not 100% sure
that these are lined up, choose view and outline, and then you can zoom in. And what you should see is that these overlaps here
should look seamless. It should look as if you've actually just drawn these lines. And these are looking
perfect to me. They're really, really good. I'll choose view GPU preview. So now I know that these
are touching exactly where they should to
make our pattern. This time, we're going to
select over all four shapes. We'll go to object
pattern, make. Let's zoom out so we can
see what's happening here. Obviously, things
aren't lining up yet. So what we're going to
do is to unlock this, maintain width height, and what we're going to do
is bring things in. So I'm going to
reduce the width. The height was perfect,
the width was not. Now, when we're
bringing this in, if you want to double
check that you've got the measurement correct, you just need to double the
width of the original shape. Now, my original shape
was 4902 pixels wide. Of course, yours is
going to be different. But whatever that was, multiply it by two, and this is the width that
you should have here. 8502 is double the height
of my original shape. My original shape was 4206. Multiply that by
two, you get 8502. So now we have a pattern that has four different
colors in it. Before we leave here, let's put a background on our pattern. I'm just going to
click in the document. This time, I need a rectangle
that is the 9804 by 8502. Again, I need a different color. Again, I'm going to place
it at the back with object arrange and
then send it back and just move it so that I'm 100% sure I can see all
the bits in my pattern. Right now, the pink flowers
are just getting cut off, so I'm just mindful of that. Everything looks good here now. I'll click done. Let's
redisplay the artboard. Let's move these
shapes out of the way, and I'll add a rectangle that is the size
of the artboard. Square it up on the artboard and fill it with our patterns. Let's just choose
object transform scale. I'm going to reduce
the scale to 45%. We're not transforming the
objects. I'll just click. This is the original pattern, and this is the one that has multiple colors and
let's have a look at a recoloring
option for this one. I'm going to try
those neutrals again. Let's just go to neutral and
see what that looks like. It's really lovely. I'm going to click away because
I want to keep that. Again, selecting on the object that is filled with the pattern. Let's go back to the
original multicolor, and let's have
another look at that. Let's have a look at an
option such as beach. Now, if you like the beach
sort of color scheme, but like to see some
alternatives for it, we're just going
to rotate around. So we're randomly changing the color order to see
what we can find here. And they certainly
have a sort of Hawaiian feel to
them if you like. When you see something
that you like, you're just going to
click a way to save that. Also, in this dialogue when you are rotating colors around. If you rotate too far
and want to go back, this is the only dialogue or the only part of this dialogue where there's actually an undo. So you can actually go
back here and forward. You can't do it in
the other panels when you get into the
advanced options, but you can at this stage. So if you do want
to rotate colors, it's really handy
to use this part of the dialogue because you've
got that sort of undo option. So if you go oops,
I've gone too far, and I really want to have a look at the one that I
had previously, well, you can get back to it.
10. Project and Wrapup for One Shape Many Patterns: We've now completed the
video training portion of this course so
it's over to you. Your project for this
class is to create one or more of these patterns
in Adobe Illustrator. Now you can use the same
starting shape as I've done, or feel free to change it up to something slightly
different if you like. Post an image of your
completed pattern as your class project. I hope that you've enjoyed this course and that
you've learned lots about making patterns and recoloring
them in Adobe Illustrator. Now if you did
enjoy this course, I'd really appreciate you
taking the time to review it. Even just indicating if your expectations were
met is helpful to me. By writing a sentence or two explaining why you
enjoyed the course, you'll be able to help other
students to see that this is a course that they
might also like to take. If you see the follow
link on the screen, click it and you'll be alerted when new classes are released. If you'd like to
leave me a comment or a question, please do so. I read and respond to all
of your questions and comments and I look at and review all your class projects. My name is Helen Bradley. Thank you so much
for joining me for this episode of Graphic
Design for Lunch, and I look forward
to seeing you in another class here
on Skillshare soon.
 Helen Bradley, Graphic Design for Lunch™