Transcripts
1. Introduction: Animation is a team sport, and getting the feedback
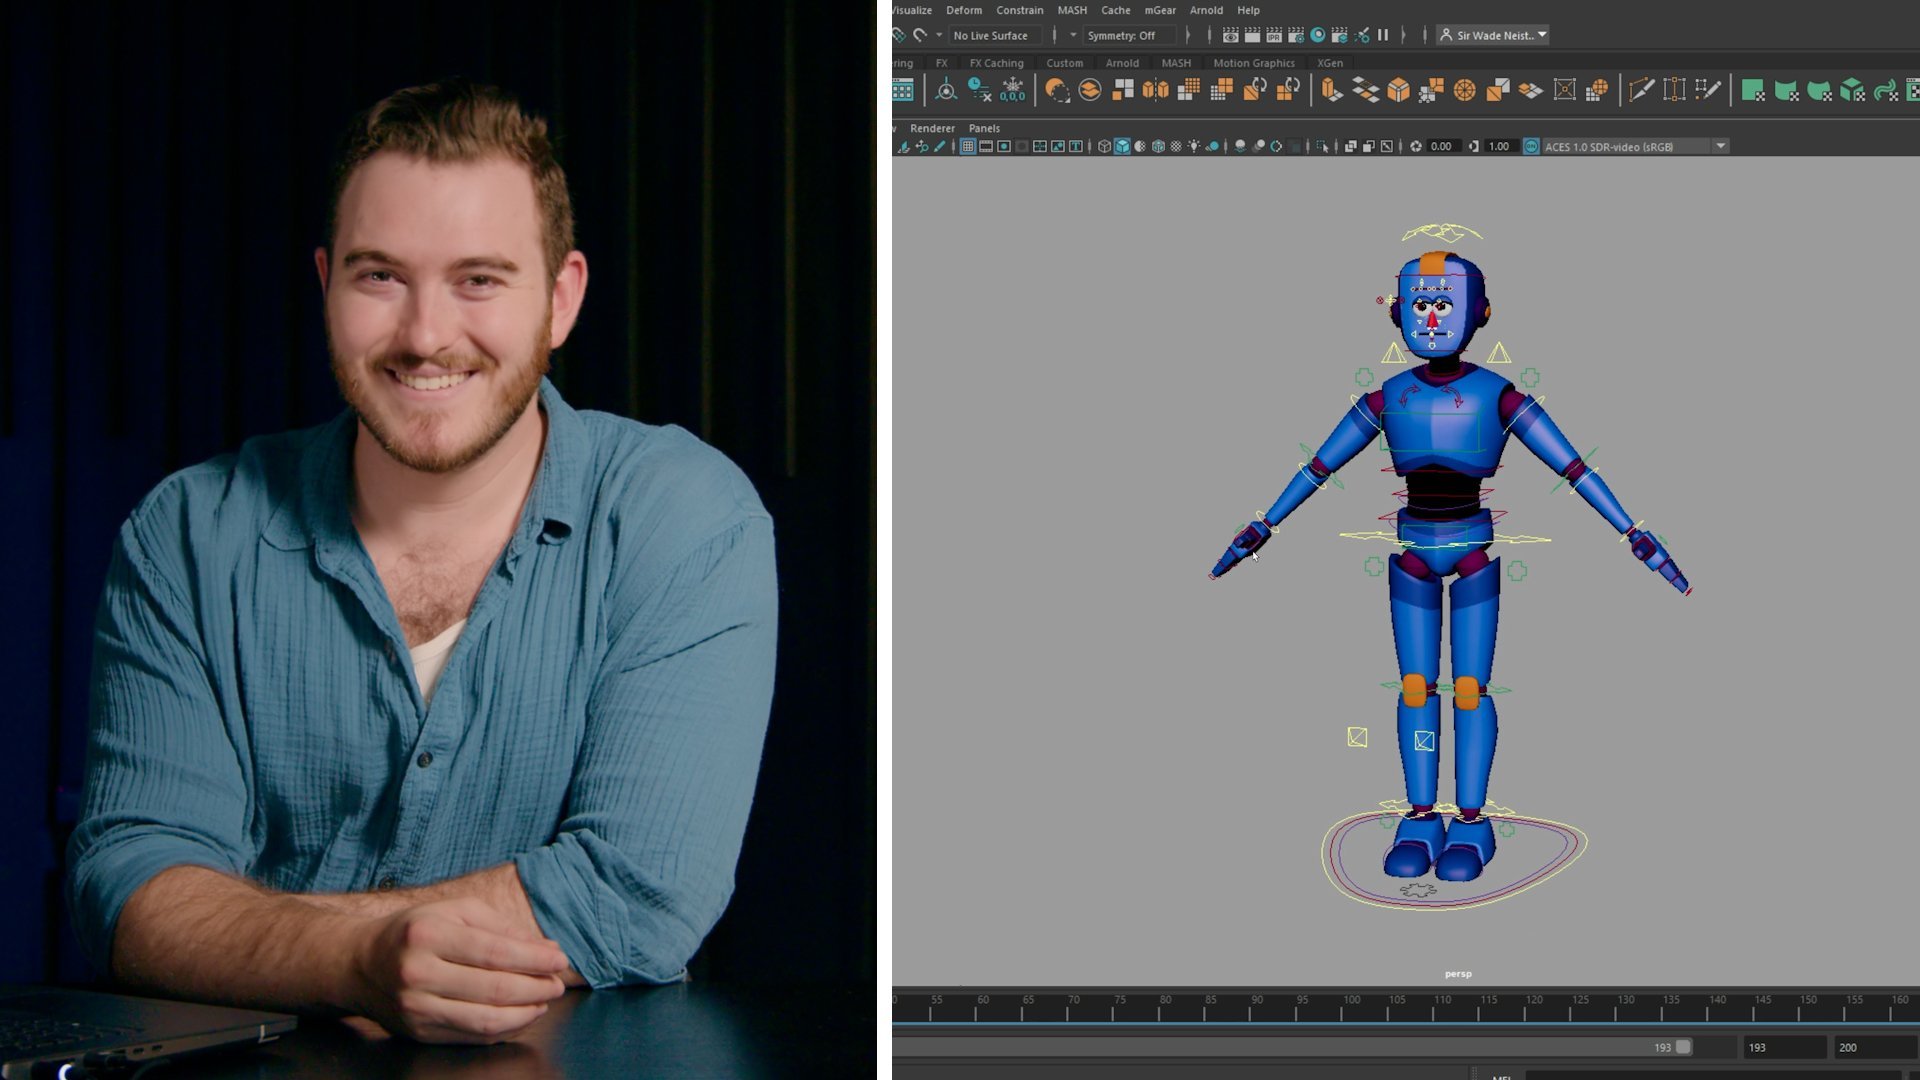
is super essential in actually making these ideas better and the best they can be. Hi, I'm Sir Wade Neistadt, I'm a 3D character animator, a full time content creator, and an animation
trainer and educator. In addition to
freelance animation, I create YouTube videos for aspiring and
professional animators. From the beginning, my
goal has been to create the resource that I wish I had had when I was
learning animation. In this class,
we're going to look at some different ways that you can rework a shot
when you get notes. We're going to start
off by looking at some animation we completed
in a previous class, and then I'm going to introduce some different ideas that need to be incorporated and show you specific workflows
and techniques that are going to be needed to
accomplish those notes. To follow along, I would
say you need two things. When discussing feedback, get a pad and paper because you're going
to want to take notes. This is important
information that you'll want to just keep
through your career, build upon and evolve
your opinions of. When it comes to the
actual animation part, it'll help if you have something that you've
animated before, whether that's from one of
our classes that we've done together or just anything
else you've done in the past. This class is really
for all animators. If you want to do animation, if you've been doing
it for a while, everyone will get
something out of this one because everybody should
be receiving feedback. I'm excited you're
here. I hope you enjoy the class.
Let's dive right in.
2. Getting Started: Since this class is all about receiving animation
notes and feedback, whether it is your own thoughts and opinions about how
your shot turned out, or you've given it to somebody else, someone that you trust, someone that can help
you grow as an artist, it'll definitely help to have
something already animated. Now, hopefully, at this point, you've build up some
amount of work, whether you have been following
my classes where I've showed you how to
block an animated shot in Blender or the class
where I showed you how to create more complex
animation in Maya. I'm going to use those
files a little bit later on to show you how
to take a shot, rework it in small, large and really large changes that are going to require some different
workflows and some different ways of
thinking about our shot to adjust and alter what
we've already created. Hopefully this class will
give you a good guide of how to approach making those
alterations to your work. So let me show you some
of the stuff that we're going to be working
on in these lessons. This is some animation
that I created earlier in another class that you can
check out where we take a complex animation
inside of Maya, specifically the dive role in the middle of this run cycle. The ending of this dive role has our character roll on the
floor and pop back into the air in this
more cartoony jump back into the run cycle. This is the part
that we're going to be adjusting a
little bit later on. I actually presented
this animation to a 3D artist and friend of mine. He's not an animator, but he has a really good sense of
these types of things. So I thought it'd be
a good opportunity to involve the notes that he gave me as a way for us to show how to make adjustments. Because, as you can see,
the character runs, they squat down, they jump, they dive, they roll, and then they press against the ground and pop
up into the air. It's a more cartoony action, and that might work with
some projects to have that more cartoony hang
time and that energy. But if you're going for
something more realistic, more visual effects type work, whether it's a job, whether it's freelance or
just for your own demo reel, something like this is
almost where it needs to be, but you might need
something a little bit more grounded to really make
this feel correct. So this is one of the things
we're going to be tackling and figuring out how to change that one section without
getting rid of a lot of the foundational work
we've already put in and the time that
we've spent on this shot. You have to show it to somebody. You have to get eyes on it, and you have to see
how an audience will react to because it's not going to be the same
experience for a viewer as it is for you as the artist, and getting that perspective is a really important
part of the process. Now that we've talked through what to expect in this class, maybe in the next
lesson, we're going to talk about receiving
animation feedback.
3. Receiving Animation Feedback: When it comes to getting feedback and
critique on your work, I have some tips and tricks
for you to keep in mind, some advice for your career. When you work on a movie, work on a game, the majority of the people playing that
game, watching that movie, that TV show
commercial, whatever it might be that you're doing, most people who watch
that are not animators. They're just viewers
of whatever that is. They could have any job, any experience, and any amount of background in
this type of work. Usually, it's not very much. There's not a whole
lot of understanding of what went into the
process to get there. Non-artist feedback is an
extremely valuable resource that is not to be
underestimated. That's the first thing I want to mention just because a lot of the times people think that they don't have anybody they can ask, when in reality,
you can ask anyone. Let's say, for argument's sake, that you have nobody to ask. You don't want to
show a friend, and your mom says that she
hates looking at your work, and never to show her again. Well, then we're going to
have to do it ourselves. If you have to self critique, I have some tips on how
to observe your own work, how to analyze it, even despite the numbness that
you probably will experience when working
on a shot for so long. The easiest tip is just
to step away for a bit. If you are staring at your shot, you're working on it actively, and you hit "Play," you
might notice some stuff, but that's the
worst time to make any real decisions
about your shot. You need to take a break, go to sleep, go on a walk. You need to have an
extended period of time away from that piece of work to come back fresh and
look at it with new eyes. That may not be enough on
its own, but it's a start. Now, there are some more
specific techniques that you can use to sort of freshen up the way you see
the work as well. This is a website
called SyncSketch. You can make a free account and upload your animation
work to the site. What's nice is, you can
share it with other people. They can give you notes by either typing
here on the right, and they'll leave frame
specific notes or they can draw and give
you visual notes. It's a very helpful website. A lot of us in the
industry use it. This particular piece of work
that's going to play here is from another class that I've done here
on a SkillShare. If you want to see more
about body mechanics, you can check those out. Even if you're just
giving yourself notes or trying to give your own
critique of your work, this can be a very powerful
tool for a few reasons. First of all, you may have heard this tip
before, maybe you haven't. But one way to see your
work through a new lens is to flip it horizontally.
There's a button right in here. It lives right over
here, the hot key is P, but it's flip canvas, and it will just reverse the horizontal
axis of your shot. It's just going to make
it a little bit weird to your brain all
of a sudden that you're seeing it for the
first time this way. You might notice things that, just because it
doesn't look the same, it's almost like the cache or the memory that you
have stored of it. Now doesn't match
what you're seeing. That's a pretty common trick, and it can be really helpful. But one of the things
that I have not heard talked about as much is a
trick I really like to use, and this is specifically
to help you with the timing and the
spacing of your work, which is arguably one of
the more important parts to be able to self critique. It's also very difficult to notice as you're earlier
on in your journey. When you hit "Play," on
any piece of animation, you're typically going
to know what to expect. What you can do is this, there is a playback speed in
the bottom left corner here. I animate at 24 FPS, and so
that's what it gives me here, and you can see that I can
up the speed to 1.5 speed. If I hit "Go," it'll play
a little bit faster. If I up it to two speed, I can play a little bit faster. Your goal here is to keep upping the speed until you can't really tell
what's going on anymore. Because the question
is, if I play this at, let's say, 1.5 times speed, can you tell what's happening? Can you see all the keys? Is it clear what story
is being told or all the important moments that you
spent time posing reading. But let me exaggerate this, and go up to four times speed. This is just too fast.
My advice here is to up the speed until
it gets to that point, and then back it
down to where you could still see
everything working. For me, I think 1.5 speed
is the limit on this shot. It's still a little fast, but I can see it. This works. Now, what you can do is set it back to your
regular speed. See how much slower this
feels all of a sudden? In this particular shot,
I don't think there's any glaringly obvious
timing issues. But we can definitely feel like, this feels slow now. Maybe we could stand
to speed it up a bit. That's the key. As fast as you're able to
make it and still see it, is a good indication of how short your shot might
actually need to be because everybody has a
tendency when they're starting out to make their
shots really long. You have these three,
400 frame shots for actions that should only
take 100, 150 frames. Usually there's little
pockets of sections where may be the jump here plays normally, but then the flip
of this character, that needs to be sped up or slowed down or things like that. That's why inside of tools
like Maya, for example, you can actually hold shift
and move in your timeline, and you can bookmark different
ranges of your timeline. But being able to adjust
the speed of your shot will help you notice when
there are timing issues. Finally, when you get
notes from other artists. If another animator is
going to give you feedback, make sure you take notes
in one way or another. Don't just think you're going to remember it, because often, you'll miss little
pieces or you'll forget what frame number
somebody might have called. If you can record,
doodle, draw, write, however, you need to
take notes, that's fine. Just make sure you do
actually take notes. If you have a character
who is feeling angry, but they think your
character is confused, and they give you
all this feedback, try to phrase a request
for clarification in a grateful way of
basically saying, like, oh, that's great feedback. Thank you so much.
Actually, there is one thing I want
to double check. You said that my
character looks confused, I was actually going for angry. You don't want to
push back, and say, well, what I was trying to do. Don't explain every little thing, because
it just takes time. They don't need the explanation of what it is you
were trying to do, because it's clearly
not landing. They're giving you
notes for a reason. Beyond that, it's
always a great idea. At that point, if you're
frustrated, if you're like, oh, that feedback didn't
feel like it helped, ask another artist,
and this time, give some initial context
as to what it is you're looking for that you can build on what you've
learned over time. Then this is where you can
have two different options. You can either say, do you have any tips on how I can make my character look angry
instead of confused, because I think I missed the
mark there or you could say, if my character did
look more angry, I'll have to work
on that separately. What would your feedback be if the emotion
were different? Ultimately, your goal
is to learn more, and hopefully keep them sharing valuable
information with you. Encourage that through
asking questions. That's a super positive way
to get that information. Now that we've talked
about receiving feedback. I'll wait you in
the next lesson, we'll talk about actually
addressing those notes.
4. Addressing Animation Notes: Let's talk about what
happens when you receive feedback
on your animation. Sometimes the notes are small
and easy to accomplish, sometimes they're
larger and require you to really adjust a certain
part of your animation, and other times, unfortunately, the note is to change
the whole shot. Those are probably
the least fun, but they often result in some of the best
changes to your work. Now, as for the feedback
you're going to get and the size of those notes. When you're given a small
change, for example, if I point over here
and I'm told, oh, hey, do the Disney point, the two
finger Disneyland point, which fun fact, if you
haven't been to Disneyland, no one who works there is allowed to point
with one finger. They have to point
with two fingers. That new pose is going to
affect the surrounding finger. It might adjust the
wrist a little bit. Things like that are
not too difficult, and those are the best
notes to receive. But often the changes
become a bit larger. If it's not just the
pose of pointing, but it's I want to
have the character, from the arm over here,
we got to change the arc, we got to change the timing, we have to change the spacing, we have to change something
about an actual action where there's motion involved, depending on your workflow and the way you've built your shot, that could be easy to accomplish
or that could be a pain. The more keys you have, the
more controls you're using, the deeper you are
into your shot, the harder those
things are to fix. I see a lot of people
who are really resistant to deleting
key-frames in general. They always want
to try and rework, adjust, maybe add more keys to try and get that
thing in there. Sometimes it's not a bad
idea to delete stuff. If you are constantly trying to rework existing animation, you're trying to take one thing and shape
it into another, sometimes I can
just take more time than just redoing that section. But my tip for you
is to do bookends. The idea is, with whatever we need to adjust,
if I need to adjust, for example, the
height of this jump, I'm told, hey, the character
needs to go much higher. I'm going to go ahead and
open my Graph Editor, Animation Editor's Graph Editor, and just put that over here, if I need to change
the height of a jump, with this particular rig, I need to grab the IK
feet and the IK hips, and usually the way I work is pretty sparse in
terms of key-frames. I don't have too many
keys because I can see the top of the hips and I can see the tops of the feet.
They're a little bit delayed. But overall, I know what
my curves are doing. I'm very heavily using
the Graph Editor, so it's easy for me to
come in here and make adjustments because I know
what these splines represent. The more familiar you are with things like
the Graph Editor, the easier changes
like this might be. But you might not be a
Graph Editor animator. You might be more pose
based. You might use layers. There's many ways to
go about this process. But to do the bookend trick, I can go to a frame where
everything is good, and so what I'm going
to do is I'm going to hit "S" and set a key. In fact, sometimes
it's safer to take everything and set a full
key on the whole animation, on the whole character
on that frame so that everything is
locked down on Frame 58, I can move ahead to wherever
the character lands, which I'm going
to call Frame 73. I had a full key, I've now
just bookended that section. I have full keys that preserve anything on
the outside of this range. Within those two bookends, I can do whatever I need to do. I will have to be mindful of
how I blend in and out of these changes just
so that nothing feels too jarring once
we enter this new range. But I should be free to delete keys and make adjustments
without too much consequence. If I filter by the up and down, I do have a lot of keys here, I can technically come in here and blow away all these keys. I'll get rid of
this one and then all of this before
he hits the ground, this one, this
one, and that one. I don't think that's really
going to help me because I got rid of a lot of useful
information, but technically, I could come and make the
character go much higher, and then eventually his feet, I might also want to be
a little bit higher, and there's other things
I need to play with. I'll make these adjustments without setting additional
keys a lot of the time. I'll just start
moving things around, and I'll workshop it. The bookends are really
useful for when you're using things like the Graph Editor and you want to adjust
your animation, the view port in
the Graph Editor, however you choose to do it. But another technique for these smaller changes
is animation layers. I can take, for example, the feet, once again, and the body, the
hips, these three, in particular, because
these are the things that cause the character to move
around through the scene. If I leave out the feet,
they just stay there, so I need to make sure I don't leave them out, I
bring them with me. I'm going to go to my animation layers
over here on the right, and I can say Layers, Create Layer From Selected. That now creates a
new animation layer that put those three objects in, and they're ready to animate
on top of my original data. I'm going to lock what's
called the BaseAnimation. The BaseAnimation, you can see all my
key-frames down here, they grayed out, that's
all my normal data, all my animation
that's pre-existing, everything I've done, and now I have a brand new layer with no key-frames that
those three controls only can be animated within. If I try to grab something else like the head and set a key, it'll give me a
little error and say, that's not in the layer
and the BaseAnimation is locked, you can't key that, and so I have to just make
sure that when I do this, that's why I did the create
layer from selected. But once that's done, I
can take my three objects here and I'm going to
once again bookend. I'm going to take the three from maybe here because the
feet are on the ground, so I'll hit "S". I'll set a key. Maybe I'll do it on 59 actually. Because 59, the feet are
right off the ground. Sure. Up into the air, and then there we're trying to make contact
with the floor. Look at my bookends and
right here in the middle, I'll just say, up you go. Now, all I've done is I've done this adjustment
to the height, which if I go ahead back
into my Graph Editor, you can see that I have
all this grayed out animation because in my
BaseAnimation layer, everything's still
there, it's just not accessible
because I locked it. In this new layer, I
have a fresh set of curves that'll translate Y.
I can adjust my hang time. I can maybe change the
E's on this a little bit. He now goes much higher
with this layer. What's cool about this is if
I give this to the director, the supervisor, my client,
you wanted it bigger? Here it is. They
go, it's too much. This is really nice animation
layers I have a slider. I can just dial this
back, 50% of that change. There you go. Done.
Notes completed. There are different
ways to address notes, something like this where it's about the height
or about the pose, I can make these changes really easily with something
like animation layers, and the bookend trick works whether or not I'm
using that just to preserve anything outside of the bounds that
I'm trying to adjust. If I want to just
mute this layer, I can I can turn it off so we don't see the change anymore. I can also delete this if
I'm not happy with it, or I can merge it
back down and combine it into the final animation
if I want to keep it. I'll just delete it,
go back to normal, and I'll unlock my BaseAnimation so everything is back to normal. Now, let's say that I'm given feedback on this
dive, which I was, I showed this to
a friend who has a more realistic visual
effects background, and his feedback was that little jump at the
end is a little springy. It's a little cartoony. Could we see it maybe with,
like, a scramble? What do we do? I would
do the same thing. I would find a nice frame
like this where the characters kind of
in a point where we can create an
alternate timeline. We can branch off and
do something different. I'm going to grab
all the controls, and you can see in
this particular case, I've got keys on
every single frame. We're not going to worry
too much about that, but I would pick the Frame 88. I'm going to set a full key. I hit "S", I key everything, and to be really careful, I'll also click the
little Bookmark button, and I'll leave a little note
for myself on Frame 88. Now, I can see right here in the timeline this orange thing, that just tells me which frame
I have done my bookend on. I'll move forward until we are maybe in
the down position. I'll leave myself
another bookmark. I should also set my full key there.
Now I can see, great. In between here and
here, fair game. I will narrow my focus, jump to 88, jump into here. Now this is the range
that I want to adjust. Instead of springing
up into the air, I need to animate a scramble. Now, there's not time
for me to completely animate this whole thing before your eyes right now.
It takes some time. But what I can show
you is the first step. What I would do immediately, I would save this as a new
version of the file just so I don't screw up my old file. I can always
come back to this. But first thing I'm going
to try is just say, you know what? Let's
just start afresh. Take everything in
between my bookmarks. Delete. We're not starting over. We're starting again
with experience. We can add specific poses if we know what
they're going to be. We can just layer in pieces that we think
might feel good. We can go look at reference, create new planning for this little part
of the animation, and Frankenstein it in there. There are a lot of different ways to go
about this process, but the first step is to not be afraid of
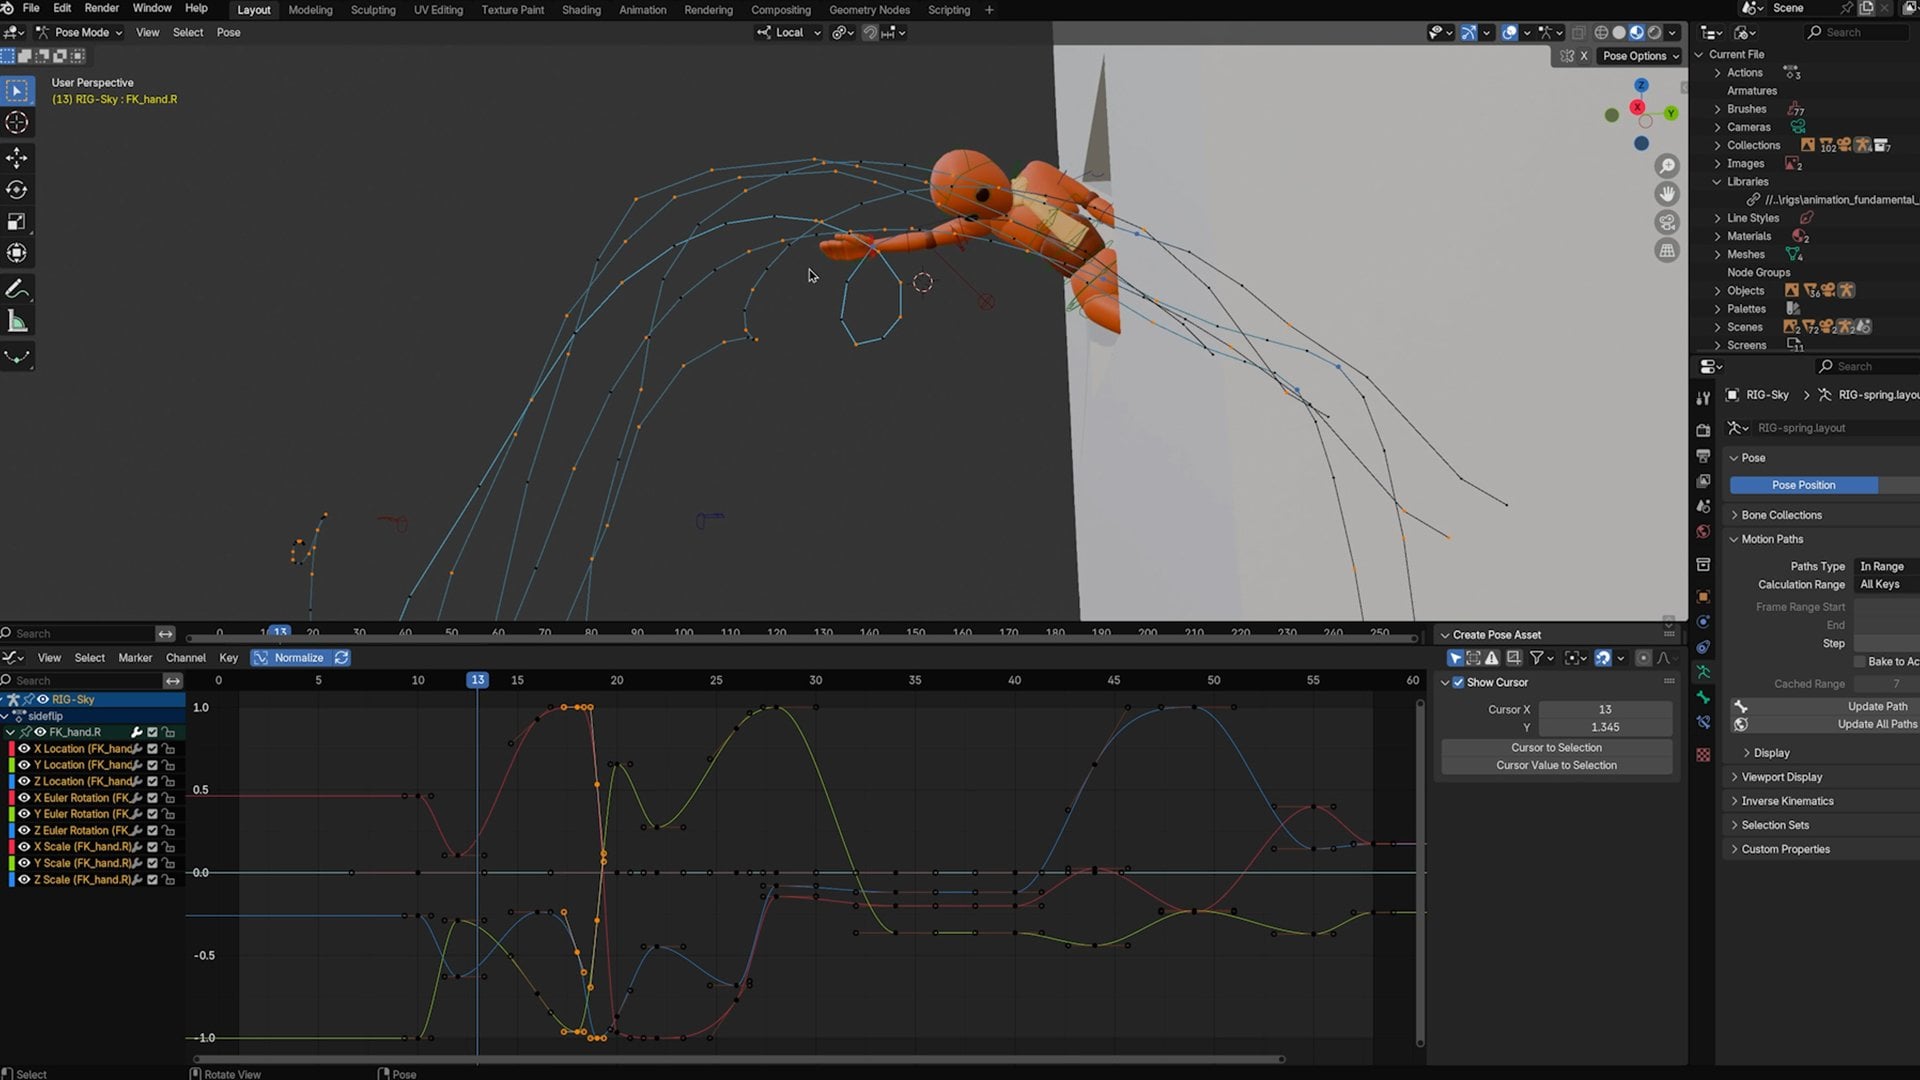
deleting our work. Before I delete, in general, in the Graph Editor, you can do what's called
buffer curves. Buffer curves are awesome. If I have some
rotation animation, in fact, let me just
do this with one curve so we can really
focus our attention. If I grab the hips
and I bring this up and I look at the
translates and the rotates, I will switch my view mode to normalize just so I can show you the curves
a little bit easier. Here's all the animation data
we have for this section. This represents the hips
jumping into the air, and you can see the little jump right
here in this green one. Rather than just blowing
it all away off the bat, I'm going to select
these curves. I'm going to come up to
this button up here. It'll look like
nothing happened. You can click it as
much as you want, nothing's going to
visually change. The only thing I
want to make sure I have is, under View, I want to make sure I have
Show Buffer Curves turned on. Instead of Maya, I need to
make sure that's checked. Because what'll happen now is if I move one
of these curves, I can see the ghostly outline
of where it was. See that? That little outline. Now, I can make adjustments, I can delete, add keys. I can just say goodbye,
whoo, and they're gone. But when I select that curve, I can see what it used to do, you can see what
it used to have, and so if I ever need to
reconstruct anything, it's pretty easy to just match the old ghost, or better yet, I can just select
that curve and click the button next to the one I had hit before, and that'll swap. It jumps back to
what it was before, and what I had adjusted now becomes the
buffer curve ghost, and I can just switch
back and forth. What I'd like you to
do at this point, hopefully you have something you've animated in the past, doesn't matter if it's
body mechanics, acting, could be anything.
Change something. Practice the process of
making an adjustment, small, medium, and large. If you have the time to do
all three, I'd recommend it. At the very least,
try small and large. I'd like you to try making these adjustments
in whatever way works best with your workflow. If you're working
in Blender, you don't have animation layers. Only Maya has those
at the moment. You can use the bookends,
you can adjust your splines, you can adjust your poses, you could try the
animation layers workflow, or if you're reworking
the whole shot, you might just go back to the drawing board for
that one particular part, new reference, new planning, different workflow,
try some stuff. I'll meet you in the next
lesson where we get into some techniques for
large animation changes.
5. Making Large Animation Changes: When it comes to making
adjustments to your animation, there are some
things you can do to make the process a lot easier. One of those things is knowing exactly which controls you're using for what and limiting how many controls
you're using in general. This isn't really
something you can adjust later on in the game
if you've already animated a whole thing
and you're close to polish and you've
used lots of controls. Ideally, you're getting
feedback early and often and you can address these things before they become too
much of a problem. But this is going to tie into
your overall workflow and the overall way you choose to work with certain characters. It's part of your setup
process and your planning, and you don't want to
skip it for this reason. So if we look at this character, this is just some
character from Miximo. It's just some mannequin
dude with a rig from mGear, which is a free
rigging framework. It doesn't matter what
character you're looking at, because most rigs
are very different. But what I want to point out is that all of these
different controls, if I hide the character,
there's a lot of options. There's a lot of
things to mess with, and guaranteed yours is going to look a bit
different than mine. However, some things
I want to point out are that the color coding you often see in the
torso is not an accident. In a lot of rigs,
you actually have a few sets of what we almost would consider
redundant controls, things that seem like they do similar things to other
controls on the rig. Why are there so many
that do similar things? Well, in the same way
that you have an FK and an IK set of controls for
the arms or the legs, we also have FK and
IK torso controls. The red ones in this
particular case, if I select it and go to
the top right corner, I can actually see
that it says spine, C0, FK0, control. On above that, FK1 control. It's an FK set of joints
because they're meant to be rotated and I would move up through the chain
and bend the torso. But then these yellow ones, you'll notice that they
aren't really moving around as I move
the red controls. So even though I'm
moving the torso, this other torso control, this big yellow one here, it totally got left behind. What's the deal with
that? Because it's an IK torso control. It's like a different setup. Now, the torso is a little bit different than the
arms and the legs. Typically with arms and legs, you only use IK or FK
in a given moment. But when it comes to the torso, you can use them
interchangeably as a group. You can mess with
different things. But what you should
do before you start animating is, like, learn what they do and
decide what you want to use them for because
you have, like, your main body control here, but inside, I actually
have an IK hip control. That can be used to translate
and rotate the character. It's great for
cartoony animation to be using this all the time. It's not that you wouldn't
use it for realistic stuff, but you just might have a different way of
going about it. Same thing in the
torso. I've got this rotation control that's
also meant to be translated. The reason that
you could just use these yellow ones is because by using the two of
them in conjunction, it will reshape the spine without ever using
these red ones. The point is that
it is a decision that you should be making. There are plenty of other tools at your disposal,
especially in Maya, one of the reasons that
people use it for this kind of stuff is because of how
many options you have to work. One of the workflows at Sony
Animation, for example, Hotel Transylvania, Cloudy
With A Chance of Meatballs, Spideivers, you know their work. A lot of the really cartoony
movies that they've done, like Cloudy With A
Chance of Meatballs or like Hotel Transylvania, they'll have these really
specific graphic 2D pushed poses in their 3D models. They're not accomplishing that
with their character rigs. So sometimes it goes
beyond the rig itself, and it's actually deforming the mesh using what's
called blend shapes. If I select my mesh, I will go up to Windows
Animation Editors, and there's a window in here
called the Shape Editor. In here, I can actually
create a blend shape, and if I add a target, it gives me the ability to
modify the mesh itself. So I'm going to turn off
my animation controls, and I'm going to
use just sculpting tools or modeling workflows. I'll just go to
the sculpting menu just so I can show
you a fun example. If I were specifically trying to maybe change the curvature of this inner torso stuff, I
want to just smooth it out. I want a really soft line. I could just use a
smoothing brush, and I've gone
outside of the realm of animation here
but if I'm given a note on the posing and I can't accomplish it with
regular animation means, sometimes in studio workflows
and freelance projects, especially, you
might need to resort to non animation solutions. So with this blend shape activated for this
particular mesh, I can go in here and I can
actually just shape it up. I can get rid of those
nicely defined abs, get rid of some of this
definition in the chest, and I'm literally just
smoothing the mesh. Now, if I go too much, I might turn off editing mode, and I can now have a slider that reactivates
that definition. And I can always make
additional adjustments. If there's something
wrong with his back and maybe from this
particular angle, we don't want this dip. We want to have just a really
smooth surface of the back. I could add an
additional target. Now this one's being edited, and I can say let's use
another sculpt tool. These are not huge
fixes to the animation, but they are things
that are going to define how we work
with our character. If your controls can
help you do it, great. If they can't, this is another really cool
studio-based workflow. This is a late-in-the-game technique and I can
key this, as well. These are some really
cool ways to adjust our animation for all kinds of different workflows,
especially professional ones. This can help you hit
very specific shapes to really define a character
and define an emotion, the body mechanics, to make it look a lot more
interesting and that much more memorable
to help you get a job or your next
client project. Now, two other quick tips I want to leave you with here are the FK and IK workflows of arms and legs and your
curve hygiene overall. Curve hygiene, what I'm referring
to is the graph editor. Go ahead and switch
all this back. The graph editor is your friend. I've said it before.
I'll die on this hill. It's a great tool. I recommend always having this
open somewhere. It helps to be able
to see, interesting. This down position
is a lot lower than the other down
positions surrounding it. When you're given a
note and you're told, for example, again, hey,
have them jump in the air. I know exactly which curves to use to do that
because I've been watching the curve editor evolve throughout the
process of animating. So it makes a lot of sense. I'm just like, I need
to make it go higher. Great. That's my
translate y-curve. Here's what it looks
like. These are the curves I have on it. I know what they do, and
I know that if I scale these curves up just
drag the whole thing, and now he goes much higher, I immediately go, well, he definitely goes
higher, but now his feet are hyperextending, but I
know what to do there, too. So here we have him
springing up into action, and this is where the FK
and the IK stuff comes in. I have the character
with FK arms, meaning that the entire
time I'm animating him, the arms are rotation-based. But the moment I have
him hit the ground, when he pulls his arms
here, wham, right there. I actually switch
the hands into IK. IK is the other system where I can place the
hands in a specific spot. And if I move the hips,
they now act like the feet. The hands and the
feet are both IK, meaning the body and the
hands and the feet are independent of each
other and they lock into place as
best as they can. You see the break up
I get too far away. But doing that change adds complexity to
when I need to start making larger adjustments
because to having him scramble and try to
get up in a different way, I now have to manage not just the IK skeleton that
I just showed you. I also have to manage FK skeleton keys,
which, for example, this little arm cage,
soon as he switches to the other mode, where
is that arm cage? It disappears. Because when you
switch from FK to IK, the controls that are
visible often change. So I know how to manage
controls that disappear. So I need to make sure that
I select the ones that I can see the elbow and the
wrist as an example. I got to scrub back over here, and I need to also add to
my selection the shoulder, the arm, the forearm, and the wrist and
on top of that, whatever control it was that actually did the
FK-IK switching, which in this particular
rig, is like, way back over here
towards origin, there's this little
thing right there. Which I can zoom in to show
you it's this little x. This little x is the
thing that actually has the FK-IK blend control. I have to grab all this stuff in order to set my bookends
and make adjustments. So for large changes that have more complex rig settings
involved as well, don't forget these
types of things. What you can do so
that you don't have to keep selecting this every single time I want to
adjust these things. If I need to keep
changing my timing, selection sets are your friend. Personally, I use animBot. animBot is a collection of
tools in a script that you can get you can create
for yourself a way to hit one thing and it re-selects everything
I've just done. In the script editor, bottom right corner
of Maya, there is a log of everything
I've been doing. You can see that I have all these different
selections of stuff and there's also the frame count that I've been going to.
We're going to ignore those. But if I just say, hey, all these things I was grabbing, I'm going to copy that, paste it into this little
mel scripting window, make it big so you can see it. You can see that we
have a selection of an arm FK control. We change to the frame. I'm
going to get rid of that. We don't need that
this one as well. Typically, if I'm doing
all my selections, I'm trying to grab them all. You need the last
one that has the -r, it basically deselects
everything else. I want you. Bam. That's just
how I remember it. It's my neumonic device. But I changed this, which is why I know it's the last
one in the sequence because when I clicked this and then I clicked
this and I clicked this, it was deselecting
the ones before it, so I know that these
aren't selected anymore. I changed them all to toggle. But this whole set
of things right here should be
everything I need. This is the entire right arm. I will click this little
button right here, which looks like a
floppy disk on a shelf. I'll just call this arm
right and hit okay. Now, you can see I just created a little button up here
on the top of my shelf. Once I click this button, boop, it actually grabs all those
things all over again. That is a huge time
saver to be able to re-select stuff that you need to be adjusting keyframes for, moving things around, or
dealing with bookends. Let me show you what it looks like after we've
made our changes. So here we have our run, we have our dive, and instead
of popping into the air, we have a little bit
of a scramble and kind of this half-hop to
get back to our run cycle. But that is how you can take something that you've
already put a lot of work into and just
build off of it. And while sticking with
things like the core, the root, the main big
parts of the body, just start layering
in what you want to happen piece by
piece until eventually, it starts to resemble
something new that still feels connected to
the overall animation. If you have a piece of
animation that you've already animated this works for and
you can chop out a section, do the bookend, and
make adjustments using this layered workflow,
great. Do that. But if you don't have a piece
of animation that really fits this mold where you have something where you
can make an adjustment, maybe all your shots are pretty straightforward and you don't
really know what to change. In that case, I would say, start off from scratch. Open up a blank scene,
bring in your character. Take a minute to evaluate the actual controls you want to use for this before you start. That's one of the
things we talked about. What I'd like you to do is have two poses an A and a B pose, a standing pose,
and a sitting pose. Just make a cube as your chair. Don't worry about downloading models or making it complicated. But just have your character
sitting and standing. The order is up to you and just figure out
just with the hips, just the main hip control, the overall motion to have the character sit
down or stand up, think about the weight shifts, think about where the
character's balance is. If they lean forward, they
can't just fall forward. They're going to have to
compensate by changing the translation as
well as the rotation. And then just start
adding detail. Do you want the torso
to drag behind? Do you want it to
lead the action? If you're sitting or
standing first or second, that might change your answer. But try that process as if you had other stuff
on the outside. So give them a prop.
Give them something to hold if you want to
make it more complicated. Regardless of what's
on the outside of this imaginary shot or if you're using a shot
that you already have, in this window where you
have two different poses, figure out how to get from A to B in a new way or if
it's from scratch, just by using this particular workflow and see how it goes.
6. Bringing Maya Animation to Blender: If we consider animation as just one piece of the pipeline where we have a bunch of
different departments working on a project
collaboratively, helping each other achieve some kind of a goal, oftentimes, animation is going
to export their data to another software,
another set of artists, and the department to hand it off for
another set of tasks. Inside of Maya, we have a whole bunch of
options for doing this. I thought I'd go through
some of the most common ones so that whether you
are working on your own and you're doing
Indie production or you are working professionally
with other artists, you're prepared for what
those projects need from you. Now, in this particular example, I've got a run cycle. This is just part of the larger animation that I've been showing
you this whole time. I will go ahead and do
the whole animation so we have all the fun stuff,
but just to show you this, I want to point out
something about cycles because the
first thing I want to show you is how to export to a game engine Unreal Engine, Unity, things like that. To send your animation
to a game engine, you actually won't be
sending the whole character. You're only going to be sending
the skeleton information. If I come in here, I go to Show, and then I
just turn on the joints. In my particular case, that will show the character joints. I'm also going to go
to Display Animation and then Joint Size with this character they're
big right now. I just want to show
you what this looks. It's a little bit
tighter. There we go. This is what the character
looks like under the hood. I make the characters
see through, you can see that the mesh, the character themselves is just being deformed by
the skeleton underneath. This is the whole,
rigging process, but when it comes to a
game engine, Unreal, for example, does not need the character's
mesh from Maya. When you're sending your
actual animation work, you won't be sending
the full character. You'll only be sending
this skeletal data. Let me show you how this works. When it comes to
cycles in general, I just want to point out that if Frame 1 and Frame
19, in my case, are the exact same pose, I don't actually
want to send 1-19. I want to send 1-18. I don't want the
first and last frame because if I play through this, I get the first and last
frame matching exactly, which is great for the cycle, but what would happen if I just hit "Play"
every single time, is you're going to see Frame 18, then Frame 19, and then it's going to
play the next frame, which is the same
frame, which means we just saw the
same thing twice, but when exporting
your animation, you might also need to have one additional frame at the
very beginning your T-pose. The T-pose is for exporting
the character and the skeleton to prepare us to be able to bring
the animation in. If I wanted to first
send out the character, I'll go ahead and
make my character selectable, and I'll
open the outliner. In this particular case, what I have is the character mesh, as well as my armature. It's got the whole joint
chain inside of there, and then the controls
are separate. We don't need the controls. Our exports will
never care about our animation controls because the rig won't be alive
once we export it. It's either going to
be just the mesh data or just the skeletal data. If we're sending
our work to Unreal, for example, if I go to File. There is an option for send to Unity, send to Unreal,
things like that. There's even a live link plug in which won't be
there by default. You can install it and you can do some really cool stuff, but the game exporter
is what we care about. This makes it really easy. You'll see that
there are a few tabs at the top, the Time Editor, which we're not going
to talk about today, the animation clips of
how we actually export our animation data,
and the Model Section. This is where you would select your mesh and your skeleton. You might want to select the
entire skeleton hierarchy, and the way you do that would
be to click the top level, go to Select and then Hierarchy. Photo grab everything
in this hierarchy, and then I'll shift click
to select the character. That is how I would select just the character
for this process. I would export my selection and I would give it a
name, all that stuff. This would be to just
take the character, send it to Unreal. Again, there's more complexities depending on what
character you're using. Once that's done to actually
export the animation data, or if you're doing
motion capture, you want to do
retargeting, you can bypass that whole thing
I just showed you. I just want to address
it really quick. What I can do here is if I
select the "Skeleton Data." That's going to actually
grab the joint hierarchy. You might also, again,
select hierarchy, grab everything in-between, but if I grab this root, I'll just use the
top level control. I will just say animation clips, export selection, and I'm going to create an
animation clip. So I will hit the "Plus" button, and then I'll give it a name. I'll say Start Frame 1-18
or I can hit this button. It'll chop it to the same
thing I have in my timeline. If I want this whole thing, I can change this to 1, 2, I think it's 126 actually, because 127 is again
that loop point, which is the same as one,
I won't back a frame. I want 126. I'll give it a name, anim_divescramble. Sure. Underscore 01. I like to give my
names the number. That way, if I need to
do multiple versions, it's easy to keep track of. Then we need to
check the settings, make sure that the Bake
animation checkbox is turned on, so it's actually going to
get the animation data, and we will go ahead and change the path to wherever
we want to go. I typically like to use the data folder that it gives
us in our project Window, but you can put it anywhere. This is also using
the Maya Set Project. If you want to just throw it on your desktop, that's fine, too. Just put it somewhere you
can keep track of it. I'll hit "Choose" and
I'll give it a name, which is up here, and I'll hit "Export." See how
quick that went? That was, instant. I'm
suspicious of that. I don't think it actually
got what I wanted. I think, in this
case, with this rig, I want to select my root,
select "Hierarchy." I'm going to try one
more time, change this to 03, export again. That time it took a second. I actually saw my playhead move, and I think that's
going to work better. Because now if I
jump into my folder, you can see I have
anim_diveScramble 1, 2, and 3.fbx. Your animation data
to game engines goes in the FBX file
format, typically. You can see that these
are 27 kilobytes, and this is 1.2 megabytes.
This is a bigger file. There's more in
there, and that's probably because these only
contain the root bone. This actually contains
more information. This animation data we
could bring into Unreal. We could now load this
up with really any rig, any character that's
set up over there, and we can attach
any mesh to it. That's what's cool about
animation data in this way is that this skeleton
can deform any model. As far as animators,
our job is complete, but that's how you use
the game exporter and how you export your
animation for games. Now, one more thing
I want to show you is what happens
when you want to actually just export
the animation data for film work flows, for commercials, for something
that you're going to send to an effects artist
or for a lighting artist. Because those artists don't
need to be retargeting stuff. They just want to
have your character, whatever it was that
your camera saw this whole thing right here,
this is what they need. Let me show you
what we do. If you want to export the actual
character information, this is the same workflow
that we used at Dreamworks, and I've got some
modifications to it as well. If I go to Frame 1, once again, I don't need the T-Pose in this particular case and Frame 126, there's my whole shot. Character is going to go running
off and doing his thing. I'll select the character. I actually just want to select the character's
mesh at this point. I'm going to go to File, Export Selection, and I'll
go to the little option box. I asked, how do you want
to export your file? You can choose from
all different things, but the ones we care about
are an Alembic and a USD. Now, the Alembic is
the most common way, and it's an older way,
and it's totally great. It works wonderfully, but it's
not the one that I prefer. It's also not in this menu. The Alembic export
lives somewhere else, and I'll show you
where that is second, but the recommended workflow
that I like to show is USD. If I scroll down, there is a
USD export and Arnold-USD. I just want regular USD export. If you're working
with a team and they have certain requirements, great, but in most cases, you don't really need
to worry about this. The only thing you
do need to check is animation data. Turn that on. Otherwise, you just
get the one frame. We'll make sure that we
get our frame range, which is why I changed it here. We want to change this from
1-126 in my particular case. Every single frame, if you
haven't done the Euler filter, which adjusts rotations,
it can do that on Bake. I don't need to worry
about that because I've already handled it. Now we'll say export selection. I'll go back to my data folder. I'll call this
anim_diveScramble_01. This time, it's a USD file, so 01 is fine because there's
FBX. Now there's USD. It's not going to hurt
anything. Export Selection. Runs through the timeline. It's pretty quick,
as you can see. Then while we're here, I'll just show you the
Alembic one too. Up in animation, I'm actually
going to switch to effects. I'm going to come up to Cache. This menu is not here if you're not in the effects menu set, but I go to the cache menu set, Alembic Cache, and I'm going to export selection to
Alembic option box. It's basically the
same steps over again. I'm going to use my time slider, or I could specify starting
end frames of 1-126. I'm going to scroll
down, and there's one extra thing I
need to check here. UV light. You want to make
sure you hit that button. Otherwise, the
texture information for this character is not going to connect properly
because the mesh has UV data, which is how it knows how to lay the textures onto the geometry. We can now say export selection, and we can make sure that we are set to an Alembic file type. We'll call this anim_diveScramble01,
another file type. Export Selection. It also
runs pretty quickly. Just to prove that this worked, I'm actually going to open up a different
software entirely. We're going to jump into Blender because it opens really fast. In Blender, I go
to Import Alembic, I navigate to the location
where my file is, and I can go ahead and double
click that Alembic file. Right there, you
can see we've got our animation live
playing in Blender. Obviously, the rig is no longer there because the rig
is not compatible, but the animation data is
there exactly as we expect. Now, file Import
one more time, USD. I'll do the same thing.
I'll bring in the USD file. Now, they're pretty much
on top of each other, so I need to move one of them over a little bit. There you go. USD and Alembic both work great. The animation meshes here
will be completely identical. You won't be able
to tell them apart. However, the reason I
recommend using USD most of the time is because if I go to the folder where
these files are saved, the FBX file that we had from the game animation is
only 1.2 megabytes. It's very small because it's literally just the skeleton and a bunch of rotation
translation information. It's just a text
file, basically. The USD and the Alembic
actually have the mesh data, so they're going to be heavier, but the USD file, which stands for universal
scene description, it is only 21 megabytes, where the Alembic file
is 104 megabytes. It's like five times as big, and it's a lot heavier. Pretty much compatible in any software application,
which is really nice. If we had a much heavier rig and we used the Alembic file, it might not play
back at 24 FBX, but the USD one
definitely would. It's just a lighter file type and a bit more effective
for playback animation. My recommendation
from here is to try it yourself, do the export. If you bring it
to something like Blender or back into Maya, try to reconnect your textures and just make sure it works. That'll show that
you're ready to use this in a professional capacity.
7. Final Thoughts: Congratulations on
finishing this class. Hopefully, its information will serve you for years to come. Getting feedback and
figuring out what to do with that feedback is
something you're going to be doing constantly
throughout your career. Hopefully you took
some good notes, you learned some cool
stuff, and be sure to share it in the project
gallery down below. Thanks so much for
taking this class. We'll see you next time.
 Sir Wade Neistadt, Animator, VFX Artist, Creator