Transcripts
1. Introduction: The beginning of your
animation journey, there's so much opportunity. You have so many ideas,
there's so much creativity, and you don't know
where to point it, and so having a little
bit of a guide of how to shape your process can go a long way to get you
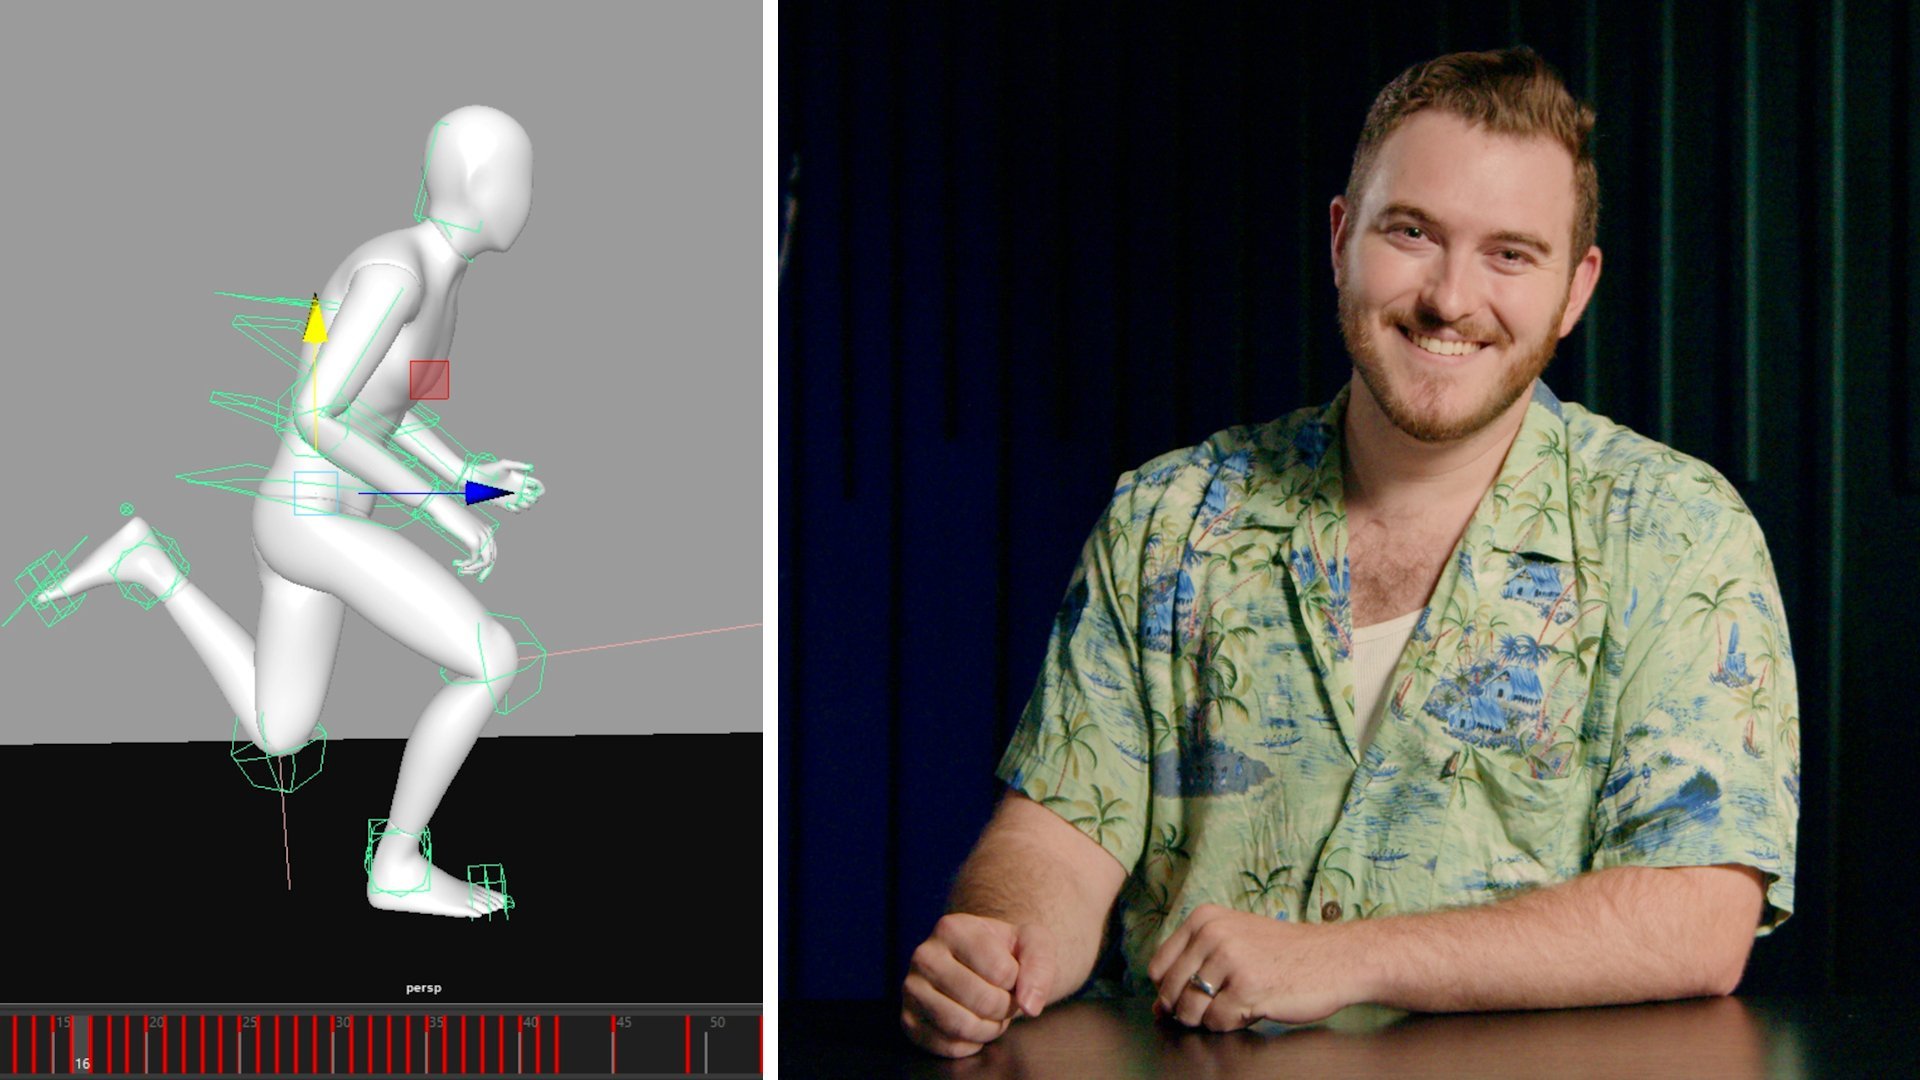
started on the right foot. Hi, I'm Sir Wade Neistadt. I'm a 3D character animator, a full time content creator, and an educator and
technical trainer. I have YouTube
channel where I cover a lot of educational
content around animation and to help artists get into our industry
and stay there. Today, we're going to be
learning everything you need to know to get started
with a new animation. We're going to be using
blender, and we're going to be using the
post deposed workflow, which is one of the most
common workflows out there. But we're going to be
covering the initial steps from planning your
shot to blocking your shot so that you
set yourself up for success and don't cry
later in the process. Whoever we're going to
learn in this class is I prepared some
different exercises that will hopefully help you step through the
process the way that I usually do when approaching
about mechanic shot. We're going to start
off by diving into the five stages of animation, and then we're going
to plan our shot, analyze some video reference, and then we're going to
block out our shot with a few different
exercises that I have to actually give you a
checklist of things to accomplish when
working on your shot. To follow along with this class, you only need a few things. Your computer has to be
able to run blender, which most computers can. Besides that, the only
thing you need is a bit of patience because animation
is time consuming. By the end of this class,
you'll understand how to plan and execute a shot using
the post deposed workflow, and if you're following
along with your own shot, you might end up with your
own blocked animation. I'm excited to get started,
I hope you are, too. Let's jump into animation.
2. Getting Started: Before we jump into actually
animating our characters, let's first talk about the
process of animating a shot. To me, there are five
really important steps to consider planning, blocking plus, splining
or refining and polish. Now, this list is a little bit different than you might
have heard before. This is my own personal way of looking at this because
it's workflow agnostic. Typically, people will tell
you block, spline and polish, but that only refers to a post to post workflow where
you block and stepped, and then you spline your shot, and then eventually
you go to polish. There are two problems
with that. One, if you don't do that workflow, then this doesn't really apply. But more importantly, it leaves out a lot of
important information. You don't just go
straight to blocking, you first have to
plan your shot. That's something that a
lot of people skip over, but it is arguably the
most important part of the entire animation process. We're going to spend some time
talking about that today. We're going to start off by just introducing
the shot that we're working on and jumping into
the planning for that shot. Now, you don't have to
animate the same thing that I'm creating in this class. In fact, I encourage you to find a new piece of reference and
animate something different. You can apply all these
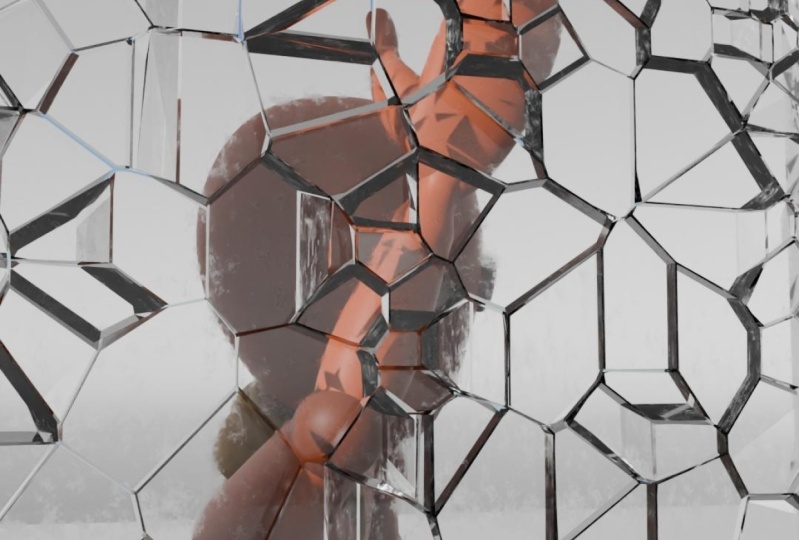
lessons the same way. This is the shot that I
have animated for today. It is a side flip, which is a fun little
body mechanics exercise. Obviously, we've got some
lighting, some effects. We will talk about that
a little bit later on, but our focus is going to be on the character animation itself. Behind many good
body mechanics shots is some great body
mechanics reference. Comes to preparing
video reference, my recommendation is always to try and shoot it
yourself if you can. Now, in this case, not everyone
can go outside and just do a side flip out a window,
and I don't recommend it. But being able to do some of
these actions yourself will inform a lot of how this
action should work, how it should look,
how it should feel and that's the
most important thing. Not so much every single
pose being exactly right. You're not trying to
rotoscope the motion. You're not trying to trace it, you're trying to capture the
essence of what's happening. You're trying to get the
technical information of how the body is moving, things like that, physics, gravity, and so on. This is a great
technical exercise for us to demonstrate
some new things to learn. But this particular shot isn't something that
I'd put on my reel because you can pretty
much see the one for one copy I've made from
the video reference here. There's a few
things I've pushed, but it's not different enough that I've reimagined it for my. Once you have your
video reference, one of the things that I
recommend taking a look at is any application where
you can draw on top of the footage
or do draw overs. In my case, I'm going to
be using synsketch.com. They have the ability
to make a free account. You can do that if
you'd like. A lot of us use that in the industry. There are plenty of
other tools as well, so you could use
Blender on its own and the Grease Pencil and
annotation tools if you want to just stay entirely
within that one software. But sync sketch is very popular and it allows you to
collaborate with other people. That's what I'm going
to be using here. As you can see, I can
scrub through here. I can see individual frames. I can pick different colors, draw on my screen, definitely helps if you have some
a display tablet. But if you're skilled with a mouse, this will
work just fine. It comes to planning,
it's not just video reference you want
to pay attention to. There are a bunch of
different things you can do. Thumbnailing is a
really popular thing where you can just
draw little pictures, little doodles of your character to get an idea of what you want. If you have drawing
skills, that's amazing. If you don't, that's okay. Stick figures will do.
The idea is more or less to document the intention
behind your shot. In some cases, if you are
a really good 2D artist, some people will actually block out their entire animation by animating it in 2D before
they go into the computer. The animators who used to
work in 2D animation still use this workflow today at studios like Pixar
and Disney and so on, because it's typically faster to draw something
if you're good at it than it is to pose a 3D
model for various frames. But for those of us who are
not so artistically inclined, video reference is a great tool. But the most important
thing once you have the reference is to actually figure out how to analyze it. Developing your eye for animation is the first thing
that you need to be working on if you want to
get into animation to observe various things
that exist in real life, but that you can use in various
ways in your animation. Take the 12 principles of
animation, for example, 12 principles of
animation are not just things we do in cartoons. There are things that
we have observed in real life that we exaggerate and we push and we draw attention to with
animation to add appeal, to make it more interesting, more fun to watch. Once you've decided what
you'd like to animate, and hopefully you found
some planning materials, you've gotten some
reference, things like that, the next step is to
choose a workflow. I want to take a
second to point out, you don't have to pick
any specific workflow. There is no correct workflow. Now that we've
covered all of that, I encourage you to go find some video reference to use
for the rest of this class. Few quick ground rules. Try to record something
yourself first. Feel free to browse
the Internet, but make sure to keep it short. You want to keep
this as manageable and easy to accomplish
as possible, less than 100 frames for sure. Try it on your own, see if you can find
something you like, and if you can't, then we've got some files for you to
download, as well. In the next lesson, I'm
going to show you the post opposed workflow with
the milestone technique.
3. Analyzing Your Reference Video: In this lesson, we're going
to plan out our shot. Specifically, we're
going to learn how to analyze reference because finding reference or shooting reference
is easy enough. People talk about
that all the time. What no one ever seems
to really discuss is what to do with
it once you have it. This will hopefully be a lesson that'll serve you
well regardless of the workflow
you choose to use. We're obviously
using pose to pose, but whether you're
using layered, straight ahead,
whatever it might be, knowing how to actually pull useful information from
your video reference or from any kind of planning is an essential skill, and that's what we're
going to do right now. I also have a shot planning
document for you to download, but you won't need
that until the end, so hang on to that till later. Here we are inside
of Sync sketch. This is again, a free website. You can make a free account
and drop your reference in. We can draw on top of it. We can see individual
frame numbers, which is very useful to
be able to keep track of a Frame 17 where
this happens. This is going to be the basis
of how we analyze our shot. When it comes to working
in pose to pose, the goal ultimately is to put the major tent poles
of your shot in first. I call them storytelling
poses because to me that's the most
important thing that they do. They tell the story. If you saw only those poses, those are the first
things to do, the first things to capture. Looking at our reference here, if we try to break
down this action, there's a lot going on, but if we just start with one of the most important
things that if we can only see those poses and we
couldn't see anything else, we can tell what's happening. To me, something here
in the beginning where the character is
actually coming out of a window if we're keeping the window because again
you can change stuff. But if we are just
copying what we see, well, then there's
a window, and we need to see that the
character's coming out of it. Something in this area, I'll just put a little slash
and come back to it later. But more importantly are things like this. The
dude's upside down. That's important. That's a flip. He's doing some
kind of a flip, so I'm going to just
make a little mark. I could analyze deeper,
but at the moment, I'm just interested
in marking in my timeline where
these things are. This to me is an
interesting one. Here he's completely upside
down facing the sky. Here he's pretty much sideways, but his head's
looking at the floor. There's a lot of stuff we're going to pick out in a second. Then right there,
he hits the ground. That seems pretty important, and eventually, he compresses. That's our bouncing ball,
our squash and stretch. That down position is an
important moment as well. Eventually, he jumps up
and floats into the air. Now, we don't
actually see him come back down and hit
the ground again. We'll probably add
that ourselves. But right off the bat, we have a few important moments that if we just
stepped through those. I can just hit the up
and down arrow keys. We can see the shot. Now, this is not
everything we need, but this is a great
starting point to figure out whether we have enough storytelling poses
to tell the story. When it comes to
starting our shot. In the reference,
we have a character jumping through an
already open window, but maybe we want this
to be a glass window that we explode at
some point later. We also don't have to keep every single thing
exactly the same. Here, the character's
arm is sticking straight out as if
he's just speared through the window mostly because the guy is just
trying to get momentum going. But if we imagine that there's actually a pane of glass there, he might actually cover his
head or protect his neck, we might make adjustments
to these poses. Don't feel like you
can't change anything. That's the point. You're the artist. Being able to modify what you see
is the whole point. I would say that Frame 3
here is fairly important. We have a nice straight
angle of the arm here. The head's turned at this
nice angle over here. I'll just try to draw a little plus of where
the face would be, and then we can see the body at an angle coming out the window. That to me is an
important moment, but we can always change it. Then I'm going to say that
this is our next pose here with the character's body pretty much straight
on where the head is. The arm is straight down. We've got some nice
drag through the wrist, and then we have this
straight across arm here. There's a few interesting
angles going on, but now if I step through, we have a character
jumping out the window, flipping, landing,
and compressing. Beyond that, I don't
think we have anything that's extremely important for telling our story because we might change
things after that. But if we're just going with
what we see is what we get, then I'm going to say
some up position, maybe something like
that is going to be our last storytelling pose. Now we have all of our
storytelling poses right here, but now we get to sift through
everything in between and find all the useful
little tidbits that usually get missed
in this process. This is where the analysis
really comes into play. We have all these
different body parts. Head, torso, the hips
themselves, the legs, the knees, the feet, the arms, the elbows, all the stuff, the wrists, there's a lot of detail to find. If you take a look at the planning worksheet
that I provided for you, on the right, there's a
list of things to look for. I'm going to show
you some examples of each of those right now. For shape or line of action, I would say anything that you find particularly
interesting. That's what I looked for on
these first couple of frames. This straight arm right here is a shape. It's just
a straight line. Also to be Frame 13, this shape is really
interesting because we have an entirely closed shape. There's no negative space in
this character whatsoever. There's no gaps in
between the armpits, or the arms, the legs. Everything is tucked
really tightly into this little ball. If you look even the head is contained within
the shoulders. This just little cannonball
shape seems important, and we can recreate
that on that frame. That, to me, is an interesting
one to take note of. For angles and
direction, I'm going to jump ahead over
here to Frame 20. This looks interesting
because we have this arm pointing straight down and
then this bend in the elbow, then another bend in the wrist. We have this nice separation all the way up from the shoulder
down through the wrist. We have this curve and
this shape happening, but particularly having this straight down
angle of the arm, it makes it really
easy to keep track of. If you look for straight
angles or really nice curves, that's a nice thing
to find as well. Now, spacing and
timing are difficult. I know those are not
the easiest things. This took me a long time to really grasp when
I was learning. This particular clip
that I downloaded, if you were to find this
on the Internet yourself, it actually had some
slow motion in it. That is a very
dangerous thing to have when it comes to video
reference because if I were to copy the exact frames that we have here
in our animation, I'm going to end up
with some weird, slow, fast changes that I
didn't do on purpose. Because the reference has
that timing adjusted, it's going to mess with
our perception of time. That can also go for frame rate. If you record
something at 30 FPS and you're animating at 24, something like that, you'll
have duplicate frames. Just take a look if you have any duplicate frames as
you're scrubbing through. Arc paths is probably something you'll
already understand, but looking to see what
the general path of action is and specifically looking
at individual body parts, the hips, the head,
the hands, the feet, what are the arcs of each of those different
parts of the body? Because they may not
be what you'd expect. Now the last couple,
we can go pretty quickly contact and release. This is really important, and people miss
this all the time. The feet are a really
great place to find this. Anytime a particular foot
contacts with the ground, releases from the ground or the frame right before it
actually hits the ground, those are all very
important to take note of. You don't have to
copy the exact frame, the exact timing but it's important to notice
that here, for example, the left foot actually
connects right there while the right
foot is still in the air, a frame later then the
right foot hits down. You have a little
bit of asymmetry in how those feet
actually touch down. When the character goes to pop off the floor here,
that left foot, once again, screen right, but his left comes off the ground earlier
than the right foot. That is going to
come into play a lot when it comes to balancing your character and
where their center of mass is centered
over those feet. Because the character
cannot lift this foot if their hips
are over that leg, all their weights on it. Which means that all these
things tie in together, the characters arc
through space, the hips and how they
move through space, allow that foot to lift early. All these things are
going to connect. Taking note of as
many of them as possible will help you discover these things
along the way. Last two, I don't
need to show you, but I just need to point
them out poses to push. Just take note of
anything that you think could be a
little bit stronger. As you're drawing, see if you can straighten
any straight angles, see if you can curve anything
that's a little bit wiggly. Just make more contrast. Make anything that's big, bigger, anything small, smaller. Just try to make it a little bit more interesting as you go. That way, when you
start posing things, you don't have to copy your reference and then
later try to push stuff, push it as you're analyzing. Finally, take note
of the essentials, what's really important to the shot versus
what's just noise. You don't need to copy
every little thing that you see in here, different
finger motions. It'll start to feel
like motion capture if you get everything. Which might be what you
want, but in a lot of cases, it's too much. Now
I've taken a second. I've drawn all of
my little notes on top, and you can
see there's a lot. In the next lesson,
I'm going to show you exactly what I was
looking for when I made all these notes and
how to translate all this information
onto our worksheet.
4. Translating Your Shots Onto the Worksheet: I've done my drawings
on the reference, and I'm going to point
out to you exactly what I found useful and identified
in all of my drawings, and then I'm going to
put it on the worksheet. I have put some different
markers in the corners just to keep track of what I consider to be
storytelling poses. If I found it to be a
story telling pose, I just marked it with the frame number one
and three, for example, have those, or if it's something really important, I
just put a little star. Every frame that has
a little marking here has something that I've found useful and so that's
what we're gonna walk through. On Frame 1, to me, it was just having
the arm come out, that line of action, and just having that angle
that felt important. This is exactly what you saw before. The arms
just straight out. I thought that was useful. But then here, I thought that
this curve through the body and the way that
the head is tilted even more than the body was
going to be really helpful, as well as the arm
clearly moving in this direction because the
wrist is dragging behind. We're starting to
get that breaking or what we call successive
breaking of joints, where the arm is
not super straight, it's got different angles
all the way down it. As we keep going, we can see that drag continue
through the wrist, as well as this nice
shape of the arm. The body's almost entirely
straight sideways. The heads still got a
little bit of an angle, but the rest of the
body still curves down away from wherever
the knees we assume to be. Here I can see that the hand is about to make contact
with the leg, and on the next
frame, there it goes. Remember how one of
the things we said to look for is contacts
and releases. That doesn't just mean the feet. If a character grabs
something, releases something, even just grabs their
hip or something, that is a great example
of a contact frame. This frame right before we could use this
in anticipation. We could push this and have the hand maybe spread out
a little bit more with the fingers actually visible
as a way to anticipate Wham, that connection point, things that we can
adjust later on. But the other hand hasn't yet
connected until this frame. This frame that before we identified an
interesting shape of the full body being this
one contiguous blob. It has a full shape,
the head's inside, and then I made
little indications of which way the knees pointing because the knee and
the rest of the body is still aiming in that direction. It has rotational momentum, so we want to keep
track of that. We don't want it to be too flat. The head continues to
turn on this frame. I found this really useful
because that's the head getting ready to look
at where he's landing. Here you can see he's made
contact with the ground. His eyeline is direct. While the body is
still spinning around, the head is leading the action. Things like this, this is a pose where I just thought the breakdown is
really interesting. This is just a cool pose.
I don't want to lose it. And there's interesting
shapes until here. Here, we get ready to hit
the ground with that foot. Boom, the next frame, we're
actually on the ground. This little note here is just
to point out that 20 and 21 are the same key. I need to make sure to get
rid of something there. Since I'm going to end up
deleting, let's say, Frame 20, I'm going to have
to move everything after Frame 20 back a frame, so the numbers are going
to be different later on, which is what all this
is to point out that basically all these
little key frames down at the bottom are going
to end up getting shifted at some point. It's not important right now. Here I'm pointing out an
interesting part of spacing. Spacing can mean how something
moves through space, but it can also
mean the distance between different objects
in screen space as well. But in this case, I'm looking
at how far away the knees, the hips and the
shoulders are from each other and how they
will accordion, right here, they're really close together all of a sudden. If I continue forward, there's another
thing where here, the knees and the hips are a
little bit closer together, and the distance from the
head is even further away, so they start to
become not consistent. That feels important to me. But I'm just looking to see,
right, this foot's down. Now this foot's down. That's a little pink
thing to point out that on this important frame,
it's about the foot. Here I just thought this
was a nice extreme pose. This is the furthest out from the body that
this arm gets. That is what we call
an extreme pose. If it's getting
really far away from the body, for example,
and then it comes back, I want to find that
maximum extreme point away from the body and
that's what this frame is. I also like to point out
that this nice curve through the arm has a
nice little roundness. Then here, if we look at
the spacing of that knee, it swings out all of a sudden. On this frame, his knee on
the right on his right, screen, left shoots out a
little bit more than expected. With this yellow
line, I'm tracking his cog or his
center of gravity, basically where
his hips are over the ground because you can
see when he's landing, boom, his hips are
over that foot. His weight is centered on
something that can support him. As he moves over, he shifts his weight. This little yellow line, he shifts his weight towards his right foot because that's where he's
shifting his weight. That has to be balanced
or he'll fall over. I'm trying to pay attention to all these
different things. This is the frame where
he's at his lowest, and so this is our down pose. From there, I'm just
trying to point out that his left foot seems
to be kind of peeling off the floor, and his arm, in this case, feels like
it's at its low point or its extreme as it gets
pulled up this way, you can see that his
arm starts to rise up. I'm looking from this pose to that pose in terms
of his right arm. Then from there, I'm
basically just making a little note to point out
the shape of his legs, how he's pushing with
that right foot, that right toe is pushing
a lot of the weight down as this left foot is pulling
smoothly off the ground. Eventually, here he is
floating in the air, and I have him just
a ball to represent his hips to show that
that is his up position. Then he starts to move
down a little bit here, and then this last
little thing is just to show the path of what
his left arm did, because if you watch
his arm, it swings back behind him, right there. There's that green drawing
of the arm behind him, and eventually it swings out
in front with that path. Once you have it all, great.
What do you do with it? That's where we pull out
our handy worksheet. This worksheet is a loose guide of what to do from this point. There's a lot of
blank space because who knows how many frames
you have in your shot? My recommendation is always to keep it small, keep it simple, and so I've left the left
column pretty blank. On the right, we have our answer key of what
we're looking for, but what we want to
do is in my case, I've got 37 frames, and you can see here that if I were to just write
out every single frame, I could go and try to
fill them all out. But that's also a
waste of space. If you have a 200 frame shot,
that's a lot of numbers. You could just write it manually
of what you really need. But just go through and say, on Frame 1, what do we have? Just try to give words to whatever it is that
you've written down. These things to look for
if you here on the right are just some helpful
ways to identify, in this case, that's a shape or a line of action,
something like that. I'll just write down,
line of action. For Frame 13, here's what
I've decided to go with. It is a storytelling pose, so I've given it
a K for key pose, which is just a little
bit easier to write. Since S has already
taken by settle, I didn't want to use
it for story as well, but we've got a key
pose on Frame 13. Both hands are in
contact with the body, the body's overall shape
I found to be important, and ultimately,
this one's really useful that the knees are
pointing to the left. I've just done a little arrow here to keep track
of it for myself. But just make sure
that if you were to just look at this
worksheet by itself, everything that
you've just found in this reference is now going
to become a checklist for you to be able to go
through line by line and make sure that
whatever you put in the computer has all
this information. The last thing to point out
is that I do recommend using these different pose types over here and put them over
here on the left, just so at a glance, which ones are your
storytelling poses, your anticipations, and so on. You don't have to
use all of them. These are some of
the ones that I use, and I don't even use every
single one every time. Now, you've got your
reference analyzed. You've got your worksheet, take them in it, fill that out, move all your information from your reference to
your worksheet, and I'll see you in the next
lesson to set up our shot.
5. Setting Up Your Shot in Blender: It's time to open Blender. Before we jump into using our worksheet and
starting our posing, let's first just get the
hang of a few things. If you are already experienced with Blender
and you know your stuff, maybe there's a few little tips in here that you don't know, and if you're newer
to it, this will be a good place to get started. Right off the bat, when you open Blender, as you can see, we have just our
regular 3D viewport. We've got our outliner over
here and our details panel. A few things we
want to customize. Down here at the bottom, we
have by default, a timeline. Timelines are great, but they're not all that useful
by themselves, unless we have the dope
sheet stuff worked out. Let's go ahead and switch
top left corner and make sure that this is set not to
timeline, but to dope sheet. Then also in this little bottom left corner of this window, you want to get this
little cross hair. If you don't see it, you need to go further
to the corner, drag a new window, and then in this one, we're
going to add our timeline. Timeline, you can just collapse. That way we can get the
little play pause buttons, some auto keying. Turn that on. You definitely want that.
But if you're doing like an audio dialogue shot, you
need this window as well. But right off the bat,
we have our timeline. We now have our dope sheet, and a cool little hot key
is if you hit Control tab, it'll switch between the dope
sheet and the graph editor. That is a really useful thing. Keep that in mind. Then if you go up to your
edit preferences, of course, this is where you can turn on various settings. If you need to grab some
extensions or add-ons, if you're using
anything for animation, there are some really
great animation add-ons that you
may want to use. You turn those on here as well. Now, life is going
to be a little bit easier for me because of
the laptop I'm using. I actually have a 10 key
number pad on the side. If you are using a laptop
or a keyboard that does not have a 10 key numeric
keypad on the side, you probably want to go
to your edit preferences, and then inside of here, go to your key map and you might want to adjust
a few things. Specifically, what I just
showed you was frame selected. If you type in frame selected, you'll see that
your frame selected right here in the 3D view. This is the command, and you can change that to something you actually
have on your keyboard. You're going to
want that, as well as this one, view camera. This is the one that I
hit by default zero. If you don't have the zero over here on the
right of your keyboard, you're going to want to
set this is something. This is how you will snap your viewport directly
to your camera, and then you can go into this
bottom left corner and make sure that you save or auto
save your preferences. That way you don't
have to do this every time you
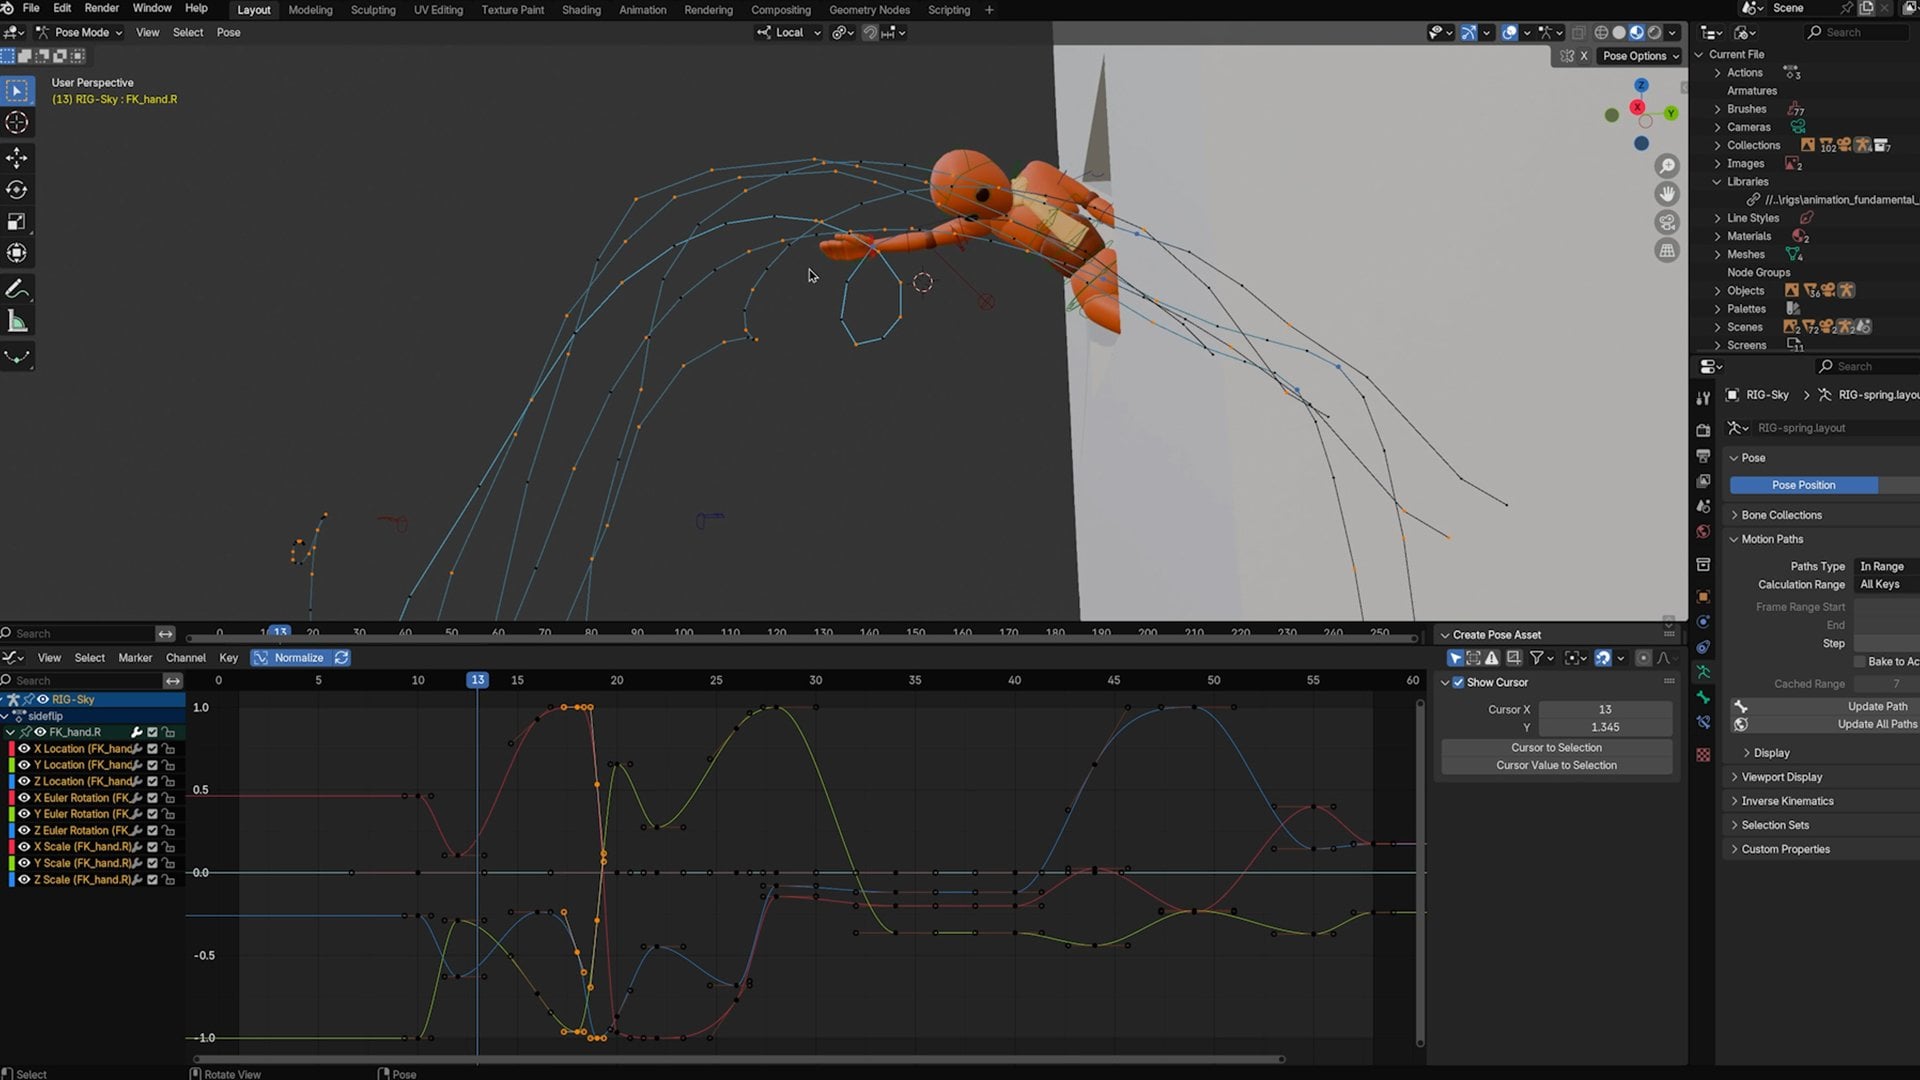
come into Blender. Now we're ready to rock. Now, the rig I'm gonna be
using for this shot is just the animation
fundamentals rig that the Blender Studio
has provided for us. This is a free download. You can grab it
from their website, and there's actually
a whole bunch of little characters to help you establish your
fundamentals in animation. I'll be using the character, which is named Sky, and that's our bipedal
character here. But you can use whatever
character you want. I do recommend keeping
it simple, though, grab something without a lot of facial controls
because you don't want a whole lot of extra
work right off the bat. When it comes to
bringing a rigged character into our scene, we technically have three
ways we can go about it. The easiest way but typically not the best way is to just open the rig file and start
animating it right there. You can do it, but
if you save over it, you overwrite the character and you'd have to
redownload them. Then obviously, if you have built a world
or an environment, you close that file because you just opened a new file
with just the character. You could do that
if you wanted to, but it's probably
not recommended. The next and most common
way that people bring characters into Blender
is with file append. Appending the file
will basically take the character file and put it inside of our current
Blender file. It makes it really easy
because it's just in there. When you open it up,
everything's inside, files a little bit bigger,
a little bit heavier. But it's typically
pretty straightforward, and it's most commonly
recommended because of how Blender treats
linking and appending overrides and libraries and all this stuff that we
don't need to get into. If you are trying to work in a studio mentality or with a large team and you have a more professional
production, this is not the
recommended way to work. But if you are just learning animation and you
download a character, you just want to animate, this is the quickest way
to get started. Stick with this if you want,
but I will just briefly show you how linking works because it's not covered
in very many places. Going up to file and link, what this is going to do
is it's actually going to tell your Blender file where
to find that character, and it'll bring it in kind of. It doesn't actually load
that file inside the file. It just gives you access to the information contained
in that other file. If you want to link the file,
here's what you would do. You would go to Link.
You would select wherever your rigs
are downloaded to, and then we would
grab our character, which is right here, Sky.Blend. Now, I might have a few more
in this folder than you do, but Sky.Blend, you'll have
when you download it. If you go to open that file, it actually opens
the blend file. I'll go into collection, and you'll have to
figure out which one of these is the full
character with the rig. In this case, it
should be this one, but I'm going to give you
a quick caveat that in the case of these
particular assets from Blender, there's
actually a mistake. They work great for appending. They work great
when you open them. But to link them,
there's actually a fix you have to do
to make that work. When we bring the character in, it's actually hidden
under our cube, so I'll hide that, and
there's our character. Now, this almost
works except that we can't see any of
the rig controls. That is a little
bit of an issue. Now, what we've done is we brought the character
in from that other file. We have access to see it, but we can't really modify it. The actual rig data or
the model data itself, we can animate on top of it as long as we can
access the rig, and that's the main
thing that an animator would want to do with
linking a character. If I right click
on this character, I actually have to create what's called a library override. Don't worry too much about this. We're not going to go
in detail on this. I just know that we're basically bringing in
something from another file, and we need to override where the animation
data comes from. If I go to make, and I'll say selected in content is the
biggest option we have here, this allows us to now animate the character except that
we can't see the rig. You can see that there's
something called mesh here, which is the geometry, and there's something
in here called hidden. That's actually
where our rig lives, and it's not visible. You can see it's actually
turned off right there, disabled in viewport.
That's our problem. In another Blender file, we actually need
to open that up, turn that on, save the file, and then when we link it
in, it should work fine. In a new copy of Blender,
I'm going to go ahead and just open the Sky.Blend file. You'll see that
everything goes away. We now have this character
as the creator made it. If I come back up, we can see that same group of
things mesh and hidden. Inside of hidden is a rig. If I go ahead and show that,
I can click on this and you can see that is what
I've actually selected. It wasn't visible before.
It should be now. If I just control
S, save over it, I can close this, and now
I'm actually just going to redo this original file
just to do it from scratch. I go File, Link. I'm back in that
Sky.Blend collection, and I'll go Group Sky, Link. Now you can see when I
bring the character in, it suddenly has all
these controls. I can't do anything
with them until I right click Library Override, Make, Select and Content. This icon has now changed. I can click on one
of these controls, and I can now go
up to object mode. I can change to pose mode, and I'm basically good to go. With one last little caveat. You always want to make sure
that this actually saves. If I grab all my controls
and I set a key, I'll hit I to set a key, move over here in the
timeline, move my character. I have auto key now turned on. I'll just go ahead
and hit I again. Now I set a keyframe. If I save this file, close Blender, reopen it,
I won't see that keyframe. It won't actually
have it. But if you switch this from the
timeline to the dope sheet, and then specifically change where it says here, dope sheet. I switch to the dope sheet
using this left menu. Then where it says dope sheet, I'm going to switch
to the action editor. Here you can see that I'm
actually in something called relax. That's an action. It's basically a little
container of data. It was stored in the
original rig file, which means that now that
I've set keyframe data on it, I can see it where I'm at now, but if I save it because it's from the original file,
it won't actually save. I just need to either unlink with this X or
duplicate the action. If I say unlink, it
gets rid of the action. We no longer are in the
little relax thing. I can make a new action. Now, I can animate to
my heart's content. I can save, and it
will all stay there. If instead, you're like,
but I did all this work. I don't want to delete
it all, then you can just hit this little
duplicate button, and now it creates a new
action that I can now rename to whatever we want it to be with our keyframe
data in there. If you're linking a file, those are the steps to make
sure everything works fine. With these Blender
characters in particular, I had to go to the original
file, make a tweak. Most characters, you
won't have that problem, but you always want to
check the action editor, just to make sure there's
nothing leftover from the original scene that you're
keyframing temporarily. Because none of that stuff
is going to get saved. The recap of all
that was that you link your character, you bring
in the right collection, and then once you have
it, all you need to remember is to right
click the character, go to Library Override, and you make a selecting
content override so that you can
then grab the rig, go into pose mode, and start working as long as you
don't have any action. Again, that was in
the dope sheet, switching down the
dope sheet thing here to action editor, and then making sure that
there's nothing here grade out. I'll go ahead and just say, X, new, good to go. From here, you can name this whatever you want. I
can just leave it as action. But immediately we
should save our file, and we'll just call
this animation time. We're good to go.
We can now animate our character and return to
this file without any issues. You can also make
a copy of this, so you don't have to do this
every single time, as well. No, I know that was
all very dense. I hope we haven't lost you. But the last thing
we need to do, and this part's really easy, luckily, if we need
to make a camera. I'm going to also give us a
quick little environment. If I hit Shift A and I go into mesh, I
can create a plane. I can hit S and drag the mouse to create
a little ground, and then I could hit Shift A again and go
to the search thing, type in camera, hit Enter. Now we have a little camera. If I hit G, I can
move this around, click to position it. If I just hit my zero key or whatever hot key you have
to jump into the camera, you will take over
that camera view. Now, by default, as soon
as you move your viewport, you leave the camera and
you can't move it around. If you want to be able to
control it for a little bit, what you can do
is hit the N key, and as in nice. You can come over here to the View tab and click
Lock Camera to View. Now I can reposition my camera wherever makes the most sense to me, put it right over here. I can deselect that again to now not screw up my camera when
I move around at any point, I hit that little hot
key and I'm in there. I can scroll, zoom in and out, and I can pan within it by holding Shift and
middle mouse dragging. But as soon as I just regular middle mouse drag, I
pop out of the camera. But that is a really quick way to make sure that we
have our character, our scene, and whatever
environment assets you want to create ready to go. At this point, you can now
take whatever you made from your reference and block
out a general environment. Don't spend too much time
modeling everything because, again, focused on animation. You can always add
more modeling details later. Here's what I've
decided to go with. Since my character
is supposed to flip out of the window,
I made a ground plane, and I made a window, which
is basically just one cube that has another hole
in it by another cube. The last thing is, if
you would like to, you can just drag
in your reference, pop it into your scene,
and now you can go ahead and see what you
were looking at. Anytime you're posing,
you can just kind of reference your original file. The only thing I'd recommend
doing at this point is for your reference and maybe
your environment assets, put them in different collections
and make sure you turn the selectibility off so you're not always grabbing them
and moving them around. By default, you probably
won't see this. In this top right corner
under the filter menu, turn on this little arrow icon. When you turn that on, you get this new little icon
that if you disable, for example, my reference
right here is an empty. If I disable that, I can no longer select
the reference plane, which means it won't get in the way of clicking
and dragging. I would do the same thing for all these
environment assets, just throw it in a collection
called environment, deselect it, and now I
can't grab it anymore. Now the moment you've
been waiting for. In the next lesson, we finally start blocking
out our animation.
6. Blocking Your Animation: Milestone Technique : It is a long process
to get to this part of animation of actually animating
if you're doing it right. Most people want to
jump straight to just blocking out a shot
and animating a character. But the problem is, if you don't set up all that
other stuff first, you end up just trying to
figure it out as you go, and animation is a lot harder
if you do it that way. But now that we're here, we can start our blocking. Because of our handy worksheet, we know exactly which
poses we've identified as the most important
ones to just begin. For now, I'd recommend
just starting with anything you marked with a K, your storytelling poses. Let's just block in
our main core poses. By the way, a hot
key I'm going to use a lot is if I select a Rig in object mode
and hit "Control" tab, that automatically
sets me to Pose mode, which I can do with
this menu as well. I'm going to grab
my whole character. I'm going to hit "I" with my
mouse over the 3D view port. If I'm down here and I hit "I," it'll pull up the
Insert keyframe menu. That's fine, too. I can
hit "All Channels." But either way, I
want to set a key on everything right off the bat. I also want to make
sure, once again, that I have autokey
turned on so if I go to another frame and I move something, it saves
that keyframe. Because the character's coming
in immediately flipping, and then he lands, and then he's going to go
do something else, I would recommend in
this particular case, moving my full keyframe
on everything, I'll just grab my key, move it over here, and find wherever the
characters on the ground. Frame 27, for example, that's going to be
one of my down poses. I'm going to go ahead
and just say, that's a frame where we've
got everything keyed. I'm going to now go all the
way back to the beginning, and I'm going to
take my character, and I'm going to move
him up over here and I'm going to de-rotate him. Which might seem a
little bit weird. I'm going to take any
IK handles as well, which I haven't really
talked about yet, but IK meaning
inverse kinematics, meaning I can take these feet and move them wherever I want, as opposed to the arms
that are currently set to forward kinematics or FK, that I have to move each
joint piece-by-piece. Both are very useful systems. In this particular
case, the legs being set to IK means they'll
stick where I want them. I'm going to take them up here, but because they also spun
around when they do the flip, I have to imagine that they
have to spin around as well. If I select my feet and my hips, since I now have two keyframes, you'll see that what happens
is the character just breaks and spins.
Looks a little weird. And if I go to the Graph Editor, you can see that I have
a bunch of data in here. This one, in particular, this rotate Z goes all the way down to
almost negative 400. That's that negative
360 degree rotation. I'm basically starting off at a value of negative 400 ish, and I'm unrotating [NOISE] all
the way down back to zero. When you have a character
that needs to flip, it is typically safer to have them spend the most
amount of time as possible at anywhere under or above the negative
or positive 360. Once you have them rotate
all the way around, sometimes rigs can get
a little bit weird. This might not matter
at all for your shot, but because mine has a flip, I thought I'd just
give you that tip. But now once we have that, we can go right into our posing. I can go back to Frame 1, and I can make sure that this
is actually in a good spot. I'll bring my character
back through the wall. And if I need to see the
character a little bit better, I can just hit this
"X-Ray" button up in the top right
corner of my viewport, and you can see that I can
X-ray through the wall. I can see my controls
a little bit better. I can also go into
wireframe mode if I want to just isolate
the mesh in this way. All that we can see of the
character is their arm. If I just say, great, rotate the character
and spin the arm, don't forget to
use that shoulder. You can't move your
arm up without involving the shoulder
one way or another. I know that the
head's going to be spun a little bit because from my camera's view, I
can see the character. You always want to
check every pose specifically from your camera. If the camera sees it's
wrong, then it's wrong. If I've got the legs all
broken and weird over here, the camera can't
see it, it's fine. Now, if I can see the
hips or the torso, they might be influenced
by that stuff. I don't want to
not pose stuff out of laziness, just
out of efficiency. If it doesn't affect
anything we see on camera, it's probably okay. But from here, we can just start bringing in all
of our key poses. Now, as far as which pose
I should start with, you could go in order
and go straight ahead. You could jump around to whichever ones you think
are most important. In my case, because
I'm doing a flip, I'm going to start with, I think the three most important parts. My character's beginning pose, somewhere in the middle
where he should be upside down, and then the landing. Those should define the action that I can start
adding in more and more of my storytelling poses. What exactly I'm posing
on those frames, that's what our worksheets for. If you go to Frame 26,
this is my down pose. This is what I wrote
down at the down pose. I'm going to go ahead
and immediately get out of my camera
and just go to work, my character down,
maybe bend the forward. I want to get these hips to
curve a little bit more, and then I'm going to take, you can have different
choices as well of which controls you
want to use for what. In this case, I'm just
going to go for it. As we're blocking, we don't
want to be precious about it. We don't want to be
too worried about exactly which control and
exactly what rotations. We just want to get
the gist. I want the character to be mostly
over this foot on the left, which I should
probably put somewhere useful. Go like that. I rotate it out a little
bit, take this other foot, make sure that
everything's not pointing super straight in
all directions. Once again, I don't want
to forget those shoulders. The shoulders are
super important. I want to make
sure I'm involving the whichever way the arm goes, That's which way the shoulders
are going to be going because they're really the
ones that start the action. Make sure you're using
that perspective as well. Don't just pose from one angle. You need to move
around the character. I don't want to bend the elbow in a way that
wouldn't be natural. This rig actually limits us. I can only rotate
it the way it's meant to go, which is helpful. But in the case of his neck, I can twist it in horrible ways, and we typically don't
want to do that. Try to keep it comfortable,
see if you can recreate it, and then pose whatever
you can follow. We have a lot more poses to go. This is not all the key poses, but these three define the
main action of our shot, which allows us to just
keep moving forward. We're going to speed time up, and I'm going to keep working on this and get all those
main key poses in here. Some time has passed, and
I have now blocked out all of the poses that
were on the worksheet. With all that
information in there, you should be able to
watch your animation. Just step through with the up
and down arrow keys and pop through the different key frames so you can see what your shot would look like and find out if there's
enough information with just that information to understand exactly what should
be happening in the shot. Not just for the whole
character, but per body part. Everything we've
animated, we can see it. I can select it. I'm going to come down here. I'm going to hit the
"T" key, T for time. I'm going to switch
this from Bezier curves to constant keys. What this does is it
changes it to stepped mode. This is typically how people
work in pose-to-pose. The lack of interpolation
means that we do not see anything we
did not key ourselves. But at this point, you
can watch, you can see, and this should tell you whether or not your shot is working. Now at this stage, I have
three final tips for you. The first is to
actually go through your entire worksheet
if you haven't already done so and make sure
everything you put is in here, is keyed, in stepped, you've got it represented
somehow in your file. It is at this stage
that you want to start adjusting anything that feels
slow or feels really fast, you want to make those changes earlier while all
these things are on the same consistent keyframes or while you have a
few keys as possible. The second tip is
if you're trying to position something in
between two points, for example, you just need
to adjust the arm position. If I want to just change
exactly where this arm is, and I like where it was before, and I like where it was
after because I did two key frames, and I'm doing
something in the middle, if you just pose it yourself, you might end up in
a different spot where the arm starts doing weird motions once you
hit "Play," and it just feels very jittery because the arms just
popping all around. If you want to just find
a nice happy medium, you can use the tweener
tool built into blender. If you hold Shift E, you can see at the very
top of my Window here, there's a little
slider that's been created where I can blend from the previous key for this particular control
or the following key. The halfway point it's
right there in the middle, but I can favor one
way or the other, and that will give
me just an easy way to favor and create an ease
between two keyframes. This will only work in
pose mode with a rig. If you're using a
cube or something, you won't be able to see that. It only works with
a control inside of pose mode, so heads up. Finally, the Euler filter. It's just something
you should know about. We're going to need it for the splining process
in the next class, but I want to make sure
you know where to find it. What you want to do if you
have any weird rotation stuff is just run the Euler filter. You'll just select any curves that you think might be weird. You go to the channel menu, and under here you'll find the discontinuity Euler filter. If I run this, it's not
going to hurt anything. It's not going to change
anything. It typically won't mess you up to use it. But if you have any
weird rotations or you were spinning something
and it caused a problem, that's how you can
quickly fix it. One final tip for this
stage of animation is it is very helpful to have two
Windows open at the same time. If you have two viewports,
and in one of them, you have your camera and the other one you're
able to move around, this is probably one of the most common ways
to make adjustments. That way, you can change
stuff and move stuff, but you can always see
what your camera sees, which is the most important
way to pose your character. By this point in the process, if you've followed
your worksheet and you've brought all your poses
from that into blender, you should have a fully
blocked out animation where you could
show it to somebody and now get feedback
on your work. But it is at this
point, you want to make those changes before you
move any further along, because in the next class, we're going to dive into splining, refining, and polishing our
animation. See you there.
7. Final Thoughts: [MUSIC] Congratulations on making it
to the end of this class. You probably put a lot of
work in to get to this point. Now, in this class,
we covered a lot. We covered the
stages of animation, we covered planning
and animation, analyzing our reference, putting all of that into a worksheet, and really trying to pick out all the little details to create not just the
poses for blocking, but really what we need
for blocking plus, which has a lot more information and takes us much closer to the next stage in our
process planning, refining, ultimately polishing. Whatever it is that
you've animated, make sure to share it in
the Project Gallery below. Whether you are all the way
done or just a few poses in, it's great to get in
the habit of just putting your work out
there and sharing it, whether it's for
feedback or just to show what you've
accomplished, because this is a time
consuming process, and you're doing great so far. Thanks for watching. We'll
see you in the next one.
 Sir Wade Neistadt, Animator, VFX Artist, Creator