Transcripts
1. Introduction: My favorite part of creating characters is starting
from nothing and seeing a character come to
life through decisions that we make artistically
and creatively. Hi, my name is Lucas Ridley. I'm a professional 3D
animator and filmmaker. You may have seen my work on
games like The Last of Us Part II or in films like
Avengers: Infinity War. In today's class,
we're going to learn how to use Unreal Engine
for the first time, and we're going
to create our own custom character as a metahuman. We'll also learn how to
apply facial capture to it and use this character as a playable character
in the engine. Creating characters is
such an important part of video games because it's who
our audience connects to, and they're literally
playing as. It's important to create them in a way that you're putting
your own thumb print on this character so
that it gives it that human touch that the
audience can connect with. You should take this class
if you have no experience, but you're interested
in creating your own short films
or video games. By the end of this class,
I hope you'll realize that Unreal Engine isn't
as intimidating a software as it may
appear on the surface. To take this class, you'll need a computer and
three button mouse. Unreal Engine is free, and you can download that
from the Epic Games website. Ready to bring a new character to life? Let's get started.
2. Getting Started: Welcome back. In this lesson, we're going to get started
with all the software and things that you
need to get started. We're going to start with a
live link at for your iPhone, and then we're going
to download and install the Epic Games Launcher, which is what we need to
install Unreal Engine. You're going to
want a computer and three button mouse to
get all this done. Now I'm going to walk
you through step by step how to actually
get Unreal Engine downloaded and installed through the Epic Games Launcher because
it's not super intuitive. Let's get started. To start, you want to visit epicgames.com to download the Epic
Games Launcher. Click the Download button
in the top right to begin downloading the
Epic Games Launcher. Once it's downloaded, we'll
click here to install it. If you want to explore any of the features of Unreal Engine, you can click and find
all the features, as well as a step by step installation process that you can follow if this
becomes confusing. Once the Epic Games
Launcher has installed, you want to make sure
that you're logged in through an Epic Games account. This is the Epic Games Launcher, but what we're interested in is the Unreal Engine tab
here on the left side. There are tabs at the top, and where we want to
start is the library. Up at the top, we have
our engine versions, and I can click the Plus button to actually install
Unreal Engine. This is where we
install Unreal Engine, and I can choose from all of the versions that
they've had in the past. What we want is the most
recent version 5.4. I can click Launch to
begin Unreal Engine. When you first open
Unreal Engine, you'll be greeted with the
Unreal project browser. This will show you
all the projects that you've recently worked on, as well as some templates
on the left side. We're going to start with
a third person template in the games category. We can give the project a name. I'm going to call
mine mytestproject, and I can browse
to where I want to save that and click
create project. The first time
Unreal Engine opens, it's going to need to
compile a lot of shaders. It can take a while to open
Unreal Engine the first time, but it's going to get faster
every time you open it. When unreal engine first opens, we're greeted with the third
person template level. We have the viewport
in the middle, and on the right side, we have the outliner,
which is like a table of contents of what's
inside that level. Then beneath that, we
have a details panel, so whenever we select
anything in the level, we get all the details for
what we have selected. We also have different modes in the top left that we
can navigate through, and we can actually begin
playing an example game right away by clicking the green
play button in the top left. Now we have our player
already in the game, and we can click to enable it, and I can navigate
around my character by using my mouse by just
moving my mouse around, and to move the
character around, I can use the W, A, S and D keys to actually
have them run around. I can also jump by pressing the space bar and navigate
around this test level. I can also run and
collide in with physics objects and
make them move around. I can hit Escape or F8, and then the stop button in the top left to get
out of the game mode. Now they're outside
the game mode. We're inside the
level editor now and to navigate
around this level, I can do it in two ways. I can hold down Alt and left mouse button to tumble
around the view. While still holding Alt, I can middle mouse
button to pan around, and the right mouse button
will zoom in and out. I can also mouse wheel
scroll to zoom in and out, and right mouse button
holding Alt zooming in and out will be a
more smooth zoom than mouse wheel scrolling. It's basically holding Alt
and your three mouse buttons. This is why we need a
three button mouse. The second way we can navigate around the level editor is by holding down the
right mouse button and using the same W, A, S and D keystrokes
on our keyboard to actually fly around our level
as if we're playing a game. Those are the two
ways that we can actually navigate around
the level editor. You can see I'm
moving a little bit fast for the scale
of this level, and I can change this
speed in real time by still enabling this right
mouse button being held down and just mouse wheel scroll and it will change
an attribute that we can also access
in the top right. You can see a camera icon with a decimal 0.4 right now, 0.7, 0.5. I can mouse wheel scroll and actually change the
speed that my camera is moving depending on the size of the level that I'm
actually working inside of. I can manually click up here and just click and
drag this speed as well so that I'm not always fighting the
speed of the camera, and it's exactly what
I want it to be. This is how you navigate
around a level editor in the two different ways that is most convenient for you. One of the options
I like to change from the default
is the mouse pan. I like to invert it. I'm going to go to edit
editor preferences, and I'm going to select
the viewport settings, and I'm going to locate the invert middle
mouse pan option. I'm going to check
that on. You can find other custom settings here if you want
to change how you can navigate with
the mouse controls. Now, if you forget where this is in the editor preferences, you can use the top search
box and type in mouse, and you can filter by any settings having
to do with the mouse. By searching for mouse, you
can see I can also find the same invert middle
mouse pan option here. That's how we can control the different preferences
for our navigation controls. In this lesson,
we've covered how to get Unreal Engine
installed through the Epic Games Launcher and how to actually navigate around
inside the level editor, as well as the game mode, that we can already
go ahead and play the template third
person character game inside of Unreal Engine. In addition, we've learned how to navigate around in
two different ways, and you're free to choose whichever one works
best for you. I'll see you in the
next lesson where we'll talk about the
MetaHuman Creator.
3. Discover the Metahuman Creator: Welcome back. This lesson is
all about MetaHuman Creator. MetaHuman is a tool that Epic
Games gives us for free, and it's a web browser
based application. We actually don't even need Unreal Engine to follow
along with this lesson. We're going to jump on
unrealengine.com website to use MetaHuman Creator and create our own custom character
from their template. Here we've navigated to unrealengine.com and
the MetaHuman URL. We want to make sure
that we're logged in to our Epic Games account, the same one that we use
to install Unreal Engine, because that's going
to be connected to Unreal Engine when we later need to import this character we're
about to make. You can see all the
features of MetaHuman here, and we're going
to get started by clicking the Launch
button in the top right. This is going to navigate you to the splash page for MetaHuman, where we want to make
sure we're choosing the same version of Unreal
Engine that we've installed. I'm choosing Unreal Engine 5.4 because that's
what I installed, and I'm clicking "Launch
MetaHuman Creator". This puts us in a
queue that we need to wait to get connected
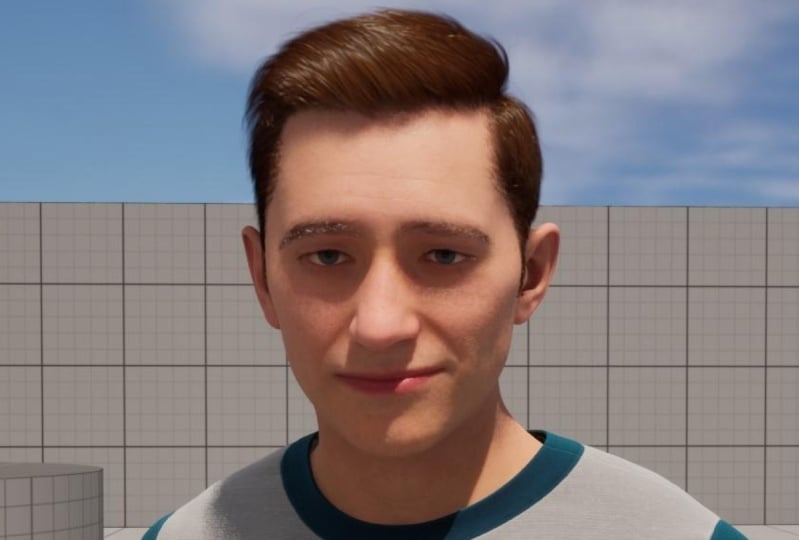
with the service. Once we're connected,
we're greeted with all the template characters
they give us to start with. These are just starting
points that we can use to create our own
custom character. Once we've found
one that we like, I've chosen Cooper here, so I've selected
him from the menu. To get started editing
Cooper and make him my own, I'm going to click
"Create selected". Now we're inside where we can actually edit
this character. You can see all the
hot key reference keys here to navigate
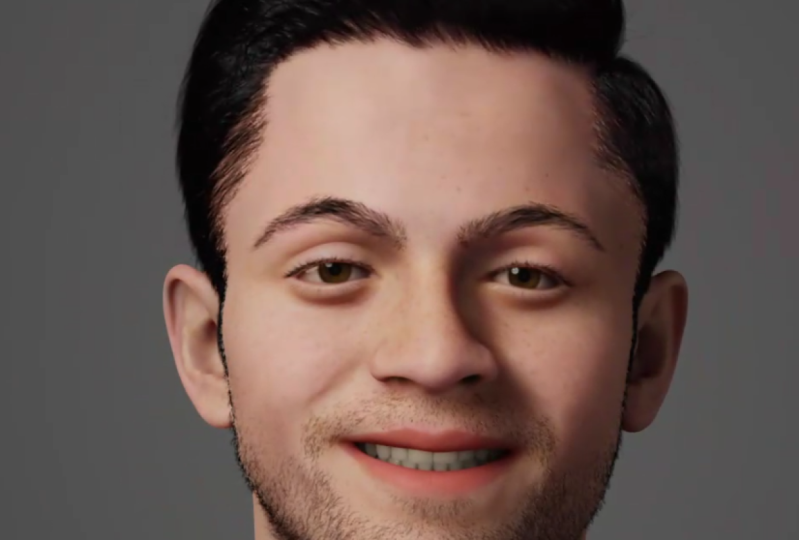
this interface. At the bottom, we have basic animations to preview what this character
looks like in motion. So these are just simple
preview animations to help us evaluate
our custom character. We can use different
expressions to see the range of emotions
that our character can have to make sure we're creating them to cover all the kinds of emotions and
character traits that we might want to put in them. When we're ready
to begin editing, we have three different
ways to edit our character: blend, sculpt, and move. Let's look at the
blend option first. We can click and drag three different template
characters into this blend menu, and I can click and drag different features
of the face to blend between each one of those templates that we've dragged and dropped
into the menu. The second way we can edit our character is through
the sculpt tools. These are much
finer tune controls that are specific
to this character, and they are a little
bit grade outs. You want to make sure you hover your mouse over these
areas that we can see each one of the little
dots that we can access to change different
features of the face. Finally, we can use
the move controls, which are just
single controls for a combination of the more
fine tuned sculpt controls. These are three different
ways to change the face. Now that we've determined the
main features of the face, we can jump into
more characteristics like the skin color and texture. I'm going to make
myself look a bit older here and maybe
choose freckles. I can also choose the
density and strength of those freckles and change
different accents of the face. Maybe if I wanted to
have bags under my eyes, I can change the saturation
and lightness, for example. Those are all the kind of characteristics we can
change for the face. For the eyes, we can choose
eye color and teeth. We can even go in and change some variation there
or color as well as add makeup to our face if
we wanted to go that route. Once we're done with the
face, we can jump into the hair category,
choose a hair color, different details, like
adding salt and pepper to the hair or adding
different hair styles. When MetaHuman Creator
first came out, they only had a
handful of styles, so they're always
adding new styles. That also includes eyebrows, eye lashes, and facial hair
like mustaches and beards. For the body, we can choose three different kinds of
heights for a character, as well as body types for large, medium and small,
and also genders. We can also change
the primary color of our primary fabric, and we can change different
style of the shirt. I can shift the colors
around here as well. The main thing I want to do
for my character is choose a T-shirt and change
the pattern to a graphic because we're going to change this graphic to a
customizable graphic later. I'm going to also
remove the pattern that came on by default. I'm going to go up here and
check this none category, so we only see the
graphic on our T-shirt, and this is something
we can change later. Once we finish with the tops, we can jump to the
bottoms and choose the style of pants or shorts
that we want to have, as well as their primary colors. For shoes, we can also chose the style and colors
for them as well, and the colors is what
we can also change later inside of Unreal Engine
if we change our mind. I'm going to jump
and test all of my choices with the range of motion or body ROM animation, and I can navigate around this viewport to see it
from different angles. If you ever forget what
these hot keys are, they're always here on the
right side of the viewport. When I like my choices, I can finish my metahuman
by going to the top left and choosing My
metahumans from the menu. Once we finished with
our character here, all we really need to do is
just close out of the browser because we're going
to import them using Unreal Engine in
the next lesson. In this lesson, we've used the web based MetaHuman Creator to create our own
custom character, and I'd really encourage
you to spend time with this lesson and go
through each one of these features to make
this character your own. This is where you're
going to really customize it and choose all the things
that's going to make this character unique to
you and your project. The one thing that I would
recommend is to choose a graphic for a T-shirt
because in a later lesson, we're going to swap this
out to our own graphic. If you have a custom logo for a company or
something like that, I'll show you how
to replace that, but we need a
placeholder graphic, and that's why I chose a graphic over a
pattern for our shirt. Meet me in the next
lesson where we're going to get back inside
Unreal Engine and import this character and replace that example
character that we saw in the past lesson so
that we can use our custom character inside
that template level.
4. Attach Your Metahuman to Third Person: Welcome back. In this lesson, we're going to take
the custom character we made in the last lesson, and we're going to import
it inside of Unreal Engine, so that we can actually
play as that character. Now we're back inside
Unreal Engine, and we've opened that same third-person blueprint template. To navigate to the
content browser, we can go to, Window,
Content Browser, and we can also hit
"Control" "Space" to open up the temporary
content browser dock. We can dock it in
the layout here, or we can go to Window
and open it from here. You can see that we have four different content browsers that we can have open
at the same time. All of our main content lives
inside the content folder. This is where we're going to
add our MetaHuman character. To add our MetaHuman character, we can do it in one of two ways. Clicking the plus button
in the top here by going to Quixel Bridge or in the
bottom on the content browser, we can add Quixel content. So either one gets us
to the same place, which is Quixel Bridge. You want to make sure
that you're logged in to that same Epic Games account that used on
MetaHuman Creator, and to install Unreal Engine. So we'll click on the
little person icon here, so that we can access
my MetaHumans. Once I click on my MetaHumans, you can see that we
have all the MetaHumans that I've created previously, and we can choose the
quality that we want, which is really just the
size of the textures, and you can see with the
green checkbox here, I've already downloaded these. If you have it, you can click the green download button here, and once it's downloaded, you can press the
blue plus Add button. It will take a little while
to download the first time, so give it some time, and then click "Add"
when you're ready. It creates a new folder
called MetaHumans. Inside that folder, we
can click on the name of our character and access the
blueprint of that character. BP_Cooper. BP stands
for Blueprint. Now, this looks
really intimidating, and we'll get to it in a second. But first, we want
to enable all the missing plug ins that will pop up as part of MetaHuman Creator. So once we've done that, it'll ask us to restart the engine. So once we've
restarted the engine, we can jump back and open
that same blueprint. And again, this does
look very intimidating, but we can jump to the viewport tab up here in the top left. So now we're in
the Viewport tab, you can see the character
as we would expect to see them from the
MetaHuman Creator app. Now, the first thing
we want to do is make sure we force LOD sync. I'll explain what
that is in a second. So we just want to jump
over the forced LOD and change that to one. So what LOD means
is level of detail. So if the camera is
really far away, it'll have a low
level of detail. We want to force it to have the highest level at all times. So as I move my camera, and you can see now it
has the highest level, but I don't want
that changing as the camera distance moves, I want to force it to always
be the highest quality. That's why we changed
it to force LOD of one. Once we're done
with that, we can compile and press "Save, " and that just verifies all
the changes that we've made. Now, the next step is
to have this character replace the example character that we played with
in this level, and the first thing we need to do is jump over to
the class settings. So I'm going to click
that button at the top, and I'm going to jump
to the parent class. We're going to use
the parent class of that example character. So I just need to find it
in this drop down menu. That blueprint for
that character is called BP_third
person character. So I can just choose
that from this menu, and that makes this character, our custom character, a child
of that example character. We need that because it gives us all the animation and
controls for free. So the first thing I need
to do is click and drag the root of our custom
character underneath the mesh. Now that our custom character
is a child of the mesh, you can see we have these
little Reset buttons in the right side of
our transform details. So when I reset those, it will line up our
custom character to match the example character. And that's important because, we're about to swap in
our custom character for this third person
example character. Now, I want to jump
down in the lower left to turn on
livery targeting, so it exactly matches up. So I'm going to check on
use livery target mode, and now they exactly
align with each other. Now we just need to select
the mesh and turn it off. So I'm going to type
in visible at the top to search for the
visibility option and just check that off. So now we just won't see that
example character anymore, and we're left with
our custom character. Finally, we want to choose the always tick pose
and refresh bones. This just make sure that on every frame it's
live re targeting, so that when we play it back
after we compile and save, that our custom
character will be replaced with our
example character. I'm going to press the
green Play button again, and you can see that we still don't have our custom character. Why is that? That's
because we're not spawning our custom
character in yet. We need to do that in the
Edit Project Settings menu. So in this menu, we can jump
down to maps and modes, and we can change the selected game mode default pawn class. Under default pawn class, this is where we're
going to choose our own custom blueprint
for our character. So when I press "Play" now, I have my custom character, but I can't navigate with them. I can't input any
WASD or my mouse. So we actually need to connect. The controls are a
keyboard mouse to this custom character
that now spawns in. Luckily, we can use
and copy and paste the template character
onto our custom character. So I'm going to navigate
to the blueprint of that third person character
and open up their blueprint. Now all I need to do is copy and paste everything from
this event graph, into our custom
characters event graph. So I'm going to
press "Control C" to copy and close this out. I'm going to navigate back to our custom characters
blueprint in the MetaHumans folder and
open up BP_Cooper again. Now we're going to go into the technical part of this
under the Event Graph tab. This is where I want to go to a clean space in the event graph and just
press "Control V" to paste in all the input
information that we stole from the free stuff that we get from the
third person character. So now we have the inputs, and we just want to
make sure that all gets initiated when
we begin playing. So we want to take this
event, begin play, and click and drag it over to the start of all of
these input controls. So I'm just going to grab
those first two nodes and get rid of the one that existed there to replace it
with these two nodes. So I'm just left mouse button clicking and dragging
that connection up, and compiling and saving. Now when we press "Play, " we actually can play as our custom character
inside this level with all the same controls that we've seen in the example level. I can jump around, run, and do everything that
you would expect. Now, say, for example,
I don't really like the distance of this
camera to my character, I can jump back
inside the blueprint, go to the Viewport tab to
see where that camera is, and just move it forward. I can press "W" on the keyboard to pull
up the move shortcut, so that I can actually access
the move manipulator and just move it closer
to the character and compile and save, and press "Play" again,
and now you can see we have a camera that's
closer to our character. So that's how you connect
your custom metahuman to the third person
character that they give us inside of Unreal Engine. So just take your time
with these steps. I know it can be
really intimidating, but what we really
just did is copy and pasted a lot of things
to get to this point. So just follow along with the steps I gave you,
and you'll be fine. Meaning the next lesson, we're going to use an
iPhone to actually capture our face and use that as the blueprint
for our metahuman.
5. Create a Personalized Metahuman : Welcome back. This lesson
is for our iPhone users. So if you don't have an iPhone, you can use the
template character that we've customized in
the previous lesson, but for our iPhone users, this is where we're going
to use the live link app to capture a calibration take and create also a
little animation of our facial
capture performance. And we're going to
connect that up with custom new metahuman face that we're going to bring
inside of Unreal Engine and connect that animation
take up to that face. For the calibration take, you're going to want to make sure that you're
looking straight ahead and turning side to side, and making sure that you also end with
exposing your teeth. It's going to feel
a little funny, but you need to have your teeth slightly apart and
make a big smile. So now you've captured
the footage from the live link app
on your iPhone, and we need somewhere to put it. So we're going to
jump back inside of Unreal Engine and create
that custom face, and apply that animation to it. So now we're back
inside our project, and I'm going to right
click and create a new folder and call it MH animator for
metahuman animator. I'm going to right
click and go to the metahuman animator
menu options. We're only concerned with
the bottom 3 options here, the capture source, the
metahuman identity, and the metahuman performance. We're going to go
through these one at a time in that order. So if you don't see these, you need to enable the
metahuman plug in by going to plug ins and
search for metahuman. Make sure you check
on these plug ins, and you'll probably have
to restart Unreal Engine. Now that you've been
able to plug ins, you have access to
these menu options, capture source is where
we're going to use the footage that we've taken
to create our custom face. Metahuman identity is where
we're going to create it, and then the performance is actually applying that
second take that we took and applying that
animation to our custom face. So first, let's click
"Capture Source." I'm going to leave
the default name and double click it
to open a new window. In this window, we
have two options to import the calibration take. We have the archive
or the connection. I want to choose the
connection version, and I can directly connect to
my iPhone with this option. After choosing the
connection option, you want to jump back
into your iPhone, open the Live Link app,
go to the settings and find the OC server
listener address. This will be a number that's
custom to your phone, and you want to make
sure that you're on the same Wi-Fi network
that your computer is. So we can listen into your iPhone and just
pull the footage directly from your iPhone using this step of
the capture source. Now that we have
this, we can just click "Save" and close this out. Now we want to go to the tools menu to open the
capture manager. Now we have access to all the takes that we've
taken with the Live Link app, and we want to make sure
that we're bringing in the calibration take as well
as the performance take. Make sure you add to queue
both of those takes. Once they're queued, we can click the
"Import All" button. This is going to
create a new folder with these takes inside of them. Now we can go to the next
step, our metahuman identity. So we're going to use
this captured footage to create a brand new metahuman
face exactly like our own. Because it's going
to be like my face, I'm going to rename
this to MHI_Lucas_001, and double click that to open. You're going to want to
make sure that you're logged in to your
Epic Games account. We're going to go through each one of these steps at the top. These are listed in
the order in which we're going to do them
from left to right. We're going to start with
create components first. We want to choose from footage and choose the calibration take. Inside this calibration take, we're going to move on to
the next step and promote a frame in the front facing
orientation inside the take. So we're going to scrub the
timeline at the bottom, to where we're facing
forward and promote this frame and click "Okay." This is going to
be our front view. If you need to move
these points around, you can, but this
usually is fine, so I don't touch
these green points, and we can unlock
the camera again to scrub the timeline to
move to the side view. So we want to make sure
that we're choosing a frame that you can still
see the corner of your eye, and click "Promote Frame" again. We want to unlock the
camera just like we did previously and
find the next side. Again, making sure the corner of our eye is still visible
and promote that frame, and then we can move on to actually adding
the teeth pose. So I'm going to go
to the add button and choose add teeth, and we can scrub the timeline
to where we had our teeth exposed and promote this frame while we have the
teeth pose selected. You can click "Okay, " and now we have
the teeth pose, and we can move on
to the next step, the metahuman identity solve. Once we click this, we can go to the body and choose
the body proportions we want for this new face. We can choose between genders, as well as height and body type. Once we're happy
with our choices, we can move on to
the next step of the top menu and go
to mesh to metahuman, and just make sure
we're choosing the skeletal mesh
plus full metahuman, because we want the head
as well as the body. This is going to take a
little while to process. Once that's done, we can click
"Prepare for Performance." This is also going to take
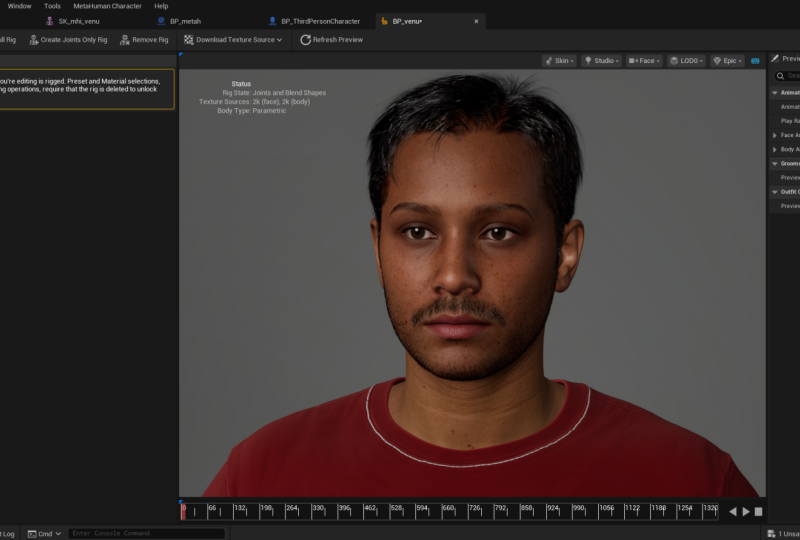
a little while to process. Now we can close out this step, and you can see that it's created a custom metahuman face. So if we double
click this new icon, we can actually preview our new custom face that
should resemble ourselves. It even has my slightly
crooked nose there, so I know it's chosen the right frames to
create this character. Now we're going to move
on to the next step. We can right click and choose metahuman performance and
give it a custom name, which is a skill share intro. I can double click
that and I can choose the footage capture data and choose the second
take that we imported. This is the performance take, not the calibration take. Now I can choose the metahuman
identity that we made, and I can click "Yes." Now I can choose for
the head movement mode, control rig, and you can see we have control rig options here, and if I process this take, we're going to be
able to watch it, process the performance take and apply it to the 3D model. So now we're going to scrub the timeline and play it back, and we're going to see
our performance from our iPhone playing back on our custom
metahuman character. Now we can choose to export this animation so we can use it in other places or export
directly to a level sequence. I'm going to choose
this option because it's going to be the best way
to present our animation. It's going to ask me where do
I want to save this level. So LS means level sequence, and I'm just going to
accept those names and accept all the
defaults here as well. So now I can close
this window and I can open up the
level sequence. We have a new node here
called level sequence, so I can just click and
drag this tab to share the same window docking
as my other one, so we're not splitting them, and have greater real estate to view the timeline of
the level sequence. A level sequence is really
just like a timeline in a W Premiere or DaVinci Resolve or any
video editing software. I can lock into this camera by clicking
this camera icon here. It's going to turn blue and
snap our camera to view our custom metahuman animator inside the level that we're in, and we can play back and see our animation is
working on the face. It's a little dark here because it's overlapping with
part of the environment, and that's okay. We're
going to change that later. I'm going to control
middle mouse wheel to zoom out in the level
sequence editor, and write mouse button to pan to see the entire
level sequence. I'm just going to click and
drag this up so I can see all the attributes that we have in the tracks of
the level sequence. You can see we have a camera, we have the metahuman identity, we have the actual video plane that's just behind
my 3D character, the original footage
of the performance. So these are all
just tracks that are holding all the information
that we're going to use to apply to a full bodied
custom metahuman character that matches this one
with textures and other customizations that
we're going to apply inside of metahuman creator that
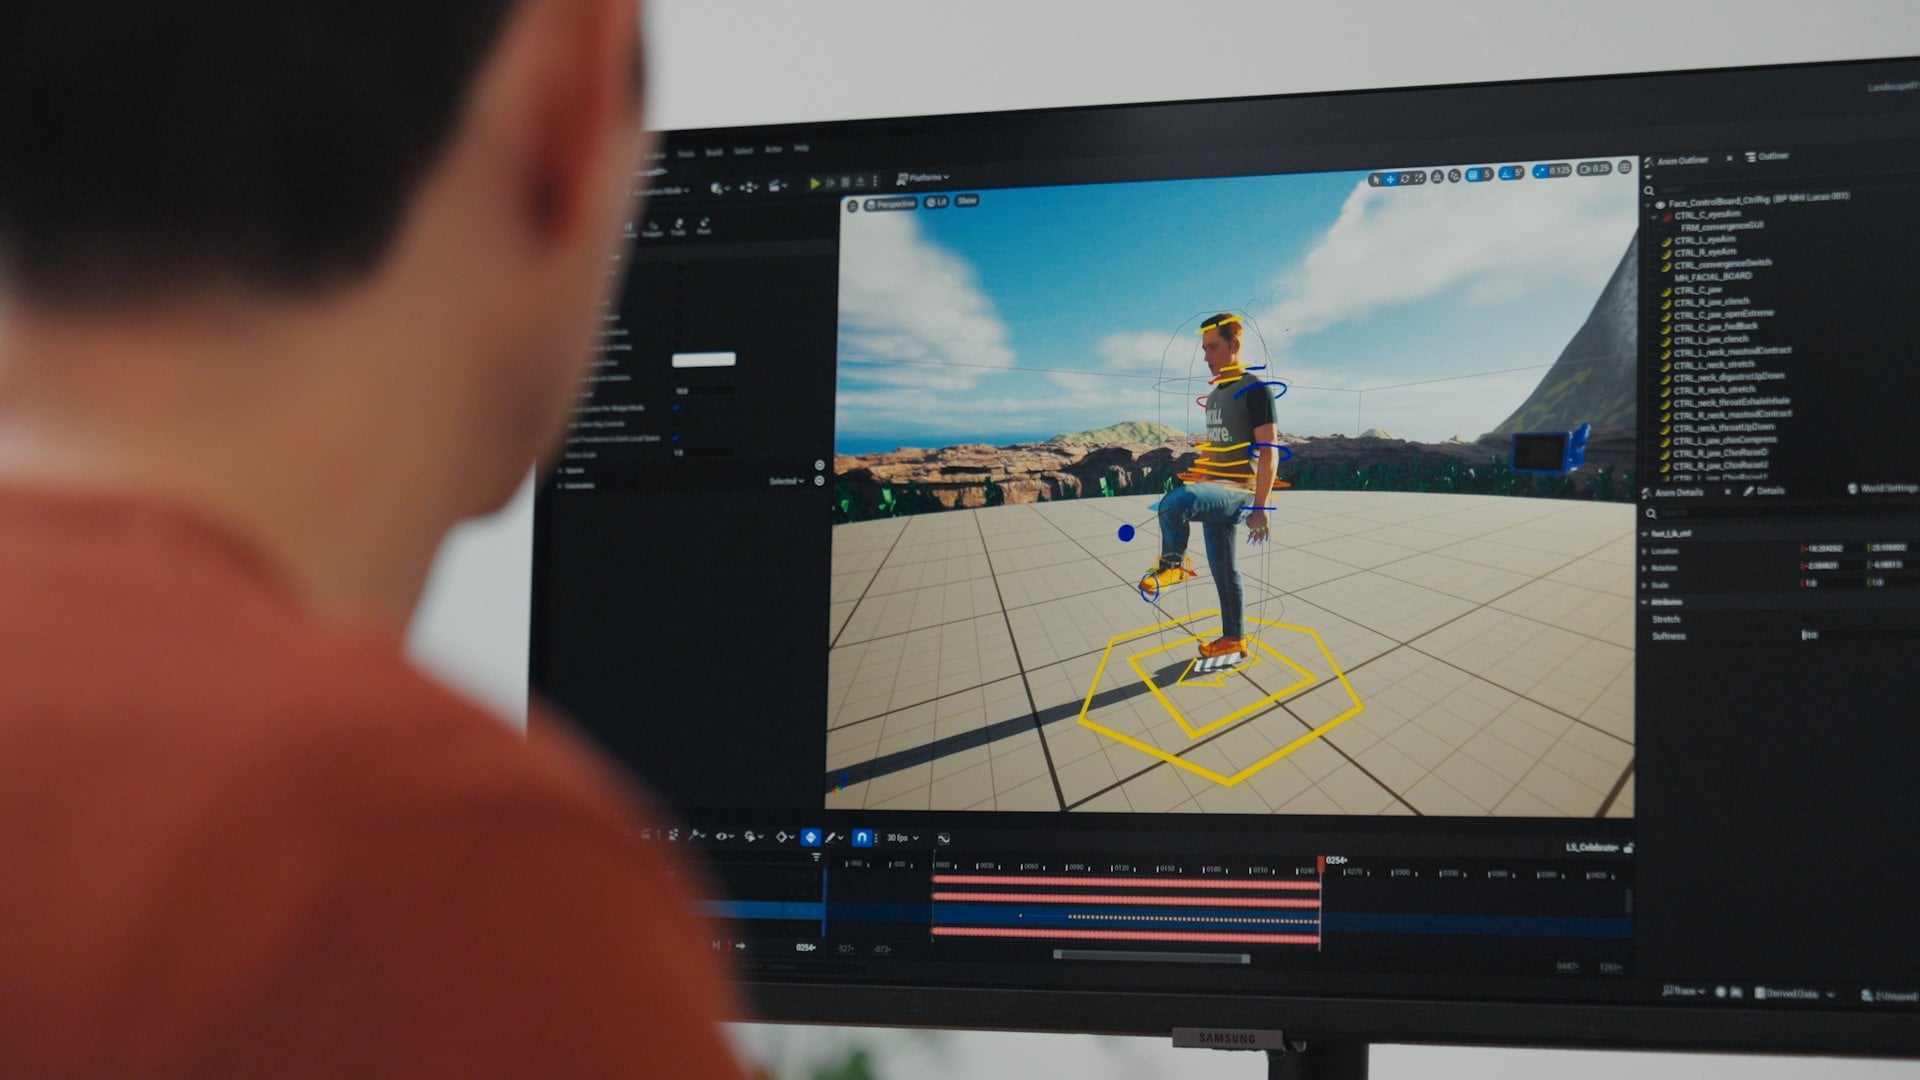
you're already familiar with. You can also see the audio
track is listed here, and you can see under
the metahuman identity, we have the face control board, which is where all the data
for the animation lives. If I select this, it's
actually going to enable the animation mode once
I select this track, and so I can go up to the top
left and just get back to selection mode if I ever am
unable to select something. So you just want to be mindful
of the modes that we're in that change for you if you
make selections like that. So up here, I'm going to change it back to selection mode, and now we're back to the
normal navigation style inside the level editor. So back inside selection mode, I can just uncheck
that camera cut lock. So now we're back viewing
the level as we'd expect, and I'm going to navigate
over to the content browser, and this is where we're
going to actually import the full-bodied
metahuman character that we're going to create
in the next lesson. Meet me in the next
lesson, we're going to talk about metahuman
face animation.
6. Create Your Metahuman Face Animation: Welcome back. In this lesson, we're going to take that
custom head that we just made using our
iPhone captures, and we're going to apply that to a full-bodied character using
MetaHuman Creator again. Then we're going to take
that full-bodied character and apply that performance
animation to it, so it's not just a floating
head talking anymore. It's going to be a
full-bodied character. Back inside our Unreal
Engine project, we're going to choose
the add Quixel content, and I'm going to navigate
to the people icon, so I can click the
"My MetaHumans". You can see here we have our MetaHuman identity
that we just created. When I select that, I have
the option to start MHC. That's MetaHuman Creator. When I click this, I'm actually
going to get access to that same MetaHuman
Creator web browser that we had in a
previous lesson, and we're going to be confronted with our iPhone-created face. This doesn't really
look like me yet, and this is what we'll use in MetaHuman Creator to further
customize skin tone, hair, and any clothing
choices we want to make. I'm going to leave
this to you to further customize and make it
look exactly like you. You can use the
same blend, sculpt, and other tools at our disposal inside the MetaHuman
Creator to customize this. Once we've finished customizing our character inside
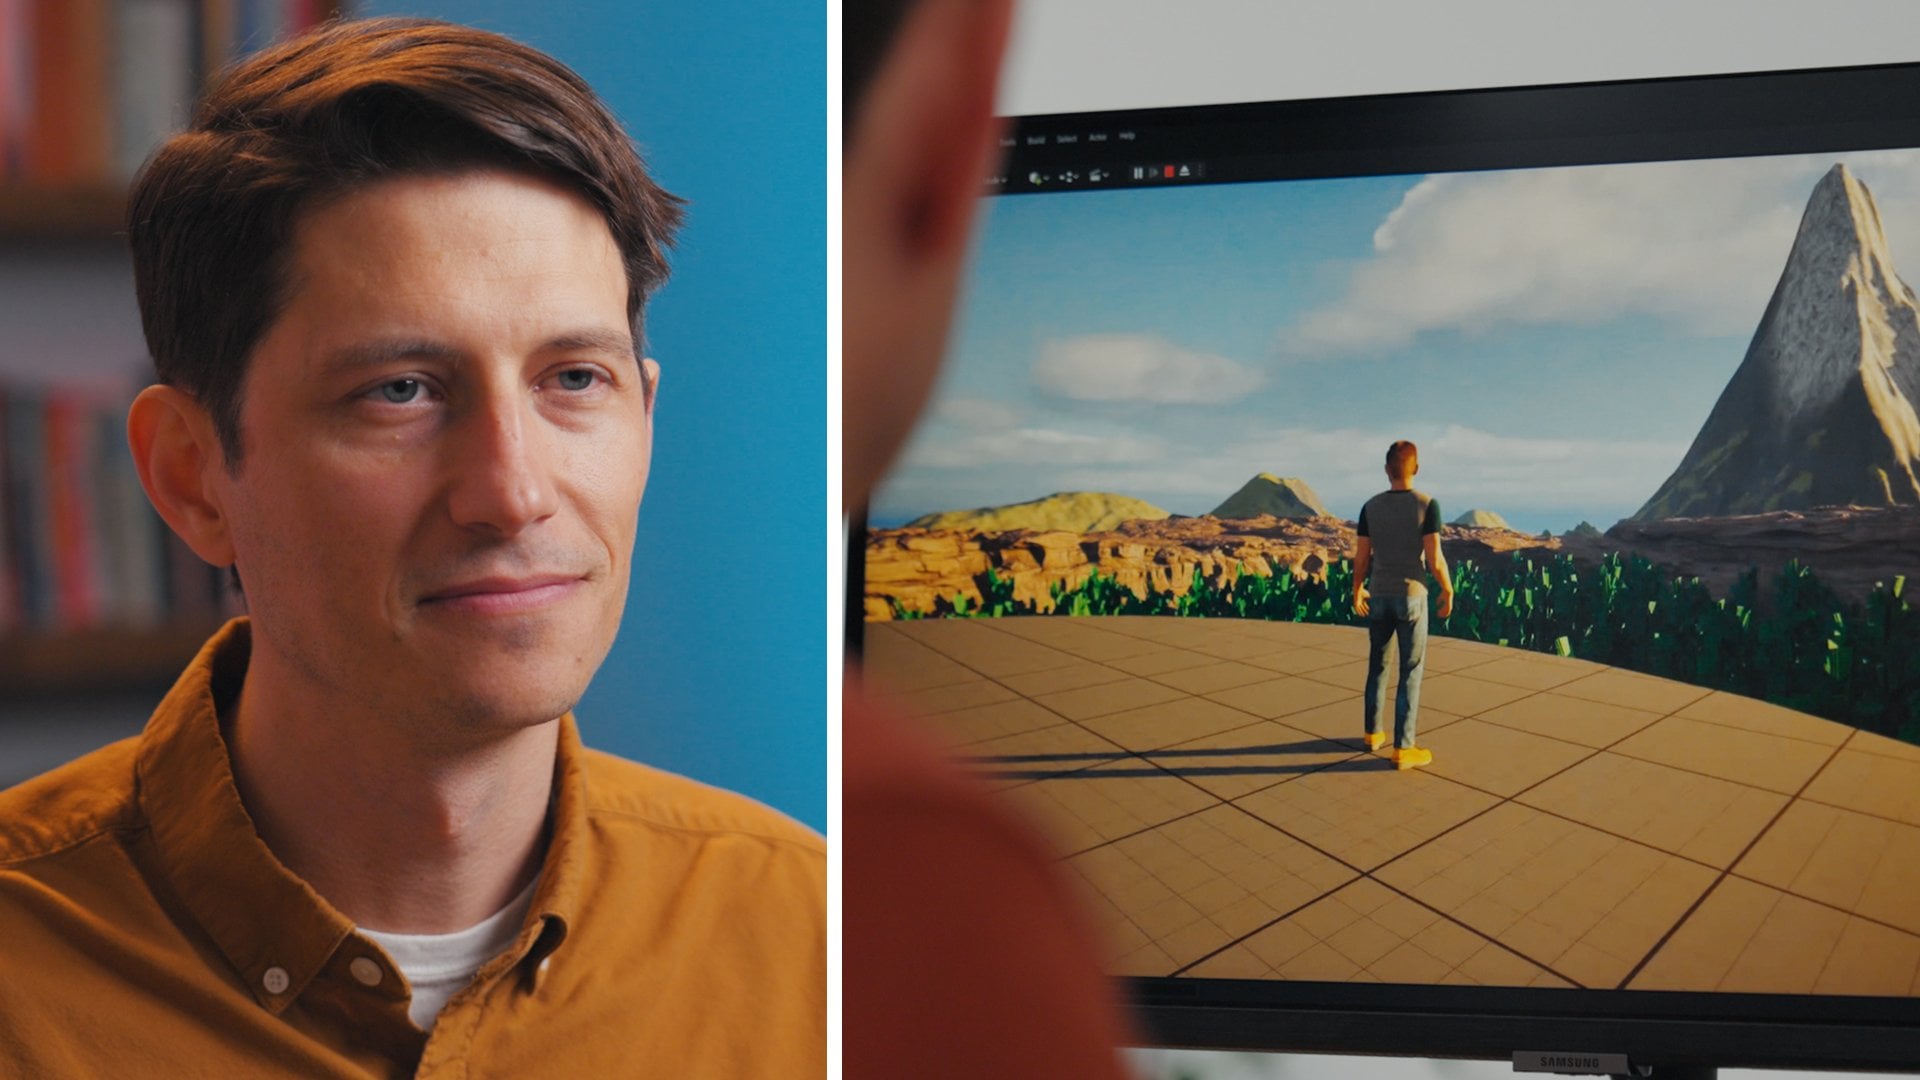
MetaHuman Creator, we can close out the browser, and we navigate back
to our project, you can see that
we have a preview of our character that
looks like us now, and we can download it and
then add it to our project. That creates a new folder with the same name as our
MetaHuman identity, and now we also
have a blueprint of that character when I
navigate inside that folder. I can click and drag that
blueprint into my level. I can press "F" to frame up
my camera on that character, and now I can switch
over to the sequencer, to click and drag that same blueprint character
inside the sequencer. I have the full-bodied
blueprint character, as well as all that animation from the previous lesson here. This is where I can copy this facial animation onto
our full-bodied character. I'm just going to copy
the facial animation, and "Right-click" on the face of our full-bodied
character and paste it. Then now when I play back the
timeline in the sequencer, you can see that I've
applied that animation to our full-bodied
MetaHuman character from our iPhone capture. Now, unfortunately,
one thing that stands out to me
is the fact that the head is still slightly
floating away from the body. That's something that
we can fix by copy and pasting animation from the
head onto the neck controls. I'm going to navigate down
the controls of the face, and I'm going to find the one at the very bottom called
head_ik_switch_ctrl. I'm just going to turn that
from a value of one to zero, and now when I play
back the sequencer, you can see that our head is no longer floating
away from our body, but it's totally static. That could work in
some situations, but we can also take this a bit further and
just copy and paste the animation that was there on more appropriate
controls so that that animation is connecting
our head and our body. I'm going toggle down
the head_ik_ctrl, and I'm going to copy and paste the animation from
these transforms of the rotation onto the FK controls further up in
our stack of controls. I'm going to go
to Rotation Roll. I'm going to click,
drag, and select all these keyframes, and in the anim outliner
in the top right, I'm going to navigate to where
I can find the head_ctrl. I want to locate the same
rotation roll attribute. Select it and have my
timeline indicator at zero, and press "Ctrl V" to past that animation on
that attribute. Now I want to rinse and repeat this process for
the other rotation attributes from the
ik_ctrl to the head_ctrl. I'm going to click, drag,
select the rotation pitch, navigate back up
to the head_ctrl, and find the same
rotation pitch, and Ctrl V to paste that in. Find the rotation yaw, click, drag, and select those, and navigate back up and do the same thing for that
attribute onto the head_ctrl. We've pasted all the
head_ctrl animation. We've brought back some
of that rotation value, and now we can apply some of that translation
value to the body. We can further connect the
animation with the body and the head agreeing
with each other. Now I want to take the
location of the head_ik_ctrl. I want to apply that
to some other control , like the body_offset_ctrl. I'm going to select
the body_offset_ctrl, and it's going to move the body now and not just
rotate the head. I'm going to navigate to
the appropriate location, move my timeline
indicator to zero, and I want to copy
and paste that in. I'm going to do that for
each one of these X, Y, and Z values for location, going from the head_ik_ctrl
to the body_offset_ctrl. If you're not happy with
the animation you have on the body location attributes, we can click those attributes and open up the
sequencer curves window. I'll click, drag, select all these keys and then
select the multi-select tool. This will give me a new GUI interface that
I can click, drag, select and scale down
these keys globally, so I can just reduce
the overall motion. If something is happening
too much or too little, I can just increase
those values or decrease them altogether once I
click, drag, select them. Now I just want to make
sure I'm saving all under file save all to make sure
we're saving our changes. I'm going to navigate back
to the Sequencer tab, and the best way to
record this animation is to actually use something
like OBS screen capture, because unfortunately,
Unreal Engine doesn't export audio right now. The best way to capture the audio with
the video is to just screen-capture your viewport and play back the
sequencer timeline, if you want to capture
this animation to post to social
media or YouTube. Now it's your turn to connect your custom MetaHuman
head from your iPhone to a full-bodied character
using MetaHuman Creator and customizing it with your
iPhone-captured animation, connecting those up in
the level sequence. Meet me in the next lesson.
We're going to dive into customizing
materials and textures.
7. Customize Materials and Textures: Welcome back to this lesson, where we're going to dive into materials and
textures and applying our own custom ones to
our custom meta-human. Back inside our Unreal
Engine project, I want to select the blueprint
of our custom character, and I can navigate to
that using the outliner. If I look in the top
right here, I see, I have a little option
to edit blueprint, so if I click that,
it'll actually open the blueprint
for this character. Now, this has all
the body, face, torso, all the attributes that make up our
custom character. This is where we can find the materials that are
related to these body parts. For example, if I wanted to change the material
of the T-shirt, I can navigate to the
materials of the torso and click the folder with a magnifying glass to
browse to that asset. This is where we have access to all the custom parameters
that are available to us. This is what's called a material instance
of a master material. These are all
variables that they promoted to us to
have access to. We can actually change the
colors of the T-shirt here, we can change the logo
that's displayed, and it's all showing on a
sphere in this preview window, but it will update
the viewport as well, that's why I have this docked to the right side so I
can jump down into material A and change this
to some branded color. I can actually use
a hexadecimal value here and copy and paste that in, and I can also change the other colors that we
have available to us. Now, if I jump down into
the print attribute, I can scroll down
to this red, green, and blue icon that has the attribute named
print graphic map. Now, it's red, green, and blue, but just
above it we have A, B, C, these colors are mapping on to red,
green, and blue. They're actually using
white for the red, they're using the
gray for the green, and they're using the
blue for the blue, so A, B, C could really just mean
RGB, red, green, and blue. If we want to replace this
graphic with our own, we just want to
convert any colors on our graphic to
red, green, and blue; then afterward, we
can change the A, B, C and colors to remap those red, green, and blue values. For example, I'm going to
jump inside a Photoshop. I'm going to select
different parts of this logo and recolor them with
red, green, and blue. I'm just going to
select everything by control-clicking
the layer and then deselecting the parts of the logo that have
different colors. Now, I'm going to
create a new layer, and I'm going to
paint brush 100% red onto this Skillshare text. I can make sure it's 100%
red by seeing that R is 255, and everything else is zero, and I can just brush in a 100% red color onto
the Skillshare text. Now, for the other
parts of the logo, I can color them green or blue, and then we can
remap these colors inside of Unreal Engine
to be whatever we want. That way, we're not always
having to go back to a program like Photoshop just to change colors inside
Unreal Engine, once we set up this graphic, we can change the colors
inside of Unreal Engine only. I'm going to file,
save a copy as a PNG. Now, I'm going to
browse to this asset using the folder
magnifying glass icon and click and drag the
PNG that I saved from Photoshop into this
content browser drawer. Then afterward, I'm
going to click and drag the Skillshare PNG into the
print graphic map slot. Now, it's replaced the
logo on my character, and I just need to choose the brand-specific
colors for A, B, and C. Once we're happy
with our T-shirt logo, we can jump into
customizing the face. I'm going to navigate
back to the blueprint of our character by clicking
it in the outliner, and I want to jump down
to the face attribute. Inside of here, you can see
we have a bunch of materials, and I'm just going to
navigate to the first one. This is the main
texture for our face. Inside of here, you can see we have a few material instances. I'm going to click the
first one because that has to do with our main LOD, the highest level of detail. Inside of here, you can see all the different parameters
we have for this material. We're most interested
in the base color. There's multiple textures
for the base color, but these are just
for wrinkle maps, so when the face is animated, it activates different
types of textures. Now, when we're creating
custom textures, we're not really
concerned with that, we can just apply our
custom texture to all four of these base
color textures. I'm going to use the folder icon with magnifying glass to
browse to this asset. Once I have that asset
in the content browser, I'm going to right-click it and choose "Asset
actions", "Export". Now, I can export
this texture as a PNG and bring it inside a Photoshop and paint right on top of it. You can see I've already done a few examples that
we'll look at now. I'm going to import
these example files I'm also providing to you. I've imported these examples
by just clicking and dragging them into our
content browser, now, I can click and drag
them onto our character, and you can see it's immediately updated our character to
be even more customized. All of these textures
were just made inside of Photoshop using
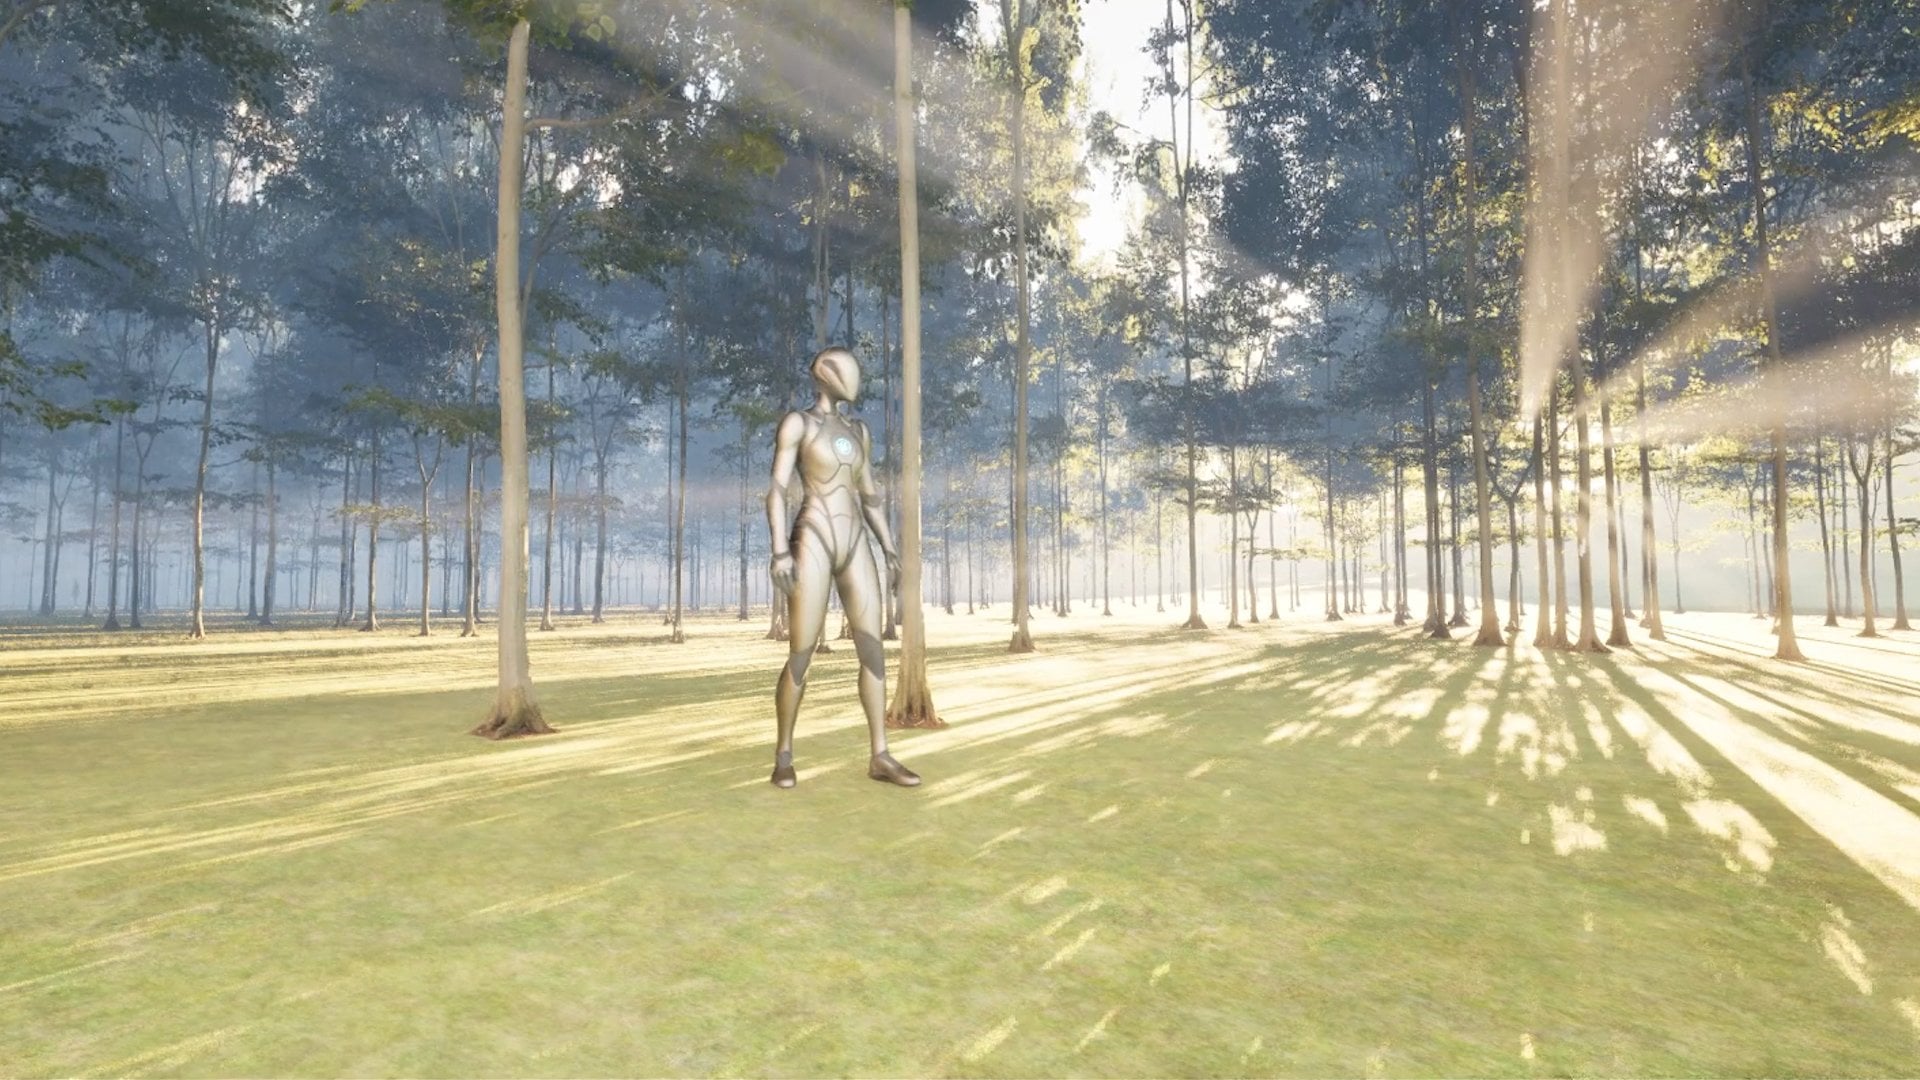
simple brushes. I can also just shift
the hue of that texture, and now I look like an alien. I can get back to the
main one just by clicking and dragging the original
texture onto my face. Now, the reason why we want
to make sure that we apply the same texture
to all four slots is because as our face animates, it's going to activate all
four of those textures. If our custom texture
isn't applied to all four, we're going to have odd results, so we want to click and drag the texture that we choose
onto all four slots. In this lesson, you
learned how to apply your own custom
textures and materials. Take a minute and use
this knowledge to further customize your character to be exactly like you want. Meet me in the next lesson where we are going to talk about applying props and
animation to our character.
8. Customize Props and Animations: Welcome back. In this lesson, we're going to apply some props to our character
like sunglasses, and we're going to find
out where to locate those free assets so that we don't have to
model them ourselves. We're also going to find some
stock animation that we can apply to our character to
make them come more alive. To add props to our character, I'm going to click
the add button on the top of the Components list, and we basically
have two options, a static mesh or
a skeletal mesh. The only difference is if the skeletal mesh has some kind of joint
associated with it. For this asset that I'm
going to be finding, it is a skeletal mesh, so I'm going to
choose that option. I'm going to rename
it to be sunglasses so I can differentiate it from the other attributes
of the character, and because the sunglasses are going to be
following the head, I'm going to click and
drag it onto the face. Now, I just seem to tell it, where is this
skeletal mesh asset. Luckily, for us,
there's some free ones available on the Unreal
Engine Marketplace. Just to open up the Epic Games
launcher and navigate to the Marketplace tab and
search for the free items. The sunglasses that I'm using live inside the
stylized character kit. Anytime you see these previews, you can usually cannibalize these projects and use them
for your own purposes. I want to grab these sunglasses, and I want to add it to my
5.4 Unreal Engine project. Now, this says it's not good
for 5.4, but that's okay, I can click "Show all projects", when I want to add
it to my project to access any
project that is 5.4. It's going to give me a
warning, but that's okay. I can just choose an earlier
version of Unreal Engine, and it will still import
this asset into my project. It's just giving us a warning that it's not suited for it, but because it's just a model, there really are no
model differences between Unreal Engine versions, so we can always apply custom props to any
version of Unreal Engine. Once this asset is
added to our project, we can navigate to
this new folder that it creates and find
the name of this asset. For me, it's MESH_A01, so when I jump back into my
blueprint for this character, and under this sunglasses
skeletal mesh that we added, I can jump over to the
skeletal mesh asset and search for it in the
Search Assets window. I can just type in MESH_A, and I can find it here. When I click select it, we've added it to our character, and I can actually jump to my Viewport tab to also preview it in this window so I can actually move it into
place over the face. For this prop to actually follow the head when this
character is animated, we need to choose
a parent socket, so I'm going to choose
the head joint. I'm just going to
type in head under the magnifying
glass folder icon, and now, we have parented this sunglasses prop
to the head joint. Now, this has created a little offset that
we can correct for. I can press EMI
keyboard to pull up the rotate manipulator
and rotate it into place and then press W to get the move manipulator to move
it down back onto the face. That step is all about just making sure that it
follows the head, and not just the character, so that when this is animated, it will follow the head. I can turn off snapping
so that I can get some more fine-tuned control
to the move manipulator. I can just uncheck this
blue icon that has the grid next to the number
10 in the top right, and now I can smoothly
move around the asset. I can also jump to the
transform attributes under the Details window
here and type in specific values or click
and drag select them. Now, I just want to
make sure I compile and save so that these changes
are saved onto our character. Now, I can jump back into our level sequence
that we made in a previous lesson and test out that this prop is actually
following my character. Now, we can see the sunglasses
are actually following the character's
head and not just the character itself,
like the body. Now that we have the prop
working on our face, we can jump to the
meta-human control rig inside the sequencer. There's a little bug in
Unreal Engine where you can hide and unhide
your control shapes, and they may not display in the viewport, but that's okay, we can still access these
controls in the sequencer view. I can jump down to the
upper arm, for example, and I can just dial
in the rotation of this arm joint to be
a bit more appealing. I can actually pose my character out by
just click dragging, selecting these attributes for each one of these controls. If we'd like to reorient our character
a little bit, we can do that with this
control and line up our camera to view
the character. Now, instead of using
the control rig, if we want to use
a stock animation, so the whole body has motion, I can actually do
that by going to the body track and clicking the Plus button and adding an animation from this top menu. The problem is, we don't have any animations specifically for the skeleton of this character, so we can use some third-person
blueprint animations and retarget them to work
with our custom character. I'm going to navigate to
the Animations folder of the mannequins that comes
with the Unreal Engine, and I'm just going
to right-click the "MM_Idle" animation and
click "Retarget animation". Now, the target skeleton just needs to be our meta-human. Because there's
different components that comprise a meta-human, we just need to find the
right one for our meta-human. I'm going to change back
to the selection mode so I can select the meta-human
and see him in our outliner. I'm going to navigate
to our components list and click the body
to find what is the skeleton mesh asset for our body because this is
what I want to retarget to. This is the name of the
asset we're going to try to find in the retarget
animation window. When I right-click and choose
"Retarget animations", I want to choose a target
that matches that name. Now, I know what to type in. Now, it's okay that we don't
see the full body here, it will work once we apply
it in the sequencer. I can find that
idle animation that we were interested in
and double-click it. Now, we can watch playback on the retarget from the
source where it came from, on the template character
onto our custom character. I can click "Export
animations" to save this animation so that I can then apply it
inside sequencer. I'm going to accept the
defaults and click "Export". I'm going to close our
blueprint and you can see where the idle retargeted
animation lives. Now, I'm going to
just jump back to the control rig and disable it by clicking
this icon here. I'm going to jump to the Plus button on the
body component, and now, I can type in
and search for our idle. This is the retargeted
idol that we just created. Now, you can see
this animation face our character away from
the direction we wanted, so I can actually add a
transform track so that I have a way to rotate him now that we're not
using the control rig. I'm going toggle down this new transform
track I just added, and I'm going to change
the yaw from here. Because I added
the animation when my timeline indicator was
at the end of the timeline, it added the
animation to the end. So I want to click-drag select this idle track all the way to the beginning
of our sequence. If it doesn't cover enough time, I can actually just copy
and paste it and line them up back to back because
they should seamlessly loop. Now, when I play
in the timeline, I can see my character
actually has some body animation that's
making it feel more alive, and we've added our
own prop to his face. In this lesson, you
learned how to add your own prop star characters
and where to find them. You don't have to model
them from scratch, you can actually find assets on the Unreal
Engine Marketplace, and most of them are free. You can also choose paid
assets or go to websites like sketchfab.com and
find other things that people have modeled
to add to your projects. Just remember the
difference between the skeletal mesh
and the static mesh, you may have to choose
one or the other, depending on the
type of asset that you grab and import
into your project. I'll see you in the next lesson where
we are going to take this customized character
and now make them playable.
9. Customize Your Playable Metahuman : Welcome back. We're going to take all the knowledge
that we have now, and we're gonna apply it to this custom character
to make them playable. Back inside our unreal
engine project. Pressing play, you can
see that we still have our first earlier version
of our metahuman character, and we're going to replace them with our personalized one. I'm going to jump into
the Cooper folder, and I want to duplicate
this blueprint. I'm going to right click
and choose duplicate. This is what we're
going to swap in our custom character inside
this blueprint that has all the information
that we've already added up to this point
like the input controls. Looking at this blueprint, I can see that I have
all the components of our metahumen that I want to replace with our
custom character. I'm going to pull up
both blueprints side by side so I can copy and
paste one from the other. On the left side, we have
our custom character, on the right side, we have
our template metahumen. You can see that it's
the duplicate version because it's BP Cooper 1. If I navigate to the face, you can see I can find the skeletal mesh
asset for our face, and I can click the face for the one
we're going to replace. You can see that
there isn't one here. I can click and drag that
into the skeletal mesh asset. We get our personalized
face onto this character. But there's a little glitch
inside of unreal engine. We actually have to
reset the skeletal mesh, and then bring it back in
for it to refresh correctly. All the hair is going to be
messed up, but that's okay. We're going to shift, click
from the top to the bottom of all of these groom assets like the beard, and just delete them. We're going to
shift click the top to bottom from the
one we want to copy, and hit Control C, the navigate
to where we're pasting, select the face
and hit Control V, and just click and drag
them under the face to make sure they're children of the face so that they
follow along with the face. Now we have our
personalized face and hair, and we can start replacing
other parts of the body. Now, for example, this torso actually
has the same T shirt. Instead of replacing
the skeletal mesh, we can actually navigate to the material of our
personalized shirt and just click and drag that material onto the materials element zero. Instead of creating a
new skeletal mesh asset, we can just click and
drag the materials on to these other
components like the feet, because the style of the shoe is the same between
these characters. I don't need to swap
in the skeleton mesh. I just need to go
to the materials. But, for example, the
pants, I need to do both. Now I can click, compile
and save on BP Cooper 1. Once we've completed
that, we can close both of these blueprints
and navigate to the right side here
where we can see there's a tab called World Settings. If I click that, I can see there's game modes
available right here. I the default porn class, we can choose the BP Cooper 1. When I press play,
now we actually have our customized character as the playable version in
this template level. I can run around and use the same WASD keys and space
bar to jump and run around. This is our fully customized
metahuman character, now playable inside
unreal engine. Now take a moment and connect the final dots so that you
two can have a personalized, playable character
inside on religion.
10. Final Thoughts: Congratulations for making
it to the end of this class. You've learned a
lot of key skills about making a character
from scratch and customizing it to
look exactly like you or from metahuman
template characters. We learned how to take that
personalized character and leverage the assets that
Unreal Engine gives us, and animate that character, and even play that character
in a template level. Be mindful that Unreal Engine
is a complicated software, and we've streamlined
that process. But there's still
bugs that you'll run into here and there, and sometimes just restarting Unreal Engine can help reset it. Always remember to
compile and save your blueprints when you're
making changes to them, like we did in the class. If you're interested
in this as a career, this is its own discipline,
creating characters. Dive deeper in and
get inspired by what you find around
you in games and film, and media, and start creating
your own characters. This is the first class
in a series of classes, where we're going to dive even
deeper into Unreal Engine. In the next class, we're going
to create an environment together and even design
a level for a game. Until then, enjoy creating your own customizable character,
and I'll see you soon.
 Lucas Ridley, Professional Animator