Transcripts
1. Introduction: I think a lot of us wear
masks and in doing that, we sometimes inhibit
ourselves from expressing our true self
or being vulnerable. An avatar actually can be
a great avenue to taking that metaphorical mask off and finding a deeper side of yourself and
expressing yourself, Hey, every buddy, I'm
Teflon Sega, a singer, producer, and multi verse
native world builder. You might have heard
me on Spotify, also, you might have seen
some of my work on one of the newest Metallica
music videos. I also performed
a virtual concert alongside Justin Bieber
and the weekend. This class will guide you
through the process of creating a unique and personalized
avatar that represents you. I'm going to be
bringing all of you earthlings into my world, whether you're
interested in V, tubing, gaming, or just want a new
outlet for expression. I'll be walking you
through step by step, scanning your face, creating
your avatar from scratch, adding props and
assets to your avatar, exploring some environments, setting up lighting and cameras, animating your
avatar in real time. And then getting you set
up with OBS so that you can stream on any
app of your choice, from Youtube, Tiktok to Twitch. One of the best parts
is the majority of this software we'll be using
today is completely free. Whether you're a beginner or an experienced digital artist, this class definitely has
something for everyone. I look forward to seeing
what you guys create. Leska started.
2. Getting Started: Welcome to my world. I want to talk to you a bit
about the virtual world and what we're about to dive
into before we get started. To me, the avatar is a
new form of expression. A lot of you will find
ways to express yourself through an avatar that maybe never even have
been done before. And I get a lot of comments like Teflon, why are you hiding? Or why don't you
show us who you are? And for me, the reality and the irony is that I've been able to explore very
vulnerable topics in my music like depression, recovery, sobriety, and
unmask my true self. And a large part of that is because of the use of an avatar. So in a sense, for me, putting on one mask allows me to take a lifetime
worth of masks off. And this is what I hope
some of you can find. I wish I had this
class starting out, because when I embarked on this journey during
the pandemic of learning real time animation, I did it pretty much on my own. So we're writing the
blueprint as we go. It's a brand new medium and I look forward to at least
giving you some of the DNA, to pushing the envelope on top of gaming and a growing
Youtube community, so many different forms
of live streaming, as well as creating film and storytelling in more
of a linear style. All of that will
be relevant with the tool set I'll give
you in this class. So to follow along.
Ideally you'll have a PC. If you have a gaming
PC even better, you'll want to download
live link face, preferably for an
iphone or a newer ipad. You'll want to have
Unreal Engine. In addition, you'll
want to have OBS, which will allow you to
live stream Unreal Engine to Twitch or Tiktok or Youtube. I think the hardest part in general about what
we're going to learn today and what I want you to take away
from this class, is the amount of hats
you're going to be wearing. You're going to be
a sound engineer, you're going to be a live
streaming broadcaster. You're going to be a
lighting director. You're going to be
running your camera. You're going to also, on top of all of that, be
a personality, it's a lot. You're learning a
few new programs. I would encourage you
just to take baby steps. You know, it took me
two years to get to a place where I'm comfortable
with a lot of this stuff. And it is a new language and a lot of the
tools are brand new. So I think just pacing yourself and committing a
little bit of time every day. You'll come forward
leaps and bounds. So now that we've
discussed the philosophy, let's move on to preparing the first steps of
creating our avatar.
3. Preparing Your Software: Okay, before we
really get started, we're going to need
to download and prepare some of the software and some of the programs
that we'll need in order to build our avatars. So first we're
going to go to Real Engine.com So here for free you're going to sign
up and create a profile. And once you've
done that, you're going to download Unreal Engine, which will give us this
is the Epic Launch. Scroll down and click
Download Launcher. In the meantime, you probably want to check and make sure that your PC or Mac is up to speed. Now on a ipad or an iphone, you want to go to the app store and download live link face, and that's how we're
going to actually capture our facial expressions
in real time. We're also going to want
to download OBS Studio, so you can go ahead to OBS
Project.com slash download. It's another free
software that's going to allow us to do
some live streaming. Once you've downloaded
the Epic launcher, you're going to
click on Library. And this is where we're going
to install real engine. So you're going to click
the little plus sign here, then we're going to
specifically choose 5.2 0.1 So make sure you
have that installed, that's going to take a minute. It's probably 20 gigs, so make sure you have
some hard drive space. And once you're all set
up, let's get it moving. So while Unreal Engine
is downloading, take your time getting
all your accounts ready and meet me
in the next lesson.
4. Scanning Your Face: Now that all our software is
installed, in this lesson, I'm going to show you
how to get your avatar started by scanning your
face with your phone. We're going to open up live
link face on our phone. And we're actually going to
select metahuman animator. And here is where we
will do our calibration. Take scanning the face,
You're going to make a video. It's going to be about
ten or 15 seconds long. And you're going to start
with a neutral pose, looking at the camera. Then you're going to do a
three turn to the right, a three turn to the left. You're going to do a smile
and show your teeth. You're going to look up,
you're going to look down. And then you can click Stop. In the bottom left hand corner, we see the picture of a slate with a little magnifying glass. We click that, we're going to click our
take that we just did, which was Katie's
calibration here, and we are going to
email that to ourself. We can either use e mail. I prefer to use Google
Drive, it's way quicker. You can air drop,
you can dropbox. Google Drive is my preference. Once we email that or
get that file to our PC, we're going to download
and unpack that. That can just remain in
the downloads folder. That's fine. Now we will begin
importing that calibration take into Unreal
Engine so that we can scan our metahuman
in Unreal engine. You're going to want to
create a new folder. I'm calling this
Metahuman, Katie, you can call it metahuman,
whatever your name is, and that's where the
scan is going to live. Once you've downloaded and
unzipped the files that we transferred from our phone
to our PC in this folder, we're going to create
all the assets that we need to extract that. The first step is
to right click, and then we're going to
go to Metahuman animator. And we're going to
click Capture Source. Here the source was an
iphone and this was Katie. Just so that I know what it was, I will type Katie, we're going
to double click on that. Under capture source type, we want to click live
link Face Archives here on our storage path. This is where we're going
to click in downloads and we're going to find the
folder that we had for me, it was called Live
link metahuman update. You can just click Select
Folder I'm going to save. So the next step,
we're going to click Tools and we're going to
go to Capture Manager. And we're going to
click iphone Katie. Here we can see it
populates automatically, the takes that she did, We only need one click, Add to Q, and click Import. Once that's imported, we can
go ahead and close this. And we're going to go
back into the folder that we made which
was metahuman Katie. I'm going to write,
click back down to metahuman animator again
and metahuman identity. I'm going to name
this identity Katie. Double click up top where it says Create
components from footage. I am going to find that
calibration footage that we had which for me
was called iphone Katie, it's going to process
might take a little bit. Now that we have
that footage in, we're going to first thing we
do is select the body type. It's doing a little
auto save right now. Wheel savior for us on the body, it's going to be
a female normal. We will now select poses, and this is under neutral pose, where we will create key
frames to scan the face. First you want to find
a nice neutral pose. This one looks good. We
press promote the frame. Then we're actually going to
click the camera right here, which lets us find
the next frame. I'm going to find a three
quarters turn to the right. I'd like to have a
little bit of cheek there, Promote the frame. And then we click the
camera to get out again. We're going to do a
34, turn to the left, a little bit of cheek,
promote the frame. Gives us the key
frames on the face. Again, click the camera. Here's the look up, here is the look down. Now we're going to
click Identity Solve, Metahuman Identity
Solve at the top menu. Once this is done, you're going to click mesh to metahuman. Up in the top, you want to make sure you
click the second option, auto rig identity, skeletal
mesh plus full metahuman. Here you want to press. Okay. And the next step, we're
actually going to add a pose and we're
going to add teeth. We want to go to the frame
where we're showing our teeth. We're going to promote that
frame with the plus sign. Then we're going to
click Fit Teeth. Once that's done, we're going
to hit for performance. This is going to be
pretty intensive. On the PC, it might
take 5 minutes, it might take 10
minutes depending on what type of
computer you have. But yeah, just make sure that all the other apps are closed and you have just on
real engine ready to go here, we're going to prepare
for performance. Okay, now that that's done, I think it's a
good time to save. And we can go ahead
and close that. Now that we've saved, we can move on to the artistic part. Next up we're going to add
our meta humans, eyes, hair, clothes, skin
tone, and much more.
5. Styling Your Avatar: In this lesson,
we're going to style your avatar using
Quiksol Bridge. Which is a plug in
that comes installed with Real Engine and basically serves as a library for all of your scans plus pre made assets. Now we're going to
click the square with the green sign up top
here on the menu bar, and we're going to
open Quisolbridge. Here's where it's
going to ask us to sign into the Epic account that we made earlier.
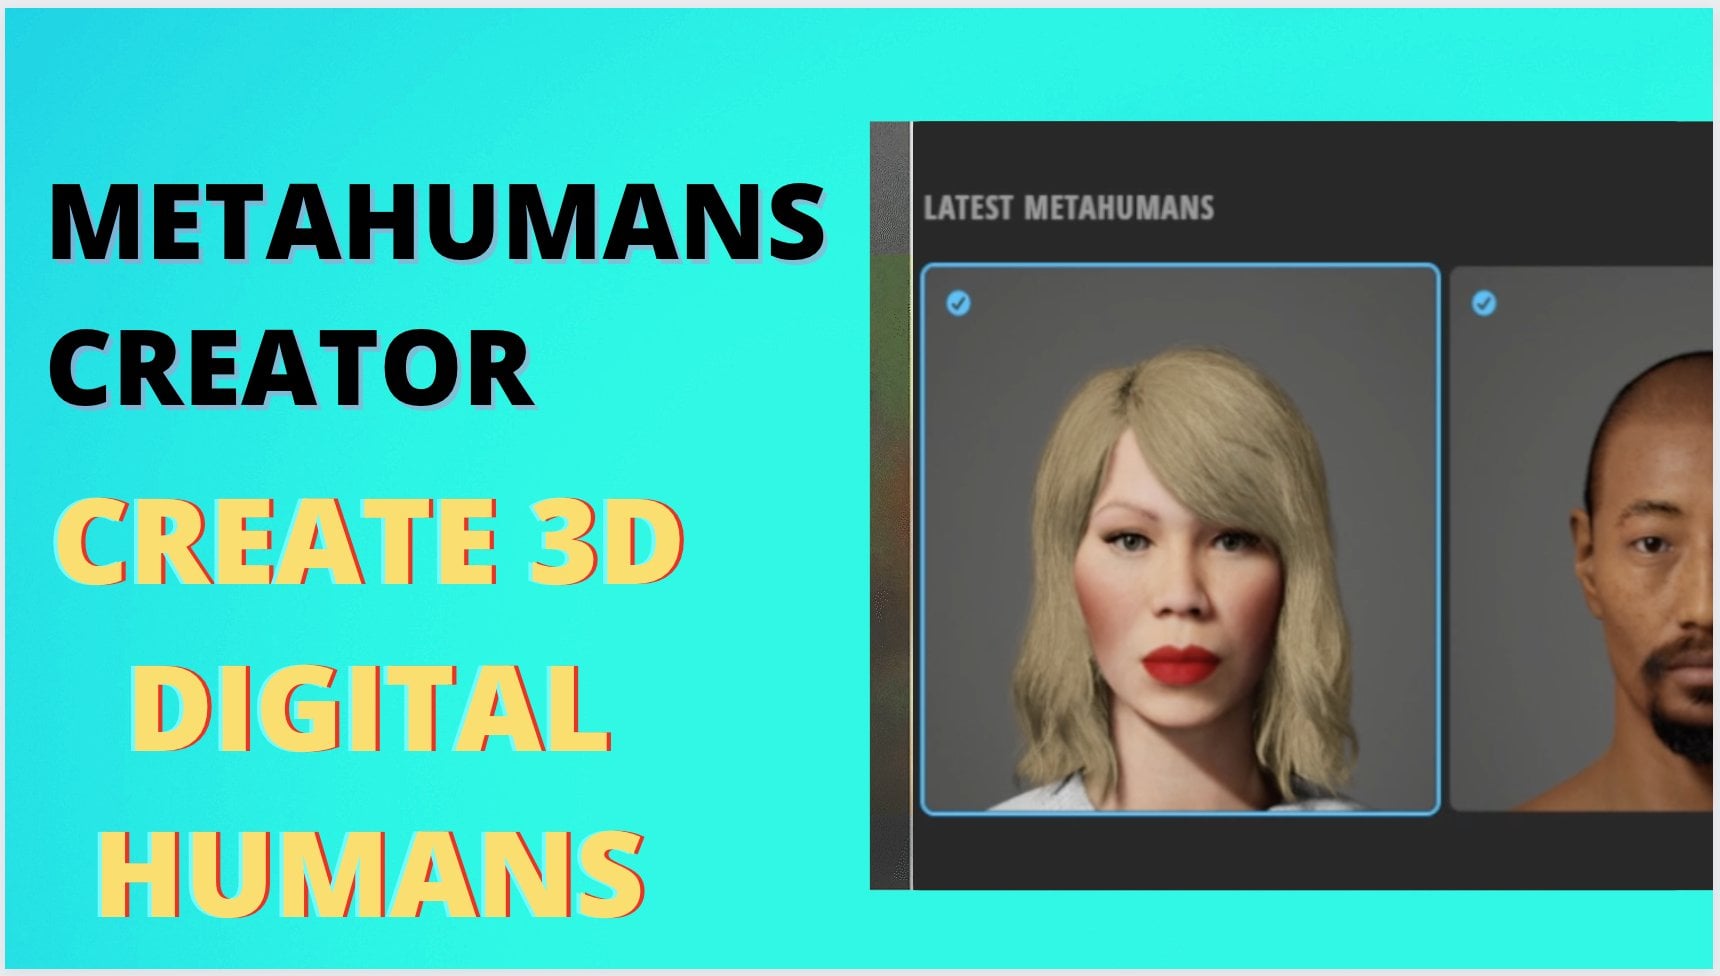
I'm already signed in. I'm going to navigate to
my metahumans identity. Here we can see the most
recent metahuman we made. Once we have metahuman open, we're going to click
Start MHC first, which will pull up the website. If you're not logged
in, you can use that Epic account login
that you created earlier. Make sure the version says 5.2 and then you want to
launch Metahuman Creator. Once that loads up, we can go ahead and click our new identity and
click Edit Selected. So this is the face mesh that we scan. This is Katie's face. We're going to dress it up. Now I'm actually going to
go for a bit of realism. You can get as creative as you want to be your
own art director. But I'm going to
actually make this look as much like Katie as I can. We can start with skin, see skin tone looks good. And you can click here. Different shades and textures. Eyes, she has green eyes,
we'll go with that. You can actually
click iris here. Make the size bigger
iris saturation. So we're just going to tweak things how we get to a place. The vascularity is the amount
of red veins in the eye. I like to actually
pull that down so it looks completely white. All right. We'll
move on to teeth. For some reason
they think having plaque on teeth is cool. I actually like to turn that completely down teeth
color to make those white. Why not? Now we'll
move on to make up, apply some foundation here. Mostly it's affected under
the eyes and you can actually increase the intensity or decrease to apply
the foundation. Put it leaves somewhere
in the middle. Get some eye make up. I see Katie in the video, likes to have some eye liner. Here we'll go a
little bit of blush, maybe a make up color we want. Here's where it gets
fun. We can go head and we will choose hairstyle. I think a bun up makes sense. And she's a red head, so we will choose that there. Eyebrows, a little bit
of red in the eyebrows. Let's give her some lashes. You can choose the top
you want, Should be good. Give her some jeans, shoes. We'll give her some slip there. It's looking pretty good. So this is an
example of trying to create realism in an avatar. And feel free to explore
all the options, all the clothing get as creative as you
want, mix and match. You can even go back to the
face here and contour it. The world is your oyster here. You can do anything you want. So I encourage you to just mess around with all this stuff. Spend a lot of time in
your now all of this auto, a lot of people ask me,
how do you save this? Did I lose anything? I did. It's going to auto save
when you're on the website. You can go ahead and
close that. What we're going to do here is go
back into Quil Bridge. If we go back to
our my meta humans, we will see that there
is a new identity here. We are going to always export
at the highest quality. And we're going to
add this tar project right now. You're
going to click Add. Once you do, we'll go into
our humans folder here, and here's the identity
that we just made. We're going to drag it into
our scene. There she is. When you initially drag your
metahuman into the scene, one thing that's
really important to remember is that you're
going to get a lot of prompts down here in the
bottom right hand corner that are going to
say enable plug ins. Just make sure you enable all of those and then you're going to close on real
engine or restart it. Now that we've
created our metahuman and that's in on real engine, let's move on to adding some props and some
assets to the metahuman.
6. Adding Custom Props: So here we're going to add props and some assets
to the metahuman. And we're even going to create
some stuff from scratch. So I noticed that Katie
wears a nose ring, so why, let's explore how we can make one of those
in on real engine. First, we actually want to go to edit and we're going to go to Project Plug Ins
at the bottom here, Plug ins and then type
in modeling tools. We want to make sure that
modeling tools is enabled. If it's not, click
Enable and then restart to take use of
these modeling tools. We will click Selection
mode and go to Modeling. Now, for a nose ring, I want to create a Taurus. We will drag that in. There is more, looks
like a doughnut. We're going to tweak this, and this is all our little
attributes for tweaking here. Major radius, I
can make it a bit more big there and I can thin it out with
the minor radius. I think that for me
looks pretty good. We're going to
accept these meshes, actually save in the content
folder under generated. If you click generated, here is the object we just created and they
called it a torus. We're going to actually rename
this to Katie's nose ring. If we click on that, we're
going to make a material. There's a material
slot over here. We're just going
to apply some of the default materials that
come with meta humans. If you type in metal, here's a nice looking metal,
we're going to use that. Now let's get into how do we
add this object to Katie. You're going to click on Katie. We have Katie in the scene. We're going to click
on Katie's blueprint, which is in the outliner here in the upper
right hand corner. And make sure
you're on viewport. Click Viewport, here's
where we can see Katie. Let's get into how do we attach the ring that we just
made to Katie's face. You're going to go into
the content drawer on the bottom left hand
corner of the screen here. We're going to navigate
to the folder generated, which is an automatic folder of meshes that we are making
in on real engine. We just made this ring, and we call it
Katie's nose ring. We're going to drag it
onto the face here. Here's Katie's nose ring. Click on the nose ring here
in the components section. And we go to the
right hand corner, we can see parent socket. In parent socket, we
want to click nose. Where we're going to
attach it to is facial. Nose is just for center, obviously this ring
is way too big. So we can click
scaling right here. I'm going to drop it probably to 0.05 maybe still too big. 0.01 still looking too big. 0.005 here. I can drag this around
position how I want, but I still think it's
looking a little big, so I'm going to go 0.03 Let's get that
fitted to her nose. We're using the translate
objects right here, we're just dragging
that onto the noses. Pretty good. We can
always tweak that later. But let me just position
that a little higher. And we're going to compile in the upper left hand
corner when we are done. And then we want to click Save. This is how it ended up looking here, there's our nose ring. We made that from scratch. Additionally, if we want to
get a little more creative, let's say Katie's a warrior. She wants a sword. We're going to go
to Quill Bridge. Clicking the square with
the little green plus sign. Upper left hand
corner, we're going to go back to our Quick Sil bridge, which is a great tool
with tons of free assets. Free type in sword. That's one. We got a dagger. Let's see what we got. Sure, let's go with dagger. You can click on dagger. You can choose the quality you want. Maybe if you're doing a
lot of live streaming, you want to go with
a lower quality. If you do have a PC with a 30
90 or RTX 30 90 and above, I would keep it high quality. So you're going to
click Download. And then you'll click
Add to the Project. Again, we want to add this to Katie's body here, Attach it. We're going to click on Katie in the scene, and
she'll show up here. And we want to click
on her blueprint. We're going to edit
her blueprint again. We go to Viewport, so that we're looking at Katie. Zoom in. We go back to the
content drawer, which is where we have all of our stuff in on real engine. We want to look for
anything we download from the Quiksil mega scans where we were is going to show up
here under mega scans. If we click three D asset, we have the dagger here. I'm going to drag
this onto her body. Sometimes it actually doesn't go onto the body the first time, So you want to manually grab that Jagger and click on Body. Where are we? Here's the dagger. I want it to look like a sword. I'm going to change
its dimensions. We are going to attach
this dagger to a bone. Now I want it to look
like it's on her back, so I'm going to actually
attach it to her spine. It defaulted by putting it
in a perpendicular position, I'm going to rotate it is if
she's carrying it around, we'll move that in place. That this is just an example of one asset you could
add to your character. A lot of times I'll
go to a G Trader or Sketchfab.com and these are websites that have endless
three D objects that you can, you can get as
creative as you want and add all kinds of
stuff to your character. It's just an example of
one thing you can bring in and let's save and
compile and move on. Now that we've added some assets and some prop star meta human, let's check out some
new environments. So come along with me
and let's explore.
7. Exploring Environments: Who feels nice to get
some sunshine after traveling through hyperspace?
Welcome to the desert. Now that we've explored
our avatars, appearance, and features, let's dive into some different
environments. Open up the epic launcher
that we downloaded earlier and click
on Marketplace. I'm going to
navigate you to some of my favorite
free environments. First we're going
to Typ Facility. We see this one here is free, and you're going
to install this. And then we can go ahead
and once it's installed, add it to our project. The project we're
working on right now. It is called skill share, I'm going to add to the project. Boom. Next type in city park, city park environment
collection. Click on that one. Here's nice, good place to skateboard, vibe out, sit on a park
bench, do a live stream. We're going to install
that and this one actually requires us to create in its own project,
but that's fine. So choose a place you
want to put that. And click Create. And I'll show you what
we'll do with that later. Moving on to a art gallery. I got a few options here. I think my favorite one, it's type free,
is this one here. Yeah, it's kind modern
art gallery vibes. And what's great
about these is you can actually customize the art. You could put your
own art in there. I art, whatever you're into, install that, create a project, select the drive you
want it to be in. This is a strange little thing that you're going to
see every now and then. It says, project names may not contain the
following characters. For some reason the creator
of this has put commas. We just have to delete that. We're going to delete
the comma here. And then we're going to create. Lastly, go to Browse
in the store, click Mega Scans, and
this is going to show you all kinds of ultra realistic projects that you can download. We're going to
click on this one. This is the Norway maple
forest, pretty beautiful. And we're going to do, we're
going to add a project. My project was
called Skill Share, I'm going to add it there. Boom. One thing I want to
go over is when you download a project or
something from the store, that does not allow you to
add it to your project. And it says it wants to
create its own project. For example, the Art
Fashion Automated Gallery. It required me to
create its own project. What I can do here
is actually click on that and click on
the contents folder. Then I'm going to
command control C. I'm going to copy the Showcase folder inside
the content folder. Then I'm going to go
back to my Hero project, the project that I'm
currently working in. I'm going to click on the
content folder for that, and I'm just going to command
V and paste that in there. That's going to take a minute that'll compile everything
into one project. We've got our four new
environments added to our hero project here,
let's check them out. Here's our facility
that we added. If we click on Polar and Maps, we can click on Overview. Let's see what it looks like. First time you open
these projects, it's going to load
all the shaders. Going to take a little
bit. This right here looks like an
actual overview of the meshes and the pieces
that build the environment. We want to actually
see the demonstration. Let's try example map, Sunset. That sounds nice. Here we
are in our free environment, our facility. Pretty cool. You could make a
short film here. You could live stream here. This is part of your escapism. I would probably make
a music video here. That is a very cool view. Outside, looks like
something blasted through or maybe just some urban
decay going on. We can explore this. We
got a few rooms here, something going on
here. O test facility. Let's see what else
we got. Let's. Explore the art gallery.
We download it. So we're going to click
on an art gallery. We're going to click on Maps. It looks like we've got a
few different showcases. We have an art gallery,
a car showcase fashion. Let's go Art gallery. Here we are in the art gallery. Sometimes when you
download free projects, you're going to notice the
lighting or something. Just feels not so right. A quick way to get around that, if you see a project
like this that looks too dim would be to add a camera. We add cinematic camera actor and we are going to change our perspective to that
camera that we just added. Camera actors zero,
because it looks dark. You see in the bottom right here the details of the camera. I'm going to click
exposure and then click exposure compensation and we can brighten it up, that
looks a lot better. This right here, I feel like would be a great
place to live stream if you're an artist or
if you want to showcase some cool art behind you
that you've purchased. Whether it's an NFT or whether it's some
art that you made, or maybe some art. But this in general
would look really cool. As a backdrop for a live stream, you can explore
different backdrops or different areas that you
would want to stream from, but it just gives you a
cool almost highbrow vibe, if that's what you're going for. All right, let's see. We have some environments
that are more nature driven. We're going to
open up the Norway Maple Project that
we download and click on Maps and click on
Norway Maple Asset Zoo. This one took a while to
load because those are Megascan trees, fairy hide poly. But this gives us the ability
to do some live streaming outside or we could
easily create a scene where there is a
background of nature behind us. Free assets, brand new stuff. I'd encourage you to take
advantage of all the Megascans. You can let us check out the city park and we're
going to click on Maps. We're going to
click on Showcase. Now we have opened up City Park, which I'm just now realizing
is pretty accurate, maybe slightly derivative
to Central Park. All you humans that have been in New York City would
recognize this down here. I think this is usually like street musicians
playing under this tunnel that goes up into
the park. This is crazy. This would not be the best
live streaming environment, but you could start a new level just because of how heavy this
is In all these trees, you can always pull
assets from here and kit bash and make
your own environment, which is honestly what
I do 99% of the time. I'll just create a new
level and then pull from objects and meshes that are inside these
free environments. I would encourage you to, again, go back on
the marketplace, find any free environments that you're into, download them. I've probably downloaded a
terabyte worth of free stuff on the marketplace and you
can go into these projects. For example, you know,
you see city park here, there's a meshes folder. You have all the
stuff that makes up the city park, buildings, trees. You could create a new level. You can go file new level and start assembling your
own stuff if you want to make a live
streaming background or showcase something
on a stream. If you want to make a Tiktok and assemble a quick
back round dig in, dive in, have fun,
explore around. Maybe figure out how
you can apply them to what you're going to be
creating with your avatar. Now that we've explored
some environments and you've got your
hands on some free ones. In the meantime, let's
move on to lighting and camera set up and start getting you ready
for a live stream.
8. Setting Up Lighting and Camera: All right, so for
this lesson we're going to go over
lighting and camera, the right lighting is
everything. So let's dive in. The first thing we're
going to do is go to file new and we're going to
create an empty level. We can save this as
our live stream level. You're going to want to go in to your meta humans and grab
the one that you created. Ours was called Kate, identity. Here is her blueprint which I'm just going to
drag into the scene. It's completely
pitch black in here. So the first thing I want
to do is add a rim light, which will be a wrecked light. This is called the three
point light setup, which consists of a key light, a rim light, and a fill light. The first one is going
to be the rim light, which is going to be right in the back of our character
to get them to pop. This is my favorite light, and in final fantasy, they're big lighting their
characters with rim light so you can see how it gets
a character to pop. I'm going to angle that
down just a little bit and we'll make
the light blue. So it's a cool light, creating
another rex light here, which will be our key light. This one we're going
to shape a lot. So I'm going to drag
this over in front of our character from up
above and off center. I'm going to shine this one on the face and here under
the details for the light, I'm going to set the width. It's pretty tiny. It's going to be like a little box light. And I'm going to
set the door angle, I want to be long,
that's the door length. The door angle, I'm going
to close in completely. I'm going to shine
this down on her face, probably come from even
higher, further over. I want to tighten that
up a little bit more. So I'm going to go 15. With 15 height, maybe
even ten height, I'm going to shine
this on her face, I'll make the
intensity maybe six. Now we can see that there are some shadows
on the left side. The last light we're going
to add is a wreck light on the left hand side which will be called
our fill light. And I'll make this
perpendicular to her. It's going to be a
very low intensity just to kill some
of these shadows. Maybe even point
Ward, there we go. There's some good studio looking lighting
for our character. The next step is going
to be to add a camera. We go down to add, we
go down to cinematic. We go to camera actor. I like to change my
perspective so that I'm actually viewing from the
perspective of the camera. You click perspective here
and you click camera Act. We can navigate this camera to be in front of our character. I'm going to actually
decrease the speed of my camera so that I'm
coming in real slow here. Framing here, real nice. Obviously, this is out of focus. We want to look for focus under focus settings
for the camera. If you click Draw
Debug Focus Plane, it'll give us this
purple indicator of where our plane is focusing
on, which is really handy. If I drag it, I want to focus
probably around her eyes. Then I'll deselect focus plane. You can see here, the aperture is what creates the
depth of field. Her hair in the back here is getting way too out of focus. I want to find aperture. I'm going to increase
that probably to ten, even to 15. 15 looks good. I feel like now my rim
light is way too bright. So I'm going to bring that down and it feels like it's catching those hairs a little too much. So I'm going to bring
it even further up. Reposition that to the camera. It's still looking a
little too bright. We'll go warned tensity. Here we have Katie, and I'm going to refocus that
since I brought the camera in. Again, make sure you're always selecting the object
you're trying to adjust. Camera. Here's your outliner. I'm selecting camera,
I'm selecting focus. I'm going to drag
that into touch. There's our metahuman,
the nice camera, nice depth of field. One quick way to find different attributes
from the camera is type them in the
search bar here. I'm going to quickly go back to aperture and I think I'm
going to change the depth of field a little more blurry
on the back side of her hair there just to get
it looking pretty cinematic. There we go we our rim
light in the back. We've got our key light, which is brightening up
the face there. We've got the fill light to
kill some of the shadows. And we've got our
camera nicely set up with the depth of field
to look cinematic. I think it's time
to change the vibe up and I head into
the cable wonders.
9. Animating Your Avatar: Welcome to the cable wonders. We're going to work on animating your avatar in real time. So we're essentially
going to apply one of five different
animations that I'm giving you as a
bonus to the class. And they'll loop
continuously forever, so whether you're
on a live stream or a zoom call as your avatar, you'll be able to use
these animations so that your character doesn't
just have a static form. So let's dive into that. First we want to
click on our avatar, then you're going
to click on body. Then you want to click where
it says animation mode. You want to use animation asset. As far as animation to play, this is where you're going to use one of the
animations that I've given you to download.
I'll choose one of them. One's called Skill Share Idol. For us to see these previewed, we actually need to press play. That's where all
the magic happens. When we press play, you can see the
avatar is going to loop in an idle position and
just have some life to it. Once you've downloaded my class animation pack and unzipped it, you're going to want to
copy the folder into the contents folder of your
Unreal Engine project. Have fun with these animations. You'll be able to use
these animations that loop indefinitely as you live stream to give your
avatar some life. Without needing to spend
all the extra money on motion capture suits and some
of that heavier technology. Feel free to play around
with the different poses and animations and
idols that I gave you. Some of them make your avatar
look like it's laughing, there's a dancing one. There's some fun ones. But feel free to explore
with all of these. And this is going to
be key to bringing your character to life in
a real time animation. Now that we're able to apply
some animations that we will actually be able to use in real time and stream
with our avatar. The next step is going to
be capturing our face. We're going to move on
with live link face, which is the app you
downloaded on your iphone and get you up and running with the live streaming facial data.
10. Capturing Facial Movement: Now that we've set our
avatar up to move, let's get live link face
up and running so that we can live stream your
face to your character. One thing to make sure is that your iphone is
iphone X or newer. Or an ipad Pro Gen
three or newer. The first thing we want to do
is find our computers, IP. You're going to click
in the search bar down here and you're going
to type in CMD. And that's going to
open up Command prompt. In command prompt, you
want to type in IP config. This is going to give us
access to the IP number. The IP address, which
is specifically the one that we see
IPV four address. We want to copy that one down. The next step is to open
up live link face on our iphone and we're
going to click on Live Link AR Kit and continue. Then we're going to go to
Settings when under streaming. In the middle of the screen,
you'll see Live link. You want to click on that.
And here's where we're going to type in the IP that
we found on our computer. Additionally, we just
want to make sure that live link face is set up with
our plug ins Unreal engine. Go to edit and then
go to plug ins. We want to type in Apple AR kit that's already
enabled so I'm okay. If not enable it and then restart with the
metahuman in the scene. We want to click the
metahuman under Details. We'll see AR Kit with
live length face open. We should see AR Kit here. I'm going to click that
under AR Kit face subject, where it says use AR Kit face. We want to enable that. This is going to give you
access to controlling. And you can see now Katie is controlling in real
time, her avatar. Now if you get an error up top, which you will see occasionally that says texture
streaming pool, full or over budget in the console command down
below and on real engine, you're going to type in
streaming pool size space 8,000 Once you do that, that error should go away and the texture should be brought
back on your metahuman. That concludes AR face kit. It's pretty straightforward
and go ahead and just see all the crazy expressions and all the different ways you
can maneuver the face. The next step is going to be
getting OBS set up so that you can stream your metahuman
into anywhere you want. Let's dive into that.
11. Livestreaming Your Avatar: Now we set up our avatar
to move and be expressive. Let's pull up OBS and
get it all set up. So the first thing we want to do is Capture and crop
Unreal Engine and OBS, you're going to click
on the plus sign and the sources for OBS and
click on Window Capture. Sit down here. We're going
to click on Display Capture. We'll call this Unreal Engine. That's okay, good to go. Getting a little bit of Infinity
screen, but that's okay. Now we're going to
open on Unreal Engine, and we're going to actually
drag this so that, you know, honestly I recommend
dual monitors if you can, but if you can't, you can actually stretch this to fit inside the OBS window. So I'm going to make
the little bigger. There we go. Next
thing we want to do is set up audio again, under sources, you're going
to click audio input capture. You can add an existing, whatever mic you have. I have a little USB mic, it was like 20 bucks on
Amazon. Sounds great. So now we got audio set up. The next step you're
going to want to click Profile and you're going
to click New Profile. You can name this what you want. It could be Unreal
Engine live Stream. Once you do that, it's going to be a series
of questions here. First question is,
optimized for streaming, recording is secondary, I
think that's the goal for me. Anyway, base canvas resolution,
you can keep all of this. Default 1920 by
1080. Looks good. Your FPS 60, 30,
but 61 possible. That's great. Here
you're going to pick. I'm not going to
actually do this now, but this is where you're
going to sign in to Twitch or Youtube or Facebook. You can re stream or Twitter. And there are ways
to stream into Tiktok and other applications
like that, even Instagram. You'll link your accounts and use your streaming key
from your Twitch account. If that's the case,
before you do stream, you have to make
sure that you hit Start Virtual Camera here. And then you'll be
good to go now that you're all set up
with OBS and you know how to live
stream as your avatar, let's do a little added lesson, animating the avatar
using unreal engines unbelievable tool called
the metahuman animator.
12. Bonus: Metahuman Animator Tool: Now we're going to
mess with one of my favorite tools
and on real engine, but we're going to
use it for more animations, less real time. First step again is to open up live link
face on the phone. And once you have
live link face open, you're going to select
metahuman animator down below. For the first recording we're going to look with
a neutral pose. We're going to look straight at the camera and then we're
going to show our teeth. So this is about a five
second recording recording. Then in the next recording, you're just going to show
some facial expressions be about 10 seconds longer. So we're going to
press record again. Show some facial expressions. You can see our model St. here, Mr. Pixel urge himself. It's just showing you some
crazy facial expressions. And we're going to
hit end record. And then like we
did the last time, we're going to transfer
these files again to our computers in the
bottom left hand corner. We hit the slate and then we are going to select those
two recordings, the one calibration and the
one facial expressions, and we're going to send
them to our PC again. Once we have those downloaded
and extracted to a folder, we're going to go back
into real engines. So here we are in on real engine and I'm going to
make a new folder. I'm going to call this
metahuman pixel urge because we have a slightly
different model this time. First step is to create
another capture source. We're right clicking and we're going to meta
human animator. And we're going to
capture source. And I'll call this
iphone pixel urge. And I'm going to open that up
under capture source type. We're going to go live
length face archives. And I'm going to navigate to
that folder that he sent me, which is right here. You're going to navigate to the recordings you made
and downloaded on your PC. Once we have that saved, we're going to go
up top to Tools, and then we are going to
go to Capture Manager. And we're going to click on
the iphone we just created. You'll should see the two
videos that you have set up. We're going to click both of those and we're going
to click Add to Q. Now that we've got
those imported, we're going to go back
to the new folder we created, we're going
to write click. Then we're going to go
to meta human animator. Then we are going
to add identity. And I will call
this identity pixel here up to where he
says create components. We're going to add from footage and I'm going to search
for that footage, the calibration
performance specifically. We're going to add that. Cool. We got Mr. Pixel Urge.
Here's a neutral. I'm going to capture
that promote. That S okay. Then we want to click Meta
Human Identity Solve up top. Once that's done, we
can click on Body. And I want to apply these to
the metahuman that we have. So I'm going to normal female, click on that one there. Then we're going to
go mesh to metahuman. Click that up top and
click auto rig identity, skeletal mesh plus
full metahuman. Cool. Once that's done, last step is we're going to
click on poses. We're going to add a pose and we're going
to say add teeth. We want to scroll to where the model showing their
teeth. There it is. We're going to promote
that frame with the plus here, press okay. And then we click up to Cool. Let's do a little save. And we're going to now
prepare for performance. So top and again, very hard on the computer. It takes a little while. So make sure you have
other apps, other Windows, other programs closed,
just on real engine, and we're going to
prepare for performance. We're doing that now. All right. Sweet. So we are done. Back on quick save. Now that we have our
performance prepared, we're going to go back to the metahuman folder we
created with our new model. Here we're going
to go right click again and metahuman animator. We are going to click
metahuman performance. I'll name this
performance Pixel Urge. Boom. In the upper right
hand corner of the screen, we're going to see
footage captured data. This is where I'm
going to search for pixel urges actual take. So he did some facial
expressions, looking awesome. We want to actually where it
says meta human identity, that's where we want to find the identity that we
had made for him. I called it pixel urge identity. And we're going to plug that in and we're going
to process this. Now we can see the animation
baked onto the face. And look at those curves. Smooth, smooth as butter. What you want to do here is export these animations
that you create. Call it Katie face. And I'm going to find our
meta human face. There it is. Do not enable head movement or your head for your meta
human will actually fly off. Keep that off. And
then then we're going to add a level
sequence and I'll call this Kate New Anim. I'm going to apply
her to the timeline. I'm going to add track,
add actor to sequencer, add BP Kate Identity. You can delete these two. This is a control rig. You can delete both of these. Then under face, I'm
going to add add an animation and find that Katie face animation that
we just baked here. Now you can see
St. is controlling our avatar saints pixel urge. By the way. He's got two names. He was our second model. You can see how
great that looks. This isn't really a
live streaming tool. This is more of an
animation tool to get unbelievably realistic
facial animations. And feel free to check
out my Tiktok to see how I apply them
to different avatars.
13. Final Thoughts: Congratulations. You know how to create your own
custom meta human. You know how to add any type of funky little assets you want.
You can download those. Again, feel free to use the marketplace whether
this is just for a hobby or if you want to run up 1 million
followers on Tiktok. There's so many opportunities
to make money doing this, especially right now
'cause you're very early, you have all the tools you should need here to get started. So now you guys have
your own avatars. You're up and running. Please share them with me
in the project gallery. I can't wait to
see what you make. I can't wait to see how
you express yourselves. I'm excited for this new
chapter and please experiment. Push the envelope, make it your own. It's been a ton of fun. I'm gonna see you
in the multi verse. For now, I'm rolling
out riding my dragon. I'll catch you guys later.
 Teflon Sega, Musician, World Builder