Transcripts
1. Introduction: The layered workflow is
something that I never saw done until a couple of years into my journey as an animator, but for a lot of
people watching, it's going to be probably a breakthrough
moment of my gosh, this works so much better
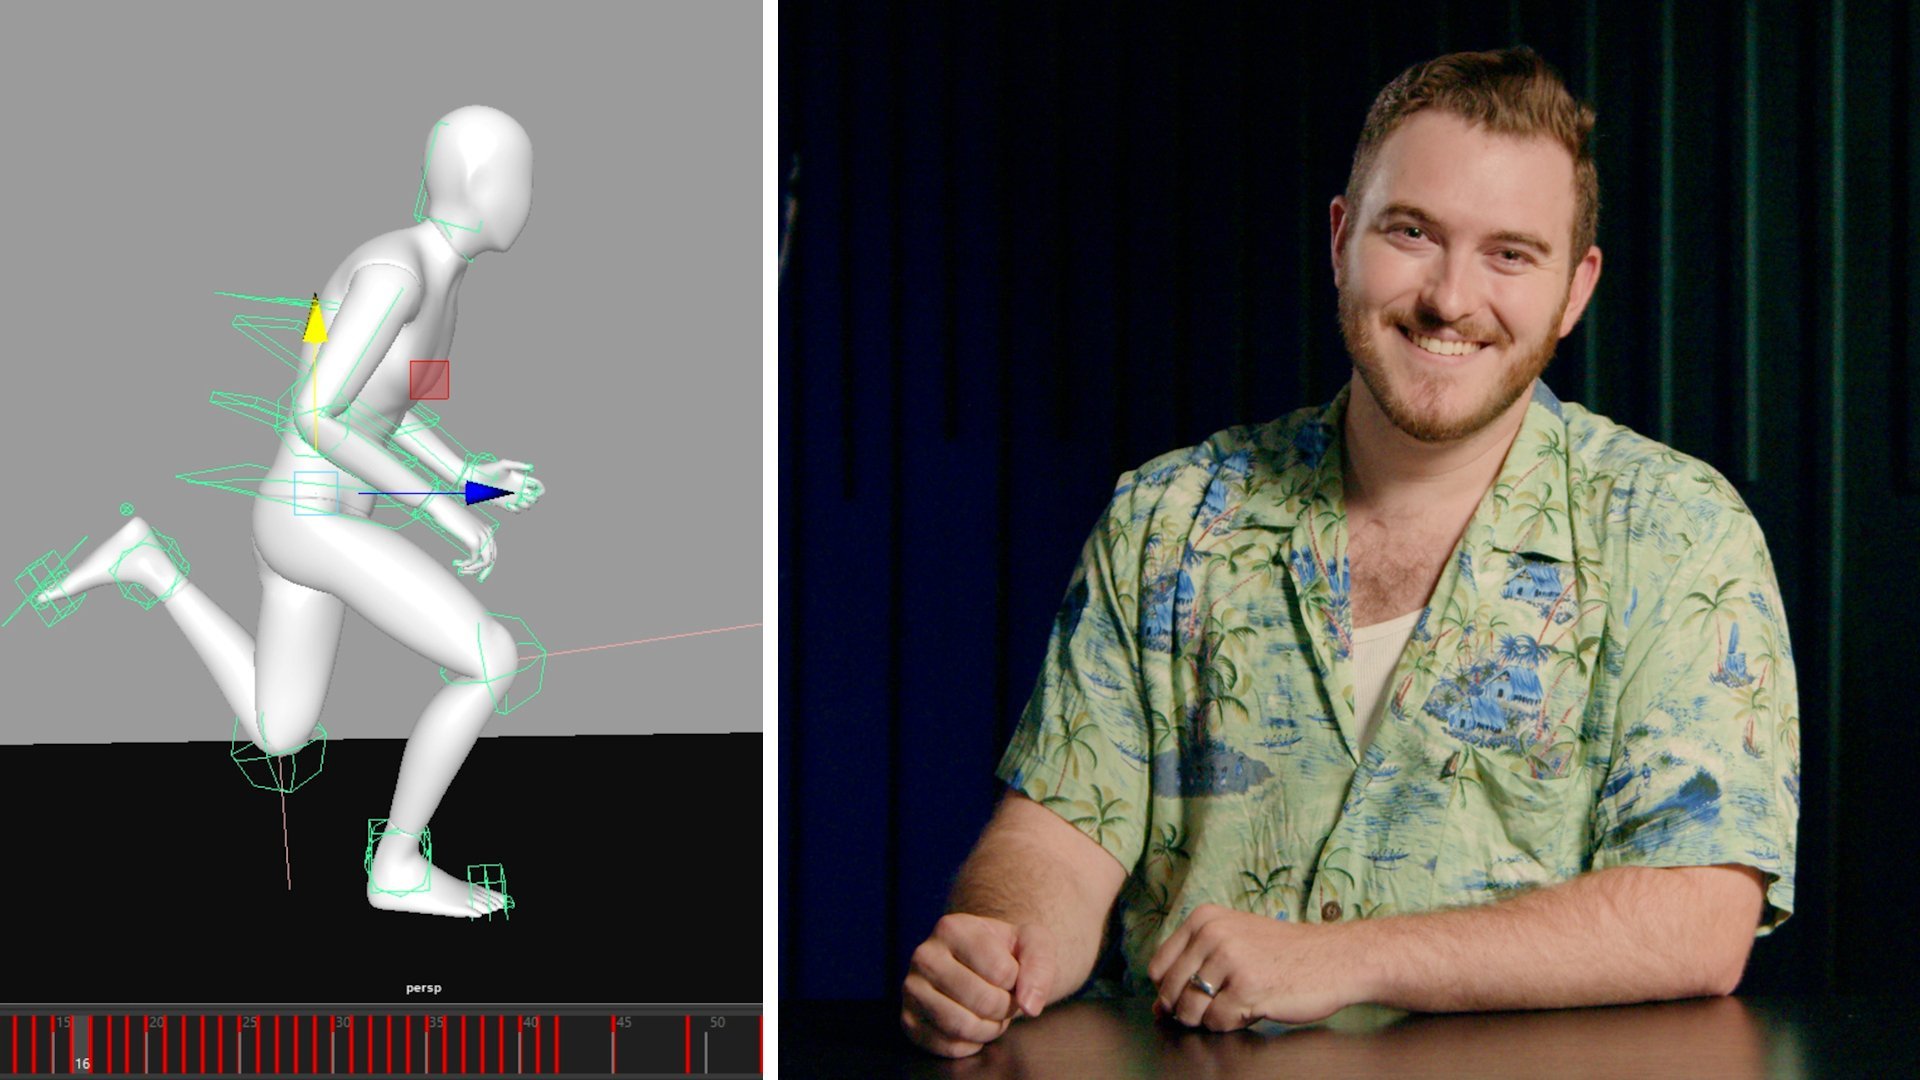
than pose to pose. Hi, I'm Sir Wade Nystat, a 3D character animator and
full time content creator, as well as a trainer and
educator for animation. I've done a ton of tutorials for animators to get
started using Maya, and I've done a lot
of my professional work while using Maya as well. For a lot of people, it's one of those applications that you open it and you just use the few things that
you know you need, and you never explore
its possibilities. So I'm excited to
show you some of the features that you
may not have seen before and some of the
workflows that can really help speed
up your process. We're going to actually
build up our shot using different parts of the body
in different passes of work, working on the hips and then the feet and different things that will eventually come together
into one cohesive shot. This will potentially
allow you to work faster, more efficient and just
to be able to wrap your head around
what you're actually doing a little bit easier. So I'm hoping by the
end of this class, you'll have a good understanding of how that process works, how to bring a shot
to fruition using it, and you'll have the confidence
to blend the two together. If you've ever
done post deposed, you'll now have layered as
another tool in your arsenal. To follow along with this class, you only need two things. You'll need Maya and a
character to animate. You don't have to have any
prior experience with Maya. If you do have 3D experience, whether it's in Maya
or another through the application, it's
definitely going to help. But if you're new to Maya,
I'm going to show you the ropes of exactly
what you need to know, where the certain buttons
and features are and how to use them to accomplish
the task in this class. I'm excited to dive in, show you animation in Maya.
Let's get started.
2. Getting Started: Maya is usually considered the main tool for
character animators, and it's been around in
our industry forever. Some of the reasons
that Maya has been in the industry for as
long as it has and why it continues to have a hold on so many studios is partially because of how
many people just know it, how many resources exist, tutorials, assets,
characters, environments. Maya is just very entrenched
in all the pipelines and all the technologies
and everything that we have working
in the industry, and it's expensive and difficult
to get away from that, but at the same time, you don't always want
to get away from it. It can be a very
powerful application. DreamWorks, Pixar, Disney, they have a lot of custom
tools that live inside of Maya that artists will use
within the Maya shell, but sometimes they're not even really using Maya features. Ultimately, it's
all these years of existence that Maya has
built this name for itself and all these things have
been built on top of it that newer studios might not really need to jump into it because they
don't have that history, that legacy, and they don't necessarily have artists that have been using it for 20 years. You'll see newer studios that are using
other applications, but sometimes those
animators that they'll hire still ask, hey, can we return to Maya? Can we use it for this project because there are
just some things that I'm really comfortable
with and I'd like to just do it
where I know what to. Because there are, like I
said, still some things that Maya has that other applications
just haven't added yet. But all that aside, Maya is the first application that
I ever got into a 3D. I know it really well, and while there's a
lot of stuff in there, I'd like to focus
in this class on the things that are the
most helpful for anyone looking to get into animation and whether or not you're
using this specific workflow, some of the things that
you may or may not have come across that will
help you work better, faster, more efficiently, and with less stress, which
is ultimately the goal. A tip for anybody who is jumping into Maya
for the first time, especially if you're coming
from another application. Don't be afraid to customize it. Don't be afraid that
you're going to break it. That was one of the
things that when I was a student and I was learning
Maya for the first time, I was constantly afraid that if I hit the wrong button
or did the wrong thing, I wouldn't know how to undo it, I wouldn't know how to
get back to where I was, but don't be afraid of it. Maya is just another
piece of software. It's very powerful, but
it's also very forgiving. If ever you completely
ruin everything about it, the layouts are weird,
the panels are missing, there's things that you
can't find anymore, there are buttons we
can use to just reset, start over, and that doesn't mean getting rid of your data, just resetting
your experience in the software to make sure
you have a solid footing. To start animating with Maya,
you only need two things; the software, and a character. The software's
pretty easy to get, and if you're a student,
you get it for free. But if you're not a student, I'd recommend the Maya
Indie license. Don't get the commercial
Maya license. That's the really expensive one that just shows up
on the website, and we're going to have a
link to that down below. As for the characters, there's a whole bunch of
characters out there. That's one of the
benefits of using Maya is it's been
around for forever, and almost all of the
riggers in the industry who create characters,
they do so for Maya. So there's a ton of free
and paid characters that you can grab very easily, and a lot of them
are really good. There are going to be
some that you'll run into that don't give you the greatest experience, but
it's all trial and error. Don't be afraid to just
try different rigs. And once again,
we're going to have some recommendations for
you down below, as well. Now enough talk about Maya. Let's jump in and let's
set up for animation.
3. Discovering Maya: Welcome to Maya. This is the interface when
you first launch it. You might actually
have the home screen, which would look like this. If you hit Escape, it'll pop you into the rest
of the application. Just to point this out, this also has a lot of
useful information. Under Getting Started, there's various tours and tutorials. If you've never used
a 3D application, if Maya's actually your first and you have no Blender
experience, for example, or Unreal, this
will actually show you how to move through
the application, how to move a 3D camera, things like that, which is cool. Most people don't
know this is here. You'll notice that
I'm using Maya 2023.3.1 specific
version of 2023. It doesn't really
matter, especially for animation. This is
what you should see. I'm at the default
layout, default settings. I've changed nothing yet. Let's do a quick tour. On
the left is your Outliner. This little button will
open and collapse it. On the right is
your channel box, so anything you select will pop up its various attributes
over here on the right. In the bottom right
corner, we have our display layers which are empty. We'll also
return to this. Animation layers
live here as well, our timeline, of course. You can change the length
of your timeline of how many frames
you're focused on at one given moment,
move this around. We have some settings
in the bottom right that we're going
to come back to. Those are important.
We'll keep track of that. At the top, a whole
bunch of menu items that can be a
little overwhelming if you've never touched
the software before. The only thing that's really
important for us to take a look at is that there's
an animation shelf. These are called
shelves right here. We have the menu set, which is this dropdown. If we drop this down and
switch to animation, you'll see that some of
these top-level menus actually change. If ever you watch a
tutorial or if I show you something in a menu that
you don't seem to have, make sure that your
menu set matches mine. Typically modeling
is the default. We'll keep it with
animation, but that's just a good
handy tip to know. I prepared for you a
downloadable handout which has some very handy tips and tricks on how to
get started in Maya. Your 3D camera controls
are all up here, as well as a whole
bunch of hotkeys that I think are
essential to know. There's a bunch of stuff for just normal viewport
functions of animation, as well as some graph
editor-specific functions since we'll be
talking a lot about the graph editor in this class. Now some useful hotkeys just
to start us right off is Alt B or alternative background is how I like to think of it. That will cycle the background
colors of our viewport. I typically just stick with this light gray because the contrast, but there are some
changes we want to make to our general
Maya settings. Right off the bat, if
you go to Windows, settings and preferences
and then preferences, the other quick
way that I usually get there in my
videos is to go to the bottom right corner and
hit this button right here, which I affectionately call the man running from
the gear of death. That'll actually
jump you straight to some animation relevant to
settings in the time slider, but I'm just going to go top
to bottom through some of the most essential things I'd
like you to take a look at. In the interface menu, you can actually change the
scaling of Maya. If your buttons
are really small, this is one potential
way to mess with that, depending on your
monitor and screen size. This may not fully do the trick, but it's a good place to start. If you animate with a tablet, then you want to
change this dropdown from automatic to WinTab. If you don't use any
a drawing tablet, then this won't
really matter to you. If we keep going down, a couple useful things. Underneath the little
settings button is the world up position. Inside of Maya, why is the axis that points
up into the air, whereas Unreal and Blender
both have Z pointing up. This is not something
you need to change even if you plan on animating a Maya and exporting that data back to Blender or to Unreal, those applications know that the stuff from Maya is going
to come in with a rotation. You don't really need
to worry about this. I just like to point
out that it is here. If for some reason you need or want to
change it, you can. You can also change
the working unit, which if you're ever working
with an effects artist, this might matter
because Houdini, for example, uses meters. These are some of the things
that working in Maya, you're typically working with departments at various studios. This kind of stuff is just important to know
where it lives. In our case, as animation,
we don't need to touch it. What we do need to mess with is under the animation section, we have a bunch of
different settings. This first section
called evaluation, you don't actually need
to do anything with it, but I want to point
out because it can become very important
that you know about it. If you ever just have some
weird inexplicable thing with your character rigs and they're just not
behaving properly, you can try changing
this dropdown to DG. That's the old evaluation mode from back when a lot of
those rigs were created. Maya's a little bit slower. You lose some features,
but it'll brute force the rigs to work
in that old style. Essential button right here, turn on Auto Key. You can also activate that right here in the bottom
right corner of Maya, make sure that's turned on.
You definitely want this. That way when you make changes, once you have one
existing keyframe and then you make future
changes on other frames, it automatically saves that
as a keyframe instead of having to lose your work after not remembering to
hit the button. You can also change
the behavior. Maya, by default, will only key the main
thing that you change. If I, for example,
come in here and I hit S. S is the key inside of Maya to set a full key on
every channel that I can key. If I move over here to another
frame and I move this up, you'll see in this top right
corner in the channel box, the translate Y
gets a bright red, everything else is pink. What that means is I've
only keyed translate Y, and I move ahead
again, move this down. I've just keyed
translate Y again because I'm only changing
that one channel. Then if I move forward, and then I just move
this other channel, all the way over here,
what you'd expect to happen is for it
to go up then down, and then to the side,
the way I animated it. What's going to happen is
it's actually going to drift all the way the whole
time. Why is it doing that? Because I didn't have
keys to hold that translate X value in
place from the start. This can be very helpful
for a layered workflow, but if you're not expecting it, it can really throw you off. If that's a problem, you can change this
behavior to key all attributes anytime you make any change, it'll
key everything. I'm not going to
change this setting. I just want you
to know about it. I think it's better to leave it this way and set
manual keys when you want so that you have the control over a full
key or a partial key. I also recommend
that under tangents, we change this from
non-weighted to weighted. I'm also going to change
these different auto spans to auto ease, which is the newer mode of the automatic easing
of these tangents. Then if we scroll down, there are a couple
other settings that we don't need
to worry about. What we do want to worry about is a couple more
things down here. Under cache playback, that's this button here on the
bottom right corner, this feature is designed to actually put that animation
data into your RAM, into memory, so that it can play it at the
real-time speed. Just make a few quick
changes to this. I'm going to change
preferred mode from evaluation cache to viewport hardware cache that
will actually allow us to use our GPU VRAM. If you have a graphics card, it will take advantage of it.
If you don't, that's okay. Hybrid cache, we can say smooth mesh preview
or we can say all. Yes, please with
cache smooth meshes. Of everything that
I just clicked, the most important one is this, background fill direction. It should work fine for
forward and backwards. They've made a lot
of improvements in recent years that this
shouldn't be an issue. If you're doing advanced
animation and you've got constraints and just more technical
things in your shot, it is a safer thing to stick with forward from
animation start. I'm going to jump ahead to undo because this is a
pretty useful one. Maya used to have a finite limit of 50 undo steps.
That is not enough. I think Blender also
defaults to, like 32. All these applications
have different numbers of how many undoes you're
allowed to have by default. Maya is set to infinite
now by default. I think that's too many
because eventually, your file starts to get
a little bit slow as your computer's keeping track
of all of those undo steps, especially if you never
close your scene. I'd recommend switching
this to finite, but just make it a
really large number 500, 1,000, something like that. I'm going to stick mine at 500. Finally, we're going to
jump over to time slider. This is the default
that it pops up to when you actually hit this button in the
bottom right corner. It takes you straight
to time slider. The frame rate of our
shot is set here, which is the same as this menu, and I'm going to be animating
in 24 frames per second, the typical film
animation workflow. Changing this does not change it for every
single Maya session. I'm going to change the key
ticks from active to smart. I'm going to change
the key tick size from one to two or three, just so you can see them
down here in the timeline. You can also change
your time display from frames to time code or a
combination of the two, which if you're doing freelance
projects or something, this can be really handy
to actually be able to see your time code as
well as your frames. Mostly just frames for now. This is probably one of the most important little
combination of checkboxes. Check both of these on, turn them both off,
turn them back on. For some reason, it's a bug. It's been here for
a couple of years. Sometimes it works,
sometimes it doesn't, but if you turn them both
on, off, then back on, this sync timeline display and sync selection
in graph editor, then they for sure work. I'll show you what
they do in a minute. Then we also want to
turn on auto snap keys. Auto snap keys keeps us from
having partial frame keys, for example, a key on frame 1.5, which you never want. That'll keep that
from happening. Finally, under playback speed, play every frame is the default, which is for
simulation workflows. We just want to see it
at real time 24 fps. We'll cap that there,
and we want to change the update view
from active to all. That's all the settings we
need to worry about for now. Save. Right now, before you do anything else, File, Save Preferences. Or you could always just close Maya at this
point and reopen it. If you do all that
stuff that we just did, and then you don't save preferences or you
don't close Maya, but you just start working. If for some reason you do something that
causes Maya to crash, all those preferences
go back to default, and you have to do
all this over again. Time to bring in our characters. We have two ways to
do it inside a Maya. If you go up to File, we Create Reference,
and we have Import. Import sounds like
the thing that you're probably
most familiar with, but do not import
your characters. It will work, and it can be
used for certain workflows. When it comes to animating
at Maya, nobody does this. It is not recommended, so we're going to
ignore it entirely. Instead, what we're
going to do is we're going to
create a reference. Ctrl+R is the hockey, but we
just say Create Reference. From here, we're
going to navigate to our character that
we've downloaded. Now, by default, as soon
as we open any menu, it always tries to open us to what Maya calls the
project folder. That, by default, is in your documents/maya/projects/default. Then inside of that
default folder, there's a whole bunch
of these useful things. This is your folder structure
that Maya creates for us, and we don't need to worry
too much about it right now. I just want to point out that
when you save your files, when you export a playblast, when you render something, when you go to import something, this is always where
it goes to look. If we go to get our character
in here, we go to File, Create Reference,
and now I'll jump to my assets folder where I
keep all my characters. One of the recommendations that I have is the Mecha Mechs. There are different versions, and I'm going to
just open up dash. I'll hit "F" to focus my viewport on
everything on the scene, and we have this character here. This is ready to go. Unlike other applications, like Unreal or Blender, when you reference
a character in, it assumes you're going to
animate it, and that's it. The first thing you
always want to do is grab everything and set
one key on Frame 1. Now when I go forward
to some other keyframe and I change something, auto key is activated, and it's going to
start interpolating. The benefit to referencing
a character over importing, which I had you do
without explaining it, if I were to have
imported the character, it would have taken
that rig file and embedded it within
this Maya file. All the data from that
character would be in here, and it would be
very difficult to troubleshoot if something
ever happened to that data, which from time to
time can happen. You can maybe break
your rig or something, and your animation data and your rig file live
there together. It's hard to extract the data from the one
and put it on the other. For animation, we do the
reference because what that allows us to do is if I go
to the reference editor, you can see that I have
this character here. What's really cool
about this is, let's say we have
this character, and then from
wherever we got it, let's say they make a
change. They make a fix. They edit it in some
way and make it better, whether it's a color change, they added controls,
or they fixed a bug. What you can do is you
can just right click on this asset and you can go to the reference section and you can say
replace reference. It allows you to swap this
file for the next version. If you do have a studio pipeline or
if you have two assets that are very similarly
made with that in mind, I can actually swap dash
for his counterpart, flourish, which is the male, female versions of the
characters, and it just works. If you ever want a second
copy of the character, I can just hit
this little button right here to duplicate
the reference, and it'll make a second
copy of the character. Just like that, I now have two versions of this character. That is the process
of setting up our Maya for animation,
bringing in our character. Once you've done all this once, you don't have to do it again. In all the future attempts, I can just open Maya, reference a character, and get moving. Now we're ready to go.
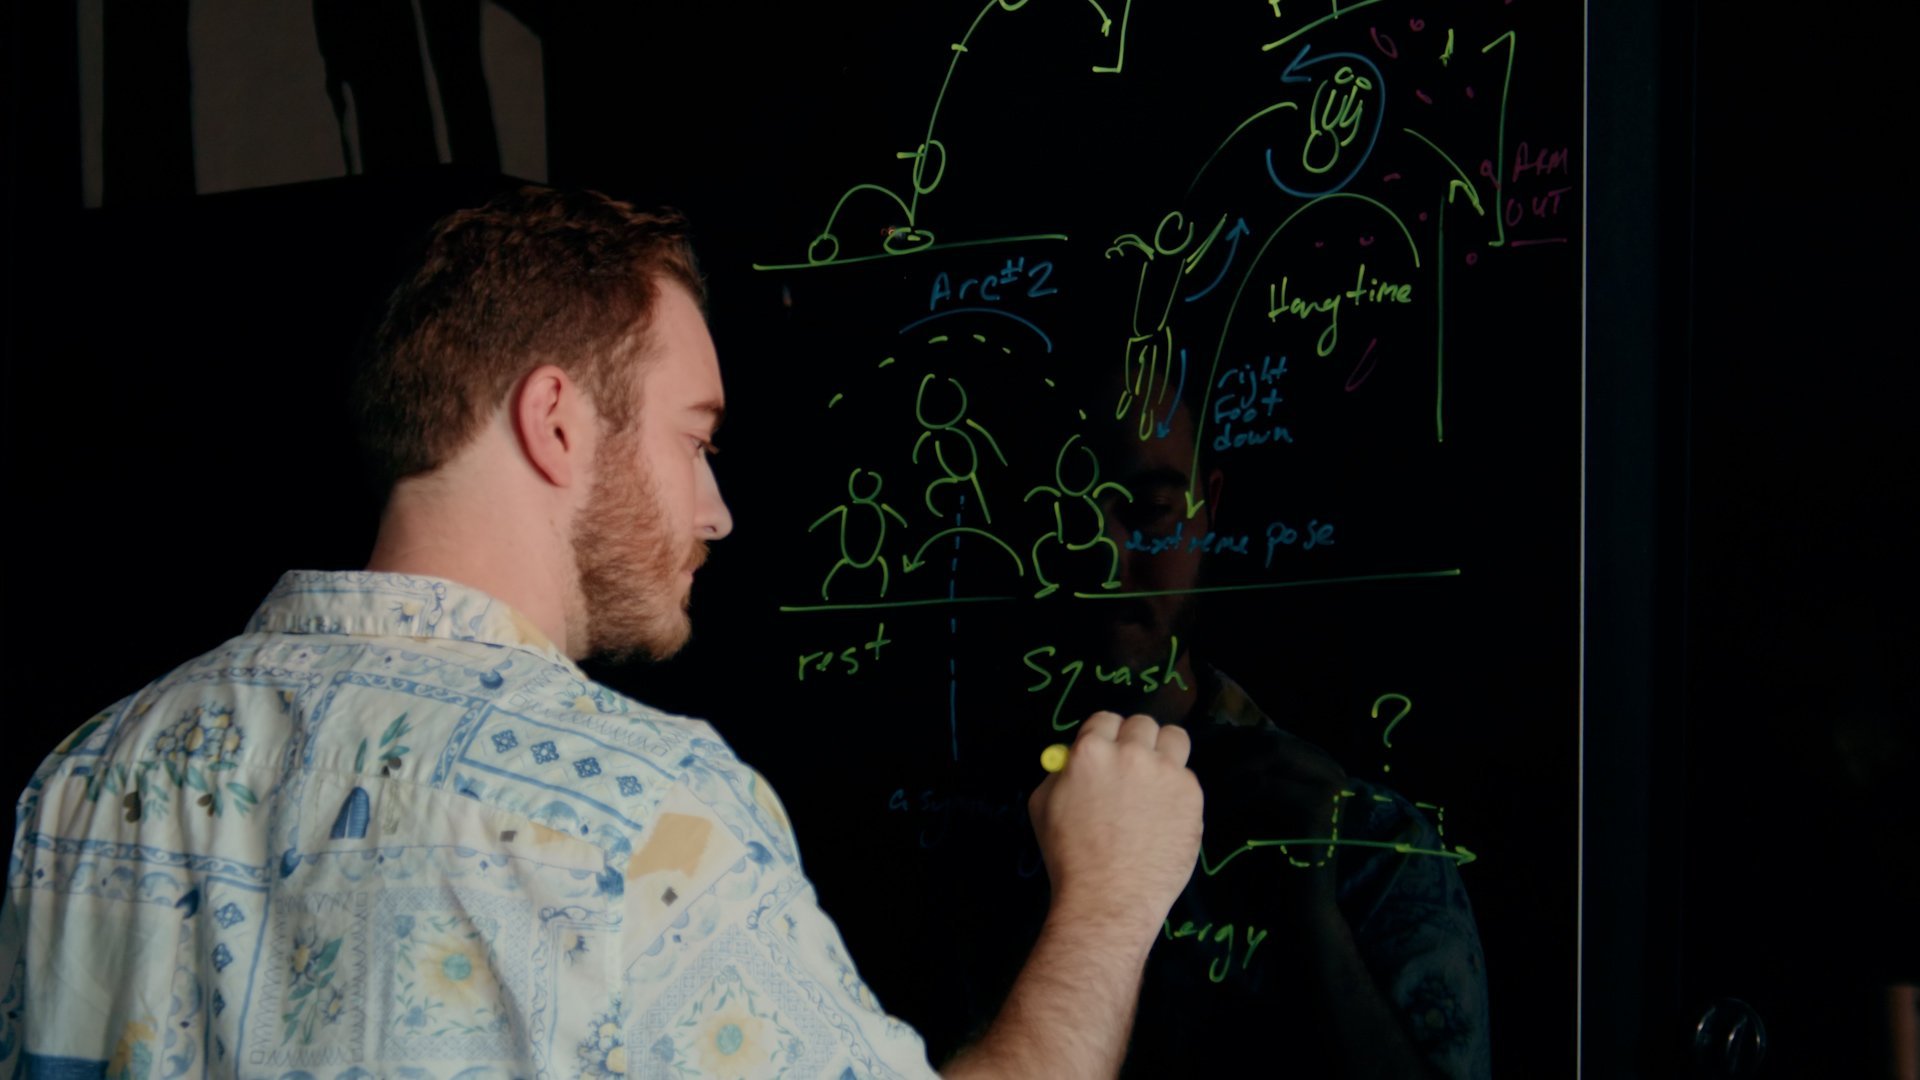
4. Animating Using a Layered Workflow: Let's talk workflow. The
layered animation workflow is something that I
didn't have a lot of exposure to when
I was in school. It's more common now
to know about it, but it's still not very well explained in
a lot of places. Pose to pose is really common. You have your key poses and your anticipations and your
breakdowns and that stuff, things that I've covered
in previous classes. But when it comes to
a layered workflow, first, I want to point
out what is not. When I say layered workflow, first thing people
usually think is, animation layers,
I've heard of those. A layered workflow
and animation layers were very similar,
are different. If I have something in my,
I'll just take this cube. I'll set a key
with the button S, come over here, hit S again, and then move it over there. Now I have some animation. Horay. If I go over to the animation menu area over here on the right, there's
nothing in this window. There is always something there. It's just invisible because
we're not using the system. But all this animation
that I put on this cube, that's just what we call
the base animation layer. it's not really
visible by default. But if I take this
cube and I say, You know what, I want to
layer on more animation. I say, Create Empty Layer. What we now have is
a base animation, which was always there. We just couldn't
see it before, and that's where my
animation data lives. We now also have AnimLayer1, which if I try to click my cube and select AnimLayer1
and hit S to set a key, it let me set a key,
but it's misleading. Even though I have
this selected, base animation is the
thing that's green, I'm going to undo
that key frame. Now if I lock base animation, so I can't actually do anything, see how that little
green circle went away. Now if I try to set a key, I get a little error in
the bottom right corner. It'll say down here, warning active objects have
no keyable attributes or animation layers are present, and base animation is locked
or something like that. What it's basically saying
is, I can't set any keys. You've locked the layer,
but I might be like, Well, I want to add layers
of animation on top of it. In order to do
that, I have to add the object to the layer so I
can right click it and say, Add selected objects
to that layer, and now I can key on top of it. Now if I say, set a key here and I'll put
this up into the air, zoom out a little bit,
and then later on, I'll drop it back down. Now it does all that. But the thing is, I
have this layer of animation which I can turn off. But if I click the Mute button, I can actually turn off
that up and down motion. This side to side is what was there in
the base animation, which I can't mute.
It's always there. But you can see that
up and down is gone. If I unmute AnimLayer1, suddenly, it does it again. It's combining the
original animation with the animation
layer on top of it. That is what an
animation layer system looks like and a little
bit about how it works, but it is not at all relevant
to a layered workflow. But the idea is similar. If I go ahead and
just clear this out, we get rid of that, and I'll go ahead and reference
my character, control R, go to assets, and I'll pull in one of
these little max once again. First thing is always
grab all my keys, grab all my controls, hit S, set an initial keyframe, close my outliner, I
don't really need it. From here, I can start
messing with stuff. If you wanted to have
a character jump, for example, in pose to pose, I might block out the character standing here in anticipation, the action of them jumping, another pose of
them about to land, and then the down
position of them landing. But in a layered workflow, we would approach
it differently. What we would probably
do is if I go ahead and just give myself a little bit
of a set to work with here, I'll create a surface
and a place to jump to. Quick tip, by the way in Maya, if you have a bunch
of environment assets that you don't want to
be selecting constantly, if you're trying to grab
your controls and it keeps grabbing the floor,
you don't want that. If I grab those
environment assets, and in the bottom corner, we have display layers. We're going to go to layers and create layer from
selected objects. That will create a
new display layer with all the environment
assets I have selected, and you'll just see it's Layer1. If I turn off the V for
visibility, it turns them off. The P is for
playback visibility. If that's turned off and I start scrubbing in the
timeline, they disappear. I'm going to leave
that on. But then the last one is this empty box. If I go to T, that
stands for template, which I can just see
a ghost to where it is or R for reference, meaning it's there
for my looking, but I can't actually select
these objects anymore. Every time you make a scene and you build out some environment, just throw them in a layer, make them a reference object, and now you can't actually
interact with them. That's also how a lot
of characters have it so that you can't
grab their geometry. You can only grab the controls. Typically, you start with the biggest part of
the action first. The hips on this character are the main thing that
move them around. If I were doing a quick
little blockout of a jump, you pretty much just put the
character in this pose here. I'll take the arms, and I'll bend them a little bit. If I take the body,
and I leave it there, I'll hold them in place
for a few frames. I'll drop them down. Lean them forward. I'm hitting S to key the whole set of controls
over here on the right. You can see that if I
weren't doing that and if I were just doing
the modifications, it's only setting keys on
what I change once again. What I'm going to do here
is just start blocking out. I'm using the idea
of pose to pose, I'm blocking out my major poses. But I'm going to go ahead
and just put the character up like this and then down. Bam. Maybe like
that and like that. If I hit play, what I've done is I've
left the feet behind. It doesn't look great yet. The main thing with
a layered workflow is we want to get the graph editor open
as soon as possible. It would help a lot to be able
to see what the motion is doing because a layered workflow is a motion based workflow. We can start to figure out, what is the jump
going to look like? Have the character squat down. But maybe I want to
have the character not just stand and squat, maybe I want to have
the character do a little bit of an
anticipation here. I'm going to right
click on this curve. I'm going to say insert key
that adds a key right there. I'm going to have
the character maybe anticipate up a little bit. I'm using the
middle mouse button with my mouse anywhere in the window to indirectly
manipulate where that is. If I want to isolate
that to just up and down, I can hold Shift. I can have the
character stand here, do a little bit of an
anticipation, then drop down. I'm going to have
the character maybe not drop down quite so quickly. I'll mess with this. This
is where I'm starting to use some of the tangent
weights and stuff that again, I'll cover this in
more detail later on. But I just want to show
you the process of drop this down and then here, maybe I have the character
start down here. Stay low for a
little bit longer. I'll favor this down pose. I'll delete this key. Then I'll have the character
up into the air. I'll have that be my midpoint. It's a nice hang time with this, and then I'll drop that down. Down, overshoot, like
this to auto tangents, make them go back to normal, and I'll ease into this final pose. Like that. then I'll add some extra key frames
just so we have some room to see it end. All I've done is focus on just the up and
down of the body. You can start to see the jump coming together at this point. This is the benefit of a
layered workflow where you focus on just passes
of information. I look at just the up and down. Maybe I start looking at
the forward and the back. Maybe I have the character
anticipate not just, you know, up into the air, maybe I have the anticipate a
little bit backwards. Go backwards a little bit, maybe not quite that much. Backwards, down this way, I'll keep him back this way. I'll push him forward
right here like that. I'm not worried about
the knees breaking. I'm not worried about
the feet looking weird. Get rid of this key. Then I'll just have move forward a
little bit more in general. Down, forward, overshoot
it a little bit, and then settle back. Just with a couple
quick key frames, I'm starting to now build in
some overshoot of the body. Maybe the body
overshoots and has to settle backwards a little bit
on the balls of the feet. He almost falls forward, but he collects himself
and pulls back. The layers are not
literal layers. The layers are just
you looking at stuff step by step and building things over time with every ability to go
back later and adjust. Making sure that you start with the most
important parts first, like the hips, which most
of the motion comes from. After that, I can start worrying about what
the feet are doing, what the hands are doing,
and things like that. But that's the idea of
a layered workflow. When done properly, you can
see that it's very fast. But as you get into
that workflow, there is one trick that I'd like to show you before
we move any further, and that is how to copy
and paste properly. To show you copying pasting, I'm just going to take
a sphere and a cube. I'm going to keep
it really simple. If I hide my grid and just
show you these objects, little Windows, animation
editors, graph editor. I'm just going to
drag this over to this side here until
this turns blue, then I'll snap it into place. If I really like that, I
can lock my workspace as well so that I can't
undock that by accident. I can collapse it, by the way, by hitting that little
tab very handy. Now, if I just grab
both of these objects, I hit S to set a key. I'm going to take my sphere. I'm going to animate
it going up. I'm going to animate
it coming down, and I want to go back to
the original position. There are a couple of
ways I can do that. I can right click and say
copy in the timeline. I can then right click and say paste, and that works fine. There's no wrong way to do that. That's a really
easy way to do it. That will take all translates
to rotates and scales and just pop it over by default.
Another thing I can do. This is a nice
little trick is if I am scrubbing around and
it's down here at the end, I can go back to a frame that I like and
say, You know what? I really like that first
frame. I like its position. I can middle mouse
click and drag. I'll click and drag with
my middle mouse button from Frame 1 in the timeline. Middle mouse click on
Frame 1 while I'm here, drag it over this way, now I hit S. I've basically
just stolen that pose. I brought it over
as temporary data, and then I keyed it and
I pinned it into place. Typically, I think
the most common way that people copy paste data in Maya is the visual
way where you can actually see what you're doing. This is the most
dangerous way to do it. If I take my sphere, I go to translate Y and I
take this curve. I can take individual keyframes. I can take the
whole curve by just selecting a curve
with no keyframes. I can say, for example, grab that frame, control
C, move over here, where my playhead is, control V. As long as I have a curve
selected, it'll put it there. If I say grab the curve again, control V. If I don't have the curve selected and I control paste,
it'll still put it, but the difference is if I have a whole bunch of curves
available to me at the moment, whichever one I have selected
is the one it'll paste to. But if I have nothing selected, it'll paste to all of them,
which you usually don't want. You just want to make sure
that whenever you're pasting, you grab what you're
copying, you copy it. You go to where you
want to put it, and you make sure that whatever you're
trying to put it to, that thing is selected,
and then you paste. Do not ever select something
in your graph editor, copy it, and then put your
mouse in the viewport. You can totally come over
here and click stuff. Just make sure you
return back to the graph editor with your
mouse and click your things. Don't hit control V with your mouse somewhere
over the viewport, especially if you have a whole character rig in the scene. My recommendation is for
practice, do some animation. Set a couple of keyframes, copy paste them. Don't
be afraid of this. Just give it a shot.
When you're ready, I'll meet you the
next lesson where we actually start
animating our shot.
5. Approaching Complex Mechanics: Now it's time to dive into
some complex mechanics. I'm going to opened a file that already has a
run cycle in here. You are probably
looking at this going, "Oh I don't have that
in my file just yet." You don't have to
have the run cycle necessarily to do
what I'm about to do. I'll show you the
setup for this file, and then I'll show you
how you can modify it since you won't have
the exact same file. My file is, we have a run cycle, then this gap, and then
the run cycle again. Now, in our case, if you are starting
from just a T pose character with
whatever rig you're using, you can see I've also
changed characters. Whatever you're using
for your character is probably going to work just as well as
what I've got here. But if you are going to
try and follow along, then what I would recommend
is instead of having a whole run cycle, just
for this first pose, just have the character in
a squat ready position, because that's more or less
what these poses here, but you'll probably have
two feet on the ground. On the landing, instead of
going into a run position, you'll have your character
land and stand there. You'll change the
first and last pose, but you don't have to
start off by doing that. Just do the first
pose. Don't worry about the last
stuff till the end. In my case, what I'm going
to do is I'm going to show you how to implement
a complex dive role. We have this run. Let's have the character dive over a box. I'm going to go ahead
and make a cube, bring that in just like that, and my character
is going to come, run and dive over that object. Right off the bat,
I'm going to make sure I take these
ground elements and put them in a display layers
create from selected, set them to reference so I can't grab them, and we're set to go. I have the character
already moving. There's already a run cycle, and so I'm going to put all
this animation and layer it in considering what's already there. I'm going to
have my character. I'll grab the hips. He's here, he's down, he comes up, somewhere around here, I'm
going to have him step down onto that other foot for kicks, I'll do a couple of
different things at once. I'll say the hip is down
the foot is also down. I don't have to never
touch the foot. I'm only touching
the hips right now. It's my shot. I can
do what I want to do. I can say, I'm going
to scrub through. How is this looking? He comes in here, he takes another step. I do want to make sure that whatever I had
with this back-foot, I don't want that
backfoot sliding around. He lost all of his weight.
He's just slipping. I want to have happen is
frame 50 is where that foot, the front foot plants. I'll use that trick from before. With this back foot selected, I'll right click and say copy. Go to frame 50,
right click, paste. Because it's a little
stretched out, I have various controls
to do a foot roll. Your rig is going to have a
completely different setup. Every rig is different. Usually, it's some foot control. There's something over
here in the channel box called foot roll, and you can just
move that slider. In this case with
this particular rig, it's a little ball underneath
the ball of the foot. Sometimes it's this little
spinny orb inside as well, and you can see
that it's adjusting where the toes and the feet are. Usually what you
don't want to do is just rotate the
foot and move it. There's usually something to help you not have to do that. It's impossible to know what
rig everybody is using, and all the rigs you'll use throughout your
career are different, but usually you're looking
for some foot roll control. What I'll do is say,
well, you know what? That's a little bit more
stretch than I wanted. Let me tone this down.
Let me pull them back, and that's going
to actually inform where this front
foot is going to go. Maybe I just decide,
you know what? I was going to go further, maybe not quite that far. I'll go there. That might
be more reasonable. Go ahead and grab that
little foot roll control again, fix that. Now I have the
character come in here. He takes a step. Still
looks a little bit weird. It's fine. We're not
looking for perfection. We're just looking
for the rough idea. Then after he steps down, somewhere around here,
he's up in the air. He's sideways jump. For example, if I were
just keeping up upright, he could just jump and then land back in this
running position. But if I'm going for
something more complex, I want to have him
do a div role. I want him to dive
forward over the box. In fact, I'm going to
move this keyframe [inaudible] to
shift click it and drag it. I'm going
to go like this. So he goes, Wing. A little fast, but whatever
there and then down, smack his head into the floor. I'll select it, copy it. More here, right click "Paste", and just to get the same pose. Then I'll say, well, I
want him to do a roll. I'll align him as best I
can to make this part easy. He was here, n ow
he's over here, and he does a roll. Maybe I'll put him like this and he'll be sitting
on his butt. I'm just layering in
the base of the action. The only thing that's really happening is right
here at the end. He's like, really spinning. If you are doing a
character flipping, think about a clock
for a second. You've got the 12 hand on top, which represents midnight,
but it also represents noon. 12 noon and 12 midnight are
the same pose on the clock, but they represent
two different times. When you rotate 360
degrees on a clock, you're technically at a
different value 12 noon, 12 midnight, but the
pose is the same. Rotation values in 3D
are the exact same way. I take my character
from 12 noon, I spin him around
to 12 midnight. However, the
original pose that I had right here was
still at noon. It wasn't rotated, what ends
up happening is he spins 360 degrees and then he
unspins 360 degrees. If I go to the graph editor,
you'll see what I mean. If I take his rotation values and we take a look just
at those three things, you can see that
one of the axes, the green one in particular, goes down to a value
of negative 353, basically 360 degrees,
the full spin. If I go like this, you can
see that it's actually calculating a sideways math, but then we also have this one. It's a weird combination of X, Y, and Z that's causing it. You would think, I thought
it was forward and back. When you're doing
a complex action, like a flip, you have your
character do a full rotation. All you need to do when you have a flip is you select
the rotation channels, you go to curves euler filter, and Immediately, you
can see it changed it. What it did was it normalized 12 noon and 12 midnight and it made them connect to each other, so that it doesn't spin 360
degrees and then unspin. It does the math and
then stays there. If I now just fix
the rotation values, you can see that it's actually
now using the red one, translate X, which
is the one that we thought it should use, one
that goes back and forth. He's no longer
spinning this way. Now he does his little spin
but it behaves as expected. That is a really, really handy little thing
that you're going to want to know for more
advanced animations. Grab all your controls,
come back in here, set your graph editor to this button right
here, step tangents. Now, I can go through with
the period and comma buttons. I can step through
those individual poses rather than hitting
play 0 if I hit play, Oh, if I hit Play, it doesn't
look like anything happened because I think I missed. I only have the
rotation channels activated. Let me
try that again. Select everything and
make sure that I actually grab everything. There we go. Now by hit play, it only plays the poses that we've isolated, that
we've actually keyed. Now, a few other things as we're beginning to
block this out. We're still in the
blocking phase, and one of the key differences
of a layered workflow is, I never set anything to step. We absolutely can set it to step and layer stuff in
with our hips and our arms and so on
in stepped poses, so no interpolation, just teleporting from pose to
pose from what we set. But a very common way to work in layered is
just to leave it interpolating and we're using the motion to figure
out the motion. One of the things I'd
recommend checking out is a downloadable link I
have on this video, the shot planning
workflow and on it is a nice little list
of things to look out for. One of those things
is contact poses, wherever you have a
contact and release frame. Here we have the feet coming
into contact and then we have the feet leaving
at some point, presumably we skip
that whole section. Here he hits both of his
feet down on the ground. We'll go ahead and just key
the whole body on frame 49. I'll delete frame 50. We have frame 49 right there. And then here he's
up in the air. I'm going to kind of do a hybrid thing here and I'm
going to just bring his feet to be a little bit
more useful like that. I'll key his feet. What I'm
going to do is I'm going to layer in a mixed thing here where I want to
have the character getting ready to
jump or beginning his jump with foot up
in the air like that, and the other foot still
here on the ground. I'll keep the whole character just to make sure I
have keys on things, and I'll tilt this foot
up. I'll go like that. Now if I look at it, he steps, he jumps, he leaps. Now, once again, the
interpolation is back. The reason that will
keep happening to you is because in the
animation preferences that we set at the
very beginning, under the animation menu, it says the default
tangents are Auto ease. Every time I adjust my I set keys and things like
that, it creates new keys. It creates default tangent handles that have
easing turned on. If you want to
change that because that is just more
comfortable for you, you won't find it in
the default in tangent. It's not here, you'll find
it in default out tangent. It'll go out as stepped. Using the stepped workflow, boom, and then the
jump, right there. It's still using the
ideas opposed to pose, but I'm not worried about
the entire body's pose. I'm just working on
the hips and the feet. Now if i play, it's
starting to come together. My recommendation is every time you want to pose the arms, try to do it channel by channel. If I go to the top right
corner of Maya and I can hit this little three-tiered icon
with the hammer next to it, it pulls up the tool settings. Inside of Maya when I hit QWER my transformation hot keys, which are also little tools
over here on the left, if I'm in rotation mode, you can see my settings
for rotation mode, I'm by default set
to object mode. If I switch this down to Gimbbal ktrua mode,
most animators, especially newer
animators to Maya, don't like working in this mode because I can't
just spin the orb. It won't let me do
it. But this is the most accurate
just 3 rotations. When I move these, what you
see is exactly what you get between this rotation
orb and the graph editor. If I change this green
one, the green one moves. If I change this red
one, the red one moves. I change the blue one,
you get the idea. Ultimately, I'm just going
to start adding stuff. I'm going to clean
this up a little bit. In the next lesson, I'm going
to show you how to actually start refining some of
the actions as we go.
6. Animating a Flip: Meet the ball. This character is a stand-in for the character we've been working with so far. Now, when it comes to
these complex animations, there's a lot of controls. There's a lot of body
parts. There's a lot of just stuff happening at once. As you saw from the last lesson, it can be a lot to look at and just to see all
this stuff moving around can be very distracting. Sometimes it can be easier to just do what I call
geometry blocking, where you take a
piece of geometry and you have it do
the action instead. Here, I've actually animated just the up and the down and
the rotation of a sphere. This gives the rough idea of what's supposed
to be happening. Now, on the top, I don't know if I
pointed this out before, this is my actual camera view. If I go like this,
select my camera, right there, you can see
that I actually have my camera following
the character. From the perspective of
the camera that matters, it stays in the
same screen space. From the bottom, we can
see the normal world. I've animated the sphere
just doing its thing. This becomes a really
helpful base to figure out the timing and the energy of the shot that you're
trying to animate. I would recommend doing this for a lot of
complex actions. You'll see this in
the behind the scenes of lots of movies, short films, even games because animating one object moving around
at a certain speed is much less overwhelming than having the whole character with all the different controls, where you're tempted
and distracted to start posing everything. If I look at the animation on the ball itself, this
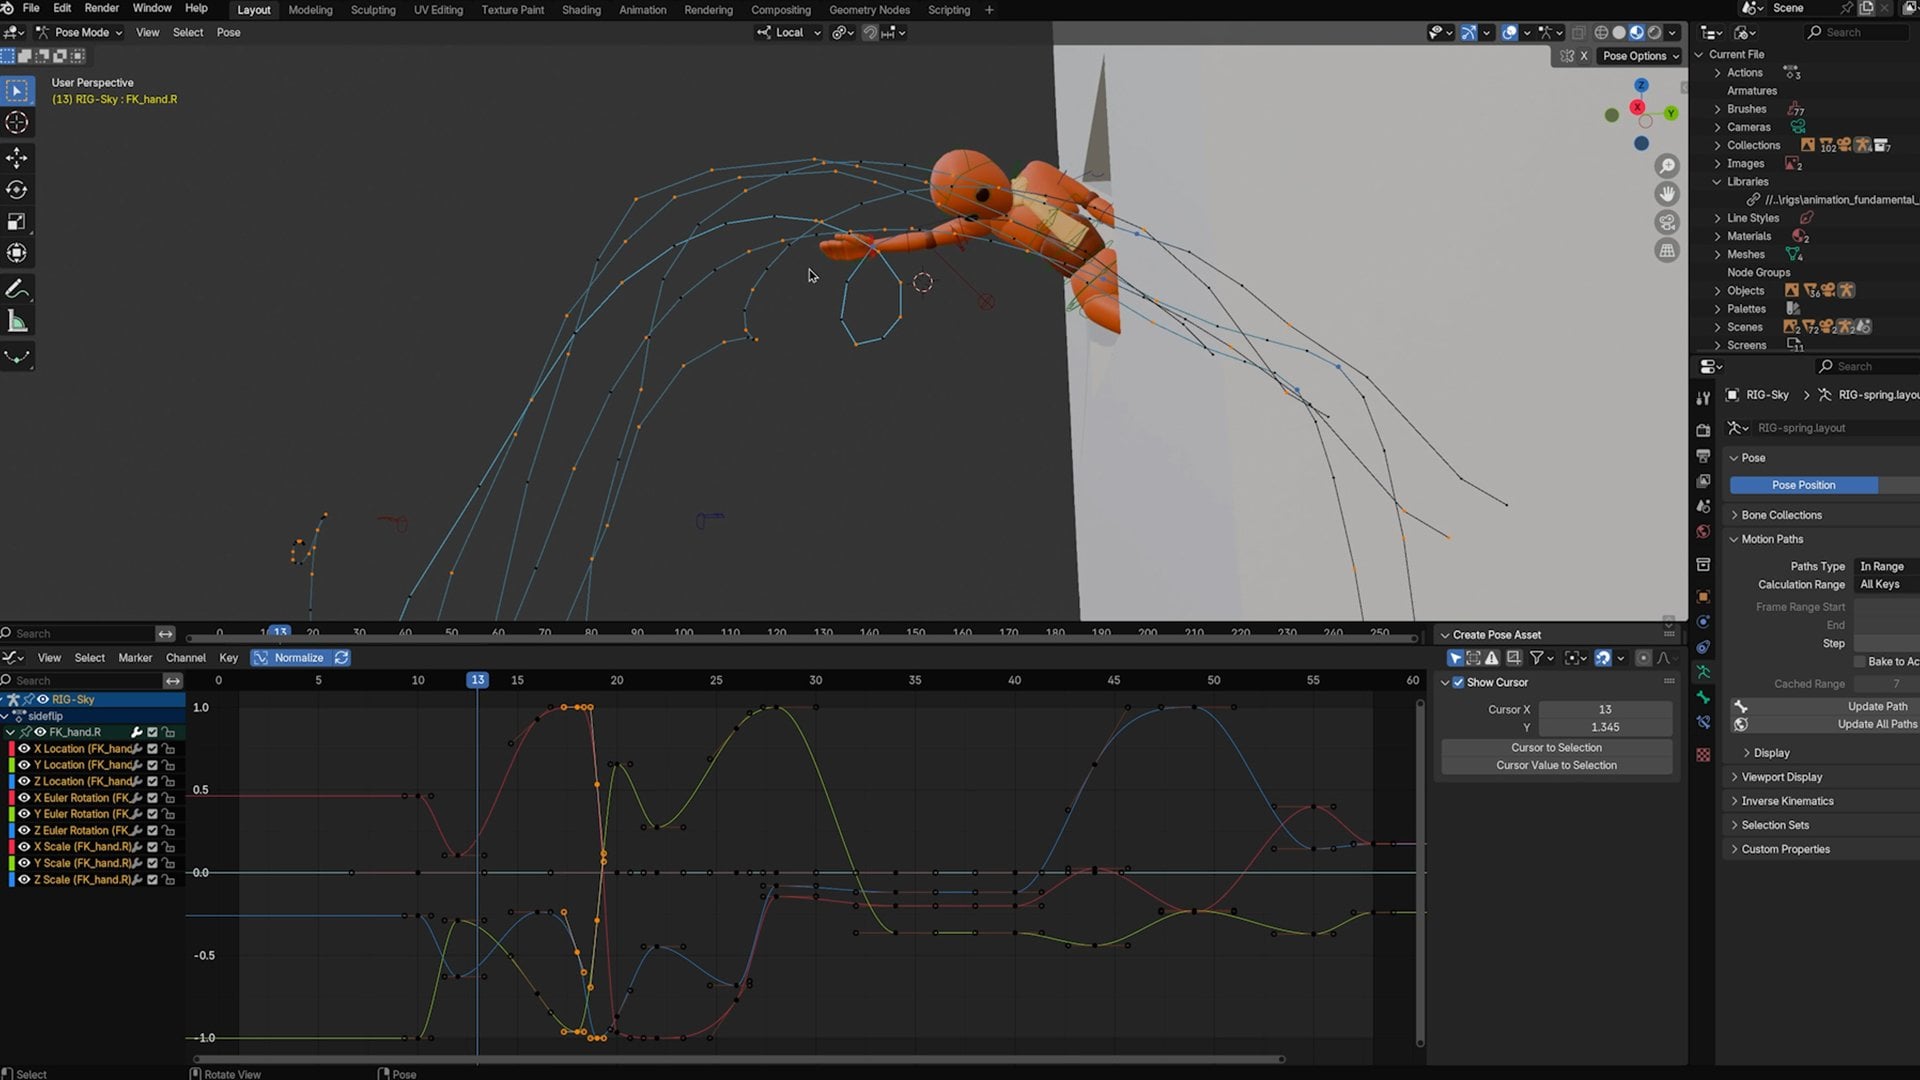
is what I've got. I've got my translate Y, the up and down, the jump, the fall, the roll. If I go to the rotate X, that is the roll. You can see it has this lean forward as it pushes forward. It goes into this rotation, you can see this would edit it. It stagnates a little bit, flattens out because
it has hang time. It's not really
rotating while it just does this little bit of a dive, and then it dips forward. We get to this, it doesn't
move at all for this frame, and then suddenly it
does the whole thing. We go from a value
of 173 to 370. It does a whole spin. The numbers are not important. The point is the information
is here, the data is there. I can use that if I want. There was a reason I showed you all that copy-pasting stuff because if you really
like what you've got here, you can
use it as a base. I can take this translate Y, select it, and I can paste it onto the root
of the character. I can use the rotation values and use that as a
starting point. You probably will still
need to change it, but it can give you
a good idea of what your curves might look like if you're using
the graph editor. If nothing else and you ignore
the graph editor entirely, it gives you something to shoot for when you're posing
in the viewport. At the very least, it's
just a helpful tool. I'll go ahead and
just hide it now. Now, with my character, I've gone ahead and I've cleaned
up a few of these poses. I still have stuff,
like, for example, this back leg is just
kind of stuck in space. You can only have a
couple of keys on it. I have a key here, there. Then that one, I don't
know why it's keyed, but it's just in the wrong spot. I should probably fix that. Then here, it's at this pose, and then eventually,
nothing happens. At the moment, I've used this sphere to show
what I might do. I actually went and
deleted everything after the dive roll just to show that this can be
a good starting point. I'm going to go ahead
and keep adding poses. A little bit of time has passed, and I have added even
some more stuff. It's not done yet, and
you can see he kind of freaks out right here at the
end. But we have the run. He does the little
hop. It follows the sphere almost exactly, and then eventually
does the dive. We have that pose from before, and I've added a little bit
more to have him extend his arms and spin. He ends up on his butt
like we had earlier, and then eventually
he kind of freaks out right there. He
just totally breaks. That's just the gimbal rotation again because I have
undid what I did earlier. If I go ahead and just
grab all these controls, go to the graph editor,
go to rotation channels, what I can do is just
grab all these curves, Euler filter, and you can see it fix that frame
right off the bat. The main idea here is using that geometry-blocking
workflow or that technique as a way to build out what one
of our layers might do, what our hips should look like. The goal of that is to animate
the energy of the shot. Now, after adding
some more work and fixing the Euler filter,
this is what I've got. It's starting to
feel pretty good. All I've done to get to
this point is by using the hips and if I
look at the curve, I don't have a ton
of key frames. I mean, there are several, but it's not like
every single pose. If I step through it, you
can see that I did spend quite a bit of time
figuring out the beginning. His feet kind of just
float off the ground, so not everything
is perfect yet, but I have the overall
idea of the roll. I haven't put a lot of
time into the weight, but I wanted to make sure
that when he came down on his hands and he
supports his weight, his arms bend quite a bit. Go ahead and zoom in here
so you can see it better. I wanted him to land on his upper shoulders
with his hips elevated. Then his hips are on the ground. He gets a foot down under him. I'm looking for
those contact poses. Then he puts the other foot
down underneath him as well, and I move his hands down. Now, the hands right
now are really rough. There's still an FK, which
means they just rotate. They don't actually
lock onto anything. I should switch them to IK if I want to have him actually
plant his hands, which is why right now, they
just kind of wiggle around. They don't actually stay on the floor the
way his feet do. His feet lock onto the floor
because they're set to IK. But for the moment, that's
okay. I'm doing it in passes. At the moment, I've used that sphere workflow just to
get the energy of the shots, the timing, the spacing, the overall feeling of
this dive, hang time roll. If I'm watching it and
it's just hard to tell, one of the other
tips you can use in this situation is
if your rig allows, you can also turn off
things like the arms, the head, the legs. If they're really
distracting you, you might be able
to just turn them off. Some rigs
have that feature. Some rigs don't. As we're working on this and I want
to keep adding stuff, I'm just going to
say, pick a target. What do you want to look at? What do you want to stare at? Because everything
needs a little bit of work, so we can
really look anywhere. If I want to grab the
hips and focus on that, is there anything with the
hips that I want to do? I could maybe adjust
the down position. I could add a little bit
more compression here. As he starts to lean forward, his feet come off the ground
a little bit earlier. Maybe I can take his feet
and grab both of those. This pose, they're
both on the floor. Here, they're up in the air. I'm just going to
say, you know what? I don't want his feet
to come up just yet. I'm going to just Shift+Click this and I'm going to
move this key over. It stays there for
another frame, and then they come
off the ground. It's a little bit
better. We have a hyperextension on this foot, which means I should do
something about that. I'll maybe grab the little
foot rotator inside there and just do that till his knee stays
a little bit bent. Then maybe this back foot, I'll do it a little bit less, just tweaking, just adjusting. But now what I've got
is he stays like that. Now his legs actually
straighten out all the way before he
pops into the air. I'll go ahead on
this next frame. I'll key it on 58, make sure
I don't change anything. On 59, I'll point it down a little bit and move it up so we have
a little bit of bend. I don't want hyperextension. Hyperextension is when
the leg is pulled so far away that we have no control over the knee. You
don't want that. You want to make sure
that at the very least, you're back in range
enough that the knee will engage right there. It doesn't have to be bent; it just can't be disconnected. So that's bad, that's fine. I can keep it looking
very straight without having it hyperextended. That is a quick little change to the feet that now helps that jump feel a
little bit better, where he actually pushes
up against the ground. The back foot isn't
really helping with that. The back foot is totally flat. So I'm going to go
ahead and key that on frame 0 here on this frame. I'll rotate it, there we go, on this frame, like that. I don't know why this
toe is all bent. Maybe I'll back this
up a little bit, like that, like that, and there. Since that foot was not as
helpful in the frame before, this foot towards camera
is very straight. This one in the back is
not quite as helpful. I'm going to say that
that one in the back is still a little bit closer
to the ground because it released a little bit
later. It's like that. That's the process here, is just to pick a target, pick an object, and
start adjusting it, tweaking it, and just
improving it over time. Now Maya gives us some tools
to help with this process. But before we dive into
those in the next lesson, what I'd like you to practice, go ahead and add a
sphere or a cube. I think a cube is usually better if you need
a rotation values. I did the sphere and then made an oval so you could still see the rotation.
That's fine, too. But take a piece of geometry, just a regular primitive
and animate that object, doing whatever the action is that you're
trying to animate. It'll still have
all the difficulty of figuring out the
timing in the spacing, but once you have that done, you can use it to help inform your complex
character choices. Take a minute, do that, and I'll see you in
the next lesson.
7. Working in Spline: Right now we have the
run, the jump, the dive, and then right
here, the character puts their hands on the
ground and then nothing. There's no keyframe data. So we just have interpolation over to here where the
character resumes their run. So in between, the
character runs, jumps, rolls, and then
floats into the next pose. There's no mechanics,
there's no motion. If we look at it
in screen space, you can see that the character just glides along the floor. Not great. We have
some stuff to do. The first thing I'm
going to do is I'm going to start with the hips. I'm going to pull up
the graph editor, and I'm also going to reduce how many frames I'm staring at. I'm just going to
jump over here to 88, which is the frame where the
character is on the ground, and we'll end it around
around 111 inch. Actually, maybe I'll get a
couple extra frames just so I can see where
we're coming from. There. So I can see the momentum that we're entering
this pose with, then nothing, and
then the ending. Because we have an A
pose and a B pose, like the character
has somewhere to go, it makes it a little
bit easier to know what direction the
characters going in, what the translate Z is
going to look like in this situation because
the characters just kind of moving forward. There's not a whole
lot I have to do here. If you are starting
from scratch, I would have no keyframe
data on the back end. I guess I would have all
these keys to deal with. Like that, I would end up in this situation
where I'm at frame 88 or in this pose, and
then there's nothing. So if I were coming
from nothing, I'd probably start with
moving the character forward and up to their
standing position, which is pretty much
where I'm going to leave it so if I undo that deletion, I've got my key
frames back, that's pretty much what I've got here. I've just got the character moving forward and up and back into a standing position, and
that's good enough for now. Now, to get to that spot, I'm going to grab the
hips or the main mover, the cog center of gravity, and I'm just going to focus on the up and the down and
the forward in the back. I want to have the
character jump up into the air and then come down into the step right here where they'll
continue to run. I'm just going to focus on the down and the
up for a second. I'm going to push the character. I'll just use Translate Y. I will set a key in
my graph editor, and I'll just push this down
to keep the character lower. I'm also going to
set these to Auto so that they aren't making
creative decisions for me. I don't want those plans
doing their own thing. So keep the character
kind of low. I'll also maybe keep the
character back a little bit. So that they have to work their way out and then they'll
accelerate as they move. From here, the other
thing I want to do frame. I use 94, just for fun. I'm just picking a
frame at random, but what I feel like timing
wise, I want to use. I think I'm going to establish
the feet locking in place. It's very distracting having them sliding all over the place. I'm going to say whichever
foot is the front one, which is going to be
this one over here, the character's left
foot, the blue one. That foot pose, since it's
the farthest forward foot, it's most likely going to
still be there on frame 94. This other foot that's in the back is probably going to have to come off
the ground by that point. I don't know what it's
going to do just yet, but I can guess that this
one here might still reach. I'm going to go ahead and grab my keyframe data from here, copy, paste it so that
that foot does not move. Pull it over here. I want to keep it planted
in that position. Now, it doesn't have to
stay in that exact pose. I'm going to come in here,
grab the tilt up control, the foot roll, and let
that foot roll forward. But that way I can have the character getting
ready to jump. Maybe what I'll do is I'll use
this in a hybrid approach, and I'll start thinking about the pose that I might
want to have happen here. I'll have the character
come forward like that Then I'm going to take
this other foot as well, and I'm going to
say, it was here, how long can I keep it there? This is a trick that
I use a lot for this stuff where I'll
take the backfoot. I'll find where that keyframe is where it's locked
on the floor. I'll copy, and I'll just
paste that keyframe here. Now, I just jumped
arbitrarily into the future and
dropped a keyframe. Clearly, that foot can't
still have a value of whatever this keyframe data suggests because the
foot does not reach. It doesn't work. So, rather than reposition it and
try to figure out, well, where should the foot be on this frame? I don't know yet. But what I do know is
that it's going to stay there for some amount of time, but how long do I
let it lock there? Well, it works here on frame 91. Frame 92 questionable.
Let's start there. So I'll take this keyframe
that I duplicated. I'll move it back to 92, we'll just see if I
can make it work. If on 92, I roll the
foot a little bit further, it's almost there. I can maybe adjust
the hips if I want to to get that
knee to re engage. I could try to push the foot
more bent up or I could just manually create a bend in the knee if I really need
to, depending on the rig. In this case, I'm going
to say, You know what? Let's go ahead and
take the translate Z, and I'm going to
pull it back just a little bit to keep it
there for that frame. So here, I'll just
keep that foot in position until wherever it feels like it needs
to come away. I think I'm at about 92. I'll adjust the hips a little
bit just to pull them back. I'm also going to
remember that the hips themselves might need
to rotate a little bit. I could use various controls
and different things. But one of the main points
of layered is not to get too in the weeds of getting
the specific poses, the specific controls, and
getting everything perfect. I'm just trying to layer
in the general idea. So for me, I think that is a decent enough spot
for that to go. Then I've got my foot I'm going to go
ahead and just say, it's somewhere up in the air. Where? I don't know. I
won't worry about it yet. The foot comes up,
goes like that. Eventually, it is
that right foot that's going to
land on the floor. I'm going to say
that at some point, whatever this keyframe is going to do the same
thing in reverse. That is where that foot lands. At some point around here, I'll try to put that foot
there. I'll reposition it. Then I will put the foot in a stepping position,
maybe like that. Now I have a roll control
and a foot control. Both of these are relevant. This keyframe is important. This is my contact pose. It might not be on the
right frame though. That's very stretched
out. I'm just going to take this, move a frame forward. That looks like
it might be right because here it looks like
we're standing on the foot. I'm going to say,
104, we'll use this. I'll adjust this to look
a little bit better and maybe I'll back it up a tiny bit so that knee re engages. Cool. Now as a frame 105, I'm just going to say copy, paste the down position
once again of the foot, and I'm going to make sure
that this is not rotated. This is I think 360. It's not zero because the character did a
whole front flip, which means the foot
has over rotated 360. But I do know I want
translate Y on the floor. I don't think I want the toes tilted up either. Go
ahead and key that there. What I can do here is I can
start to introduce the jump. I'll just go somewhere in the
middle here to get my jump. I'll just go in the
middle frame 100. Sure we can always move the
key and just up you go. I don't know how high
to go necessarily I can compare the rest of my
character's movement. I'll just go a little
higher than usual. Set that to Auto.
Now the character will come up this way. You smooth those
out. Jump and down. Then I'll just go back and
forth between the feet, the hips, and any
of the main things that move most of the
character's body. I'm not going to worry
about things like the arms or the head just yet. So I have pretty much just kept going with
what we were doing. I've exaggerated things
a little bit more, just added more details. When it plays, it
looks like this, and it's exactly
what we were just doing just with a little
bit more refinement. If I now look at the
finished curve of the body, you can see that we pretty
much have the same curve here. The hips stay down
for a little bit, they shoot up into the
air, we get our hang time, and then it drops down and dips into a slightly
bigger down pose. Then back into the
run. Now, the arc of the hands is still not perfect. We definitely could adjust that. If I go into my little
animation shelf up here at the top of Maya, with the hand selected, I can hit this button to create a motion path.
Here's a tip for you. Because I'm switching
from FK and IK, there is IK on the floor, goes back to FK in the air. FK and IK are two different
sets of controls, which means if you
try to track them, you can see that my
IK control goes away. So let me select that motion
trail and get rid of it. When you're trying to
track hands specifically, it's usually smarter
to track a finger. Because the fingers are
not FK IK specific. They'll be there either
way, you can see here. The arc of the hand
could be better, could definitely
make that cleaner. It's a little bit
pointy here on 95, so there's still work to be done and still more
adjustments to be made. But hopefully now
you can see that this is a process of
layering things in as we go, focusing on the big stuff first so that the overall
idea is coming through, and then you can
always work on those smaller details as we go. If I were to have done the hand first and started with that, everything I would have
done with the body would have gotten rid
of all that work. This is the point of
a layered workflow. You can start to see the
shot coming together sooner. Working in spine allows us to
preview our motion as we go and it gives you a really
good sense of the timing and the spacing of your work
while you're working on it. If this is your first time using a layered workflow and you want some more practice on top of what we've done in class, I'd recommend doing
small assignments, really easy to finish manageable things like a weight shift, a character just
standing on one leg and then stepping
onto the other leg. Little things like
that where you can focus on the hip motion, and then you can focus
on foot contacts, those are usually
the best places to start the hips and the feet. If you're doing this
with an acting shot, focus on just this
part of the body, just the main bust of your character and deal
with the head rotation and any major changes in
the face to start off with and start to layer
the little stuff as you go.
8. Final Thoughts: Congratulations on
finishing this class. I know that learning a new
software and diving right into complex animations can be
a lot, and you did it. To recap some of the things
that you accomplished, we dove into Maya. We learned the UI, we set up character, we set
up our settings. You're really ready to use Maya for anything going forward. Now you have a new workflow under your belt, the
layered technique, which is something that will take some practice
to get used to. If it feels a little shaky, it's just a practice thing, and also you might just be
a pose-to-pose animator. It's a good thing to try
these different workflows. Whatever you made,
regardless of how it went, please share it in
the project gallery. I'd really love to
see it. I can't wait to see you in
the next class.
 Sir Wade Neistadt, Animator, VFX Artist, Creator