Transcripts
1. Welcome and Class Overview: Hello, and welcome to class. I'm Brenda, and I'm
so happy you're here. In today's class, we're
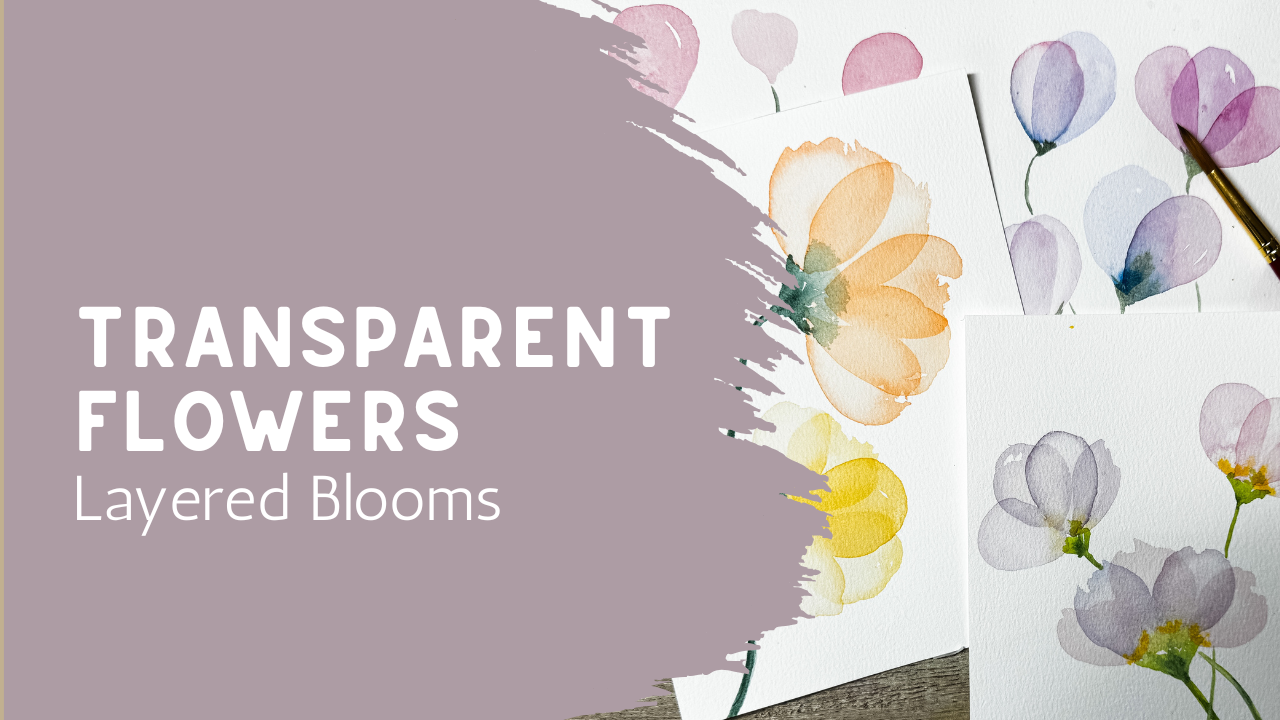
going to be painting these beautiful transparent
watercolor blooms using just a few simple shapes layered on top of one another. The result is light, airy and modern, yet
surprisingly easy to create. One of my favorite things
about this technique is that it encourages us
to let go of perfection. Instead of worrying about
painting realistic petals, we'll be focusing on
transparency, soft color, and beautiful effects that happen when watercolor
layers overlap. This class is perfect if
you're looking for something relaxing that still teaches
valuable watercolor skills. Along the way, you'll
learn how to control the amount of water and
pigment on your brush. Build soft layers without
muddying your colors and use overlapping shapes to create depth with
very little effort. We'll begin with two
short exercises. First, we'll be
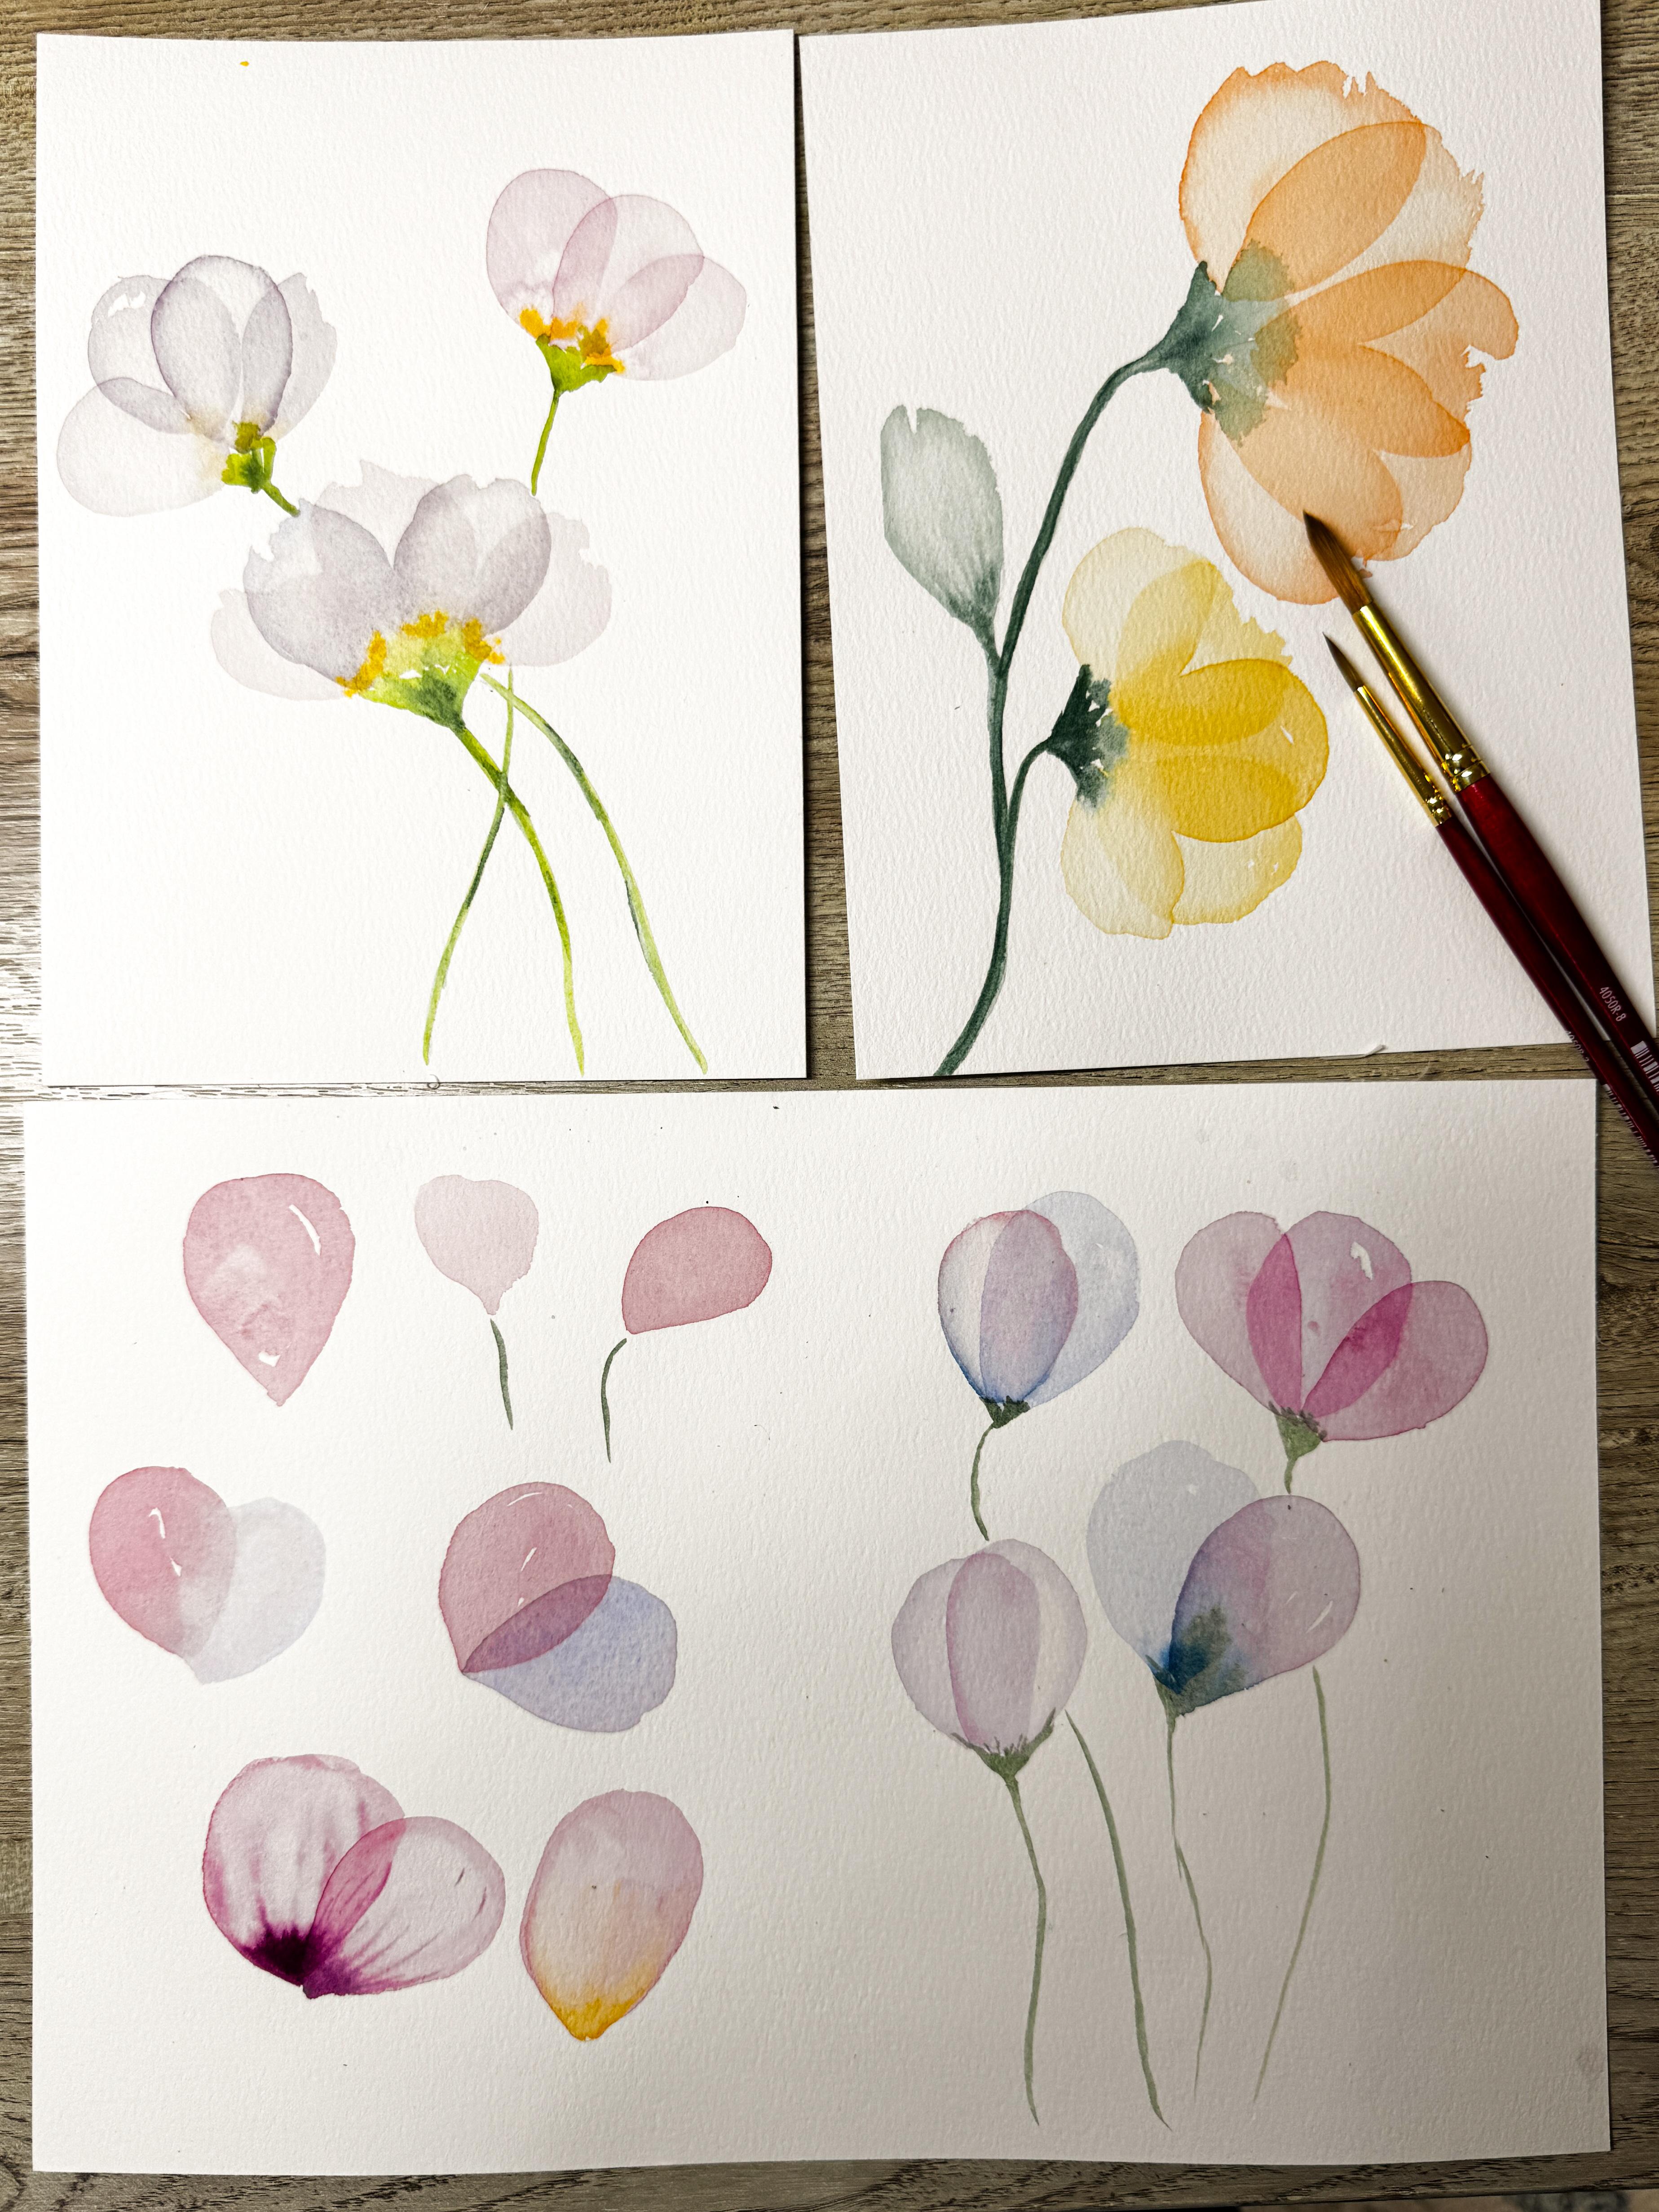
practicing creating individual transparent petals so that you can get the feel for the right amount of water and pigment and then we'll
combine those petals into simple flowers while
experimenting with different sizes,
colors, and overlaps. Once you've built
confidence with practice, we'll move into two
finished projects. Our first project will
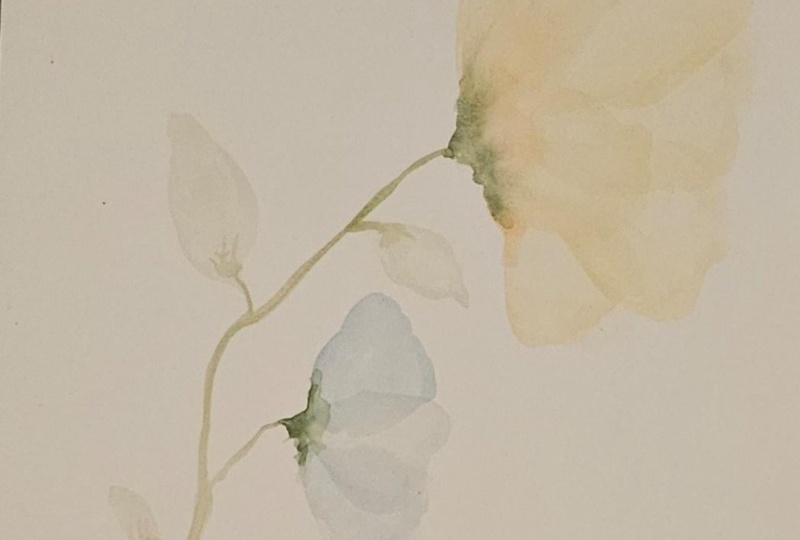
be graceful composition of overlapping blooms with
gentle curving stems. It's simply elegant and a wonderful way to become comfortable
with this technique. The second project, we'll create larger flowers with more layers and rich color variations. You'll see how just a
few additional petals can completely change the feeling of the
painting while still keeping that
soft transparent look. Gather your watercolor supplies and find a comfortable
place to paint. Let's create something
beautiful together.
2. Exercise One: Painting Transparent Petals: Welcome to class and to
our very first lesson in this really fun
technique that I cannot wait to tell you all
about and teach you several different techniques to creating transparent
watercolor flowers. The number one tip
that I can offer you is to use more water
than you can imagine, and as little amount of
pigment or paint as possible. That is going to be
your number one tip. The first thing we're going
to be doing is practicing. I think this is really
important because I want you to be able
to practice and see different techniques
and how I mean to be able to manipulate the paint on
your paper using your brush, you're going to be
able to lay down a really thin layer and
also lift off the paper, lift off the paint
off the paper. These are some techniques
that you're going to be able to use in other settings. When you are painting something
completely different, you're going to be
learning some techniques today that will actually become something that you're
going to use on a day to day basis
every time you paint. That is why I found that this particular
class is going to be really important for not only beginner
watercolor artists, but also artists that have been painting for a while
who maybe just need to come back to some refreshers or to learn something a little bit different from how you may have learned it before. So I'm going to jump
right into it and we're going to practice
two different things. We're going to practice. I
have my piece of paper here. Is just a scrap piece of paper. In fact, I have something on the other side of
it, some scrap, and so I just taped it down and I used a
piece of tape here in the middle so that I
know that I'm going to do my very first
practice over here, and then I'm going
to continue and do my second practice
over on this side. So for right now, we're going to be working on the
left hand side. To get us started, I went ahead and did a couple
little practices. This is what we're
going to be working on and applying it right
here to this side. We're going to be
learning what it's like if we don't
wait long enough, not that that's a mistake. I just creates its own effect. If we wait until it's fully dry, if we leave spaces, and also if we have
lifted off the paint, let it dry slightly and then dropped in a
little bit thicker paint, a little bit more
paint and less water. And using a brush to create
some little strokes in here. Just a bunch of
different techniques, and we're going to
go over all of that. I do want to mention that I will be using a bunch of
these paint brushes. Most of these are going to be my Princeton Heritage
paintbrushes. Most likely, I will use the
size eight and the size six, the most, but I do want to
also have a smaller one. I have a size three here. So next is my paints. These are Daniel Smith paints. I do have this
great big palette. If you don't have
this, that's okay. You can just use
whatever kind of paints you have. Not a problem. What I do recommend is
that you get something for this particular technique
because we need so much water. It's not going to
work real great if you're just dipping
into your pan. If you just have a pan like this and you are
dipping straight into the paint pants
are like this, this is going to
be too much paint and not enough water
and you're going to really struggle
to be able to get enough water into this area. Then I would recommend that if you have
something like this, that you also find
yourself a little dish. The dishes could be
little sauce dishes like this little one
that I have here, or you could use something like this is just
a little plate. This is just dried paint that I could
reactivate and reuse. A little something
that has a little lip, it could be a dinner plate,
as far as I'm concerned, a little salad
plate or something, something that
you're going to be able to use but it's going to capture a lot of water and
a little bit of paint. So because I have my palette, what I will be using over here is put I have sprayed this whole thing
down with my water. I've sprayed it and
made sure that it's nice and liquid and activated. If you've taken any
of my classes before, we talk about the different
levels of paint versus water this particular class
we are going with T strength. That means it's going to
be almost see through. If you look at this
and you put it out here on the palette, you can see that this is
almost completely water with just a little tiny
bit of paint in it. Which color you choose
doesn't matter. You choose any colors
that you want. I'm going to just be random and choose different
colors in here. So what you're going to work
on is creating an oval. So you can either
draw it out with your paint brush and draw an oval shape and then
paint onto the inside, or you can just use your
brush and create the shape. It can be more perfect
like this one here where it's a teardrop
shape where I actually drew it out with the tip of my paint brush or something
like this where it's a little bit more oblong and sketchy and
not quite perfect. Whichever direction
you want to go, what I would recommend
is that you try several different ways and you figure out what
works best for you. So I'm going to
use this pink that I have over here in my palette. Lots and lots of water, more water than you
think you need. It has to be transparent.
It cannot be thick. It has to have just
the smallest amount and seriously the
tiniest amount of paint. You're going to have
more success if you have more water than
you think possible. When I dip my paintbrush in, I am completely filling it up. See how I'm pushing my
paintbrush down and completely getting
that 100% saturated. I am not just dipping
it in just the tip. I'm making sure that the whole paint bristles are
completely filled. Now, if it's going to drip, I like to just brush off the
tip so that's not dripping. I also always have some a
paper towel or a rag nearby, and I could also just dab it off here so that
it's not dripping. So but I do want it as full as it possibly can as long
as it's not dripping. Then to make my oval, the first one I'm going
to do is drawn out. Using the tip of my paintbrush, I'm going to create
a teardrop shape. So kind of point
here at the bottom, round it at the top, and then coming back
down in to the center. Now, before that dries, I'm just going to go ahead and fill that up with my paintbrush. Now I'm laying the
paintbrush down part way. So it's like maybe a quarter
of the paintbrush to a third of the paintbrush is down on the paper
as I fill that in. And you can see that
there's lots of water that's moving around
here and that's fine. I wouldn't want it
any darker than that and I wouldn't want
any more water than that. I'm just going to
move this little puddle into the corner. And I'm going to go ahead
and make another one. But this time, I'm
going to go ahead, I'm just going to move
over so that that one has enough space instead
of drawing it first, I'm just going to
push my paintbrush around using most
of my paintbrush anywhere from a half
to the full bristles. I'm just going to
push it down towards the center and then I'm
going to come around and I'm just going to push
down the other side and see how it also
made a petal shape. It's just not as perfectly
shaped as this one. So then I'm going to go ahead, fill my paint brush back up and maybe I'm going to make
another one over here. This time, when I
made the first one, I start at the top and I push down towards the center
towards the tip. This time, I'm going to go at the other direction. I'm
going to start at the tip. I'm going to push my way up and just create this
little teardrop shape. If I decide I wanted
to make it bigger, let's say this is the one I made, and I go, You know what? I really want this
flower to be larger. You can always just
make it larger. Just make it a bigger petal. You can leave some white spaces. You can fill them in,
whatever you want to do. I'm just going to leave it like that and leave a little bit of a white space and
allow that to dry. So now that I have
those three done, I want you to practice this. I want you to get out a
piece of scrap paper. You can use the
backside of one of your art pieces
that you've made in the past that maybe you're
not so excited about, or maybe you have
a notebook that's spiral bound and you want
to keep this as a study. Go ahead and get out
your notebook or your scrap paper and
practice along with me. You can always pause
this video and go ahead and do the technique
and then come back. That's fine. Whatever
you need to do. But I do want you to be
practicing along with. This is a wet on dry technique. My paper is dry. I have not wet down my paper. If you practice and you put your paper is wet, this
is not going to work. It must be wet paint on
dry paper, wet on dry. Now that I have
those three done, I'm going to go ahead
and make another one. Because it's all about practice. Practice is so good. I'm just going to let
those three sit there, and then I'm going to come
over here and I'm going to get ready to go on
to my next piece, which is going to be doing
this technique where I maybe add my second petal when the first one
hasn't completely dried. Then I will also do
this one where I put the second petal on after the
first one has 100% dried. We're going to just go
ahead and get started. I'm going to create an
oval for my first leaf, my first petal,
put that one down, maybe make it a little
bit bigger, expand it. I can change the shape, and then I'm going
to let that one get dry but not completely dry. Then I'll come back in and add a second color and
see how they blend. Then over on this one, I will create another one. This one I'm going to
let dry 100% before I go ahead and add the second petal. I'm just shaping my
pedal a little bit. Okay. I'm going to watch these. You can see that
these have almost dried, this one is dry. But these are the ones that
I'm going to be working on. You can choose any
color, doesn't matter. I'm going to be starting to
look for a second color. Now that I did this pink, I'm going to clean up my
palette just a little bit. Because you have so much water, sometimes they really start
to run and blend together. I'm going to use
this lavender color. It's really a pretty color. Again, just using lots of water. I wanted to add more water. I'm taking my paint
brush and I'm dipping it into my water and dropping it right onto my palette
there so that I have even more
water and less paint. I'm going to fill
that up completely. Then I'm going to come over
here and looking at this one. This is still wet. You
can see how shiny it is. I don't know if you can
see that on camera, but that is still shiny. When I come in here
and I add a second petal and I come around
and then I overlap. That is going to blend
right into the pink one and the pink and the lavender are
going to blend together. It's not a mistake to do that. It's just I want to make sure that you are knowing
that you're doing that intentionally and that
that's what you wanted to do. Because if that's not
what you wanted to do, you'll want to avoid doing this. You're going to
want to wait until your petal has 100% dried. So this one is
blending together. The pink and the lavender are going to blend
here in the middle, which is actually a
wet on wet technique. So it was wet paper. This pink is the wet paper and the wet paint
being the lavender, that's a wet on wet. Paper the outside paper
out here is still dry, but this paper over here with the pink is wet and
so it's a wet on wet. So this one's not
completely dry. I'm going to just quickly dry
it off with my hair dryer. This is just a quick
little heat gun that I can use to dry this off so I make sure it's 100% dry before I go and put
on the second pedal. I'll be right back. Okay. Staying with the same color, I'm just going to use this
lavender with lots of water and filling up
my entire paint brush, pushing that paint brush the bristles all
the way down in, so it's completely saturated. Drip off dap off any
of the extra drips. I'm going to come in here
and I'm going to be adding a lavender on top
of the pink one. This is again, wet on dry
because my pink is now a dry paper because I used my
heat gun and dried it off. This is a wet on dry with lots of paper with
lots of water and very little pigment so that it becomes very transparent
and you can actually see the paper through the
um, through the paint. You'll see the difference
between here and here, where this one is, if I even make it a
little bit bigger just so you can really see that where this one is showing through the pink shows
through the lavender petal, where on this one,
they blended together. So two different techniques, neither one is a mistake
or the wrong way to do it. It's just two different
ways to do it. Practice both ways, the wet
on wet and a wet on dry, where the first petal is 100% dry or the first
petal is mostly dry. Okay. Now that you have
practiced these things, I want to do another one, which is this style right here where we are
lifting the paint. I'm going to go ahead and
choose another color. This time, I'm going to go
into maybe a darker color. But see how thick that
is. You see that? I hope that's coming
through on the camera. Yeah, you can see that. This is so thick. This is too much paint
and not enough water. As you push this around, you can barely see the
palette through there. See that white that's just
barely showing through. It's almost milk consistency.
That is too thick. What we want to do is add more water and as I
take my paint brush, I can just drip that right
in here and add more water. So now maybe it is coffee strength where
it's still thick. You can't quite see the palette, the plate through there. I'm going to add a couple
more drips of water. We're going to just add more, add a little bit more
water because remember, we're going to be putting in more than you think possible. Now it's see how it almost turned it from being a
bright red to a pink. Now we're going to call
that tea strength, which is what we want. Here I'm going to
paint another one. And I'm going to be putting
down my first petal, you can see that there's
lots of paint here. This is where if you have a paper towel or you have a rag, this is where this is
going to come in handy. You're going to
want to rinse off your brush so that there's
only water on here. Dab that off so it's a
fairly dry paint brush, and you're going to lay
it down and you're going to lift up that pigment. See this, you're
going to lift it up, staying within the lines, dab it off of your
paper towel or rag, lift up that pink. Come over here. I'm
staying inside the lines. I'm not going to
touch that edge. I'm just going to lift up
that is going to create this nice darker edge around the outside with a
nice pale center. It's even more pale and transparent than these.
Do you see that? Then if I want to, while
this is still wet, it's still shiny because
this is still wet, until I don't want to
let it dry completely. I want to keep it wet. While that is still wet, I'm going to come
over and I'm going to choose a creamy strength. See how this is now creamy. It's a different color,
it's a darker purple, but it's really creamy
and I'm going to put it down here into the
tip of my petal, similar to how I did this one. Just drop it into the
base of the petal, rinse off my paintbrush. Now you can use the
same paintbrush or you can use a smaller one. I'm going to switch over
and use my size three. My paintbrush is wet, but I also dried it off slightly so that
it's not dripping. Now I can use this and draw
out from that darker color, I can create these neat
lines within the petal. I can even come out along the edge if I wanted
to darken that. If I want it to, I can make it be a little bit darker tip here, a little stronger tip. If you don't care for something, you can come in with
your clean paint brush and you can lift it up again. Smooth it out a little bit. I felt like that was maybe
just a little too much. I'm just going to smooth
out some of those lines. And then I can let
this just dry or I can use my hair dryer
and dry that. Okay. Just a quick little
dry session there. That is now done. I'm going to go ahead and make a second one right on top of it. So this is dry. So
this is wet on dry. I'm just going to come in with
my second and overlap it, create my oval, lay
that down, fill it in. Then if I want to lift it, I can use this rag again and just with
my clean paint brush, lift up any of that extra
surplus paint that's on there. Just lift it up, dab
it off on your rag, paper towel, whatever
you have nearby, leaving a little edge
around the outside edge, and then coming back over to this creamier texture paint
and drop it into the middle. The clean rag. I'm just
going to draw out some of those lines like
what you would normally see in a
flower. That cool? I want you to practice this. First try several different
ways of making the petals. Try a wet on wet wet
on dry, lifting. Then if you want to, you
can add in a darker center. This isn't required, but
it's sometimes really cool. Let's just do this one more time because I think this is
also a fun thing to do. If I made this a petal, I didn't have to go darker. I could have gone lighter,
could have done a yellow. Let's just do it one more time. I'm just going to
lift up some of this. This is where your
creativity gets to play. You don't have to
lift it at all. You could leave it a little
bit on the darker side. I just like that
really contrast, so I'm going to be lifting mine. But while this is still wet, I'm going to come over and
get some creamier yellow, which is less water, more paint. I'm going to just drop
it here into the center. While this is still wet. Using a smaller paint brush. I can draw that up into it. See that. It's important that
you practice this, not just watch the video. I know it's really
fun to just watch the videos and just binge watch, which is great and it's fun. But if you want to
get better at this, I highly recommend that
you play around with it, that you get your paints out, and that you actually
practice it. You can even manipulate
this even more and move some of this yellow
because everything's still wet. You can just even keep
playing with this and move that still
around a little bit more. So play around, use the
whole sheet of this half, or use multiple papers. Like this one, this is just a little scrap paper that I have. If you just have little scraps, go ahead and make a whole
bunch of little scraps. Try it different ways, see what you can create, see what you can explore
and experiment with, and then come back
to the next lesson and we're going to
start putting it together over here and get ready to make
our class projects. For this class,
we're going to make two different class
projects. I'm so excited. Both of those projects
that you create, you could make and make
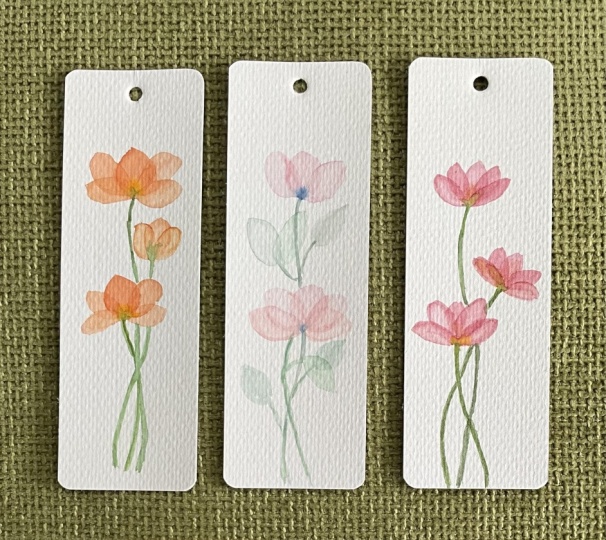
them into greeting cards, or you could make them
into artwork that you hang on your wall
or gifts because they're going to be so beautiful that you're actually
going to be able to hang them up and use or gift
them in a greeting card. I can't wait to get started, practice this, I'll meet
you in the next lesson.
3. Exercise Two: Building Simple Overlapping Flowers: Okay. Now that you have
practiced how to make petals, we're now going to
be putting them together and figuring
out how to put a stem on them because that is the next piece of this
to make this flower. I'm just going to stay
with these same colors. I'm going to go ahead
and make my first petal. I'm going to make
one right here. And I'm going to just
lift up some of that. I'm not going to lift
the whole thing, some of the extra surplus water
that's pulling up on top. Maybe I'm going to make
another one, lots of water. So it's really transparent. I'm just going to make another
one here just for fun, create a second petal. Then let's just do
another one over here. We're going to just
add some water. Ots of water. That's too much
paint, not enough water. So we're going to
add more water. We're just going to
make another one here, almost making the
shape of a balloon. You could even do this whole
technique and turn this into a birthday card by
doing this exact same thing. This is just a fun way to create a beautiful birthday card by turning these
all into balloons. Instead of stems, we can
think of them as strings. Be really a fun little Card. Okay. So I have those. I need these to dry. But I think before I do that, I'm going to make one of these
using a little creamier. See how creamy that is. I'm just going to add
a little bit down to the bottom on some of these. Just says two, I think.
Using my smaller paintbrush just to move it
around a little bit. You don't have to. You don't
have to move it around. You can just leave it as it is. I'm just wanting to
move them a little bit. This one just just got
a little too thick. No I'm just going to manipulate
that around a little bit. Just have fun with it, play
around, see what happens. There's no rules.
Watercolor is just for fun. So if you're doing this and it's getting
you stressed out, let's take a step back, relax, remind yourself
that this is just for fun, and then come back at it
and see how it works. I'm going to dry
these off because the next thing that I
need to do is put a second petal on here for some of them and I need this
to be completely dry. Okay. Just a quick
little drying. It's mostly dry,
it's dry enough. I'm just going to
keep using some of this paint that's over here. You can use contrasting colors, you can use the same color. On this one, I'm
just going to use this pink on top of that purple. I'm just going to put one there. Then because this
bottom one is dry, I can actually make
my other petal on this side at the same time because that back
one is the dry one. Let's lift up some of that. Now this one has three petals coming down here to the tip. Now I'm going to go ahead
and add in some of this, um, lavender color and maybe
I'll put it on this one. But this time, I think
I'm going to make it so that it's really overlapping. Here we only did it
on the last quarter. Here I'm going to make
it on last covering at least three quarters of it. I'm just going to make
the petal a little bit bigger and also covering more. That is also going
to be something that you can then decide how much of your first petal are
you going to overlap it? Do you want to have
it almost just barely overlapped or really
overlapped like this one. Then how many
petals do you want? Do you want to have
three? Do you want to have five that go
all the way around, all different choices
that you're going to have when you are practicing
and making yours. This one, we're going to just go ahead and make another one here. Do you want yours to be contrasting colors or do you want them to
be the same color? Here I'm going to
add another one. Just right up on top. And then with a fairly
dry paintbrush, I'm just going to
lift up some of that extra to make it
really transparent. There we go. Then I
want to add in some of that creamy into
the base of this one. I'm using my smaller paintbrush
just to draw up some of those lines. Isn't that fun? Then what we'll do now is we're
going to put in the base. I think I'm going to use the
smaller paint brush for now, and I'm just going to create just a little bit
of green over here, and I can add in This
one is still wet, so I'm just going
to go ahead and tap into that so that it has
a chance to bleed up. They don't have to, but I want to show you the differences, and then you can
create your stem. Or maybe it's already
dried like this one. I like to make my base
almost like a triangle. See that? Go, it comes
up on the edges. It's a little triangle. And then you create your
little base, your stem. I like my stems to have
a little bend in them. If you were doing
this as a balloon, maybe you only did you
didn't do the overlapping. You didn't make your
two petals on top. But, for example, over here, you could make this
into a balloon. It's just a fun little
activity for making a card. So make your little base, little triangle, and
then your bending. Little triangle that
connects all your petals. Do you see what I mean where
some of them the petals are overlapping a lot and
some are really open, so it's almost like
this flower is closed. This is a bud and then
these flowers are starting to open up and we're
looking at it on the side. That was a great lesson. I hope you've practiced this. If you like the fact that
the green bleeds up into it, then make sure you're adding your green stem while
this is still wet, especially the last petal. If you want it to be just
a base similar to this, then make sure that
you're doing it as a wet paint on dry paper. And dry flowers. We are now ready. We have practiced everything
we need to practice. We are now ready to go ahead
and make our class project. We're going to start
with the first one, which is going to
be three flowers in a really organic
showing movement and just a lot of fun shapes, and I can't wait to see
what yours looks like. I hope that you
can upload that to the class gallery so that we can see I would love to
see this work as well. It's really helpful
to other students if you show that you
actually practiced. The practice is what's
going to make you a better artist.
Don't skip this part. Go ahead and practice
this if you need to rewind the class, the video, and start over when you have a chance to actually
get your paints out, it's really important
that you practice. I'll see you in the next class.
4. Project One: Two Graceful Transparent Blooms: Okay, so I have, again, taken my piece of paper. This is my Academy
watercolor paper, and it is 300 GM, 100% cotton. This one is a 12 by eight, so I'm just going
to cut it in half, and I just put a
piece of tape down the center here just so that I remember to stay on my side. And we're going to
go ahead and create the first piece of art that you can either
turn into a greeting card. If you're going to make
it into a greeting card, make sure that you
have prefigured out the size that you
want it to be so that you don't make it
too big or too small. Sometimes there's
these cute little, um, envelope and card
systems that I like to use, which is fantastic. You slip your watercolor
down in here. They're called frame cards
frame greeting cards, I think is what it's called. You would normally be
putting a picture in here, but I use them to put my watercolor paintings
inside of it, and then it comes
with envelopes. If this is what you're
going to be using, make sure you have mapped it out and you know
that you need to keep it within this size so that it fits
inside of your frame. Um, but I'm going to be making
it bigger so that I can possibly hang it on my wall if I would like to
when this is finished. So this time, I'm going to be just using the paints
that are on my palette. I'm just going to go ahead
and use it that way. And I'm going to be making one flower head up
here towards the top, one about in this area. Then I'm going to
make another one that's tilting and
looking off to the left. This first one is going to be fairly straight up and down. This one, I think I want to have it facing that direction, and then also a
second one almost shadowed underneath
it with some stems. Again, my stems are
going to be bendy. I'm going to go
through here and just paint and talk to you as
appropriate and needed. If you have any questions
about how I'm doing this, please go back and watch the other lessons where we are
practicing this technique. After you've practiced it, come back and do this one. Um, but I got to kind of concentrate on what I'm doing to make sure that I
get this done well. I think I'm going to make four or five petals on some of these. Maybe they'll only have three, but that's kind of the
concept that I'm going for. So I'm going to go with
making the first petal and possibly like
the third pedal so that I can get them both
done at the same time. So what I mean by that is going to make my
first petal here. I'm just going to
lift up some of that. And then I'm going to make
another petal over here, knowing that once
these are both dry, I'll make another petal
here in the middle. But I need to wait
for this to dry. So I'm just going to make, almost like every
other petal start. So there I have that, and I think I'm going to add
in a little bit of yellow. I think I want while
this is still wet, just drop in a little bit of
yellow and see what happens. Hey, I'm not even
going to draw it up. I'm just going to let it
float around in there. I'm going to make
another one over here. Remember, I'm going to add two more petals at
least, maybe three. I'll put one here and
one here in the middle. Now I'm going to come over
here and I'm going to make a petal coming this direction.
This is my first one. Just using this lavender
that's here on my paper. Maybe again, I'm just going
to add another one here, knowing that I can put a
third one in the middle. I'm just going to lift
up some of that purple. I'm dabbing it off on my rag. I have my rag laying here
and I'm just lifting it and dabbing it off. Okay. And again, I think I'm just gonna add a little
bit of yellow. There's a really soft
yellow on that one. And then I'm gonna
come back in with my pink and put another
one down in here. Put another and I'm
going to be filling it in by putting in additional petals right up on top of these
after they are dry. I'm going to lift up the pink in the middle so I can get it as transparent
as I possibly can. I'm going to drop
a little yellow. Okay. Now that I have
those three done, I am going to dry that so that I can add in the
next layer of petals. I'll be right back. Now
this is dry or mostly dry. I'm going to come back in
with my very liquidy paint, and I'm going to add another
layer up on top of it. I thought about
doing contrasting. I thought about moving
this purple one over here to this one and putting
a pink one over in here. I think for these two,
I'm not going to do that. I'm going to do pink and
purple and then I'm going to decide if I'm going to add the purple onto this one
or not. I'm not sure yet. I can make that
decision as I go. I'm going to go ahead and add in my third petal right in there. I'm going to lift this again, make it really transparent. I don't think I'm
going to add any more yellow into the center. I feel like I have enough
yellow in that one. But I want this petal to
be really transparent. But because I waited until
these other two were dry, you can see how lower the petals behind
it are shining through. Now I'm going to come in with my lavender and add another
petal here in the middle. And just put another one here. I didn't get that
one facing quite as I wanted it facing the other direction
a little bit more, so not loving the direction
that this one is going. So now I have to
look at it and say, do I want to put another
pedal over here, which maybe makes it feel like it's facing that direction? I'm gonna try it. Yeah,
I think that worked. So just make a fourth
petal on this side. Lifting up that lavender. So it's nice and transparent. I think I'm going to add
a little bit of yellow to this one since it's just
hanging out over there. Okay. Now for this one, I think I'm going to go ahead and mix that lavender right in here and go ahead and make
a contrasting one petal. Just make it a little
more jagged on the edges. A little bit more paint. A little more rounded. Again, I want to lift that. This is why we
practiced it so much because if you don't
practice that technique, this can be pretty tricky, make sure you are practicing. And then I'm going to
come in with my yellow. I'm going to drop more yellow
in here to the center. Maybe lift up some of that. I like it. That's fun. This one has a four petal, and this one is one,
two, three, four, five. That's really fun. Now I'm going to go ahead
and grab that green. Actually, I think what I want is a little bit
brighter green because my flowers are so
bright and happy. I'm going to add
lots of water again. So it's nice and liquidy green. I'm gonna just add just like we practice, little
little triangle. A little triangle. This one can get even bigger triangle cause this one has
that five petals. I might even just come up and touch into there
and let it bleed. And now I'm gonna have use
my smaller paint brush. And I like to make sure that my stems
have a bend to it. If you get up close to
here, you can stop, follow through, come onto the other side. I've
gone like this. I just pick up my paintbrush,
I come to the other side, and I bring it back
down here so that it shows that that stem
is going behind. So the same thing over here. I'm just going to
come down, barely touch into that because
it's dry, it's okay. Come over here and bring
that stem all the way down. I think what I'm going to do now is grab just a little bit darker green and add in almost like we
did with the yellow, where I just add just a hint
while this is still wet, I can just move that
around a little bit, just so it has a little
two tone effect. It doesn't have to coat it. It doesn't have to
go the whole way. Using just a wet paint brush
just to move it around. See how it's not I'm not
filling the whole thing. I'm letting it have
those two tones, the lighter green and the darker green and
having that contrast, just like we allowed the yellow to have a little
contrast with the base. Okay, so I'm going to dry
this and then we're going to come back and work on
another class project.
5. Project Two: Modern Layered Floral Study: Okay, so this is dry now. That one's completely dry, and I really like that. I think that's going
to be really cool when I put a mat on that one, which I'll show you
in a little bit. But this next one,
we're going to make bigger bigger flowers. I'm going to put a
big flower over here. I don't know, maybe five
again, something like this, but I want to make it twice
as big. If I can do that. I want to make it
really big here with a stem and then a second big one over here coming off
of that same stem. I think I'm going to
mix up my colors. I've done the lavender
and pink quite a bit. I think what I'm going
to do is more of a orange and yellow or
orange and golden colors for this one over here. I am going to mix it up
and I'm going to get out a bigger paint brush because this is going
to be a size 12. If you don't have a
size 12, that's fine. If you have a ten, great. If you only have a size
eight, that's okay. You can still do it
with a size eight. But I am going to
move on and try to get this size 12 going. I cleaned up my palette. I'm putting some paint out here. I'm going to be adding
some water so that again, it's nice and transparent
tons of water, just a little bit of paint. And I'm going to
get started with this flower that's going
to be facing over here. Again, I'm going
to do every other. So I'm going to make
it nice and big. My first petal. I'm going to make it keep going until I feel like I have it really big, really big petal. I'm going to make
another one here because I'm going to come back and
put something in the middle. So we're going to just
kind of fill that out. It's okay if it
doesn't completely, come up and around. It doesn't you don't have to. It doesn't have to
fill it up completely. Now, I'm going to just
make one more here. So I have my three and then
I'm going to be able to put two more in there with it. But I'm going to use my rag. My paintbrush is mostly dry. I cleaned it, and then I
dried it off on my rag, and I'm going to come back
in here and I'm going to lift the inside and leave
that outside alone. Don't touch the outside. You can rinse off
your paint brush. Do not touch that outside
edge or this will not work. You have to leave that
edge just the way it is. But you can lift that paint. Now, lifting is
something that's really helpful as you are painting in other ways when you're not even doing transparent painting. Sometimes you get something
down and you go, oh, that's a lot darker
than I wanted it, or maybe I didn't want it there. You can lift up your paint
just like I am doing here. And so this is a great technique that you are learning that you will be able to apply
in your other paint. Practices and artwork. Okay. Now I have lifted that, so I'm going to leave that and
let that dry a little bit. I'm going to move on
to this golden color. I have my paint and
I'm going to add my water and make it nice and
transparent, very tea like. I'm going to put another one. I'm going to make this one here. Maybe this one's not going
to be quite as big because my paper is a little bit on
the smaller side for this. That's okay. We're just going to make this one
have maybe not five. I'll just do those
two and then we'll decide if I'm doing three
or if I'm doing four. I'm going to lift this
golden yellow. Lift. Make it really transparent. It's almost like you
are just staining the paper and then you are
lifting that pigment off. Because you can't
get to the edges, you're creating a little
darker outside outline. I cannot move forward because
these are still very, very wet and I don't want
that to, um, to blend. I want them to be not blending. I want them to be definition
and defined petals, so I am going to dry this
off and I'll be right back. The good thing is that
when you are drying it, there's so little
amount of paint and water on your paper that
it dries really fast. Here I'm going to
add another layer right here in the middle like that and another
one right here. I come up over the top, and it wide enough
lift some of that. Especially down
through the center. That's gonna be really pretty. And then I'm going to
take that golden color, and I'm gonna lay that
one here in the middle. Make sure it comes
up high enough. Um, you know what I'm gonna do? I'm gonna make it so that they are just a little bit smaller and really
overlap them a lot. Might as well, let's try it. I mean, everything is
just an experiment with watercolor guys. So if you don't love it, flip the paper over
and do it again. It's just an experiment. Now I have both of them
facing that direction. I'm going to grab
some of my well, I think I may I need
a smaller paintbrush, go back to my size eight. I think I might add
a little blue to it. I'm just going to make
that a little triangle. It's okay that it bleeds. It can bleed up into
it. That's okay. I didn't wait for it
to dry completely. And this one's just gonna
bend over like this. I grab some more
green while this is still wet and add some
darker green to it. I'm just going to merge it like it's coming out of the same one. Kind of like that darker color, so I'm going to go
ahead and add more. Bring it up into some of
that orange that yellow. Just go to thicken that
stem a little bit. Feel like the um flowers
are pretty heavy, so I feel like it
needs a heavier stem. So I'm just gonna just
thicken the stem. Okay. No, I think I want a leaf. Now, my leaf I want to have
is transparent as well. So I think I'm just going
to bring that leaf up here. Lift that again. I think this green may have been a
granulating green paint. So it might show off several different colors there
when it's completely dry. Okay. That's kind of fun. I think I'm just gonna drop a little bit more green into the base
since I lifted so much of it. Drag up some of that
to make it look like the veins inside the leaf. Alright. Okay, so pretty cool. I'm going to take this
off of the paper of the pad and cut it and maybe even find a
little frame to show you. Come back to the last
lesson where we talk about what we learned in this lesson and how
we can frame this. I'll see in their
very last lesson.
6. Final Thoughts and Next Steps: Congratulations. You've
completed broth projects, and I hope you're
beginning to see just how versatile this transparent
laying technique can be. Even though we only used a
few simple petal shapes, changing the colors, the
direction of the stems, the number of
overlapping petals, or the spacing
between the flowers creates an entirely
different piece of art. That's what makes this
style so enjoyable. It gives you plenty of room to experiment while still
producing beautiful results. I encourage you to paint a few
more versions of your own. Try a different color palette, make the flowers
larger or smaller. Let the stems curve
in new directions or experiment with different
numbers of petals. Every variation helps you become more comfortable
with this technique. If you haven't already, I'd love for you to upload your project into
the project gallery. Whether you've completed
one project or both, sharing your work encourages
other students and it gives me the opportunity to
leave you personal feedback. If you enjoyed this class, I would really appreciate it if you could leave
a quick review. It helps other students
discover my class and lets me know what
you'd like to learn next. And if you would like to
keep painting with me, I have many more
watercolor classes to explore with
different flowers, techniques, and loose
painting styles. You can choose whichever
one inspires you next and continue building your confidence
one painting at a time. Make sure you follow me
here on Skillshare so that you are first to know when I have uploaded
a new class. Thank you so much for
spending time with me today. I can't wait to see
what you've created, and I'll see you in
another class real soon.
 Brenda Jones, Watercolor Artist & Teacher