Transcripts
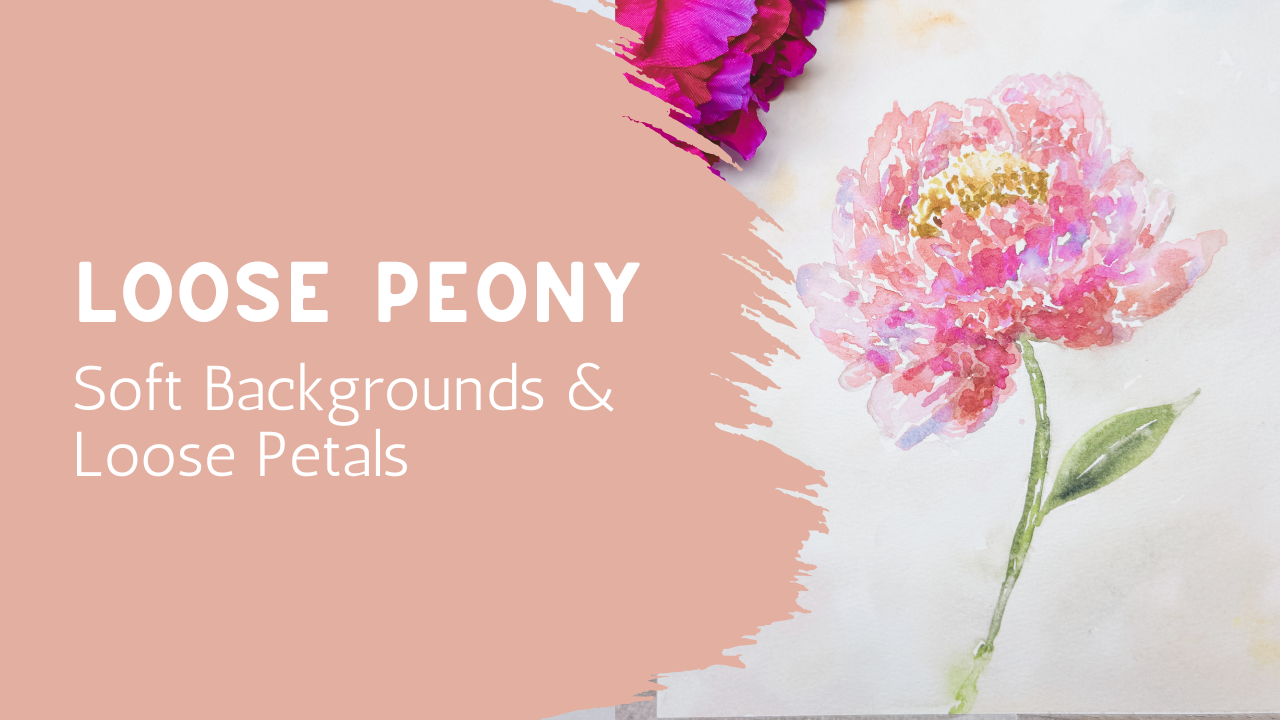
1. Welcome & What We're Painting: Welcome to class.
Today we're going to be painting this
beautiful loose watercolor peony with a soft background and
expressive petals. If you've ever admired peonies, but felt intimidated by all
those layers of petals, I want to reassure
you right from the beginning that we're not going to paint
every petal we see. Instead, we're going to
focus on suggesting shapes, creating movement, and allowing the watercolor to do a
lot of the work for us. One of the things I
love most about peonies is that they give us
permission to be loose. Their petals twist,
fold, overlap, and catch light in so
many different ways that a perfectly detailed approach
often isn't necessary. In fact, some of the most beautiful
peony paintings are created when
we simplify what we are seeing and focus on the overall impression rather
than every tiny detail. To help keep this
class approachable, I've included a simple outline that you can transfer to
your watercolor paper. This means that you can spend less time worrying about drawing and more time enjoying the
painting process itself. Throughout this class, we'll be talking about peony shapes, where to look for
shadows and how to create depth without
overworking your painting. This class is designed
for beginners, but it's also a
wonderful exercise for anybody who
would like to loosen their style and become more comfortable allowing
watercolor to flow naturally. Remember, your painting will
not look exactly like mine. Every watercolor painting
develops its own personality and some of the most
beautiful moments happen when the
paint surprises us. Gather your supplies, get
comfortable and let's start painting those loose
atmospheric peonies together.
2. Understanding Peony Shapes, Petals & Shadows: Welcome to class. Today we're going to be working on peonies. I love peonies. They're one of my
favorite flowers. But they can be a little tricky
to paint with watercolor. So I want to actually go over this a little bit more
in detail with you, just to help you
kind of understand the anatomy of a peony flower. I have provided
this line drawing. It is in your class project. You can download this.
When you print it, it will be big like this
for an eight by ten page. And if you would
like to shrink that, just change your
printer settings to make it a smaller size Pony so that it fits
the size of your paper. If you don't want to draw it or trace that and you have
your own, that's fine too. I'm just providing this here
for anybody who wants it. I have gone ahead and I
put my carbon paper down, putting the shiny side down, and then I went ahead and just very lightly traced
over this with a very, very light pen, not pressing
down very hard because I don't want this transfer
to get really, really dark. It's hard to get that off. And so I was very, very careful. Now, before I begin painting, I will erase a lot of what you see here because
even this will be too dark and will
shine through with my watercolor because
my watercolor will be fairly transparent. So I went ahead and did that. I also marked out my page. I'm using this watercolor paper that I really enjoy using, and this is a 12 by eight, and I only need it to
be a ten by eight. So I use some tape at the
top and the bottom to contain myself so that I'm painting within the
area that I meet. But one of the things
that we're going to work on before we even get
our watercolor out is looking at the anatomy of a peony because they are a
little on the tricky side. Now, this is a fox peony. This is made out of
paper or plastic. I just want you to
maybe you haven't had an opportunity to see one
up close yourself recently. You could look at
pictures online. You could grab something from an image so that you can
take a look at it closer. But I wanted to show this
to you really up close. First of all, I want you to see how many different
layers there are. It's just layers and layers, and they're all jagged. You can see that each
leaf is really jagged. It's not smooth. It's
not a nice edge to it. It has lots of points and valleys throughout
every single leaf. There's also a center that
is often a different color. Sometimes it's a like
a pink leaves or petals and then a more
orangy or yellow center, which is what I'll be
doing today is adding in some yellow and
orange into the center. There's often something that's even a different
color in the very, very center, which
this one is a green. Sometimes that's even like
a brown or a dark color. So you have lots of
options for that. The other thing I want
you to see when you are painting peonies is it's hard to get that definition
between leaf each petal, the definition between
each petal is very, very challenging because it's
all one color basically. But when you really
start to look at it, you start to notice that there's actually several
different colors. Here we have almost
like a dark wine color, and then we go into
almost a lavender color and then back into
almost a pink color. Do you see how there's lots of different variations of
almost the same color, just a slight tint
change to them. The other thing you can notice
is that we have shadows. Because it's really deep, you're going to be
getting deep, deep, deep, deep shadows inside the flower. That's something that we're
going to want to do here. Now, our drawing for the sake of making this
easier for watercolor, our drawing is opened up. The petals are opened up more. They're more like this, so you're going to
get an opportunity to see some of the other colors inside here and you're going to be able to put
some extra shadows in. But even as I open
this up a little bit, you can see that down in here, there's a nice big shadow. You're going to want to
incorporate some shadows into your drawing so that when you are well,
not into the drawing, but into the water color so
that when you are painting, you can be adding
in those shadows, which is really going
to give that separation between the back petals
and the front petals. I'm going to be using
my regular palette that you've seen many times. I will probably be
using my buff titanium. I really like to use this, especially when I'm doing
flowers that I want to just mute down the colors so there's not so
bold or bright. But that's my preference. You don't have to have that. You can just use whatever
you have on hand. But what I'm going to
do next is off camera, I will erase some of
this so that it's not so bold and it's a
little bit more subtle. But the next thing I'm going
to actually do is work on this with you to show you
what I mean about shadows. So this is an exercise that
you could do on your own. You could print
out this piece of paper that I've
supplied for you. Then just using your pencil, it could be a number two pencil, whatever pencil
you have in hand. I just happen to have a
mechanical pencil by my desk, and so that's what
I'm going to use. But I'm going to show
you what I mean by adding variations of
color and shadows. You might want to have
your lightest colors, and I'm just going to put
an up here to show that I might want to have my s by my lightest colors all
the way up in here. But then down in here in
the depth of the flowers, I might be wanting to
put in some shadow. Maybe I want to add
some shadow over here. Do you see that?
I'm going to add some shadow right down in there. When we get around to doing
this with the watercolor, I'll be showing
this to you again, but I just wanted to show it to you where I could
scribble on paper. Down in here, there would be a shadow because if the sun
is shining down on here, these petals would be casting
a shadow down under here. That might be darker. This might be darker under here at
the base of that flower. And then this would
be lighter up here and this might
be light up here. I'll put a big L.
This might be very light and it might even fade off into the
background over here. When we start adding in
our background color, it might actually start to blur out where you
can't even really see a definition between this
petal and the background. Then over here behind here, this might be darker. We might be adding in some
more shadows down in there, and then you might choose to put in some shadows over here. That's what we're
going with as to why, when I say to add some shadows, that's what I'm looking
for is you're not wanting to shadow in
the entire petal, just in the inside where the inside of
that flower would be. Just down in this area, way into the inside
of the flower. Then I would be
making this a yellow or orange or some maybe
add some browns in. And they also want
to show you on the leaves that sometimes these leaves down here at the bottom get a little
bit of green on them. Sometimes they're a little bit of pink and a little
bit of green. Even down in here, when you're painting this stem and you're
putting some green on it, but these areas are still
wet with your pink, and then you touch that
green into your pink, it might start bleeding down into here, which
would be perfect. It's almost like that's what
Mother Nature does is it allows that stem color to
just blend on down in there. Or maybe the opposite happens. You have a stem here and a little bit of purple
or pink adds into. That will actually add a
lot of beautiful color. Maybe it's yellow
that you add in. Don't be afraid of
allowing your paints and your watercolors to mingle and be happy on
the page together. Go ahead and print this
out if you want to practice looking at where
your shadows might be. Go ahead and get your
watercolor prepped and ready. I'm going to go ahead and
start erasing this and then I'm going to come
back in the next class and we're going to dive
right into watercolor.
3. Let's Paint a Loose Atmospheric Peony: Welcome back to class.
And as you can see, I had gone ahead and did
the line drawing on here, and I hope you can see
this on the camera. This is so faint now because I did go ahead with an eraser. So I will be able to see
what I'm working on, but I'm not sure
that these lines are going to show
up well for you. Oh, it's pretty far away, but you know that it's there, and hopefully you're
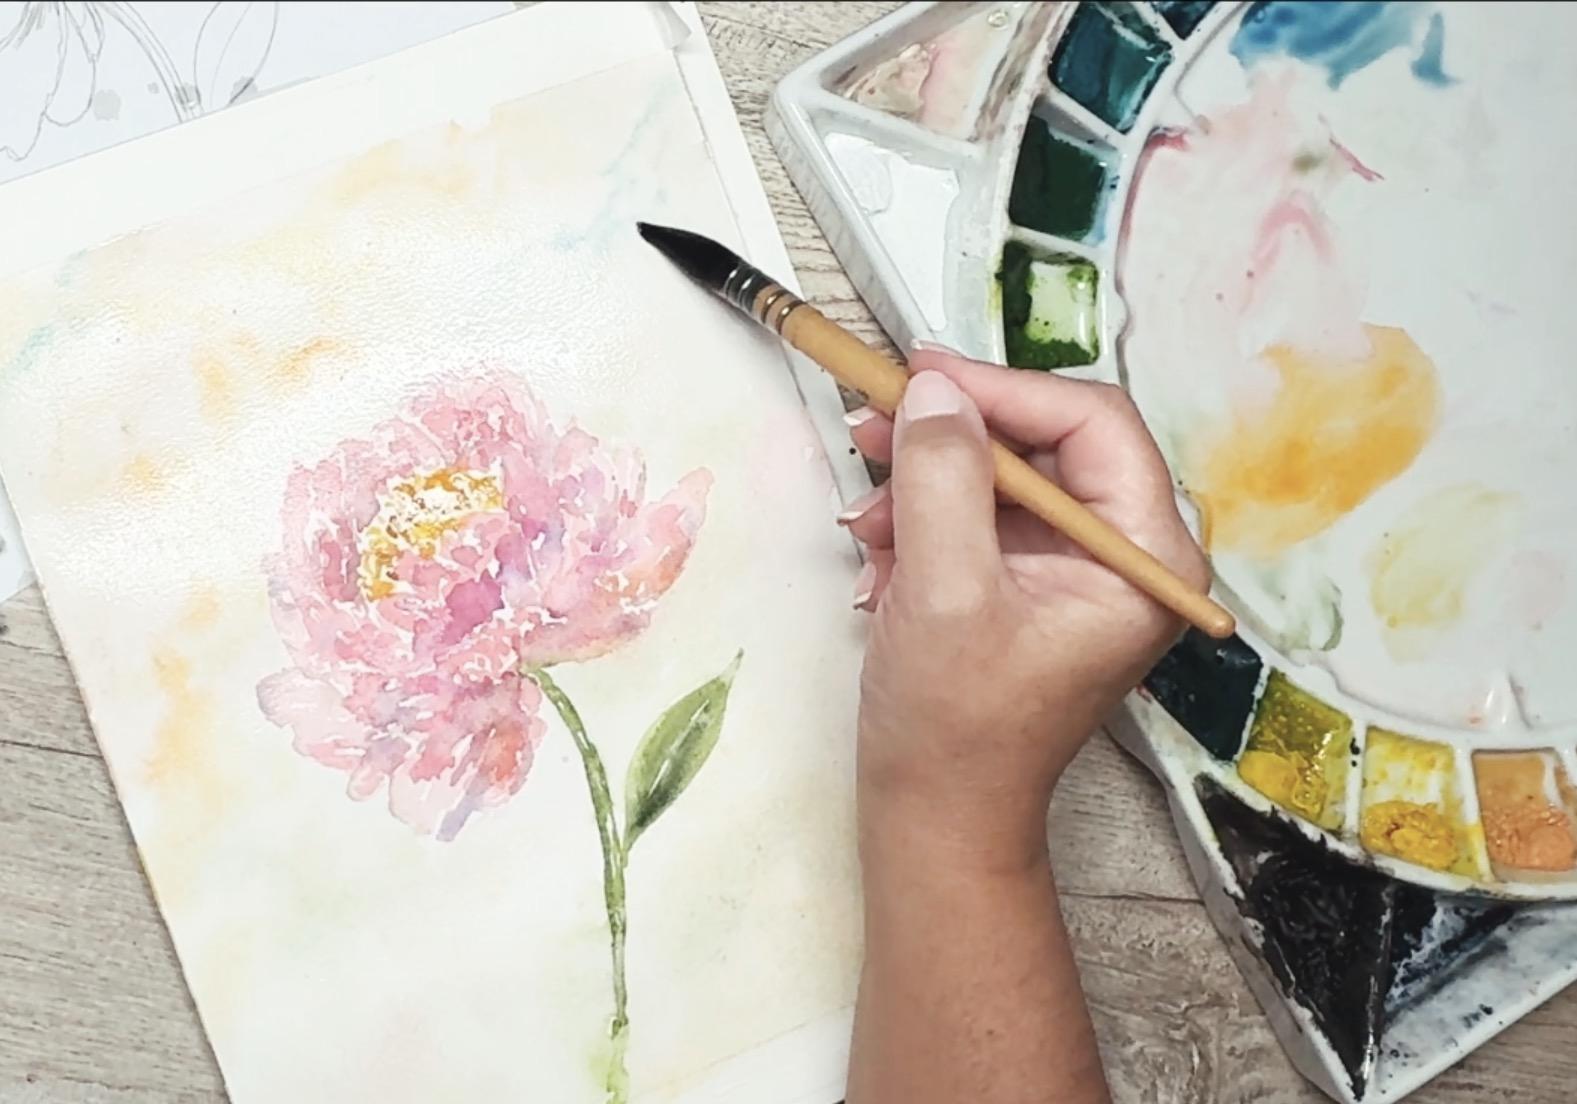
painting along with me. I'll just be using my
standard paint brushes. I have my size eight, my size six, and then a
couple small detail brush. I always like to have some of these larger brushes in case I need to add
a lot of water. These are my go tos. Sometimes I use other ones, but they're my standards
that I have here. Of course, I have my watercolor. I have sprayed
everything down with my water so that
it is ready to go, it is completely activated and
I am ready to get started. I of course, have my water. I like to have two or
three different jars so that I can keep
a fresh paint. My paint brushes nice and clean. I'm going to go ahead
and get started. I'm going to be leaving lots of little white spots in here
as my highlights because I know that I can get darker by adding in more paint
or another layer. But it's really hard to create highlights if you have painted
over the entire thing. I'm going to as I paint, I'm going to be using a lot
of white from the paper itself to allow that to create some highlights
while I go ahead and paint. So I'm going to be using
my pink that I love, and I will be also grabbing
some of my buff titanium, of course, just to lighten
it up a little bit, make it a little bit warmer
and more not quite as bright. I just need to move this
out of my way a little bit. I need to have a little
bit room for my elbow. And I'm going to go ahead
and I want to show you this. When I have put all this
paint onto my paint brush, that's a lot of paint
on here and I like it because I want my
paint brush to be completely filled
up from the tip to the base of the handle. I want all of this to
be filled with paint, but maybe there's just
a little bit too much, especially because I'm trying to create some light spots first. What I'm going to do is just
dip it into my water maybe give it a little swsh and then just drop it off
a little tiny bit, and now I have much
less paint on here, but I still have the paint. Now I'm going to start
working on my left, my back left and I'm going to
be moving my way this way, mainly because of where
I like to have my hand. If I started here, it would
be wet and then I'd be putting my hand down on that spot and that
would be difficult. I like to start because
I'm right handed, I start on my left. Typically. What I'm going to do is just follow a little bit
of that outline of where it is and remember
how the flowers are jagged. I'm going to just create
some jagged edges here, and then I'm going to
bring down some of that color and see how much
paint is still in here, even though I put it into the
water, I could do it again. I can brush it off again. I can still have a lot
of paint in there, even though I put
it into the water. But that's allowing
this to be really soft. Then when that dries, that's
going to dry even lighter. Take a look that I am only
painting this very back petal. So if I bring this over
where you can see it, I am painting this
back petal right back. Leave that there
so that maybe that helps you be able to
see what I'm doing. But I want you to notice that I didn't fill the
whole thing in. I left some white spots. I'm just kind of going around in that area and allowing
some of it to fill in with paint
and some of it to just be white, the paper. I'm just going to come over here and add a little bit more. Now, I could always come
back in as this starts to dry and either
add a lighter color, which would mean that I'm using more water and less paint. Or it could even
make it a darker color by adding more
paint, less water. I'm going to go
ahead and go back over here and do
this one as well. And I'm just going around it and making it nice and
jagged because we know those petals
are really jagged. Just filling it in. But only so much. Now you can see how much lighter this petal
is going to be because I have so much less
paint on it, which is fine. I love this. This is
going to be good. Now, I'm probably
going to skip some of these inner petals
here because I need to wait until these
have dried so I can create some a definition
between petals. All right. I'm going to go ahead
and come over here because I know this one
needs to be light too. I did not dip back
into my paint. I dipped back into my water just so that I could add a
little bit more water to it, which will create this really
nice light look again. Now I'm not worrying about where those shadows
are right now because I'm just working on creating
my highlights first. I can always come back in later and add in more highlights
by going darker. I mean, I'm sorry. I can always come back in. I can always come
back in and add in more shadow by adding more
paint or adding another layer. I don't have to worry too much about those shadows right now.
I will get back to those. I'm just going to dip
back into my paint. I feel like I'm losing a
lot of color at this point. I do want to have this area down here a little bit darker. I'm going to go ahead
and just add in a little bit more paint color. It's going to be
a little darker. Maybe this area up here will be a little darker than this one. There are ways of painting
a peony without drawing first and that will be something that we will also
work on in another class. But for this time,
I thought it might be helpful if we
really looked at the anatomy of a
peony so that we had something to reference
back to at another time. Here I'm going to
just keep going around and creating all
these little petals. Look at all that white space. I'm adding in all
that white space. Come out and do this
petal over here. And this one almost completely transparent
down in here. Just fine. If you took my other class
for the cone flower, we did something similar to that one where it was very light and sketchy like this where
we left lots and lots of little white spots on
the flower itself, and then we would add in
more colors as we went. This is that same
similar feeling. I'm just giving everything
just a once over. Some of them are darker,
some of them are lighter. Lots of white space being left. If you're struggling with
that, loosen up your hand. Don't hold it so tight. Don't hold it down
here like a pencil, hold it up higher so that you can be a
little bit more free. I think I'm going to
come in here now. This isn't completely
dry, but that's okay. I'm just going to start
adding in a little bit more of this color, another depth. I probably will want to start bringing in remember when we were looking at this flower
over here and we were saying that there's even
purple or lavender. I might even want to
grab some of that and start adding in
that color as well. Working fairly quickly because I don't really want this to dry. I'm adding just a little
bit of lavender to my pink, so I'm using the same color. I just adding in just a little
highlights here and there. Where the paint is
already still wet, I want it to really
start blending in. If I find an area
that's already dry, it's probably not going to do
well with my adding paint, and so I'll probably
just skip those spots. I don't need a lot,
just a little bit. This area over here was
fairly dry when I added it, so I'll just add a little bit more water and
move it around. It's okay. It's okay
if that happens. Don't worry about it. It's all going to be beautiful
at the end. You can even put some of that lavender in
between where some of the white spots are because we're not going to need
all of these white spots. We were just leaving
those there for the freedom to add to them if we need to with
another color. I also want to add in maybe just a little
bit darker color. I'll just add a little
darker color to it. Again, I'm going to be
looking at my depth is, where my shadows
are going to be and I might add in some
of that down in here, maybe some of that over here. Hoping I can still find
some spots that are darker are wet so that I
can add in that dark spot. Remember I said I wanted to
add some in down in here, so I'll come back over at
the base of this flower. Add in some darker colors. This is wet so it's blending and being able to move around. Now this front one is
still dry, that's okay. I'm just going to
pick up some of it and just using my rag, I can just move it around. So let's just pick up some, lift it, move it around
where you want it. All right. Even pull
up some and say, well, maybe just a little
highlight up there, pull some over here
just out of interest. Okay. I'm making a mess
of that, but it's okay. What I want to have now is a little bit of yellow
added in to that center. Little dots, little squiggles. Just move your
paintbrush around and let it create these
little random shapes. And then I'm going to
actually come right back in with a darker color, in an orangey color. Maybe mix it with my yellow, maybe add just a
touch of brown to it. Just to add a little bit of extra depth dimension
to it. Okay. I'm going to let that
dry. Don't mess with it. I'm just going to let
it dry. It's looking cool. I'm liking that. Might want to add in No. Yeah. Sometimes I just mix a color in with the other colors
just so that I can I don't know
how to describe it. It's using the same
colors that are already on here and
then I'm adding in another color and
it really makes it really cohesive and it
feels like it belongs. I'm just adding in just a touch. These are areas
that are still wet, so I'm able to really
just drop that right into those areas and
let that bleed around. Maybe it's a darker
area from the shadow. I'm liking a lot of that. Okay. Um, I'm gonna wait for that to dry a little
bit more and then I might add in a little bit
darker color as well. I pick up some of this so
I don't get it too muddy. I just use a rag, have your paper towel or rag next to you that you can
pick that kind of stuff up. Um, It's going to get a
little softer color here. You can always come in and add just a little bit of definition
to some of these petals. Now, I cannot see
these lines at all. Now those lines have been
completely covered over, so I can no longer see them, but I know they're
something about like this. I'm just going to add in with this softer color, some
little definition. They're going to dry, but
sometimes it's nice to just have a small
little extra detail. Especially when this is
still wet it blends. I'm certainly not
outlining everything. I'm just adding in a little bit more where the petals would be just so
that you can see some definition between
one petal and the next. I adds a little shadow. Remember that your
watercolor is going to dry lighter than what
you see when it is wet. If you're looking at
it and you're like, maybe that's too dark, don't forget that it
will dry lighter. Now, what I'm doing here is I felt like some of those
lines that I put in were a little too outlining and so I'm just softening them. This is just a wet paint brush. I rinsed it off completely. I dried it off on my towel and then I'm just
coming in here and softening some of those
lines that I made just because I felt
like they were maybe just a little too dark. This is where it's just really fun because you
get to just play. You can say, Oh, I
feel like maybe I need to have a little
definition of a petal there and so you
can come in here and add just a little
darker color to it. You're almost adding
another layer right on top, which also gives the effect of all of these different petals because you're
adding more layers with a slightly
different hue of color. You could just add another
little layer of petals there. I'm going to leave this
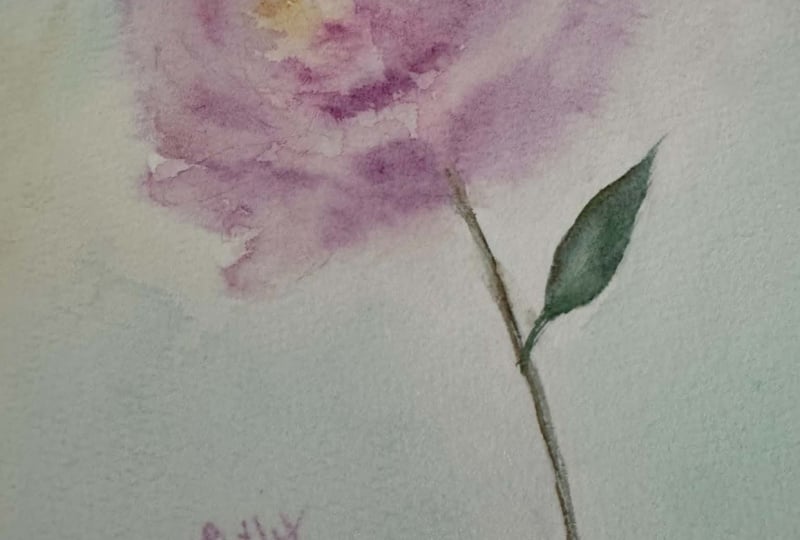
alone for a second and move on and work on my stem. For my stem, I like
my stem to be warm. I'm just going to bring
that all the way down. Again, I am not going to
fill it in completely. I'm leaving it alone a little bit to have some
white spots and I'm also purposefully allowing
that to touch in there so that I get that little two
tone effect, that base. I might come in with
a lighter color of green and add in a lighter
color here and there. I think I want the
stem to come all the way down and touch my paper, the edge where this is my tape, so I want to make sure that
it comes all the way down. Then I want to have
my petal, my leaf. Let's add a little
darker spot over here. I'm okay with leaving a little
white spot in the middle. Again, just feels cohesive
for everything else. Now I can come back up in
here and look at this green that bled in and I'm just
going to lift it slightly. I don't mind it being there, but I maybe didn't want
it to be quite that much. I'm just going to lift it, all it means is that my
paintbrush is clean and almost dry from wiping it off and I'm coming over here
and just lifting it up. Mostly using an
eraser to lift it. Now, if I wanted to, I can
come back over and add in more pink to heal that spot. Now, some of these areas
are already drying, so I can add in
that extra layer, which gives it that effect
of having lots of petals. I hope you're having fun
creating this peony. I sure am. I'm loving this. I think that's really pretty. I'm going to move over to a little bit larger paint brush. I'm just going to add some water in here and it's okay if it touches into your petals or into your leaves, totally is fine. You can then dip over
into your paint that's already on your palette and just put it down and
move that around. Rinse it off, get
some more water on here, move this around. Don't necessarily want to
wipe over it at this point, but you can touch into
it and let it bleed out. That's fine. It's going to just create a little
atmospheric look. You can add in some pink. But whatever you're doing here, I like to keep it really
on the soft side where it's almost completely faded out and you can hardly see it. That's just my way of
doing backgrounds right now is that it's so
subtle, so soft. I can add in some pink, I can add in some green. I can let them mingle
and move around. There's not a whole lot
of rhyme or reason as to why I do one
color in one spot. But sometimes I just I know that maybe there would
have been a leaf there. Maybe this is where I want
it to be a little darker. Maybe I add get my bigger brush. Add a little bit more water. Go ahead and touch into
some of those petals. This is why I like to have a
big brush because I get to really throw down a lot
of water at one time. I'm just going to go around
just add in this water. Well, you've been
going to just scrub these corners a little bit just to make them a little bit softer and atmospheric. All right. Adding a little
bit more green over here. This is all going
to dry, so soft. Just go to add in
some of that pink, and I added in some of
the titan buff titanium. But green. You can leave
little white spots in here. You don't have to
fill the whole thing. Go to add in just
a little yellow. This is where it's just fun
to play and experiment. It's really just
random and casual. Have fun with your watercolor. If you're not having
fun, you know, I don't I want you to
make sure that you are having fun and just
relaxing and experimenting. And if the first
time you paint it, you're like, that
wasn't my favorite. Just go ahead and
paint it again. It's just a little
bit of supplies. It's really not
that big of a deal. You can always use the
pieces that you've made. If you're not thrilled with it, you can always cut
them down and make them into cards or into bookmarks or use them as
you can use the backside. If you really hate it, you can just use the backside of it. So this is just nice and fun to experiment and play
with your water color. Play with water, how
much water you need, play with your With your paints, play with your paint brushes. Just to create this little
randomness with orange, soften it up, the one side, let the other side be
a little bit harder. Even I can add in a little blue. I don't always add
in a random color, something that's not already
in the piece somewhere. But sometimes You got to be careful with your
blues because I already have yellow up in here, so my blue could turn
green very quickly. I'm just being really careful with where I'm positioning it. Again, I'm just going to come
in here and soften this. I'm going to dry this off and see if we need
to come back and do another layer or what situation we're at. I'll be right back.
4. Adding a Few Final Details: Okay, this is fairly dry and what I'm going to
do is I wanted to add just a little bit more
depth to the center and I wanted to fix
these petals down here. I'm going to just
go ahead and get up a little bit more pink going, so I have a little bit more and I'm just going
to add some more of that random little dots
just because it looked a little too smooth where I
had to lift up that green. So I want to just fix that. I'm just putting
another layer of petals right up on
top of that area. Um, so I'm going
to do that there might even come in
with a little bit of that darker color and just add in some little squiggles of that darker color
down in there. Just to add a little
bit more depth. Let's see how that works. Even my paintbrush is
now clean and dry and so I'm just going to
move some of those around just to soften it so that they don't
look like poke dots. I want it to also incorporate
it into the rest. I don't want this to now all of a sudden look too bold or different
from everything else. I'm just bringing some of that color up into
some other areas. This just my way of
fixing this situation. If I only left that down here, it might feel your eye might go to that instead of
to the whole piece, so I'm using that as my palette and just bringing it up into other areas as well. We're going to see
how that dries. Then I want to add in just a
little bit darker area here, not through the whole
thing, through this base, just to give it that depth
that I was looking for. I'm going to still let
this be the highlight, the top quarter, but just adding a little bit
darker color down in there. Okay. So I think I
am good with this. I'm going to go ahead
and take this tape off and remove it
from this board, and I'll come back
with my final thoughts and may even put a little mat on it so we can see what
it looks like if it was hanging. See you in
the next lesson.
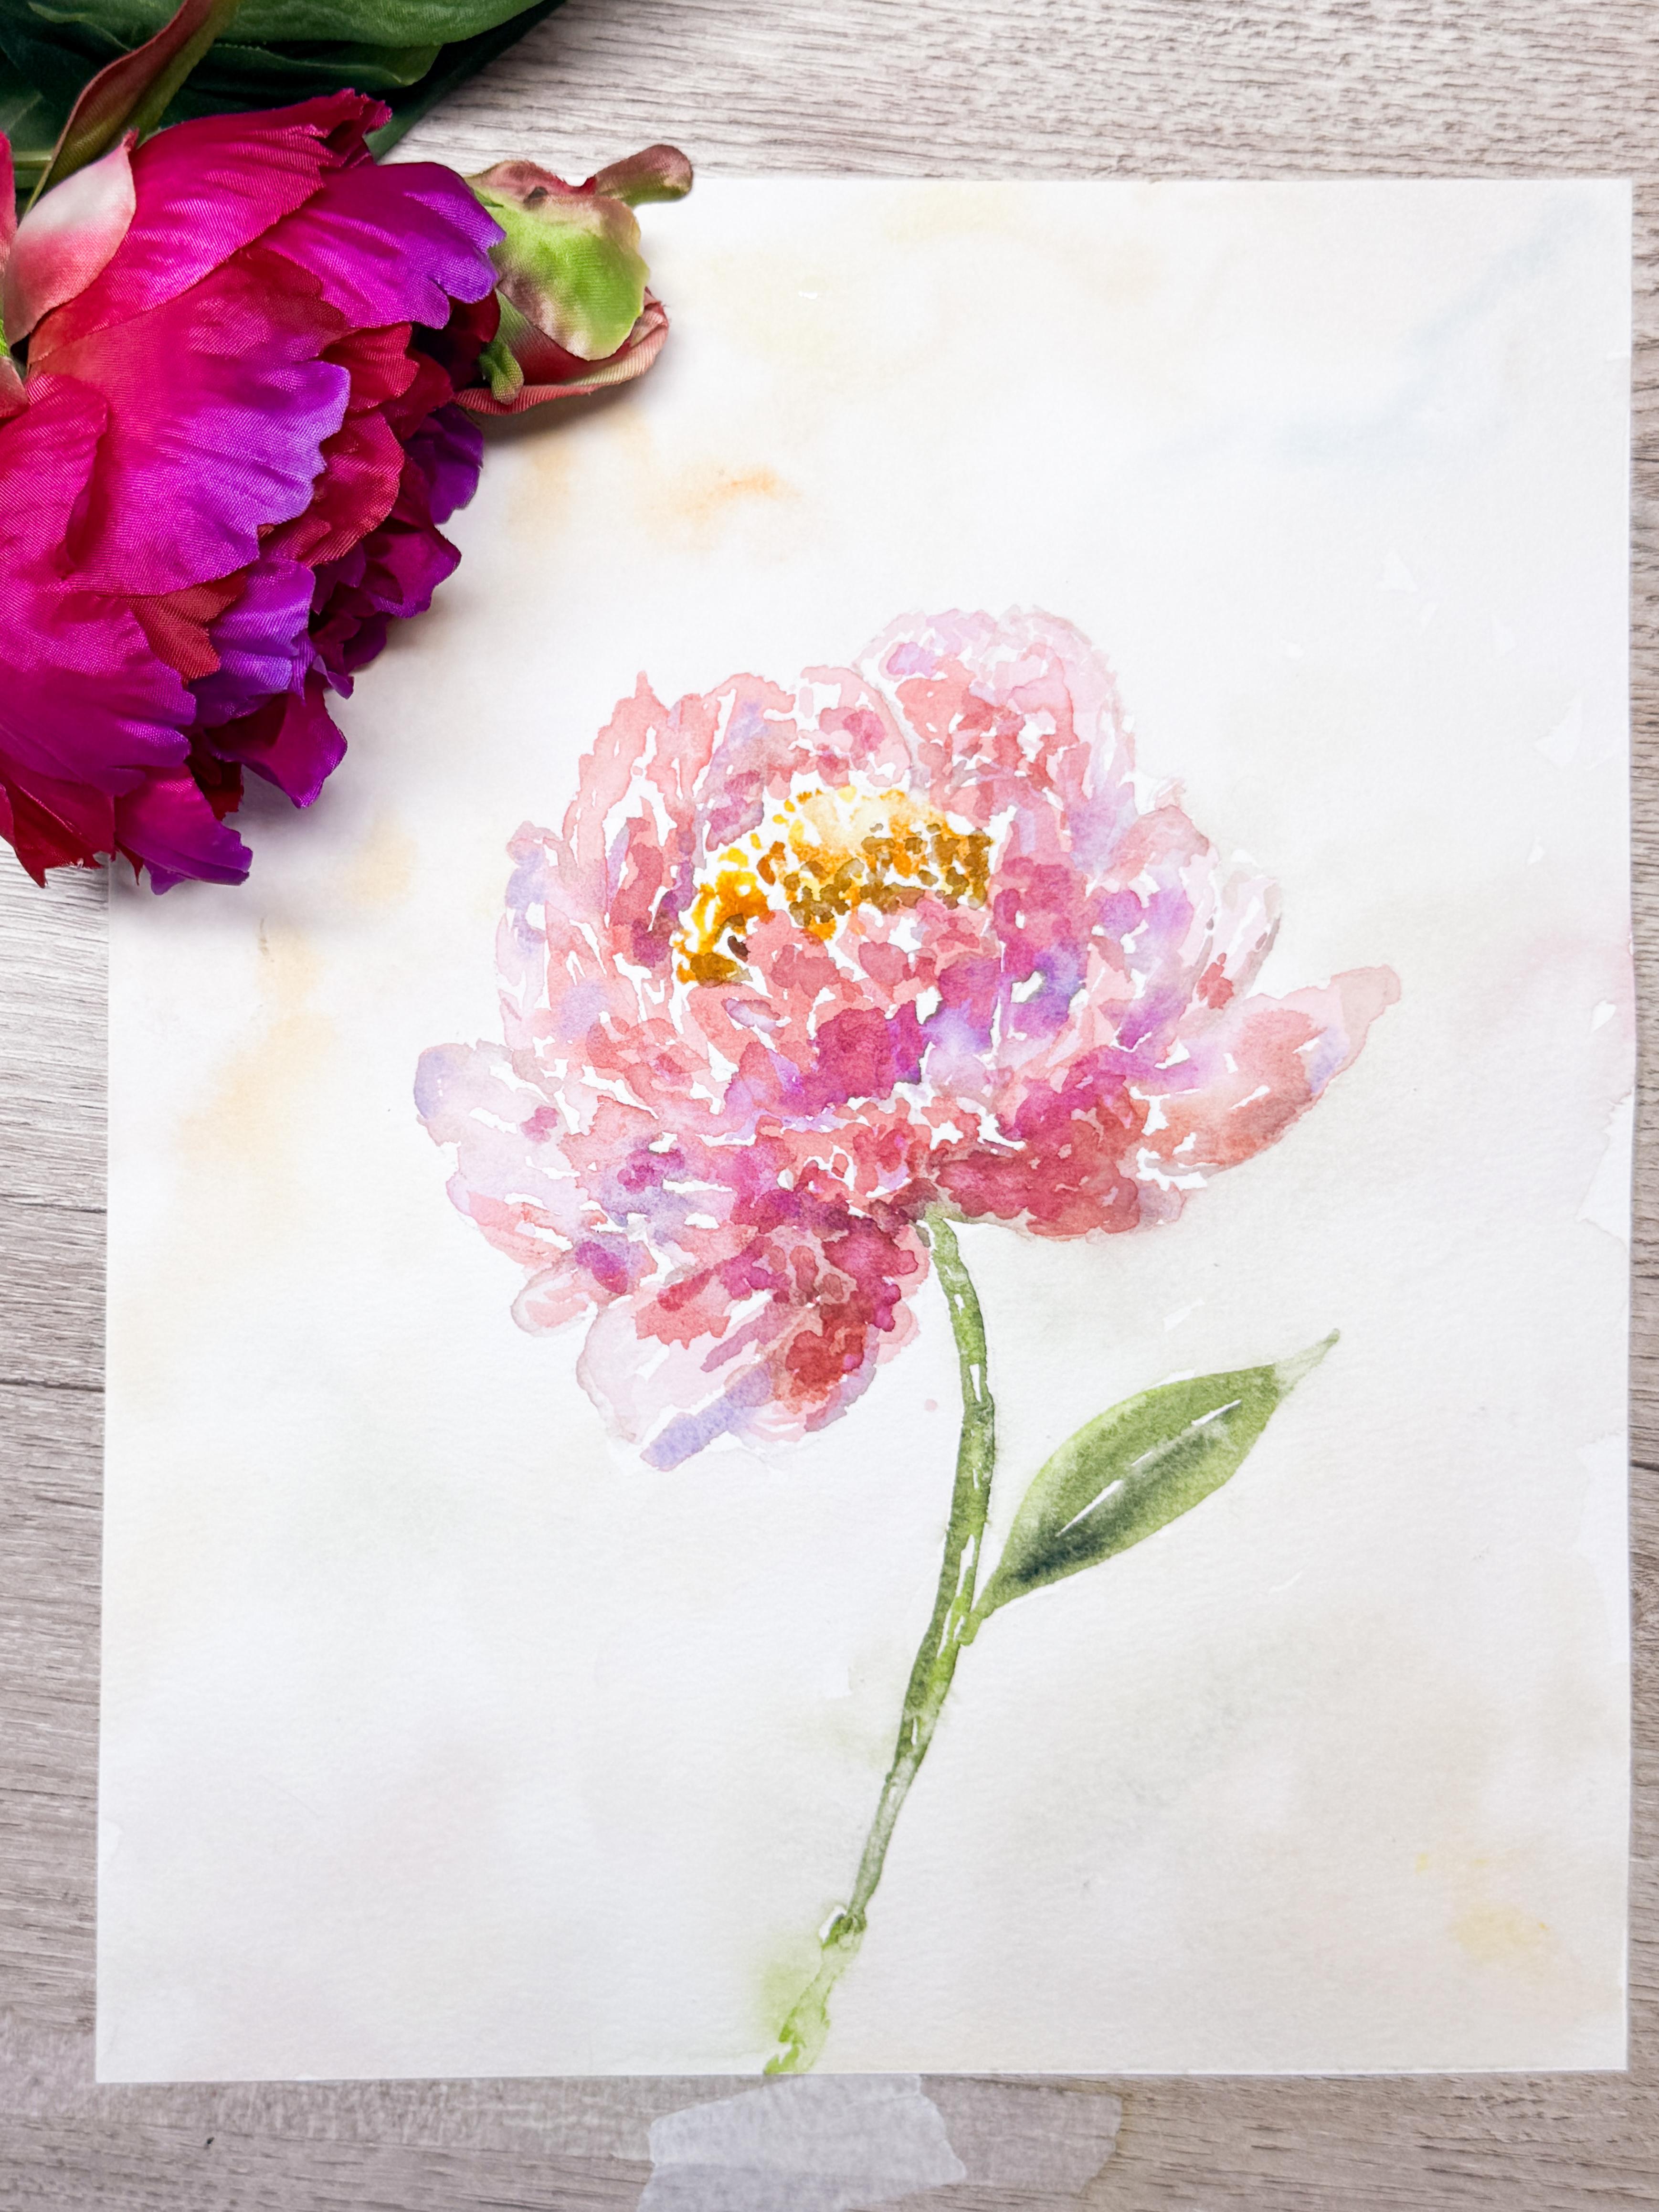
5. Final Thoughts & Your Next Steps: Congratulations on finishing
your peony painting. I hope you're taking a moment to appreciate what
you've just created. Peonis can seem complicated at first because of their
overlapping petals. But hopefully, this class has helped you see
that we don't have to paint every single detail to capture that
beautiful flower. One of the most
important lessons in watercolor is learning
what to leave out. Sometimes the areas that
we are suggesting is even more interesting than the areas that we
have fully defined. As you continue painting, you'll start to develop a better sense of which
details matter and which details can simply be implied with a few well
placed brushstrokes. I hope that this project help you become a
little bit more comfortable working with soft edges and
atmospheric backgrounds. These techniques can
add wonderful sense of lightness and movement
to floral paintings, while helping the main subject remain the star of
the composition. If your painting turned out a little different than mine or different than you expected,
that's completely normal. Watercolor has a way of teaching us something
every time we paint. Some of my favorite
pieces have come from moments where
I stopped trying to control the outcome and simply worked with what I
was painting and doing. I would love to see
your finished peony in the project gallery. Whether you're completely
happy with it or still experimenting and learning,
please share your work. It's a wonderful way to build confidence and connect
with students. I truly enjoy seeing the different
interpretations that come with the same project. If you enjoy this
class and would like to see more of my
watercolor tutorials, I'd love to have you follow my profile here on Skillshare. That way, you'll be notified whenever I release a new class. If you found this
lesson helpful, I'd also be grateful if you took a moment
to leave a review. Reviews help other students discover the class and helps me continue to create projects that support your
watercolor journey. Hopefully, you just finished your piece and that
you're starting to feel a little bit more
comfortable letting the paint move and
just do its own thing. This really is something
that builds over time. The more you paint, the more
natural it'll start to feel. I'd love to have you join me in another class. See you soon.
 Brenda Jones, Watercolor Artist & Teacher