Transcripts
1. Introduction: Hi, I'm Elizabeth. Welcome to my torn
paper collage class. I've been teaching on
Skillshare since 2021 and I have been a professional
educator since 2005, teaching students of all ages, sharing my passion
for artists and art history and art
exploration art techniques, especially mixed media works, and just sharing everything that I love about art
with my students, whether that be in person or
online in classes like this. Class is mostly focused on using torn paper to build
up a collage background. You could lean into
rainbow or you could go with any other
color scheme that you like. This class is
approaching it as if you already have
the collage papers. So if you need to make
some collage papers, you should check out some of
my other Skillshare classes, or you can absolutely use
any other collage paper that you have or find
around your home or studio. Class, I walk you through the basics of building
up the background, and then we add a fun and easy St. Patrick's Day
inspired pot of gold. That is an optional step. You could absolutely
just lean into torn paper collage as a
really fun, relaxing, colorful way to have a quick art making session
and leave it there, or you could continue on
and add anything else that you wanted to on top of
your torn paper collage. You could add words, you could add found images, you could create
some other imagery to celebrate whatever
you want to. But this is my fun take on Torn Paper collage for
St. Patrick's Day. Let's send it over to
the next lesson to talk more about our class
project. I'll see you there.
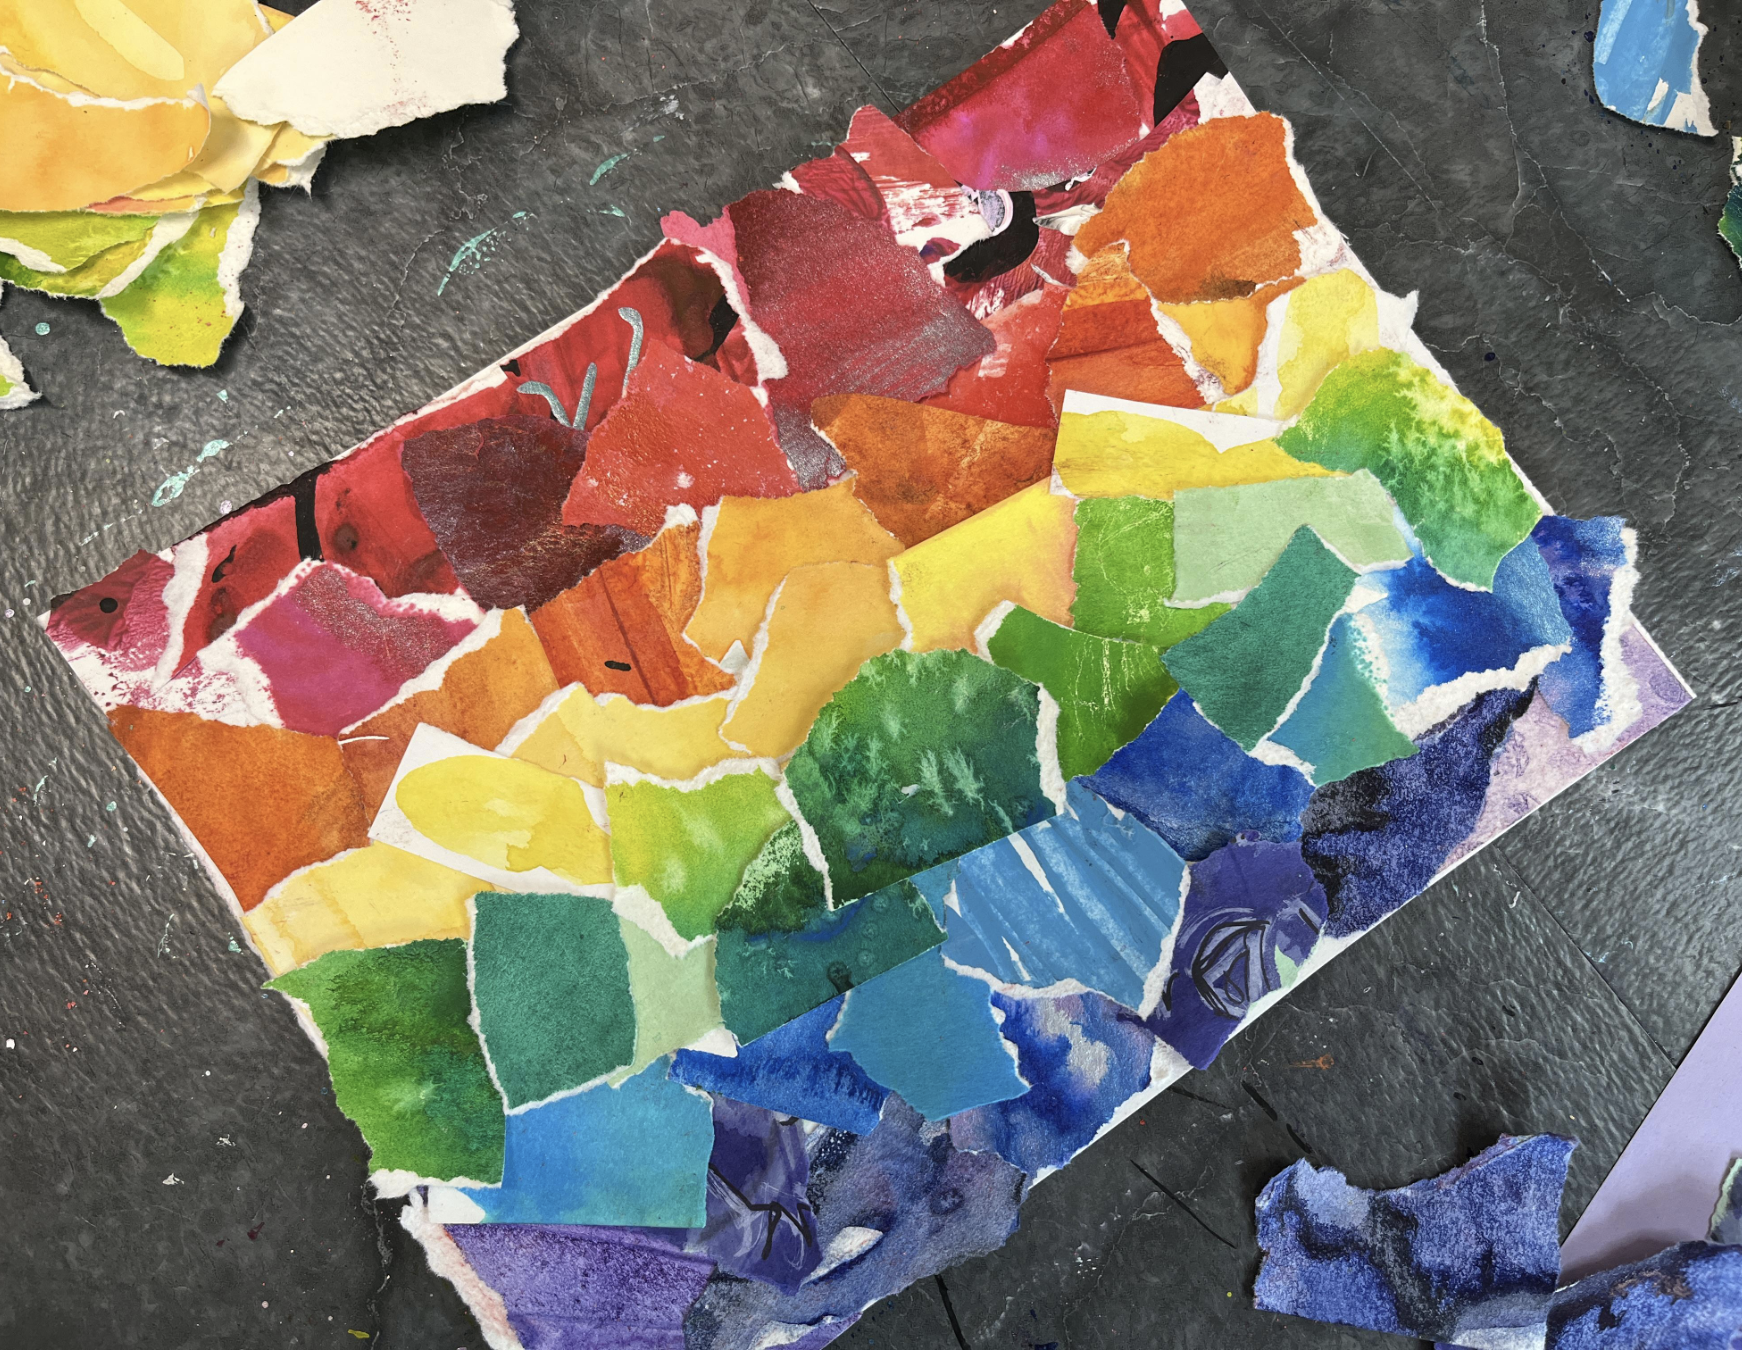
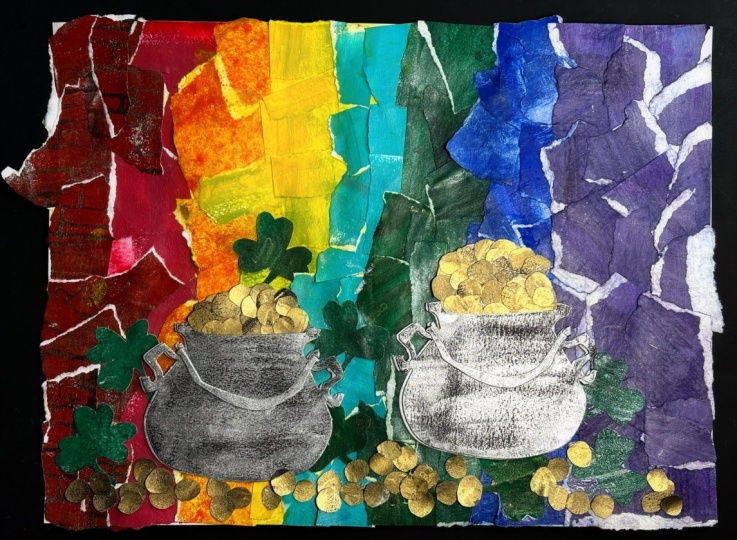
2. Class Project: And For our class project, we are going to be using torn up paper to create
a torn paper collage. I have created all
of these papers, either using watercolor
techniques or acrylic techniques, leftover paint, I make
collage papers all the time. So I have a very large stash. This project came
out of wanting to do something fun for
St. Patrick's Day last year and wanting
to use up some of my papers that were sitting around and some
small scraps I had too. It was kind of a fun way to use papers that were
leftover bits, too. I really wanted a lot of
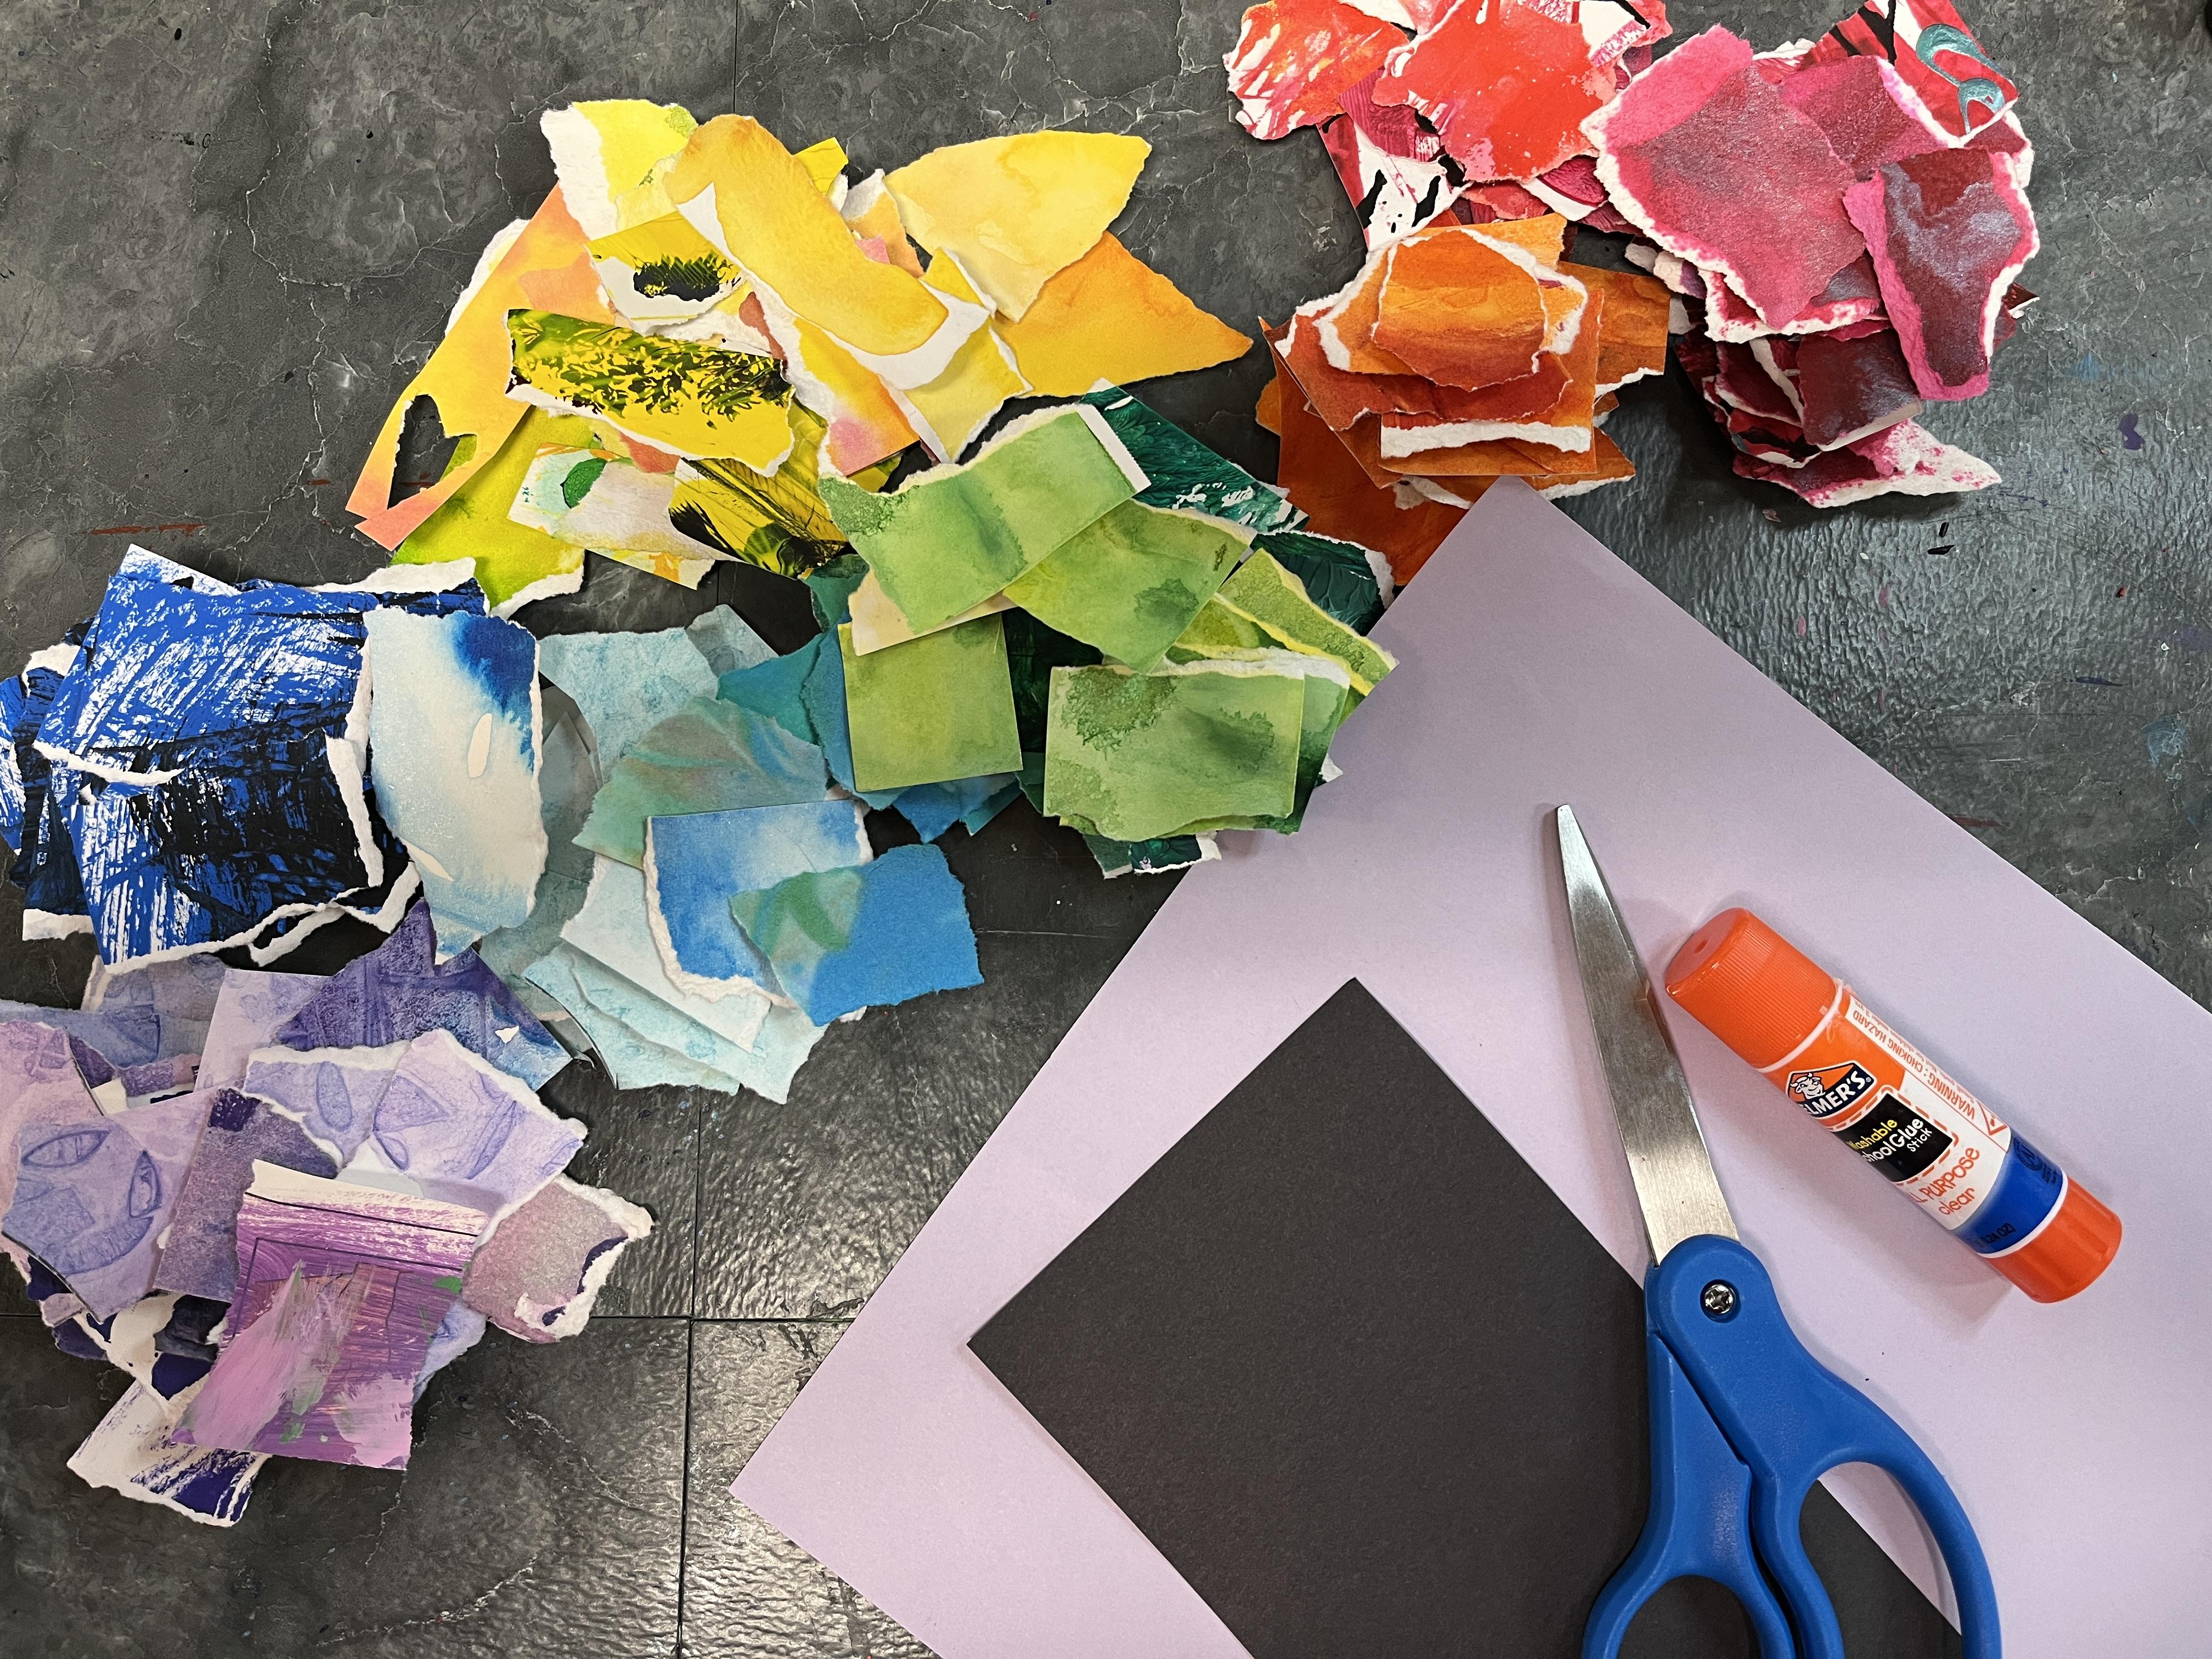
variety even within the color. I collected out my
collage papers. I tore them up into squares, and then I will show you
in the demonstration how I build up my torn paper
collage background and then how I added just a really
simple cut paper shape for the pot of gold
and the gold itself. Let's sent over to
the next lesson, and I'll talk to you a little bit more about the materials you're going to want
to have on hand for class. See you there.
3. Materials: So the materials for our
class project are going to be a piece of drawing paper
or mixed media paper, something that's
going to be able to handle a lot of collaging. And then you are going to use different collage papers
that you're going to tear up into small pieces to represent the different colors
of the rainbow. I have used different
painted papers. So papers that I have done different watercolor
techniques on or acrylic paint techniques so these
are all papers that I've created on watercolor
or mixed media paper. I had created big sheets
for different collage, mixed media projects.
I have a large dash. So I just kind of
went through those and pulled the
colors that I wanted for my rainbow and
then tore them up into mostly rectangles. You could also use collage
papers that you find. You don't have to
make your own papers, but if you're interested
in making your own papers, I have a couple other classes on Skillshare that teach you different techniques
for doing that. Either different watercolor
techniques to treat your papers that you can use
for additional watercolor, mixed media artworks or ways you can use
your acrylic paint, whether it's leftover
or new paint to make collage papers because I love making my own papers
for my artworks. Check those out if
you're interested, and then I've got a pair of scissors and I've got a glutick and then I've got
a small piece of paper that's going to
be my pot of gold. Going to do the pot and the
gold out of black paper, and then I'm going
to get out a gold, metallic marker or paint
pen to add in the gold. And then you can decide how detailed you want to get
for this part of it. And then I've got a scrap
paper that's my gluing paper. So I do all my gluing here,
and then I stick it here to kind of maintain and
control my glue mess. Gather up your
supplies, and we'll head over to the next lesson to get started on our rainbow
collage background. I'll see you there.
4. Color Collage: I've pre torn all my papers, and I'm going to start
gluing them down. I'm going to work left
to right because that is the most comfortable way for me personally to work on this, and I'm going to start with red and I'm going to
work my way through the different colors
of the rainbow. I'm just going to start grabbing
pieces of collage bits, loading it up with a
whole bunch of glue. And then starting
to stick them down. I'm not worried about
them going over the edge. I do want to fill up
all of the space, so I'm going to probably
overlap it a little bit, and then I can always
trim up the edge. This one I didn't trim the edge. I left the hanging over bits. I also have a little
bit of white, that's totally fine because
when we tear paper, we're going to have some pieces that tear and have
that white edge. It just adds to the
character of the piece. You could always go back
in with other media to fill in any white bits if you
didn't want those to show. But I like showing
that it is collage. I also find that when
I'm doing Ambre collages or rainbow collages
or anything where the colors are moving
across the page, I like to vary the type
of paper that I'm using. What I mean by that is I don't want to have one big
sheet of painted paper, say it's red, and then
tear that up and then all of my bits are the
same. I like more variety. I don't mind that there's
a little bit of teal in here or that there's
black or that there's white. I like having the different
kinds within a color, both of media and of technique, and then also any other parts where there's different
value variations. As long as the piece is
predominantly the same color. You don't have to do
that. If you want it to be more uniform,
that's great. You should do this
however you want to. I just really like when the paper themselves have
a little bit more variety, even when I'm going for unity. I have a white section
here that's a triangle. I'm going to skip down and
do another section here. It's a lot of back and forth. But ultimately, I'm aiming
for stripes across the paper. So what I might do if I
wanted to fill that gap, I could tear off
a smaller piece. You can always make your scraps whatever shape you
want them to be. It's totally fine. Then I'm working with relatively
thick paper. Most of this was
done on watercolor paper, these decorative papers. I often have to flip
my piece over and furnish the backside
just to really make sure that my collage
pieces are sticking down. Another way you could do that, I could put another
paper on top of it and I could furnish
it this way too. I find it's just as
easy to flip it over. Whatever works best for
you is what you should do. So I'm going to dig
through here and find some different types of red paper to go for that
variety that I want. I'm just going to keep
going as I go down. Building up my color as I go. I might inch up more
into where my orange is going to start just to
kind of help bridge the gaps. Because although
I'm doing stripes, I still want to
have a little bit of play of the colors
going into each other. If I notice that my collage
papers are not sticking down, I'm going to spend a
little bit more time burnishing just to get
that glue to stick. This one's a little bit
more on the orange side, so I'm going to start to creep over to where my
orange is going to be. I love that paper,
but I do want to keep things more in
the family of red. I'm using quite a bit of glue. You might find when you're doing this much collage work too, that you need to wash your hands a little
bit more frequently. You can do that by having
a damp towel nearby. Just make sure you
dry your hands off before you go back
to your gluing. Or you could just
get up and go wash your hands or you
could have wet wipes. It's another good go to art supply to have for
quick and easy cleanup. Almost done with my red
strength and a little bit more. I have this big piece, I
think that'll fill it in. I do like that edge though, so I might sneak
this underneath it. Perfect. Now I'm going to
start working into my oranges. I've got some red oranges, but I've from past papers. I'm going to throw a couple of those in there where I've got some sections where my red
didn't go over quite as far. You don't have to have all
of the in between colors, all the intermediate
or tertiary colors, the colors that go between
a primary and a secondary, but if you happen to
have some already in your paper, why
not throw them down? Add even more variation to your college and start
on that next strip. Now I'm jumping around because I've got something to build off of so I can decide where
these are going to go. A lot of my oranges
are orange orange, I might play a little bit
with that what goes where, dig through some of my more red oranges too do
a mix of the two maybe. If you feel like you've
got too much white, you can always tear or
cut off that excess. I like the torn edge, but sometimes with
those thicker papers, it's just too much. You could also do this step with any other collage adhesive you have because we're not working
back into it necessarily. You could mage page it, you could use acrylic
medium or matte medium is another good one
you could paint it on and do white liquid glue. I do tend to lean more into the painted liquid glues when I'm doing thick paper
collage like this. But because I'm working
with such small pieces, I feel like that's going
to get pretty messy. I just like to lean into the glue stick when I'm
doing small bits of collage. It's still going to get messy, but it's a mess that I can
control, which I like. So your thicker papers
are going to need a little bit more glue and a
little bit more attention. That's normal. Other thing you could
do, you could do all of this collaging
with a glue stick, and then you could go back
in over the top of it and seal it with Mg podge or a liquid glue just to
kind of help it set. That would be a great
idea. If you were worried about your pieces popping up,
it's just another option. And I'm not too worried
about running out of space. You could always work
on a bigger piece of paper and then cut it down as you've got your
final strip of purple. I will say this one, the red comes over
quite a bit farther. The orange is a little skinnier, the
yellow and the green. Like, it kind of varies. But I did start with
kind of a bigger strip, but I did go into some
of the red oranges, so I wasn't too
worried about that. And the purple gets pretty tiny. There's some areas where
the blue is really narrow. But I wanted the
essence of a rainbow and not kind of a perfect
measured out thing. But you can
absolutely chart this out in advance and sketch out on your paper lightly where
you're going to have your different strips change to make sure that you
can fit all of them in. That would be another option.
I'm focusing on six colors. I know that my yellow is
going to go about halfway. I might shrink back my orange a little bit by
overlapping some yellow just to help make
sure that everybody has a chance to fit on here. And my orange did go
over quite a bit, that'll work well if I do
that and shrink it up. I do have some
straight edge pieces. Those are nice ones to put
on the top, but again, it doesn't matter
because you can always trim off any excess
if you need to. I'm going to keep the yellow
pretty narrow because I do want to make sure that
I fit in my other pieces. Actually I'm going to shrink up my orange as I've
already gone past it. I'm going to take some
pieces and I'm going to just put them over the
top, let them go in there. Cut into the other pieces.
You're constantly adjusting. It's like anything. You're
kind of playing with that back and forth to get the
effect that you want. I have a nice mix of light
green and dark green. I like that variety, especially since my yellow is so pale, and I'm going to goch the
green over quite a bit because I want to make sure I have room for blue and violet. Don't be afraid to
cover up things. Even things you really like. Like, it's okay if things disappear the more that
you work on a piece. Don't hold onto it and
let it be so precious. It stops you from continuing
on with the work. I do want to make sure that
it's not becoming dark green, light green, dark
green light green. I don't want to make a pattern. I want it to feel a little
bit more random and organic. It's also nice to have a variety of different sized papers, have some bigger chunks
and some smaller chunks. I don't want my blue to
sneak over on my green too much to at least
feel balanced, even if it's not actually It gives you a little
bit more blue, and then I will be ready for
my last strip of purple. You could also paint a big sheet with all
the rainbow colors, make it one giant
painting of rainbow, and then you could tear
that up into the pieces too if you wanted to have
a little bit more control, or you needed to make paper
and you wanted to make one big paper that would
become these little bits. That would be great
too. If you're looking for another
way to approach this, that would be really easy to do with watercolor or acrylic. Then I think I just need
one more little bit. I really like the organic edges, so this bugs me. I'm going to find a
tiny piece or rip a tiny piece that I can collage in there
just to break it up. I have a teeny bit
of white there. I'm going to snake some of the leftover bit of
that tiny scrap I created and I'm going
to stick that there. Give a good furnish, make sure everything
is sticking. And then usually, I like to let this set because there's a
lot of collage bits on there. It's nice to put a piece of scrap paper on
it and then put a couple heavy books and let
it really stick to itself. And oftentimes I might
even put a scrap of paper and then put this upside down and
put another paper, just protect it all. But I'm going to skip
that step so that I can show you the rest of this and you don't have
to wait for that to dry. I have a lot sticking off. So to trim that up, I like to
flip my paper over and then that lets me see
where it's going off the edge. Optional step. I'm only doing it because I have so much ticking
off that one side. I'm just going to do a
little bit on the parts that are sticking off crazy
on the other edges. Just a little bit of cleanup and then get your
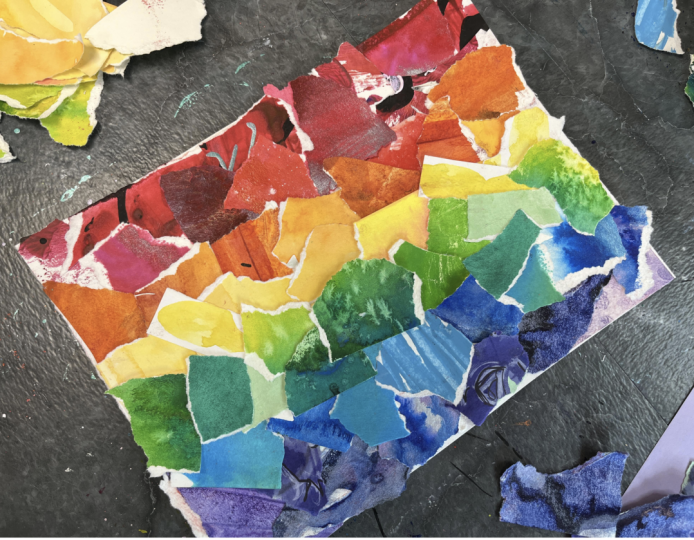
scraps out of the way, and then I have my rainbow, which you can also see is a
sunset over land and water. It can be interpreted
lots of different ways. I'm going to lean
into St. Patrick's Day because that holiday
is coming up and I have waited an entire
year to create this class and share it with you after creating
this original one. I am very excited
that I remembered.
5. Optional Addition: So you can make your
pot of gold as tall or as narrow or you can take up as much of the
space as you want to. You could have it
being the whole thing. I really wanted to
showcase all of the colored papers that
I had in the background, so I kept you kind of
small for that one. I might make it kind of big
for this one, actually. So I'm going to use
this paper for my gold, and I'm going to get
a bigger piece of black paper to make my pot. This is my bigger
paper. It is as wide as my background collage. So I'm going to use
that as a guide. And I'm going to trim it down. I can always keep trimming it, so I'm just going to get it generally to the size I think
I want to go for this one. And then once I have
that figured out, I'm going to take my pencil and I'm going to sketch out my pot. I'm leaning into
another cartoony style, more whimsically one. I'm going to show you a
fun trick for helping to figure out how to
make your gold fit. I'm going to start with
two curve lines to map out the body of my pot of gold, and I'm
going to flip this over. Don't worry about lots of sketch lines on here, we're
going to use the backside. Do make sure that your backside
is good or good enough. Then I'm going to go
ahead and round it, but I'm going to leave it a
little flatter than I did in my original just so it has a little bit more of
the sitting on the ground. You could add feet to
it if you wanted to. I'm going to let it just
be a flat rounded bottom. Then for the lid of the pot, I just like to keep it fun. I do like to give it a
little bit of a dip it's not totally following the laws of perspective or
anything like that. It's just a little bit
of whimsy that I like. And then what I can do is you can either
dry your gold too, but I liked it being
two different pieces. Not sure why. It's
just how it happened. So I'm going to cut out my pot, and this is your
chance to kind clean up your shape of it. Just get that ready. I think when I did
the original one, I was using black card stock. That's what I had around.
This time I'm using black construction paper because that is what I have around. A black paper will do. You could even do a
black textured paper if you wanted. All right. And then you flip it over, kind of see if it needs to
be adjusted at all. I'm seeing that this side doesn't really cut in
as much as the other. It doesn't have to be perfect, but I do kind of want it
to be fairly symmetrical, just for my own
aesthetic wishes. Alright. I've got my pot.
Liking that it's bigger. I very much enjoying that. So now, this is going to be
my template for my gold. So I'm going to take my piece
of paper, my extra paper. I'm going to put it behind it. And now I can kind
of see where it might come out of the pot. So I'm going to
kind of just create a blob of gold that's coming
out from inside my pot. Just some sort of wibbly wobbly mound of
gold awesomeness. Then I can cut that line because that is the part
that is sticking up. Again, I'm going to
flip my paper over, so all of my pencil lines
are going to go away. Now I have the gold. I flip it over, straighten out anything that got a little
funky in the cutting stage. It's going to be a
mirror on this one, which actually does bug me. I only have a teeny bit of pencil marks
that show through. So you can flip yours over
or I'm just going to just lightly erase those knowing I'm going to go back
over with gold, it's not really going
to be a big deal. And then I've got the amount
of gold that I started with. I am going to adjust
it a little bit. I'm just tweaking it and changing the shape and making
it fit a little bit better. There we go. Great. Okay, so that is my
gold for inside my pot. I'm going to trim it
down a little bit. I've got a whole lot of it.
The overlap is intentional. I'm going to glue
my gold to my pot, and then I'm going to
glue it to my background. What I want to do before
I do that, though, I want to go in with
my gold marker. I have a couple options. I have this metallic craftwork
pen. I love this. This works great. I also have in my betam acrylic marker set, I have a gold metallic. I still need my collage paper
for later. To attach this. I'm just going to fold
it in half for right now so that you can see it a little easier
on my art table. So make sure that's
the size I wanted. Then I'm going to take my gold, and I'm just going to kind of, like, do a little bit of coloring in and a little
bit of scribbling. I kept it pretty loose
on the original. We can take a look at that
one while we're working. I left some black
showing through. This markers drying
out a little bit, so I'm going to switch
to my other one. So it's basically the scumbling or scribbling inking technique. If you've ever used that
is what I'm going for. I do want to take this one a little bit further
than I did last year. So I'm going to get the
basics down with gold, and then I think I'm
going to get out some colored pencils this time. This is completely optional,
all of this stuff, but I do feel like I want to add a little bit more range to
the gold that I put in there. So I'm going to add
a little bit of yellow with my colored pencil. And then I'm also going to
add a little bit of white. It's just going to kind of bring it to life a little bit more. And maybe even some
light yellow, too. Maybe that instead of
the white, actually. I don't want to draw
out all the coins. I don't really want
to focus on that. I just want some texture just to kind of make
it seem kind of fun. I think I still need
some more gold. So a little bit of gold on top of that color
pencil texture. So just back and forth
with the different media. I think that's pretty great. I still want to break up that
black a little bit more. So I'm going to do it with
some sharpie. Not everywhere. Just kind of a little
bit here and there. And then I can even
mute this again with the gold I want to. We can start gluing
this together, and then we can
decide if we want to add the gold at the bottom. So I'm going to put some glue on the lap part that I left long. It doesn't need to be
a ton, just enough to adhere it to my pot. Then I'm putting
my gold in my pot, given that a good burnish. So it attaches,
double checking it. Feels good, and then I'm
going to put blue all over the bat because this is
now going to be stepped down on top of all that
layering of paper. I really want to
make sure it sticks well. Scoot that aside. You're going to get
a rainbow page, decide where you
want this to go. You can always add
text to this too. I'm going to put it
a little lower and then flip it over and give it
really, really good urnish. More paper you layer
into your collages, the more you really
need to get that glue to stick a good burnish
will get you there. You could add Shamrock, you could add all sorts
of fun stuff to this. The reason I added
these is because it just felt like it
needed more last time, and that's how I'm
feeling this time too. I'm going to take my
black paper scrap and I'm just going to cut some rounded bits that can become some gold that is spilled out of
my pot of gold. It's basically just cutting
a bunch of half circles. It I like to make
sure that I round it. Then we're going to do
the same thing we did originally put some gold
on there, gold texture. I love beta markers so much, but I do find that when
one end starts to go, I need to remember
to flip it over. Now I'm going to add some of this brightness to
this piece too. And a little bit
of light in there, and then we'll add a
little bit of sharp and then we can glue that
down onto our paper, put some glue on it,
and then stick it down. Some my scraps out of the way. Where do I want that to go? I just right there, kind
of off to the side again. You could do multiple
pieces of skilled gold, too, like I did in
the first example. I think I put one down and I felt like I needed
some more layering. But this one, I think
is good like that. So two different ways to play
with town paper, fun color, easy art making, festive
for St. Patrick's Day, or when you just feel
like making a fun, colorful background
leading into the holidays. Well send it over to the Less
lesson to wrap up the plus. I'll see you there. H
6. Final Thoughts: Mm. I hope you had so
much fun creating a colorful project
for this class. I had a lot of fun
sharing this technique with you in this
approach to making fun, colorful collages and I can't wait to see
what you created. I hope that you'll pop on
over to the projects and resources section of class and share your artwork
with everybody. Then don't forget to take
some time to leave a review. That's the best way
for others to find the class and get an idea about what it's about from the
student perspective. It also is a great way for
me to get some feedback as I can future classes and
tweaks to make to those. If you want to stay
connected here on Skillshare, be sure
to give me a follow. If you would like to
connect off the platform, I would love to see you
over in Instagram or on my YouTube channel where I share lots of fine art
adventures I'm going on, things I'm doing in the studio, classes I'm teaching in person and online, all things art. There's lots of good stuff
over there to get you inspired and ways that we can connect with our art making. Thanks again for
taking the class and I hope to see you in
another one real soon. Till next time.
 Elisabeth Wellfare, Artist, Art Educator