Transcripts
1. Introduction: Okay. Are you looking for new ways to create
mixed media artworks? Are you curious about
how to incorporate portraits into your mixed
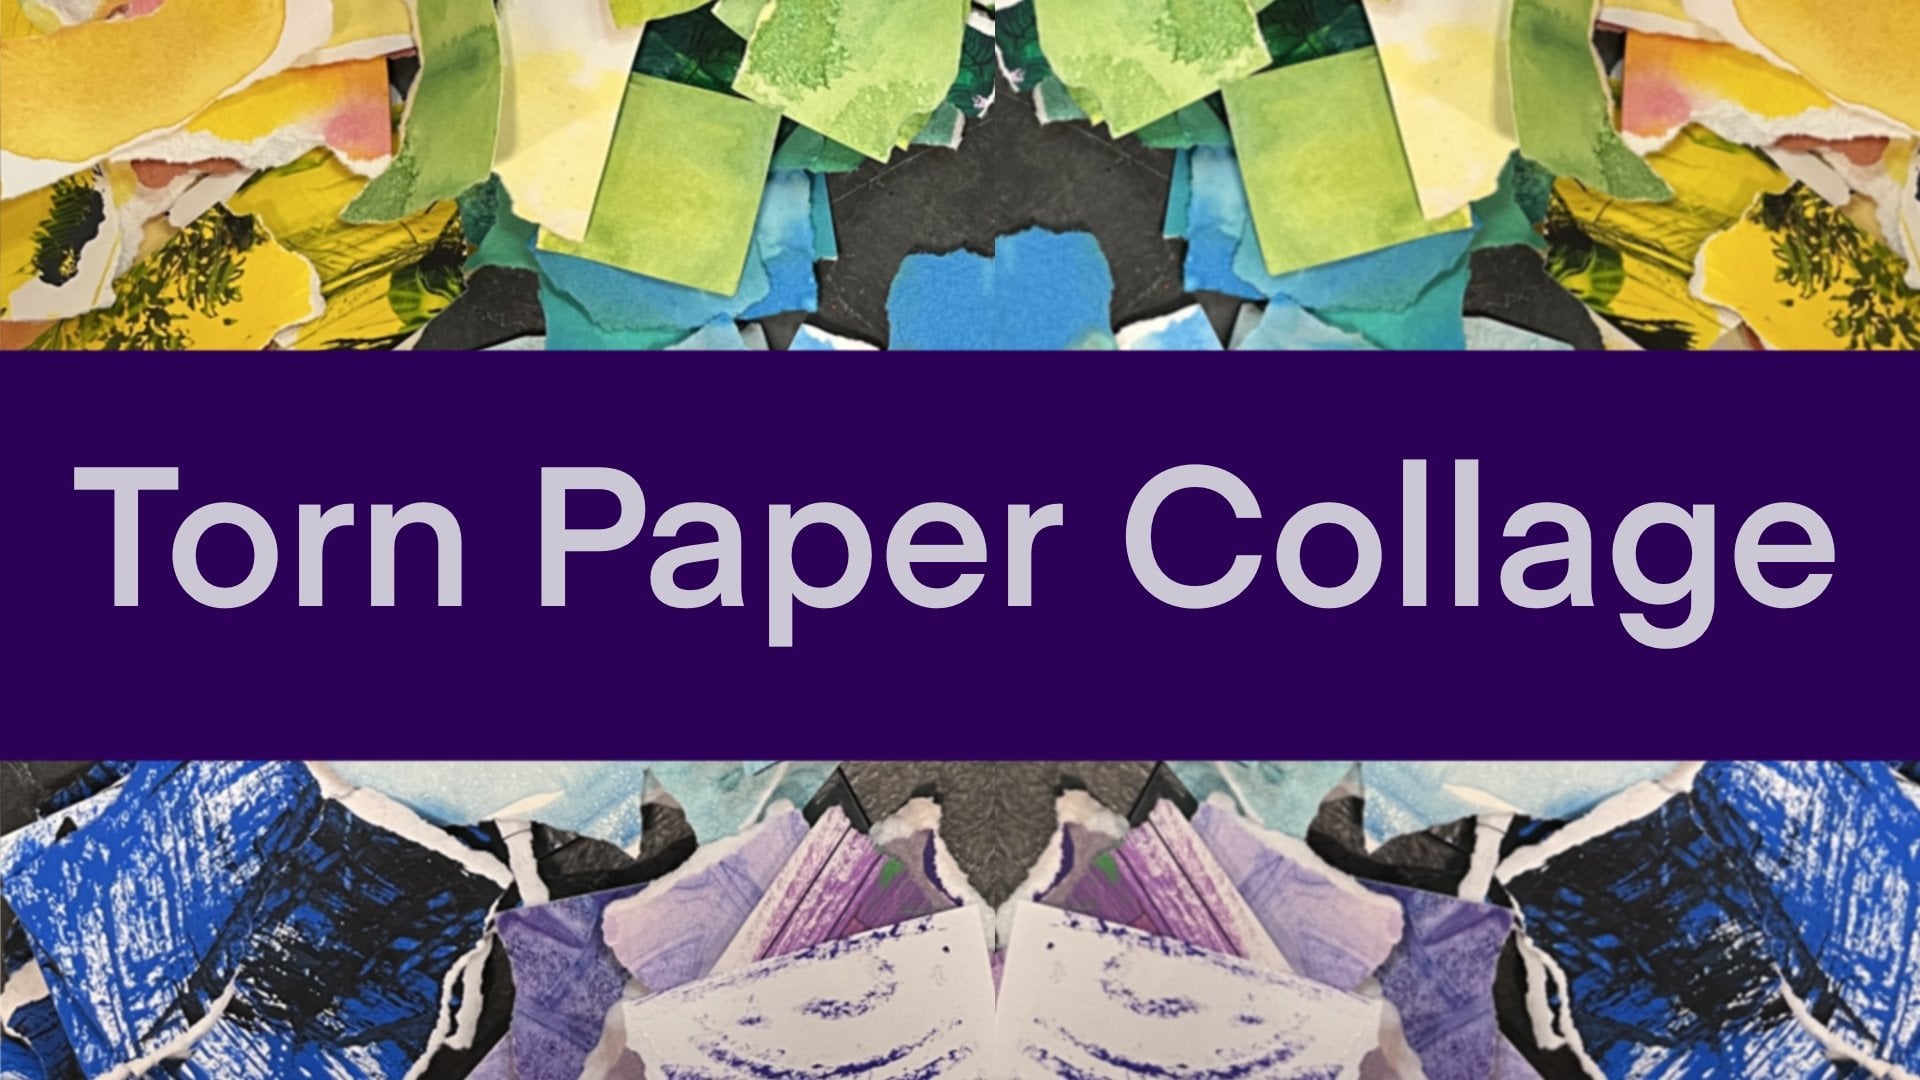
media art practice? Hi, I'm Elizabeth and welcome to my class Mixed Media collage
Silhouette portraits. I am a professionally trained
artist and art educator, as well as a published
author illustrator. In 2020, I began
teaching for Skillshare, developing classes that explore a wide range of
materials, techniques, and art making
approaches as I share my creative journey and artistic practices
with my students. I love exploring mixed media
techniques and finding new ways to work those materials and techniques into my artwork, and I love coming up
with new ways to work collage into my mixed
media art practice, as well as finding new
ways to break down some of the more
intimidating art concepts, such as in this case,
with portraits. Then we'll add lots of fun mixed media techniques and materials as we bring our new collage
silhouette portraits to life. There's a wide range of
materials that you can use. I have a few that I'm
particularly fond of, but really you can work
with whatever art supplies you happen to have on hand. This class is intended
for creatives of all skill levels as a fun
way to get into collage, mixed media art practice, as well as incorporate
portraits of sorts into your
artistic journey. By the end of this class,
you'll have created some fun decorative
watercolor papers. Learn how to incorporate them
into a collage practice. You'll have learned how
to use magazine portraits as a template for mixed
media portrait artwork. And ways to add mixed
media techniques to your portrait collages. I hope you'll join me in this really fun mixed media
collage portrait class. Okay.
2. Class Project: Thanks for joining me.
For our class project, we'll be creating some fun
watercolor textured paper, choosing a magazine portrait
for our collage template, cutting that out and then
building up our collage image. Then we'll a lots of fun mixed media techniques and materials as we bring our new collage
silhouette portraits to life. Our portraits will
be silhouettes, but you can add as many
details as you like. If you don't have access
to magazines, no worries, popping over to the projects and resources section of
class where I have several uploads of different
portrait silhouettes that you might want
to use for class. This class is designed
for students of all experience levels as a fun way to create mixed
media collage portraits. It's so fun to see how everyone approaches
an art project, especially when it involves mixed media and collage and
watercolor technique papers. I really hope you'll consider
sharing your project in the student gallery on the class project
section of class. The first step is to gather
up our art supplies. So let's head over to the
next lesson to see some of the materials that
you might want to work with. See you soon.
3. Materials: Welcome back. Now, let's talk about a few art supplies
that you're going to want to have on hand for
class and some that you might want to
consider having nearby. I've included a list of necessary and optional
art materials over on the class description
section of class. The materials for this
class are pretty simple. We're going to use some
watercolor or mixed media paper. You can decide how big or
small you want to work. I like going rather large
so that I have a lot of flexibility with space to both have my watercolor
texture techniques as well as my options for collage and then adding in mixed media materials. So I would say your end piece should probably be around
nine by 12 " at smallest. But you can go as
large as you want to. This piece of paper for my final one is going
to be 18 by 12 ". You're going to want to find some magazine portraits that are about a full page
in size or pretty decent in size so that we have something really
interesting to work with. The size of the
portrait will actually probably dictate the end
piece that you work on, depending on how much
additional space and negative space in the background that
you want to have. So I would say portraits
that are about this size are what you're going to want
for your portrait template. We're going to be
cutting those out. So we need scissors. We're also going to
be doing collage. I like to work with
white liquid glue, and then I like to paint that
on with an old paint brush. It's an old acrylic paint brush. I like having these
little cups on hand, so I can fill them with the
glue and then easily paint. Then I like having
some scrap copy paper on the side too to keep the gluey mess on the scrap paper and not
on my art table surface. For the mixed media
part of the class, you can really work with
anything that you want to. I'm going to be using
some fine liner work. I'm going to be probably
getting into some brush pens. I've got some acrylic
paint markers, so I really love
how bold they are, and then some colored pencils. Those are kind of my
standard mixed media go to when I'm working back into a collage that starts with textured watercolor
paper. And that's it. You can use as many other mixed media art materials
as you want to. You could get out
your oil pestels, your soft estels, charcal, any other markers that
you have on hand. There's really no limit to
how far you can take this, but you could also just do
it with watercolor paper, ballpoint pen, and
leave it at that. Take some time to gather
up your art supplies and then head on over to
the next lesson where I will meet you to begin working on our watercolor
texture techniques. See you soon.
4. Watercolor Texture Techniques: Okay. Welcome back. Let's begin creating our
watercolor texture papers. There's a wide range of ways
to work with watercolor. But when it comes to
creating textured papers, my go to is always wet and wet. I wet the surface of my
paper and then I work with some really juicy color
so that I can build up some really
beautiful color on my paper before I start
applying my texture techniques. Let's take a look at two watercolor texture
techniques for class. So to kick off this art project, I wanted to go over two
new watercolor techniques so that you have some
experience creating some textured watercolor
paper that you can then use in your portrait collage
and mixed media projects. So both of these techniques
are going to be wet and wet. So the first step is
always wetting the paper, and then we're using wet media, which is why it's
called wet on wet. So I've wet my paper that I've taped down to a sheet
of plexi glass, and now I'm dropping
in some color. And I really love to build
up juicy vibrant color. So sometimes it takes a
little bit of time depending on the type of water
color that you're using. So this one, I
decided to kind of go with an analogous
color scheme. Because we're working non
realistically for this project, you can use any color
combinations that you want to. If you're new to creating
decorative papers and working with a wet on wet
technique for water color. Analogous is a good way to go. So an analogous color scheme are colors that are next to each
other on the color wheel. The great thing about
analogous colors is that you use the same colors
to kind of make them up. So when they bleed together
and mix together on the page, they're going to make
another beautiful color versus if you're kind of
jumping across the color wheel, you can sometimes end up
with some muddled stuff. So for this technique, I wanted to just play around
with watercolor blooms. So that is where a
wetter amount of water or water color paint is
dropped onto a wet surface, and then it pushes
the pigment out and creates these really
beautiful bloom edges. Wet the paper, paint
in a bunch of color, and then you just splatter some water or water color
over the top of it. And as it hits the page, it pushes the pigment out, and when it dries,
it's really beautiful. So the next technique
begins the exact same way. We're going to wet the page, and then we're going to drop
in lots of nice juicy color. This one is a texture
that's created using either gauze or cheese cloth or any kind of fabric material
that's kind of like that. I didn't how many
cheesecloth on hand, so I decided to use some
medical gauze for this. So before I started
dropping my color in, I cut out my strips of gauze. So I'm just kind of making
them about the length. A width of my paper. So the next step is
to drop in the color. The more color you have, the more of an effect you're
going to see with something like a gauze or a cheesecloth
texture technique. So I'm just using a bunch
of different greens. And I was taking a
long time to get the vibrancy that I really wanted with my pan water colors. So in the end, I
did decide to grab some really bright yellow
liquid water color. I'm using black
liquid water color. It works great for these textured watercolor
papers because the color is so bold and you can get a lot of it in a tube, which is a bottle,
which is really nice. So you just kind of drop
it down on the page, and then It's going to do
its own wet on wet reaction. Blick liquid water color
is a little gubbier, a little thicker consistency. So I do like to add
a little bit of water to kind of
help move it around, plus I really wanted the
juicy effect all over. And because the texture
technique was going to completely change
the painted surface, it doesn't really matter what it looks like before you
put the gauze on. So here's a point
where I am stretching out my gauze so
that I can really start to see the fibers in there for how it
is woven together. Cheese cloth you
won't have to do this with as much,
but this gauze, I really needed to to cover to the surface and to really
get the effect I wanted. And then I press it down
because everywhere it touches the surface is where
the texture technique is going to show up, and we really want
that texture for this. So I'm stretching
out another strip, and I'm going to lay that
across the watercolor surface. And then I decided to cut
another little section just to really cover the whole
surf I step so that I had a lot of that beautiful gauzy textured fiber technique happening when I take it off. And this is a technique where we're going to
have to let it dry. And then once it dries,
we'll remove the gauze, and then you can
see that it should look something like
this dried image. Let's head it over
to our next lesson. Will we wait for our watercolor
texture papers to dry. See you there. Okay.
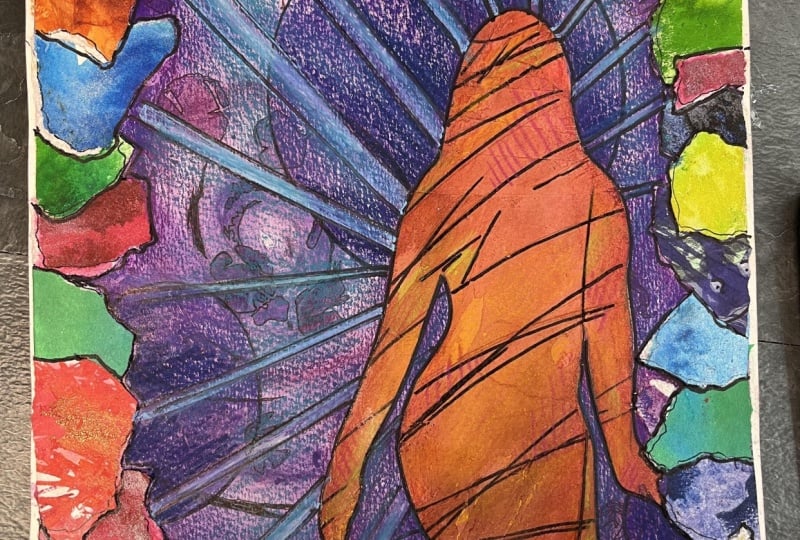
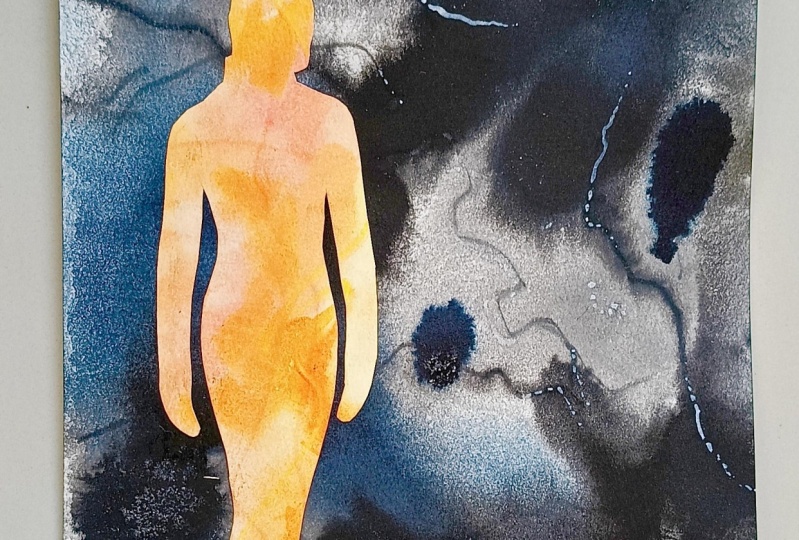
5. Silhouette Portrait Collage: Okay. Welcome back. Now, let's choose which magazine
portrait we're going to be using as a template to
create our portrait collage. And then let's get that transferred onto our
watercolor paper and begin building
up the portrait collage portion of
our class project. So for our portraits, we're going to be using
magazine images as templates for the
silhouette shape. So I've got four
different options that I've pulled out
of various magazines. These would all be really great. The what you want to think
about is the outside shape. So if I chose this one, I would have a straight
on silhouette, which can be totally great. These ones, I've got a profile. This one is a nice
three quarter shot. We're going to know it's a face because of this line here. The rest of the
details on the inside might vanish when it
becomes a collage. So that will be something
we'll have to think about. And then here's another three quarter shot going
the other way, which also this one, we can
see the back of the head. We've got a little
bit of the body. This might be a better three
quarter shot than this one. You might want to save this
face for a different project. Let's actually set
that one aside and think about which of these three is going to give me the look that I want for
my portrait silhouette. I think for this
one, I'm going to go with the middle one just because there's a lot of body there. There's the hair to work
with, and it's going to give me some really
interesting negative space. But you want to go for something like this when you're
looking for your portrait, something that's
fairly full page for your magazine image. So the next step
is to cut it out. So we're going to go
ahead and cut along here. And Magazine paper
is pretty thin. So we want to be careful, especially if we're cutting
some smaller areas. It's okay if it's not perfect. We're going for the silhouette. If we end up with some
of the background there as well,
that's totally fine. It's going to carefully cut around the details of the mouth. We can always clean up
any rough edges later on. Then our silhouette there's two different ways we can do it. It can be with the
magazine image facing up when we trace it onto our
decorative watercolor paper, or we can flip it upside down. And I'll show you. If
we leave it up right, we're going to end up
with a mirrored image. Then I'm going to go ahead
and get my decorative paper. Now, I have to decide, I've got a couple options, and I want to have
one is my background and I want to have one is
my figure as my portrait. Here's the one that
I made in class where I dropped the water down. This one I had made
previously, these two. I had made for a
different class. These are some extras and
this is using salt technique. If you want to learn
more about that, definitely check out some of my other watercolor decorative
paper related classes. This one is with liquid
watercolor and ink. This is pretty
great and vibrant. Then this one doesn't have as
much going on as I'd like. I'm going to set that one
aside. This was an experiment. These both were experiments with ink and liquid water
color and blotting, but they're a little more
muted than I want to do. Then this is one where it's a watercolor and
ink abstract that I did that has now
made its way into my collage. Let's see. I'm going to save this one for a future
poisonous dart frog. Then this green looks
nice with that pink. This is a little crazy
eliminate this one. Then, I do like this
in that together. These look nice together because the greens create a unity there. The pink is a nice pop. I'm going to go with these two. I have to decide
what's my background and what's my figure. One way you can do that
is you can look at one full sheet for the
background and then just put a little corner on it and see
how you like this against that with this being
taking a background to it. Then we can do the
same thing. This way. Cover that up, squint a little bit too to
see which one feels. It wants to be a background. It really doesn't matter
which way it goes, and it's going to change
a lot when we get into mixed media work. Let's do this. Let's keep this is
our background, and I'm going to use
this one for my figure. I'm going to set my
background aside. So she is going to
go down on here. What I love about doing this, I love doing this
on the back side, and I don't really know what
part I'm going to pick, but I do know that I want
this white border to go away. I'm going to quickly cut that off so that I don't end up with the tape border as part
of my collage portrait. She's going to fit
on there this way. I'm just going to go
ahead and flip it over. I really like that she's
looking to the right. I'm actually going to
trace it upside down. If I kept her looking to the right and
traced it this way, my actual image would
be looking to the left, like I said, that
mirrored image, but I I want to keep
her to the right, so I want to trace her
looking to the left. I can put it all the
way down on the bottom. I know that she's not
there's no white edge there. The other thing you can do is if you're worried
about this slipping, you can take a little
bit of tape and we can create some tape balls. We're going to trace this. With pencil. But if you're
worried about it slipping, you can just put a
couple tape balls down just to keep it. Keep it from scooching on
you while you're tracing it. That's attached,
and I'm going to go ahead and take my pencil and I'm going to trace around the image. The reason I like to do
it on the back side is because I don't want
these pencil marks on the watercolor side. If you want to see what exactly is happening on
the watercolor side, feel free to do
this the other way. And then you don't have to worry about flipping your image over or anything because what you trace is what you're
going to get. But I like to just be able to get some nice
trace lines and not have to worry about them because they might disappear in
the mixed media step, but they might not. And you can't erase
pencil off of watercolor paper without
damaging the paper in some way. Then you can take this off. We are done with the magazine. Unless you really love
this and you want to keep it for a different collage or more silhouette work or just in case something happens and you
want to start over. Set that to the side
and then I'm going to cut out my shape. We don't have to be
terribly careful, but the closer you
cut to your outline, the more like your template, your portrait template,
it's going to be. Then this is the super fun part. Save your extra because this is a lot of really
great decorative paper. We're going to set
that up for the side. This is my favorite.
This is the Bak veal. Awesome. So if you
planned it out, you already know what part of your paper you're
using, but I didn't. I just randomly placed it
on the back and traced it. So I let the watercolor
technique gods help determine. I still have a
little salt on here because I'm going to be doing
mixed media back into it, I do want to get those
granules off a little bit. I want to be able to draw
and paint back into this. Now I've got my portrait, and then I'm going
to go ahead and get my decorative background
paper out again. She's going to go
off to the side. Unlike the other one that I created where I had
a vertical format, this one is probably going to be horizontal. Well, it
doesn't have to be. It absolutely doesn't have to be because actually that
might be pretty cool. Then I might still
cut this down a little bit because that's
a lot of height there. And I want to because I have
a corner from my picture, that kind of
determines that this is going to go down here. So actually, I'm
going to go ahead and trim off the border
on this one, too. It's not just I only
tape it enough to get it to stay on the board
during the painting process. If you tape farther in, you probably have a really
lovely white border, which can look really sharp. But I'm always in such a rush to get to the
painting part of it that I don't take
terrible care with my taping process other than
getting it as secure as I needed to be to get the paper really with color and water. So Optional step off the border. The scraps out of the way. Now I need to decide
where is she going to go? She going to go that way? I can always cut it down. I like it vertical, I think. I like having that extra
area on the top to play with B she's whimsically
looking off to the side. The question is, do
I want it this way? Or do I want it this way? I like this corner better. I don't know, no rhyme
or reason to it. I'm going to go
ahead and get out my liquid glue and an old paper brush and I'm going to go ahead and glue her down. But actually, now that
I'm thinking about this, we can do more to
this background. We're going to ink
into it and paint into it and all that good stuff. But we could actually collage more into this, maybe
that's what we'll do. Maybe that's where
this paper comes in, we cut this up in some way. I'm going to glue ahead
and glue it down. I've got a little cup that
I'm going to go ahead and put my liquid glue into.
These are really great. I love picking these up
at our food supply store where you can get
stuff in bulk for catering or parties or whatever. These are just
little sauce cups. They come with the
lids, which might actually let your glue last for a little while if you
needed it to potentially. I haven't actually tested it. Now, the one other
trick that I have is I love a scrap piece
of paper because then I can put whatever
piece I'm gluing down on there and that I don't have to worry about glue
all over my art table. I'm using the white
liquid glue because I am working with mixed
media watercolor paper, so it's a little thicker. A glue stick might work if
you have really thin paper, but oftentimes I
find that I need the thicker liquid glue to
really get it to adhere well. It's going to get all around the edges and sum in the middle. I work a little bit
quick for this step, and then pick your portrait up, place it where you want it. Then once you've got it there, gently squash it down. The liquid glue does add a little bit of
moisture to the paper. Right now, my paper feels a little bit damp,
but that's okay. The other nice thing
about the brushes, it helps me keep from getting too much glue because I can control how spread out it
gets with the paint brush. Now I've got my collage
portrait on my background. I'm going to keep
gluing, but I have to make some decisions about what's going to happen with
some more collage. I'm going to wash my
brush really fast. At this stage, I have a
lot of choice to make. I can go right from this into other mixed media materials or I can collage more into this. That may be fun to
play around with. When I was putting
her down on here, I had a feeling of this
idea of adding a frame. But to do that, I would need a paper that
was a little bit bigger. I like that idea. I'm going to go ahead and trim off the border on this one. Then I'm going to actually cut this into a frame that
goes around here, and then that actually solves my dilemma when I was
trying to pick which paper to use because I do still really love this paper with
these other two. Colors together,
like the textures. And mixed media artwork. You really there's so
many things that happen along the way that change
how an artwork looks. A lot of it is just trusting your intuition,
trusting your gut, listening to whatever ideas come to mind and fearlessly
trying them out. No idea is a bad idea. No, I'm going to get a ruler. I'll measure it just for the
sake of being a bit ter. Let's see. I'll just do an inch. I'll keep it very Very thin, but it'll just kind of
give a little picture frame feeling to it. This is something I
haven't tried before. This is an idea that
just completely came on spontaneously in this moment of creating this piece and
explaining my process to you. Intuitive thought
process in action. I'm going to measure in an
inch all the way around. Then I'm going to connect those lines and cut out the middle. Then the middle
will give me more decorative paper to
use in the future. But I also have this
really cool frame idea. I think it's going
to be really cool. I'm excited about it. That's
the most important thing. C. Then I'm going to
use my exacto knife to cut these out so that I can get a nice clean
cut on the corners, just like I would do if
I was matting a piece of art and cutting the
mat hole myself. I'd want to be in control
so that I could stop right at that corner and have
a nice clean corner cut. Okay. So if you have done
any matting of your artwork, same idea. I should say if you've done
any matting of your artwork and you don't have a mat cutter. Same idea. My giant cutting mat is wrinkly, like wobbly. It's really old. I need a new one. But the back of an old sketchbook
works great. Ruler. Exact knife. I'm going to do is
I'm going to line up my ruler with
my pencil line and I'm going to I'm only going
to cut from one corner. Make sure my blade is tight. From one corner of my
pencil lines to the other. I'm going to go through
that line twice. Great. Because I'm
working with thick paper. Actually, I'm going to
do both of the shorts first so I don't have paper sliding
around on me too much. Line at my ruler. This act
knife cut through once. I found over the
years when I'm using these act knives I used
to be really impatient. I kind of expected
one cut to do it. I have since learned that
more cuts gets me a cleaner, more accurate line,
cutout section. So I'm still applying a
nice amount of pressure, but I'm I'm letting it do multiple cuts
so that I don't have to like working smarter,
not harder, right? Okay, almost one more cut, and then we'll make sure we
loosen up those corners. I can already tell they
didn't quite cut all the way, and I want to be careful
that I don't rip them. Okay. So now, just go ahead and carefully
free that corner. And that one. Here we go. And this one still attached a little bit and gently
moving it around. Okay. I still have all of
this beautiful paper to use for something else, best of all, I have a really cool textured
watercolor frame. I'm going to go ahead
and, I love this. I'm so glad this
idea came to me. Now, there is a little
bit of buckling there that's from the back paper because of the glue drying and the moisture here and
the dryness here. That's going to be fine. I'm not going to worry about
that right now. I do want to decide which
way I want my frame to go. That way. That's the ticket. No, actually that way because I like what's happening
up there more. Then I like the bottom. This
is about the same size. I could cut my smaller picture down if I wanted to, or I can. Actually, I'm going
to do that. I'm going to go ahead and pop over. I only want to take off
a tiny, tiny little bit. I'm just going to
take off a little bit over there at
my paper cutter. This is all I took off just
this little strip for now. I want to make sure I want to make sure that I have enough room to tape
it to the frame. I don't want it to come
loose. I could glue it. Actually, I probably
should just glue it. Then everything will be
attached more. Let's do that. I'm going to set this
off to the side, and I'm going to get
a big scrap of paper. I'm going to go ahead and
I'm going to put glue all along my frame
and then I'm going to place my figure on top
of it. Scrap paper. Now, I don't need to go all
the way to the end because I know that I have a
little bit of space. There. So I'm just going to paint
a thick line of glue all the way around the inner
part of the frame. And then after this
step, I am going to I'm going to put it
upside down and set some heavy books on top of it and just let it hang out
for about 10 minutes just to let that glue settle
in and dry a little bit before I move on
to the next step. But after this step, I might be done with collaging. Because I put such a
detailed frame on it, that might change how I feel
about collaging further into either the silhouette
or the background. I go to work fast. I know this is the top. I'm
going to make sure I put her on the way I want her. Scooch it a little bit. I want it to be
right in the middle. I know that I didn't cut
anything off the sides. That looks good. I'm
going to burnish. Sorry for the shaky camera. I really want that
to stick nicely. Now, the whole thing is
starting to warp. Totally okay. Well, let's do the
big reveal. Oh, yes. Yes, I love this.
Indecision about decorative papers can
really work in your favor. I'm going to be super curious
if you also try to do a decorative frame on yours because I think
this is super cool. And this is just
the collage step. Because there's so much going on between all of the decorative
papers that I'm using. This is going to be up
for my collage portion. If you want to collage
further into your background, if you want to create more of a collage
textured background. Collage pattern, break it up some more with collage,
break your figure up. However you want to do that, collage as much as you want to. Then when you're done with
the collaging portion, I recommend flipping it over. I'm going to go
ahead and put this scrap paper on top of it. Now I'm going to let my
portrait collage dry for at least 10 minutes just
to ensure that the paper dries out a bit and the glue is set before I begin applying
mixed media techniques. I'll see it soon in
the next lesson. Okay.
6. Mixed Media Techniques Part 1: Okay. Now it's time to begin using different
mixed media techniques to enhance our
portrait collages. As I said earlier, you can use whatever art supplies you have on hand for this
portion of class. My go tos when it comes
to mixed media collage tends to be ink brush
pens, colored pencils. Those are my top three. But sometimes I also like to
paint back into my collages, feel free to experiment and play with whatever
art supplies you have on hand or follow along with the techniques that
I'm going to be doing. Let's get started. We're ready for the next phase
of our project, where we're going to
start to work back into our collage silhouette portrait using mixed media materials. I have a sharpia fine liner. I've got some marker, brush pens, I've got
my colored pencils. I'm going to get out and anything else that
comes to mind. I already have a little bit of ink work happening
in the frame that I decided to add from a previous collage
paper abstract piece. I definitely want to incorporate ink into other parts of this. I think because the silhouette on mine can lean
toward abstract, even though there's an
outline of her face there, I might want to do some work to make the
background darker, especially around her so that the facial features in this profile view
are more apparent. That's something I'm
thinking about doing. I do have a system for how I
go in with my mixed media. As far as the sharpie and the fine liner and
the colored pencils go, those I can go back and forth between, and
it's not a big deal. But the brush pen,
I do like to do that before I do my
colored pencils. I'm not sure. I'm not actually sure which direction I
want to go with this. But I think what I'm
going to do first is I'm going to start
adding some inking details to my background. To try to give it a little bit more definition and to push it back behind her because right now
this lightness is competing with the brightness in some parts of my silhouette. There's a little bit
of a fight happening for what's foreground
and what's background. That isn't necessarily
a bad thing because we're working a
little abstractly, a little loose
representationally, but I do want my background
to be my background. I'm going to try to
push it back a bit. One way I can do that
is by adding ink. I'm going to go ahead and
start inking the background anywhere that feels right, and then I'm probably going
to jump two colored pencils. We'll see. I'm going to
start with my fine liner. This fine this is a CPA pen. It's not waterproof. I do have to be a little bit careful because my brush pens, they will reactivate this ink. I might not be able to do
brush pen in my background. If you're concerned about it, definitely go with
a waterproof ink so that you have the freedom
to go back and forth. But I am out of waterproof
ink pens right now, and I do really love the
line of the SIPA pen. That's what we're
going to use today. It's going to be great. One of the ways
that I like to ink is just starting to go along the edges that are created by the textures
of the water color. Essentially outlining is
kind of a good first step. If you're new to inking or you're just
not sure where to begin. There's really no way to worry. It's not a stressful process. It's actually relaxing, especially if you
allow yourself to be a little bit more loose
with it and you don't worry about
perfectly lining up with all of the marks and edges that were created with your
textured watercolor. You can also add things
that aren't there. Not worry so much about
the harsh definition and just have some fun with it. Which is what I'm doing in
a lot of these sections. The blooms have given me some really lovely
sections to go along, but I don't want to spend
all day inking this. I just want to add
some fun ink details to create some definition
to the background. I'm going to let myself be a little more relaxed
in how it goes. If you're interested
in other inking techniques that we might not get to in this one that I might not explore depending on
where this piece goes. Definitely check out my
intuitive art making, I think it's called
simple watercolor and ink abstract techniques. You can find it in
my skiture profile. If you want to check out some other watercolor
techniques, some other inking techniques. Watercolor and ink is one of my favorite mix of mediums
when it comes to mixed media. It's one that I do a lot of. I love sharing ways that
I do that to help inspire others to add that to
their art practice. All right. That's a good start. That's getting interesting. The important part about mixed media really art in general. But mixed media, especially
is to just be fearless. There's really nothing
you can do or add that is going to ruin something. Everything is going to
just further enhance it. I'm going to go in with some colored pencil
and I'm going to try to keep pushing
that background back, but also add some interest. I'm just going to do a couple
pops of darker color that match what happened with the water color and try
to add sar interest. And then I'm probably going to jump back to the ink again. We'll see where it
goes from here. The color pencil is
something you can go in fold and just create
blocks of color. You can also just add
a little a couple of value scales where you've got some darkness
that fades out, and that's what I'm
going to try to do. I'm going to really try
to get my colored pencil to fade out into what's already happening
with the water color. And just continue to break up the background into some
interesting sections. The color pencil is going to show the tooth of your paper. Depending on how
toothy, your paper is, you might have more
or less texture that shows up with the
colored pencil. That's not a problem at all. I just know that because
I want to fade mine out, I just have to spend a
little bit more time on the fade out part
so that I can get it to disappear into
where the water color is. This is also a great way to practice your pencil
control if you are newer to shading
because really it's just all shading is all
about pencil control. And getting it so that you can create the values that you
want to where you want them. Pretty cool. I'm
very happy with it. And then as you're
going, you're going to notice areas that you might need to go back to help create
a balance in your work. Don't be afraid to jump around and revisit some sections as you decide and to really embrace some of the
techniques that you're using. Add some great colored
pencil additions. So this is part of
the process, right? You make a decision, you do it, and then you have to
evaluate where to go next. There's still some
competition happening between the figure
and the background. That's okay. I have to figure out where I want to go next. I think I'm going to jump
to the figure and kind of incur a bit and maybe
add some brush pen in two. Actually, maybe I'll do
the brush pen first and then see where I
want to go next. We're kind of phase one of
mixed media techniques, and then we're going to tackle another stage of mixed
media in the next lesson.
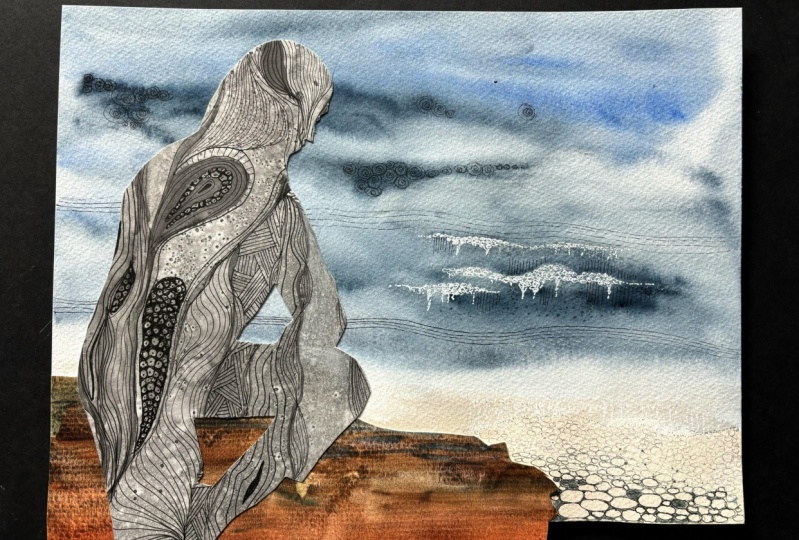
7. Mixed Media Techniques Part 2: Okay. Now we're going to work on doing some mixed media techniques to the portrait part
of our collage, and then I'm going
to see if I need to go back into the background at all or the frame
that I put on it to see what else it needs. Now, I decided I want to
be a little bit bolder, and I'm just going to start going in with some brush pens. These are dual tip brush pens. So color is the brand. I really like them.
They work great, and I rarely use the fine tip. I almost always use the
brush tip portion of them. But you could do the same effect that I'm going to
play around with with going back in with your
watercolor or even guash acrylic, but I want to really make her
pop against the background. I'm just going to go in and use my watercolor texture as a guide to decide how
to make some stuff pop. If I work fast enough
with my brush pens, I can get them to blend out. At this point, it could
get really abstract or it could get you could lean more
towards representational, depending on how
much texture you have in your portrait
watercolor paper. We're going to see, I'm
going to let this go abstract and just really embrace what's
happening here with all of this salt texture
that I have from this paper. I'm just trusting my intuition. I'm just playing around taking pauses to reassess
where it's going. This is the point
where it might have some awkward moments because I'm making some pretty
bold decisions, and that's okay
because I know that in the end it's going
to be really neat. I'm just embracing whatever's happening here. You should too. But if you're new to
intuitive art making, this might be a
point where you need to just be bold, be brave. You can't do anything wrong. That looks good. I want to go in with some darker
green, I think. I don't want to lose the
light areas from my texture. If anything, I want to
make those pop even more. Another important point is to keep taking moments to pause and take the
whole picture in. It's really easy to get sucked
into a small section and forget to check back on yourself and see
where things are at. I'm going to go back and forth
between these two greens. I don't really like
this harsh line that's happened here
and I'm going to try to reactivate the marker a little bit so that I can soften that. I can also soften it with
colored pencil, too. You might find it
picking up some of your water color since the markers are a wet
media, and that's okay. I go with some yellow. Pop that a little bolder. And some sections to try to be a little
sketchier loosen up. I think that'll help
me eliminate some of the harsher lines that can happen when you
use marker brush pen. The other thing I
like to do is to these really light markers and use that almost
like a blender. You would a color a
splendor and colored pencil or a blending stump with
other drawing media. It picks up a little bit
of the color that's there. It lays on its own color. Depending on what color you put it with, it can
help soften it. In this case, it's
intensifying it. So it's doing the opposite of what I was
hoping it would do. But like I said, I can go
back in with colored pencil and play with that to help
soften things up bit. I think I'm going to go in with some fine liner and just
start to ink some stuff. Things feel a little
muddled at the moment. I'm just going to
super loosely go in and follow some of
my lines around. I'm already ing it
better. I don't know. There's something
about that black line, although it's a very bold
statement in a piece, it also I don't know, it just helps in so many ways. I went up into my other
section. That's okay. I'm going to embrace that. Her break the outline
of the silhouette. Let's see. What else
do we want to do. Let's go with some
colored pencil. If you find that
your color pencil isn't really going down
like you expected to, it's probably because if you use something like a
brush pen or a marker, your paper is now a little wet. You can wait or you can just embrace the way it's
going down on the page. I'm doing a combination
of the two. I think I need to
be a little bolder with what's happening here. She's gotten pretty abstract. We can't really
tell she's there. Maybe I need to pull back
on that a little bit. This is a white paint pen. It's showing a little bit of what's happening
underneath through. I find a lot of joy in my mixed media
practice when I really embrace layering and texture
mark making texture. Interesting. One
direction marker is making folder marks
than the other way. But I think I also
did less brush pen on this side. She's
getting there. I'm going to flip
this over because I really want some of
these to be bolder. She's definitely
getting abstract. I think what I want
to do is I'm going to circle back to the
background and I want to do a little bit more bold work in the back just to help create
some more separation. Because if I squint, there's still a little bit
of competition happening. I really like this angled
line thing that's happening. I think I'm going to do it across these sections and close them up, almost
like stitching. If you go faster, you actually end up with a straight line. I don't like that at all. We're
going to get rid of that. We're going to go
in with some pinks and I'm just going to
d that down a bit. That's one of the great things
because we're working with mixed media and we're
working with layers. We truly can layer out things
that we don't love as much. I have to keep going with these lines in a way or at least get them to stop in a
way that makes sense, which I might be able to do. But I'm going to have to do them somewhere else to unify it. What I can do is I can
I can shrink the space. I'm using the techniques that
I did earlier to help me eliminate how much of
that I'm going to have to deal with it's right in
the middle of the picture. But I can also go back
into it with paint pen. But I have to remember that
the paint pen is going to activate my fine liner because I'm not using a
waterproof fine liner. I actually I'm liking it, but now I have to
treat more areas with that darkness because otherwise it'll look strange. It's okay. I'm going to just
repeat the things I didn't like and then follow the steps that
I used to fix them. I'm just following the
same steps that I did. Up there again. The cool. The cool thing about mixed media is you really don't know where an artwork is going to end up because
every time you add a mark, you add an art material, you make a decision,
it changes things. You just along for the fun creative ride,
which is amazing. I know. In the end, I'm
going to love this. I just need to stick with it through some of
these awkward stages. I do need to do some
more of that dark black though because otherwise,
that'll stick out. Unity yet spontaneity
is what I'm going for. I'm going to paint
back into them. That's what I'm going to do. I'm going to get
up my watercolors. I'm going to paint back into
some of these other areas. Let's start with some red
and a little bit of pink. I'm going to start
up here. Now again, my watercolor is
going to activate my fineliner and that's okay. I'm just going to
be a little careful when I get up to those edges. You can also do a glazing
approach to your water color at this point and let
it go over areas. Actually, we can pull
that color across. Even pick up some of
that color. Yeah. Let's doing the job. This
is working out great. Let's do a little bit more pink. Because I know I'm going to end up painting
over all of it now that I've embraced glazing. I can paint a bit more
sloppily and it'll be fine. It actually makes for
some pretty cool effects. My paper is warping.
But when it dries, we can put a heavy book on it again upside down and we
can flatten it back out. Don't worry about that. As
I get it more and more wet, it is going to
warp a little bit. That is working great actually. That's now all gotten a lot
bolder and a lot darker and now the brightness of the greens on my figure are popping off
that really nicely. It is going to mellow
out a bit as it dries. You can always decide
to go back into it. But I'm really happy with that. I'm going to go
ahead and let this dry And I think it's done. And then after it's dry, I'll put a piece
of paper over it, and I'll put a couple of
heavy books just to kind of help flatten
things back out again since we have the
combination of now re wedded watercolor
paper with collage. I love this, and I
can't wait to see how your mixed media collage
site portrait turned out. Let's turn it over to
the final lesson of class to wrap things
up. See you soon.
8. Final Thoughts: Okay. Thank you so much for exploring mixed media and portrait
collages with me. I had so much fun working on this class and creating
this class project, and I hope you did, too. I would love to see how
your projects turned out and hear how things
went for you in class. There are two ways that you
can share with everyone else who is in the class and those considering
taking the class. The first is to upload
your projects to the class resources section of class in the student gallery. This is a really fun
way to share images of your artwork both in process
and the final project, depending on how you like to document your creative process, as well as adding some notes about what techniques you use, the watercolor texture
papers that you created. Anything goes when it comes to sharing in the class
project section. The second way that you
can share with others, your experience is taking the class is by
leaving a review. This is a really great way to help others who are
considering taking the class, find out what it was like
from the student perspective. I'm not only a skill
share teacher, I'm also an avid
skill share student, and I really appreciate the opportunity to leave a review on the classes
that I've taken. And I appreciate checking out the reviews that past
students have left as well. It's a great way to share your experience
with the class to give the instructor feedback on how things went,
what you loved, that they might want to consider
doing in future classes, and even suggestions
for things that could be added or anything, really. It's really a wonderful way
just to kind of summarize your thoughts as you wrap up the learning experience
of that class, as well as provide others
with some insights as they consider their next steps in their
creative journey. So if you do have time
to leave a review, thank you in advance so much. I greatly appreciate it, and I can't wait to hear what you thought
about the class. Do have questions
during the class, a great way to get in touch is through the
discussion section. It is a wonderful way to post questions both to me
during your time in class, to fellow students who
might be taking the class. It's really a wonderful way to start building
classroom community. I will be happy to
reply to any questions, comments, feedback that you share in the discussion
section of class. I love sharing my art adventures over on my Instagram channel, and that includes
celebrating student work. So if you do share
your class project, I'll be sure to ask you if it's okay if I can reshare it over on my Instagram to help others find the class to see the amazing
work that you've created. And I also love following
other creatives. So if you would like to stay
connected on Instagram, be sure to leave your
Instagram profile name. In your class project,
and I will happily jump over on Instagram and follow your
creative journey there. If you want to stay up to
date on my newest classes, be sure to click
the follow button so we can stay connected
on Skillshare. And if you want to continue your creative journey
with me elsewhere, you can also find me over on YouTube under Elizabeth Welfare, where I share art tutorials, demonstrations, what I'm working on from the student and
professional artists perspective, art adventures I go on, really all things Elizabeth and all things art over on
my YouTube channel. So, feel free to jump
on over there and follow and connect
that way as well. And if you do pop on over
to my YouTube channel, be sure to click
Subscribe so we can stay connected and
leave a comment. I would love to continue
engaging as fellow creatives on this wild and
wacky art journey that we have going
on in our lives. I love hearing from and
connecting with my students on and off Skill Share. And
I'll see you next time.
 Elisabeth Wellfare, Artist, Art Educator