Transcripts
1. Introduction: Hello, everyone. I'm
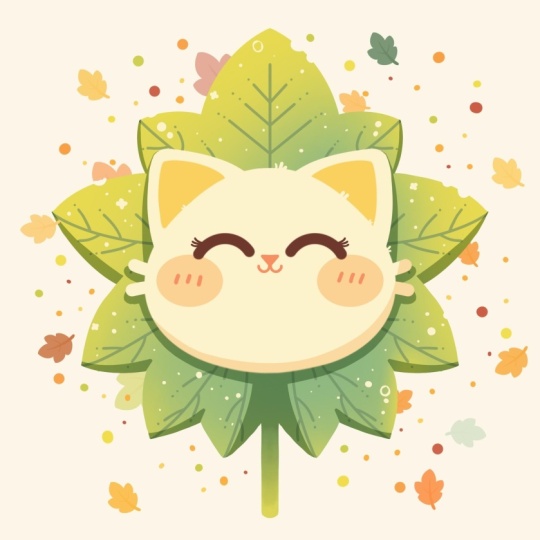
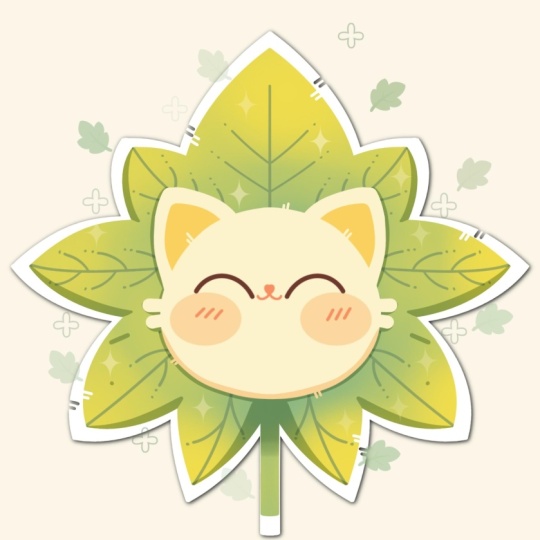
Uni, and in this class, we are going to draw this
cute Kawhi illustration of an adorable
leaf in procreate. During this class,
you'll get familiar with a lot of useful features
like quick shape tool, symmetry tool, liquefied
tool, clipping masks, and blending modes, and learn the basics of drawing
in procreate. By the end, you'll not only draw an adorable illustration
you'll be proud of, but also feel super
confident using procreate. And now let's spend
some time drawing.
2. Scheme: Begin our class by first deciding what kind of canvas
we are going to be using. Today we're using a standard square canvas from Procrit with pixel width and pixel
heights to 2048 pixels. DPI are at 300 and our color profile is set as
SRGB with this loan number. When it's all done,
let's it down. Let's take a look at
our new Canvas and before it starts to work
onto our illustration. Let's first go under the
project and reso Stop and download all the materials
that we need for this class. While needed it, let's continue our preparational part by
going to a brush library. We'll go to the
calligraphy folder and we will choose
monoline brush. Also will need to
adjust the brush slightly so all of our
lines look very smooth. Let's tap on the brush, go inside the brush studio. On the left, we'll go
under stabilization, and we'll be playing
with amount of streamline and amount
of stabilization. You can set the
settings the same way as you see them right
now onto your screen. You can go to the draw pad
and try it out right here. If you want to tweak
something here, so it will be easier
for you to work with, you are welcome to
go and do that. And when you are ready, let's hit down over our top right. Now when we are
done with a brush, let's go to our layers, and we will go to the
background color layer. We will go to the
color palette that you downloaded and we
also will go under palette on the bottom and the card on the top to
see the colors names. Let's select the first color
with the title background, and when we did it, let's go
to our actual color palette. Again, go under palette on the bottom and under
card on the top, and we will select
some contrast colors. For example, let's
select the mouth color. And with this color, we will go to our slider with the size, and we will set it to
something around 6%. Now when we are all set, let's create a little
scheme that will help us to build up
our illustration. Firstly, we'll go to our
canvas and with one line, we will create a
shape like that. It is a straight line. We
will hold it at the end, and we also will hold
one of our fingers on the screen to make sure that the line is vertically straight. When we have it, let's
lift up everything, and let's make sure that
this line is in the center. To do that, we will go to
our Aoki on the top plats. We will go under uniform method, and we will also go under snapping and turn on
snapping into the settings. When we did it, let's
get back to our canvas. We will hold our app up
until a samblin space, and we'll be looking
for two orange lines, one vertical and one horizontal. That way we will know that
we are right at the center, and when we have the
result like that, straightaway, let's go
to our list and create one more layer on top by
tapping on the plus icon. On this new layer, let's go so word our
canvas, and with one line, we will create another shape, and this time it will be a
perfectly rounded circle. So hold your ship in the end and hold one of your
fingers on the screen, adjust the size slightly. So for example, let's go
with something like that, and we will lift up everything, and we will again make
sure that this ship is in center by going
to our Ake first. Again, use a uniform method
using snapping and we will need to position the shape
onto this orange line. So we are aligning it vertically
onto the middle part and we also will need to
touch the shape on the top with the line that we
have on the previous layer. So when we have the
result like that, let's one more time go
straight to our layers, and we'll get back to
our previous layer where we have just
the line like that. Onto this layer, we will add a couple more lines right here
that will help us to build a so we want to create the veins later on and the overall
shape of the leaf, and we want it to be
quite symmetrical. So let's use one
option that procreate house to help us with it. When this layer is selected, we will go to the range
icon over the top left. We will go under Canvas, and we will toggle
drawing guide. Now, we also will need to
go under 80 drawing guides, and on the bottom, we will
use the option symmetry. When we have one line like that, we are not touching
anything here, we are not moving it anywhere. This is at the center and we will heat down
over our top right. Now when we have
everything in that way, let's go to where this line
that we have right here, and we will eyeball
where the center is. We will go and put a little markdown like that
in the center, and then we will go
slightly lower than this markdown and create
another markdown right here. Now, going on from this little
markdown on the bottom, from it, going up and creating another
line on in that way. We we need to hold it at the end and we can adjust
the angle right here. Let's go with something
not too wide open. We'll go with something like
that, and with this line, we are not touching the
edges of our circle. Let's create something
in that way and we will continue by going again
to this little markdown in the middle and
we will go with it toward the sides and create
another set of lines. We will go to the edge with
this line and we will again adjust the angle right here
to make it not that open. So for example, let's go
with something like that, and when we have the
result like that, going toward the
bottom and we will create a couple more
lines right here. Again, starting from the center, creating another
line that will touch the edges of our circle and
creating something like that. When we have it one
more time going towards this little center part and creating another
set of lines. If you need to try it
out one more time, go and do what you need to
do to create this shape. Again, with this part, we
can touch our line or give it a little bit of a smaller shape by creating
something in that way. Now when we have the
shape like that, we have everything for our skin. So let's go to our layers
and do the following. First, we'll merge these
two layers together, so we will need to go to
the layer on the top, tap on it, and use the
option merge down. Now to make it a little
bit more transparent, let's tap on our icon. We will go to the opacity
slider to go with it toward the left and
reduce the opacity. We still need to see
what's happening here, but it doesn't need
to be very bright. Now, when we have the
result like that, let's tap on this layer, and let's create one
more layer on top. Now, when we have it, we will go toward our color palette
and we will switch the color to green
men Wi this color with the same brush and with
the same size of the brush, we will start to
work on our leaf.
3. Base for Leaf & Cat: One more time, make
sure that we are using assisted drawing
onto this layer. We will need to tap onto this new layer and use the
option drawing assist. And then let's start
building up our little leaf. You can go and start
to do it by going to the middle part right here where we have our
little markdown, and we can go and start to create the leaf
going in that way. So we are connecting
the shade that we have on the bottom
with the line that we have on the can
hold our line at the end and we can go to
the Edit two on the top. When we are at the edited mode, you can see we have some notes right here, so we
can go to them. We can hold our Apple
pencil at the node and adjust the overall
shape that we have a here. You can play a bit with the
overall shape that you want to create for your leaf and when you are
satisfied with it, let's tap on our screen with our Apple pencil or with our finger to
accept the changes. We have the first
shape for our leaf, let's go along the whole shape along all the lines that we have right here and let's connect the top parts
with the bottom part. Again, we are starting to create half of the circles or half
of the ellipses right here. You can go full weight
toward the middle or only create the
elements on the top. Again, use all the tools
that we used before. You can go with
the editing tool, you can go with holding
your Aval pencil at the end of the line or go manually and create everything that you
want to see right here. Again, you can go with different
shapes if you want to, you can spend some time here and create something that you
would like to see right here. When we are done with the
second pair of leaves, let's go towards the middle part and let's write something
similar here too. Again, use editing
tool on the top to create maybe a softer
look for your elements, create a more open
curve and then continue by going
to the bottom and finishing up with this leaf. Also, make sure that you are creating nice
connections on the top. If you have some gaps, you will need to go
manually and adjust them. If you have some very
pointy elements here, the same way, you can go and
manually adjust them too. When you are done with
the next leaf right here, go to the next one and
create the next segment. So continuing to
create our leaves, trying to connect them nicely, adjusting them through
our editing tool over the top and adjusting the
overlook of our elements. Going to the last one
that we have right here, the line that we have
onto our scheme, and finishing up by creating
another leaf right here. Again, making sure that we have nice connections
between the parts, go on to all of these
little tips that we've created and making sure
that they look pretty fine. When we have the
shape like that, let's also go to where this line that we have in the
middle and we will step a bit from
the middle and we will create a line
going down in that way. You can make it thicker, you can make it thinner, it's up to you. Hold your line at the end with the Apple pencil and put one of your fingers on the screen
to make the shape vertical. When we have the
result like that, let's go to the bottom
and let's create the continuation of the shape in the shape of the little curve. Now when we have the
result like that, now it's time to go inside with our color and edit
to these places. So let's go to our
icon with the color. Let's drag it to
one of the areas, and then we will continue
filling right here on the top. So tap onto this option and
go to all of these areas and start to tap on them to recolor everything
that you have right here. If you have some smaller
areas and you maybe want to try to go to them
with your Apple pencil, straightaway, you are
welcome to go and do that manually add
the color inside. Don't forget to recolor these little parts, and
when you are ready, let's tap onto our check mark on the top near our color draw. Let's take a look at
everything and decide whether we maybe want to
go and adjust something. For example, we can go
manually to some of the areas and make them a
little bit more rounded. So if you want to
adjust something here, let's spend some time go onto the places that you want to
adjust and adjusting them. Also, if you already
have the shape and maybe you want to try
out something different, maybe sculpt a bit of
a different shape. We can do it very easily
by going to the magic Q two over the top left and we
will use the option liquefy. On the bottom, we will use the option push and
the size slider. This is for the size of the brush that we're
going to be pushing with. So we can select it and we can go to some of the areas and sculpt them and adjust something here if we want
to adjust something. So if you want to do that, you are welcome to
spend some time here and adjust the shapes
to your liking. When you are satisfied
with everything here, let's hit our magic O tool twice to get away from
the smote one more time, if you already did it alte
bit or if you want to go to some other areas and adjat them or maybe make them
el bit more clean, you are welcome to go
manually with your brush and with your eraser to these
places and adjust them. And when you are satisfied
with everything here, let's continue by
going to our layers, and we will hide our layer with the skin because for
now, we don't need it. Let's tap onto this check
mark and hide this layer. When we have the
result like that, let's go and start adding some beautifications
for our leaf. We will go and create
one more layer on top of the main shape for our leaf and we will go and add the
secondary color here. We will create some
of the gradient. Let's tap onto this new layer and we will use the
option clipping mask. That we will be able to stay inside the shape of our leaf. When we did it,
let's go and switch the color to yellow and
with this yellow color, we also will go to
our brush library. We'll go to the
air brush and fold the select salt blend brush. We will set the
opacity of this brush to something around 35% or so, and we will go with
the bigger size of the brush and start to go from the edges and start to add the
secondary color here. So spend some time here and
start to add this color. We are mostly adding it toward the top and
toward the left part, but also going
toward the right and adding a bit of the color
to the tips here too. Also, we can go with slightly smaller size of the brush and put a bit of the color
right here to the stem. So creating something
like that and creating the nice
gradient right here. If you overdid it a little bit, you can go to the smudge tool, make the brush bigger, and go and smudge it so everything looks
very, very smooth. So for example, let's go
with something like that. Or if you want to
spend more time right here and add more color, you are welcome to
go and do that. So create something
that you like, and when you are done, let's get back to our previous brush. So we are going to the brush
library and we will go to the calligraphy folder
and choose monoline brush. When we did it, we
will get back to our layers and we will
create one more lay on top. Let's tap on the lay and use
the option clipping mask. Again, we will stay inside our
sheep and when we have it, let's get back to
our color palette and switch the color
to dark green. With this color, we will go and start to add some
veins right here. Let's go with
slightly smaller size of the brush or for example, 4%, and we will go toward
the middle part first and we will create
a line that will go down. If you want, we also can use the symmetry tool right here so we can go
back to our layers, tap onto the sly and use
the option drawn as to be able to add these veins on both sides at the same time. You can do that, or you can
create it one by one to create some interest and to create some
difference insights. Or if you want to
use the symmetry, let's go and start
to do it right here. Going from the top firstly and creating a straight line
going down like that, we need only one line, so we are holding it at the end, and then we are going
to our editing tool. We are going to the
note right here and we are trying to match
it with the previous, the shape on the opposite side. When we have it, let's tap on
the screen and let's go to the sides and let's create
the veins right here. So we will go with simple lines. In that way, if you want to
add some beautifications, you are welcome to add some nodes or some little
dots or something like that. Go and create one more set of these elements on the bottom. Create some beautification
if you want to. And when we have the
result like that, let's go toward the
next little segment right here onto our leaf, and let's go from
the tip right here. You can go with straight
lines or you can go with the curve so you
can hold your line at the end and create a if you are holding your line and it is
snapping to a straight line, you can try to lift up
your Apple pencil and go toward the 102 and you
might have the option arc. If you have it, use it. If you don't have
it, you will need to try it out one more time, and maybe this
time you will have this option arc if you
want to adjust it. So go to the editing mode
if you want to adjust it. When you have the
result like that, let's again go to the sides and let's create some
veins right here too. Again, you can go straight
away to the same level or if you want to add some interest or something
else right here, you are welcome to go
and create some pattern with these little veins
that you are creating. So for example, let's go
with something like that. Maybe create one more
little shape right here. Again, if you want you can go with the curse or with
the straight lines, we don't need to pay too
much attention toward the middle part because we will have another element right here. So you can keep the middle
part a little bit black. When we have the
second part done, let's go to the next one and again, doing the
same thing here. Starting with the middle line, holding it if we want to create a curve and then going into the sides and starting to create these little parts
over the sides. Again, if you want to
add some beautification, you are welcome to
go and do that. Go along the shape and create
a couple of these details. When we are done with this one, go into the next one and creating one more
little line right here. Let's finish up creating
these little things, little veins that
we are creating by going to the rest of the leaves
that we have right here. As for the bottom one, let's go from the middle and we will create a
line going like that. Again, we don't need to
connect it because we will have another shape right
here for this part, let's create only two
lines for the veins. So for example, go on like that, and if you feel that maybe it is a little bit too
dark for the veins, we are welcome to
go to our layers, tap onto the icon
right here onto this layer and
adjust the apasite. For example,
something around 60, maybe 65% will look
slightly better. When we have the
result like that, let's tap onto the screen, and let's go and create our future little elements
inside the middle part. Let's create one
more layer on top. We will switch the color to cat and we will go
inside the shape, and we will create the shape of the perfectly round
circle one more time. Let's first go with slightly
bigger size of the brush of 6% and we will go and
create the shape like that. Again, hold your
line in the end, hold one of your
fingers on the screen, adjust the size to your liking, we will need to create something
pretty big right here. When we have it, let's position it straightly at the center. When we have the shape,
going straightly to our key uniform method, snapping it on, holding our apple pentel and looking
for this orange line. Adjust it to your liking, so you can go a little bit
higher or a little bit lower, find what looks good to
you when you are done, let's straight go and add
the color inside the shee. Now when we have it in that way, let's go and adjust it slightly. Firstly, we will go
toward our layers, tap onto the lee and use
the option drawing assist. Now, when we have
it, let's go again to our magic one,
two, liquefy two. Push option, size slider, adjust it to your
liking, and let's go and sculpt slightly
different sp right here. To go on firstly
from the bottom, starting to create
a shape like that. Again, if you need to go
to the size slider and adjust it while you are
creating the things right here, you are welcome to
go and do that. Let's go and widen the
bottom part of our shape and create the shape of some kind of the loaf of bread
shape right here. So if you need to spend
more time right here, you are welcome to take
as many time as you need. If you want to maybe try
out a different shape, you are, of course,
welcome to do it. So, for example, when we
have the shape like that, that's pretty good for us. Let's tap on our magic once or twice to get
away from this mode. And let's go and create
the ears right here. So firstly, let's get
back to our layers, and we will go to this layer
where we have our skin. We will select it,
we will hold it, and we will drag it above everything that we
have right here, and also we'll go and unhide it. Now when we have it, let's go
underneath the leer that we have for our loaf of bread
or our fish for our cat, and let's create one
more layer here. Onto this layer, we will again tap on it and use the option drawn assist and then with the same color with the same
brush with the same size, we will go toward this area right here and we
will create the ears. We will step from
the middle part a little bit and we will
create the shape that will be connected
in a middle with this line that we for
this little part. When we have it, we will go
toward the bottom and we will create a big ear
going down in that way. If you want to adjust the shape, when you are creating it, adjust it if you want to, let's go to the bottom and let's connect the part onto the side, and then when we have no
gaps inside our shape, let's drag and drop
the color inside. Now when we have the
result like that, let's get back to our layers, and we will hide our
layer with the scheme, so we don't need it anymore. Let's take a look at what
we have for our ears. If you want to adjust it in any way, let's go and do that. For example, let's
grab our eraser, go toward the top and soften up the overall
shape right here. So instead of this
very straight corner, we will create a very soft one. And if you want to do something with other shapes right here, you are welcome to go and do whatever you want to do to them. When we have the
result like that, let's get back to our layers, and let's create one more layer on top of our layer
with the ears. Let's tap on it and use the
option clipping mask firstly, then tap on it one more time and use the option
drawing assist. Now switching the color to
yellow ears and we will go inside the shape
of the ears and we will create the inner
part right here. We will need to basically go and repeat the shape
that we have outside. Let's go and start to do this. Going like that, creating a smaller shape to
what we have outside, you can use all the options
that we used before. Hold your Apple pencil, go to the editing tool, adjust the shape if
you need to close the shape when you are ready and then drag and drop
the color inside. Now when we have
the inner parts, let's go and work
more onto our fees. So firstly, go into our list and go into
our lie where we have the fist and we will
need to go again and select our color
with the title cat. Let's go to our size slider, and let's make the size slightly bigger so something
around 30% or so. And we'll go to
the side and we'll create some kind of the
whiskers right here. So let's go and with one line, create the shape,
going in that way. You can adjust it angle wise or size wise,
it's up to you. Try not to go too far
away from the shape, and when you have the first one, go to the bottom one and create one more set of
whiskers right here. Now when we have it, let's go and work on
artificial features. First, let go into
our layers and we'll create one
more layer on top. We will tap on the layer and use the option
clipping mask. Again, we will tap on the layer and use the option
drawing assist. When we have it, we will
switch the color to ice and we will need to go and find the size that will
be suitable here. For example, let's go and try
out something around 13%. If it's too small, we will
try it with a bigger size. I feel it is looking
pretty good, so we will create half
of the circle like that. We can hold your line
at the end and go to the editing tool to adjust
the curvature of this. Let's make it pretty rounded, for example, go in that way. It's easier to take a
look at the opposite side when you are adjusting the
overall look of the elements, you will see clearly
what you are doing. If you want you can
move the shape slightly down or closer to one
another or farther away, find what looks good to you. If you want to add more details, maybe lashes or
something like that, you are, of course,
welcome to go and do that. When we have the eyes like that, let's also go back to
our color palettes and switch the color to mouth. We will change the size
of the brush to 4%, and we'll go right
between the eyes, and we will add a little
mouth right here. So, for example, let's go
and start in that way. We will go to this
line that we have in the center and we will go slightly toward
the side from it. And from this side, we will go and create
the shape like that. So hold your line at the end, and let's go to our editing
tool to adjust it slightly. Let's go and make it slightly
more rounded and maybe make the nose part a little
bit smaller too. Adjust it. Take a look at it
from the distance if you need to make sure that it looks fine or not.
Adjust the placement. If you need to move it down, move it high, it's up to you. When you are done,
tap on the screen, and let's go and work onto this nose by adding
the line right here and maybe if we have
extra little parts that we need to take care of, we will go and do that too. If you want to do something
else to the nose, for example, maybe make it
smaller or something else, you are welcome to
go and do that, try to make everything very, very soft and when we have
the result like that, let's go and add the checks. For the checks, firstly, let's get back to our layers. We will go underneath the layer that we have
for official features. To our main layer, creating one more layer here, tapping on it, and using
the option drawing assist. It will be automatically
clipped because we have the layer that is
clicked on the top, and we will go back to our color palette to
select the cheeks color. Now let's go underneath the ice and we will create
big checks like that. Again, hold your
line at the end, adjust the rotation,
adjust the placement. If you need to hold it, go to the editing
tool or the top, find the right placement
for these elements. For example, let's go with
something in that way. Let's tap on the
screen when we are ready and let's drag and
drop the color inside. Now when we have the
shape like that, decide whether the opacity of this element is
enough or too much. If you want to adjust it,
let's get back to our layers, tap onto the icon and go to the opacity slider to
adjust the opacity. For example, let's go with
something around maybe 65%. That looks pretty good. When we have it, we
also can go toward our main shapes that we
have for facial features, and we can go and add a bit of the blush right here
toward our cheeks. Let's tap onto our lay
with facial features and let's turn off our drone assist by selecting it from the last. When we get it, let's
again get back to our color palettes and
select mouth color. With this color and
with are 6% of brush, we will go inside
the cheeks and we will add a couple
of lines like that. So try to make triangular
lines that will be in parallel to one another and do the same onto the
opposite side too. Now when we have the
result like that, let's also go and add a bit
more interest toward our cat, and we will do it in that way. Go on firstly to our layers, go into our main
layer with the head, we will tap on it and turn
off our drone assist. Then going back to our
color palettes and selecting the color
with the title cat. And let's go with our size
that we used before, 6%. We'll go and add some
fluffiness toward our cat. For example, let's go like that, add a couple details
go in that way. If you want to go
along the whole shape and add a few details here too, you are welcome to go
and do that or add the details only on the now when we have the
result like that, we will need to
add some shadows. Let's move on to the next part.
4. Shadows: Begin this part firstly
by going to our layers, and we will start with
our layer with the leaf. So let's go to this layer
where we have the veins, and we will create one
more layer on top of it, tapping on the layer and using the option clipping
mask to again stay inside the shep then we also will go to this
icon on our layer, and we will switch
the blending mode to multiply because we
want to add the shadow. And as for the opacity, let's go with something
around 60% for now, and if we need to
change it later on, we will do it later on. When we did it,
let's get back to our color palettes and select
this dark green color. Firstly, we will go toward this part that we
have right here, and actually, before
starting to do that, let's move the cat slightly lower and we will
do it in that way. We will need to go
to all elements that we have for our cat and
one by one, select them. When we've selected the ears, we will go and select the La by swiping it
from left to right, and we will do it to all the layers that
belong to the cat, all the face elements and
the ears and everything. When we selected everything, we are going to our
Aoki uniform method, snapping and we will move
the cat slightly down going along this line that
we have in the middle. So orange line. For example, let's position it in that way. So we'll have more
space over the top. When we have it, we
will get back to our layers and we
will go to this layer that we've created for
our future shadows. When we have it,
we will go toward the bottom part and we will
start to do the following. We will go toward
this little part and we will start to
add the shadow here. We can go one by one to every side that we have right
here, but we quite lazy. We don't want to do that. So
let's get back to the leer, tap on it and use the
option drawing assist. So one more time, we will start by going to these little parts, and we will go and start to create the shadow
going in that way. So we will need to
have a rounded chip, and we will go
with our brush and start to add the color
inside when we are ready. So going like that,
starting to add the shadow right here on the
top of the stem two. So let's go like that.
And then we will grab our smudge to and
very, very softly, we will go and add
the color right here, so we will smudge it and
we will try to create a very nice and soft
transition between the colors. When we have the
results like that, let's tap onto our
brush one more time, and let's go over all of the bottom parts of the
segments of the leaves, and we will start to add
the shadows here too. You can go with
the bigger size of the brush or with the
smaller size of the brush. Basically, what we
need to do is to create the shadow in that way. We have a bit less space
with our shadow over the top part and we
are trying to make it a little bit bigger
onto the bottom. And also we'll need to pay attention to the
connections right here. So if you overlap the leaf, go with your eraser and erase the parts
that you don't need. When you are done
with this segment, let's move on to the next one
and do the same thing here. Starting from the top, trying to create a rounded
shape like that. Hold your line at the
end if you need to go to the bottom and create
the line yo in that way. And the cata inside and if you have some extra
elements that you don't need or if you overlap the segment that you
have on the bottom, and erase the parts
that you don't need. Now when we're done with it, let's tap on our brush
one more time and add one more shadow right
here once at the top. Again, the same way,
holding our line and the end going toward
this little part, adding a bit of color here, a bit of a thicker shadow, and erasing everything
that we don't need. Now when we have these shadows, let's tap onto our brush, and let's go and add the
shadow underneath the cat. Again, starting from the bottom, starting to add the
shadow going like that, repeating the oral shape
that we have for the cat. You can go with a
thicker shadow or with a thinner shadow,
it's up to you. When you have it, let's go toward these little
whiskers that we have, and again, we will
repeat the oral shape. When we have it, going
toward the ears, starting the same way as
we did right here with slightly thinner
shadow on the top and a bit of a thicker
shadow onto the bottom. Again, you can use all the
options that we used before. Hold your Apple pencil
at the end of the line, use your eraser if
you need to make a nice connection right create something going in that way. If you want to add more shadows, you are welcome to
go and do that. When we are done with this task, decide on the opacity. If you want to go
maybe a little bit further away with the opacity, you are welcome
to go and do that or maybe you want to reduce it. Again, tap on the Mcd and
adjust the opacity from here. I noticed that I
have a little bit of the line right here and I
don't want it to be here, so I will go back to the layer
where we have the veins, grab the eraser and erase
this part that we don't need. Now when we have the
result like that, we are done with the main part, but let's go and add
some beautification.
5. Final Touches: For the beautification, firstly, decide whether you want to add a bit of the shadow
onto the cat. If you want to do that,
let's get back to our layers and go above all the layers with
the cat that we have, create one more layer here, tap on it, clip in mask, and we also will go to the N icon and change the
blending mode to multiply. Let's go with something
around 40% of opacity and change
the color to checks. With this color,
we can go toward the bottom part with the slightly bigger
size of the brush, and we can go and add the shadow in that
way, for example. Let's go and repeat the oral shape that
we have for our cat. We can go toward
the whiskers onto the right and put them
in the shadow, too. So going on like that
manually, creating the shadow, and going to the opposite side to create a bit of
a shadow here, too. When we have the
result like that, let's continue by adding some beautification
onto our leaf. Let's get back to our leas. We will go above all the
layers that we have. We will create one more
lay here, firstly, we will go and switch
the color to the cat. We will go with this color and with slightly
smaller size of the brush toward our leaf and we will start to add some
speckles right here. Go like that, starting to add some dot, some little lines. You can vary the
size of the brush, go with the bigger size, with a smaller size, it's up to you. You can overdo to make
it very, very sparkly. It's again up to you. Go and vary the size of these elements. If you want to create
some other elements, you are welcome to
go and do that. For example, you can
go with the shape of sparkles or maybe some
kind of this shape. It's up to you, create
a couple of details, so everything looks pretty nice. You also can go and maybe
create some bubbles. So for example, we
can go right here, create a rounded shape and then use our eraser to
cut the inside part. So add a couple of
these beautifications, and when you are
ready with them, let's go toward our top. And if you want, we can
add a bit of interest to our leaves by adding
some little cuts to them. Firstly, we'll need to get back to our color palette and select the same color that we use for our background, so
background color. And with this color, we
can go to our leaves. And for example, add some
little cuts in that way. You can go to all of the leaves
and add some pattern with this cut or only go toward the top and add
something going in that way. When we have the
result like that, let's also go
outside the sheeps, and let's add a couple
of details here too. So firstly go into our least and create one more lay on top, and we will go to our
color palette and we will be using these colors that we have onto the bottom. For example, let's select this slightly
lighter orange color and with the bigger
size of the brush, let's go outside, and let's add a couple of dots right here. You can vary the size
of the elements. You can go with smaller size, with bigger size, add a
couple more duets right here. It's up to you what you want
to create with these things. When you are done with
this orange color, let's go and switch it to, for example, yellow ears. Let's go with slightly
bigger size of the brush or smaller size of
the brush and add a couple more details
with this color. Let's go like that, at a couple more speckles and
add something going in that. If you want to switch the
color to, for example, yellow green and add the
similar details to what you already have onto your
screen and go with this color, you are welcome to
go and do that, too. So, add some kind of the interest or the picture
with this little duet. When we have the
results like that, we can go and make it a little bit more
interesting by adding a couple more details over the elements that we have
onto the outside part. So firstly, let's
get back to our list and create one more
layer on the top, and then we will
go to this brush or to two brushes
that you downloaded. So we will be using
either tinted leaf or tinted leaf multiclored. The one that we have as
a tinted leaf will be only one color when you are
going to be stamping it, and the multiclored will have a bit of a difference
into the color. So let's first go with this
tinted multiclored one, and we will go and change the color for, for
example, orange. This color and with slightly
bigger size or the brush, let's go over the top and let's start adding
the additional leaves. You can rotate your canvas
to add this element. You can see when
you are stamping, you have a bit of difference
between the colors, and if you want to use
this brush, go and use it. If you want to use
only the tinted one with no difference in color, you are welcome to use it too. For example, let's go like that. Again, rotate your
canvas to have a difference inside the rotation of the leaves that
you are adding. Go with different sizes, go with different colors. You can try out something
else right here, for example, yellow green, go
like that and add a couple more details
with this brush. If you want, you also can
go to the leaf and add a couple of details here to
not only outside the shape. For example, we can go and
select some orange color and maybe add a bit of the leaves
right here onto the bottom. Again, you can go
with smaller size of the brush and add a couple of smaller shapes going outside the shape or inside the
shape, it's up to you. Let's spend some
time here and add a few little details in
the shape of the leaves. And when you are done
with it, if you want, we also can add some
leaves behind the leaf. So we will need to
go to our las and go to the bottom part
of our as panel. For example, we can
go to this layer where we have the
shadows for our leaf, create one more leaf here, and drag it underneath
everything that we have. And we will go with
slightly orangier color than we have like right now,
we will go, for example, with this orange,
we will go with very big size of the brush, and we can go behind the shape
and add some leaves here, too, to add some
interest to the picture. You can add a couple
of details like that. So for example, go on here, there and add in a couple
of details in that way. If you want to change the color, you are welcome to
go and do that. If you want to add
more interest, more details, you are welcome to explore this folder
that you downloaded. So for example, we can go
with some petals like that, go outside and add a couple
of details in that way. Spend some time here, beautify your little shapes, your
little illustration, and when you are done
with everything, when you did everything
that you wanted, we are done with
our illustration. Thank you for
watching this class. Review if you liked it and cont subscribing for MirkaY
videos in the future. Looking forward to
seeing your projects.
 Uni Corn, ⭐Kawaii Art Enthusiast⭐