Transcripts
1. Introduction : Astra 1019 is coming to the end. I thought I'd make one last class of the year for you guys. And what best way to bid farewell to 2019 than painting five off my favorite landscapes of the year? But don't worry. I have selected really simple, really easy paintings which you can also use as New Year cards. Ceasefire sadly tops my year and I hope you love this too right. Each landscape that I have selected is simple but quite different from each other. So we will be learning lots of elements as we move along each class. And I'm quite excited for us to get started. Hello guys, This is Secreta. So let's not wait any further unjust dialing to it.
2. Art Supplies : paper. I use Saunders. What a 4 300 years. Same 100% garden. I bought this paper in rolls. Basically, how this works is you by a bunch of roles and cut them up using scissors or Qatar in two sizes off your choice. They're more affordable than buying papers in blocks. For Baines, I used White Knight. I also listed down all the colors are used for each landscape here, as well as in the beginning, Off each video for mixing my colors. I used to ceramic palette, a clean water job. I started using White Job because it is easy for me to know when the water gets too dirty, so I can change. - But it's completely your choice for all the classes I used only three brushes, one small round brush off number one for adding details like birds. One round brush of size. Four for adding all the elements in the landscape. One more brush off size. Six for reading the paper exclusively. One masking tape on a few issues
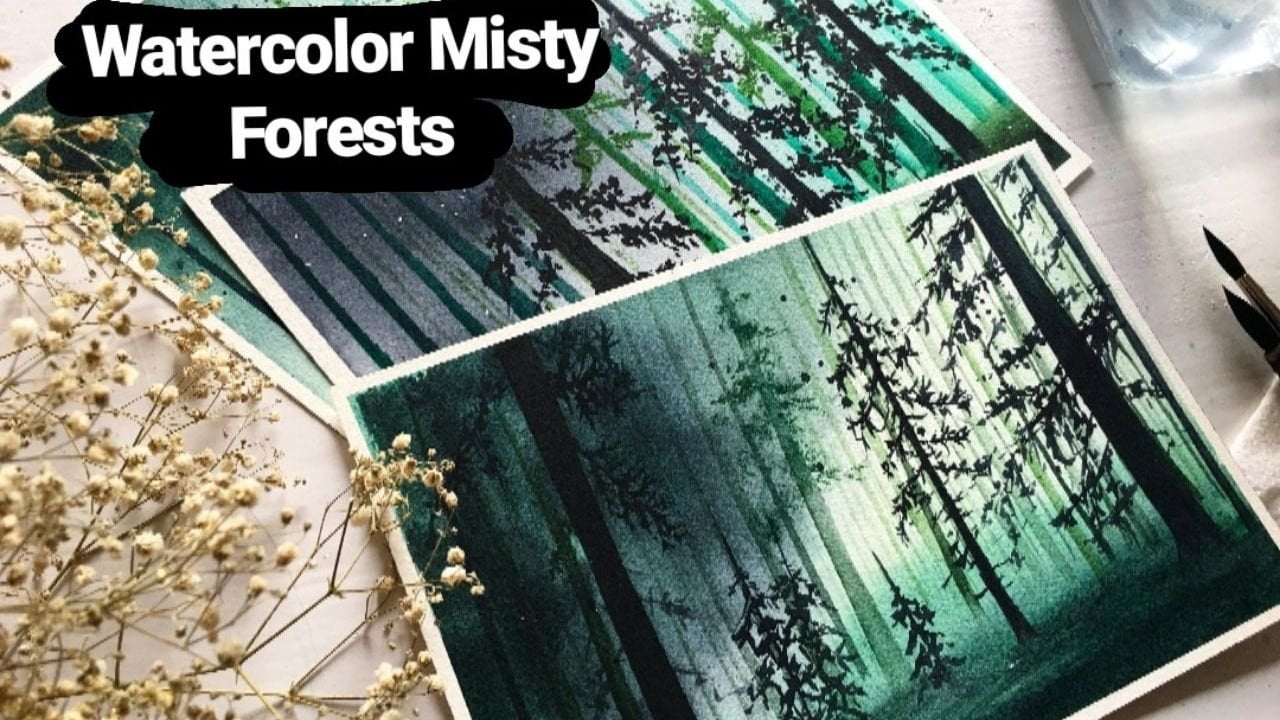
3. Misty Landscape : All right, so let us start with the first landscape. Personally, this is my favorite off all five. Start by vetting the paper with a clean brush, not take something which helps to keep your paper in a slight slanting position. I'm just taking my tape and keeping it under the paper. Do not ignore this because this step gives your paint a good flow. Now I will take a light shade off indigo and quickly paint the sky. Make sure to use very light shirt off the color. We don't want the sky to dominate the landscape. I will keep this for drying. Now take the paint. This time more pigment and less water start roughly adding the first layer off mountains make their just re glove, which gives the effect off these mountains covered with dense trees. Now, first half off the mountain, I painted in particular for the next half. I wanted tone it down and make it lighter. So I'm dipping my brush in the water, and I'm just dragging down the clean brush or the pain to remove the excess pained. This gives it beautiful, misty effect once you complete the landscape. So when I'm painting mist. I try to keep it a Riegler and unpredictable, because that's how you see it in the nature. I'm just messing with my paper and pains until it feels right for me. - I think it's good enough. I'll keep this for drying now for second layer off mountains, take more pigment than the previous Dale and repeat the same process as West Mountain Lee. I'll keep this for drying now. Now repeat the same process for the third layer of the mountains, of course, with more pigment than the previous layer I'm gonna keep. This were dying now for the rare of the mountains. Follow the same steps as before and remember to take more pigment than the previous layer - and then keep this were drying. Let's start with the 50 layer, which is very brief at pine trees in the front. You don't have to be very specific your because thes trees will later be dominated by a large pine tree. Painting pine trees is not always easy because there are so many ways you can paint them. But what has helped me is one simple thing to move by brush pretty much in his exact motion So I hope you're good out to try and see if that works for you. I think this is enough. I'll be back after it tries. Okay? It's time for the most complicated part of this landscape, at least for me. Remember, move your brush in zig zag manner and keep checking whether you are doing it right or wrong . Slow down. Take your time and paint very carefully. Practice on a piece of paper. If you had no was. I think this is good enough on I'll stop right here are not mourn toe painting the birds All right. I'm glad we are now painting the easiest part of this landscape. Splattering is not in this city, but it adds a bit off a drama to any off your landscape. Today I'm just using a plain white on Indigo article on my brush and just flattering away on my pain. Well, that's it. I hope you guys like this landscape. If not, let's more onto the next one
4. Sunset On The Beach : all right, This is one of my personal favorites, sunset or the beach with lots of colorful and fiesta colors that I personally do not use much. I will start by taking clean water on reading the entire paper with a decent, more fresh. Now I always go with the light to dark in watercolor, so I would start with red light or any orange color that we have on blended carefully with the violet about no blending should be done while the paper is still that. So. I would say this to use 100% cordon paper because it stays wet for a long time while the upper half off the paper is trying, I will start with the bottom. Have this is going to be the beach, which means I will are only violet. To indicate the water, make sure to keep the white part in the middle. It's just a missed in a very subtle way. Now I will keep this for drying. Read the paper very lightly with clean water. Make sure your paper is completely dry before adding water. Now let's work on the clouds. I will take violet and start randomly, adding fluffy clouds it is easier to add these clouds because I went the paper very lightly . If the paper is soaking wet, it is impossible to manipulate your subjects. - All right, I think we are done with the clouds. Let's keep this for drying. Let's start with pilings now. Pilings are long. Piece off. Would you tire boats, too? So they make up a great prop for your landscape. Just take Brian's great and start adding a few on the beach. - Since this pilings are on the beach, I will add reflections. So take light shared off pines gray and start adding these now A small trick here is to make the reflections realistic and natural. Take a tissue paper and lightly dab on it. Well, how about the birds sitting on one off this pilings? This cloudy sky looks rather than so. I will add a few stars, and don't ask me how stars are visible on a cloudy day. I just thought it looks more lively this way. I am using normal white watercolor ping toe. Add the stars. - A few reflected stars on the beach. This actually gives such nice 30 effect. All right, we have done. I hope you like this landscape and let's move on to the next one
5. Foggy Mountains : next to landscape would be all about four game on pains. The moment I painted this one, I knew I would want to make a class on it. So here we are. I am using my previous painting as my real friends, as always, will start by reading the paper with clean water, and I'm taking into go and I'll paint the sky right. Keep lending the paint with paper until it looks natural to you, and I will keep this for drying. Using reference, I will start hiring mountains. Here goes too fast. One. I am using indigo here. This is wet on dry that is, red paint on a dried paper. - After the first mountain has dried, I will start earning the second as before. I am using indigo once he hope entered the outline. Clean your brush and used that red brush to sort off. Drag the paint along just like I'm doing here. Discuss kind of misty effect to the mountains. I will add another layer off pain because it looks rather than I will keep this for drying . Let's start with the next 23 mountain ranges. Remember to let each one to completely dry before you attempt the next mountain. It is the final mountain range. We're gonna paint now to show that these are closer to view. We need to make them a bit tickle in color than the previous Mountain rangers. So I will take Brian's gray instead off indigo. Let's add a few pine trees here and there to give that lush forest. Still, - do not forget to add some birds here and there. All right, I think we're done. I hope you like this landscape.
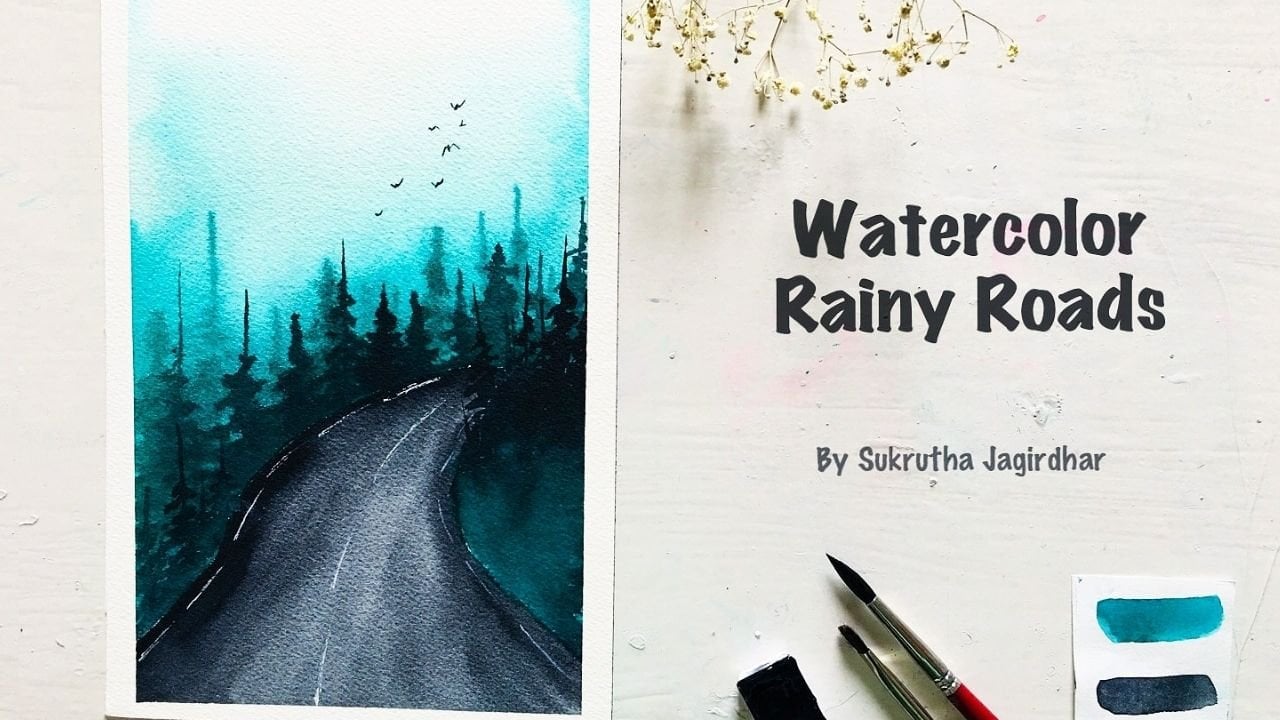
6. Rainy Pines : This is one off the simplest A landscapes you're gonna paint today. Today I'm using only tacos. Culo, if you do not have this particular color, you can always go for Viridian, as always will start by wetting the paper with clean water. I will paint the sky. Now Make sure your paper is consistently read the entire time you're walking on the sky. If you're a beginner, I want to let you know that this is wet on wet technique wherein the paper is wet with water as well as the brush with paint. And I'm using a number six my brush. Keep the paper aside for drying. Alternatively, you can use a dryer to speed up the process. Once the sky is completely dry, take the lightest to ST of the cholera, the lightest shared on more water and less pigment. Now start bending. Bynes. There are many ways you can find pine trees. One matter that has always helped me. He s painting them in zigzag mana and keep this now for drying. It's tried. Now I will take the darker shade of the color, which means more pigment unless water and I will repeat the same process off painting pines . We're almost done. Let's add in some boat. - That's it. I hope you loud painting this very simple landscape with me. Let's move on to the next class.
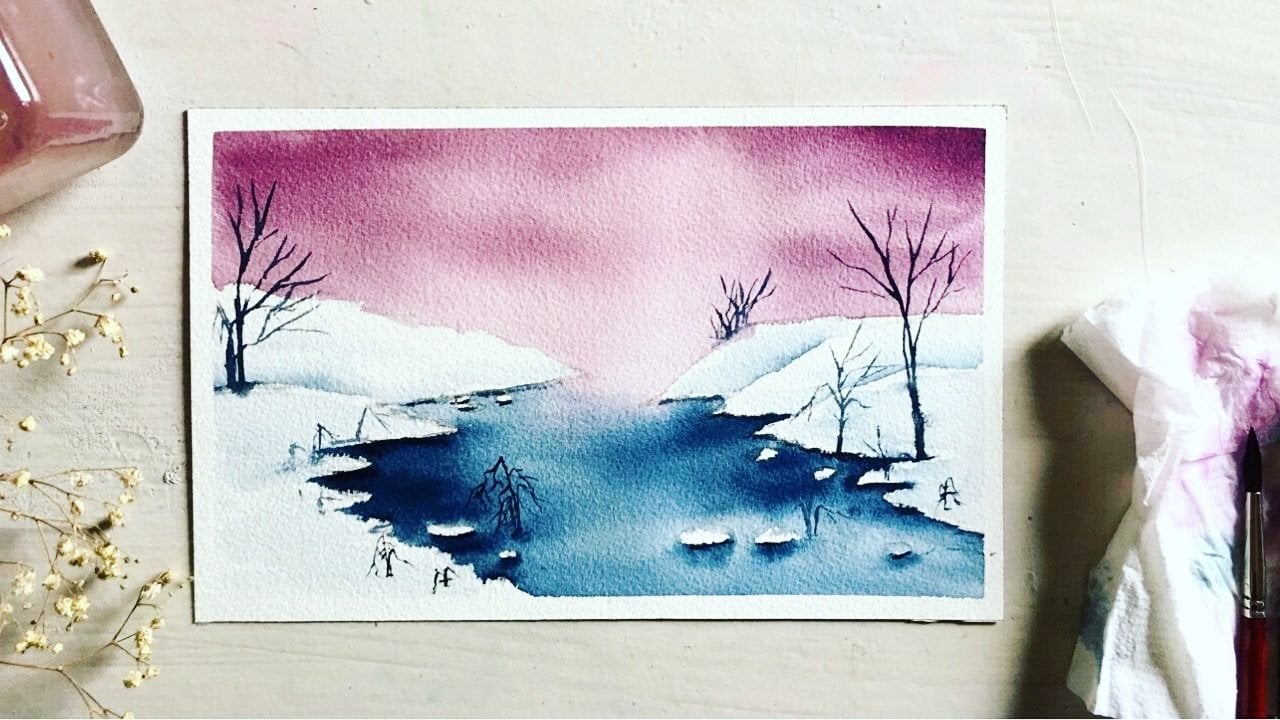
7. Soft Misty Lake : Let's start with our last landscape off this class. It is it again, a simple one, with leg and reflections being the highlight. I used to contrast Colors arose color on the pines gray. I will start by reading the paper with clean water. I will take ruby color on paint on both a just off the paper, upper and lower, but actively leaving out the middle part. - Previous layer was very light, so I'm adding another layer off pain and, of course, living out the middle part while the paper is still wet at Brian's Gray on open in lower part of the paper. Keep landing both the color. Remember, you can only plan until the paper remains red. I'll keep this word drying now. Now that the paper is completely dried, I will read the paper again with clean water. Remember, your paper should be completely tried for you to read it again. Or else he will dream that background and possibly this entire landscape I am taking finds gray and I'm adding the forest, but not with a lot of details. I'm just showing the subtle trees at another layer off clients crazy. This shows the depth of the forest. - Let's get started on the reflections. It's quite easy. Take by in scree and added just below the forest we had just painted. But make sure to leave the white gap in the middle. This is the space between land and water, a small reminder. We are painting reflections while the paper is still that that is literally it. The Arden Painting Reflections Let's get started with painting birds. - I thought I would add reflections off birth, so I'm taking very light shirt off pines Grace. I'm using my brush for correctly painting the reflections as the last step. I will add a few white lines over the lake with my wife gel pin. Alternatively, you can use white pain as well, and that's it. I hope you enjoyed painting yet another landscape with me. Thank you for watching
8. Thank You : All right. We're here at the end of this class. I hope you all have loud painting, this five serene landscapes with me. With each class we have learned a new technique on these techniques can be used in various other landscapes as well. Thank you for watching. And I wish you a merry Christmas and a very great New Year ahead. Let us all meet in the next class. Bye, guys.
 Sukrutha Jagirdhar, Watercolor Artist I Creative Entrepreneur