Transcripts
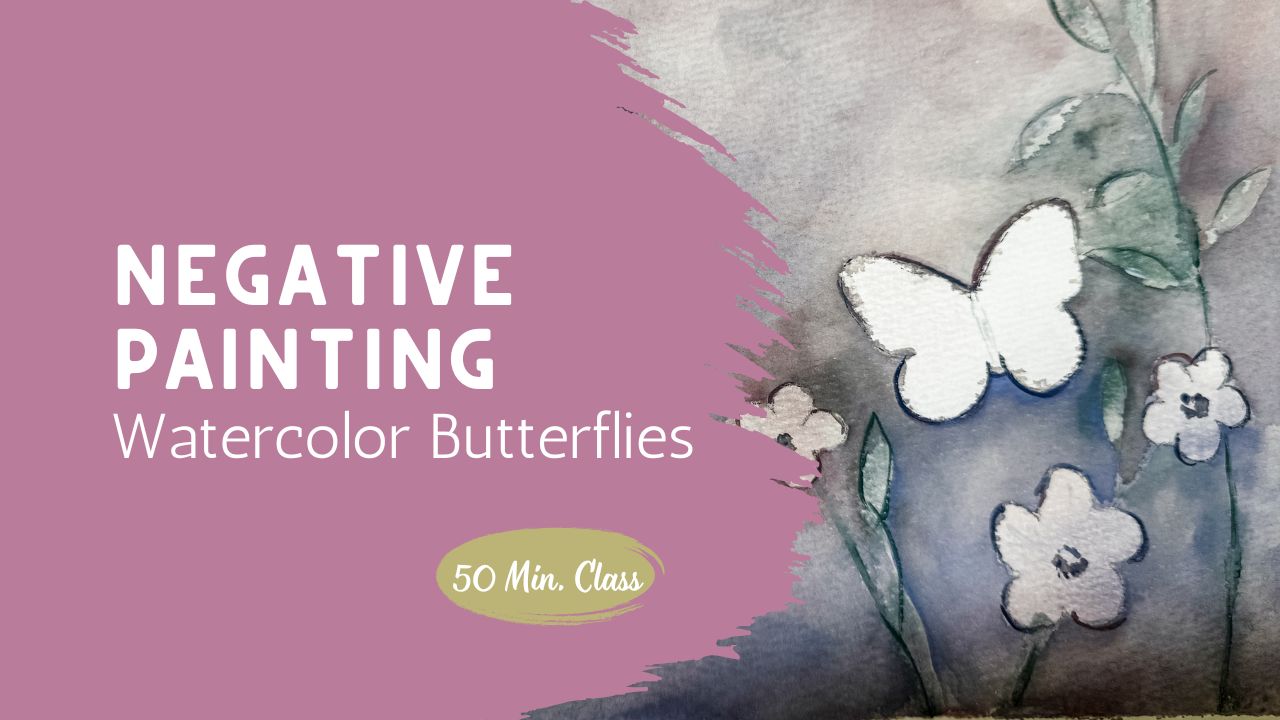
1. Introduction: Painting Butterflies with Negative Painting: Welcome back to
class. Today, we're going to continue exploring
negative painting, but this time in a slightly
more intentional way. In the last lesson, we
focused on discovering shapes and letting
forms emerge naturally. In this class, we're
going to start with a simple butterfly and
floral shapes and learn how to build around them
to bring them forward. This is a really nice next step because it's going to
help you feel a bit more in control while still keeping that soft loose watercolor feel. We'll begin by lightly
sketching or tracing a few simple shapes and
then we'll be building a soft background using
a wet on wet technique. From there, I'll
guide you through layering around shapes using negative painting so
you can start to see those butterflies and
flowers come to life. If you're new to the
style of painting, don't worry about making
everything perfect. The goal here is to understand
the process and get comfortable working
around your shapes rather than trying to
paint it directly. Take your time, keep
your hand relaxed, and enjoy watching the
painting develop step by step. So go ahead, gather
your supplies, and let's get started.
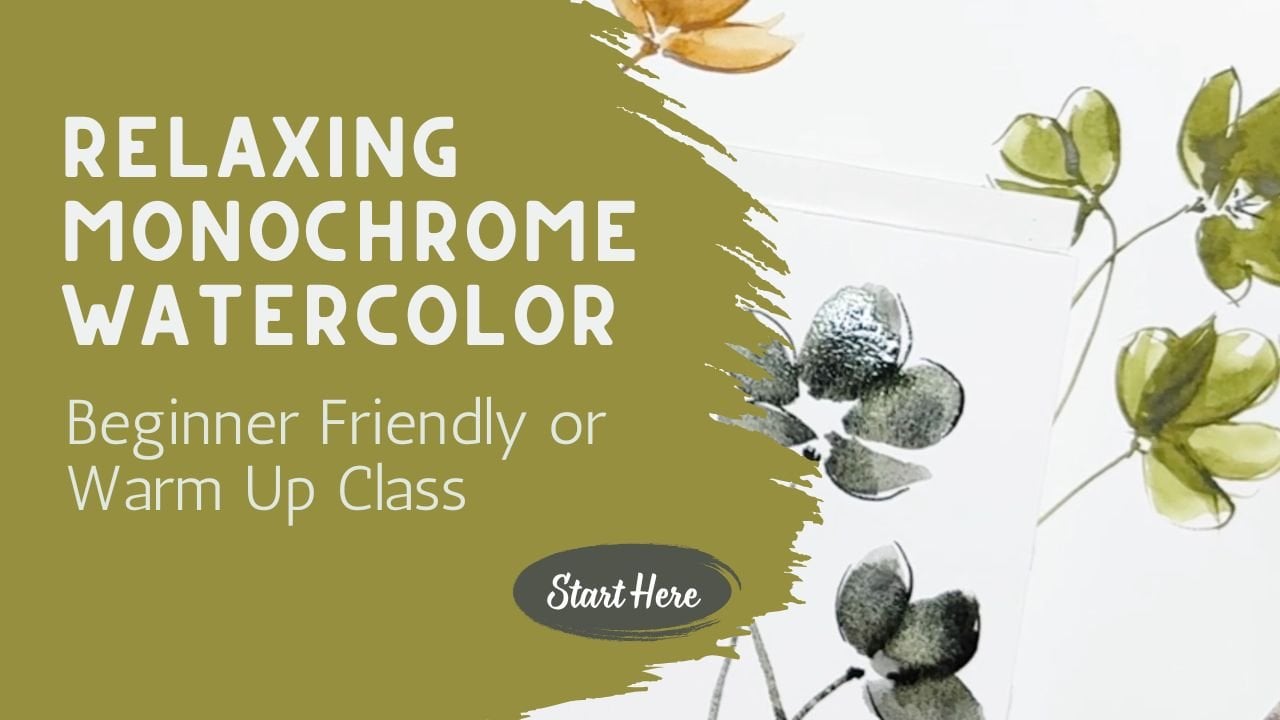
2. Supplies and Understanding Negative Painting: Today we're going to
learn a little bit more about negative painting. And if you haven't taken
the class already, take the class that I just
posted a couple days ago, which really dives
into the basics of negative painting when we learned how to paint
around an object. We first made a moon and then we painted the sky around
it and add some details. That was our basics, and then we took it a
little bit further, and we added in some details. First, we had just created
something very, very simple. There were no flowers
on here to begin with. It was just blobs of paint, little colors that were just
swashed all over the place. And then we found our flowers, and we discovered where
the flowers were, and we painted around
them and added in this really nice background
using our indigo paint, which brought
forward the flowers. So today, we're going to
do something similar. We're just going to take
it a little bit further, and we're going to
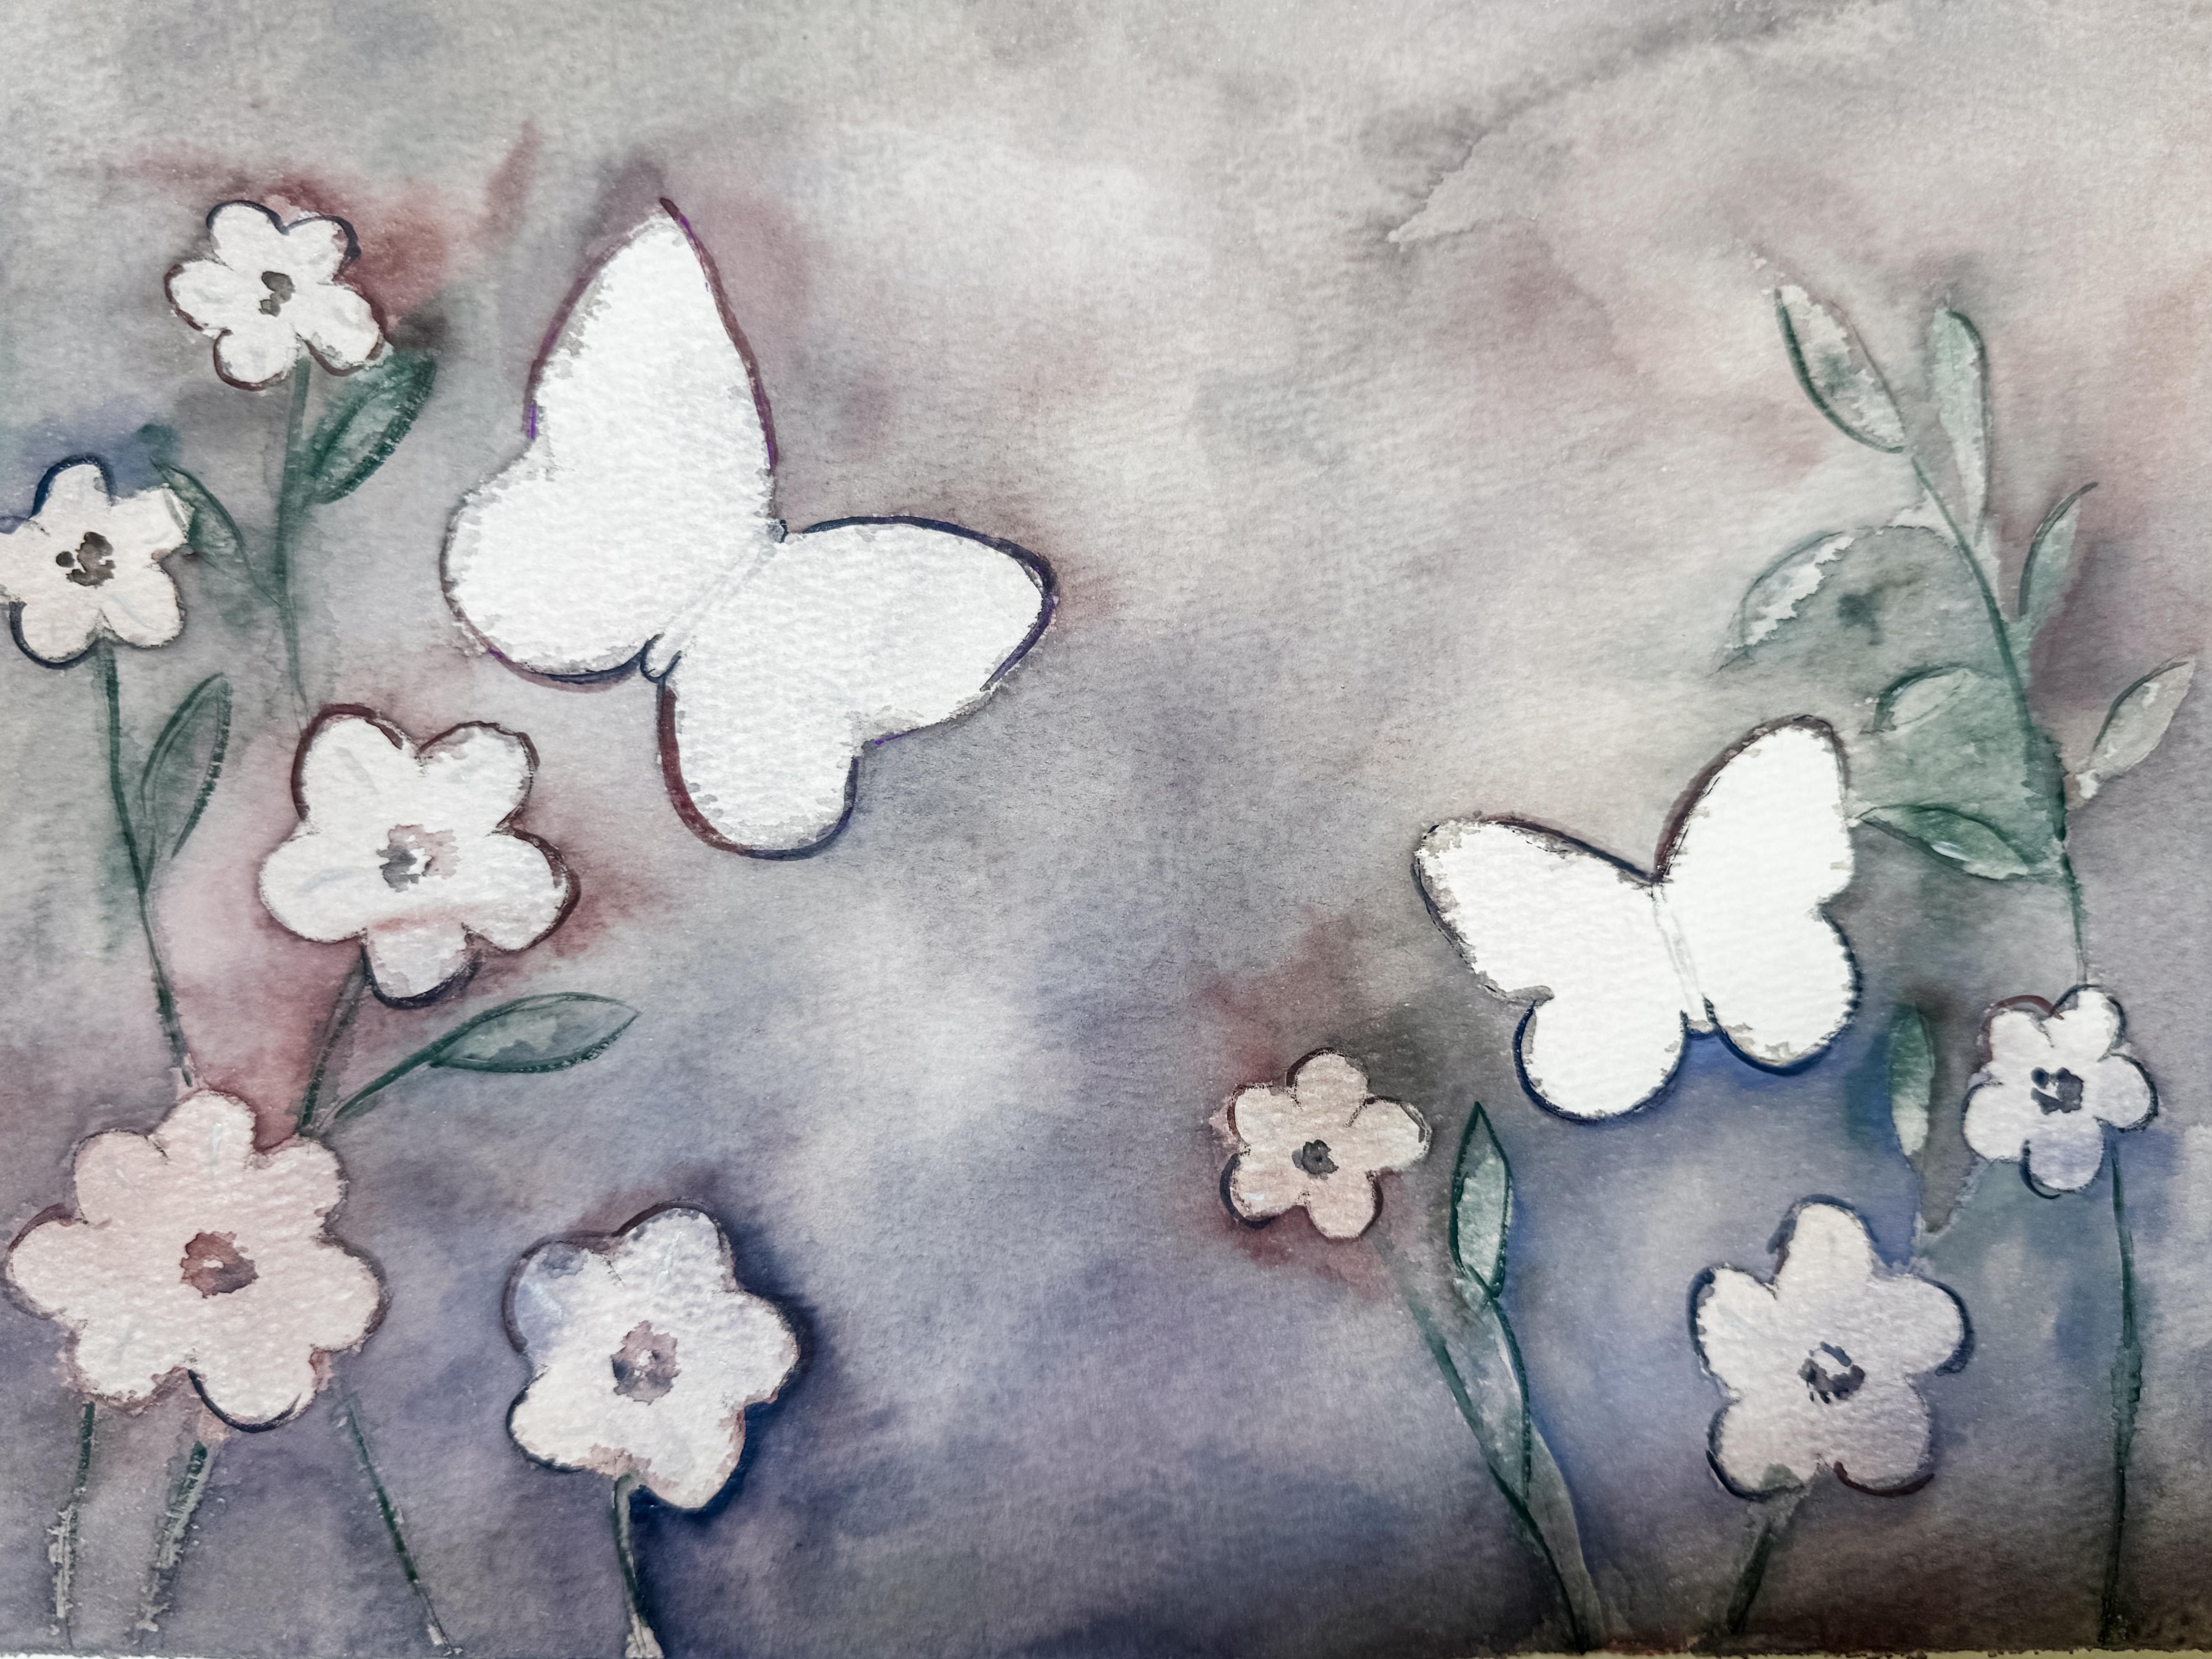
create a design but something more like this. So this is going to the one that we're
going to make today. We're going to be adding
some butterflies in and some flowers and making a
display and arrangement, an art piece that you
can be really proud of. I'm really excited
to get into that. You'll find this sheet
as a downloadable in the class project so that you can download
this piece of paper. You can either cut these out and use them as a stencil
to draw around or you can use carbon copy
paper and put that down. Remember that the shiny side or the darker side goes against the paper that you're
trying to transfer it to, and the dollar side
goes up like that. And then you can
trace around here, and it'll transfer a line
onto your painting area. So I gave this to you so
that you can print this out. I made four different
sizes of butterflies so you can decide
where you want them, how many you want
them, and what sizes. So you don't feel like you
need to use all of them. Maybe you just want to use one. Maybe you want to use them all. Maybe you want to overlap them. This is where your creativity
gets to really shine. You get to do whatever
you want to do. Then also, just in
case you wanted it, I gave you a couple
different flowers. So some of these are
a little bit more detailed and may or may
not work out for you. So just use them sparingly and carefully if you
decide to use these too. But the rest of
these, I think, would probably work pretty
well for you. I didn't give you stems
and leaves because I think you're
going to be able to do those all by yourself. And even these are so simple
that I think you could probably paint around something
that you've hand drawn. But in case you want this, I've given this to you and I'm going to go ahead
and use this when I use my class project because
I want to show you the very, very basics and I want
to meet you where you're at and make this as comfortable
and as easy as possible. But so you just know
your level of expertise, and you fit wherever
you need to. Today I'm going to be using this beautiful watercolor set. I just received
this and I love it. I am so excited
about these colors, and I think this is just so beautiful, especially
for spring. So I'm going to be
using that set. There may be a little bit more on the grayer, whiter side. Maybe a little bit more
opaque like a guash, but they are still
watercolor and you can use more water and less paint so that you get that
transparent feel. So if you ever use this set, just make sure you
use a lot of water to give yourself that
watercolor feel. I'm going to go ahead
and get this started. These are currently
dry, so I'm going to get those wet and get them um, primed and ready to go
for our class project. Since we have already dived into what negative painting
is today for the class, we're just going to dive
right in and do the project. If you need more guidance
on a step by step, please go back and watch that
other class where we did the moon and discovering and finding our
flowers because today, we're going to
actually be creating a beautiful masterpiece
on our piece of paper. Now, I am using cotton paper. Because I'm going to be using a lot of water
and a lot of paint, and I wanted to have a
higher quality paper. I think it's going to
work a little bit better. I did tape it down. It's just a sheet of paper. So I put tape on all four
sides so that it lays flat. That way, as it dries, it will also return to
the same exact size. It is dry, and I'm going to start with
a dry piece of paper, and then we're going to be wetting it through the process. Have several different
sizes of paint brushes. I'm not sure exactly which
sizes I'm going to be using. I, of course,
always like my size six and a size eight
in my round brushes. These are the Princeton
Heritage brushes, and they're probably my
two favorite brushes. You'll see me using those a lot. I also have this. It's
just a squirrel hair. Really a great brush, holds a lot of water and
is really nice and floppy. I like that one. I do have a smaller one for
a detail brush, and then I do have my 1
" Princeton flat brush. I sometimes like to use
that if I'm trying to fill up a whole area with
water or with paint. I have a couple of choices here. I'm not sure that I'll get
to using all of those, but that's what I have in case you find them. Um, let's see. I think, and I've discussed that you might want
to have carbon paper, or you can just
cut these out with the scissors and then
trace around them, or you could free hand them. I tried to make these
butterflies really, really basic and
simple to allow you the freedom of feeling
like you could possibly even just hand
draw them yourself. So the first thing we're
going to take a look at, and this is just on
a piece of paper, this is just a printout is my butterflies are going to be probably the lightest thing, and all my color is going to be coming from what
I paint around it. That's what's creating that negative painting a feel where the object itself is the lightest and the
background is the darkest. Then you can also take note
that around the butterfly, we are getting the darker edges so that it really makes
those butterflies stand out. Same over here, you can see that my darker areas are here, if this butterfly was sitting
here in this lighter area, you wouldn't have
as much contrast between the butterfly
and its background, and then it might not
stand out as much. We want to make sure
that we remember when we are painting to keep our butterflies light
and our backgrounds darker. Then you'll notice that
my flowers that are here, are mid tone. They're not as light
as my butterflies, but they're not as
dark as my background. That was intentional to create some dimension
within my painting. Now, I did add
some little leaves and some branches and whatnot, and we'll see what we get to. We'll dive right in in the
next lesson. See you there.
3. First Layer: Creating a Soft Background: First thing I'm going to do
is create the first layer. The first layer is
this background color. Now, this is not just paper. It could be. It could
just be paper color, but actually has a very
faint color added to it. I'm going to use my paint
and I'm going to put one cover of paint
over the whole thing. And maybe add a little
variation here and there, but basically keeping
the whole thing one color and then
on top of that, we'll be adding our butterflies. Let's dive in. To begin, I use my wide 1 " brush and I'm going to wet this
down the whole paper. It doesn't need to
be soaking wet. It just needs to
have a nice amount of water just so that it is wet enough that the paint
when it gets added onto it, flows a little bit. Anytime I see any
puddles of water, I'm going to brush
those away because I don't want to have any puddles, but I also don't want
to have any dry spots. If I see a dry spot like that, I'm going to wet it
and then just move that water around
going both directions. To make sure that it's
nice and level and even. Not the paper because
it's cotton is going to start to soak that water up and just
absorb that water, which is really what
we're going for here. I'm going to be starting to
add in a little bit of paint. I'm going to be
using some pinks and some purples and maybe even
some greens at some point. And you'll see that I am just
dabbing my paint brush into that paint and moving it over here and adding it to my page. I'm not trying to make it even. I don't mind that this
area is darker and this area is lighter,
that's totally fine. I might even just go ahead
and grab a little bit of this purple just to
add in another color. I'm not exactly sure where the butterflies are
going to go yet. I'm just adding
some color to it. So that I maybe a
little too much, but I also know that
that paint is going to dry lighter once we get a chance to get that dry the
paint will dry lighter. So we're going to add just a
little bit more pink on top. I usually have paper towel up here and I'm missing
my paper towel. I might have to go get
that while this dries. But I think I just got a little bit too
much water on here, so I'm just going to dab up. Typically, I would use a
paper towel to dab it up, but I'm just going to use
this cloth, which is fine. Just to dab up any
extra water that was sitting on top because I don't want it to be
flowing that much. I got little too
carried away there. Okay. I'm going to let this dry. I'm going to go grab my
paper towels, let this dry. When I get back, if it's
not completely dry, I will use my heat tool. I just have a heat gun here that I can use to dry this off. But if I use it too soon, I run the risk of
creating back flows and textures in this that I
am not looking to create. I'm going to allow
this to dry naturally, at least while you
run downstairs and grab some paper towels.
I'll be right back. Okay, I got my paper
towels and I'm reset, and this was mostly dry, but I don't want
this to be damp at all because when you go
to paint the next layer, if your butterfly area on
the inside is still damp, the paint is going to seep into your butterfly
because you have to remember that the paint will flow anywhere that
the paper is wet. I need to make sure
that my areas where my butterflies are going
to go are 100% dry. They can't be even slightly wet. So I made sure
that this was dry. There are some edges here
where I'm going to be doing my flowers that I can still feel slight dampness
to this area. So I'm not too
worried about that because I know I'm going to put my butterfly here and
another one over here, and I made sure those two were completely dry by
using my heat gun. We need to re wet this because
I know that it was really sudden for you because of
the magic of videoing, but I will need to re
wet that because I did take about 5 minutes to
get that completely dry. Take your time and
pause the video and make sure that yours is completely dry
before you move on. I told you that I was
going to be using this and tracing it so that you could
see what I'm referring to. I love this big one, but I'm not sure if that's if I want that
big of a butterfly, I think I'm going to
put this butterfly here and instead of straight on, I'm going to put him on an
angle like he's flying. So somewhere in
that general area, I'm just going to hold
my paper down with my left hand and then just insert this copy
paper underneath it. Then I'm going to trace
that using a pencil. Now, I'm going to use
a mechanical pencil because it's what I
have here on my desk. But if all you have is
a number two pencil, whatever you have is
going to be fine. I just really highly
recommend that you go as lightly as possible. You're just trying to
get a very light outline onto your watercolor paper because this will be
very difficult to erase, especially since you've
already painted on here. You don't want to
be using an eraser and lifting up that paint. With a very light hand, and you can even tell I mean, I am just barely touching
and then we're going to take a look underneath
and see did that work. And yes, I can very lightly see where that outline is and that's good
enough for me. I'm just going to very lightly
outline this butterfly. It's a very simple shape, which is nice and I
think that's going to make it easier for painting. Because we are going to be
painting around the butterfly. We will not paint inside. Again, holding onto my
paper and my carbon copy, I can lift it up and I can
see that butterfly is there. Now I'm going to put
another butterfly probably over in this area, and I think I'm going to
use the smallest one. I think I'm going
to put it about in in this region, right here. I'm just going to trace
this butterfly again, using a very light hand, not pressing down at all, just letting the pencil
roll across my page. Because they're very simple, I'm going to be
able to see those. I'm not putting
in my flowers yet because that's going to
come in the next layer. Now you can see
that whatever is in the inside of this butterfly is what my actual butterfly
is going to look like. I've put a little bit more
darker purple in this area. This butterfly is going to have a purple texture
where this one is going to be almost white with
just a hint of pink on it. That's what that final butterfly is going to look like
because we're never going to be putting paint on the inside of these
two butterflies. So now I'm going to go through
and add another layer, I'm going to get my paintbrush
out again and I'm going to spray down this palette. Again, not really sure what color I'm going to need,
but I'll get it started. Get this wet, but go
around these butterflies. When I go to go around them, excuse me, I'm going
to be careful, maybe use a softer
paintbrush than a flat edge and just go
around those butterflies, getting into all the
edges, just outlining it. And adding that
extra water there because we're going to be
putting paint right up to it, but not on the inside. Okay, so I got that outlined
and then I can bring in a little bit more water it doesn't match
the edge because we're going to be
adding another layer. I'm just adding some water around the outside
edges at this point. While you're painting water if you go back and look at
your first one because this took you a long time and
you feel like it's just got a little too dry on
that first butterfly, you can always just re wet that area and just
make sure that it gets another wetting
down with your water. Nothing wrong with adding
another layer of water. It doesn't have to be perfect because you're going to
be getting in there with your wet paint brush and getting into the details. That's fine. This is close enough, and
I'm just going to around. Make sure there's enough
water around this first one because we're really painting with a wet on
wet technique for this. I'm going to use this paint
brush and probably one of these smaller ones to go
around these butterflies. See dripped just a little
bit of water on the inside. That might be a problem, so I'm going to avoid that
one for right now. Coming in with my paint, I'm just going to add a darker color very carefully
around my butterfly. It doesn't have
to be the darkest because we're going to be
putting another layer on, but I do want it to be darker. You can always dip
your paint brush back into the water and move that around Remember, whatever colors you put down, it will get lighter
once they are dry. Right now, I can
still see my lines from the tracing, that's okay. I'm not too worried about that. That's going to eventually cover it over with
the third layer. But for now, I'm
just getting close. And then when we go to
do it the final time, I will probably use a detail
brush and make sure I get those lines covered over
with a little darker color. So I'm just going to add
some extra paint in here, and then I'm going to use this other paint brush and just kind of move
this around a little bit. Like I said, you don't
have to go edge to edge on this one because we will be putting another
layer of paint on, but I do want it to come out to where I know my flowers
are going to be because basically what we
are painting right now is the layer that
the flowers are going to whatever color
we have down on this layer is our flower color. I know my flowers are going
to be in some of these areas, so I'm just making those a
little bit more interesting. And I have that paper towel now, so I can also just come in with my paper towel and blot
up some of this and create another texture lift
up some of that paint. Okay. I like that. I am going to let that dry for a couple of minutes and then I will finish it off
with my heat gun. I don't really want
to create any blooms, so I don't want to add
more water at this point, and I don't want to dry it off too soon to create
any hard edges. So I'm going to let that dry
completely and then I will
4. Second Layer: Building Around Simple Flower Shapes: Came back to show you something so that maybe you
can learn from my mistake. That last time that I
did the second layer, I said that these areas
for my butterflies were dry enough and
obviously they were not. I'm going to get it close
up here so that you can see how my second layer into my first layer
that although I thought this section of
the paper was dry enough, it wasn't what I am referring to that if you don't have
your paper dry enough, that second layer
is going to bleed in because wherever
your paper is wet, even if it's just damp, it will bleed in. I didn't paint inside the line, but the paper
absorbed it because that paper area
was slightly damp. I need to stress that you
make sure that each layer is 100% dry before you
move on to the next layer. I jumped the gun I think
this is going to be fine and I'm going to work with it and I can always fix that. I'll actually maybe make it look a little bit more because it will have this jagged
edge once it gets finished. But I want you to see that. Now I have dried this and
I feel like it's dry, but I feel like it's at
the same dryness that the last one was where
I can still feel a slight coldness
to it and which tells me that it's
still slightly damp. Um, I think the last time I touched it and I was
like, Oh, it's warm. It's fine. But I think it's
warm because I was using my heat gun and I didn't let
it cool fast long enough. So I'm going to let
this sit like this. Now that I think it's dry, I'm going to let it sit
for another 10 minutes. I'm going to go
grab a cup of tea, and then I'm going
to come back and dry it off one more time
with the heat tool, and then we'll get started
on that next layer. Okay, it has been
about 5 minutes, and what I've decided
to do is go ahead and trace because it's dry
enough that I can trace on, but I'm not going
to paint it yet. I might give it another
5 minutes after I trace this before I start to
paint the next layer. But I can get some
flowers added to it. So going back to my sheet, I know that I want to
put a couple flowers, maybe two or three down in here, maybe one or two
going up the edges, maybe one or two over here. And then I think that's it. I think I'll then add in
some leaves and such. I'm just going to lay my
carbon paper over it, and then I know
that I want one of these smaller flowers up here. Again, just using a
very light touch, I'm just going to outline
around these flowers. I don't have to worry
about the center because we're not
going to be painting. We'll add in some details later. While I'm still waiting
for this to dry, I'm going to add in
where I think I want some simple leaves
and simple stems. And I don't need to add a lot. I just need to add some. And I'll just note very light. I'm double sided because
I know I'm going to need to leave that area unpainted. I like to have my stems going
in different directions. Because I know that if I put some paint on top
of these leaves, I'll still be able to see them. I might actually do another
layer and allow some of these green areas these
leaf areas to get green. I'm going to dry this one
more time with my heat gun. Come back and show
you what I mean. Okay. I believe that
this is dry now, but I can't stress
enough that it takes a long time for
your paper to dry, take your time and you'll
be much more happy with your outcome if you take that time to get your
paper completely dry. I wet down my palette here, that's ready to go, and now
I'm going to make a plan. What I'm going to do is this
next layer, the third layer. I'm going to make
sure that I add some green on top of my leaf areas, even if it's just in some
of them because then we'll come back and
do a fourth layer for the final layer. That way, my greens will
stay and whatever color I put on top will push
down the other greens. I'll show you what
I mean by that. Right now, I am
focusing on my flowers. If you see where the flour is, everything that's on the inside is going to stay
exactly the way. It will be a pink and this one will be a purple and a purple, purple pink, and
then these are going to be lighter color,
which I really love. So using a more fine detail,
I'm going to use my eight. I'm going to wet down around we're going to
work on these three first because I'm concerned
that if I work too broad, my other where I've started
is going to get dry already. So I don't care
about these leaves because I've decided that that's going to just
be another layer. I won't need to draw
them or anything. They're going to stay there
because I'm not putting a really dark color on top, just another light shade. I should be able to still
see those leaves and stems. And I don't have to get real
particular about any of this because it's
really just the flowers that I'm going to
be going around. I don't have to go and
do the whole page. But I am going to
work in sections. I think that's just going
to work out better for me. Being careful not to paint, even if I'm going to get near
the butterfly to go around that butterfly because if you put water inside that butterfly, it's going to bleed in there. That is not the look we're going for because we are doing
negative painting. Basically, what we
are ending up doing is painting the top layer, what's going to
look like the top, the closest to you is actually
what we're painting first. The butterflies
should pop the most because then the flowers because they'll be
the next lightest, and then the leaves and then the background
will be the background, which will be the darkest. Like I said, I'm gonna
just work in sections. So now just add a little
darker color down here. Let that come up close
to those flower heads. I'm gonna use several
different colors so I can move it around. Okay, let's choose a new color. Maybe some of this lighter pink. Not everything has to be dark. Especially since we know we're going to be adding
another layer. We haven't added Too much. Add a little purple. I just using some
water to push that around dilute it
down a little bit. Remember this is just
one of the layers. Stage there, a little bit here. I'm not painting the leaves. I'm just putting paint
in those general areas, being careful not to
hit those flower heads. It doesn't have to coat
it. Just going around it. Say even if just some
of these areas get some greens moving that around. Trust the process. This is going to look great by
the time we're done. I careful not to paint over my flowers or my butterflies because
those are never going to get painted again
until we go back in and add in any details
that we want to add in. Okay, I'm going to
let that dry and then I'm going to dry it
completely with my heat gun.
5. Final Layer: Adding Depth and Contrast: You see how much water I'm putting down and
how much paint and how much scrubbing and going over it and over and over it. That is why I really recommend using a cotton
paper, 100% cotton. Um is probably ideal just because with this
style of painting, you're going to be going over it over and over and over again. I want you to be successful and feel
happy with your outcome. And if you're not using
a high quality paper for this project, you might regret that. Other times, I am not going to tell you
that you need to have a high quality paper because it's not always vital for
every single project. But in this particular case, I would recommend that
better style paper. I'm just moving that
purple around just so that it feels like it's intentional and getting put
in different locations. I have not pre
thought this through. I am not going, oh, I wanted to make sure that this
area was purple and that area was blue and I'm
just going with my heart. So as I'm painting it, I'm looking at the
surrounding areas and wondering what color
I need to make things. You can use a smaller paintbrush
if a smaller paintbrush would be easier for you when you go around the items,
that would be fine. Feel free to use a
smaller paint brush. What, just add a
little lightness up in here by adding
in some gray. Since everything's really wet, it's just going to
blend very nicely. Make sure you're using enough
water so that you don't get so that it's not too rigid. You're not trying to
paint like a hard color. It should be very
transparent at this point. Don't forget those leaves, paint around those leaves. If you're not feeling like
your flowers popping, put a little darker color
around it or your leaves, put a little darker color
and then blend it out. I just added in that purple and now I'm going
to just blend it out pushing that paint around. Let's see I wanted to be a smaller color, a smaller paint brush. I want this to be a little
darker pink in here. Around those leaves. Blending it out. Add more water. If you're not feeling
like it's blending, add a little bit more water. You can also lift. So if you like you
have too much, you could just come
in with a paper towel or your paintbrush and just lift some of it. Yeah. Okay, I'm going to let
this completely dry, and then we're going to come
back and in the next lesson, add some details to it. So let your painting dry and then I'll meet
you in the next lesson. And
6. Finishing Details: Bringing Your Painting to Life: Get a little little of this darker pink and just
put a little center to it. Yeah, it's kind of pretty. Try different colors. Okay. Fun. Let that dry. I'm going to go get
my detail brush. I think maybe I like that
better than the gel pens. Again, I'm not
going to put it on the whole thing just
in certain areas. I kind of helps make that flower stand out a little bit more, a little bit more definition. Same with a butterfly. I think I definitely like that better than
the gelpen look. But maybe yours will
be different and so you just choose whatever
works best for you. Basically just using
purple and pink. Just a little mix
between the two. So I'm making blue. So I'm making purple pink. Basically using the same colour paints that
I've been using. Maybe just a little
bit of the green. For some of the leaves, Okay. I think we're coming to the
end of the class project. I want you to come back to the next lesson,
our last lesson, where we're going to
wrap this up and talk about what we learned in the class and look forward to the next
class because boy, we have some really fun things
coming for the next class where you're going
to get a chance to put all of this into practice. Come back to the last lesson and we're going to
wrap this all up.
7. Final Thoughts and Project Wrap Up: I hope you enjoyed working
through this class and continuing to explore negative
painting in a new way. This time, you were
able to start with simple shapes and
build around them, which gives you a
little bit more control while still keeping that
soft expressive look. This negative painting process was very different
from the last one, and so your painting will
look very different, which is exactly what we want. Each approach helps
you understand this technique a little
bit more deeply. If your piece didn't
turn out exactly the way you imagined,
that's completely okay. This is all part of
the learning process. You'll begin to
start to see shapes, build layers, and become more comfortable
with the process. It just takes practice. Take a moment and look at your finished piece
and notice how those shapes stayed clean and bright just by
painting around them. That really is the power
of negative painting, and it's something
that you're going to continue to build
on as you practice. Would really love to
see what you created. Please take a moment and upload your project
to the class gallery. It's always so inspiring to see how different everyone's
work turned out. If you enjoyed this class, I'd also appreciate
it if you left a review and followed
me here on Skillshare. It really helps me continue creating more classes like this. Thanks for painting. See
you in the next class.
 Brenda Jones, Watercolor Artist & Teacher