Transcripts
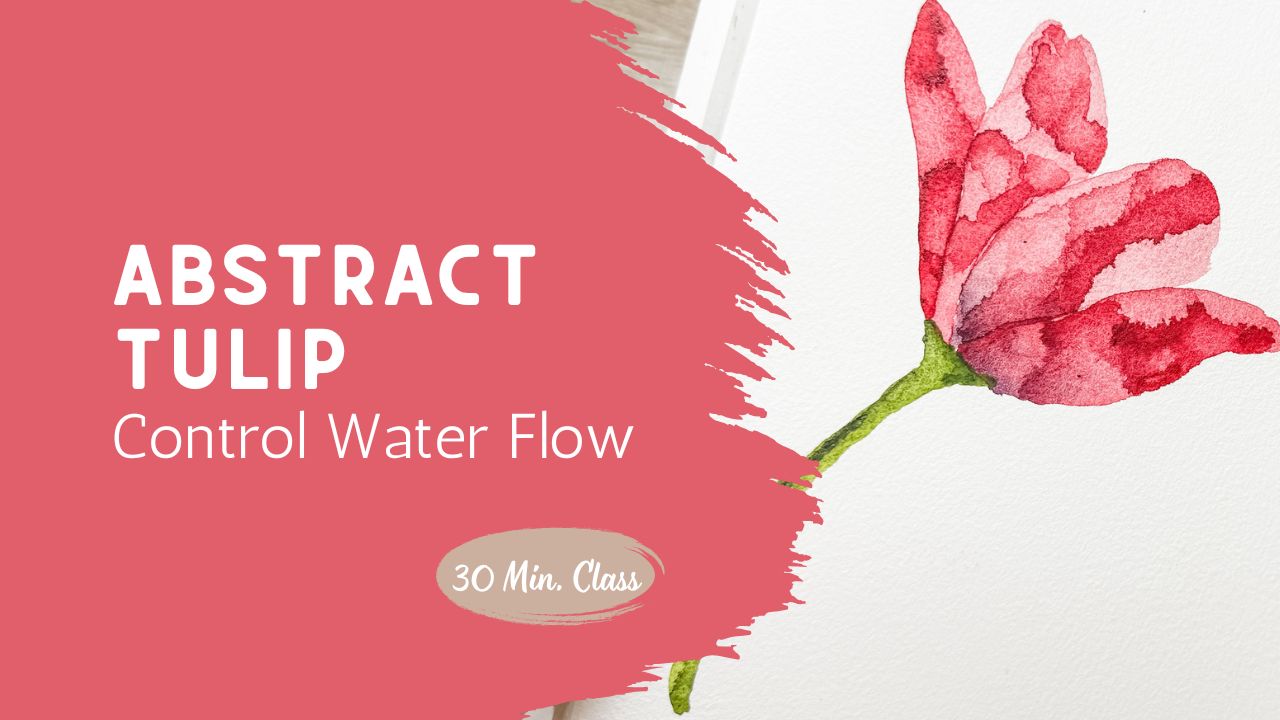
1. Introduction: Let the Paint Move: This class, we're going to
create an abstract tulip using a technique that's a little different and honestly
a lot of fun. Instead of trying to
control every brushstroke, we're going to let the water
and paint move freely, and then we're going
to use a heat gun to guide what happens next. You'll see how drawing
certain areas at just the right moment creates
beautiful hard edges, unexpected layers, and soft transitions
all on the same pedal. This certainly isn't
about perfection. But it is about learning
how to work with paint. I'll walk you through
how to build each petal, how to move the paint
while it's still wet, and how to use a heat gun
to create the texture. If you ever feel
like your paintings look flat or overworked, this is going to open up a whole new way of
painting for you. We'll see what happens
when we give up a little control and let
the paint lead the way.
2. Supplies: Simple Setup: I do want to give you a
quick little supply list because there are a
couple things that maybe you don't have
that would be really helpful before you go
and start this class. So you're going to
want to print this out unless you can draw
really well and you want to freehand draw it,
you go right ahead. But if you need help with the
drawing, I did supply this. You'll find this in the class project where
you can print this out. And remember that when
you're printing things, you can scale it so
you can adjust in your printer settings to whatever size you
want to print it. If you don't change your sizes, this is the way it should
print for you about that size. So along with that,
you're going to want some watercolor
paper, of course. Because we're going
to be working with a lot of water in
this technique, it would be better if
you had 100% cotton. So get yourself a couple
of different sheets. They don't have to be large, but, you know,
whatever you have. And then also have
a couple sheets of just some practice paper, some things maybe it's
been painted on the back, something where you can
play around with and practice the technique before moving onto your better paper. So once you have all
those things gathered, it would be really helpful. If you happen to have
a mat or a frame, something I'm going to
be using the square one. You could also use
this five by seven. You know, whatever
size you're going to be finishing
this project for, if you had a mat, that would be really helpful
for doing this process, and I'll show you
why in a second. The other thing that
would be really good for you to have is some carbon copy. Unless you're going
to free hand this, which again, you go right ahead. This is not that difficult. It's just a bunch of ovals. So you could free hand this
however you wanted to, but if you want to trace it, having some paper like
this, this is carbon paper. You lay the darker
shiny side down onto your the watercolor paper that you want to
transfer it onto, lay your copy of what you
want to trace on top of it and using a very,
very light touch. You don't want to be drawing
it really, really rough. Just a very rough
light tracing of it so that it just shows
barely onto your paper. Just to give you a sense of your outline would be a
really great thing to have. Of course, if you have
some kind of an eraser, this is one of those
eraser bags that I prefer, but a regular eraser
would be good. In case your lines
get too thick, you could erase them if
they're at too dark. Obviously, because
we're doing watercolor, you're going to want
to have some brushes, some water, and some paint. You use whatever you have, whatever colors you like, whatever style of
paint you have, whatever you have is perfect. I'm not going to
tell you what colors to use or what
style paint to use. So if you have a palette
in a tin, that's perfect. Use that. Don't feel
like you need to have the tube paint in
order to do any of this. So I'll be using this because that's what I have on my desk. This is all dry. I have not painted yet today, and so this is all dry. I'm just going to
use a spray bottle and activate it
and get that wet. I'll wet down the whole palette, and then it'll be
all ready to go. I might not even
clean up the center because it's not that bad,
and I'll leave that there. But I just like to spray
it down so it gets nice and activated by the
time I'm ready to use it. Of course, I have water
and I am ready to go. So what I'm going to do, I'm just going to
move right over into the next spot is
deciding how we're going to position this flower that we're going to
paint into our frame. So using my five
by seven square, my five by seven frame, Matt, you could just put it on top of it and
say, that's perfect. That's exactly the
way I want it. Or if you want it to get a
little bit more artistic, you could have it peeking
in through the corner, or maybe you want it to be
peeking up through the bottom. And turn it that direction. You can choose
however you want to. Maybe it's a dripping down tulip and it's just coming down. This is where you get to
be really creative and why it's really helpful to
have some kind of a mat. So I have decided
that I want to use a square one because of
the frame that I have. And so I'm going to be
using my square mat to help me decide what direction this flower arrangement
is going to go. So I could just go straight. Absolutely nothing
wrong with that. I could put it on an angle. I could tuck it all the
way over to the side. See how it's just so many different options
of what I could do to decide how I want my
final art piece to look. So I'm going to take a
minute to think about that. And then once I have
figured it out, I'll be transferring it
onto my final paper. But first, before we do that, we're going to do
some practicing of this technique using a hair
dryer or a blow dryer. But first, we're
going to be using this scrap paper to practice how we're going to actually
achieve this look that we're going for
using a heat gun. So the last tool
that you really need to have is some
form of a heat gun. A hair dryer might work, but you really need to have it concentrated where the air is coming out in a smaller spot. So if you have a little adapter that
you can put on the end, that would probably be
helpful because you do need to be able to move the
paint around a little bit. So I use a heat gun and
I recommend a heat gun. You might be able to
use a hair dryer. I have not personally
tried that, but that's an option if you want to play around
with it and test it. So come back to the next lesson, and we're going to
start practicing it and seeing how we're going to use that heat tool to get this effect that
we're gonna be going for.
3. Practice: Control Water Flow: Okay, so if you've been in
one of my other classes, I did show this to you before. But for anyone who's new, I want to show it again here. This technique that
I really like to do, I find it really fun. So what I'm going to do is you can wet it first if you want to or you can just go right in with the paint, whichever way you want to do it. But I wanted to first show you how much water we are adding. Let's see if I can get this
to shine with my light. Okay. Here, I want to
show you how much water. I wanted to show you how
much water I'm adding. I brought it up here to
the camera so that you can see that I think that you're going
to be able to see that. I'm letting that water have so much water on that spot
that it actually moves around. It's sitting up on top
and it's moving around. I'm going to add some pigment to this so that you
can see it move. So if I add in this color, you can see how it's flowing. See how much water I have. This is not just a
little amount of water. We're using a lot
of water on here. Okay. So very different from how you would
typically do watercolor, but you can also see
that it doesn't run. It stays exactly where
the paper is wet. So if I start moving
my paper and I mean, if I start getting this
area wet down here, it will actually blend and move down into that area
too. See that? Otherwise it wouldn't have
moved into that area. If I get it wet
and then I touch, all of a sudden it moves
into that area as well. As long as it's not wet, it's not going to move. That is the basis for how we're going to be making this water effect happen for us. I'm going to go ahead and
show you now that you can see that there's water on here and it's moving all over the place, we're going to use our heat gun and I'm going to move that water around
using the heat gun. But I do need to make sure
that I'm not spraying it. If I start off right here, that might splatter
the paint all over. I hold my heat tool up high and let it get started and then I can
move it around slowly. I'm going to show you
what I mean by that. What I'm trying to do is dry one section creating a texture so I'm going
to dry one section and then I'm going to push the paint up to that edge of where it's dry and create another line which is going to create
another texture area. I think it's just
easier if I show you what I mean rather than
talk about it a lot. I'm sorry that this
is going to get loud. I'm going to not talk over it and then maybe I can even
silence this during editing. Let's see how it goes. Okay, so I dried that
section right there. So now you can see that
if I tilt my paper, it's not going to fill that area because now that areas dry. So now I'm going to
dry another area. And so now you can see that the paint slips back over here, but it won't go into this area because now that area is dry. This is just creating all these different
little textures. So do you see how I'm creating all these different
layers throughout this? So that's kind of what we're
gonna be doing when we get over to the tool up that
we're going to make. So you can see that I'm actually pushing that paint
around with my tool. Being very careful by not letting it just
splatter all over. I'm using my tool and
going up and down. And essentially what this is doing is allowing me to create all this fun texture
and layered effect with lots of petals without actually having
to paint in all of them. So I feel like maybe that puddle is a
little bit too much, and so I'm just going to use my brush and just
pick up some of it. I didn't you know,
I didn't brush it. I just let it pick
up some of it. I'm going to go back
and try some more. If you don't take the
time to practice this, this whole class might be
really frustrating to you. I highly recommend that you actually take
the time to watch the videos and review this and take the time to actually
do this practice. Make a blob, move
that paint around, dry different areas,
and create this effect. You will feel so much more
satisfied with this class if you take the time on a scratch
piece of paper to do that. So I'm going to then come in and just add
because I feel like maybe we missed an opportunity to have another petal over here. So using really wet
water and paint, just create another
wet spot here. I'll see what happens
if I can blow that around and get that dry again. Just kind of making
another layer there. Okay. So that's the basic style. That's the basic
technique of what we're going to do when we
move over to our tulip. Technically, you could take this and just make your little
blob and say, You know what? My little blob is also a flower. Maybe it's a rose, and this is the
center of that rose. And here you've created a flower and you
didn't even intend to. So maybe that is, um, you know, what happened here
and you can create something beautiful even
out of your sample. So it wasn't really intended, but I noticed it as I
was painting it that it kind of looked a
little bit like a rose. Very abstract, very
freeing and fun. While this is a really
easy thing to make. It's actually you need
practice because it's really easy to just put too much paper down and come
at it a little too fast. Let me just show you
here. Let's just put a bunch right here
along with some water. And then if I just
came at this too fast, I want to show you some
things that could happen. I I start down here too
low, See how it moves. Because I'm not being careful. See how it moved all the way out there and
splattered out. That's because I
wasn't being careful. The other technique,
the other thing that can happen if you're
not being careful. I'll show you this is
you could create circles unintentionally
because you're not moving your heat
gun around enough. I'm going to create a circle here just to show
you what I mean. So there I actually
created almost like a complete circle
because I was coming straight down on it and I
held it there for too long, and I didn't come back and
move the paint around. So those are some
things that you're gonna want to avoid
is going at it too fast and too hard and concentrating on
one spot for too long. Move that paint
around a little bit, and I think you're
going to be able to do this and
have a lot of fun. This is actually very addicting
once you get started. So now that you've practiced
this hopefully a whole bunch of times and you have a whole bunch of little
blobs that you've created, um, come back to the
class next lesson, and we're going to get started
right away on the project.
4. Tulip Part 1: Build the Petals: Okay, so like I told you in my earlier lesson that I am
going to be making it into a square image or painting because I have a square frame that
I'm trying to fill. So I could transfer this using my carbon paper.
I have my paper here. I can use that and just make it go square and just straight on, or I could move it
around an anklet, and I think that's what
I would like to do. So what I first want
to decide before I decide where to place it on
my paper for my watercolor, I want to decide what direction and how much I'm going
to be filling in. I think I think for this class, I'm going to make that shape. And so so I think I've decided that I would like to
have it kind of on an angle, kind of like that and
off to the one side. So what I'm going to
do is using my mat, I'm going to use
this as my square. So this top edge has to line up with the top edge of
my watercolor paper. Whether it's on a
tablet like this, on a board or a single
sheet of paper, this needs to line up with that. Because I'm holding
this paper underneath it attached over here so that I don't lose my angle that I want. So that is the
direction that I want. And then I'm looking
at left and right. I think I want it right
about there compared to where I can feel
the edge of my paper. That's the way I want
this to be finished. But as you can see, I'm going
to just hold onto my paper. You can see that this is
kind of like, tilted. It's not straight up at the
top because I'm trying to tilt my arrangement that
I'm going to be painting. So I'm just going to
make a little mark here just so that I have a clue. I can always erase that later. I'm just using a pencil. So that lets me know that that is where this top of
this paper needs to go. When I get finished, so
I can pick this back up. And I'm gonna be putting
my carbon paper back down. Remember, the shiny side or the blacker side goes
down towards your paper, and then I can line
this all back up. And then I can just
confirm that this is right by coming in here and
laying that back down on top. Okay, I hope that made sense. And the only reason
I'm having to do that is because I'm not trying
to paint it straight on. So now I'm going to trace this. And so I'm going to hold this lightly but securely in place
so that my carbon paper and my paper on top with my outline doesn't move
because now I know exactly where I want to get this
painted onto my paper. Just going to move
it over slightly. Re confirm that this is correct. Yeah. That's good. So using a pencil
and you can use a mechanical pencil or just your regular
number two pencil, but very lightly, very lightly outline this
or free draw it. If you want to free
draw it, you go right ahead and just put some outlines around
the outside edges of all of these
different petals. I'm not going to be putting in the outline for
these center ones, like that line and that
line and this line. I'm not going to
put putting those in just because I'm
not going to need that for this um painting that
I'm going to be making. So I'm just putting a
little outline here. Holding my paper down. I can lift this and verify
that what I painted, what I traced on actually
came through and it did. Now I know that I have
what I needed and I. It's very, very faint now. I had it on there, I went light, but then I erased it and I
made it very, very faint. You might not be able
to see it now that I put it down all the way
away from the camera. Come back to the next
lesson and we're going to get started
with adding some paint to here and using the hair
dryer to move that paint around creating some really
cold texture for this tool.
5. Tulip Part 2: Create Texture with Heat: We are back and ready
to get started. I am going to be
using some reds and pinks and maybe some
purple to create my tulp. Again, we're going to
use lots of water, lots and lots of water. If I put it down and it's not enough water, I
can always add more. But we are just going to paint
one tulip petal at a time. I have one, two, three, four, I have four different petals and I'm just going to
paint one at a time. I'm going to start over
here and do this one first. Because it's my back one, I'm actually going to try to
make that one my darkest, so I'm going to be
adding in my paint here, maybe transfer switch over to a thinner brush, but
we'll see how it goes. So adding in this red, I really like a red tulip. Oh, so beautiful. I'm going to add a little
bit more water up on top because I really want to have enough water on here
to move around. So you can see that
that is moving. Lots of water that
moves around. Okay? So I'm going to carefully use my heat gun and move that around to create
some extra texture. So I feel like this area down in here has just
a little too much. It's too thin of an area
and too much paint, so I'm just going to
lift up some of that. Okay, so my first one has done, it's got great texture
going on in there. So now I'm going to get
started on the next petal. And I can come right up against this because
now that area is dry, and I'm just going to fill out this next petal going all
the way down in here. But just doing the
one petal at a time. Okay. Again, you can see that
there's enough water on there, that it can move around. Okay? If you don't care for something on how it's dry, you
can always rewet it. So I'm not really liking
this line right there. So I'm just going to re wet this edge and just bring it back up and let that get wet
again and dry again. Okay. So now that one's dry and I'm going to
move on to the next one. It looks like I've decided
to just do this in this complete red color and
not adding in the purples. We'll see. I hadn't practiced
this one before, so I'm not really exactly sure if I'll make any changes here. I might be fun to just
add in a touch of purple. Maybe just into the
base. See what happens. I think another one. Last one. I did like that little
purple in the bottom, so I think I'll
add some more in. Just let that move
around a little bit. Just kind of
intentionally making some areas darker than others. Just just such a fun
creating those hard edges. I'm not sure that I'm loving
the white lines in between, so I'm just going to cover
those up a little bit. Oh. Okay. Such a fun project. So now I'm going
to get some green. Um, get my green
activated over here. I go with a lighter green
first and just add that in. I always like to have
where it connects, if you can see it connecting
to the base of the flower. I always like that to be
just a little bit wider, a little bit more
like a triangle and adding some
extra water in here, bringing that all the way down. I think I want to add in a
little bit of the darker green some texture accents. All right. So coming back to my Now I can put it
on there like that. And look how neat that is. That's so cool. And because
I have it big enough, I could rearrange it. I could choose different spots, because it's small enough on my piece of
paper that I could move this around
a little bit and find now the exact
spot that I want. If I wanted it to come up
from the top, I could. So I can choose where I would
like to have that come in. So come back to the next lesson, and we're going to put
this into a frame.
6. Final Thoughts: Your Project: If you have your
watercolor on a tablet, I've heard some people having a hard time getting this paper off of a tablet where it
is glued on several sides, it's really not that difficult. There's always a spot that
has a little opening. This particular brand is
in the middle at the top. Other times, it's on the top
here or even on the corners. You have to look for it
depending on what brand it is. If you just have a
straight butter knife, you can just slip that
knife right down in there and then wiggle it
around and get it out. You can also use
a palette knife. I happen to have this boning
knife, which I prefer, and I just slip it in there, and then I just slowly
move my way around. Slowly, slowly move my way around to free it
from the next page. But I just do it really slowly, and all I'm doing is
breaking that seal. So if you've ever had a hard
time with getting these off, it's a really simple way. If you ever get stuck
and you feel like you can't go that direction
anymore and you might rip it, just take the knife or whatever you're using out and just come from a different direction. And sometimes I can even, like, wiggle it a little
bit to free it. So sometimes it just gets
stuck on this extra clue. So now that it is released, I'll put this aside
and get this cut out for my frame that
I have laying here. So I want to take off
just some of the top. I'll take off some
of the bottom. But, what is it gonna fit? Yes. I need to remove
some of the bottom. If you don't have
a paper cutter, I do highly recommend you
pick up a paper cutter. It makes things so much easier if you have
a paper cutter. I'm going to make my frame here so that I can decide
what I want it to look like, make sure that it's
fitting on the back. I like it just peeking in. Such a different abstract feel. How would I have it
exactly the way I want it? I'm holding onto it so
that it doesn't slip. I'm going to carefully
lay this down. Then I'm going to
use some artist's tape and I'm just going to tape it down so that it doesn't move around inside my mat. After I get two pieces on, I am going to double
check to make sure that it's still in the position that I
wanted it to be in. Nothing worse than getting it all taped up and
realizing you moved it. So, no, I feel good with that. So now I can tape
down the other sides. This is just the way I do it. There's all different
ways of getting your artwork inside of a frame. This is what I found
to be easiest because then I can just pull
this out and I can rotate this because this might
be my arrangement that I put on or my art
piece that I put into my bathroom for
this next month. And then I take
it out and I take it apart and I put
in the next one. But I just realized that
I never signed this, and I like to make sure
that I sign my artwork. So I'm going to take
a second and sign it. I have a bunch of these. Let me show you this.
This is kind of cool. I just picked up all of these. Let me move this out away. All of these pens here. They're just gel pens, but there's so many
different colors, and what I've decided to do is use a coordinating
color that I, you know, if I wanted to make it bold or if I wanted to
put something down here, I could choose different colors. So instead of always doing black or always doing a brown mark, I can use something else, and so I'm deciding
to use a screen. And I'm going to sign it. Okay. And on this one, I think I'm just going
to do something really simple and sign it
on my stem itself. Really tiny. Like that. Very, very small. But using that green just so that it
blends in with the stem. See how I did that? I just
made it really small. You sign yours however
you'd like to. Okay, and then this
is just a it's a shadow box frame that
I picked up at Ikea, which I really like
the Ikea frames. They're inexpensive, easy
to get your hands on them, and then I have a
bunch that match. They're really easy
to take apart, 'cause I trade out my
artwork quite frequently, like I said, so I like
to be able to do that. Then there you go. It's in a frame, ready to go. Before you head out, I'd love
to see what you created. So take a moment and upload your toilet project
to the gallery. Even if it didn't turn out
exactly like you expected, that's part of the process, and it's always worth sharing. If you enjoyed this class, I'd love for you to follow me here so that we can keep
painting along together. If you have a quick moment,
leave a short review, which will help other
students find this class. Thank you so much for
painting with me today, and I will see you
in the next class.
 Brenda Jones, Watercolor Artist & Teacher