Transcripts
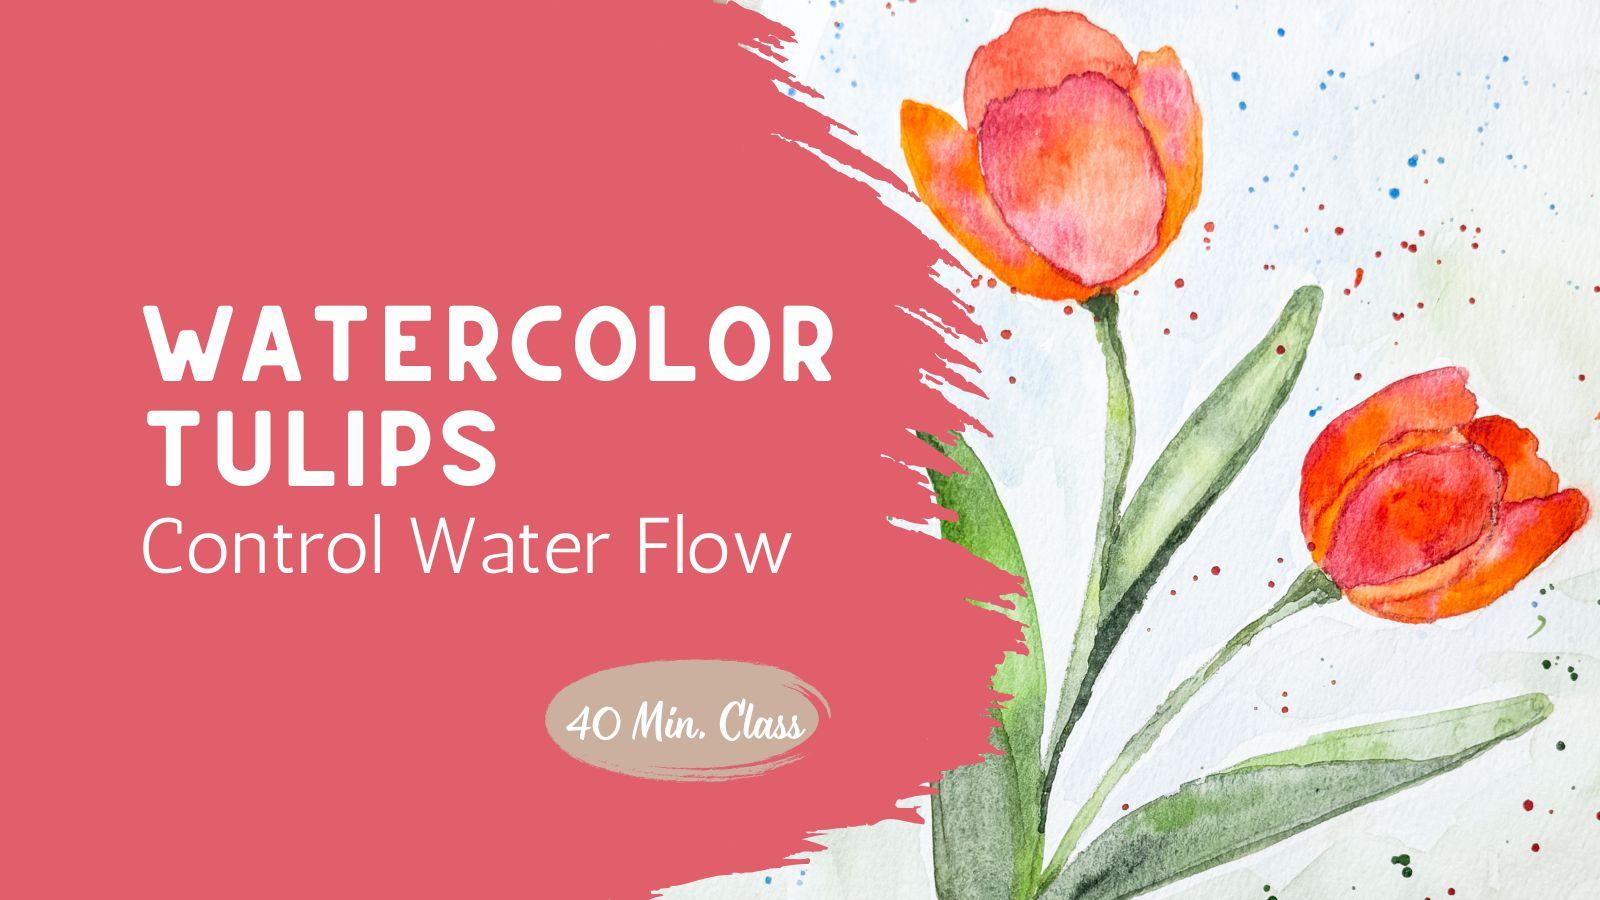
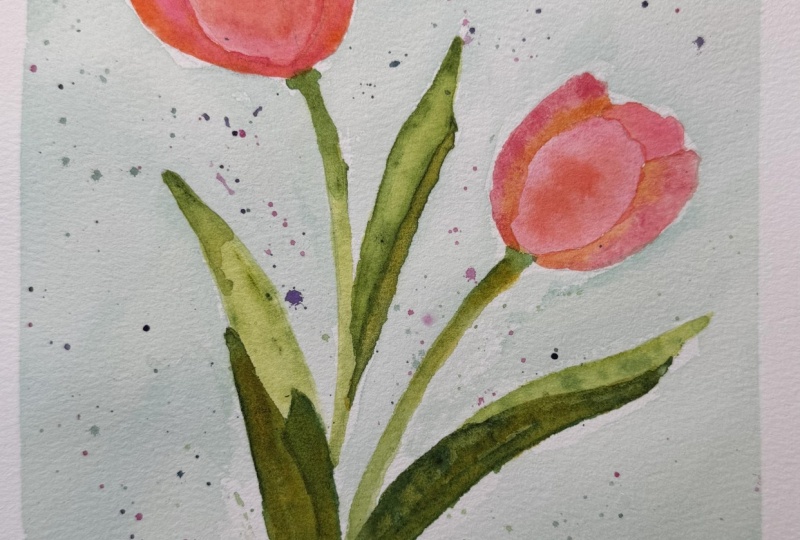
1. Soft Tulips: Class Introduction: This class, we're going
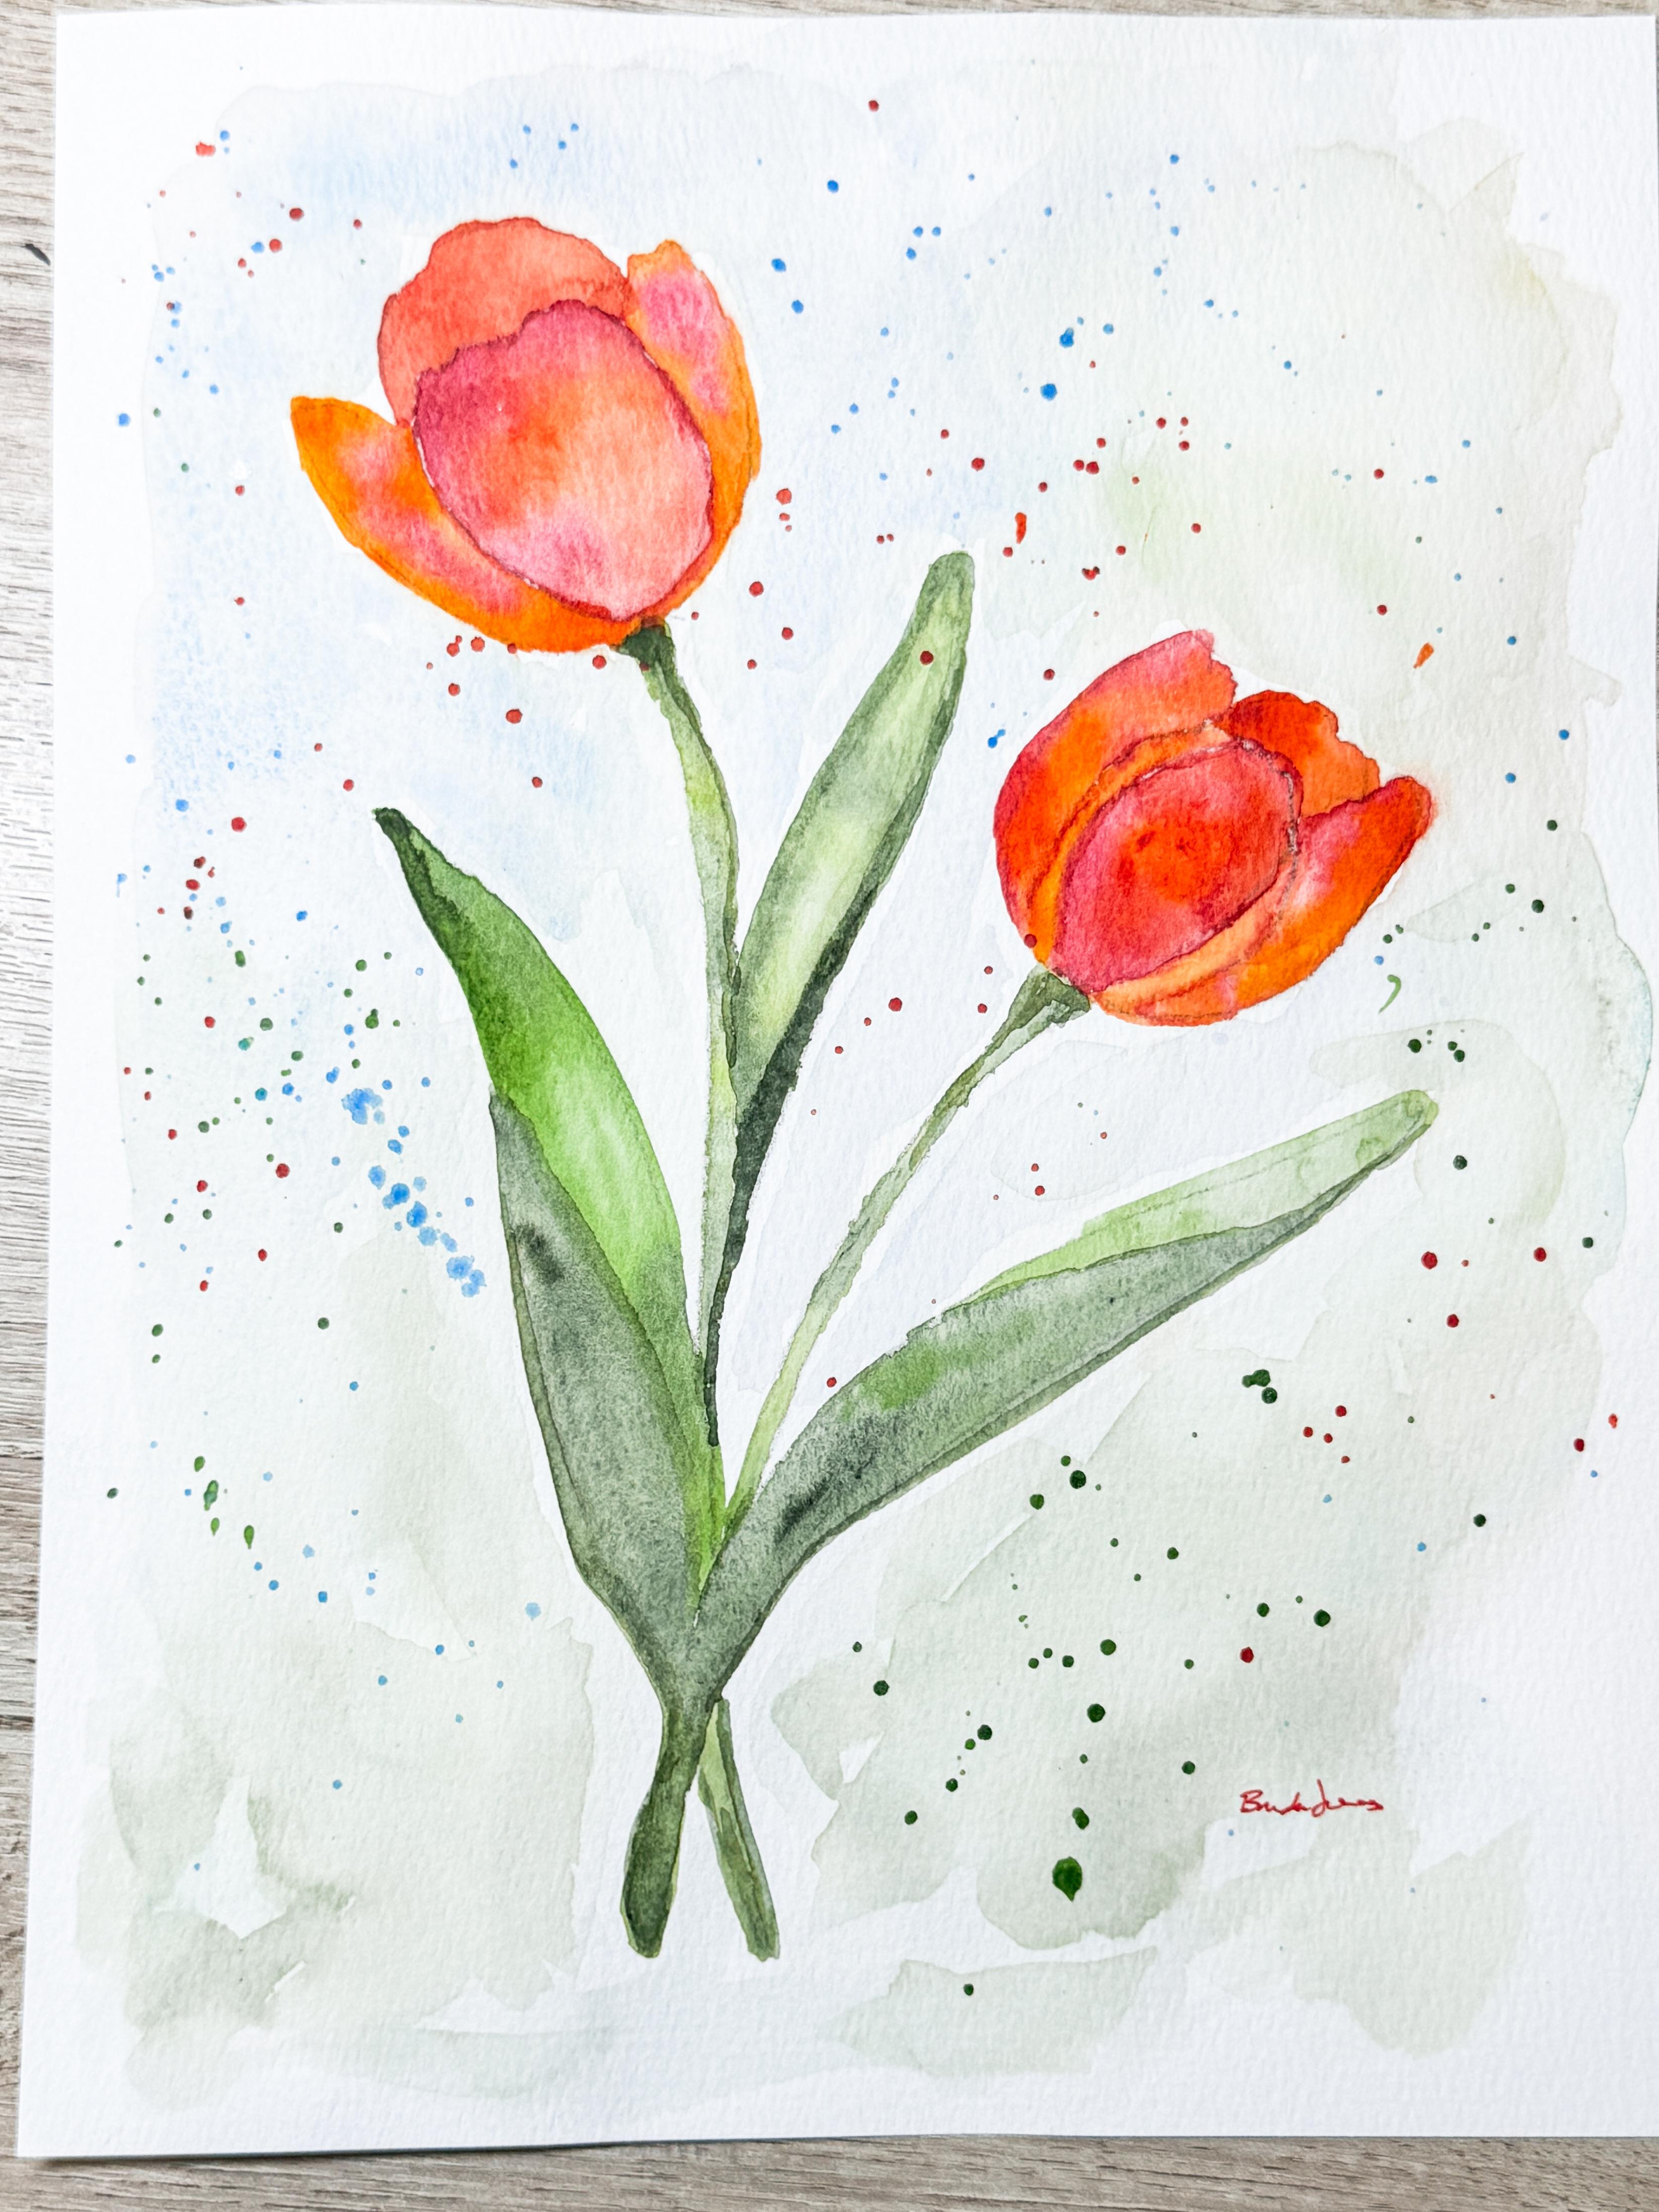
to create a soft, expressive tulip painting
using wet on wet watercolor, a gentle background wash, and a bit of strategic splatter to bring everything to life. This is a really beautiful
way to loosen up your painting while still
feeling in control. We'll focus on how water
moves, how pigment spreads, and how to glide that movement
without overworking it. Before we begin
the class project, I'll be walking you through
some few key techniques. We'll talk about
working wet on wet, how to get those soft
blends inside each petal. How to create a very
light background that supports the flowers
without overtaking it. I'll also show you how to
add splatter in a way that feels intentional and
balanced and not distracting. Once you feel comfortable
with those techniques, we'll move into
the class project, which is broken into
two simple parts so you can stay relaxed
and enjoy the process. This class is perfect. If you're ready to build
confidence with water control, soften your edges and create
something that feels light, fresh, and a little bit playful. As always, take your time, trust the process, and let the paint do some of
the work for you.
2. Wet-on-Wet Control: Core Techniques: Today's class project,
we're going to be painting two tulips
with a background, and if you want to,
you can add splatter. We're going to practice
those techniques here on a scrap piece of paper. I do recommend that you're
using cotton for this project, but if you don't have cotton or would prefer not to use it, a standard piece of
paper would be fine. I'm actually using a standard
piece of paper here, although I think cotton
would probably be better. I do recommend that you
tape down your paper to your desk so that
it doesn't move around because we're going
to be getting it fairly wet. You will notice
when you get into the class project that
I didn't do that, and that caused me a
little bit of a problem. So I do recommend that
you tape your paper down. So we're going to use this as an example of
what we're going to be working with and
I'm just going to use some water on a brush. This is a quill brush and I'm just going
to make a circle. Now, my circle, I
don't want it to be flooded with
paint or with water. I don't need it to be pulling. I just need a nice amount of water on it where
the paper is wet, but it's not soaking wet where
you have puddles of water, a nice amount of water on there. Now I'm going to add some orange to show how we're going
to work on wet on wet. If you haven't
worked wet on wet, it's definitely a technique that you're going to
want to practice. I'm just going to add a orange outside edge
where it's already wet. And let that flow like that and you can see how it's flowing
into the center. Then I'm going to come
in with a second color. Just like we did here. In our final project, we're going to be adding
a second color of pink. When I add my second color
of pink, they flow together, and then you can create this ombre effect where
they flow and blend. You can even come back in and add a little bit
more orange into the middle it just creates
such a beautiful effect. You can play around, I picked up a little
bit of green there. You can play around with
that and create this effect. We're going to do it again
with a different color. I just have a little orange
on my brush, which is fine. I'm just going to
wet down my paper, not so it's flooded and
flowing just so that it's wet. Then I think I'll use a blue. Just to give it a
little different look and I can drop in my blue into my wet areas maybe
a little pink. It's just doing a wet on wet. Then I can push some
pink over here. I can put a little bit
of blue over here and you can see how it just really creates a beautiful effect. That's how we're going
to be doing our petals. Now, you're going to want
that to dry completely before you move on to the background, but I do want to work
on the background as well so that you understand what
we're doing with that. I am going to make one more,
which is for the green. I'll just make a maybe
a different shape. If I add my brighter
green to it, and then add a darker green. See how you can mix it
because it's wet on wet. You can really mix
your greens together. You're almost
mixing your colors. Instead of mixing it
here on a palette, you're mixing it over here
right in your painting. Creates a really nice variation. I'm going to dry this off and then we're going to
work on background. For the lesson, I chose
to do just circles and a little blob just because it's quicker and easier
and larger areas where you can practice that
technique of wet on wet. That's why I just chose some random colors and
some random shapes. To add a background, I'm just going to use the
cleaner water that I have here. And I'm just going to put
it in around the edges. I'm not trying to make it so that I'm not trying to go up
and around and trace out. I'm just using real
broad strokes of getting some paint some
water down onto this paper, certainly not trying to cover the entire piece of
paper with water, just squiggles here
and there of water. Then what I'll do now
that I have it fairly wet, but not puddles. Definitely not pedals
and not everywhere. I'll come in and add
in my paint on top. But here's what's important. When you are doing a background
for today's project, the way I'm going to be
recommending is you're using a lot of water and
very little paint. Here I've made this
little shade of gray and see how watery I'm making
it with very little paint. Then when I come over
here and I add it on, it's just a hint, just a hint of the color, which is going to create a
really interesting background. So if you're using a palette, I often just use the
color that's already left in my palette here
to add in a background, and you can choose whatever
colors you want to choose. I'm just being random here, but I can come over and
use more of the pinks, but I am going to
add in a lot of water before I come over
and put it down on paper. Remember that your
watercolor is going to dry lighter than it shows. If it's feeling like
it's a little too dark, it will dry lighter. If you feel like you got
an area that's too dark, if you feel like
this is too dark, just come in and
lift some of it off. Wet it down with more water and move it around and lift it. So that's how we're going to do our background and
you can see we're not worrying about the edges. They don't have to be exact. But there is our background. Then after you have this dry, if you wanted to
add a second layer, you could even come in
and add a second layer. I'm going to dry that off and then we're going
to work on splatter. Okay, so splatter can be done
in several different ways. I'm just going to show
you this one way. I'm going to use my paint brush. I'm going to set anything
that I care about, I remove from my
desk if I'm going to splatter because splatter
can go all over the place. So my finished art piece, I just moved over onto another area because
I don't want that to get ruined by having
more splatter on it. So I am putting in
water and paint, and it depends on
how much pigment you want to show will depend on how much water and
paint ratio you use. If you want it to
be really thick, then use more paint
and less water, but it has to be enough water. You have to get your
paint brush soaked enough that there's paint
on the paint brush, you can use another paint brush or a pen or you could
just use your finger, but something that you
can tap against because it's the art of
tapping against it, which splatters paint downward. If I tap it, you can see
that the harder I tap, the higher eye tap
gets further away, the closer eye tap gets
more concentrated. If your paper is wet,
it's going to bleed. If your paper is dry, you're going to have
little droplets. If I add a lot of water to it and I have just a lot of water with just
a little bit of pigment, I'm going to get a softer
look than a harder. See how lighter it is. Here I'm going to actually
wet down this area just to show you if you are putting it in and your paper is
not completely dry yet. Let's get this nice and wet. Now, this is a wet paper. See how it's bleeding. None of these are the right
way or the wrong way. It just is going to create
a different effect, and so you need to know and play so that you understand
what effect you're going for when you are finishing
up your final project. Be if that's the look you want, then you need to be putting down your splatter while your
paper is still wet. If you don't want that look, then you need to make sure that your whole paper is completely dry so that you can
get individual dots. Okay. Practice this. Make sure you know
what you're doing. Make sure you can paint wet on wet with whatever
colors you want to do, practice that a couple
of different times. If you want to add in
a soft background, practice going around it, leaving some white edges around your tulips or
around your blobs, your circles or blobs,
whatever it is you've made. If you want to do splatter, practice some splatter
and then come back to the next lesson
where we are going to dive right in to painting your beautiful tulips
and it is springtime, so it is time to be
painting those tulips.
3. Painting Tulips Part 1: Shape and Flow: Let's jump right into
painting these tools. The first thing we're
going to do is trace the outline onto my
watercolor paper. I'm using carbon copy paper. You could use a light box, you could hold it
up to a window, or you could free hand this
if you're good at drawing. I am not, and so therefore,
I'm going to trace this. Using just a regular pencil or a mechanical pencil lightly go around all the
different edges. You don't have to do all the inside lines if you don't want to because we're not going to be getting that detailed
in our painting. I just recommend that you
use a very light touch. Don't be pressing down too hard, or it will be very
difficult to erase. Once watercolor has been
put on top of this, you will not get it back off. Make sure you are using
a very light touch. I'm being careful to make
sure that I get as many lines traced as I need just to
help me with my guides. Just a little bit of a pro tip. While you are painting, I recommend that
you actually go a little bit on the
outside of the lines. That way, you've covered them up with paint and most
likely they don't show. Here I'm just double checking
to make sure I didn't miss any lines that were
going to be helpful later. I do see I missed that one, so I'll go back in there and
just quick grab that line. You'll see that
I'm holding on to the paper and the carbon copy with my left hand
so that it doesn't move. Okay, I think that's
going to be good enough and we are
getting ready to paint. I will want to use an eraser to remove any extra
lines, the darkness. So I have this really great
eraser. It's in a bag. It's like the loose eraser nubs. I don't actually know what
it is, but it works great. So you might want to
look for one of those. A regular eraser
would also work. I'm not trying to completely
erase it, make it lighter. I'm going to primarily be using my two smaller paint brushes, a size six and a size
eight for this project. We're going to wet down just
small sections at a time because we're only
going to work in one area and then
when that's dry, we'll move on to the next area. That way, it keeps things from blending and bleeding
into one another. I'm going to start with one of the main tulip petals
and I'm just using water using my paintbrush to trace around
the outside edge. I'm actually going to be
doing the back petal first. So if you're thinking of the flower and you're
looking at it, it's the petal that's
furthest away, and I'm going to be making that just a slightly
different shade than the rest of my tulips, because I want that to
stand out as my back petal. So I'm choosing to paint these back petals
like an orange, just a really beautiful
red orange color. Over in your palette,
you can see that I am mixing that color here with
a little bit of water. I don't need a lot of water on my paint because I already
have water on my paper. I did decide to mix it with just a little bit of
pink because later you're going to see
that my front petals are going to be pink and orange. I wanted this back petal
to have that same hue. As we've practiced before, you know that
watercolor paint will only move to where the
paint is already wet. I don't have to worry
about it going into the other petals or out
onto the main part of the paper because it'll just flow right to where I have
already wet the paper. I'll give that a second
to start to flow around, and then we're going
to be drying that off because I don't want to start working on
the other petals until that area is
completely dry, or those paint areas will
bleed into my other petals. That is not the look I'm
going for this time. While those back petals dry, I'm going to be moving on
to my stems and leaves, but that's completely up to you. If you would like to stay and paint the rest of
your flower heads, then I would just
recommend that you take the time to either
walk away and get a cup of tea and let those top areas dry
or go ahead and use a hair dryer or another tool to get those petals dry
before you move on. I'm choosing to move on to
my stems and my leaves. The first thing I
did is wet down that stem just with plain water, and then I went
back with a very, very light shade of green. But I don't want to leave it with just one shade of green. I do want to add in
just little touches of some darker green. It just gives a really nice
variation to your leaves and your petals when you use several different
shades of green. You could even try a
little shade of blue. That would be really beautiful because sometimes tulips have that little shade of blue in their leaves,
which would be nice. I'll do the same thing over
here with the second tulip, wetting down the stem first, and then dropping in a couple of different shades of green. While you're watching
this, you can pause the video,
rewind the video, watch it all the way through, and then go back and do it
again while you're painting, whatever works best for you. You'll notice that I'm skipping
the leaves right there. I jumped over and I
just did the stems because I want those to
stand out as being stems. Then I'll come back in and
work on the leaves second. I'm going to allow those
stems to dry or use my heat gun and dry them off completely before I move
on to these leaves. You'll notice that the leaves have two different
parts to them. They have the inside area, which is this area that I'm painting right now with water, and then they have
the outside area, which I'm going to leave
dry for right now. I do want to create a
two tone effect here. A area that I deem as being the inside of the leaf is
going to be a lighter color. Then when I go around to
painting the darker area, which will be the outside, I will have waited
until the inside is completely dry
before I move on. Each section gets its own
chance to dry before I move on. I'm just not showing
that here in my video, so I want to make sure
that that is clear that I am waiting for the one section to be
dry before I move on. Here you can see that I did drop in that lighter shade of green, moving it around slightly inside that area that is
already wet with water. I will drop in a little bit of that darker green just
for some variation, but I am trying to
keep that inside area lighter just to show the difference
between the inside of the leaf and the outside. If you think about a tulip, you remember that those leaves curl and I'm trying to be
able to create that effect. After I put in some
of that darker green, I am just moving it
around slightly, but trying to keep it on the outside edges just to create a little
bit of a border. One more leaf needs
my attention, so I'm going to continue with that inside part
of that left leaf. Wetting it down with water. Now, the water is
not pooling and sitting on top of the
watercolor paper. I'm trying to allow
it to soak in so that I'm not getting
beads of water on top. But because we are doing
a wet on wet technique, it is allowing it to
then flow a little bit easier because I have
pre wet the paper. Adding in a little bit
of that darker green again at the top and
the bottom, again, just to allow some variation, keeping it near the edges as maybe a little
bit of an outline. Again, I'll dry that off before moving to the outside
portion of the leaf, which I will be making
a darker color. It's still the greens
that I've been using. I'm not changing it and using
a different color green. I'm just using less
water and more paint, and I am using the two different
shades of green and so I'll choose the darker green
to be the primary color. I'll be putting that down first. Instead of when I was
doing the inside leaves, I was using the lighter shade first and then coming in with
just a touch of the dark. Here I'm doing it the
opposite direction. Putting down my darker green
first and then following up with just little touches of the lighter green for highlight. I want you to be relaxed while you're doing this.
We're not in a hurry. This is a very relaxing. Take your time, do it slowly. You're watching
this in real time. So I'm just taking my
time and adding in paint and seeing what it's
doing, watching it blend. Coming back up here
to that top leaf, adding the water in, and then I'll start adding in some darker pigment
right up on top. I am trying to just get
that to blend in with the rest of the leaf because
that is a smaller area, probably the harder area of this leaf to make just
because it is so small, but I do want it to be darker. And now working on
the last one, again, wetting it down with water and then coming back in
with my darker pigment. Because I've done
this in sections, I can keep moving on
without having to dry each of those
individual leaves. I'll try all three
leaves at the same time. As long as your sections
aren't touching, you can move on
to the next area. Are you starting
to see how that's creating outside
edge is the darker, and then the inside edge
is the lighter area. After this is dry, we're
going to come back in and add just a little bit
more detail onto those leaves to give a
little bit more variation. Come back to the next lesson and we're going to move on to those flower heads and get those wrapped up. See you soon.
4. Painting Tulips Part 2: Background and Splatter: Okay. Welcome back. We are ready to move on to
those flower heads. Hopefully, your leaves are dry and you're ready to move on. I'm going to do
that front flower petal now for our tulip and I'm just going to add water
right up to the edge of that back flower petal
that we had done earlier. I only want to paint
this front flower petal, one petal at a time. That way, they're not going to flow and move that paint
into the other areas. Remember, watercolor is only going to flow where
the paper is wet, so we're only going to paint
one small section at a time. Now, I am mixing up a
little bit of a pink color pink with just
a hint of orange. And I'm going to go around the outside edge of
this tula petal. That way, I'm going to
create a border so that when the next petals that I
make are going to be orange, there's going to be a little
bit of a contrast there. But I'm going to
add in just a touch of that orange into the center. We practice this technique
in one of the lessons, so hopefully you
practice that before you moved on to your
final project here. I'll do the front
petal the same way on the second tulip,
wetting it down first, adding in a little bit of the pink around
the outside edge, and then dropping in some of
the orange into the center. I don't know about you, but I love to watch watercolor
flow like that. Because we put the pink around the outside and then that orange right
here into the center, that's going to allow us
to use orange then for the flower petals that
are to the right and the left of these front petals. It's just going to give
a nice definition. While those petals
dry a little bit, I am going to come
back into the leaves. I wanted to give a little bit more of an outline
around these leaves. Using that darker green, I went around and outlined it. But now my paintbrush is completely just
with water on it. Just touching the edges with water and
allowing that to flow. I just softens that
edge and allows that hard edge that I had just painted to flow into the center. Really gives it a nice effect. Still allows for a
little darker edge, but softens it a little bit. I hope you give that a try. It really gives a nice effect. You can use that effect in
all of your water colors. Anytime you need
to soften an edge, just use some plain water
and just touch that edge. Okay, time to go back up
to those flower heads. I'm going to be painting the left and right side
of this flower. Putting down my water first, and then I'm going to
use just a little bit of orange color as my primary with then just a touch of pink. Basically, the reverse of what we had done
for that center. That's how we're going to keep those two flower petals looking separate from
being next to each other, is just giving it the reverse. Putting orange down first, so that's my edge, and then a drop of
pink into the middle. Okay. But what I actually
ended up doing was dropping pink into the center and then orange around
the outside edge. It's the same difference. I just did it in a different order. I forgot how I had painted this. Just allow that paint
to move on its own. You don't have to manipulate it. It just flows on its own and it creates such a
beautiful natural feel. Now, I'm going to move over to this other flower on the right, and you'll notice that it has several different
little flowers. I did end up painting those orange just so I had a
really good definition. Then the ones on
the outside edge, I painted more pink with
just a touch of orange. Again, let that dry
naturally to the best of your ability before you go and use a hair dryer
or a heat gun on it. It really just lets that
paint move naturally. I back to those
leaves and stems, I do want to just add a little bit more of
the dark green. Adding some little details. You don't have to if
yours doesn't need it, but I felt like I really
wanted that base of the flower to have just a
little bit darker area. I'm using the darker green. I'm also just putting a little
bit of a shadow on it by drawing a little line of green paint down the
one edge of the stem. Also adding that same
dark green around the outside edge of
this leaf gives it a little anchor a
little extra detail really helps with these flowers. You're going to have to
decide on your own if that is necessary for
your painting or not. Just because I'm doing it doesn't mean that
yours needs it. Maybe you had already painted yours darker and it
doesn't need it. If you want to add
a soft background, this is when you would
start to do that. As long as your whole
flower is completely dry. Using a larger paint brush, I am putting down some water. I'm not completely coating it. I'm just putting it down
in certain areas and kind of staying a little bit away
from the edges of the flour, but just kind of putting down some water in the
general sections, kind of like broad
brush strokes, not completely
covering the painting. Then using that same
technique that we practiced in the
lesson with very, very light wash, mostly
water in my color with just a little bit of paint is the way that I'm going
to be painting this. It adds such a beautiful
background and soft and elegant. I really like this
putting down water first and then taking
a little bit of pigment with lots of water
and moving that paint around. I decided to put a
little bit more of the green blue at the bottom and a little bit of
blue at the top. But here's where
I made a mistake. I hadn't actually prethought
about doing a background, and so I hadn't
taped down my paper. I also wasn't using
cotton paper. Those are two things that
I would highly recommend that if you're going to be painting and putting
down a background, you use cotton paper
and you tape down your paper onto your
desk before you start to paint that background
because otherwise it just curls up on you and becomes
very difficult to manage. So what I did is I just dried it off and then taped it down. It's okay. You can fix it. There's very little mistakes in watercolor and you can always
fix something or adjust it. So now that I have it
completely dry and taped down, I'll go back in and
start adding the rest of the background because I did
have to stop and fix it. I like to add just a
little bit darker color in some areas and lighter
colors in other areas. I like to vary the colors so a little bit
bluer on one side, a little greener on
the other, and maybe even adding in just
a touch of yellow. Add more water, move it
around, add more layers. It's great to add another layer on top of something that's
already been dried. It gives you all this different
texture and variation. Don't worry about getting too close to your tulips
or your stems. It really doesn't matter. You can leave that white space. I'll look beautiful. Add whatever colors really
work for your painting. Just remember that yellow
and blue makes green. So if you're going to
be mixing those two, you will get a green spot. I made sure that
my blue was dry or mostly dry before I
added that yellow. You can dry this every once in a while and then add
another layer on top. Really adds such a
beautiful texture. If you touch the painting
that you've already painted, it might bleed and that's okay. There's nothing wrong with that. But just be aware that
that might happen. You might want to avoid the
edges of your painting. I'm going to dry this off completely so that
it's 100% dry. Then I'm going to take these little scrap pieces of paper, cut them down to size, and put them on top of the actual tulip and
their leaves and stems. I'm going to be adding some
splatter paint on top, and I really didn't want to have this splatter hitting
into my painting. I only want it on
the background. I'm just cutting up
some scrap paper and using it as a shield. Now using my paint brush, I'm going to create
very, very wet paint. Lots of water, lots of pigment, tapping it against my hand, or you could tap it
against another pencil or another paint brush and adding in the colors where
you want them to be. And because we put those shields
down of the scrap paper, you don't have to
worry about it landing on top of your tulips. Now, there's nothing
wrong with it landing on top of your tulips, and if you would
like that to happen, then skip that part. I'm just showing you a way that you could protect it
if you wanted to. I'm deciding to add quite a few different
colors just because I really wanted
this to feel like spring. I'm putting some greens
near the bottom, some blues near the top, and just a little tiny bit
of orange here and there. Carefully removing that shield, that scrap piece of paper
reveals such a fun painting. Now, I did decide I
wanted to add just a little bit more of
that pinky orange color. I'm just going to hold
my hand over some of the areas just to keep it
from getting in everything. But I noticed that I missed
everything in the middle. I'm just adding in just here
and there a little tiny bit. Everything is dry and it's
time to take off that tape. If you ever have a hard
time taking off tape, I highly recommend you use a heat gun or a hair
dryer and warm the tape. Just warming that adhesive really helps you remove the tape without
ripping the paper. The other trick is to
take it off on an angle. Bending it back at a 45
degree angle and pulling it back that way often helps pull off the tape
without ripping the paper. And there you go.
Painting is finished, has a beautiful edge, and it's ready to be framed. Join me in the last
lesson where we wrap up this project and
look forward to the next.
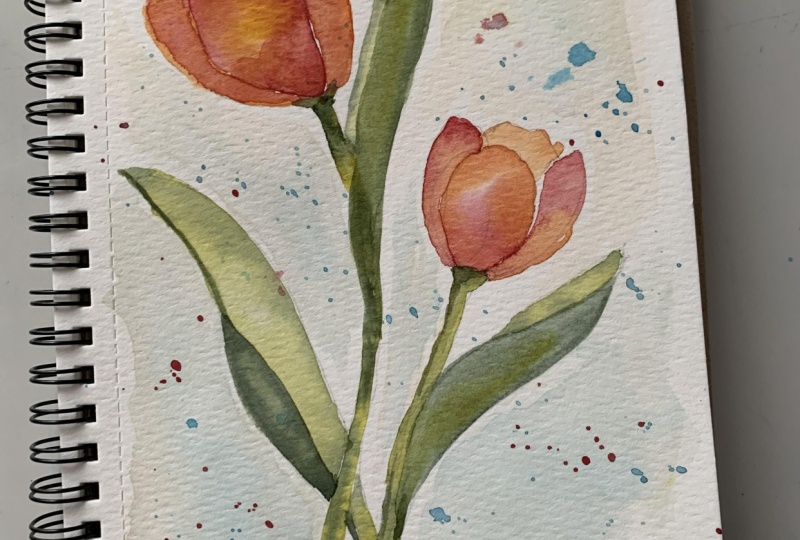
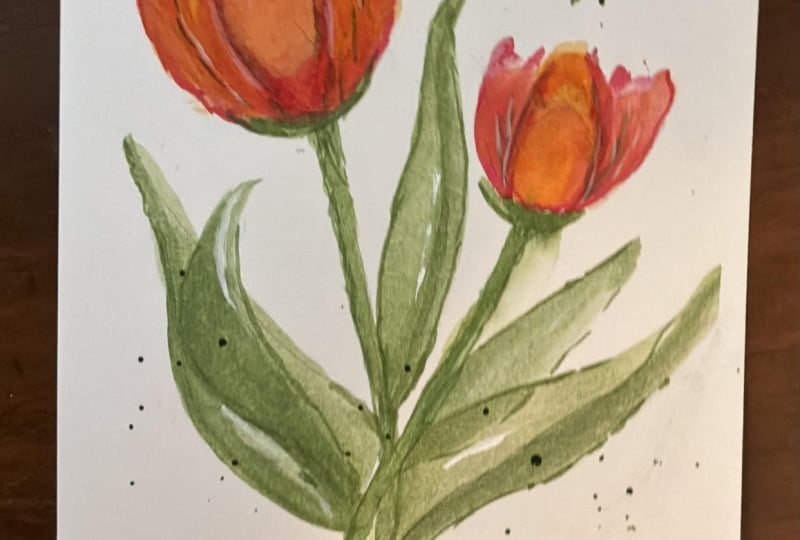
5. Final Thoughts and Next Steps: Hope you enjoyed painting this soft tulip
piece with me today. This is one of those
techniques that really starts to open things up with
your watercolor practice. The more you work wet on wet and allow that paint
to move naturally, the more confident and relaxed your painting
will begin to feel. If your piece didn't
turn out exactly how you expected, that's
completely okay. This style is all about learning how the water
and pigment interact, and every attempt teaches
you something new. Give yourself permission to explore and not get
everything perfect. When you're ready, I
would love for you to upload your project
into the gallery. You can share your
final painting or even your practice work. It's always so inspiring
to see how each one of you interprets the same technique in your own way with
your own colors, and I truly enjoy
seeing what you create. If you found this class helpful, it would mean so much to me
if you left a quick review. It helps other students find
the class and it also helps me continue creating more
lessons like this for you. Don't forget to follow
me here on Skillshare, so you'll be notified when
I release new classes. If you'd like to keep
building on these skills, check out my other
tulip and wet on wet classes where we go deeper into movement
and layering. Thank you so much
for painting with me and I'll see you
in the next class.
 Brenda Jones, Watercolor Artist & Teacher