Transcripts
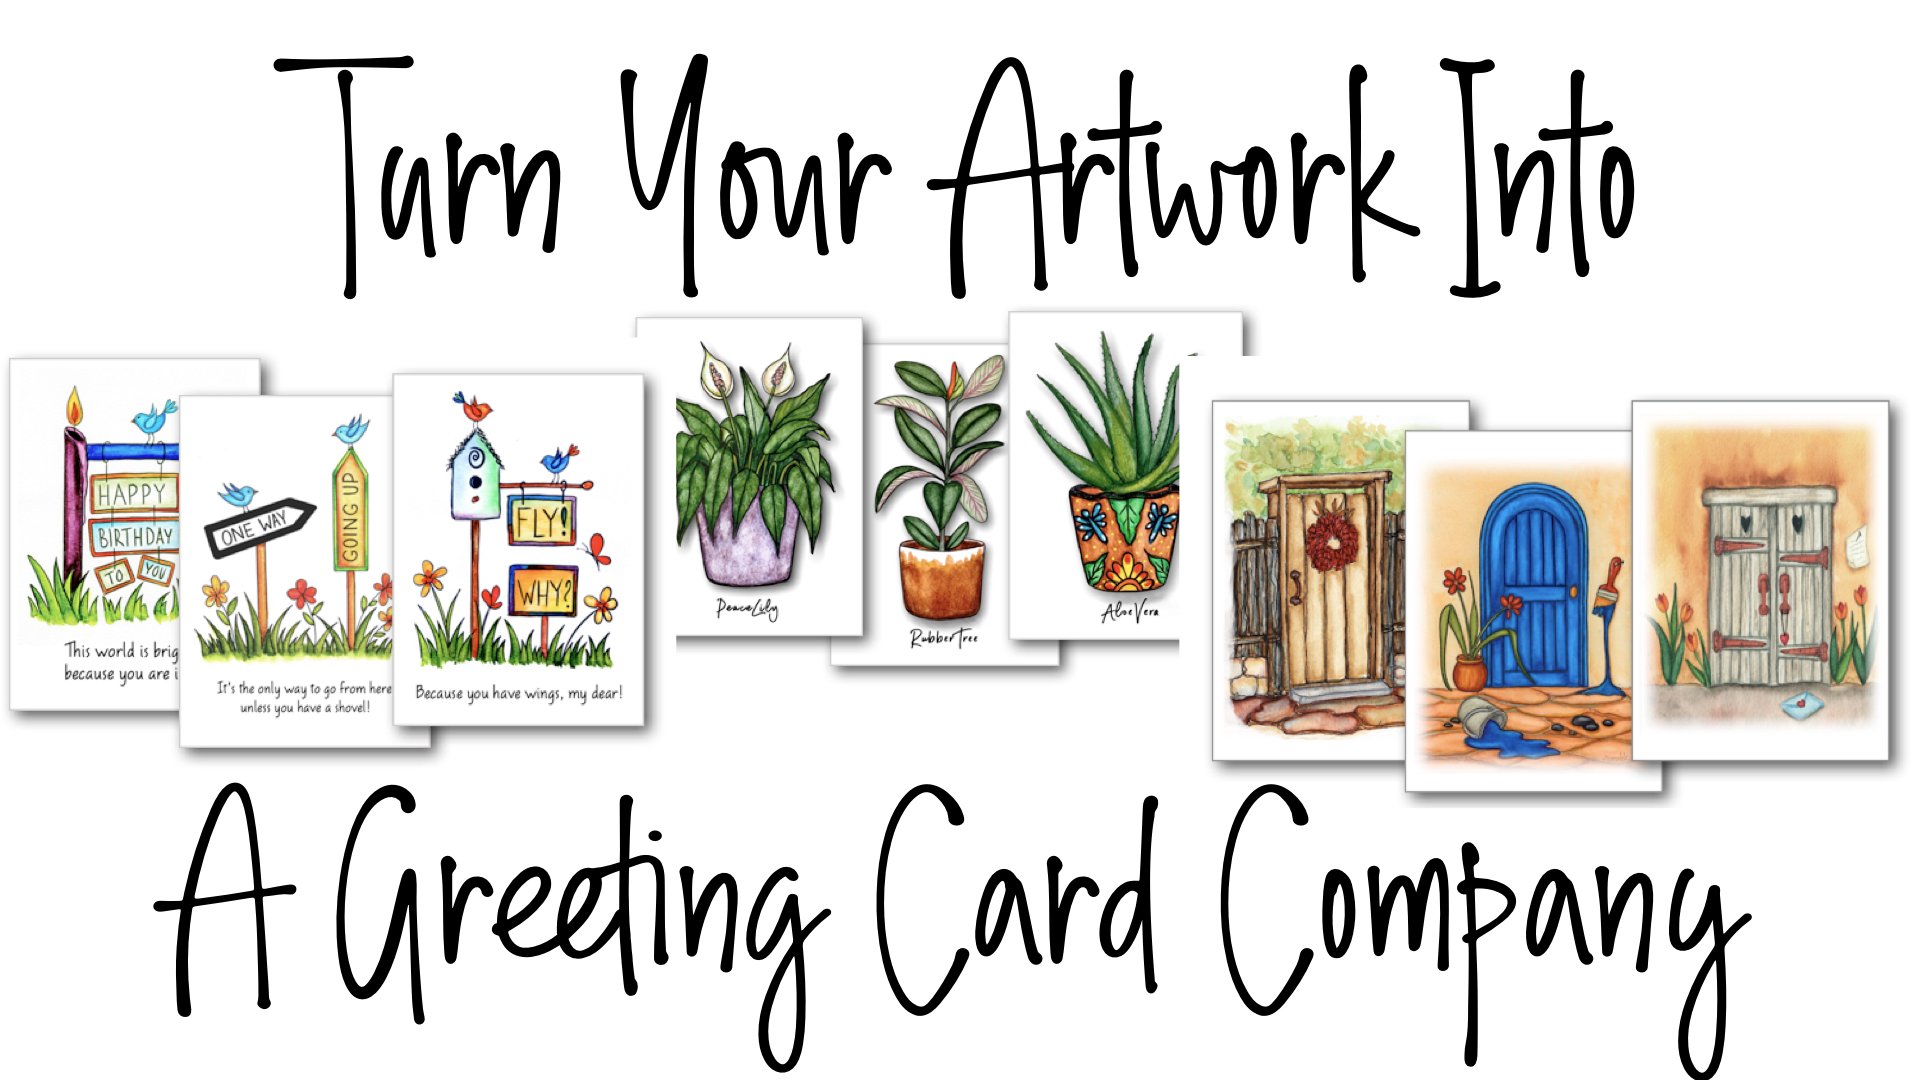
1. Introduction: My name is Jessica
and I'm an artist and illustrator and
greeting card designer. I would like to share
with you how you can use Procreate and your ipad to take any of that gorgeous
artwork that you have and turn it into a printed greeting
card in about 15 minutes. With everything in
our lives becoming digital and really impersonal, you would think that
greeting cards would have bitten the dust as
a thing long ago. But interestingly, they've done nothing but
become more popular. I think that the reason
is they're one of the last bastions of
personal connection. Many artists are
making so much art, they could go on
beautiful greeting cards. But the perceived jump from the beautiful art to
being a greeting card, it seems like a very
complicated thing. However, using the
magic of our ipads, turning our own
personal art into an two size greeting card is literally a matter
of 15 minutes. Now this class is going to
take you more than 15 minutes, but the tricks I'm
going to show you mean that anytime that you need a card instead of running to the store of the
Internet and buying them, Not that I have a card company, I would
love you to do that. But I'm just saying need a card. And instead of having to
run out and pay $5 for one, you can go into your ipad and you can have a beautiful
card in 15 minutes. That's what this class is about. Our project is going to be
to take some of our art, or a photography,
which is also art. Just do a few simple steps to
make those beautiful images into beautiful greeting
cards that we can put in an envelope and send or give
to somebody right away. That is our project. This is our process. Let's get started.
2. Supplies What You Will Need for This Class: Let's do a quick run through of what we're going to
need for this project. The first thing is an ipad. The second thing is
the procreate app. I don't want you to panic
here because you don't need to know one thing
about procreate. It'll also be a good idea if you locate on your
ipad somewhere, the keynote app that
comes with every ipad. It's in there some place. If you figure out where it is, you'll easily find it
when we need to use it. You don't even need
an apple pencil. Nice to have, but any stylus or your finger will work great
for this whole class. The next thing you will need is your Cardmaker procreate file that is in the resources
section for you to download. And it's called
the Two Cardmaker. When you open it in your ipad, it will ask to open procreate. It will do that, and then
it will be in your gallery. Always good to work with a copy when you see
it in your gallery, duplicate it, use the duplicate, and then you always have
the fresh template. Now, I have also included
in four page size for folks in Europe and other
places where that is the common page size for
printing and not letter size. There's not a lot of difference. For those who don't know, it's a little bit a quarter
inch shorter on width. It's three quarters of an
inch longer on its height. The four paper card
maker template for two cards will work
just fine for you. You just have to remember, always I've adjusted the width, but you have to cut three, 4 " off of the bottom of your card stock
after you print it. This is what this
guideline is right here. That's at eight a two. Once you cut that three quarters
off, you're in business. You're working with
basically the same card size and eight of an inch
smaller on the front. Okay. All right. Now the next thing you're
going to need is artwork. And it has to be
digitized artwork. And many of you work in
procreate and make artwork, and that is all set to go. Many of you work
in analog media, like I do watercolor and acrylics and all
kinds of things. In that case, you need to
digitize your artwork. Now, a lot of people still use scanners and Photoshop
and everything, but I no longer do that. I use my ipad to take the
best possible picture of my artwork that is a dog
in the background snoring. I take the best
possible picture I can. Then it to make it really good, If it's a little sloppy because it's a
watercolor or something, I bring it into procreate
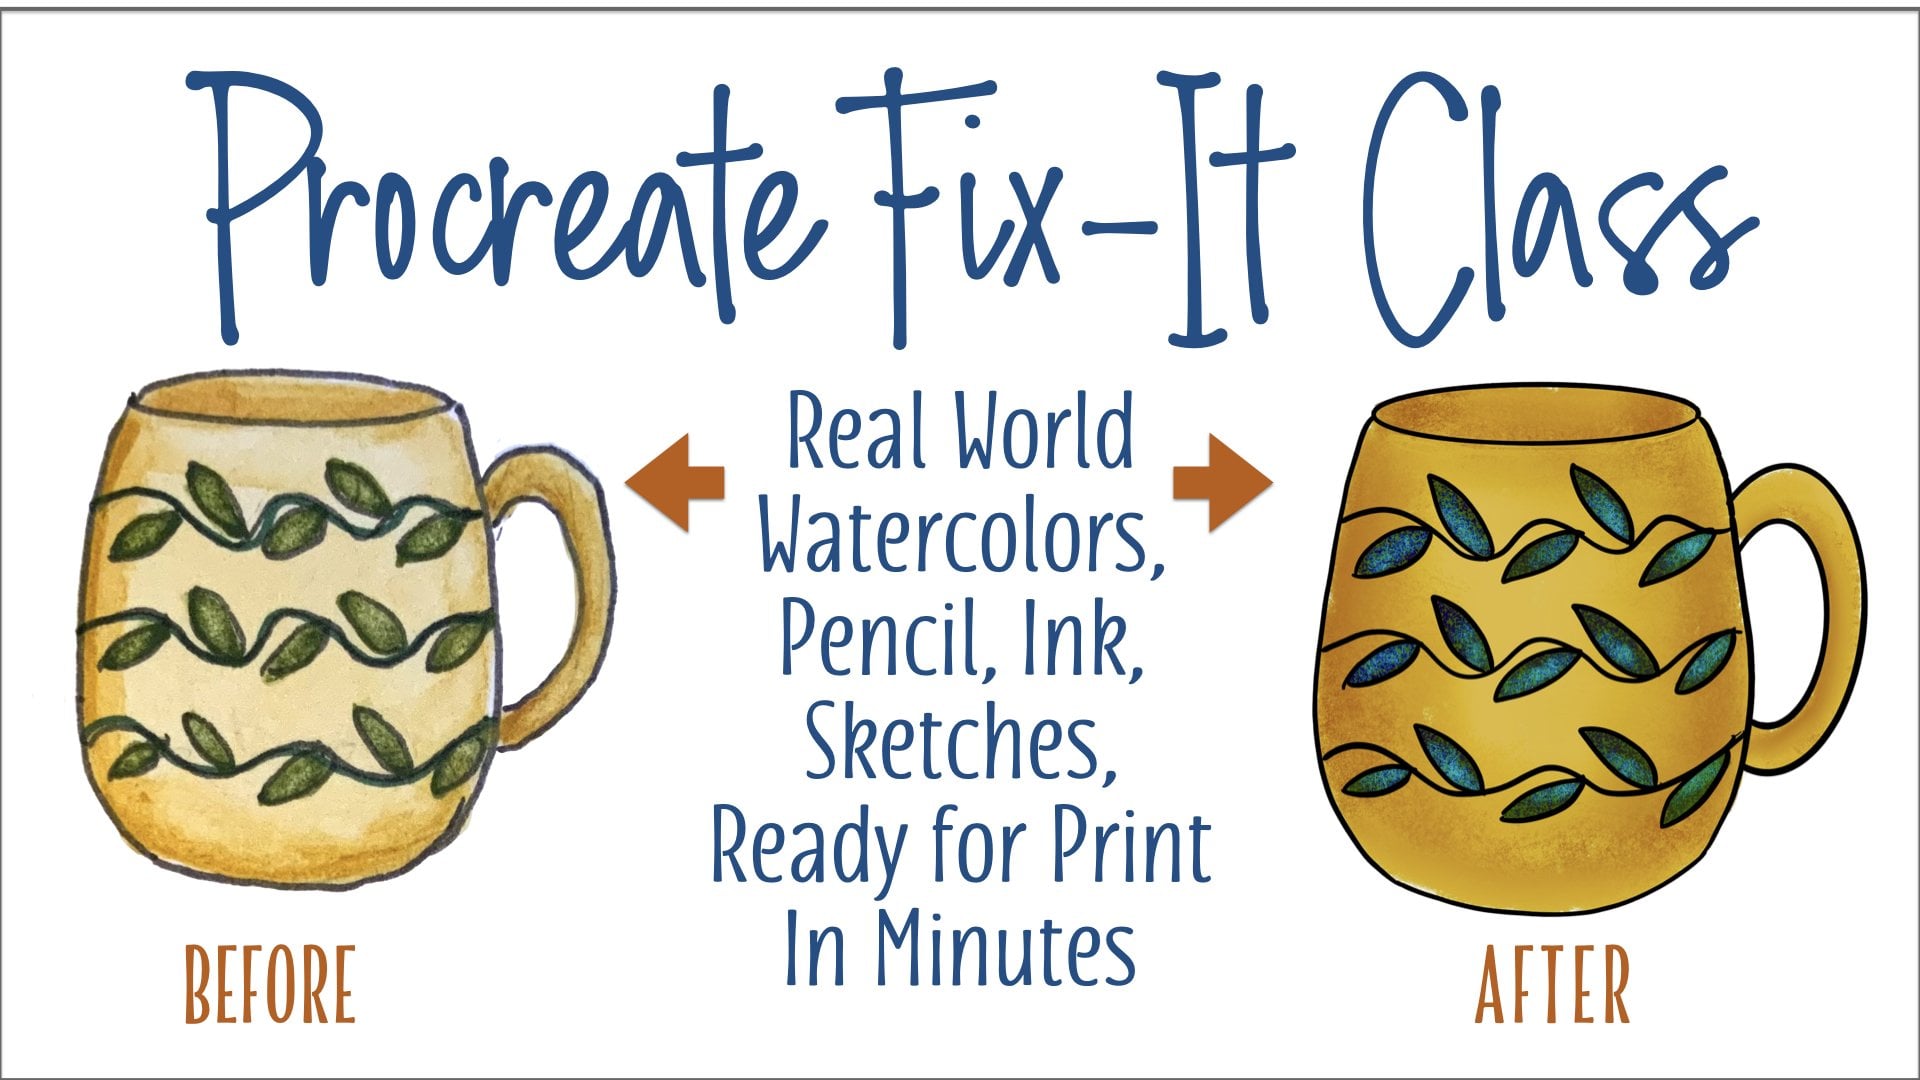
and I clean it up for print. Now the good news is that I have skill share classes
on both of those things. One is called easy
editing of your photos, and that means your artwork to your artwork right in
your photos app iphone. And the other one is about using procreate to make
your art print ready. And I can't even think
of the title right now, but you'll find it in
my list of classes. It has a messed up coffee mug on the cover and then a beautifully
cleaned up coffee mug. Okay. This was an
actual water color. Well, actually all
three of these, This had already been cleaned up for print when it was made. This wasn't cleaned up
because it didn't need it. It's very painterly. This was cleaned
up in procreate. It's ready to print artwork or photos to make your cards
from you need a printer. I'm not going to go
all into this here. Different printers have
different capabilities. Most printers can run a
piece of card stock through. If you have a printer that has a straight through feed
like it's shown here, that's an amazing
thing because it feeds card stock better and it can handle a little
higher weight paper. We'll talk about
paper in 1 second. Waterproof ink is good
if you've got it. Epsoens usually
have that for you. Separate cartridges is always
good because you run out of one color before the others when you get the
three pack of colors. If you have a printer
that can be set to a variety size of paper,
that's really good. But for the two cards
that we're making, all we need is letter
size. We're good. Okay. You want to get some card stock and test
it in your printer? Most local office supply stores, they have a little
print department. They usually will be
happy to give or sell you a couple of sheets of card stock of
different weights. And you can go
home with them and put them in your
printer and see if your printer gets upset or whether your printer
sends them right on through. Cardstock can be had at
Amazon for very good prices. And like I said, most
printers will handle a 65 pound card stock. Didn't mean to do
that like this. The other common
weight is 80 pound, which is what this one is here. Some printers choke a
little bit on that, but any printer that will print photo paper will usually be able to print
an 80 pound sheet. If your printer won't do that, then you get this Nina very
high end paper company. Their premium cardstock is the best 65 pounds you can get. It's not a heavy card but it's
a totally functional card. You will be fine. Both
of these are on Amazon. There's a lot of other
choices and there's 100 pounds and
there's 110 pounds. I wouldn't be tempting
my luck with those. That's a little rougher
to get through anything but a really high end printer, which most of us don't have. Okay, so card stock
and a printer and your artwork and your
template after we print. Going to cut. I really like this cutter and
you'll see me use it. It's now not called sunlit
anymore. It's called Bra. Who knows what is going on
with all of this, right? As an option, you can
use a craft knife with a cork backed ruler
and some cutting mat. If you've got that
around and you don't have a little guillotine
cutter like this, this is not a big price. This is desk size,
I really love it. This is worth it, because it's
so much easier then this. But if this is what
you have around, and let's use it for now, okay, We have to be
able to cut our card. We're only going to be doing
one cut right in the middle, so it's not a real big deal. Okay, after we cut our card, we're going to score them. And that you will learn in the class means
making a crease with the scoring tool so that the
paper will then fold easily. You can get bone
folder scoring tools for like $5 on Amazon for one. You can get four of them for
$11 Here says Black Friday, but it's not that different
when it's not Black Friday. This is a cool thing
for the price. It's really a cool thing because go to this product and watch this little
video and you'll see why. But this makes your two
card making just so simple. It's all marked out
exactly for what you need. Very good thing. I have no interest in you buying
any of this stuff. I'm only sourcing for
you to make it easy. Scoring tools. Okay. Then finally, last
thing that you need is the two envelope. And these are everywhere, every quality and every weight. And some have a square that's called an
announcement fold. Some have a pointed fold, and there's all kinds of
colors and on and on and on. And you can start out
really expensively, this is like 50
envelopes for $9 You can go to a site called
Envelopes.com Easy to remember, they have every color
in the universe. The prices are not bad. And they get cheaper as
you buy more envelopes. So up to you. But this is our final
supply because when our beautiful card is finished, at the end of this class, you're going to put
it in an envelope. And then you are
going to give it to somebody and make
them very happy.
3. Lesson 1 Adding Images: When you first open your card maker
document in procreate, it's going to look like this. This is a page that
measures eight, a two by 11, and it's at 300 DPI resolution. But that means it's
going to print fine to your desktop printer
or any other printer. In fact, if you are, while working,
you're doing this, resizing whatever
to make it more comfortable for you,
It doesn't matter. The document is still that size and it's still going to
print the right size. Okay. What you're
going to see is a page with a fold line down the middle and a cut
line across here. This is an two size card and folded that measures for
a quarter wide, 5.5 high. If you do the math, you
know that that two of those fit perfectly on
a leather size sheet. That's what has made the
two card so popular. If you go to the layers
for this document, you're going to see that
we have two of them and a background background
we don't care about at all because our
document is covering it up. Anyway, we're not even going to think about the background. The next layer is
called guidelines. This layer has a
little padlock on it, that means it's locked. It means that unless
you unlock it, you can't do anything to it. And that's the point. Because we're not going
to do anything to this. We're going to do
something on top of this. When we go to print, we don't want these
lines to show. We're going to turn
this layer off. They don't show only what
we put on this top layer will for now we need them. The layer above says Add Photos. That is where we're going to put our art for the
front of our cards. We're not worrying about the
type that we put on cards. Yeah. We're just going to
go and put our pictures in and size them to fit
the safety areas. What are safety areas? Home printers usually don't print all the way to the edge unless they're set that way, that takes a lot
more ink and so on. Don't print the first half inch of the page and they don't print the last two inch
and they don't print a quarter inch on either side. If we put our graphic in and it's within that safety area, we know that we're not going to have any problems
with the printer cutting off part of our
graphic under the layers menu. We're going to select Add
Photos as our active layer. Next we are going to
go and get our graphic from the photo Sap
over here, a wrench. And the wrench is the
actions menu in Procreate. The first column here is Add. The second item is Insert Photo. And that's what we want to do that will take you to your
Photo Sap and you will grab whatever it is that you would like to put
on the front of the card. I'm just using a little
doghouse painting of my own. This obviously is going
to need to be resized. Grabbing a corner, you
see that? It's selected. You see this arrow up here
says that it's selected. Grabbing a corner and
making it small enough to pull around and fit
is your first step. Then when I move graphics, I do it with my pencil outside of the graphic
itself because it's very easy to accidentally hit a corner and do
unintentional resizing. I have moved it up here
and I see that I've got to bring it a
little smaller to fit. If you tap the corners, it tells you exactly
what the dimensions are. You don't need to know
that, but it happens, okay? Now I've got it so it fits in the safety zone, up and down. And I'm going to move it over
and I'm going to watch my centering in the safety zone that it's the same on each side. I've got that pretty good. Once you print this and you have cut it and you have
scored it and folded it, this is not going to
be an exacting thing. It wouldn't look
bad unless you had it way up one way
or over one way. You're good here if you are going to go and
get a different image. For the other card
on your two up, you would just hit this
arrow over here in order to deselect our sized
picture in place. However, am going to
make two of these cards on one and I want to
show you how to do that. I'm going to hit
that arrow again. Our picture is reelected. I want to make a copy and paste. I don't have to resize
the picture again. I'm going over here
to the wrench again. Right under the same
actions that we found inserted photo, there is copy. Once you do that,
there is paste. Now we have a second
copy of our photograph, pasted right on top
of the first one. I'm going to touch outside
of the photograph and I'm going to move it down
to that safety zone. On card number two there, I'm going to hit the
arrow to deselect the two cards ready to
print from right here. We could take you out
through the print door, but most cards will have
some writing on the back. If not on the front. We're going to approach
that by an unusual path. There is a type
tool in procreate. It is like arm wrestling, a chicken, impossible
to use in my opinion. It can be used, it snicety, you can only have
one text box on one layer. The thing becomes confusing. The one thing about this class that I promised myself and you, it's going to be simple,
it's going to be fast. We're going to get our
type from elsewhere. Before we leave our card maker, I want to look at
the layers menu once again to show you that the first picture that
we added added right to the layer that we were on. But when we bring in another
one or when we copy paste, the copy lands on another
layer of its own. That's not a problem.
It's not even a problem for our printing as long
as these are both visible. If you wanted them both on one layer for one
reason or another, you can tap the
second layer that came in here and you
can choose Merge. That will take that extra layer down onto your ad
pictures layer. And both of these pictures
will be on the same layer. That would matter if you were
going to do, I don't know, color adjustments or
something and you want it to be happening
to both of them. But that again goes
into complicated. And we're not doing complicated. I'm going to leave
it just like it is. Let's go get ourselves a
little titling for our card.
4. Lesson 2 Adding Type to Your Card Back: Every ipad comes with
some fabulous apps. They're Apple apps and they do amazing things
and they're totally free. They just show up there. One of these is a slide
production app called Keynote. It looks like a little stand where you would do
a presentation. It can work so beautifully for us in what we're trying
to do right now, which is get ourselves some identity type on the
back of our greeting cards. We're going to open keynote. And you don't have to
know a thing about it, just find it on your
ipad when I open it, I have made some
other things in here. You probably, if you haven't used Keynote before,
you won't have them. If you have used Keynote,
you'll have more. But right here is a
create a presentation. We're going to tap that. We can choose a theme, we can start an outline. I'm going to say choose a theme because it's
going to work for us. Look, each of these is
like a template of type. And some is left,
some is centered, and some has three lines, and some has two lines. You have white background
or black background, and you have a whole
bunch more stuff, okay? But what we're looking
for for the back of our cards is basically something to put
our information on. I'm just going to
use a generic thing and you're going to
use the real thing. Here is a two liner. Let's say that I wanted to put my company name and website, or my company name and city, or my company name and
copyright, something like that. I am going to choose this because it's just
as simple as can be. Classic white Here
has a third line. Now this type, we're going to
be able to change the font, the size color of
whatever we want to do. We're going to stick
with black and white for reasons that you
will see right now. But your decision is
about whether you want a three line thing
or two line thing. You want it in the
center, which I do. I'm going to choose
this for that reason. Now what we have is we have
two type placeholders. And a placeholder is a
thing that's already there and you get to select
it and make your own thing. I'm going to double
tap this type to edit. I'm just going to
say my card company, I don't know what you're
going to want to say. It could just be designed by
or illustrated in your name. That's going to
be my first line. My second line. My second line is just
going to be My city. Okay, we have what we wanted to say in place
or content in place, and maybe we want to change
something about this. Let's look at how
we can do that. If you double tap on a word
that will become selected. And you can choose to move those little handles to select exactly what you want to
change at that point. Look up here for a brush symbol. This. Let's get rid
of our keyboard. This is going to allow you to choose a different
font from the list of whatever is on your
ipad to choose bold, this is already bold, italic, and so on. To change the size, I think that I would
like that to be a little smaller for
our purposes here. I'm just tapping the minus, and you can also just tap on that number and type
something else. Okay, I'm changing that and I want a little
more casual look. Let's say I'm going to
go down to Noteworthy, which comes on most ipads. Just give it a little
bit of style here. Now you can add any font you own into your ipad,
just Google that. That's a really
easy thing to do. The hardest part
of it is finding your font file over on your
computer or wherever it is, but you can import anything. Then it will show
up in this list. If you have a logo that has a certain type of
style, then great. Or you can also just have a photo of your logo
and bring that in. But anyway, we don't have one right now. This is
what we're doing. I like what we have going on here now to get rid of the
column, the brush column. You just have the brush again. Okay, now we want to take
this out so that we can put it in over in
our card maker. Kino will export any
slide as an image. Then that image would
be in your photos, and then you could edit
it there and crop it. But there's an easier
way to go on this. We're going to
take a screenshot, if you don't know how
to do that on an ipad, a newer one that does
not have a home button, you press the sleep wake button and the
upper volume button, which are on this
one located lower, right the way I have
the ipad laid out, but you know where
your buttons are. If have an older ipad that
does have a home button, it is that sleep wake
button and the home button. And you press them
at the same time that you'll hear a
camera shutter sound. And they will take a
screenshot just like this. I heard that little
sound in here it is, and we want to tap on it. This is our screen shot. We got all this stuff in it
too, and we don't want that. But you have an
automatic cropping tool that sets you up right here. You don't have to do
that over in photos. We're just going to do this. We're going to bring
this over here. We're going to tap done up here. When we tap done, we're going to
have the choice to save this to photos or to files, or to quick note or whatever. We're going to
save it to photos. I'm going to check my photos. There is a very large version of the type that I'm
going to want now. It's cool that it's
a large version because when we condense
this over in procreate, it is going to make it
a better resolution. Easier to match the 300 DPI that we have going
on over there. I'm going to leave photos and I'm going to go
back to our card maker. We're going to go again to the wrench to add and
to insert a photo. And this time we're going to
get that type screenshot. See as huge as it was there. It was 72 DPI there, but when it comes into
here, this is 300. Therefore this got
nice and tight. It got resized to
match this document. Other words, it won't
print with any pixelation. We're going to move this over to where it's supposed to go. I think that's still
a little large. Then I'm going to
center it there. I'm going to eyeball it
and I'm going to make sure that the bottom of it, there's really no reason
to have to do this, but the bottom of it is aligned with the
bottom of my picture. Now at this point, we have it aligned with
the bottom of our picture. And that looks good
and everything. We can't be sure unless you are a good eyeballer about whether we have it
centered this way. Here's a little trick
that's going to tell us that just by turning
off and on something. We're going back over here and
we're going to our wrench. But this time, not the ad,
but to the second one, which is canvas under canvas, we are going to see something
called a drawing guide. If we turn on that
drawing guide, we get a grid and this is
just the default grid. There's a way to
edit the size of these boxes, but
we don't need to. It's close enough for
government work, as they say. We're going to keep this on for a minute and we're going to get back here and that would
have de selected your type. We're going to hit this again. That middle thing there is
the center of the type. We're going to count how many little squares
we have in our card. 123 456-789-1011 12. Meaning that that center line is six over here, is six over. We're very close by
eyeballing here, but we can perfect it by just moving it a little tiny bit until it's lined right
up with that guideline. Now we need to have
that again down here we are going
back to the wrench, back to add, and back
to copy, back to paste. Now we have another one, and we are going to drag
that one down to where I'm going to move this a little bit so that we can see
the bottom of the page. We're going to drag that copy which is on its own layer
because that's how this goes. And we're going to drag it right down and make sure
it also is aligned. Now this grid is
not going to print, but it does wreak havoc a
little bit with your eyeballs. And we're going to
go back now and turn that off again because
we are done using it. We are ready to print except for getting
our guidelines turned off.
5. Lesson 3 Print and Cut Your Cards: Speeding along with our process. Here we are ready
to print and we don't want our
guidelines printing. We are going to go and
turn that layer off. Now when we get in here, we see that we have
images on two layers. We have type on two layers.
All that doesn't matter. You can collapse
down if you want to, but it doesn't affect any. What does affect is that we turn off the visibility
of our guide, our locked guidelines layer
so that they won't show. Now, procreate does not print
directly out of procreate. A shame, but it doesn't. And maybe they'll put that
in one of these days. And what we need
to do is to take our page out of procreate
in order to print it. Now to keep our resolution
really what we want it to be, we are going to share this
as a tiff file to our photo. To do that, we go under
the wrench again, and this time we hit the third
thing over which is share. Here are a bunch of choices of how you can share
your procreate document. Jpeg is fine, but Jpeg
is a type of file that condenses the file size by dropping some
pixels here and there. It's just not as
great as a Tiff file, which is a larger file. But it doesn't give up any
information from the image. We're going to save this out
as a tiff it's exploiting. And then it's going
to ask us where to go with it and we're
going to say Save Image. And that send it
to our Photos app where we're going to now
go and print it out of. Procreate into photos is my latest greatest
here. Here we go. Once we have this up, we can share it under Sharing, One of our choices is print. When this window comes up, whatever printer you have set up to work with your
ipad or whatever is on your network can
be chosen from here. Right now, only one of my
printers is turned on. That's the only one that
we're seeing you choose. Your printer will depend on
the printer that's chosen. The rest of this
check what you want on page one copy printed
printing in color. Definitely double sided. No, that doesn't happen to be a printer that does
double sided printing. Check here. Necessity
paper size is letter. Letter is exactly what we've
just created to print. When you hit this print button, you should hear the little
chug log over at your printer. And hopefully you have your
card stock in your printer. This sheet will print out, which is going to give
us our 22 size cards. Our next move is going
to be to cut and fold that into the two
cards and we're done. What we have here is the
printout that we just made. It did go to my laser printer. And I'm a little sad because it knocks the color
back a little bit, but that's because I didn't
have another one turned on. But we have our
letter size sheet, We have two things that
we have to do with it. We're obviously going to have our score go along this way. The card will fold and then we're going to
make a cut across the middle because we
want to have two cards. I'm going to pull I have
a desktop paper cutter. This is a really small
one but I like it. It comes from Amazon. I can fit on 8.5 by I think
this was $20 or something. It's called sunlit and you can search for and see
if they still have them. But it allows a large sheet of paper which those little
fisker cuts don't. I'm able to put this in here and get it to 5.2 now. It's always good
if you're going to get a guillotine cutter, that one of these guys is on it. If you hold the paper flat, that way you get a straight cut. It doesn't cut out. Sometimes the paper will move and you'll have
a curve at one end. But that isn't going to happen
if you're holding it down. If your paper cutter
doesn't have one of these on it using a back ruler, you can do the same
thing by laying it, pressing down while you cut. The only cut made on this sheet, this one right
through the middle. You never want to fold card
stock without scoring it. Scoring means that
you're making a crease that makes it easier to fold in the two card done on a letter size sheet like
this is also a good thing for that because on a
letter size piece of paper, the grain in the paper
usually runs this way. It's much easier to
make a fold going in the same direction as your
grain than going across it. Because then you've got to cut those fibers or bend those
fibers without cracking. Our next lesson about how to
score is going to be coming from my big skill
share class called how to start a card
company with your art. There's no point
in doing it twice. I'm going to pick
that chapter up and put it in here for you. Then the last thing I'm going
to do is we're going to go back and we're going
to run through this again in the
other direction. Instead of being like this, we're going to do one
in this direction. We're going to look
at what if you want to put with your picture. Now, that's not a big deal, unless you want your type
to go over your picture. You can do it exactly this way, but it's going to
have white behind it. And if you wanted to
put it over a picture, you'd be blocking your picture. There is a very wonderful
way to make that happen. I'm going to add that as
our final class right now. Go ahead and figure out
how to score these.
6. Lesson 4 Scoring and Folding Card Stock: What scoring is, is a method of putting a
crease in the paper. I don't know how well you're going to
be able to see this, but I think if I hold it
still, you can see this. There is a score going down
the middle of this card. If you look carefully, you see that this
side of the paper is the mountain score in The mountain score
is on the inside. That doesn't seem to make
sense because I'll show you the valley score
was on the other side. When you score something, you put a crease in it
and you would think, okay, it's crease and I'm
going to fold it that way. If you do that, it
will never fold flat. It will always have
a proof to it. Okay. After we get done
talking about this scoring, it's good to remember that the scoring folds toward where
you don't think it should. Now that we've talked
about folding and scoring, what you should note is that when you are
doing your two Ups, which is what that's called, you can put two cards up on a sheet and you're doing
that for the two card. You're in business pretty much. Because when this
sheet is printed, you're going to do two things. You're going to
make a score along the center at the 4.4 line, and then you're going
to cut it in half on a paper turner at
the halfway mark, which is 5.2 fold when
you have your two cards. This is going along with the fight or the
grain of the paper. That's really cool, but
it's 80 or 110 pounds. If you even folded it like this and managed
to get the corners together and everything
fold is going to look bad. It's going to crack on
a lot of card stock, but it's going to
look bad anyway. Scoring is the thing
that we always do. This is called a phone folder. This one is actually
bone and it's very old and it's
very messed up. But they are made
very inexpensively. Now you can get them Amazon. They're actually
made from plastic, but what you want
to look for is a nice round, smooth tip. The nice thing about
the old bone folders, you could file them to smooth them out after
you used them a lot. But people will say, oh, you can do a score using
a spoon and everything. Yeah, Well, aside from the fact that it might make
metal marks on your card, that's not a real good idea because this is
made for the job. It doesn't cost much. If
you're going to make cards, you want to get the stuff that is going to make it easier. A metal ruler, and it has to have a cork or some backing
on it that it won't slide. That's really important
because you're going to be running this along that
ruler with some pressure. You're not going to want to
be halfway down and then, oh dear, because
then you're done. Your printout is over with you. Score after you print. In most cases, you've just made this beautiful card
and now you just wrecked it because this
wouldn't hold still. I just saw that my
injury got in here. I just got a new puppy and you don't want to see
what's under that bandage. I thought I would spare you. The third thing is a grid. You notice that I've been doing this whole class on a grid. This is a very big one
that I have on my desk. But you don't want a very
big one for card making. You want one this just bigger than the biggest sheet of paper you're going
to have to score, which is just a letter sheet. But it's important that you want to see your measurements. Get one that has
measurements on the side. They come in all
sides, all colors. They're called
cutting mats usually, and there's some
other words for them. But you want to have rulers outside of the space where your paper is going to go, so that you can see the ruler. In order to do the scoring. We said that we were
going to score this, we're going to cut it this way. And I'm working with
a two right now. Okay. We're going to
do it with a two. Our score is going
to run vertical. We are going to want
to do that at 4.14 ". If we put our paper all
the way to one side, four and a quarter
is right here. We're lined up paper
on our cutting mat. I'm not actually
lined up very well, but there we go. We have it at four
and a quarter, which is halfway on the sheet. You want to place
your ruler just so that you can see the marking of four and a quarter because obviously this is not nothing. Your score is going to be
moved over a little bit from the four and a
quarter because of the thickness of
this bone folder. Okay, starting up there, applying pressure and running
down along your ruler. Now you can't see this
very well at all. But trust me, I just
made a dent in here. The mountain is
on the back side, the valley is on the front side. I'm going to go cut this
in half so we can fold it. This side is my
dent. I can feel it. It's a little ditch
running along there. That means it's the
outside of the card. All the mountain will
be in the middle. We fold against the mountain. Even when you have scored
something to make a good fold, it's really important
that you align your corners as perfectly as you possibly can
and hold that in place while you press
down along your score. I see this particular
sheet of paper did not even score and
fold nicely enough, but all depends on the paper you have and
how much of the grain. But anyway, then
you smooth over it. There you have a pretty
perfectly folded card.
7. Lesson 5 Making Landscape Cards with Captions: For our final act
in this workshop, we are going to make a
landscape version of our card. And we are going to do it, and we will also save a
template for the future. Right now, we're
going to go back to our two card template
portrait it's called. And we're going to swipe that way and we are going
to duplicate it. We're always working
on a copy and we're never doing
anything to the original. Okay, on the duplicate, I'm going to open
it, and here we are. We're starting from
scratch again. This time we're going to
start by turning our page. There's really no reason to have a second document to do this. We can use the same
one as long as we can just see straight
what we're doing, going to print on
the paper the same. Anyway, again, we are going
to go and get our photos. We're going to the
wrench to actions to add and to insert a photo. Okay. I did this as a
demo in my newsletter. It's a holiday card thing, but it took the pine out of it. It could be any an occasion. This time we're going to place the photo in this direction. Select at the arrow, we have our first picture. I want to put some caption
on this this time. Yes, we will go get
our type for the back. But first of all, we want
to go back to Keynote. We're going to hit
our plus sign. We're going to choose a theme. I'm going to use
that same one again, because I don't see one
with just one line of type. I'm going to use the white. I'm going to get rid
of the other line. I don't want the other line that comes up when I tap it once
with this line of things. And I can delete it.
Now we're working with one line of type and I want
to say happy holidays. On this double tap type, what you want to type? I am not crazy about
just using that. That's not very festive. Helvetica, I'm
going to select it all double tapped on one word
and then I can pull this. Then I can go up to the brush up here and choose a
different font. Again, I'm just going to go to the noteworthy just
because it's easy. And I know you all have it
because it comes on the ipad, I want to put an exclamation
point at the end. It was something I
didn't think of. For that we have to
edit the type itself. Double click, then right here, right here, you want to put
our punctuation. There we go. All right, now when you
take a screenshot of this by hitting my Up
volume in my Wake button, which now over here, because I have this
turned a different right there is our
screenshot and we open that. We have our automatic. My fingers work sometimes
better on this. All right. I'm going
to take all the white out of this that I can because you'll see why
when we get it over there. There we go. And hit
done and save to photos. All right. Now back to
procreate and under the wrench, under a insert a photo. And we're going to
go here and get our holiday one we just made. And there it is again. It's been taken from
screenshot resolution down to what we want
for print resolution. I want you to notice
what's happening here. We brought in our type, but our type is in a white box. It's blocking part of our photo. We're going to see
the trick to do that on our card over here. But for right now,
what to do with this? Well, there's a couple
of things I can do. I can make this smaller now, it's not really in
the way of anything. I can make the photo
a little smaller. And I would do that by getting over onto the layer
where the photo is. And we can select it
by hitting that arrow. Then we can resize it a
little and pull it up. That's good. That's
a good holiday card. Now the next thing
we're going to do is go put our card company
on the back. We're going there to
add to insert a photo. Here's my type. This time we're going
to move that down, bottom of the back and center it instead of going this way, it's going this way so that it reads correctly on the
back of this card. Then let's go again, let's go to our canvas and
hit our drawing guide. And give us a little bit
of a grid this time. 1-234-567-8910, 11, 121-314-1516,
the eight square over. I'm going to select this again. 12345678 is going to
be where my center is. If I put my copy so that
it's centered on there, then we're all set. While that is still selected in our drawing guide
is still in place, I'm going to go under the Add menu again and
grab copy and then Paste. Now I have another
one and it's on its own layer so I can just
plain pull it over here. I'm going to count again, 78. See, that's why you
don't try to move it from inside because
that happens. Okay? I was sitting on
that line over there. I'm going to make it the
same over here. All right. We hit that arrow and
we're de selected. I'm going to turn everything again because I'm
going to go and get a different picture
for this other card. And I'll show you something
else that we can do that's exciting about
putting a type on. Okay. Over to the wrench
to add to insert a photo. Back at my photos. Okay. This is an acrylic
painting that I did at one point in time and it's going to be the
front of my other card. If you have a type picture, it's better to use a
landscape orientation. On a portrait orientation, this would be small and
sitting there lonesome, unless you had a lot
to say beneath it. I'm going to move
this safety zone and bring it as far as I can. Okay. And then de select. Then I'm going back and I had already gone to Keynote and I had made another piece of
type to use on my card. I'm going to go get it now. Go back to add to
insert a photo. It is here. I believe this is a room quote
that is really a col one. I want to put it right here. If I do that, I don't want that white box
here is the cool trick. But first I'm just
going to size it to where I think it will work. Well, now this has come in on its own layer just
like everything else did. We're going to go up here, we're going to do something
to this layer that is going to lose that white
background and still keep the type in place. What that is, you
hit this little. The stands for normal
and it's one of the layer qualities that you
can choose in procreate. What we want though is multiply. What the multiply
layer does is it shows only the pixels that are darker than the
layer beneath it. Now if you think about
that for a minute, you'll understand
what just happened. This white all got dropped
because none of it was darker than anything in
that picture that I put it over. Isn't that cool? That will always work with black type or
dark type over light. It's not going to work with white type because it isn't going to be darker
than anything, right? But for black type, this works really well for us. Okay, now that it
is over my picture, I want to see if I can make
that type a little bigger. I can tell how much
of it is showing and I can tell if everything is going to land in an okay place
that is about as large as I can do it and still keep roomies name down here as
the author of the quote. All right, be select. What we have is a two up. That's not going to
be the same cards. Two different cards
this time we have added type on this one that is going to be
outside of our image, an added type on this one that's going to be inside our image. You might want to back up
this last bit and go over this one more time just so that you know that you have
it really stuck in your head. But this is a success here. We can get rid of our guides
canvas and turn that off. We go up here and turn
our guide layer off. If I turn the visibility off, we now have card two
cards that we can print. No guidelines will show, and they will both
be pretty adorable.
8. Lesson 6 Save Your Own Custom Templates: We are going to wrap
this up by just doing a little convenience thing for the next time that you
want to make some cards. The convenience thing we're
going to do is to make your own personal
template that includes your copy for your business or your logo or whatever
is on the back here. Instead of having to start
over with that all the time, I am back in our original
two card maker file. And I'm at this
stage where we put our images in and we put
our copy on the back. Images are going to
change the copy, obviously that you put with
images are going to change. We're not going to keep this. But what's probably
not going to change is going to be this
copy on the back. Okay, if we look in here in
the layers with the idea that we want to keep a template just open in the future
and make new cards, we are going to want these
two layers to be there. This inserted layer was our second picture coming
in. We don't need that. We're going to delete it now. There's no picture there
on our ad photos layer. We don't want to
delete the layer, we want to delete the pictures. We can take care of
that right here. We select our layer that has the picture on it and
we tap on the picture, we get this list of choices. What we want to do with
this layer is clear it. How easy was that, right? We would like to see our guidelines the
next time we go to make cards and
we're going to turn our guideline
visibility back on. So far so good. It's really
up to you whether you want to keep your two type
layers together or not. If you want them together, you can merge on this layer
by tapping and saying merge that we'll make one layer out of the
two pieces of type. You're okay there because these aren't live text
layers or anything. They're graphics.
And that'll make them stay where they are and you'll have one fewer layers. I am, for my sake,
going to do that. This is going to constitute my new two card maker when
I open it in the future, I'm going to be able to
just start up without thinking about what my copy
on the back of my cards is. Now, I neglected to mention, I'm working on a duplicate of our file that we made the
cards with the dog house in. I want that file. I
want to keep that file for printing those
cards in the future. And you will want
to do that too. And I really advise you to have different files for all your cards because what's
going to happen otherwise, is you're going to stack up
a whole bunch of layers. If you're a real procreate pro, that's no problem for you. And you certainly can do that if you're not And
you want simplicity. I would keep each of my completed card masters as
different procreate files. I was working on a copy
of our doghouse cards, and this copy now has been reconfigured to be my
template for the future. With my own information
on the back. We don't have to do
anything from here except maybe rename this document. Let's go to share
under the Wrench. We want to share this as
a procreate document, not as a picture or any of that. We want a live procreate
document to be our template and
it's being exported. We want to save, let's save it to our files. That allows us to rename here, which you're going to do in
whatever fashion you want to. I would say a to card maker, I might say portrait because that's the way
the type is going. The file is the same file
basically with moved type. Whatever your name is
on your card file, I have a two card portrait. Mine just as an example here. Once you save that
into your files, then that will be
there anytime you go to your files and it, you're going to get
new one opening in procreate saves you making
the duplicate even. So that's an even better gift. Now you may want to go to
your horizontal version. Like I say, there is no
difference in the file except for the fact that
we put type it, read on the bottom of the
backside of the card. Now you could always use this template that you just
made and what you would have to do is turn the
page to work with it. But then you would have to go to your type layer, which is here. And you would have to select, using the S, the
select tool here, these and hit the arrow and
then move them and turn them and place them again every time. It probably will really save you a lot of time to
do this once and then save it as your two
card maker landscape. Then you'll know from the
image that you intend to use, whether you want going to
want your landscape or your portrait template to use. You have all the tools you
need to make some cards. Your project is to
print some cards. I would love to see
that project in our project section and see your beautiful work and your success with this
little simple operation. So please do share.
 Jessica Wesolek, Artist/Teacher