Transcripts
1. Introduction: Hello everyone. My name is Jessica
and I love Procreate. I have since Procreate came
along, I've been using it. I've been teaching it
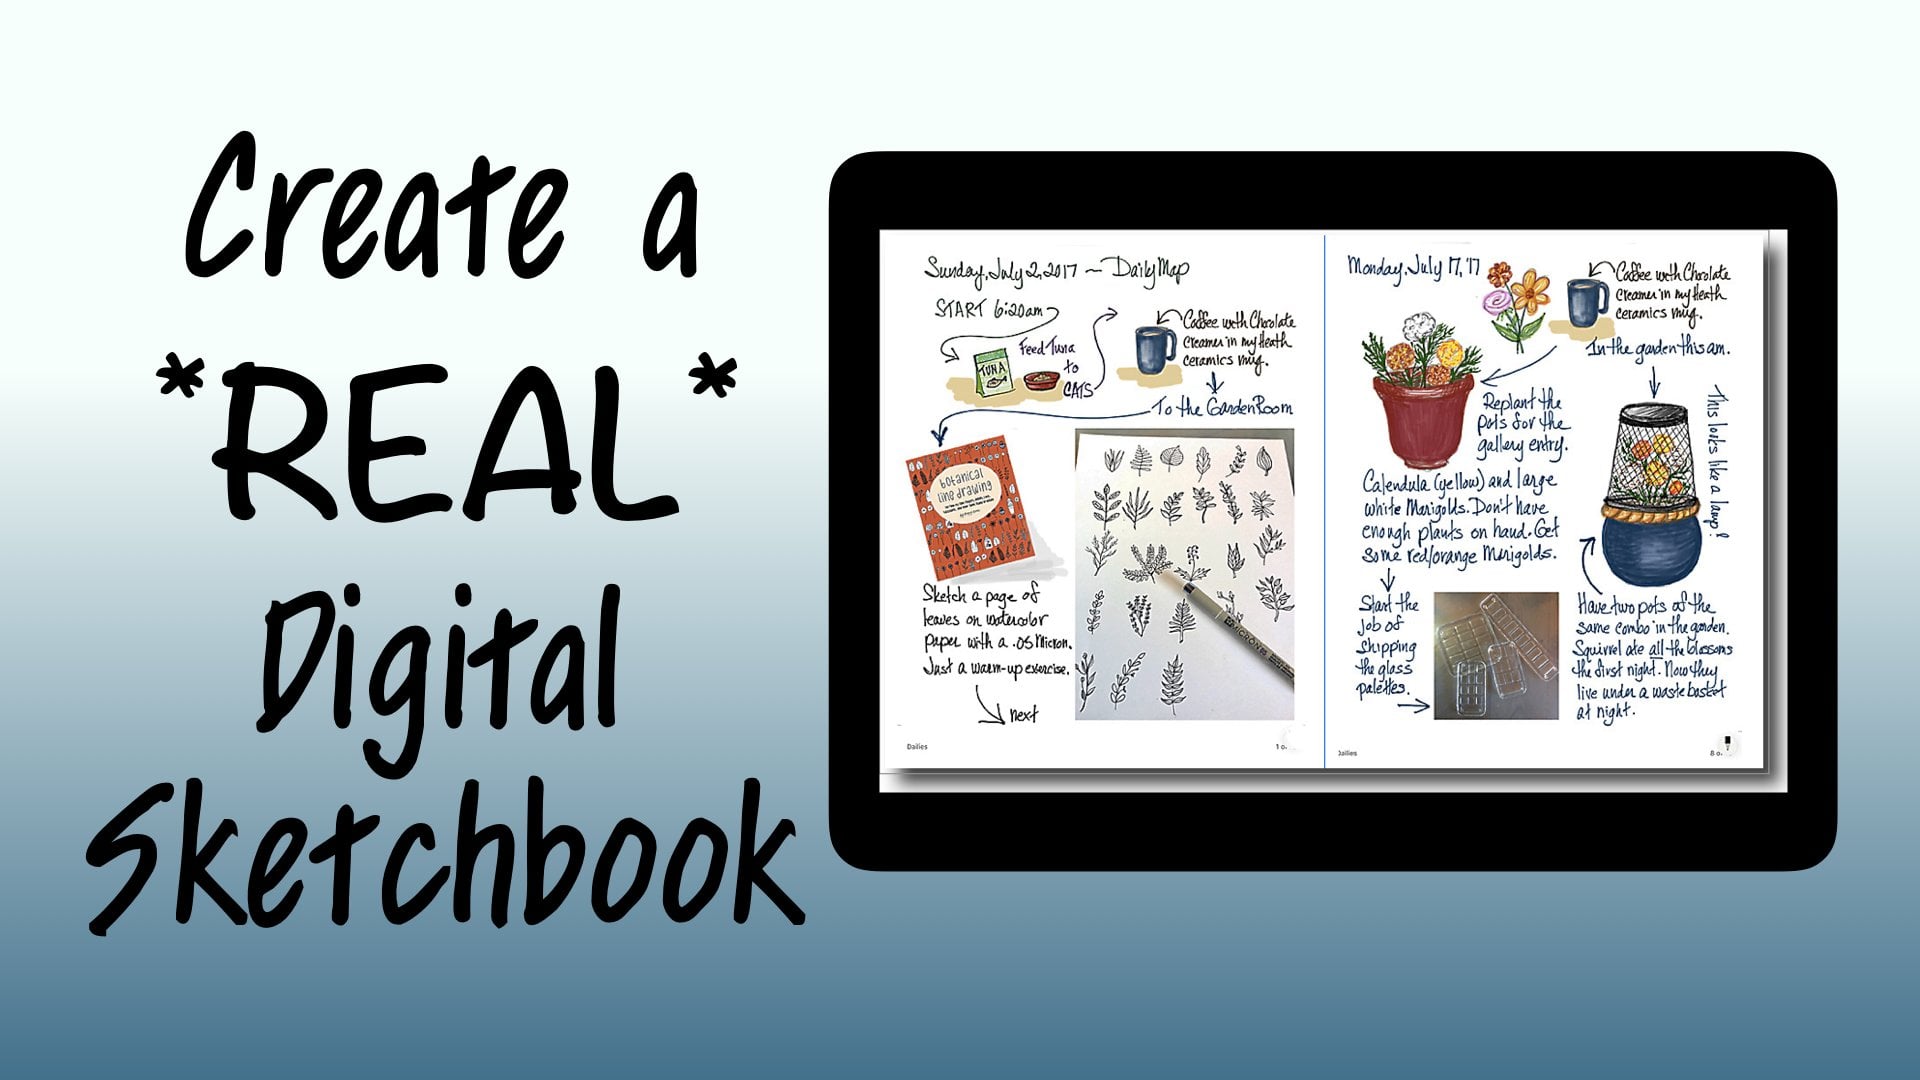
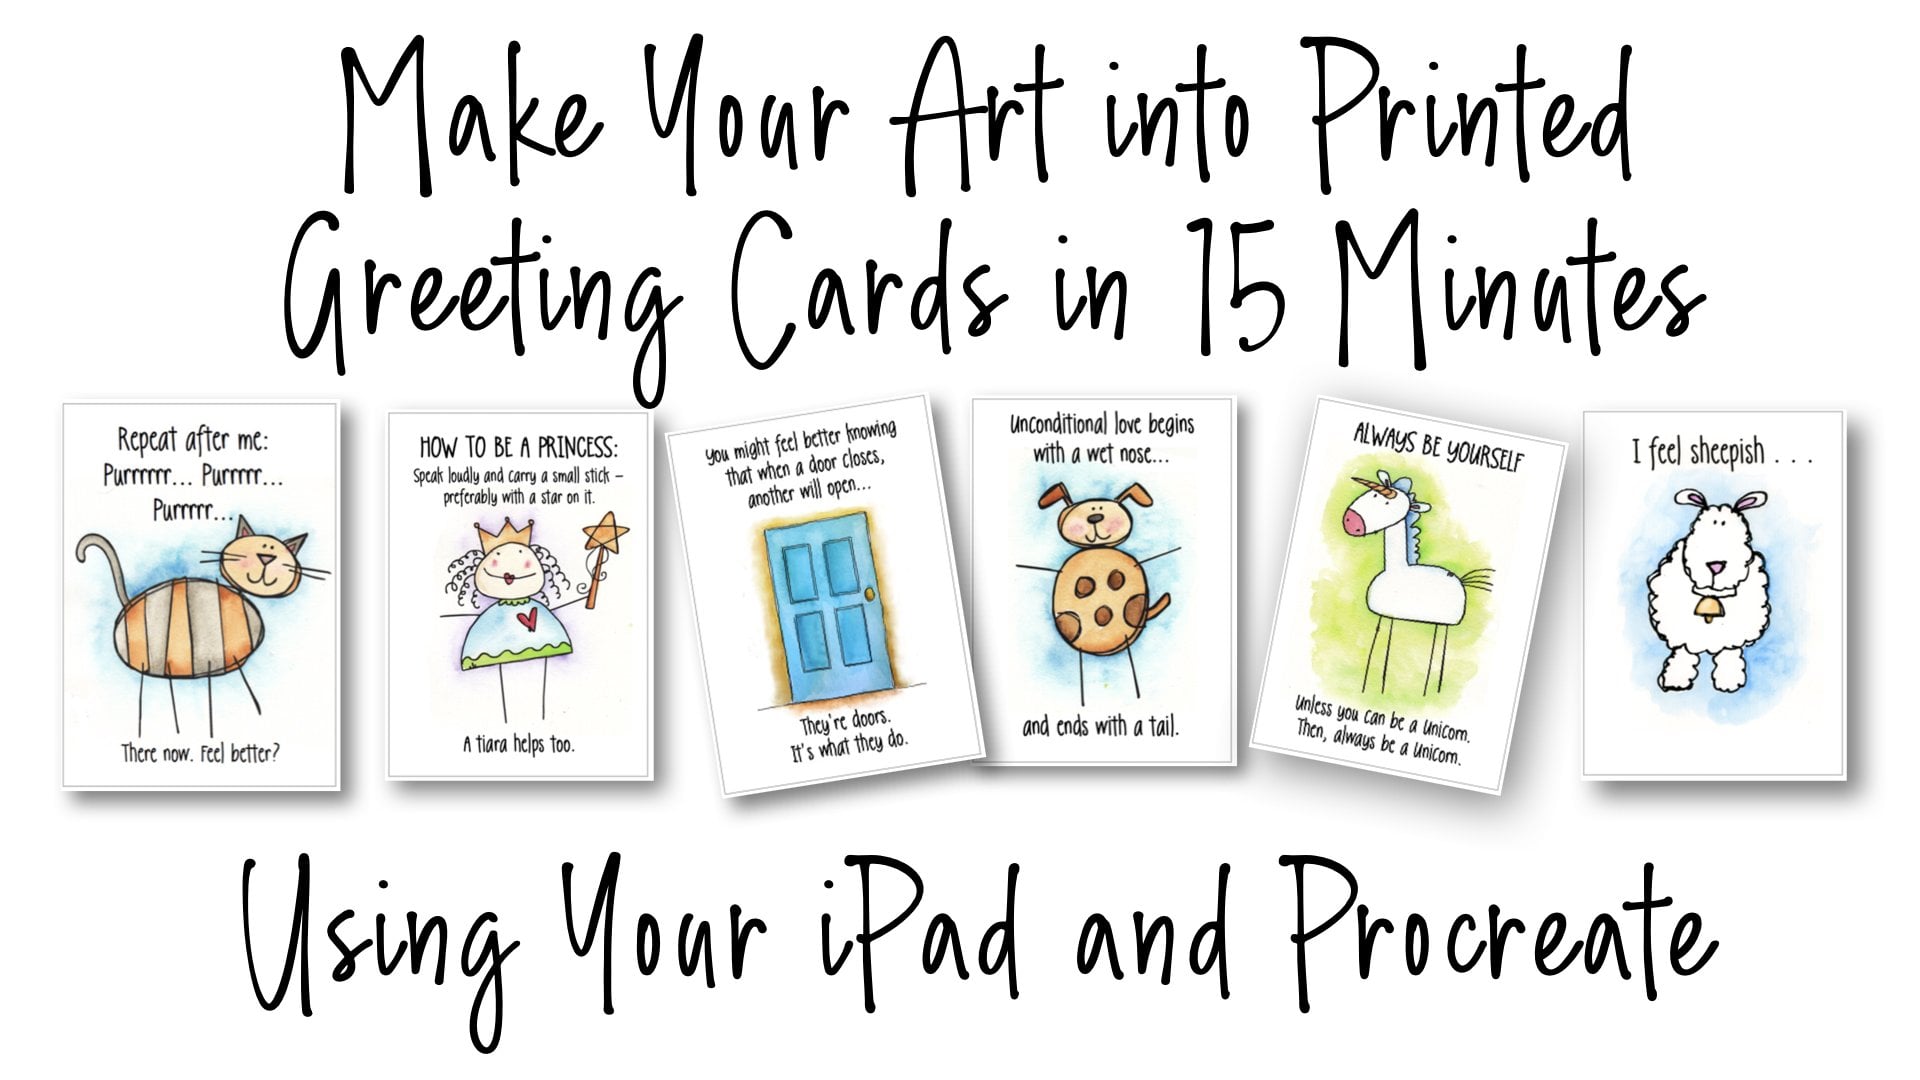
since about 20:11. I would do design ie things in there like this for
greeting cards. And I do some painting in there that I don't want to do in real life because it's
too dusty and so on. So there's a method
I use in Procreate to do a soft pastel look. And that's fun and I do that, but I spent so much time in Procreate that I'm not making
original art in procreate, I am basically playing with the art that I made
in the real-world. Most often real-world art, like watercolor and
ink work and so on, do not print well as they are. The surface of the paper, usually for watercolor is bumpy and it causes
ink lines to be bumpy. And then when we paint, we anchor drawing and
we paint over it. We're obscuring or
in lines most often. And so they come across in a printing situation
like gray and not black. And our watercolor splashes
over like down here. Our lettering hits a bump
and goes sideways on us. And so over all, anyone who uses their
real-world illustration most often has to fix it. And procreate has
made this not only an easy but a
delightful process. And I've wanted to
make this class for a long time to share
that process with you. And I finally have gotten
around to it, and this is it. This class is for intermediate or advanced
procreate users. There won't be any beginning
explanation of everything, but it will be step-by-step. And I am providing you
with a brush set of my own that I created to do the
job that this has to do. Now along the way of fixing
it and clamp on your artwork. You're going to
learn how you can recreate out of your
creations in Procreate. You can take apart your illustration as you go
through this fix-it process. You can have a line drawing
of it for future painting, you can recombine
elements since there's so much magic to be had. And you can access all that through this
fix-it procedure. So our project will be that
you will follow along with me to fix a small
painting and then a very rough sketch
from a sketchbook. That's just really a mess and we will make it nice and neat. Then in the last bonus lesson, I will give you a couple
of very challenging, really messed up pieces of art. And you can go off on your own and make them into
something beautiful. And you can carry off these brushes and these
techniques to use from now on in making your own
artwork ready for print?
2. Simple Supplies: Supply list is very short. You need an iPad, you need the Procreate app, and you need an Apple pencil. On top of that, I want you to go and
download my brush set and images from the resource
section of the class. I'm assuming that most of you know how to install a brush set. If you don't, the most
important thing to know, and I think it's still true
is that you must be on, on the website, not the app. And if you are, you
click on projects. And under projects
there are resources. And under the resources will be the downloadable
files of the brush set and for images that
we'll be able to work with. Now I noticed that a lot of Procreate teachers
also supply palettes. And I don't, because I don't
work with them myself. In the way that you usually
create palettes in Procreate, what I'm doing is working with
an original piece of art. And in that original
piece of art, my palette, there's all my colors
and all of the CO, much of a mess is really
it with all my colors and all the values of my
colors are already here. So you will see I will be
using the color picker all the time to find the colors going from the
original piece of art, which will be our bottom layer. So no need for palettes
to be provided. We will provide them to
ourselves as we need them. So go and download the
brushes and the images. And I will see you
in the next video.
3. Fix-It for Ink Lines: This is one of the small
two-inch paintings that we did in my last
Skillshare workshop, which was about creating six of these and having a
really good time doing it. And it's painted with
watercolor on watercolor paper. And it looks pretty good, right? But I decided that I
would like to use this. I'm going to write
greeting cards, one of my tiny ones, which use a little
square illustration. And we're done. I printed it. It didn't look as
good as it was dollar and it looked like the
edges weren't sharp. And it was a real mystery
until I took a picture of it with my iPad and brought it into Procreate
and took a look at it. In procreate, I brought in a canvas that is a
wide letter size. You could use an A4,
anything that you wanted to. But rather than just make a new document from
the photo itself, I want to control both the
size of my final cleanup and the resolution is really
important because it has to be 300 DPI. So we're just going
to look here at Canvas information
and dimensions and you'll see what I've got. I've got an 11 wide and an
8.5 tall and a 300 DPI. And that's the pixel
translation right there. But that's not really
what's important. So that is where I'm starting. Alright, so this
is my document and I am going to go
under actions to add looking for my
gate and there it is. Alright, And when it comes in, it's highlighted this way
so it can be resized. I want my original to be larger. I mean, not my cleaned up original to be larger
than the original. And this is arbitrary. You can make this be
what ever you want. But I kinda like this
and I'll tap the arrow and then I've got
this size all SAP. So the first thing that I'm
going to want to do here is get over the shock of
what this looks like, openness and procreate
and you're looking up, really close at it
because I need well, I didn't look bad at all right. And when you stick your nose away in there
like a bug's eye view, it's a little different story. Unfortunately, when you print, this different story shows
up and you don't want that. A print isn't appreciated for being sloppy like
original art work, a lot of people are really
appreciate the looseness, but when you print things like
greeting cards and so on, illustrations for products,
it's not so appreciated. The cleanup has
always been Photoshop and it's not easy and
you're not using a pencil. And I got sick of Photoshop. I was a beta tester Photoshop. So you can know how
long ago that was. And I think Procreate is such
an easier way to do this. So hence, this class. Anyway, I digress. So we're going to layers here. And the first thing
we're gonna do is lower the opacity
of the color here because we want to trace the ink lines in this
drawing in a clean fashion. And so we're lowering
the opacity. And we're going to add a layer above this layer to
put our ink lines on. I've given you a
set of brushes for this class called Jess brushes. And one of those, it was
my favorite inking pen. And I under the brush tool, choose that inking pen if it opens up like
this, just say done. We're now going
to use the pen to trace the lines in this drawing. I have sat and if
you don't know this, even if you're advanced or your intermediate and you
don t know this trick, you're going to want
to know this trick. You can save up to four
sizes on any brush, and it'll just stay
with the brush no matter which
document you open it. And another is just
like a great thing. The way that you do it, you would be choosing a size. And then this box opens up. This is 4% here. And if you hit the plus sign It becomes a favorite now up to four and maybe they'll
increase that in the future. But right now you
can have four sizes and to get rid of one
of your set sizes, you just hit the
Minus and it's gone. So I have sizes saved
at 12%, 17%, 24%. This is a brush that tapers, so we'll just run
a test right here. I'll go and get black. And you can see this because when I have this is a thin line, fat line, thin line flatlines. So that's a 17% earned it. The 24, 17 looks like this. That's kind of a match to the
line weight on the picture. And this one is lighter stone. This could also work. But because of our
later procedure, I liked a little
bit thicker line, so we're going to get rid
of all three of those and choose the 17
size in the middle. When I'm doing is
I am always moving the document around
because I want my my hand to be comfortable drawing
whatever it's drying. And so basically we're
going to go in here, I'm going to make sure
we're on our new layer. We are. Alright. Everybody at every level
I know screw that up, so does something or the
wrong layer and I do too. Okay, so what we're
doing is this. We're going to create a very clean ink line drawing
of our piece of artwork. Now, you're tempted when you see something wonky like that, you're tempted to fix it
and make that line right. You can do that a little bit, but don't do it too much because in our color correction phase,
you're going to see that. That makes you more
work and more troubles. So try to make your inclined just right along
the ones that were there. But obviously much cleaner. Watercolor paper, even
smooth watercolor paper isn't always that smooth and the pin just bobbles over bumps and becomes messy
and can't help it. Alright, And also we worked very small and there's two
inch paintings of the paint went all
over the place to just a couple of other tips. Remember your Procreate trick, where if you draw your
line and you hold still, you have a line, you can place more accurately. And when you let go, I didn't notice this
for a long time. Believe it or not,
when you let go, you have an edit
option over the top. And if you hit Edit, it will put these little
dots on the end of your lines so you can come
back and move it still. However, once you have touched the background again
or anyplace else, it becomes a line that's just there and you can't
move it anymore. Alright, so that is just
great for these slats, for, for these end post here that are what the gate is hooked to that to be
kind of straight. Your gate lines themselves
could be a little bit wobbly, but that depends on whether you want a
rustic look or not. I actually want to keep mine straight because these are planks and really
they were song. They weren't chewed
at the edges. So those lines are
going to be straight. These lines are going to be straight because they're
like, I don't know, concrete or brick or whatever that is at
the side of this tile, which by the way,
you'd never put this kinda title outside. But this is artistic license because I liked the look of it. This is sought TO tile famous in the Southwest and famous for
being cricket and wonky. So those lines, you are
not going to want to do your Procreate assist there because you want them
to look like the edges, the mortar on this kind of tile. In other design
decisions along the way, you may want to establish
the individuality of these by not making a straight line across
to define their bottoms, but making one for each so that they can
have personality and the same thing up here. And that's just more RD than to just have straight lines
going right across because this is a a
kind of a rusty gate. I am going to leave
you to go ahead and finish your ink
drawing of this piece, I would bore you to
death if you had to sit and watch me do it. I know you can do it. So I'll meet you with our completed line drawings
in the next video.
4. Fix-It for Color: Now we're going to tackle
our color cleanup. To do that, we go
back to layers. We turn the color layer back on. And we go to the opacity
slider here and bring it up to full force like unwise. And we're set to start
working on this. So let's go to the blend tool and choose
the just blend one. This is my cleanup tool and it's very magical and
you see how it works. It's, it's, it's
my mess on Maker. So let's take a look
at what it does. This is sat right here at 1%. Yours probably could
be set anywhere. I don t know. I want to show you how this
becomes a clean-up brush. So let's zoom way in on a mess. The blend tool takes
the color where you put down the point and marshes that into the
color next to it. Now, this 1% is very small. That total opacity over here. But you see what that does? We're gonna get rid of that messy green slopping over here. We can get rid of the excess
old line going along here. And you gotta be careful though, because you can't start
in a darker color and go because you going the wrong direction,
it's not what you want. So when we get in here and
we want to clean this leaf, we're going to start
always from the green and not from
the darker color. And you see how
nicely that fills in and cleans up what we have going on here
inside this leaf, which pretty big mess. Maybe this is a little smoother. That's something
that we're gonna deal with it a little
while, it'll show you. But first, I'm going
to continue to clean. This really, really
sloppy watercolor comes from some
real yellow here. Didn't have enough of
it down in a crack. And this is why you're
careful when you're tracing to put your lines and
basically the same place because if
they're off very much, You have a lot of this
darkness to get rid of. This is just on 1% here
because it's a small area. And I want control
of what I'm doing. Now on the outside of the leaf. I can sweep that excess line
away as long as I start. In the lighter color. Again, we've got too
much smooth is there, but we're going to fix that. It's over here. The outside of this
is a real mess. Then you can back out a
little bit to see what you don't see when you're
in there so close, I'm seeing a lot of green here. Then I'm going to want to bring
more yellow down into it. And I want to correct
this out here. This is mostly all of this fixing is gonna
go great for you. But there are occasions when something
needs a little more than what we've just done in
this particular painting. What I think is that my color here needs to have some
more of this colder blue, more like this panel
and this and that my post here definitely
needs to be lightened up. Okay. And then down here, we just plain ran out of color. I mean, I can keep doing this, but what we I have
is a situation where if you look
closely, was too smooth. We've lost our texture
from our watercolor. In here. We don't even have any dark. And so we have to fill
in a couple of fixit. We're going to do
that with some of the other brushes
that I gave you. And we're going to move to the paintbrush instead of the
blending brush right now. And I think we will start
by putting some colors, some solid color where
we have to have it, which is gonna be down in here. And so we'll, we'll choose
what I call my fuzzy fill. And it is a way to
put solid color into an area without having it
be really flat like this. And so what do I
want to add in here? I need a lighter green. So for color, stick your finger
down and move that we all around until you've got something like what
you might want. I like that little
middle business there. And I'm going to come into
my leave and just kinda fuzzy fill it and
I'm going to throw some up into that
dark area as well. I'll fuzzy fill here. Then I want to mix in
some darker green. So again, grab the color wheel, the color wheel, and go take it up to get a
nice dark like that. And I'm going to put a
little bit of fill in their hair just so I've
got color to work with. And I'm going to switch
back to the blender for a second because I see the little mouse
that I didn't catch. Now this isn't looking
right obviously, but we're going to
use our blender brush again to kind of mix this up a little bit so it
doesn't look like we just smacked some some
spots down here, but now we got a
little more variety of color, which is good. Interesting, but
a little varied. And I see that up here I have too much dark and
nothing else going on. Um, so I'm gonna go back, but before I lighten
up my green, I think I need a little
bit of that in here. Then. I'm going to go again. And this time pick up a nice light green for throwing
some of that into here. Okay, and get my blender brush and kind of just mark
it up a little bit. Then we're going to have to
come in and put some texture, which we will do
5. Restoring Texture: Now we're going to want
to add some texture. Maybe a tiny bit
more blending first. Alright, now back to
our paint brushes. Brushes, we have something
called shading texture. Just shading texture. So let's get that one. Let's take another
look at our leaves, like right over here. We need some light and
some texture here too. So I'm going to hold
down the color wheel and get a nice light
green, not too light. There we go. And my smallest
size here is a 6%. And I think that is, I'm
going to come over here and tap my nice texture brush
and have a little bit of furnace when you tap it so that it makes it
a nice visible mark. You see, there we go. We're putting a texture
back in that we need to have in these leaves
to it down here. Now, this is lighter and maybe could use
some darker texture. So I'm going to grab my
color wheel again and go until I got something.
There we go. A nice dark green. Dark green. I'm going to just
add a couple more grass places and I'm
going to move up to that gate and show you what I meant about a little
bit of a color shift. A little more texture
there and there. And I think over
here on this one. Alright, so let's take
a look at our gauge. And I felt like this
panel was lighter than everything
else and it needed a little bit of this
type of blue in it. And this pillar here needs
to look more like this, so it needs a little
lighter blue in it. So the first thing I'm going
to do is to grab that dark blue over here and use my shading texture brush to just plop some of
that color in here. Maybe a little bigger one. So a little bigger
spots and spacing. That now starts to
look like this. Now we have to pick up
some of the light blue and do that same thing to the gate post over
here on this side. Groups too much. We'd go to my smaller undo
and go to my smaller brush. And just add some end down here. Now, what you have now something that is a pretty good piece of art
work and it's going to print really well because
the lines will be crisp and the color will be all
of a light texture. I do, I do see some grass down here that could use
a little bit of texture. How does it ended up
just really smooth? So we'll do that and I'll go to my bigger version of rush. Just add a little bland grass
doesn't sit up in the air. I don't care what's
outside here. I'm going to be cropping up. So go over here to just add a little bit of blending
into the ground. So it all looks like
it belongs together. And there we have a
finished product, unless there are other things
you want to play with. Now we are on all this time. The color layer. I'm going to make it a
little smaller still here. And if we turn that off, we still have our line drawing. And if we turn that back on
in your line drawing off, you're gonna be surprised at how different that one locks. And the reason is we got rid of a lot of the
ink line in this. So this is a possibility
for you making a more painterly second
edition of this picture, getting all of the lines out. And then you have not
an ink and watercolor. You have a just a
watercolor painting. With the lines back on. You have the ink and watercolor
and it's really sharp. Now on your color layer, you can also do
other adjustments. So I'm going to go up here to this magic wand and choose Hue, Saturation and Brightness
from that list, these sliders down here, we'll make a lot of
difference in your color. So this is brightness
and not brightness. Brightness and
darkness, I guess. And you can light things up, lighten things up just
as much as you want to. Has a whole change in
value there, right? I'm going to leave that
one in the middle there. Saturation makes the
color more powerful. All the colors. You can do. Bring these up to like that kind of a brilliance, which I think is a little much. But there are times when
you're going to have something that's kinda dull. And you are going to want to
do that with desaturation. Then hue over here is weird
anyway, hue means color. And with this slider, you can make major adjustments. They don't look too realistic. But in some subject matter, they can come up with some
interesting results for you. But I'm not going
to make changes of that kind because
I think this color is nice and brilliant
and like it where it is, I think the saturation I might have lowered a bit
and I didn't want to, I think the given here as 50. So I'm going to say that I really like this and
it's a done deal.
6. Painting or Drawing? Your Choice: Now I'm going to show you
just a little bit about what you could do with that
painting layer with no lines, what you would have to do to
get it to, to hold together. And so I'm going to
go out to the gallery here and I'm gonna make
a duplicate of our file. So I don't want to
change that one. And we'll open that
duplicate out. We're going to go to the
Layers and I'm going to turn off the line layer. Alright. So I'll start down here
like I did last time. Showing you, we're going to, we're going to use
our Blend tool. And we're going to
clean up what's here without our black lines. So I've got this set really low, about 2%, one or 2%. And the reason for that is that I don't want to make
marks that are too big, but I want to kind of spread these paint edges until
they meet each other. So now we have no line. I'm going to, I'm
going to get rid of the fact that that
shadow looks like a line. We'll just blend that out. We'll come down here
and do that same thing. Bring it up to a
point a little bit. With the same cleanup tool, the cleanup tool
that we were using. We can make a believable
painting with ink lines. This is still very, very outlined right over here, which see what happens
when you do this. You get your outline that now
does not look like inked, but it looks like it
was created with paint. And you see some in some
of this action we are losing again like we did before. We're losing some
of our texture. You're going to come back and texture the very same
way that you did. So that would be over
at our paintbrush. And with our shading texture. And then picking a color
that we need inherent. Think it's like that
middle green right there. And then write it in
this really smooth part that just looks too smooth. We're going to come in
with too big of a brush. Take that down over here. I'm going to undo that. But we can come
in and we can add texture to where there isn't any open here and here. But it's better really to
do that after you have done your cleaning
of your paint lines. I'm just going to take
this to the level of this clump of grass just so
that you have completely, gotta go back to
the blending brush. You have a completely good idea of what that look is at
fuzzy painting look. Okay, this is too
sharp of a line here. This is, needs to
be less aligning, so does so you just
basically playing, you can come back in with
your dark to invoke, go both directions to make a kind of a delicate
balance here. To make it look more
painted then drawn. Alright, I do see that we're going to have
to get grabber ink, brush for just a minute here. And our dark, dark green. Because there has to be a bit more definition
right there. So I'm going to go on
my smallest of that and use the lightest
texture and define that. A little piece of
grass right there. But then we're going to come
back and we're going to blend that because we
don't want the line, but we want the definition. Is that not wonderful. Here too. Then when
we pull back out, see how this all looks like a painting at this
point in this area. So you can go through
and you can do that with all of the lines. And you're going to end up with just a painting without
any kind of outline. And I think you're gonna
like it and especially if you add back some texture. This is my final result of my, my fuzzy painting
version of this. And I'm going to show you the
dramatic difference here. You've actually made two
pieces of art out of one by coming in and correcting
the color without the ink after you've
done the other way. And if we turn watched
the difference here, this looks like a
nice soft painting, maybe watercolor
or maybe a pastel. And then we turn
our ink layer on, we have an entirely
different style. Could be any kind of pain, but it's very definitely
an ink drawing. And it's delightful. It has more of a lighthearted casual like almost
cartoony look to it. And you can make
more art from this because you have this
ink layer all alone. And so all you would
need to do is to print this on any kind of
paper you can paint on. And you can do many, many versions from the
same piece of art. So there's our color back on. There's a difference as
love that It's like magic
7. Fix-It for a Messy Sketch: We're going to try this
again with a very, very simplistic sketch
from a sketchbook, which really it was a mess. But the reason that
we're going to do it again is to show you how you can have options, color options, all kinds of options when you use Procreate in order to take your real life art to a place of a place where you
can manipulate it. Not only fix it and
clean it up for print, but change real elements about the design without
changing the rest. And so we're going to use
our same set of brushes. And again, I have a
wide letter size page. And I'm going to get a photo
and watch out because it's really creepy shape it has pencil lines showing and
let's make this bigger. So we can end up with a
nice size illustration. You see where all the
problems are, right? And the pencil lines not
even erased on there. This came from my home. A very loose sketch. And I'm going to do that. Hit the arrow and get
it to sit still for us. And I've got a background here
that I don't want either. So there is a lot going on. So we're going to dissect this illustration
to take it apart. And we're going to use base
colors from its own palette, but we're gonna do things a lot differently in turn out with a real different bug. And then I am going to, for your final project, I'm going to furnish you with a, another mug like this and
see what you can do with it. Procreate re-creation,
if you will. So, like we did last time, we're going to take the
opacity of this layer way down so that we can easily
put an ink line over it. And we're going to add another layer to do
that ink line on. We need our black and we need our justice favorite ink
pen so that we have, this time we're to do
something different though. On this layer is going to go only the cup and not
the leaf design. If we separate these two, it gives us a lot of
options and that's what becomes really
fun in Procreate. And I call that playing with Art parts and re-creating
your creations. But that is another
workshop I'm going to do, but this part I'm throwing
in here for you so that you can use your new found, fix it, fix it tools and skills. So only the cup is
gonna go on this layer. And therefore I am
going to say that this layer is going
to be the cup. And so rename. And there we go. We're ready with our
brush and are black. And again, I'm going
to turn this for the sake of my making a line and I'm going to use my
middle weight line here. And this time it is not so important to draw exactly
the same line because we are pretty much
going to discard this color except for
the palate itself. And you'll see what
I mean as we go. But if you see a bubble or something
and you want to correct it like here, you can just go ahead and make the new good line and it doesn't land on
top of the other one. That's fine. And there's the
basis of our cup. While I'm here. I'm going to make the handle
and I just held that. I hope my hand wasn't totally in the way because I
did this curve. I held it there. Drawing, Assist and Procreate
just like it will help you make a straight line and
will help you make a curve. That's kind of cool curve to
song as it's curved enough. Otherwise it thinks
it's a straight line. So anyway, and the
outside of our cup, I'm going to do the same
thing and I think that you'll be able to
see this better. They're lovely cup
handle. Then the oval. I will not mind
using pages this, I can draw all those after
practicing for 40 years, but, but, but sometimes
it's just so nice if you can just have
one for the asking. And I'm going to say edit, so that I can pull this
little further over K. And I turn this and make sure I liked the angle
of everything I do, and then I can touch
elsewhere and that becomes a permanent
part of the drawing. Okay, so now we're
going to do our leaves, but we're not doing
them on the same layer. And so we're going to
make another layer. And we're going to call
this the leaf design, rename leaf design. Okay. And we're gonna get in here
and make something nice and neat out of this leaf design. Instead of the kind of
blobby mess that it is. Again, don't have to
you can make it better. You don't have to put things
right where the color is because we're going to recreate, oops, that was a
two-finger touch. Never works when I try
it on purpose to undo, but whenever you don't
want it to, it will. Okay. You can be working along
with this if you want to, or you can just watch it or skip it and go and
do it yourself. If you got the concept and I have some
static electricity around here that
does strange things. I know if you use Procreate, you've probably
had the experience where your line
can start skipping and being erratic and everybody's
got theories about it. The only thing I have found, you see that my fingers
touch in the well, I was through a whole touching the frame of that plastic
isn't going to help. Having your finger
touch the frame of your iPad can stop
that from happening. And so sometimes I pop the
iPad out corner so that my fingers can rest against
the side of the case. I went too far there.
Right. I like it. So now what we have is we have, if we take the
color out of there, we have the drawing
of that same cup. If we take the
leaves out of there, we have a plain cup that we can use the color in any
way that we want to. If we turn the leaves back
and we're back where we started and we have a
nice drawing to color in. But we're going to keep all
of these parts separate. And so for right
now we're going to turn off the visibility of the leaves and concentrate
on painting the cup. We're going to want
our palette back. So let's turn our bottom
layer on and let's bring its opacity all the way back up so that we can
grab color from it. And then we're going
to turn it off to get it out of our way. We're going to the paintbrush
and we're going to get our fuzzy fill and
we're going make it a little bigger than we did. I'm going to turn off,
get on her cup layer, turn off the bottom layer and nicely color in our cup layer. But we're gonna do it
on a layer of its own. And not on the line work. And coloring is nice when it
is underneath the line work. And so you can see
what you're doing. And so we're going to make
a new layer and it's going to be the cop car. Okay? And we're gonna take our brush. Sorry, I gotta go turn this
on again and get my color. Forgot. Alright, I want this
light yellow ocher that is our background and we're just going to start with that. On our cup color layer. We're going to bring
our cup press and hold, bring the color, the color
under the cup outline. And we're ready to go. Though we're using
my fuzzy fill brush. And I have a size
over here of 46%. What I love about my fuzzy
filled brush is that it isn't, I don't know what they call it, but it doesn't make
it darker if you pick your pen up and keep going. And I loved that for
putting in flat color. So be careful around the edges because I'm using
a pretty big size here. But I can pick it up and
go back and see I'm not getting an overlap of darker
color and I loved that. So if your hand gets tired and it's going the wrong direction, you can pick that
during pencil, right? And put it back down. Okay, so I don't
remember the iPad, but I'll move this. And I'm going to color the inside and the handle to get a little smaller here because I'm going
over the lines. I don't have to get rid of that. Alright, so this
is our base color. And I get my little sloppy gone, so we're not dealing with it. Let me put that, fill that in. I get the eraser. There we go. Nice and clean. Okay, So we need shading to make this
interesting if we want to, to, to look again
at the original, turn this one off because
it's covering it. Turn this one on. And then a very sloppy way. This one was shaded in. So we're going to do it,
but not in a sloppy way. We're going to make sure that
we land only on that color. And I think you all know this, but we're going to create a
new layer just above this one and tap it and ask it
to be a clipping mask. Now what that means is when
we add our darker shading, It's not gonna go over the
edge of our color block. This clipping path is only going to color over whether it's
color in the layer below it. So watch how this happens as you probably know it and
you do it all the time. I want to go pick up
my darker colors. So I need to turn off this one and be able to
get at my color here. And I think I'm going
to start with a middle, not the darkest down here, but a middle tone there. Alright, and then my
paintbrush I have, and I'm going to
change that from the fuzzy fill to
my shading texture. Alright, and then go and make sure that
I'm painting on the clipping mask layer. And turn off the
other picture layer and turn on this color
one so I can see it. Layers, I tell you they can
blow you away right? Anyway. So with our shading texture, I'm gonna get like nice, bigger size and
see what happens. Okay, this is a
midtown, remember? So this is not our dark. But it's going to
start to give us some form and see if
I go right over that. It's only going to
hit the handle. And this part of the, of the mug because
it's a clipping mask. So it's only going to put color where
there's color below. Right? I like that and make it smaller. And go right on the inside here. And now I'm gonna go
get a darker version. I can also go here and
get a darker version, but I kinda wanna pick
it up from the original. So turn this back on, turn that off so I
can see it and get in here and get our dark. Get that little x to land. Where the dark shade color is. This is not always the
easiest thing in the world. But if you can see the
acts under your finger, you can make it work. Okay, turn that off and
turn this on so we can see. And now we're going to do
some more of our shading, but now we've got a lot
darker shading color. So now it's starting
to actually show up. And I want to get a larger size. So it has more texture. So I've put that up to
when I got 19 there. Okay. And a little smaller. Shade the inside of the cup. Usually the two corners
are the darkest. And then a little
toward the interior. Now we're, we're still
in the color area, which is why I
splashed over here. I don't want to. And now I'm gonna
go smaller, still. Going to get off the
eraser back on the brush. Just add some shading and over here on the handle and
then make it real small. Little more, Dirk, I
think that's too small. Little more dark. On the inside shadow
part of the handle. Pretty good. I could
use a little smoothing. So we're gonna go and get, oh, we're blending brush
and blending tool. I do that all the time. Anyway. And I'll bring that up. And we'll just help to smooth out or shading
transitions there. Should have been made
a little smaller. I didn't want to lose all of it. So I'm going to bring this
shader down a little bit. So we can kind of blend that in
8. Creative Possibilities: Okay, so we want to
join the shading with the coffee mug so that the
color is all in one place. And so to do that, we go to our clipping mask and we just ask it to merge down. We don't I'm clipping
mascot because that would allow all the paint that we had outside the lines to show. We just ask it to Merge
Down and that puts that shading rats where it's
supposed to be in the mud. Just a tiny bit
of an aside here. At this point, with our
color layer selected, we could go to the
magic wand up here into the saturation hue and so on. And we can do things
to our color. We can really saturate
it. Look at that. The sun came out right
in there. I like that. I like that. Okay. It could take it
all the way down to gray to but I'm going to make it a little brighter
just because it's fun. Do I want it a little darker? No. I think right in the
middle where it was. I don't think I want
to change that. Then you can change the color of the cup and it's going
to keep this shading. You can have a blue card and
you can have a green cup. And whatever this will pass through here
on the hue scale. But I'm going to put it back at 50 and how the
color that we have. Alright, so hit that
again to get rid of it. And we're going to go now
and look at our leaf design. And we're going to
turn our color off. And actually we don't even
need the cup outline. Because if we put it
on our leaf design, we're basically going to make those green leaves and make them a little
bit interesting. So let's get a
green that is nice and a little more yellow, a little more
natural of a color. And go to our brushes
and get our fuzzy film. But this time we're
going to go small and do what we did last time. We're going to make the color of the leaves on a
separate layer two. So we're at the
leaves new layer. Let's pull this new layer below. And we're going to rename it. And we're going to
rename this leaf color. Alright? And then our procedure again, it's gonna be to go and
with their fuzzy fill, fill our leaves and
an option here, if you were on your drawing
layer, would be two. And you are sure
you want to drain, would be to fill the leaves
by pulling the color to them. Now this is fast and it's easy, but what it does, it combines your color
layer with your line layer. And we don't want that
because we want to leave infinite variety for
using this art in France. And so we're going to undo that twice and put the color
on a different layer, which means that
I can't do that. So I'm going to use my fuzzy fill brush and I'm going to fill them
with green instead. And it just doesn't take
long and you don't have any errant marks because the
fuzzy brush doesn't do that. And I walked out just
a little fatter. I'll be back as soon
as I finished that. Okay, So what we have now, we have our leaves
are green and the green is on a different layer than the line work
for the leaves. So if we turn the line work off, that's what we have. Alright, now, we're going
to do what we did before. And we're going to make a
new layer on top of this. And we're going to make
that a clipping mask. And we're going to get
our texture brush. Let's use the big one
because it doesn't matter. Because our clipping mask
because it implies, all right, let's make a, let's get
a green that is darker. There we go. And let's get our brush a little
bit vague there. And let's just go over. And you can see if you can
see what's happening here. We have now pull it An interesting thing in, and now I want to go and
I'm gonna get a yellow, yellow, yellow, yellow, yellow. And yet my other, my shading texture, which
is more controllable. And I'd think testing couple of sides there
that that what is this? 65, I think as far as I can see. Okay, We're going to excite
our leaf design some. And again, we're on
that clipping masks or doesn't matter about
going on the Lions. All right, so let's look at this together now and
see how it looks together. So we have our clipping mask, we have our leaves. I kept them separate for a
minute because you'll see why. And let's turn our coupon. Let's turn our cup line or gun. And there we have a
cup that looks an awful lot better than the
one we brought in here. And I'll show you
that comparison. We will just turn this
on and turn these. Okay, So that, or that. So in a print and especially in a small one on a
card or something, this is just going to
be much better looking. That would be Kindle and
kind of messy for sure. Okay. So we can and this is just kinda
like little final trick. The reason I separated
all of this is that we can go to this clipping mask
where we have two colors. Remember any of the dark
and the light green. And we can go up to our hue
saturation and brightness. Whoops, got to show the layer. And then we can play
with our color. Oh, that's pretty isn't it? Like I like that blue with that. We're also will take us no matter what color
you start with. I mean, depending on what
color you start with this, how much of a hue difference in what colors they are looking. I like that a lot. That's purple because
that's kinda the the complement to the yellow. So that's kinda good-looking. And what would our
blue loved on k, the bright green, the
green we actually have all my look at that. That's pretty too. Now what's happening
here is that we're changing the color of the 22 values of green that we have on
our clipping mask layer. And that is why I did not
make a change to that. I'm just continuing now. I'm fascinated. So there goes some bluish
and some purple again. And all the way to the end, you end up the same as
the other hand, I think. Let's see. Yeah. Okay. So why don't we try something equally as
weird and why don't we switch to the
base green color? Now that we have well, I don't know if I
left it that way. So just a second. What we're going to go back, we're going to go like this. I want the want the
different colored boy. I tell you if I could
see through this phone. Okay. So I want to make a
change to the color. Maybe that blue. Okay, so we'll keep that. Then. If we go to our layers and we jump into the base
color that we have, which is that green. And we start fooling
around with that. Let's see what happens. We'll get the hue saturation
and brightness again. Now we're changing the green that's underneath the shading. So let's see where we get to within I see there's
a whole color range that wasn't there before. So this guy is like that. The sky is the limit
when you separate. You are what I call art parts. There's just so many ways to go where it was that I really like and I think I'm going to leave
it right there. Alright. So I'm going to provide a, another mug for you made of
pieces and the sketches, a mess that you can
do your own creation on following the same
steps that we did. And then you can move back
to your own artwork and know that you can take
the cryostat of sketches, rough preliminaries, and put it into Procreate
and turn it into a working model of art with
a lot of variety to it
9. Bonus Lesson Final: I promised you a bonus lesson with some real challenges in it. And here is another cup, and it's a mess, and it's got weird shapes. And you can do anything
that you want to this using our same procedures. I did save it as a ping for you. So there's no background. And when you get
it into procreate, all you need to do is turn off the white background and you'll have this with no
background at all. I usually work over
the white background. Then I will turn that
off to export as a PNG with a
transparent background. So this is your first
bonus image to play with. Your second image is
something that I do once in awhile and I don't
want to take up a lot of precious time. I will just do the loosest ever preliminary sketch drawing. And then I will, rather than inking over and doing all the redrawing
in real life, I will just bring it into procreate and I'll
work from there. And that's what this is. This is an excessively
loose sketches, especially for me
because I don't tell him why I'm here because I don't
sketch that loosely usually. But the sky's the limit here. In the first tip that
I want to give you. We will go over to procreate
and find out about, okay. When we do our blending
with our Jess brushes. The other brush That's wonderful Is the
big texture brush. And so if you were working
in backgrounds like this, you would be able to put back
some really lovely look. One of the reasons that I bring
a sketch in to Procreate, to work from, and not just
use it as a reference, is that I'm bringing
two things with me. I am bringing the look, the texture of my watercolor
on the paper I work on. Rather than trying to
fake that in Procreate, which can be done of course. And I'm bringing my
color palette with me. Now. The other trick that I'd
like to show you is if you did a really light sketch like this and you got in
here and you went, you know, what is color
doesn't have any life. I need a more vibrant
palette than this. This is a trick from Photoshop. So people who got it in
Photoshop for a long time, they know about it, but procreate will do
the same thing for you. So in this case, we're going to go to layers and we're going to
duplicate this layer. Then we're going to this place where we usually
lower the opacity. We're going to change
the blending mode. In a lot of these are mysteries. You can run through them
and see what they do. But in all honesty, in all these years, it's only three that, so that I've used. So they're not that useful without specific ideas in mind. Anyway, the ones that are really cool or multiply in screen, the multiply blending mode darkens everything in your
sketch now, too dark, right? No, I didn't mean
to go that far. Um, you can take that same opacity slider
and bring it back to all kinds of levels
and between what you began with and what
multiply did to this. So you have all the
choices there can be. Alright, the other
blending mode, and we'll just use
this same layer here, is called screen. And screen does the
exact opposite. It lightens or all the color. And you can also play with that effect to an
infinite degree by using your opacity slider, you're going to want to flatten these layers like suppose if we just wanted to lighten our
original a little bit, and we were going to work from what we'd like hair
as a middle tone thing. You can merge this layer down so that your original
that you're working with is this little bit lighter or a little
bit darker color. But if you just
work on one layer, you're going to get in some
trouble because that layer is really all I don t know
how to explain it. It's a filter. Okay, So it doesn't work as if you were playing an
editing with the base layer. And so it's a good
idea to find what you want and merge it down
before you work from the, from the final color thing. So this is it. I will love to see
what you do with this in the project
section as well. But hopefully this class has
given you a set of tools and maybe a new perspective on the process of cleaning
up your art work. Even if you are a person
who's scans and goes into Photoshop on the computer and all of that and
give this a try. Because so much easier
and so much in hand. And you don't need Photoshop and it's expensive prescription. Anyway. This has been fun and I
hope you enjoyed it and I hope it really adds
to your skill set
 Jessica Wesolek, Artist/Teacher