Transcripts
1. Welcome: Why We Are Using a Bigger Brush: Hi, everyone, and welcome back. In today's class,
we're going to be pushing ourselves
a little further by painting with a
much larger brush than you might
normally reach for. I'll be using a squirrel brush, sometimes also called
a quill brush. These brushes hold a lot
of water and pigment, which allows the
paint to move and flow in really beautiful ways. The challenge today is to let the brush do
most of the work. We paint with a larger brush, we naturally use
fewer strokes and we stop fussing with
every small detail. That is exactly what we want. Loose watercolor
often looks best when we simplify the
marks that we make. In this class, I'll
show you how to create a few expressive
blooms using a larger brush and how to let the paint spread softly
across the paper. We'll build a simple floral
piece that feels airy, relaxed, and full of movement. Let's start painting.
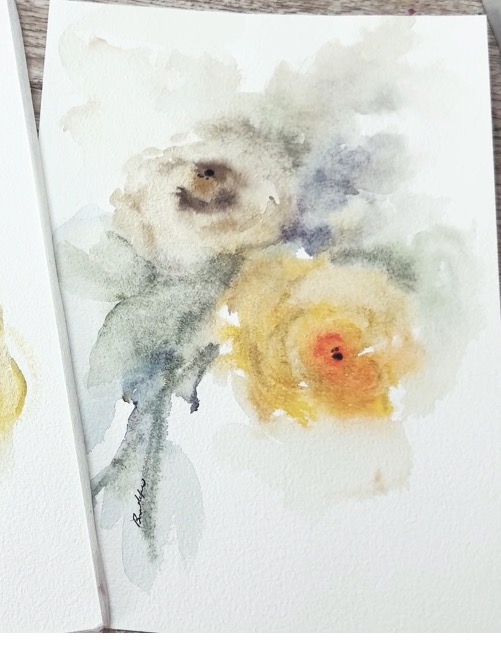
2. Supplies and How a Larger Brush Changes Your Painting: So in that introduction, I showed you the first
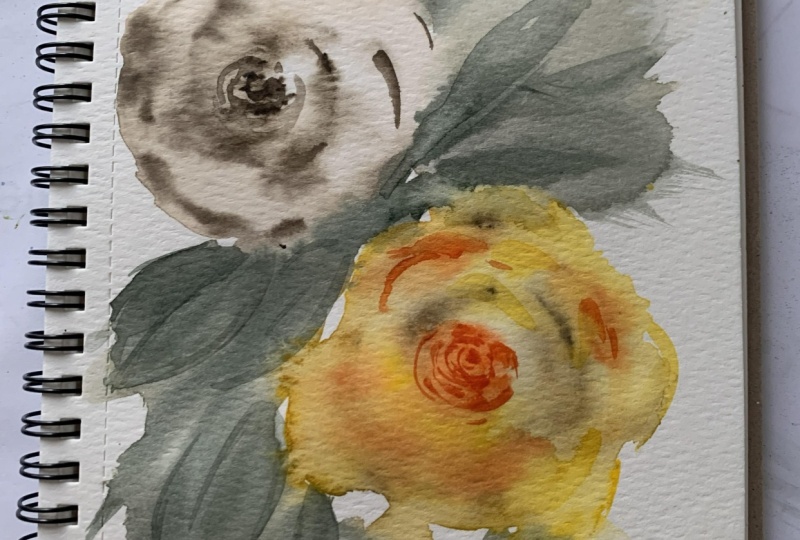
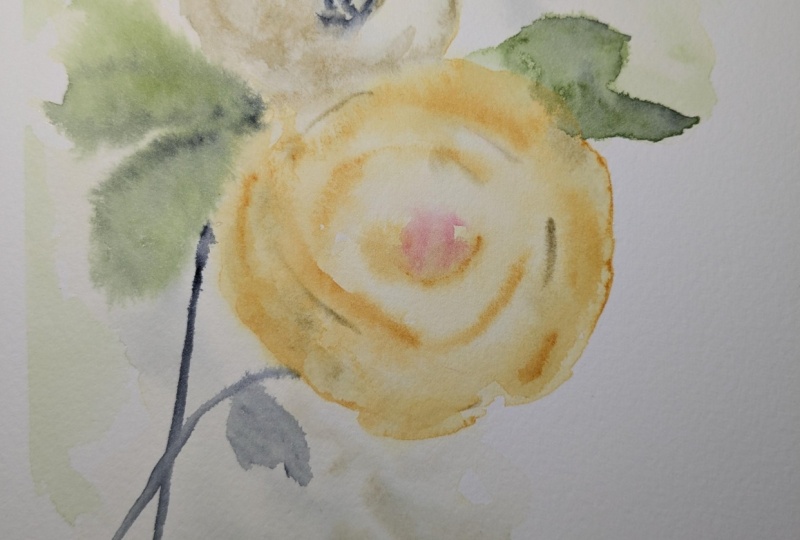
painting that I had done like this and
this was my sample. And then in today's class, we're going to paint
another one together, and I'm going to show
you all about this and talk you through
how we're going to get from here all the way from a plain piece
of paper to this. So what I recommend is if
you have a piece of paper, this is my cotton paper, I really like this paper. This one is 100% cotton and
it happens to be on a board. Each piece is glued down and it has a little opening here
where I'm going to be able to peel it back off using a knife to remove it once
it's completely dry. You don't have a board where your watercolor
paper is attached, then I highly recommend that you tape your paper
down to your desk. Use some art tape and tape down the edges to
your desk itself, or tape it down to a board or am a piece of cardboard or
something that you'd be able to pick up
and move around. But we're going to be
using a lot of water, and if you don't
have it taped down, your painting your paper is
going to warp and twist as it is drying and even when it's wet and that might be really
difficult and frustrating. For this, we are going to use
a really large paint brush. In our last lesson, I was encouraging you
to use a size ten. This black one is a size ten, where my normal size is a
size eight, this red one, I do love to use
my red paint brush and I might pull that one
out to do the centers, but I'm going to really
challenge us to go large if you have a
size ten or larger. This one is a formdan and this is a squirrel
hair paint brush, and look how much larger it is. It says seven, but
that's because the set it starts really
small and goes up large, it's not your standard sizes. So if you have a really
large paintbrush, that would be great. If you have a flat paint brush, you could also use
something like this. You know, here's another one. There's all different
styles that you can have that would work
great for that. So whatever size
paintbrush you have, try to find your largest
and experiment with that, that's kind of the
challenge for today is to use a really large paintbrush. So I'm going to be
using that one. In the last class, we talked
about not using our pencil. We put away our pencil and instead of sketching
out where you want the blooms to be or what shape the petals are
going to be exactly, we just went really loose and allowed our paint
brush to just flow. We used that larger paint brush. That was in an effort to get us ready for this next class. We are going to get
even more loose. This was one style. We're going to get even looser here because I think that is going to be the
challenge for today. We're going to be
using a lot of water. I'm going to leave
this sample laying here so that you can still
see it as a reference. I will try to make
it very similar to this so you have a clue as
to where we're heading. I have my clean water. I actually have several
different clean waters. If my paint brush is
really, really dirty, I might rinse that one off
in a back bin first and then use this one to make sure my paint brush
is nice and clean. So I do have my palette here
with lots of color in here, and I'll use that
center color as well with lots and
lots of water. I have previously
sprayed it down with my spray bottle to make sure that all of my
colors are activated. I just takes a couple of minutes to make sure that all
your paint is activated. Mentioned that we're going
to be using lots of water, and in our last class, we practice making circles. The reason that we practice
making circles is because we're going to be making
circles out of water. I am going to fill
my paint brush up with water and make it basically as full as I can
possibly make it so it's not dripping
but very, very full. We're going to be
putting one flower here and one behind it. We're going to be making this
flower our shadow flower, which basically just means
it's behind this one. This one is the foreground, it's going to be the brighter, the bolder, the
more colorful one. The one that's sitting
back here is going to be just in the shadows
in the behind. We're not going to make
this one the primary, this is our primary flower. Greens and the stems that we're
going to be adding in are just more watery shapes
instead of defined greens.
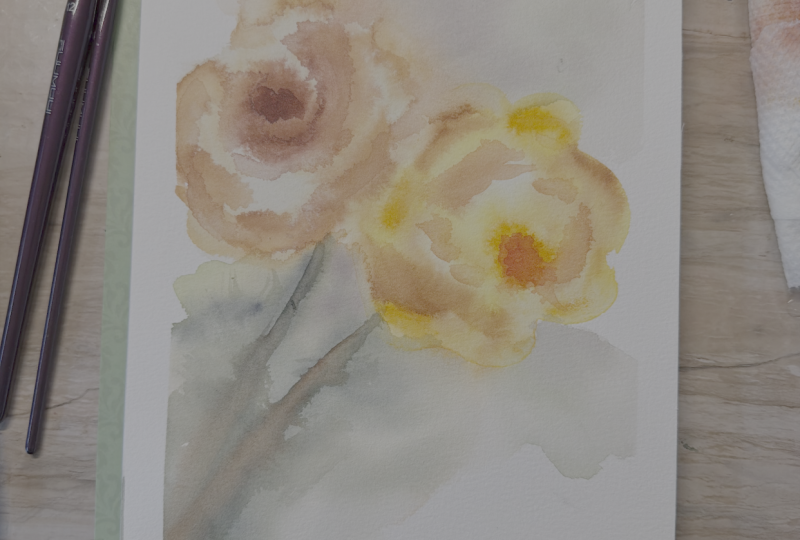
3. Building the Foundation: Choosing Your Focus Flower: Filling up my paintbrush
nice and full, I am going to make two circles. I'm going to be making one here. Again, our circles do
not need to be perfect. They need to be
just about shapes, about the shape of a circle, the water can mix. I'm touching the two, throw totally fine for them to touch. I'm making a little circle here. Now, my water, it's
all just very sketchy. My water on here, you can
see that it is shiny, but it's not puddles. I don't want puddles of water. I want my paper to be wet but not flowing and overflowing. Go to let that just dry
just a little bit while I come over here
and mix my yellow. I'm going to be
using this yellow. Again, I want lots of water and just a little bit
of paint because we're just doing a
transparent background. That yellow is going
to go down in here and I'm just going to be
dropping in this color. And just letting that flow
around in that circle, making almost concentric
circles around there. With that paint
brush full of paint and lots of water and just a little bit of paint
is what I'm trying to say. I'm also going to go outside of my wet area just gently with
this great big brush and just making some
little outside blooms because flowers don't always
shape in a perfect circle. I'm just going to
create a little bit of an outside shape. You can see lots of white space. You can see the puddle
is pulling with water. You can see my yellow
is starting to bleed up into this area over
here. It's also fine. I'm going to rinse off that paint brush and I'm
going to use this paint here, which is called my
titanium paint, and I really like that one, it's very, very natural. Again, I'm going
to start here in the center with a
circle and then adding more circles
as I come out again, just making some jagged edges and allowing them
to move around. I'm going to rinse
off that paint brush. Now I'm going to as this
one is starting to dry, a lot of what this
process is is in mixing your paints
and in timing things. I'm going to come over. I have, maybe some brown that I've
added in to my yellow, and it's just a touch of
brown in with my yellow. I'm going to add in
some little circles, some little semi circles here. Maybe even out on
the outside edges. You can see how the
water is pooling and how everything is spreading and everything's bleeding,
and that's fine. I'm just going to let
that do its thing. I go to add a little
bit more brown to my paint brush and come up
here and do the same thing. I just make these little see shapes coming around and adding that in just making the outside edges of where
those petals might be. Again, it's just going
to start bleeding, and that's perfectly fine. That's what I'm
looking for it to do. I'm also watching it to see how the timing has gone and
if it's starting to dry enough because I
can't be adding in too many details until this has started to
dry a little bit. I don't want it to
dry completely, but maybe a little bit more
than where it's at now. So you can see over here
in my sample how I have some lighter areas and some darker areas and then
a very, very dark center. Using the same
paint brush because it's all about using a
great big paint brush, I'm going to come over and
grab that color that I liked, which is just an orangy red. I'm going to drop
it into the center. But my center of this
flower is on the bottom. Third of the flour. Instead of being in the center, it's in the bottom third. I'm going to be doing
the same thing. It almost makes it look like
it's looking downwards. I just adding in some of that in a circle
or a semicircle, whichever way you want to do it. All we coming back in here
and adding a little bit more. I might even just add in just a few little tips of
that color here and there. Even move it around
a little bit. Very, very loose painting, very, very abstract almost. I'm going to get that brown, very strong brown and I'm going to be adding
that up in here. Same as you can see over there with just a
little stronger center. I might even add in just
a touch of it over here. Leaving white spaces,
leaving creamy areas. I do have a rag here next to me, and I am using that as
I rinse off my brush, I am dabbing it off so that I'm not filled with
paint with water. Then if I have that
lightly dabbed off, I can then come back in with my paint brush and move
that around a little bit. Creating petals as we go. Not through the whole
thing, in different areas. Even coming outside of it, drying off my paint brush, getting some of that
yellow to move, pulling some of the yellow out. This is a really
different process from what we usually do. I want you to just roll with
it and see what happens. If you don't like
your first one, go ahead and make another
one. It's totally fine. Play around and
see what happens, using different colors, add a little bit of
brown to my yellow, mixing up a color there and
adding some of that in here. Let me back over. Now that I've put
the basics down, and now we're going to be
moving onto the background. We're not done with these yet. We still just move
that paint around. We're not finished,
but we're going to let that dry a little bit and we're going to move on
to the background. Again, I'm going to wet
my paintbrush down, and then I'm going to
come over here and go ahead and touch right
into these flowers, which is going to give it
this really atmospheric look.
4. Background Wash and Simple Flower Details: And I'm going to actually
touch into it and drag that paint out in
a really random way. I am not painting
a leaf or a petal, I'm just dragging it
out and letting it almost flow and drop
paint everywhere. Totally fine. Again, I'm
just going to drag that over here and bring it
out really random. And because I'm pulling
this paint out, I'm going to be getting this
nice little background color that we're going for. Going up here as well, really touching right into those petals and
dragging that up there. Gives it that appearance as
if it's been just smeared. In my palette, I'm just
going to pick up some of the colors that are already in there and just drop some
of that down in here, making the center area just
a little bit darker than the outside edges because I want to create that shadow
effect down in there. Just adding in some
of this random color. Maybe pulling in some of these purples adding in some of that depth
here into the center. Remembering how we did that
with our last project where we just kind of allowed that paint brush to just
lay down and fill in maybe grabbing
some of this green, this dark green and adding in what we're gonna call
that those were the leaves. Maybe adding a leaf
here, and a leaf there. You can even be darker. De, they don't really look like leaves or the
illusion of a leaf. Maybe some greens over
here. Real jagged. I'm going to let
that be. You can see that that has almost
like a hard edge here. I'm going to leave that alone. This is where it
just becomes very intuitive that you
have to decide where you want to put
them where you want to be able to put your flowers
and where you want your colors to be and what
those colors are going to be. I dropped a little bit of heavy paint there and I
want to move that along. So I wet that down very
gently move that along. It's actually going
to go underneath. I'm pretty sure I'm going
to get that cut off, so I'm not too worried
about it when I go to, um, trim this. It's gonna be okay.
I'm just going to add some petals down
in here. Perfect. I do really like the I have, these stems that are
here, kind of stems, so I'm going to go ahead and get the tip of my paintbrush wet, and I'm going to
draw out a stem. I like my stems to cross, so I'm going to pull
out another one. Drop it in here. I hope you're having
fun doing this and experimenting and
seeing what happens and not being too particular or caring if it's
not exactly like mine because you're
going to feel see that mine is not
exactly like my old one. The other one that I had done. They're all going
to be different. Just let it flow. Have fun with this. This is just a fun exercise in letting go and being loose. If you don't like all
the spider webby, you can kind of smooth
it off a little bit with your paint brush. Like that. This is starting to dry enough that I'm going to
come back up in here. I just add just a touch more
detail into this flower. Let's see with this yellow one. I want to add a little
bit more depth. You have to remember that
watercolor is going to dry lighter than when it is wet. When it's wet, it's going
to look darker and bolder. But then when it dries, it actually turns lighter. I'm just adding just
some darker elements there into my yellow flour. Now, I'm going to let
this dry or I might go ahead and dry it
with my heat gun. I'm just going to be really
careful if I use my heat gun because there's a lot of
water if I'm not careful, I could really splash that
water all over the place. I'm going to be really
careful with drying that off. Okay, so this one is mostly dry. It's not completely dry. You can see it's still
warping a little bit, but it is taped down. So as this dries completely, that will flatten out. So I'm not too worried about it. But I do want to add in a
little bit more detail here. So I'm going to go back to my
paint brush and go back to that really dark orangey
red color and just add in just a touch more of that color
here into the center. And then I also want to
add just a little bit more of that darker color
here into this center. It's just an added little layer. You know what I think
I also want to add in, you can see how very loose because I used very
little bit of paint, mostly water for these
background splashes. It was almost like using my dirty water plus the
paint that was already on the flower heads themselves to create this
little wash back there. And then add it in
some little details. Go ahead and make
yours and upload a picture of it so that
we can see your progress, and I can't wait
to see what you've achieved with this and to
see how loose you've gotten. If you don't feel
like that first one that you do is loose and it still feels a little
stiff, use more water, less paint, try
it again and then upload your next to the
second one so that we can see how much looser
your second one got.
5. Final Thoughts and What We Will Paint Next: I hope you enjoyed experimenting with that larger
brush in this class. Using a brush like a squirrel or quill brush can feel a
little different at first. These brushes hold a lot
of water and pigment, which means the brush moves quickly and sometimes
unpredictably. But that is also what makes them so wonderful for
loose watercolor. If your painting did not
turn out exactly the way you expected, that's
completely normal. Many watercolor pieces need
to be painted more than once before they feel
natural in your own hand. Each time you practice, you'll learn a little bit
more about how the brush moves and how the water
and pigments interact. For your class project, upload your finished
floral study into the product gallery. I always love to see how different each
student's paintings look, even when we're all working
on the same lesson. If you enjoyed this class, please consider
following me here on Skillshare and leaving a review. It helps other students discover the class and really supports my teaching
here on the platform. This class is part of a larger
series designed to help you loosen up your watercolor
style step by step, feel free to explore all the other classes that
I have in this collection. Thank you so much for
painting with me today, and I'll see you
in the next class.
 Brenda Jones, Watercolor Artist & Teacher