Transcripts
1. Class Introduction: You can have good lighting,
beautiful ingredients, even nice movement,
and still end up with a food video
that feels chaotic. That is what we're
solving in this class. In the first class
of this series, we focused on light, motion, and depth, the foundations that make food look
delicious on camera. Now, we're shaping what
actually goes inside the frame because lighting
makes food look good. Composition makes people
want to keep watching. In this class, you'll learn how to style food for video
instead of photos, control portions so your
frame feels intentional. Choose garnishes that
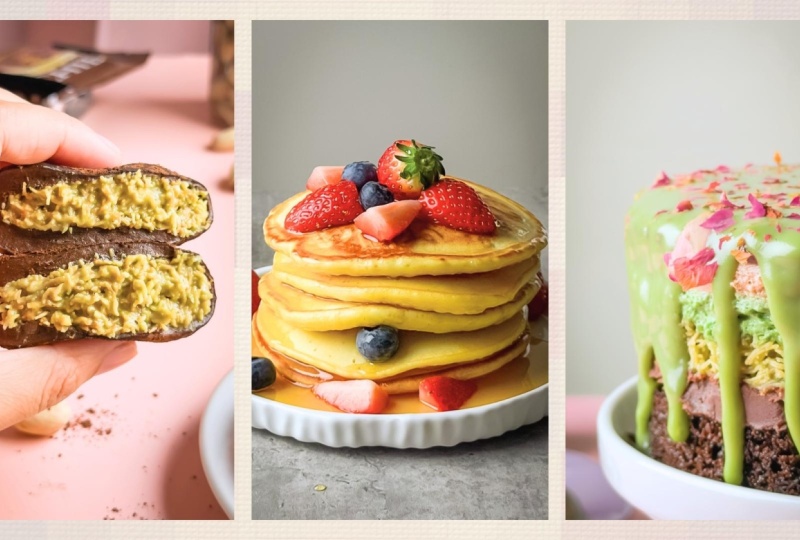
support instead of distract. Use space to guide attention. Keep backgrounds clean without making everything feel sterile. We'll use the same fruity pancake example from
the previous class. But this time we're focusing entirely on styling
and framing decisions. This series is designed
around creative momentum. Each class tackles one skill you can practice in
a single sitting. You don't need a weekend
production setup. You need clarity and repetition. By the end of this class, you'll style and compose one short foot
video of your own. Simple, finishable
and intentional. If we haven't met, hi. I'm Rose. I'm a photographer, videographer,
Skillshare top teacher, and I've helped creators
and businesses make food content that connects
without complicated setups. Now, if you're ready
to design attention instead of guessing,
let's get started.
2. Welcome to Composition & Food Styling for Video: If this is the first time
we're meeting, welcome. And if you watch
the first class in this food videography
series, welcome back. In this lesson,
we're stepping into a different layer of
food videography. Up to this point, you've
learned how to make food look good on video using light, motion, camera choices,
and intentional shooting. Now we go one level deeper. This part is not
about decoration. It's not about
making food pretty. And it's definitely not about copying a style setup
you saw online. This class is about attention,
balance, and restraint. Good composition doesn't shout. It guides the eye, and when the eye feels
guided, people stay. That's the core idea we'll work with throughout this class. Good composition keeps
people watching. This class builds directly on the foundation
you already have oh, no, you don't need
new gear or new apps. What you're learning
here is how to make clearer decisions with what's
already in front of you, what to include, what to remove, and where the viewers
attention should land. By the end of this class, my goal is for you to feel
confident creating food videos that feel intentionally styled
and thoughtfully composed, not busy, forced and overdone. Videos where the food
feels like it belongs in the frame instead of
fighting for attention. Now before we go any further, there's one important
idea to understand. Food styling for
video is not the same as food styling for photos. What works beautifully
in a still image often falls apart the moment
the camera starts moving, and realizing that is a
turning point for most people. In the next lesson, we'll break that idea open.
I'll see you there.
3. Food Styling for Video vs Food Styling for Photos: Before we talk about plates, garnishes or framing, we need to clear up a very
common misunderstanding. A lot of people approach food videography
using photo logic. They style the dish the same way they would for
an Instagram photo. More props, more toppings, more details, more everything. And then they wonder why
the video feels messy or distracting or strangely
unsatisfying to watch. I know this because,
hi, that was me. I started as a
wedding photographer, then a food photographer and only later moved into
food videography. Means, yes, I proudly carried all my photo habits
straight into video. Some of them I'm
still learning today. But here's the big
realization for me. What looks good in photos
often fails in video. And the reason is simple. Photos free time
video reveals it. In a video, the
eye is constantly moving and the camera
moves with it. That changes everything. As soon as the camera moves, excess shows up immediately. Too many props start competing. Too many garnishes pull
attention away from the food. Small styling choices
that look intentional in a still image suddenly
feel loud on video. Video doesn't hide
clutter. It exposes it. This is why over
styled food videos often feel overwhelming
instead of appetizing. The viewer doesn't
know where to look, so they stop watching. And the reason is motion. The moment something
moves, a pure, a steer, a cut, a lift, the viewer's attention
locks onto that movement. Anything unnecessary around
it becomes a distraction. This is why video
rewards simplicity. But not boring simplicity,
intentional simplicity. In food videography, styling
is not about adding. It's about choosing what
earns its place in the frame. Every element should
support one clear story, the texture, the action, the transformation, or
the appetite moment. If it doesn't help
tell that story, it doesn't belong there. This is also why
restraint is one of the most underrated food
styling skills for video. Pulling back often makes
food feel more premium, more focused, and
more watchable. This is not about
having less creativity. It's about directing it. In the next lesson, we'll
make this practical. We'll talk about portion
control, garnish decisions, and how to keep food
looking natural on camera without overstyling
it. I'll see you there.
4. Styling with Restraint: Portion Control & Garnish Decisions: One of the most
important skills in food videography is not
knowing what to add. It's knowing when to stop. Most food videos don't struggle because the
food is not good. They struggle because
there's too much happening, too much food on the plate, too many elements in the frame, too many details
competing for attention. And the food videos
that almost always stop me from scrolling
are the simplest ones. Plain background, minimal
styling, just the food, close up, bubbling, frying,
stretching, dipping. Those are the videos that
somehow make me crave food from another country at 2:00 A.M. For absolutely no reason. On video, more
rarely means better. This is where restraint
becomes your secret weapon, and it starts with one of the easiest and most powerful
upgrades you can make. Portion control.
Let's break it down. A common assumption
is that showing more food will make it
look more appetizing. But on video, the camera needs space to understand
what it's looking at. When a plate is overloaded,
textures blend together. Movement becomes unclear and
the frame feels crowded. Smaller portions
solve all of that. They give the food
room to breathe. They make life easier to read. And they make motion, pores, scoops, cuts much clearer. Portion control also
helps with camera angles. When there's less food
fighting for space, you can move closer
without distortion, tilt the camera without chaos, and direct attention
exactly where you want it. This is why many
professional food videos use less food than you'd expect, not because they're
trying to be minimal, but because they're
trying to be clear. Next, let's talk about garnish. Garnish is often treated
like decoration, something you add at the end to make food look impressive. But in video, garnish
works very differently. Here's the key difference. Garnish is visual
punctuation, not decoration. Its job is to support
the main food, not compete with it. In photos, garnish can
sit quietly in the frame. In video, the
garnish comes alive. Herbs flutter, seeds catch
light, sauces glisten. And suddenly the garnish becomes the most interesting
thing on screen. That's when it stops
doing its job. A helpful question to
ask before filming is, what is the hero of this shot? If your eye keeps
drifting to the garnish instead of the food,
you've gone too far. Good garnish guides attention, adds a hint of
contrast or texture, feels quiet and intentional. On the contrary, too much
garnish pulls focus away, creates visual noise, and
makes the frame feel busy. And here's a top tip. Garnish is optional. Removing something
often improves a food video more than
adding another element. Portion control and
garnish decisions are really about the same thing. Focus. When you style
with restraint, the viewer knows where to look. Movement feels satisfying, and the food feels premium
instead of cluttered. So the key idea to
remember from this lesson is restraint creates focus.
5. Keeping Food Natural on Camera: There's a certain
moment when food stops looking
appetizing on camera. It's not when it's imperfect. It's when it looks overworked. Food that's been
touched too much, adjusted too many times or
style to look just right, often loses the very thing
that makes people crave it. On video, stiffness
shows up fast. Edges dry out, texture
lose softness, movement feels forced
instead of natural, and the viewer feels it, even if they can't explain why. This is why realism matters
so much in food videography. Video creates a
sense of presence. It feels closer to real
life than photos do. So the food needs to feel like something that could
actually be eaten, not something frozen in place. Imperfections help with that
a slightly uneven drizzle, a crumb out of place, a sauce that doesn't fall
perfectly every time. These details make
food feel alive. In fact, some of the most
effective food videos don't try to hide imperfections. They let them work for the shot. Because imperfections
signal honesty. They tell the viewer,
This is real food. This just happened.
You could be here. When food looks too
controlled, too symmetrical, or too polished, it can create distance
instead of desire. This doesn't mean
being careless. It means being selective. The goal is not to be messy. The goal is believability. One practical way to apply
this is to style less before filming and let
movement finish the job. Instead of fixing every
detail, ask yourself, what will naturally shift
once I stay pour or cut. Often, the best looking moments happen during the
action, not before it. The key idea to remember
from this lesson is simple. Believability beats perfection. When food feels real,
viewers trust it. And when viewers trust what
they see, they stay longer. Now in the next lesson, we'll shift from
styling to framing, how composition and
camera placement guide attention and
keep people watching.
6. Framing & Space: How to Guide Attention: When people say a food video
feels satisfying to watch, they're usually
responding to one thing. Their eyes know
exactly where to go. That doesn't happen by accident. It happens through framing
and space working together. Framing decides what
the viewer sees. Space decides how
clearly they see it. When these two are aligned, attention flows without effort. With all that said, let's start by clearing up a
common misconception. Centered framing often
gets a bad reputation. But in food videography, it can be very effective. Centered framing works when
the food is clearly the hero. There's enough space around it, and movement happens
within the frame. In these situations,
centered shots feel stable and
intentional, not boring. Centered framing only becomes a problem when the
frame is crowded, and that brings us the
real job of framing. Every good frame gives
the viewer a path. Their eye enters the frame, moves toward the action, and settles on the food. You don't need dramatic
angles to do this. You need intentional placement. Simple choices make
a big difference here where the food
sits in the frame, where motion begins and ends, how much space
surrounds the action. Negative space is
an empty space. It is working space. It gives the eye
somewhere to rest. It makes motion easier to read, and it prevents the frame
from feeling rushed or noisy. When every inch of
the frame is filled, the viewer has to work harder
to understand what matters. Negative space supports motion
by giving it room to move. Pacing by making the
frame feel calmer and clarity by separating the subject from the background. This is especially
important in food videos where texture and movement
are the main attraction. Vertical video makes framing
and space less forgiving. The frame is narrower, which means distractions
feel heavier. Clutter shows up faster, and the viewer's eye
has fewer places to go. In vertical framing, height
matters more than the width. Space above and below the
food becomes valuable, and unnecessary elements
feel intrusive very quickly. This is where negative
space does its real work. It gives motion room to breathe, keeps the food
readable at a glance and prevents the frame
from feeling cramped. Designing for vertical
video is not about squeezing a horizontal
idea into a taller frame. It's about deciding very clearly what deserves
attention first. When framing and space
are intentional, the viewer never feels lost. They feel guided, and that's the key idea to remember
from this lesson. Composition guides
attention without effort. Space is not empty. It's functional. The next
lesson we'll focus on one final layer that often breaks otherwise
good compositions, backgrounds, and how
to keep them from competing with your food.
I'll see you there.
7. Clean Backgrounds That Don’t Compete: Another reason food videos lose attention has nothing
to do with the food. It's the background.
In real kitchens, backgrounds are busy by default. Appliances, bottles, containers, cords, labels,
they're everywhere. And while your eyes learn to ignore them, the camera doesn't. The camera notices contrast, brightness, shapes,
and text all at once. That's why backgrounds matter so much in food videography. Just like the garnish,
the background's job is not to impress. It's to support the food. The background starts
talking too loudly, the food gets ignored. A good background
does three things. It stays visually quiet. It creates contrast
for the food, and it doesn't pull
attention away from motion. If your eye keeps
drifting behind the food instead of staying on
it, that's your cue. The background is competing. This doesn't mean you
need a blank wall or a studio kitchen. It means you need to
simplify intentionally. The easiest mistake to make is tiling with your eyes
instead of the camera. Always look through the
frame before filming. The camera exaggerates clutter. Small distractions become
loud once movement starts. So before you hit record, scan the frame and
ask what's bright? What has texts or labels? What creates strong
lines or patterns? Those are usually the
first things to remove. Turn around or move
out of the frame. Most of the time, simplification looks like sliding items
a few inches away, rotating containers,
so labels don't face the camera and choosing one surface instead
of stacking layers. These are small changes
that create big clarity. A helpful rule is this. If it doesn't support the food, it doesn't belong in the frame. Remove readable
text, busy patterns, shiny objects that catch light, and anything that competes
with the main subject. Keep simple textures,
neutral tones and elements that feel
believable in a real kitchen. Backgrounds don't
need to disappear. They just need to
stop competing. When background quiets down,
something important happens. The food feels more intentional. Movement becomes easier to and the video feels calmer and
more satisfying to watch. So yes, that's the key idea
to remember from this lesson. If the background
talks too loudly, the food gets ignored. Now, in the next lesson, we'll bring everything
together in a real time demo. You'll see how styling,
framing, space, and background choices
work as one system, as I style and compose a recipe video from start to finish. I
will see you there.
8. Class Project Demo: Styling & Composing a Food Video: In this lesson, I want to slow things down
and show you how everything we've
talked about actually comes together in real time. Think of this as
a continuation or maybe even a parallel version of the pancake video from the first iPhone food videography class. In the first demo, we focused on presentation and foundational
filming decisions. This time, we're going deeper. We're filming the full recipe and paying close
attention to how the food is styled and composed while I'm
filming, not after. So before we start, I want to quickly point out
something familiar. You'll notice I'm using the same light setup
I showed you earlier, my artificial G Docs SL 60 W. But the important part here isn't the
brand or the gear. I'm positioning the light
the same way I would if this table were next to a
window. That's intentional. By placing the
light to the side, I'm recreating natural
side lighting. This means you can
absolutely apply the same setup using
window light at home. So the goal here is consistency
in light direction, not copying my exact equipment. As we move through the
shots in this demo, I want you to pay attention to why certain choices are made, not just what they
look like on screen, why I place things where I do, why I pause before recording, why I adjust instead of
forcing a shot to work. This is not about
memorizing steps. It's about understanding the thinking behind
the decisions. So when you do your
own class project, you're not guessing, you're
choosing with intention. Once I'm happy
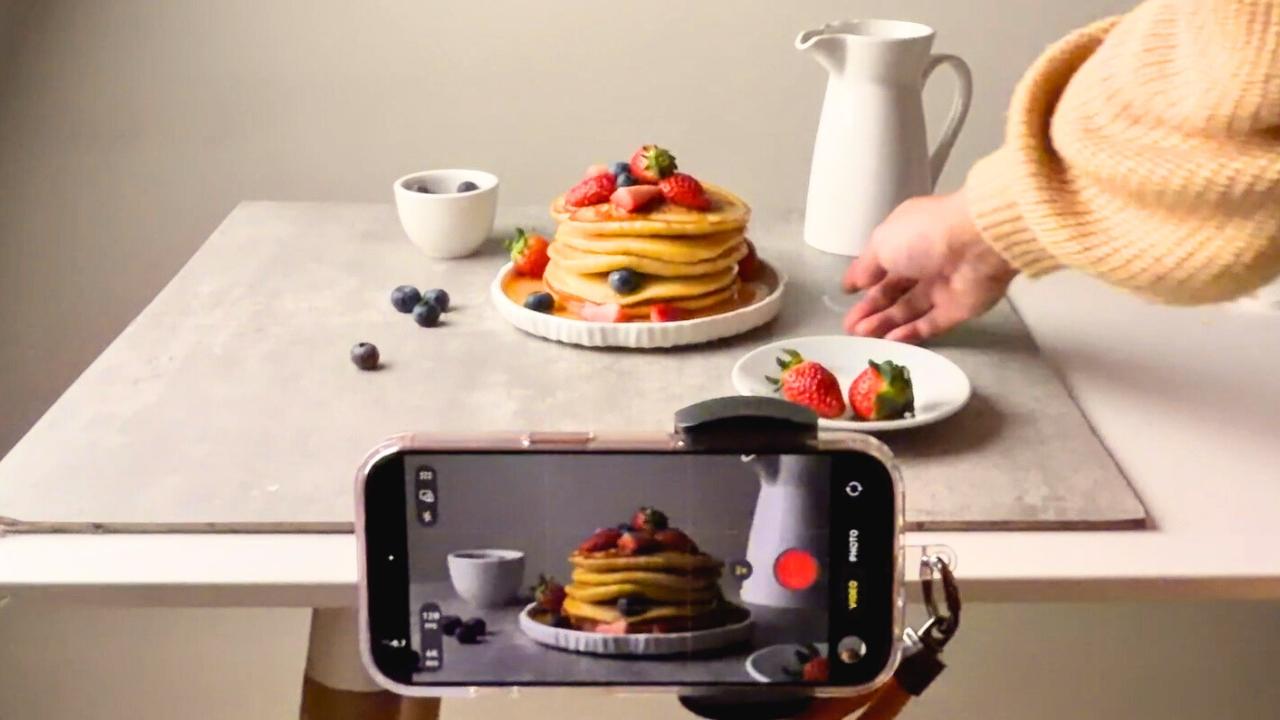
with the lighting, it's time to set the scene. For this setup, I'm keeping
things very simple. I'm just using our regular
dining table and adding a 55 by 55 centimeters double sided hard
background board. So nothing fancy.
But this gives me a clean surface to work with and helps the food stand out. Next, I place the
bowl where I'll be mixing the pancake
ingredients later. At this stage, I'm
not styling yet. I'm just testing how everything
looks under the light. I also add a few
temporary items, not because they'll stay, but to help me frame
the shot on my iPhone. Of this as sketching the composition
before finalizing it. Once that looks good, I
mount my iPhone on a tripod. This gives me consistent framing and makes life so much easier. It's like having an extra pair of hands that doesn't get tired. Any reliable sturdy phone
tripod will work here. I personally love this center
axis horizontal tripod because it lets me
move the iPhone, tilt it and change
angles smoothly without having to remove the phone from the
holder every time. Before we continue with styling, let's quickly review my
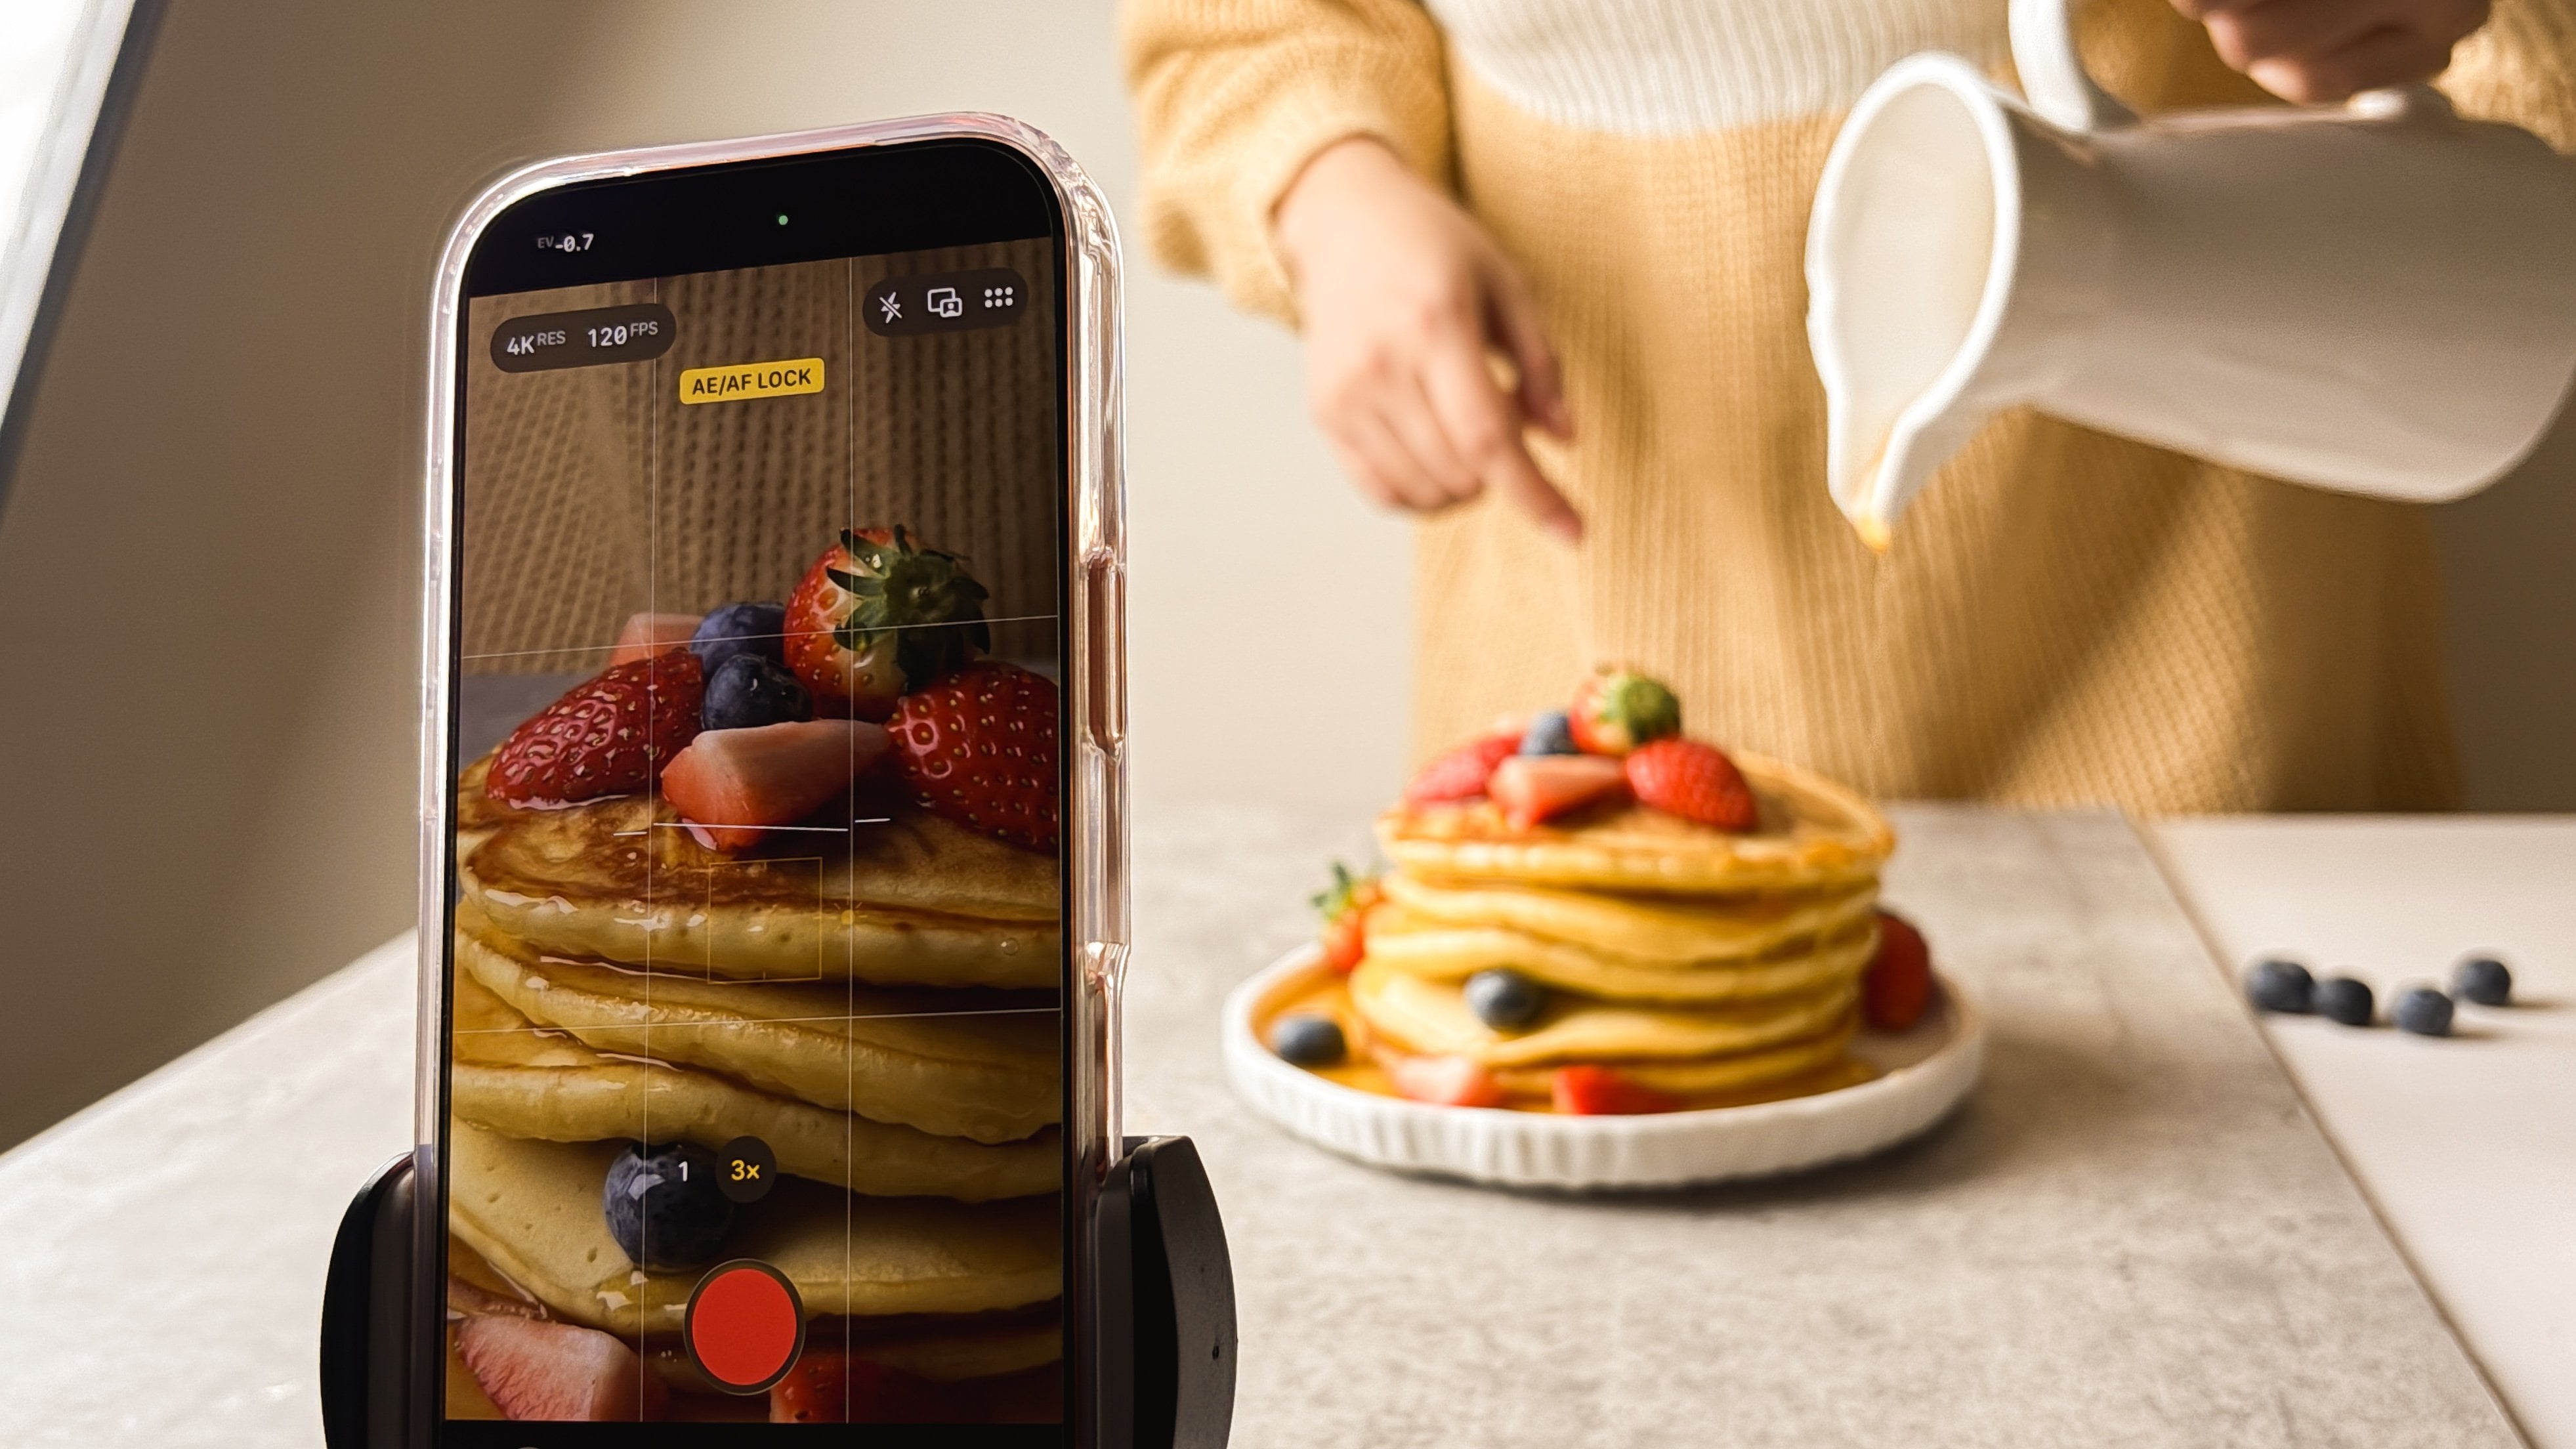
iPhone camera settings. So I go to settings, camera, and then record video. Again, you can choose ten
ATP at 30 FPS or 60 FPS. Both are great options. In my case, I'm
choosing four K at 60 FPS just in case I want to adjust the crop and
slow things down later. I might even experiment with 120 FPS depending on the shot. Next, I make sure
HDR is turned off. Then I check that grid
and level are turned on. When these are enabled, you'll see grid lines to
guide your composition and a level indicator to help you keep
the frame straight. So your shot isn't tilted, crooked, slanted or leaning. Now back to the setup. I finalize what
stays in the frame, and you'll notice
something important here. I am not adding more. I am actually removing things. This is where restraint begins. Before filming, I
take a moment to look at the setup
through the camera, not just with my eyes. I check what's
entering the frame, what feels distracting, and
where will the food sit? I also switch between
one X and two X to see how the framing changes and how the scene feels at
different focal lengths. Once everything feels calm,
balanced and intentional, that's when I move on
to the exciting part, pressing record and starting
to film the recipe video. Now that the setup is ready, it's time to start filming. Quick reminder before
pressing record, I always lock focus
on my iPhone. This keeps the shot
clean and prevents the focus from jumping or
going blurry mid clip, especially important once
hands enter the frame. I press record and begin with the first step of
the pancake recipe. Adding the dry ingredients, starting with the
all purpose flour. At this stage, I'm being
precise with the ingredients, not because every step needs to appear in the final video, but because I want to
capture everything first. Filming generously
gives me options later. I can always choose
what to keep, but I can't use what
I didn't record. As I continue adding the rest of the dry ingredients,
this happens. I get a phone call. And if
you're watching closely, you'll notice only
the first part of the dry ingredients
was recorded. Yes, crying a little inside. My husband, who's
acting as my cameraman, swore it recorded everything. But as the footage clearly
shows, it did not. And that's okay. Spoiler alert, the class project video
still turned out great. So this is a good reminder
that things don't have to go perfectly for the
final result to work. Next, I move on to filming
the wet ingredients. This time, I simplify even more. I clean up the setup and make it more minimal than
the previous shot. To add variety, I switch
from one X to two X, which makes the shot feel
more immersive and intimate. I also focus on hand
interaction here. Notice how the side lighting
creates soft shadows and how the minimal composition keeps
attention on the action. Even simple movements
start to feel intentional. I film the butter first. Again, I'm recording everything, knowing I'll decide later what earns its place in
the final edit. Then comes the milk, a few drops of vanilla, and the mixing. At this point, I realize the angle and composition
could be better, so I pause and adjust. I add a bit of foreground
and background to introduce depth and then switch back to one X and repeat
the mixing action. This is not a mistake.
It's a choice. Repeating an action with stronger framing often
gives you a better clip. Next, it's time to mix the dry ingredients
and wet ingredients. For this step, I change
the angle again. I tilt the phone
slightly so the frame focuses on where the wet
ingredients will fall. Before pressing
record, I lock focus. Again, this keeps the
shot steady and prevents the camera from hunting
once the action starts. I press record, pour in the wet ingredients,
and begin steering. You'll notice that I
stop recording for a moment, and
that's intentional. I'm using a fork which
looks great on camera, but it honestly takes forever
to fully mix the batter. So I switch to a spatula to do the heavy lifting and make the mixing faster
and more efficient. Now you might be wondering, why not just film the
mixing with a spatula. Two reasons. First, I don't have a neutral colored
spatula. It's mint green. And while that sounds cute, it pulls attention
away from the batter. Small color distractions
like that can be surprisingly
noticeable on video. So here's my workaround. I use the spatula off
camera to fully mix the batter and then switch back to my cute golden
fork for filming. So think of it this way. The mint green spatula is the stunt double doing
all the hard work. Then the golden fork
is the main actor stepping in only to look cute
and aesthetic on camera. So the spatula version, that is our little behind
the scenes secret. So once the batter
is fully mixed, I fix my framing again, always before pressing record. I start by centering the
subject in the frame, and this is a good moment to remember something important. Centered framing can work beautifully in food videography. Centered shots feel intentional when the food is
clearly the hero, there's enough space around it, and the movement stays
within the frame. After reviewing the shot, I decided I want to emphasize the texture and natural movement
of the batter even more. So I tried changing the
angle and composition again. This time using the rule of thirds with a bit
of negative space. And when I compare the two, this version wins for me. The motion reads more clearly. The texture feels
more satisfying, and the frame feels calmer
and more intentional. So that's exactly the kind of decision making I
want you to practice. Trying options, observing
the difference, and choosing what works
best for the food. Now that the batter is
ready, it's time to cook. Instead of moving my light
tripod and entire setup, I bring the induction
cooker into the scene. This keeps my light direction, framing and camera
position consistent, which makes filming much easier. As I compose a shot, I frame just the pan. I want to avoid
background clutter because let's be honest, my induction cooker is not exactly camera friendly
or photogenic. So I add a kitchen towel to hide the parts that keep
sneaking into the frame. And once that's done,
I start filming. I'll be honest, I'm not
totally loving this shot. It's not how I imagined it, but I keep going anyway, because this is real life and not every shot
needs to be perfect. So my goal here is simple. Just capture the moment until the batter
starts to bubble. When the bubbles appear, I switch to a closer forex lens and adjust the angle again. I simplify the frame to highlight the food's
natural reaction. This is where keeping food
natural really matters. Overworking the shot would
make the motion feel stiff. Letting it be real
keeps it believable. Next comes the exciting
part, the flip. So I switch back to two x, so the shot isn't too tight, and you can clearly see
the hand interaction. Notice how I'm thinking
vertically here. I am not just filming the food. I am designing the frame for
where the motion will go. That makes the action easier to follow without forcing it. Now, I may sound confident, but I'm not actually
happy with this steak. The pancake looks a little burnt and the flip didn't
feel great either. So I decided to do it again. So this time, I use a bigger pan to better hide the cooker, and then I switch from butter to oil because I suspect the
butter caused that burnt look. And it works. I get another chance to pour the batter and flip the pancake, and this time it
feels much better. The pancake looks better, too. So no regrets reflming
this part at all. This is real time
trouble shooting, adjusting, learning, and
improving as you go. So once I'm happy with the cooking and flipping
shots, I stop recording. Off camera, I cook two or three more
pancakes before moving on to garnishing
and final touches. I ended up making
five medium pancakes, and then I dump the
rest of the batter into a massive pancake that my son
was very excited to devour. Once the pancakes are ready, I bring my tripod and iPhone
back into the scene and start framing our next shots garnishing and the honey pore. Let's start with a garnish. I keep this very simple. I am only using strawberries
and blueberries. I love their color combination. I love the variation in size
and texture they bring. I choose the freshest
strawberries, and for the not so perfect ones, I cut them into different sizes to add visual interest,
and that's it. No extra props or
extra elements. Now it's time to
plat the pancakes. Before adding any garnish, I want to introduce
one more moment of movement while
transferring the pancakes, but not in a boring way. I want this to be
like a continuation of the flip shot from earlier. So I tried two versions, a dropping version and a calmer more controlled
serving version. Record both. The dropping version
feels chaotic, not great, but I might still use the very first drop
as a transition. The calmer serving version feels much better for the
rest of the sequence. Once the pancakes
are on the plate, I gently adjust
them so they look presentable, but still natural. Then I fix my framing and start recording
the garnish shots. As I am placing the
strawberries and blueberries, I suddenly get a wild idea. What if I drop the
blueberries onto the pancake? I fully expected the blueberries to cooperate. They did not. They bounced everywhere.
Instead of forcing it, I changed my approach and
tried a reverse POV shot. So placing the iPhone flat and dropping the blueberries
toward the lens. It takes three tries before I get the version
I'm happy with. Once that experiment is done, we return to the more
intentional controlled styling. This is where I stop myself
from adding too much. A small amount of garnish is
enough to support the food, not compete with it. If my eye starts drifting
away from the pancake, that's my signal to stop. Again, restraint creates focus. And now the most awaited part of the video,
the honey pore. I envision this as
the hero motion. Since we're filming vertically, I have plenty of space to move my hand and really emphasize
the flow of the honey. This is where negative
space does its real work. Negative space is an empty
space. It's working space. It gives motion room to breathe, makes the action easier to read, and keeps the frame from
feeling rushed or noisy. I film the honey pore using
different lenses, one X, two X, and four X to explore different levels of
intimacy and intensity. Before I show you
the final result, I want to share one last
experiment and one mistake. After the honey pour, I decide to add
powdered sugar and even film it at 1:20
frames per second. Imagining it would look epic. It didn't. This is
where the lesson on portion control
becomes very real. After adding the powdered sugar, the frame felt busy. There's just too many elements
competing for attention. Instead of guiding the eye, the garnish was stealing focus. I also realized I hadn't
filmed the slicing shot yet, the moment that would
have completed the story. I should have stopped
at the honey pore and gone straight into that. So here's another
real time reminder that restraint creates focus. If garnish steals attention, it's doing the
opposite of its job. Want you to notice most
in this demo is this. I didn't try to make
everything perfect. I tried to make
everything clear. Every decision I made was
about guiding attention, leaving space, keeping
the food believable, and letting motion lead. Along the way I made mistakes, and then I adjusted. I troubleshoot in real time. I made more mistakes
I couldn't undo. So I worked with what
I had and made the most of the clips I
was able to film. I removed the powdered
sugar part of the recipe and decided to end with
the honey pore instead. And that turned out to be the
right call, at least for. Even earlier on,
when the rest of the dry ingredients didn't get recorded because of
that phone call, I tried not to panic. I tried to adapt, and that is an important part of
the process, too. This is not about
getting every shot perfectly the first time. It's about making
calm decisions, adjusting when
something doesn't work, and finishing with intention. And that is it for
my class project. The system works
whether you're filming a full recipe or a simple,
satisfying food moment. The thinking stays the same. Only the scale changes. So before we move on, here's a lightly assembled version
of my pancake video, no heavy editing, just the
clips working together. In the next lesson,
it's your turn. You don't need to copy
these exact shots. You just need to apply
the same way of thinking. Let's talk about
your class project. I'll see you there.
9. Your Turn: Style & Compose One Food Video: Okay, your turn.
For this project, I want you to style and
compose one short food video. That's it. One short clip. Five to 15 seconds is perfect. You can literally film
this in one sitting. One breakfast, one coffee break, one random Tuesday afternoon. Like I always say,
in this series, the goal here is not perfection. It is practice. Pick something simple. You morning coffee, a sandwich, leftovers, a snack, whatever
you're already eating. As you film, try applying a
few ideas from this class. Not all of them, the ones that
feel most relevant to you. Styling with restraint,
smaller portions, intentional garnish,
keeping food natural. And then there's motion
that feels calm. Let movement do the work. Don't overfix details for framing and space,
guiding the eye, leaving room for motion, and for clean backgrounds, removing anything that
competes with the food. And then, lastly, for
vertical composition, designing the frame
for a phone screen. While filming, ask yourself, where do you want
your viewer's eye to land first? What
are you cutting out? How much space feels right? Remember to keep it natural. If it looks overdone, pull back. That's
the whole mission. You can share one
short video, one clip, screenshots of your final frame, or even a few stills
showing your composition. You can also embed a link
like I did for mine. So basically, I uploaded my
food video on Instagram, added a bit of music
to match the vibe, and then added a cover
on my class project. And a class project top tip, screenshot your favorite
part of the video. You can make a
collage out of it. You can go above and beyond, and then use it as class cover, so your fellow creatives
can easily see it in the class project gallery
like this, not like this. And if you want, you
can definitely use a description box to tell
us what did you remove? What changed when you
adjusted the framing, and did anything surprise you? And one very important reminder. This project is about
building creative momentum. So you don't need a grand idea, a full concept or a reason
beyond I felt like practicing. One simple intentional
attempt is more powerful than overthinking
it for a week. So finish something small today, share it, and then move forward. I'm so excited to
see what you create. And yes, even your
simple breakfast counts.
10. Final Thoughts: You made it.
Congratulations, because now you understand something
most people ignore. Food doesn't look irresistible
on video by accident. It is framed. It is styled. It is simplified on purpose. In this class, you
practiced restraint. You learned how to
guide attention instead of filling space. You saw how small
composition shifts can completely change
the feeling of a shot. That is a real skill. Now, here's the most
important part. Don't overthink
your class project. This is not meant to
be a big production. Again, it can be your breakfast, your coffee with a friend, a simple lunch, your
favorite snack, a recipe you already made. Remember, one short video, one focused intention,
one sitting. That's it. You're not
trying to impress here. You're practicing
one skill at a time. If this is your first class in the series, you are doing great. If you haven't taken the
foundations class yet, I highly, highly recommend it. That's where we build
lighting, motion, and depth. And next, we'll move into
editing where everything comes together and your
decisions become visible. This entire series is built
around creative momentum. Each class focuses on one clear
skill so you can practice quickly and repeat often small wins and
consistent progress. And if you'd like to
continue this series, follow me on Skillshare, so you'll be notified when the editing class is available. One small favor, if
this class gave you even one aha moment or
help something click, I'd really, really
appreciate a short review. Your words help other students decide if this
class is right for them and they
genuinely support me in creating more classes
like this for you. But the biggest win is when you apply
what you've learned. Even one simple video is enough to shift how you
see food on camera. You've already done
the learning now, turn it into practice. I cannot wait to see
what you create, and I will see you in the
next one. Bye for now.
 Rose Nene, Photographer & Videographer