Transcripts
1. Class Introduction: What if you are just one
lighting technique away from creating your
dream food for those. Did you know that
lighting can instantly enhance the appearance
of your images? Set the mood, defined
compositions, control highlights and shadows, contribute to your branding and allow for creative expressions. Hello and welcome. My name is Bruce. I am a food and product
photographer, videographer, and a Skillshare tab
feature photography started as a hobby for
me and my husband, but after a few years, we turned it into a business. We started out as event
photographers and videographers, but transition to food and product photography because
of the COVID-19 lockdowns, this is when we saw the
opportunity to expand our business and offer a
new skill to our clients. Our mission went from capturing moments in a lifetime to helping small businesses
and online sellers increased sales and online
presence through scrolls, stuffing food and
product photos. Apart from my obsession with
prompts and composition, a tool that really helped in my food photography is the
effective use of lighting. And that's what I have
for you in this class. I will be sharing the basics
of lighting and how you can set up your scene to create
different looks and vibe. We will kick off with
white lighting is important in food photography. Then we will go over
different elements that influence the
appearance of light, light color, temperature,
light direction, quality of lighting,
and light modifiers. I will also share tips and
techniques and how to find a spot in your space with
the best natural lighting, as well as when to use
artificial lighting. I will end the class with three demonstrations
where I will show you my process of creating a light
and airy or warm and cozy, any dark and romantic scene. These demos will bring together all the
techniques we've learned, showing you how to apply them in real-world scenarios and create
captivating food photos. This class is perfect for
beginner photographers, food bloggers, recipe developers,
small business owners, social media influencers,
digital marketers, and absolutely anyone
who wants to learn more about lighting
in food photography, you can either use
or a smartphone, DSLR, or any camera
to join this class. Now, if you're ready,
let's get started.
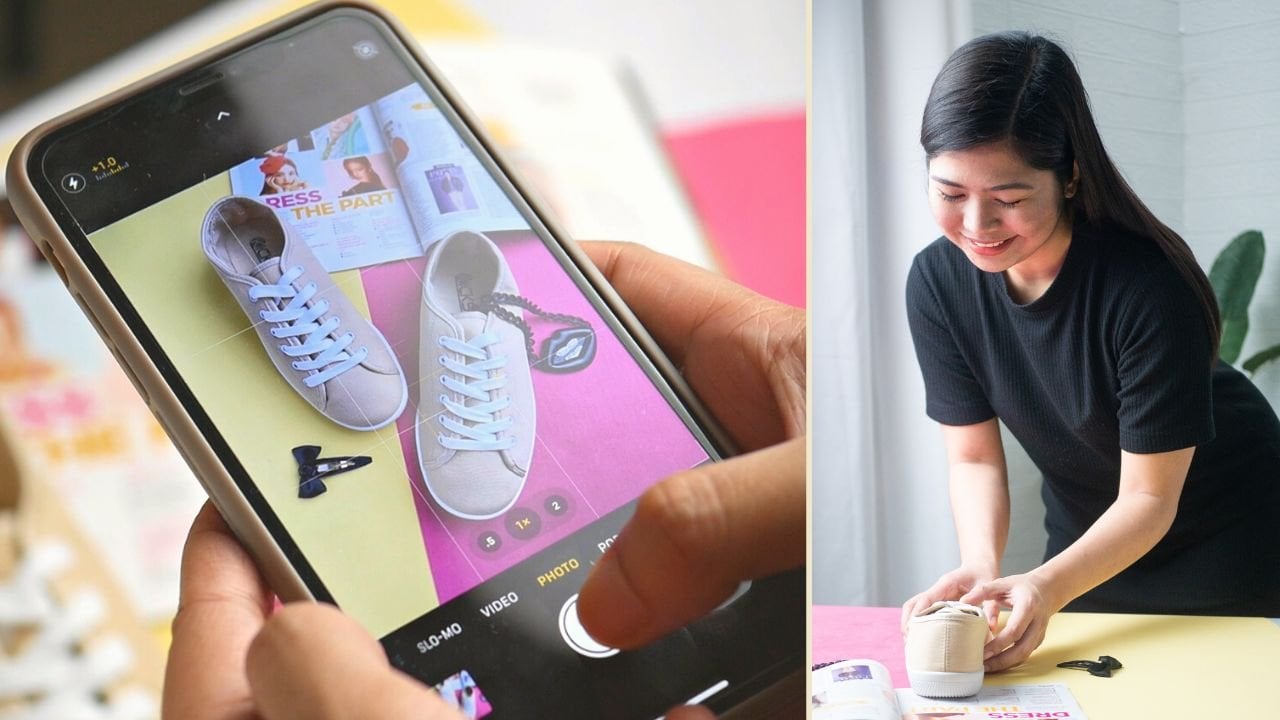
2. Class Project: Welcome again, and I'm
so glad you're here. I will do my best to make
it worthwhile for you and for you to really get the
most out of this class. However, that involves
your active participation. In order for you to get the
most out of this class, you need to see the
essence of lighting in food photography through
your very own photos. With that said, a
strongly recommend that you join us in
doing the class project. To do the class project, you just need to either
create a light and airy, a warm and cozy, or a dark and dramatic look
on your food photo or photos. You can do this by controlling the lights and shadows
in your scene. Don't worry, That's exactly what we will be learning
in this class. You will be needing any type of light source to
illuminate your subject. It could be light from the
sun through a door or window. It could be artificial
light from lamps, ring lights, strobe,
or studio LED lights. You will also need
light modifiers, and it does not have to be
all fancy and professional. You can start with improvise
ones like white folders, Corinthians, black gloves, etc. Next you need a flat
surface to set up your background,
then a background. It could be poster
papers, fabrics, or any type of plane or non-distracting background
for your scene. Of course, you need your
camera to take photos. It could be your
smartphone and you're a DSLR or mirrorless camera. Finally, you need a
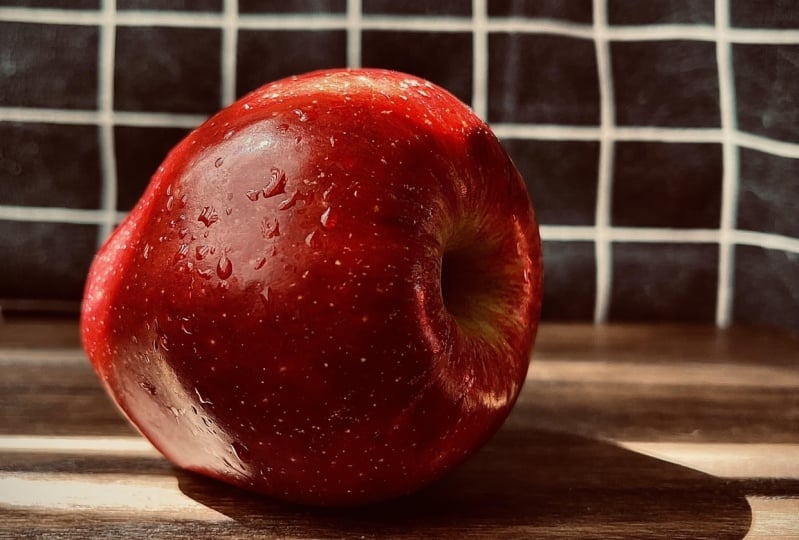
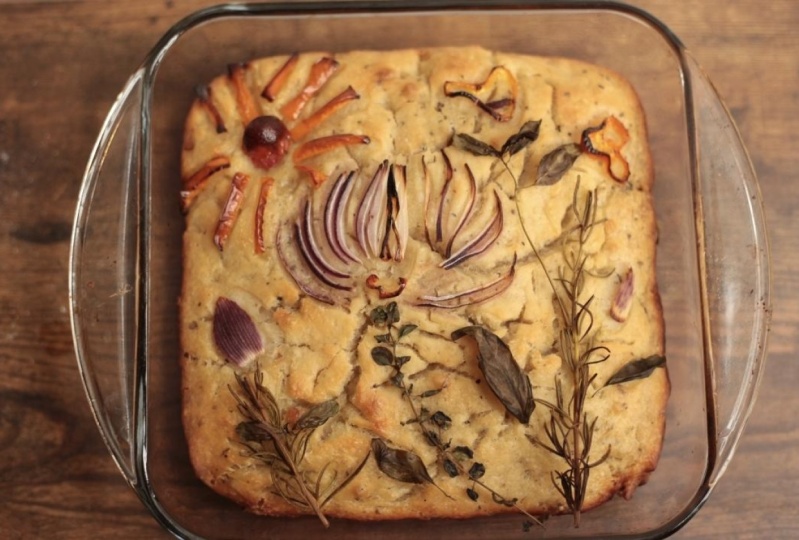
subject to photograph. The easiest food
subjects are fruits, vegetables, breads,
and raw ingredients. But you can definitely
experiment with exciting foods. Subjects like cakes, noodles, cocktails, and
home-cooked dishes. Optional materials are
prompts any tripod. Throughout the class,
I will show you different setups to
create different effects. Recommend that you
recreate the one that resonates
with you the most. Once you're done, you
can make basic edits and retouching and upload it in
the class project gallery. You just need to click the Create Project button
under projects and resources. But they project title upload
as many photos as you want, including your process
in creating your photos, then choose your
most favorite photo to be the cover image. After all of that, you just need to click Submit
so we can all see it in the project gallery
for free to check out your fellow students work
too and give it some love. I am super excited to
see how you will put the learnings from this
glass into practice. Good luck and have lots of fun.
3. Why Lighting is Important: When I was just starting out, I never really gave so
much weight to lighting. I thought that composition
and creative use of props is the key to scroll
stopping food for those. It taught me lots of
practice in a bit of regretful photo shoots to really discover that lighting
is equally important. Well, actually, it is
the most important because light is the beating
heart of every image. It's the highlights and shadows that makes an image stand out. The difference between a
flat image and an image with Forum texture and they
mentioned is lighting. Lighting in food
photography refers to the deliberate
and strategic use of light sources to illuminate and enhance the appearance
of foods subjects. It involves the selection of applicable
lighting equipment, positioning and
manipulating light sources, and controlling the intensity, direction, and quality of flight to achieve
different visual effects, the more that I
understand lighting my photos also
started improving. For example, here's one of
my food photos from 2018. In my head, Amy, the
mouth-watering dish that will surely make my
Facebook friends jealous. But this is how it looked, even if I use a
professional mirror less camera to photograph it, not appetizing at all. I tried to recreate this photo recently by prepping
the same dish. I added a bit of styling, but this time I knew how to
propagate light my subject. So here's the result. I used the same camera
for both images. But in the first one, our dining room light is the only light
illuminating my subject, and it's shining from above, so it looks a bit flat. In the second photo, I was using my
multipurpose continuous, slight lateral to the subjects. I'm getting nice side shadows, making it look
three-dimensional. I also use a reflector to soften the side shadows to make it look more vibrant and inviting. The same dish, same camera's, same person taking the photo, but different lighting setup. I hope that example
convince you of the importance of lighting
and food photography. If not, I still have three
reasons why lighting plays a crucial role
in food photography. One is it enhances the
appearance of the food. Proper lighting brings out the vibrant colors and
details of the food, making it look fresh,
appetizing and inviting. It helps to showcase the
foods natural beauty and convinced the viewers to
crave and indulge in it. Number two, lighting sets
the mood and ambiance. It helps to create
a specific mood or ambiance in food photography, whether it's a cozy and
warm feel for comfort food or a bright and fresh
atmosphere for healthy dishes. The right lighting
sets the tone and enhances the overall
aesthetic of the image. Finally, consistency
and branding. Consistent lighting
techniques and styles contribute to a cohesive
visual identity and branding, whether it's using natural light or artificial lighting setups, maintaining consistency in
lighting helps to establish a recognizable and cohesive look across your food photography
portfolio or a brand. In summary, lighting
is important in food photography because it
enhances the appearance, sets the mood, and
contributes to branding. Lighting also controls
shadows and highlights. It brings out shape and form and allows for
creative expression. So how do we master lighting
in food photography? First, we need to understand
the properties of light, experiment with different
lighting techniques and develop an eye for how light
interacts with the food. With that said, in
the next lesson, we will start with the
directions of light, which is one of the most
important properties of lighting in food
photography. See you there
4. Direction of Light: In food photography, the
direction of light refers to the angle from which the light source illuminates
the food subtract. Different light directions
can create varying effects, highlight specific textures, and enhance the overall composition. Here are some common
light directions used in food photography. First is frontline. Front lighting
involves positioning the light source directly in
front of the food subject. This lighting direction
illuminates the entire dish, evenly, reducing shadows and emphasizing details on
the front facing side. Frontline is commonly used for clean and minimalist
compositions, where the goal is to
showcase the foods, colors, textures, and
intricate details. It's also great if
you're working with hard light because you
can create this effect. This light, the reaction
helps to create eye-catching and
exciting food for those. The only downside
for me when using this direction to eliminate
my subject is that it is tricky to
work with because you can end up getting
in the way between the light source and the subject to show you
how I use front typing. Here's a photo I took
for a personal project. I wanted to create a summery
desert five in this photo, that is why I thought of using artificial hard light in
front of the subject. My goal here is to
make it look punchy, but I didn't want
harsh shadows on the side to show you what I
mean, this is how it looks. If I position the light
at the side, it's fine. But for this photo I
wanted the shadows at the back creating
this effect. Just a word of caution that this slightly reaction
requires a bit of patients because you can
end up with unwanted shadows. And if you're using
soft lighting, it can look a bit flat, which leads me to the next. And most commonly used, like the reaction side lighting. Say lading is
achieved by placing the light source
to decide subject. This lighting direction creates shadows and highlights
on the side of the dish, enhancing its shape,
contours and textures. Sidelight adds depth
and dimension to the photograph and can create a dramatic or moody effects. It is often used to emphasize the texture of
ingredients and has the visual appeal of the elements and create
visually interesting shadows. This is my most used
light direction and my most recommended when
photographing food. Just a couple of tips
when using side lighting. First, be careful in arranging
elements in your scene. Avoid putting large props or objects near the light source because it can cast a big shadow on your scene or subject. Next step is to use
reflectors if you feel that your site
shadows are too dramatic. More of that later, going back the light directions, my second favorite
is the backlight. Backlighting involves
positioning the light source behind the food subject
facing the camera. This light direction creates a halo effect around
the edges of the food, highlighting its outlines and creating a sense
of transparency. Backlighting can result in
a dreamy, ethereal look, especially when the food has a translucent or
textured elements. It can also create a RAM or riming effect where the edges of the food appear to
be illuminated. Adding a glow and separation
from the background. My top tip when using
backlighting is still considered the
exposure carefully. The bright backlight
can cost the front of the subject to
be underexposed, resulting in loss of detail. Balancing the exposure and considering the use of
reflectors or fill lights to minimize excessive contrast can help to create a balanced image. The last direction is overhead. Overhead lighting
refers to positioning the light source directly
above the food subject. The sliding direction
is often used to create a flat and evenly
illuminated surface, such as a tabletop or a plate. Overhead light works well for overhead shots and
flatly compositions, where the goal is to showcase the arrangement and layout
of the food elements. It provides a clean
and balanced look with minimal shadows. Again, like directions
that you can maximize in food photography
are front lighting, lighting, backlighting,
and overhead. Getting your hands
dirty and experimenting with different light
directions will allow you to discover the effects
that work best for your desired composition,
mood, and storytelling. It's important to really
observe and study how light interacts
with the food subject. Continuously adjusting
and fine tuning to achieve the look
that you want. Which leads me to
our next topic, the quality of life. See you in the next lesson.
5. Quality of Light: The quality of light refers
to the characteristics of the light source and how it interacts with the food subject. It plays a significant role in creating different
moods, textures, and overall aesthetics
in food photos, here are three
primary qualities of light commonly used
in food photography. First is soft light. Soft light is characterized by diffuse and gentle illumination. It could eat soft shadows with gradual transitions between
light and dark areas, resulting in smooth and
flattering lighting on the food subject. Soft light is often achieved by using large light sources are modifiers like soft boxes or natural light on
an overcast day. It is ideal for capturing
delicate textures, intricate details, and creating
a gentle inviting mood. Next is hard light. Hard light is
characterized by the rack and intense illumination
that creates sharp, well-defined shadows
with distinct edges. It produces more contrast
and can add a sense of drama and depth to
the food photograph. Hard light is often achieved by using smaller
light sources or removing diffusers to allow more direct light to
reach the subject. It is suitable for emphasizing
textures, creating wealth, visual impact, and adding a dynamic or energetic
field through the image. Finally, we have
the diffused light. Diffuse light falls between
soft and hard light. It provides a balanced
combination of softness and
directional lighting. The few slides scatter or spread the light
rays resulting in a broader light source and softer shadows compared
to hard light. It is achieved by using
translucent materials like diffusers or a sheer curtain to soften and
disperse the light. Diffuse light is
versatile and works well for a lot of food subjects, creating a pleasing
balance between gentle illumination and
well-defined shadows. When selecting the quality of life for your food photography, consider the mood, style, and decide visual impact
that you want to achieve. There is no right or
wrong way to do this. It will always depend on
the story or message. You want that though. If you want a sense
of energy, fun, and vibrant, hard light
can help you with that. On the other hand,
soft light can help in creating a homely welcoming, calm and gentle atmosphere. Experiment with different
lighting setups, modifiers, and light sources to
create unique effects and enhance the characteristics
of the foods subject. With that said, in
the next lesson, we will explore the
color of light. See you there
6. Color of Light: Did you know that the color
temperature of the leg you choose can help set a
certain mood in your scene. And when I say temperature,
I don't mean heat. Color temperature is
a way to describe the light appearance provided
by your light source. Is it warm? Is it cool or is
it in the middle? In photography,
the color of light refers to the hue or tenth
of the light source. Every type of light
has a different color. This is to do with the color
temperature of the light, which is measured in Kelvin. Warmer colored light
has a lower key value. Well, cooler colored light
has a hierarchy value. Understanding the temperature
scale will help you to choose the best color of
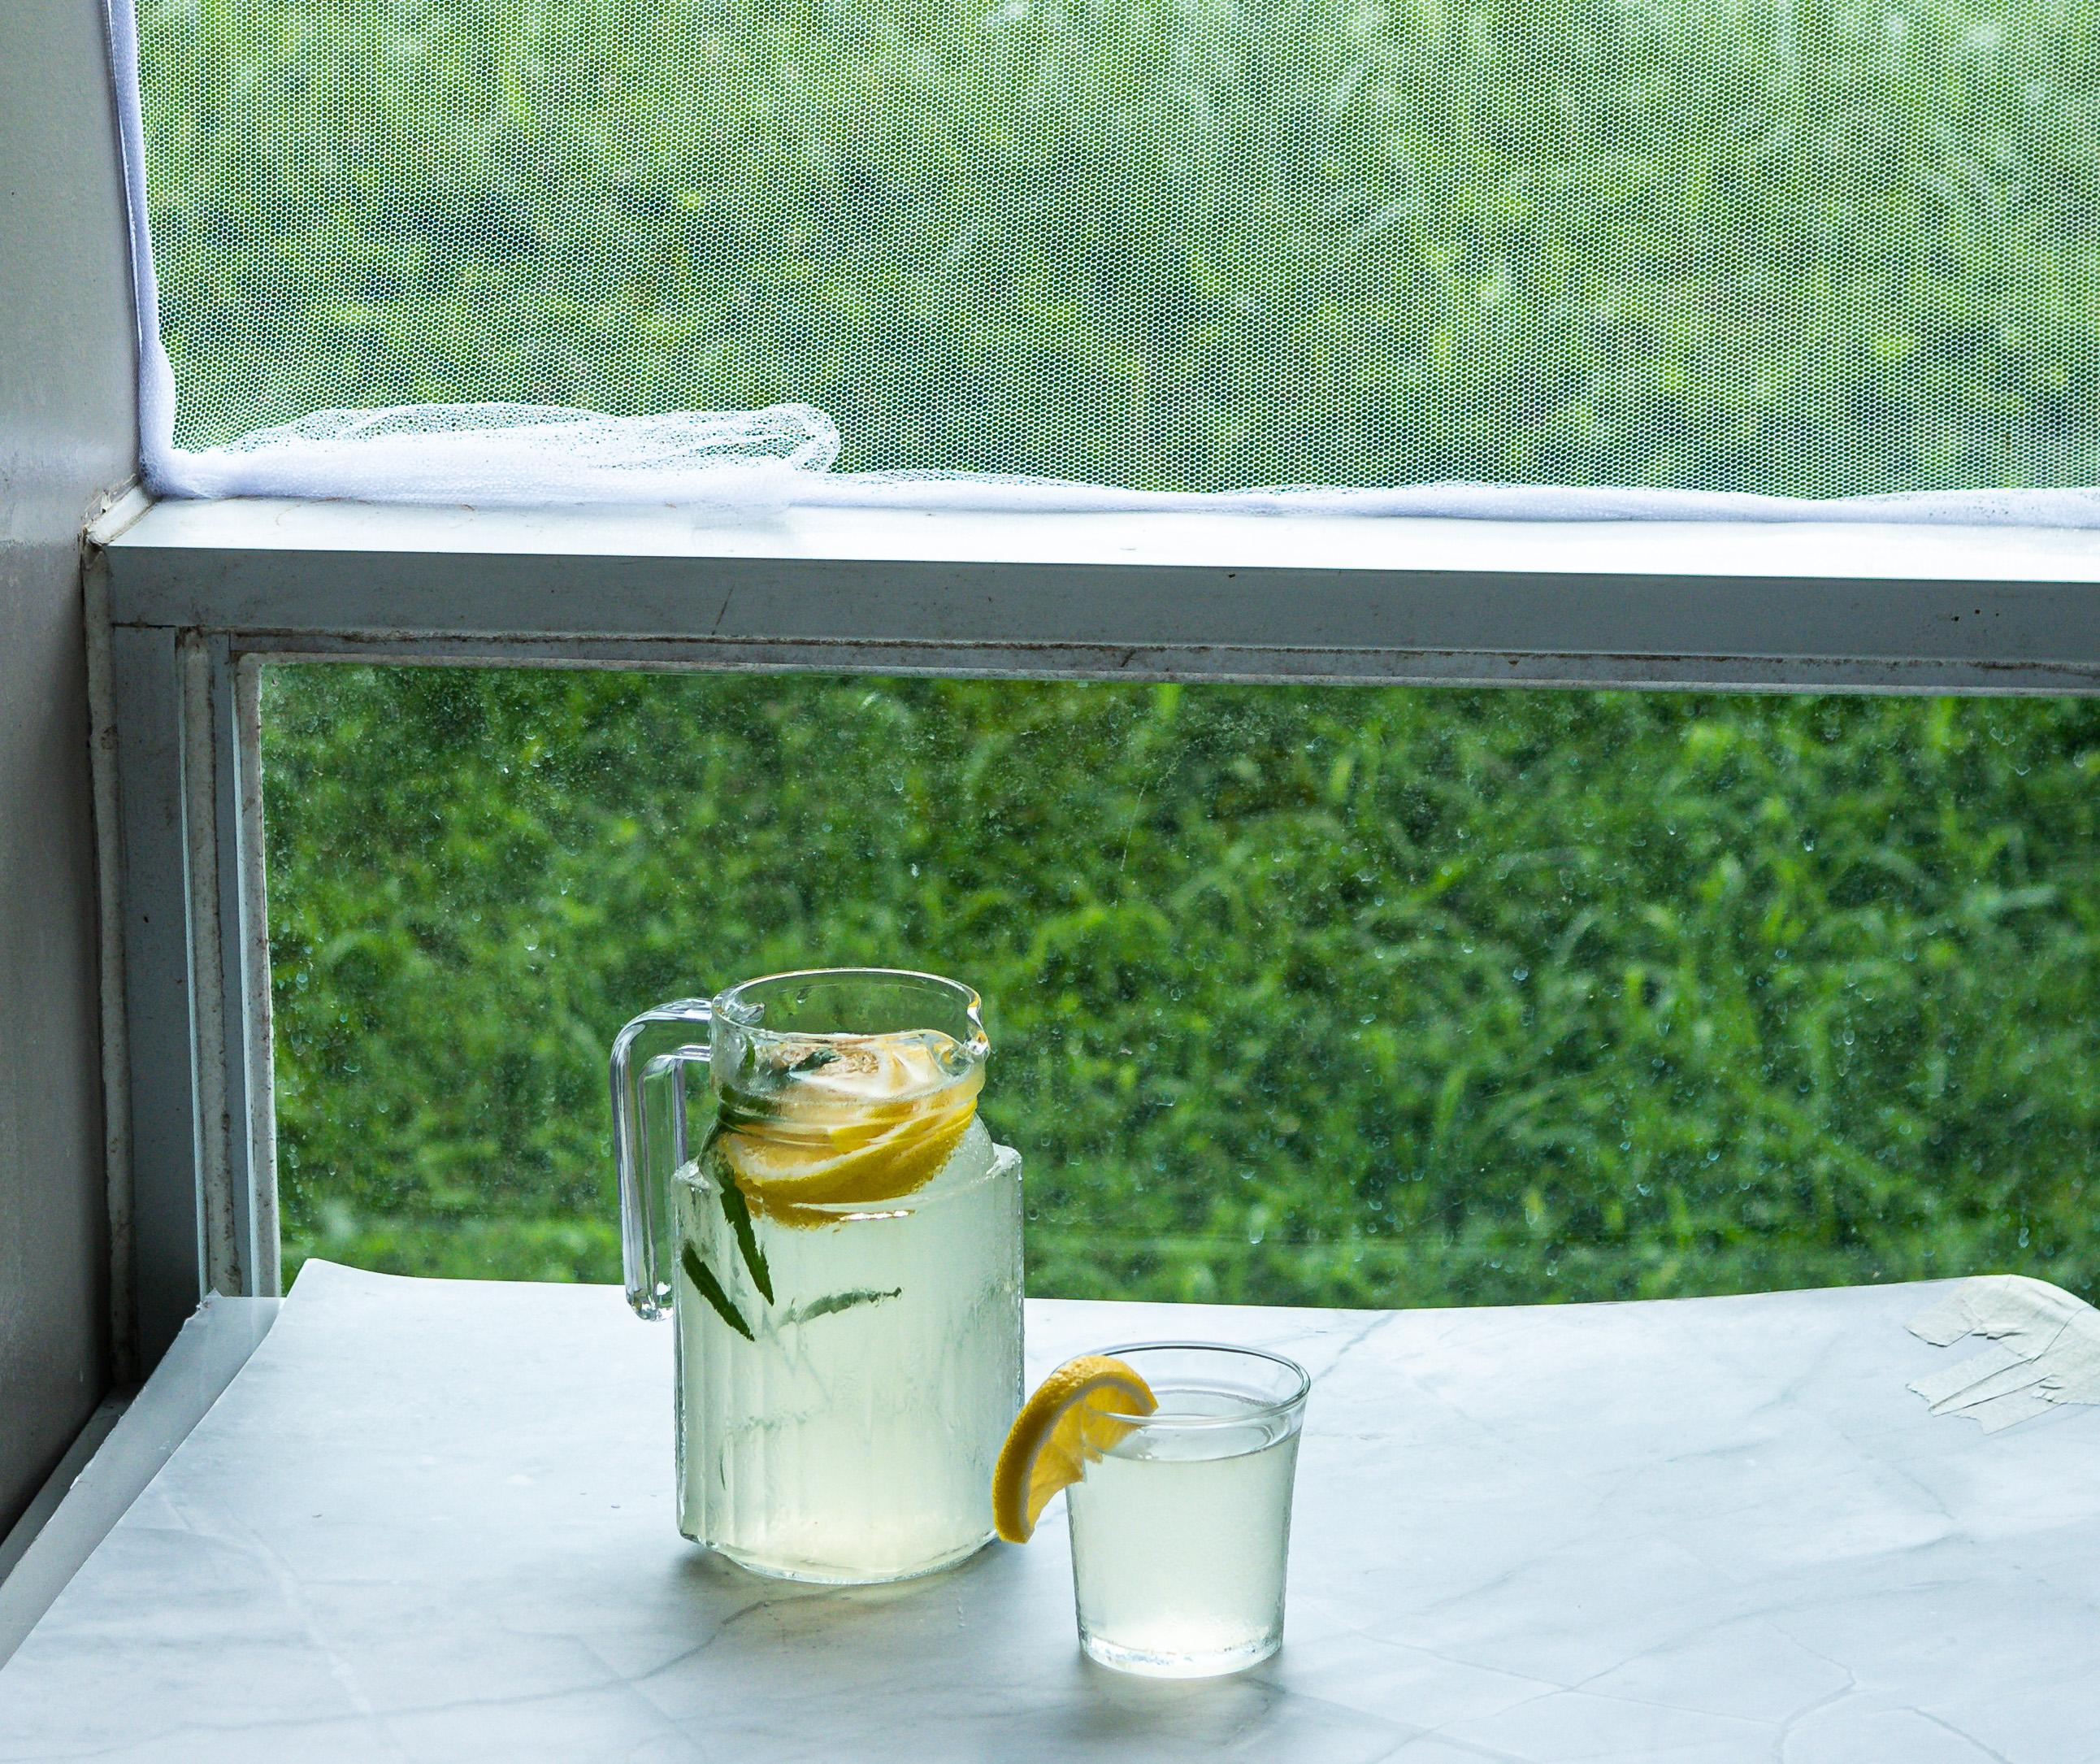
light for your scene. For example, these
images are the same, but because I use different
color temperatures, it also alters our
perception and the overall mood
of the photograph. The first one looks crisp, invigorating and
refreshing because of the cool light temperature. The second photo looks warm, cozy and inviting because
of the warm white color. Different light
sources throughout, light with varying
color temperatures, which can significantly impact the overall appearance and
mood of the photograph. Here are some common colors
of light in food photography. First is daylight. Daylight, often referred
to as white light, is the color of light
that occurs naturally during the daytime when
the sun is shining. It has a color
temperature of around 5,500 to 6,500 Kelvin, which is considered
neutral or slightly cool. Daylight is commonly used as a baseline for color
accuracy in photography, especially when
shooting outdoors or in well-lit environments. Next is warm light. Warm light has a reddish
or yellowish hue resembling the warmth of
candlelight or sunset. It has a lower
color temperature, typically around 2,500
to 3,500 kelvin. Warm light creates a cozy, intimate and
nostalgic atmosphere, often associated with
comfort and relaxation. It can be achieved with light sources such
as tungsten bulbs, candles, or certain types of artificial lighting
gels and settings. Last is cool light. Green light has a bluish
or whitish hue resembling the light emitted by
fluorescent bulbs or an overcast sky. It has a higher
color temperature, usually in the range of
7,000 to 10,000 Kelvin. Kool-aid conveys a
sense of freshness, cleanliness, and can evoke
a cool or clinical mood. The good news is choosing
the color of light is not limited to choosing
your light source. You can create different
looks and via, by setting the white balance on your camera or your
photo editing software. For example, in
photographing these eggs, I can set the white balance setting to auto white balance, daylight, cloudy, tungsten, etc. In addition to these specific
white balance settings, some cameras may provide Kelvin
temperature adjustments, which allow you to set the exact color temperature for precise control over
the white balance. You can also alter the looks
of your images by playing around with the
temperature slider in your photo editing software, you can either choose
a warm light that radiates comfort and
positive energy, or Kool-Aid that gives
a calming effect. My top tip when
deciding on the color of light is to decide
on the story first. What emotions do you want to
evoke through your photos? He said nostalgia, comfort,
freshness, or cleanliness. From here you'll have an idea of which color of light to use
and waste to achieve it. In the next lesson, we will explore different
light modifiers to really help achieve the look that you
want for your food photos. See you there.
7. Light Modifiers: Just a quick recap. So far we have learned
about the quality of light, the different effects
of light directions, and the color of light. These are intangible
tools you can use to manipulate the appearance
of light in your scene. Now let's talk about
light modifiers, the tangible tools you can use to effectively like your setup. Light modifiers allow you to shape and control the quality, direction, and
intensity of light. They help you create different
lighting effects and enhance the appearance
of your food subjects. These are like shapers, diffusers, reflectors,
and absorbers. Let's start with diffusers. Diffusion is a method of
filtering hard light through a semi-transparent material
to create softer light. Diffusers are used at the punchy highlights
and shadows when you want to create evenly balanced and column
inducing light. Diffuser soften light
by scattering it over an area larger
than the source slide. They can be soft
boxes like this, white curtains or
anything white. And then that you
can place between the light source and the
subject to disperse the light. So if you want a soft
and balanced feel on your food photos, then diffusers will
be your best friend. Next are reflectors. Remember my examples from
light directions earlier? I mentioned the use of
reflectors to lighten up dark areas cost by side and back lighting you can use to
reflectors to bounce light from your light
source back to the subject. You might have heard of the photography term for this technique,
which is phyllite, because it fills in
shadow areas with a light that's a bit less
intense than the mean life, which is referred to as if you have seen demos
from my other classes, I use reflectors are
phyllite a lot to create a bright and
balanced scene, if ever, you find yourself in a situation where
you want the lesson, the shadow on a particular
area on your scene. You can use different types of reflectors to bounce light, soften shadows, or
redirect light. Reflectors could be white
folders, multipurpose boards, mirrors, or absolutely anything
to help you bounce light. They also come in
different sizes depending on the effect that you
want for your scene. Next door. And opposite to
reflectors are absorbers. These are black
reflectors that deepen dark areas of the composition
by filtering reflections. If light from your main light
source is the key light, and light from your
reflector is phyllite. The technique of
absorbing light is known as negative fill. Any type of dark
surface can be used to reduce the light that is reflected back onto
the food scene. This technique will help
to emphasize shadows and add contrast and
energy to your images. This is extra
helpful if you have bright colored walls
in your space. The last light modifiers
are light shapers. They come in different
forms and sizes, but the main goal is to control the size and
direction of flight. For example, these are called barn doors and they
are a form of flight cheaper that create
an effect like light coming through a
partially open doorway. This honeycomb grid is
another example and its main use is to keep light focus in a more
specific direction. Observe the effect
and the appearance of flight and the scene with
and without the grid. My final example for light
shapers are blocking tools. You can use this
to minimize slide, to block light, and to highlight a specific area in your scene. A blogging tool can
be any black or solid material that you put in between your subject and
your light source. And that's the best part
about these light modifiers. You can use some materials that you may already have at home or items that are easily accessible from the
nearest bookstore. If you're just starting out, I suggest that you
start small and simple. Once you have mastered Liping, then upgrading your year
will be more worth it. Since we're talking about
inexpensive lading tools. In the next lesson, we will talk about
natural lighting. See you there.
8. Natural Lighting: Let's talk about the best
and most accessible form of lighting that we can use to create captivating food
photos, natural lighting. Natural lighting refers to
the use of available daylight as the primary light source
for capturing food photos. It involves making use of the
qualities of natural light, such as its softness,
color, temperature, and direction to create stunning and appealing
food photos. Observe the quality of
life in different areas of your house or
shooting location. Look for areas with
diffuse slide, such as near windows or doors where the light
is soft and gentle. Avoid harsh direct
sunlight which can create strong shadows and
high contrast. Experiment with different
times of the day to find the best natural
light that suits the atmosphere that
you want to create. Here are two things you need
to look for when finding the best natural light in your
home or shooting location. First is the size. Your natural light
source could be from a window or a door. These two sources
could differ in size. Looking at these examples, you'll see that the size of the light source can
give different effects. Next is the distance. If you place your subject
near the light source, it will create short shadows
while placing your subject farther than the
light source can give longer shadows and
a different effect. So when you are looking for the best spot to set up
your DIY home studio, assess and observe
the appearance of light in different locations. You can even run your
subject all over the house from window to window to find
the most flattering light. Another thing to consider in order to find the best source of natural light in your house is the image you want to create. You want a bright and airy
look with soft shadows, then you will need
to find a spot in your house with abundant
indirect lighting. If you want a contrast, the energetic hard light effect, then you need to find a spot in your house where you can
get direct sunlight. If you want just a strip
of natural light to create a dark and mysterious image than a small window
is more than enough. Using natural lighting in food photography can add
a sense of authenticity, warmth, and a natural
aesthetic to your images. It allows you to capture the true colors and
textures of the food. Remember to be patient, observe the light and continuously
refine your technique, the master the art of using natural light in
food photography. Our goal is to
maximize the best, most accessible and
most affordable source of lighting
for your food photos. But what if working with natural light,
It's not possible. What if you can only do
your photo shoots at night? That is when we can maximize
artificial lighting, which we will discuss
in the next lesson. See you there
9. Artificial Lighting: Just like natural lighting, artificial light has its own
strength and benefits to. First is its availability. Natural light is no
doubt beautiful, but you can only utilize
it during the day. Unfortunately, for
me, there are times when I can only do my
photo shoots at night, so I need help from artificial lighting
when the sun has set. Artificial lighting is also
helpful if you can find a spot in your house with
decent natural lighting. Artificial lighting
and food photography refers to the use of
artificial light sources, such as studio strobes,
continuous slides, or speed lights to illuminate
the foods subject. Leg natural lighting. Artificial lighting allows for precise control
over the intensity, direction, and color of light, making it a versatile tool for creating stunning
food for those, just like natural lighting, your choice of artificial light will depend on your needs, budget, and the images
you want to create. Studio strobes provide powerful and adjustable
light output. While continued slides offer a constant light source that allows you to see the
lightning effect. In real time. Speed lights are
portable and can be used on camera or off camera. Select the lighting
equipment that best fits your shooting
style and requirements. If you're photographing small
foods subjects than a lab or a ring light may be
sufficient if you're photographing bigger scenes or if you need a
stronger light than getting a more professional LED or strobe light, maybe the best. If you have plans
of doing stuff, motions are videos
for food recipes, then getting a continuous
life like the one I'm using may be beneficial
for you in the long run. If you're already using
artificial lighting, then you just need to
apply the techniques that we have discussed
previously to manipulate the
appearance of flight and create the image that
you have envisioned. In the next lessons, we will get our hands dirty. I will be putting everything
we talked about Bu practice
10. Project: Creating a Light and Airy Look: For our first set of photos, we will create a light and
airy look by utilizing lighting and using light-colored
prompts and backgrounds. The light and airy
aesthetic often evokes a sense of freshness
and vibrancy. It conveys a feeling of
lightness and cleanliness, making the food appear more
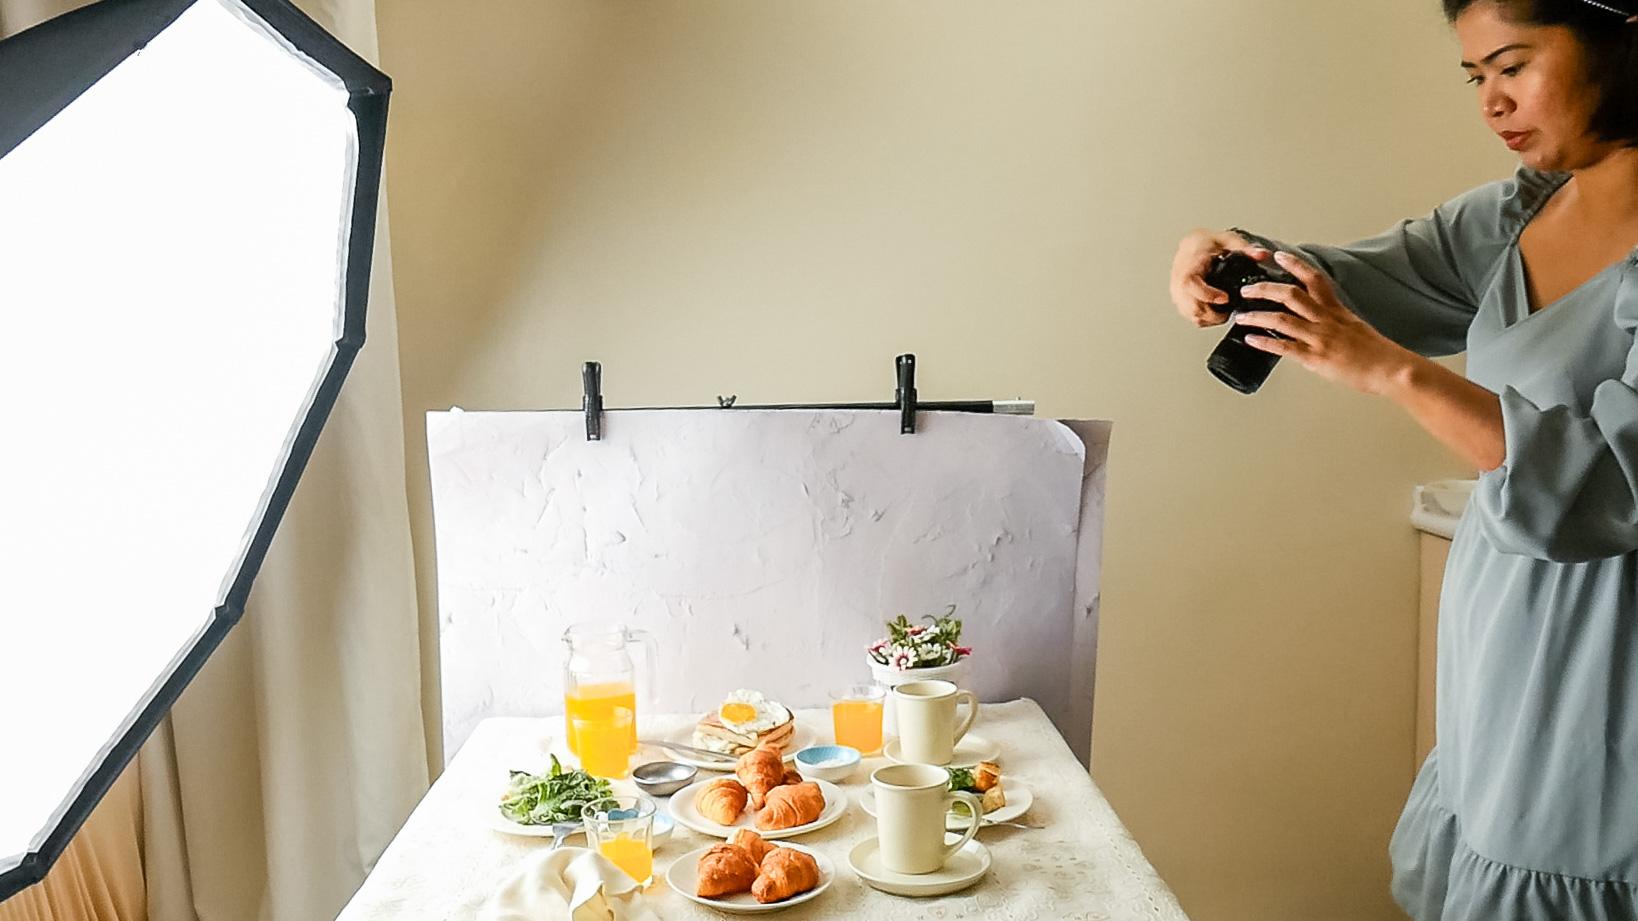
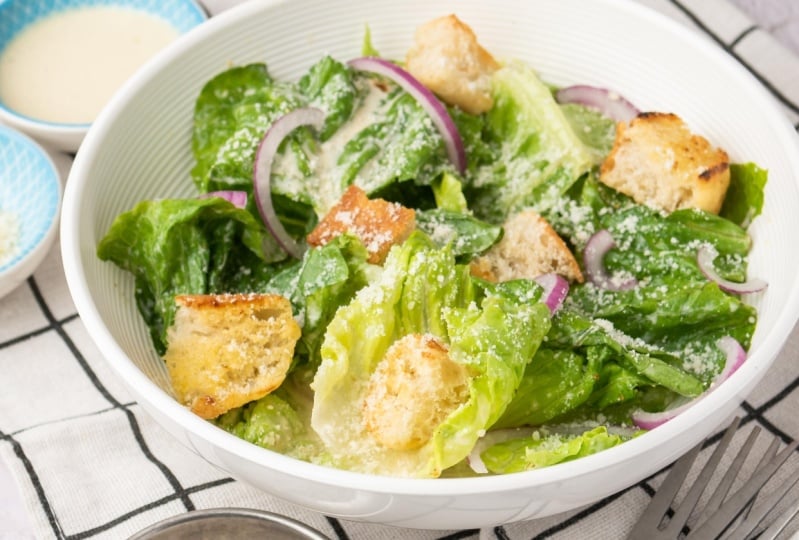
appetizing and appealing. I will be photographing
a salad first. So here's my setup. I position the ladder up to the light source so I am
getting side lighting. Remember light modifiers. I already have a softbox
attached to my light source, so I will get soft
light and shadows. But let me show you how it
looks without a softbox. So this is a daylight
LED studio light. When I turn it on
without the softbox, this is how it looks. I am getting harsh light
and harsh shadows. The light and airy
style is often associated with elegance
and sophistication. The clean, minimalist
backgrounds and soft lighting creates a sense of refinement
and aesthetic appeal. The hard light will surely
work for other subjects, but from a light and airy scene, I want a softer light, so I will reattach the softbox. This is a 60 by 60 centimeter softbox
borrowings mountaineering. I chose this off box
because they feel that it's closer to the size
of a standard window. So it gives that effect that my setup is beside the window. This is the effect
when I turn it on, just setting it to the lowest
setting, which is 10%. The show you the
effect of distance. Let me just pull the light
source away from the subject. Observe how it changes the
appearance of the shadow. It is getting longer. What they did is equivalent
to pulling your table away from a window or a door if you are using natural lighting. So the farther the subject
from the light source, the longer the shadows. Let me just put it
back because I want shorter shadows for our
light and airy scene. Let me add another
light modifier to soften the shadow on the
right side of the scene. Just said dip there that
whatever light direction you choose there will always be
shadows on the opposite side. So you can use reflectors, the field in those shadows. I'm happy with their setup. So let me take a test shot. This photo looks light
and airy than me. I love the soft shadows and the way the
reflector fills in the shadow on the right
side, the overall loop. So let me add more prompts. A table napkin to add
layers and texture, cutlery, and some ingredients
to add to the story. That's nice. The right
well lit composition enhances or colors and
textures of food and props, making it look
vibrant and inviting. I'm just rearranging
the prompts and trying out different
shooting angle. You can also adjust the
position of your reflector to manipulate the shadows on the opposite side of
the light source. You can bring it closer to the subject for our writer lock. Next, let me adjust
the settings of the artificial light
to show the effect. So from 10% to 20 per cent. Then take a photo
that looks brighter. You'll see that our greens look a couple of shade lighter. That's another tip. You can experiment with your lighting to get
different shades of the colors in your photos when
you're lighting is Brian, you also get lighter shades
of the colors in your photos. When the lighting is dark, you also get darker, deeper, and richer shades of the
color on your food photos. Going back to our
food photo shoot, so far, the overhead
shots are my favorites. So let me take
another one. Again. Rearranging the
reflector to fill in the shadow in a particular area. And this is my favorite so far. Next, let's add more prompts
and food to our scene and transform it into a light
and airy breakfast scene. So adding more cutlery, a human egg dose
and orange juice. Just arranging it
look more natural. It is okay, but I see a
dark area at the back end. I feel that it needs more light to experiment and show you
another lighting effect. I will change my
softbox from a 60 by 60 centimeter square to 120
centimetre octagon softbox. And here's how it looks. Now, let's see the
effect in photos. That's brighter in the dark
area at the back is gone. Let me just rearrange
the salad bowl by that red logo and
take another shot. That's better. As you can see, we've got a more light and
airy scene without changing the setting
on our light source. This is equivalent to
bringing your food to a larger window or using
a larger light diffuser. What happened was
my light source is giving the same
amount of brightness, but the bigger
softbox is scattering more light covering
a bigger area. Now, to polish our
light and airy photos, I added a bit of
brightness, contrast, and environments using
Adobe Lightroom and made sure that the light color
or temperature is neutral. So not warm and not cool. You can also set the white
balance on your camera, but I personally prefer
to do it in editing. I hope that gives
you lots of ideas for your next would photoshoot. So to recap, in
order for you to get a light and airy
look in your photos, you need adequate
lighting and it needs to eliminate
your whole setup. You make your shadow shorter by positioning your
subject closer to the light source
and you can fill in shadows by using reflectors. In the next demo,
I will be creating a warm and cozy
look and show you the effect of different life
directions. See you there.
11. Project: Creating a Warm and Cozy Look: In the previous demo, we created light and airy
photos using soft scattered, right light, soft and shadows
and light colored props. In this demo, we will create a Warm and Cozy Look using
the same lighting, but this time we will
be using warm colors in our props and a warm
color temperature in editing the final photos. So I changed the white
minimalist background to a page table cloth. Then I added a croissant and
a few warm colored props. Years how it looks. Warm colors are often associated
with comfort and energy, which can evoke a sense of appetite and comfort
in our viewers. People also associated
warm colors with home cooked meals and
familiar flavors, making them more
receptive to the food. Presented. With that said, I wanted my
photos to look a bit more geometric and to really show you the effect
of light direction, I won't be using any reflectors, so it will be getting dramatic
side shadows are shadows. So first let's take photos
using side lighting. The side light adds
depth and they mentioned our photo here and creates
a dramatic or moody effect. It emphasizes that
extra food enhances the visual appeal
of the props and create visually
interesting shadows. Let me take another shot using
the portrait orientation. Next, let me take a shot
using backlighting. In this case, I am
the one moving, but you can also
move your subject or your setup to get back lighting. I loved the effect
of backlighting. It gives that dreamy,
ethereal look. It also creates a halo effect around the edges of the food. Let me take another
shot focusing on the EKG and orange juice. As you can see, the
backlight creates a RAM or riming effect where the edges of the food appear to
be illuminated. Adding a glue and separation
from the background. This effect is only possible
with backlighting observed a difference of the egg and orange juice compared
to side Lighting. Now I'm not saying these
backlighting olive the time it will always depend
on your subject and the Look you
are trying to prep. I just wanted to show you that each light direction creates different effects and
looks three cups I, lighting creates
dramatic side shadows that look warm and homie. It is also best for creating a three-dimensional feel because it adds depth and dimension. Backlighting, on the other hand, creates a dreamy, ethereal look, especially when the food has translucent or
textured elements. It adds a special glow
to your food photos. Now the Polish and add a
warm touch to our photos. I edited the
temperature to be a tad warmer instead of neutral
to give me this effect, if complimented the warm
colored food and problems. In the next demo, we will
create another luck. See you there?
12. Project: Creating a Dark and Dramatic Look: We use almost the
same lighting setup in the previous two demos. For this demo, we will create a totally different
look and we need to change our lightning to do it in our light and airy photos. We needed a big bright
scattered light to create the look that we want. This time, we will use light to create a dark
and dramatic look. I love using the dark and geometric aesthetic
because it adds a sense of mystery and
atmosphere to my food photos. The shadows and deep contrasts create a captivating ambience, drawing the viewer
into the image and inviting them to explore
the scene further, this style can evoke
emotions and intrigue, making the viewer feel more connected to the
food and its story. To achieve this and to match
the dark and dramatic theme, I will be changing
the background again. This time I am using dark
colored background and surface background to go with my dark colored background
or dark colored prompts. Now for the lighting is
switched back to basics, the basics decent
amateur softbox. But this time I added
a light modifier, which is a honeycomb grid. This grid narrows
the spread of life, creating a more focused
and directional beam. It reduces light spill and
prevent slide from scattering. Disagreed also
helps in producing more defined and
dramatic shadows due to the narrow beam of light, since I am using
little light and need a tripod so I can use
a lower shutter speed. To make it more dramatic. I will do a poor shot and
pour honey to my foods subject to help me
capture an action shot, I also need a remote, so I will use my phone as
a remote shutter release. And now that everything's ready, it's time to add these
delicious cream puffs into our scene here. Nice and careful. I've turned off the
remaining room light, so I will only get the light
from my artificial light, adjusting the settings to
make it a little brighter. I decided to add a reflector to eliminate all
the cream puffs, but this time a little farther. Finally, adjusting my settings
to be able to capture a dramatic action shot
of the honey pouring. I am using my phone
as a remote or take photos while
I pour the honey. And here's the results. This one is my
favorite because of the way the honey
is illuminated. The dark tones and contrast
created by our lighting setup added a sense of richness and depth to our composition here, the use of dark backgrounds
and prompts also enhance the overall visual
appeal of the image. Just like my previous examples, I wanted to show
you how I polish this photo in the editing room. This time I added a lot
of brightness in my scene using the exposure
and shadows slider, I also added more
contrast and vibrance. Our main subject is orange. So to add more contrast
and interests, I thought of setting
the light color or temperature to cool
instead of warm. So here's the effect. The cool color added
blue hues and fans to our scene complementing
the orange subject. For me, the cool
temperature really help for our subject and our dark
and dramatic image to pop. To recap, dark and moody
images add a sense of mystery and atmosphere
that our food for those, the shadows and deep contrast create a captivating ambience, drawing the viewer
into the image and inviting them to explore
this even further. To create this look, we can utilize the
light and light shapers to control the light
and shadows in our scene. We can also change
the light color and enhance the overall
look in editing. And that is it for my demos. I hope it helped your
creativity Jews to flow. And I hope that you had
a lot of aha moments. In the next lesson, we will officially
wrap up this class. See you there?
13. Final Thoughts: Congratulations on
finishing this class. I'd like to end with
an inspiration I got from one of my favorite
food photographers. They aloo bus. She said that the magic of
photography happens. The mean if you stop
taking pictures of food and start taking
pictures of light, there is no one perfect
setup because there's no single lighting situation and no single way to
portray a subject. Think of the lighting setups
you've seen in this class, just as inspiration, explore
and find your own life. With that said, don't forget
to share your work through the class project
gallery by clicking the Create Project button
under projects and resources, if you are sharing your
photos on Instagram, please feel free to
tag me and Skillshare. My handle is address El Nino. Don't everything that
you are full of, those are not good enough. We get somewhere by doing,
not by overthinking. I hope you had fun and
found this fast valuable. But either way, please leave a review so
you can help me and your fellow students in deciding if this is
the class for them. You can do this by
going through reviews. Then click on the review. Just answered this short
and sweet questionnaire. And finally, submit review. Don't underestimate leaving a
review because I personally read all of them and really positive ones
make my day brighter. And that is it for
me in this class. Thank you so much for sticking
around and for choosing me this class to learn more about lighting and
food photography. Slightly touched on composition and color theory in this class. But if you want to dig deeper, I have classes dedicated
to these topics. You can find all of it
in my teacher profile. I also have more related
classes coming up. So make sure to hit the
Follow button below. So you will be the
first to know when a published new classes
and do giveaways. I hope that this class
is not the end but the beginning of an exciting
creative journey for you. Again, don't let a day
or a week passed by without getting your hands dirty and applying at this one, learning from this class. As always, I am rooting for you. Thank you again,
and I hope to see you in my other classes.