Transcripts
1. Class Introduction: Imagine capturing food photos so delicious they practically
leap off the screen. What if I told
you, it's not only possible but incredibly simple. With just your iPhone
and natural sunlight, you'll unlock the secrets
to crafting images that tantalize the taste buds and leave your viewers
craving abide. Hi, I'm Rose, and I'm
fortunate to live in one of the most stunning tourist
destination in the Philippines. Surrounded by a wide variety of food products and
diverse cuisines. It's like a food
photographer's paradise. What began as a simple hobby has grown into something
truly special for me. I noticed an opportunity to
help small businesses by capturing the essence
of their food and products through
photography. T hugh gigs and workshops, I've made it my mission to share the beauty of food photography. In this class, though, I'm
keeping things simple. I'll be leaving all
my professional gear at home and heading to
my favorite restaurant, armed with just my iPhone and the natural
light from the sun. This class is all about creating delicious food photos using the simplest and most
accessible method. Because let's be honest. While these LR photos are nice, not everyone has access to them, plus they can be a
bit conspicuous. With your iPhone,
you can focus on your art without drawing
too much attention. Since we're focusing
on simplicity, that's how I've
designed the class two. We'll cover a few food
photography tips and tricks, make sure your iPhone
is set up for shooting, and then dive into the
magic of natural lighting. I'll take you along as a
experiment and capture mouth watering food photos
for my class project. This class is perfect
for everyone, whether you're just
starting out or wanting to level up your skills. You don't need any
previous experience, just an eagerness to learn, experiment and discover
new techniques. All you'll need is your iPhone and a window to shoot your food. You can even join in from
your favorite restaurant for our class project. Speaking of which, I'm super excited to share it with
you in the next lesson. So let's jump in
and get started.
2. Class Project: So, why am I stepping out
of my comfort zone and leaving my beloved mariss
camera behind for this class? Well, I realized that
not everyone has access to a professional
camera gear like I do. Most people are working with just their phones and natural
light. And you know what? That's more than
enough to create stunning and mouthwatering
food photos. I've spent years
cultivating my craft with my mirrorless camera and favorite artificial
lighting setup, helping small businesses
showcase their food products in the best possible
light and sharing my expertise through classes
here on scale share. But after seeing your
feedback and class projects, I knew it was time to
do something different. I took inspiration from Lucy Lambrix's class about Peculiar prompts to find
your flow as a creative, highly recommended, by the way, and decided to downgrade my tools a bit for
the sake of art. And let me tell you
it's been eye opening. So for a couple of months now, I've been photographing
food and other subjects for personal projects using just
my iPhone and natural light. Here are a few photos
from this experiment. Now, I want to share this life changing experience with you. My goal in this class is to equip you with the
skills to capture beautiful mouthwatering
food photos using only your phone
and natural light. The key is grasping
the basics of food photography and harnessing the beauty of natural light. It's all about embracing simplicity and letting
your creativity shine. Now, let's talk about
our class project. We'll be photographing
our favorite dishes using our iPhones
and natural light. It may sound simple, but the real magic happens
when you harness the power of your tiny
yet mighty camera and the natural
light around you. And don't worry. I'll be there every step of the way
to share my tips, tricks, and insights into
my own creative process. You can also download this class project guide to help get your creative use flowing. There's no right or
wrong way to do this. It's all about experimenting, learning and growing
as a photographer. Once you've completed
your project, feel free to share it in
the class project gallery and spread some love and feedback to your
fellow classmates. After all, we're all
here to support each other and grow together
as a creative community. So whether you want to work
on your project alongside the lessons or tackle it at your own pace, the
choice is yours. I can't wait to see
what you create. In the meantime, I'll see
you in the next lesson.
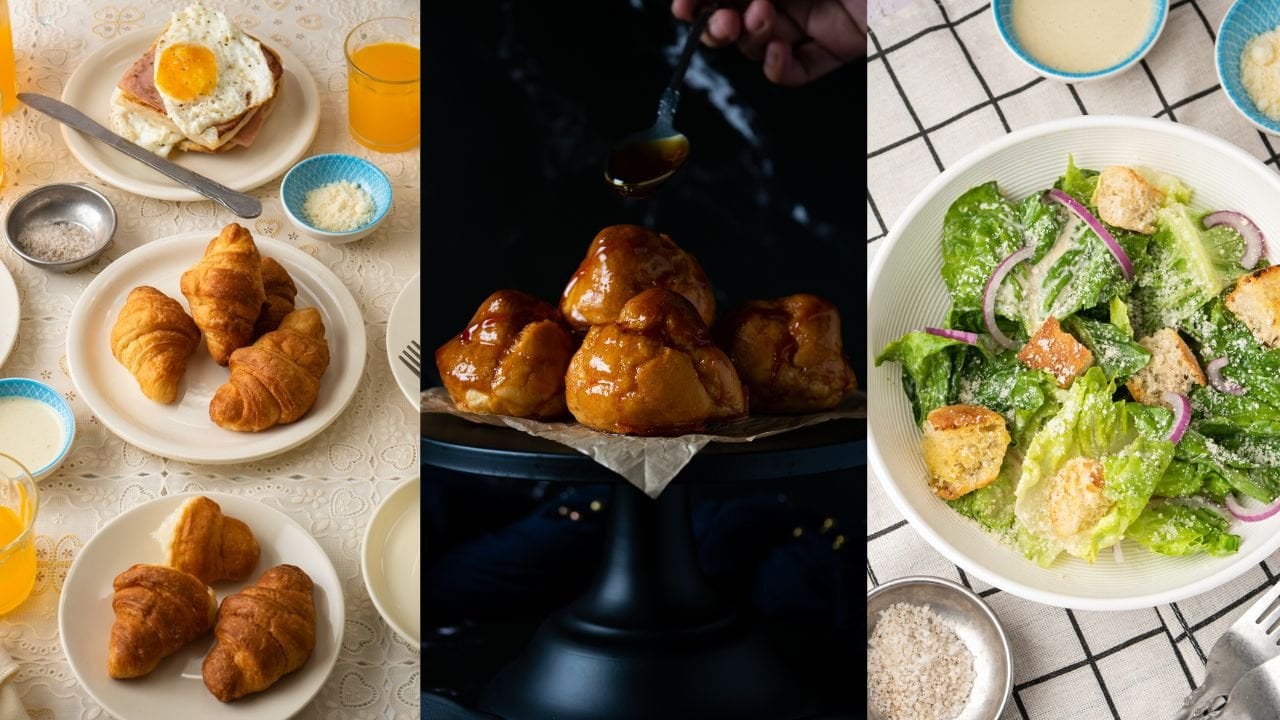
3. Food as a Subject: You remember watching a
celebrity interview where she mentioned that her pet peeve is taking photos of food. It's funny because I'm
the total opposite. I love capturing those
delicious moments. If you're here, chances
are you do too. But hey, we're all unique
individuals, right? Still, have you
ever wondered why people enjoy taking
photos of food? Well, it's not
just about showing off how tasty a meal looks. It's about preserving memories and sharing experiences
with others. Whether it's capturing
a homemade masterpiece, documenting a special moment or discovering new
culinary wonders, food photography is a joyful and creative way
to express ourselves. Plus, sharing those mouthwatering
photos on social media, lets us connect with fellow food enthusiasts and celebrate the rich diversity of food
cultures around the world. That's why I'm so
passionate about it. I just love taking
photos of food. But here's the thing.
My early attempts at food photography weren't
exactly Instagram worthy. Let me show you a
few cringy examples. Despite my dishes looking
appetizing in reality, my photos didn't quite
capture that same magic. It turns out there's a real technique to
photographing food. It's not as straightforward
as taking selfies, though. Those are fun too. So when
we are photographing food, our main goal is to
make the dish look as tempting and irresistible
as possible. So we pay attention
to how it's plated, making sure it's arranged in an enticing or inviting manner. We need to use good lighting
to bring out the colors and textures and focus on highlighting the key
elements of the dish. Getting creative with
our compositions, aiming to capture the
true essence of the food. Remember, our photo
should evoke cravings and inspire others to try
out the dish for themselves. Now, let's dive into
some practical tips to achieve this in our next
lesson. I'll see you there.
4. Food Photography Tips and Tricks: Being a food photographer
brings some funny moments, like when my friends and family joke about and following me on social media because my food
photos are so tempting. They say they either end
up craving the food and breaking their diets or
feeling bad for not having it. My response, well, if my photos
make them feel that way, then I'm doing my job right. From my not so Instagram
worthy shots in the past to the ones that now
land me photography gigs. I've learned plenty of tricks to make food mouth
watering in photos. Though teaching them
all could take hours, which I actually did in
my other classes here. In this class, I want to share my top three tips when
photographing food. So let's start with
tip number one, finding the right lighting. In food photography, our
main goal is to make viewers crave the dish just
by looking at the photo. Since they can't taste it, we need to tantalize
their taste buds through visual cues, particularly by
highlighting the textures and delicious
details of the food. And that's where lighting
and angles come into play. Proper lighting is essential for bringing out the textures
and colors of the food. The great news is natural light from the sun works wonders. Let's take this juicy
orange as an example. I wanted to showcase its
juiciness and texture. I opted for direct
afternoon sunlight by capturing the photo at a three quarters angle from the shadows area and shooting
directly onto the light. I was able to capture
the glow and really emphasize the juiciness
of the orange. To show the difference, I
also photographed it in the opposite way where I
shot it from the front, where the light is coming from. It's a decent looking photo.
It's slight and bright. But for me, the one with back
lighting has more texture, color and depth, and
is more compelling. Don't worry, we will expand this process later in
the lighting lessons. Moving on, next step is
to focus on composition. Think of arranging your
food as an art form. Pay close attention to how everything is placed
in the frame. It's not just about tossing
things around randomly. Whether it's your
ingredients, props, or other elements in the scene, each placement should be intentional and
thoughtfully considered. For instance, let's say you're photographing a vibrant salad. Instead of simply dumping the
ingredients into the bowl, think about arranging
the colorful veggies in an attractive manner. Just like what I did here, cutting the lettuce
leaves, carrots, and tomatoes in uniform sizes, and arranging them to
create a natural pattern. By giving each ingredient its own space and arranging
them thoughtfully, the salad looked inviting
and visually striking. You can also incorporate props like table napkins, utensils, saucers, and extra
ingredients to add context and texture
to your composition. As you work on your
class project, ask yourself how you can arrange the food and the scene to make the main dish stand out and evoke a craving in your viewers. Think about color combinations, props as leading lines, and include elements that spark the imagination and draw the viewer's eye to the
focal point of the photo. The fun part. You can
also use lighting as an additional composition
element to your photos. You can use it as
a leading line, a frame, or a layer to
a texture and interest. Tip number three is all about storytelling
through styling. Think about the story
you want to tell. Consider incorporating
elements or props that deepen the narrative
and evoke emotions. You can start by
showcasing the freshness, colors and textures
of the ingredients, arranging them to emphasize
their natural beauty. Then add garnishes, sauces
and additional props that elevate the presentation and inject visual intrigue
into your composition. You can also show the process
of preparing the dish or include props that transport viewers into the
heart of the kitchen. You can take inspiration from my pancake photo series where I captured each step of creating chocolate pancakes to
narrate the story visually. By investing time on
styling and storytelling, you can create food photos that not only look visually stunning, but also resonate with your
audience on a deeper level. And here's a bonus tip
for selecting props. Choose items that complement the food and enhance
your storytelling. Whether it's rustic
wooden boards for a cozy vibe or sleek
utensils for a modern feel. Each prop should contribute to the overall narrative
of your photo. Take this dish, for example. Without any supporting props, it looks a bit
lonely, doesn't it? But just a bit of
prop styling made a huge difference
by adding sauce, dried flowers, a bowl of soup, utensils, and a glass of water, the dish comes to life. Compare the before and after. The styled version looks
much more inviting and tells a story of someone about to
savor this delicious meal. Whether you're cooking
up your favorite dish at home or heading out there, go to restaurant, remember these tips when capturing
those mouth watering moments. I've even created an acronym to guide you through
the process, LCS, which stands for lighting, composition,
and storytelling. So first, focus on finding the best
lighting for your shot. Next, arrange your
scene in a way that creates a
captivating composition, and finally, add those
finishing touches to truly bring your
food stories to live. To recap, L for lighting, C for composition, and
S for story telling. In the next lesson,
we'll make sure your iPhone camera is ready
for food photography. See you there.
5. iPhone Camera Settings Checklist: Now that you've got a handful of food photography
tips and tricks, it's time to make the most
of your iPhone camera. But first, let's give credit
where it's due and marvel at the incredible technology
packed into our iPhones. Did you know that iPhones are equipped with advanced
camera systems? They boast high
resolution sensors, fancy image processing, and even optical image
stabilization. I won't dive into the technical
jargon, but basically, these features team up to
capture stunningly clear, detailed and colorful images, even in challenging
lighting conditions. Pretty cool, right? What's more? Modern iPhone models come with multiple lens options from wide to ultra wide
and telephoto lenses. You've got a range of
choices to capture food from different
angles and distances. This flexibility lets you get creative compositions
and showcase the delicious details
of your dishes. So rest assured your
iPhone is more than capable of creating drool
worthy food photos. So How do we make the most of
these impressive settings. In this lesson, I'll walk you through a
checklist to ensure your iPhone camera is ready
for food photography action. While it's not mandatory to follow every step religiously, this checklist provides a handy guide for
those who may be unsure about setting
up their iPhone camera for optimal results. To give you a little motivation, let me show you a few before and after photos that highlight the difference being mindful of iPhone camera settings
and features can make. First up, keep your
iPhone camera lens clean. Imagine this. Just wiping my camera lens with a clean soft clot
made a difference. The second photo looks clear and sharper showing all
the delicious details. Ex is being mindful of
the exposure settings. We'll play around with the
exposure slider later, but for now, check out these
before and after photos. The first one looks
dull and flat. While the second one taken with the best exposure settings
looks vibrant and lively. Next, simply tapping to focus. It's a simple step that can
make or break an image. Just look at the difference
it makes in these photos. Finally, experimenting with
the iPhone camera lens. Trying out different lenses can give you different results, as you can see in
these examples. So what's the point of all this? These before and after photos
show white's worth taking the time to understand and be mindful of your iPhone
camera settings. Don't worry, I won't
get to technical. I'll explain each
setting as quickly and simply as possible.
So let's dive in. In this lesson, I'll be
using my iPhone 15 and cross checking settings on my
husband's iPhone 11 P mats. Let's start by going to
settings, then camera. We'll skip the video settings
and go directly to formats. You might wonder why
start with formats. Well, configuring
the right formats in your iPhone camera settings is important because
it allows you to capture high quality photos
while efficiently managing storage space and ensuring compatibility with different
devices and platforms. It's a simple but
essential step to improve your photography
experience on your iPhone. In the format section, you'll come across options for camera capture and
photo capture. If you're using
older iPhone models, you'll see camera
capture settings. Here you can choose between
high efficiency or HE IF format and most compatible
or the JPEG format. Now, which option
should you go for? If you plan to edit
your photos later on, it's generally a good idea to select the most
compatible format, which is JPEG for iPhones. JPEG files are widely accepted and can be
easily opened and edited in various photo
editing software such as Light room for mobile. Light room provides extensive editing
features for JPEG files, allowing you to adjust
exposure, color, contrast, and more without
significant loss of quality. Moreover, JP files are smaller in size
compared to formats like HEIF making them
simpler to handle and share. They also demand less processing
power and storage space, which is great when
dealing with a lot of photos in your
editing application. In photo mode, most iPhones
default to 12 mega pixels. When you take a
photo in 12 MP mode, the camera grabs images with a resolution of 12
million pixels. This resolution works well for everyday photography and
sharing on social media. It strikes a good balance between image quality
and file size. If you choose the 24
megapixel option, you're opting for
higher resolution. This means the camera
captures more details, resulting in larger image files. As a result, you get
sharper details, especially when you zoom in. Since each image
contains more pixels, the file sales will be bigger. So ensure your device has
enough storage space. Additionally, if you plan
to print your photos or need high quality images
for professional purposes, 24 mega pixels can
deliver better results. If you have the pro version
of the newer iPhones, you'll have the
option for pro raw, which allows you to take
raw photos on your iPhone. This is great because it
preserves more image data, providing greater
flexibility and control in post
processing or editing. With higher image quality, better dynamic range, and finer details compared
to standard formats like JPEG or HEIF P R enables you to capture the visual appeal of dishes with professional
level results. I have a mirror less
camera that can shoot raw, which is why I initially
chose the iPhone 15. However, I am now
considering upgrading to the pro version in my next iPhone upgrade because
of this feature. But even if you don't have
the iPhone pro models, you can still enable
resolution control. Where your main camera can take photos at a whopping four
to eight mega pixels. This means incredibly detailed
images with more pixels, perfect for situations where you want to capture
every new ones. However, it's
important to note that higher resolution doesn't
always guarantee better photos. Just like what I shared
in the previous lesson, factors like lighting,
composition, and storytelling play
a significant role. But having this massive
resolution is super beneficial, especially if you plan to
print your food photos. Next, let's head back to camera settings and navigate
to preserve settings. Personally, I like to turn on all the options
here because it allows me to preserve
certain camera settings between different
camera sessions. When this feature is enabled, it ensures that specific
settings you've chosen remain the same the next time
you open the camera app. This is especially
important for me, particularly the exposure
adjustment setting. If you've manually
adjusted the exposure or the brightness level using the exposure slider
in the camera app, enabling preserved
settings will keep this exposure adjustment
for subsequent photos tape. I preserving these settings, you can maintain your preferred
camera configurations and shooting modes across
different camera sessions. This saves you time
and effort from having to readjust them every time
you open the camera app. It's a convenient
feature for those of us who frequently use specific
camera settings or shooting modes and want
to ensure consistency in our photography
experience on our iPhones. Now, for the final part of
this rather lengthy lesson, let's revisit the camera
settings once more. This time, navigate
to composition. Here, you have the option
to turn on the grid, level, mirror, front camera. And view outside the frame. While we won't be using
the mirror front camera since we're not taking selfies, it's crucial to have the
grid and level turned on. These features can
greatly assist you with framing
and composition, ensuring that your photos are
well balanced and aligned. As for the view outside
the frame option, it's a matter of
personal preference. Some may find it helpful while others might find
it distracting. Ultimately, the decision
to enable this feature is up to you and what works best for your photography style. Moving on to the next
section under photo capture, we have photography styles. Portraits in photo mode, prioritize faster shooting
and lens correction. Personally, I don't use any predefined photography
styles because I prefer to manually edit all my photos for a
natural yet polished look. So I'll skip this option. I do, however, enable
portraits in photo mode. This feature allows you
to capture photos with a blurred background and professional looking
lighting effects directly from your
iPhone camera. It's perfect for achieving delicious results with
depth and visual impact. As for the priority
of faster shooting, I keep this option off since we'll be photographing food and not fast moving subjects
like sports or wildlife. By disabling this option, the camera prioritizes
accuracy over speed, resulting in more
precise auto focus, exposure calculation, and image
processing for each shot. This is particularly
beneficial for stillf photography
like food photography, where capturing
the perfect moment is more important
than shooting speed. Finally, I enable
lens correction. This feature helps improve the overall appearance
of your photos by correcting optical
distortions commonly associated with
wide angle lenses. If you frequently shoot with wide angle lenses or
notice noticeable, distortions in your photos. It's recommended to keep
lens correction enabled to ensure your images are as accurate and true to
life as possible. Oh, I know that's a lot for a
checklist, but don't worry, you only need to
set this up once, and then you can just tweak
a few settings as you progress in your iPhone
food photography journey. But wait, we're not done yet. In the next lesson, we will explore the camera
app, see you there.
6. Let’s Explore the iPhone Camera App: Now that we've covered the
camera settings checklist, let's dive into the built in
camera app on our iPhones. Well, you can use third
party camera apps if you prefer for this lesson, we'll focus on getting the most out of the built in camera app. I'll be using my iPhone 15
and also checking settings on my husband's iPhone 11 P max to show you how to
make the most of it. When you launch the camera app, here's what you'll
see on older models compared to newer ones. Not much has changed. The main difference are the missing cinematic
mode for videos, and the JP Max, which is the 48 megapixel resolution
on the iPhone 11. When you tap on the tiny
arrow pointing down, you'll see a variety of options. The only one missing on
my husband's iPhone 11 is the white balance option. The rest looks the same. Let's start exploring. Let's start with
the settings and features when you press
the down arrow button. First, you have
the option to set the flash to auto on or off. Since we are utilizing natural light, we'll
leave this off. Next is the live
feature where you can capture sharp photos
of moving subjects. Since we are taking
photos of food, we can just turn this off. Next, you have the option to
take photos using standard, rich contrast, vibrant,
warm and cool. We also have the option to set the tone and warmth
here at the bottom. I personally like to
edit my photos manually, so I'm leaving this at standard. Next is the aspect ratio. You have the options 443 square, and 16 by nine. Again, I'm leaving
it at standard four by three because it's
more balanced for me. Next is the exposure slider. Here you can increase
or decrease brightness, depending on how you
want your photos to look and depending on
the lighting condition. You also have a
timer feature here. You can use it for lifestyle
photos where you want to include your hands or
yourself in your food photos. You can set it to
three or 10 seconds. Last icon here is for
different filters. So you have original, vivid vivid warm, vivid, cool, dramatic dramatic
warm, dramatic cool, silver tone, and war. I'm sure there are
moments where you can use and maximize
these filters, but since we're
photographing food, I will keep things looking natural and stick
with the original. And that's it for the
settings that you can adjust here on
the camera app. On the left hand
side, you also have the shortcut for a flash and
for adjusting the exposure. Remember the resolution control that we turned on from
settings earlier. That's why you can
see the JP Max here on the right hand side. If you don't want the maximum
48 megapixel resolution, you can just turn this off. You can also turn the live
photo option on or off here. Most of the time I have this
off except for when I'm photographing motion like
poor shots and sprinkles. Now, let's get ready
to really take photos. So let's see the magic that we can do here in
the camera app. First, you have the tap to
set focus and exposure. This allows for you
to manually control exposure levels by tapping on different areas of the frame. To use this feature, simply tap on the screen at the
desired focus point. The iPhone will
adjust both focus and exposure based on
the tapped area. You can tap on the brightest and darkest areas
of the scene to balance exposure and ensure proper brightness
throughout the image. Apart from tap to set exposure, you also have the exposure
compensation feature. To access exposure
compensation controls on the iPhone camera app, tap on the screen to set focus, then swipe up or down to
adjust exposure manually. When you're happy
with your exposure, you can take a photo. You also have the option to lock your focus and exposure
by pressing and holding the focus point until the AE AF lock
indicator appears. This locks both focus
and exposure settings, ensuring that they
remain constant, even as you recompose the shot, blocking exposure helps ensure consistent brightness
through your photo session, resulting in more uniform and professional looking images. Next, let's talk
about the lenses. On most iPhones, you
have the options for wide standard and telephoto. The wide lens gives
you a super wide view, capturing a lot in one shot. It's great for big scenes, group photos, and when you want to show more
in your picture. The exact focal length can vary, but it's usually around
12 to 13 millimeters equivalent if you're used
to old school film cameras. The wide lens also has
a larger aperture, meaning smaller F number, so it lets in more light, which is awesome for
low light situations. When should you
use the wide lens? Well, whenever you
want to show off, lots of space and context. Next up is the standard lens. This one gives you a view that's close to what your
eyes naturally see. It's not too wide or too
zoomed in. Just balance. It's usually around 26 to
28 millimeters equivalent, which is kind of like the
normal view for photography. The standard lens often
has a moderate aperture, so it works well in different
lighting situations. This lens will likely
be your go to for taking foot portals
because it's so versatile. Finally, we have
the telephoto lens. This lens gives you
a closer look at your subject without having
to move physically closer. It has a narrower field, the few compared to the
wide and standard lenses. Typically, it's around 52 millimeters equivalent
or even longer, depending on your iPhone model. Newer models might offer
longer telephoto ranges. The telephoto lens usually
has a smaller aperture, meaning higher F number, which means it lets
in less light, but still performs
well in good lighting. It's great for capturing detailed shots from a
distance and for creating that beautiful blurred
background effect or what we call bouquet. This lens is my
favorite for taking mouthwatering food
photos because it lets you focus on the
details and texture. Pro iPhone models may also
come with extra lenses like ultra wide or macro lenses giving you even more
creative options. Each lens type has
its unique benefits, depending on what you
want to capture and the perspective you want
in your food photos. I know it can seem a bit
overwhelming at first, but the key here is practice. The more you play around with these buttons and take photos,
the better you'll get. Your iPhone photography
skills will improve and you'll be capturing delicious
food photos in no time. In the next lesson,
we'll move on to our next tool natural
lighting. See there.
7. Embracing Natural Light: Earlier, I showed you
before and after photos highlighting the impact of
iPhone camera settings. Now, let's explore the difference
good lighting can make. The first photo was taken
inside a restaurant at night, using only artificial
light and candle light. The second photo was taken
outside the same restaurant during breakfast with
plenty of natural light. I took it under a
big white tent, which acted as a
diffuser providing soft natural lighting
for my breakfast. The colors are more vibrant and the food looks more
appetizing and delicious. As you can see, even sunlight is an excellent light source, and it's the perfect match for our most accessible
camera, our iPhones. Even though natural
light is free, it doesn't mean that
it's not amazing. In fact, it's magical. If you take your time, you'll be amazed at what natural
lighting can do. But before we dive into the
details of natural light, let's answer a big question. Why is lighting so important
in iPhone photography, food photography, and
photography in general. And why is sunlight such
a great light source? Good lighting ensures that your subject is well lit
and clearly visible. Too little light can
make images dark and grainy while too much light
can wash out details. But it's such as about
illuminating our subjects. Lighting sets the mood and
atmosphere of a photo. Soft diffused light can create a calm and serene feeling while harsh direct light can
evoke drama and intensity. The right lighting can make
food look appetizing and appealing by highlighting
textures and colors. Since we are using an iPhone, which has smaller sensors compared to a
professional camera, wood lighting is crucial to produce clear and sharp images. Proper lighting
creates shadows and highlights that add depth and
dimension to the subject, making it appear three
dimensional rather than flat. This helps in
creating a sense of space and realism in the image. Sunlight is a fantastic light
source because it creates gentle shadows and highlights adding depth and dimension
two food compositions. It brings out the
crispness of vegetables, the flakiness of pastries, and the glistening of sauces. Making them look more appealing. With a full spectrum of colors, natural light allows for
accurate color reproduction, showcasing food in its most flattering
and appetizing form. How do we take advantage
of natural light as an accessible but
beautiful light source for our food photos? My top tip is to cultivate
an eye for natural light. This means really understanding how to observe light itself. Observing light isn't
just about seeing it. It's about carefully
studying how it behaves and interacts
with its surroundings. Observe natural lighting
in different times of day. Notice how the morning
light looks and how it makes you feel compared
to the afternoon light. See how photos differ
when the light is direct versus indirect,
creating softer shadows. This careful observation is key to mastering light
in photography, not just food photography. It's not just about
technical skills. It's about using the art of observation to create
beautiful visual stories. By understanding how light interacts with your
subject and environment, you can elevate your
food photography and capture moments that
resonate with your viewers, even if you're just
using an iPhone. In summary, lighting is
not just about showing off details and textures
in your food photos. It's also about provoking
an emotional response. So keep this in mind when you work on your class
project later on. Think beyond technicalities. Consider how you want
your viewers to feel and what story you want to
tell through your images. By infusing your
photography with emotion, you can create images that
captivates your viewers. To do this, we need to
cultivate an eye for natural light and understand
its qualities and potential, and that's exactly
what we are going to unpack in the next
lesson. See you there.
8. Essential Properties of Natural Light: The key to creating
delicious food photos lies in understanding the
different qualities of light. When you're taking photos, you have the power to create
different moods and tell different stories simply by
playing with the lighting. Let me break it down for you by sharing three essential
properties of light that you can study and
apply in your class project. Let's start with light quality and its impact on
food photography, specifically focusing
on the distinction between hard and soft light. First, let's quickly
define these terms. Hard light refers to direct sunlight hitting your subject. Typically on a sunny day
without any obstructions. In contrast, soft lighting
occurs when the sunlight is diffused or scattered often
by clouds or other objects, resulting in a
gentle illumination. Hard light is characterized by its punchy dramatic
effect and high contrast. It accentuates textures,
creates strong shadows, and adds dimension
to your images. Utilizing hard light can infuse your photographs with energy and draw the viewer's attention by introducing unexpected
visual elements. For example, I use direct and harsh sunlight to enhance the vibrancy
of this sumerging. Matching its lively and
vibrant atmosphere. When working with hard light, it's important to leave
ample space between your subjects to allow
shadows to form naturally. Additionally, consider the angle of the sunlight as lower angle, such as in the afternoon can
result in longer shadows. Opposite to hard
light is soft light. Soft light offers gentle
and soothing illumination, creating a serene
atmosphere in your photos. Unlike hard light,
soft light produces subtle transitions between
highlights and shadows, resulting in a smoother
and more even appearance. In food photography, soft light can enhance the
appearance of dishes by delicately wrapping
around the subject and smoothing out
any uneven surfaces. This softening effect adds a flattering and appetizing
quality to the image. Like what happened to my
breakfast photo earlier, where a white tent acted as a diffuser and created
a gentle soft lighting. If you're shooting
near a window, you can use a shear curtain
or a blanket to act as a diffuser to soften the
light coming from outside. If you're shooting outdoors, timing it on an overcast, they can provide naturally
soft and diffused light. Or you can shoot under the shade away from direct sunlight. By harnessing the gentle
qualities of soft light, you can create
photos with a sense of tranquility and elegance, elevating the visual
appeal of your dishes. Next to light quality
is light direction. Understanding and manipulating
light direction allows you to create compelling
and dynamic images. What I will be sharing here
are just guidelines, though. The key here is to experiment. Subtle adjustments such as changing your position
or the angle of the light source can dramatically alter the look
and feel of your photos. For example, front lighting illuminates the subject
directly from the front, creating evenly lit images
with minimal shadows. This approach is
ideal for showcasing details and textures
without harsh shadows, making it well suited for certain types of
food photography. On the other hand, side
lighting introduces depth and dimension to your photos by casting shadows
across the subject. This technique adds
visual interest and can highlight
textures and shapes, particularly in subjects
with intricate details. Meanwhile, back
lighting involves positioning the light
source behind your subject, creating a dramatic
silhouette effect or adding a halo like
glow around the edges. Back lighting can evoke
mood and atmosphere, lending a sense of warmth and ambience to
your photographs. This is probably my
favorite lighting direction because it provides
structure to subjects, creating depth and dimmention
in the photograph, similar to how scenes
are lit and cinema. Plus it guides the
viewer's eyes through the intentional placement of
brighter areas in the frame. For me, it has more
depth and visual appeal. But that's just my
personal preference. I might say this too
often in this class, but the key here really
is to experiment. Move around, change
your position, adjust your camera angle, and reposition the foot itself. You can even change the location where you shoot your foot to find the best spot by experimenting with
different light directions, front side, and back lighting, you can unlock the full
creative potential of food photography and enhance the visual impact of
your foot photos. Each lighting direction offers
unique strengths and can be tailored to complement different types
of food subjects, allowing you to capture captivating photos that
resonate with your viewers. Next, let's talk
about light color. Yes. Light, even natural light from the sun has
different colors. Think about when you
walk into a room early in the morning or late in the afternoon
on a sny day. Notice how the ambience changes. In the afternoon, sunlight
may cast warm golden tones, giving the room a cozy feel. In the morning or
on overcast days, the light may appear cooler, resulting in bluish
or grayish hues. Understanding the color of light is super
important because it influences the mood and
atmosphere of the image. Warm light can evoke feelings
of coziness and intimacy, ideal for capturing
intimate or indoor scenes. On the other hand,
cool light can convey a sense of
calmness or serenity. Additionally, mastering
the interplay of light color can enhance
your creative expression. Understanding these variations
can help you choose the best time and setting
for your food photos, adding another layer of depth
and mood to your images. In summary, you can
harness the potential of natural light by
studying, understanding, and experimenting
with its properties, such as light quality,
direction and color. Of course, there are
more factors that affect how natural light
behaves like surfaces, reflectors and light shapers. But what I've shared in this lesson is a
great starting point. As you progress, you can experiment with
different techniques. Remember, these are just
tools at your disposal. You have the power to adjust, manipulate or even
disregard them entirely based on
your artistic vision. Ultimately, it's your
unique perspective, shaped by your experiences and preferences that will shine
through in your work. Now, when working on
your class project, and as you continue
on this journey, think about how you
want your viewers to feel and what impression you
want to leave them with. After all, photography is not
just about capturing light. It's about capturing
emotions and stories. Speaking of which
in the next video, we will put everything
into practice. I'll bring you along with me as I take delicious photos in my favorite restaurant using just my iPhone and natural
light. See you there.
9. Demo: Indoor Natural Lighting : Now that we've covered my
tough food photography tips, fine tuned our iPhone
camera settings, and explore natural lighting. It's time to put
theory into practice. Remember the class
project guide I shared. In this session, I'll guide
you through my step by step process as I
tackle my own project. You'll see firsthand how
I apply everything we've discussed to capture
mouthwatering food photos. To add an extra dash of
excitement, at least for me, I'll be heading to one of
my favorite restaurants conveniently located just a few steps away from our condo unit. And for today's demo, I have a special guest
training me, my Toddler. Don't worry, though, he has been briefed about the shoot
and promise to behave. So you might catch glimpses of him popping in and
out of the frame, adding a sprinkle of
spontaneity or session. I chose this restaurant
for my class project, not only because it's
a personal favorite, but also because of its
abundant natural light. Nearly all the tables inside are positioned beside large windows, creating an ideal setting
for food photography. However, I anticipate challenges with
artificial lighting, which may introduce
mixed lighting, shadows and color
cast into my photos. Nevertheless, I'm eager to
explore creative solutions. I will also take advantage of their outdoor tables
and chairs to get pure natural light and explore a more
natural environment. This place holds special
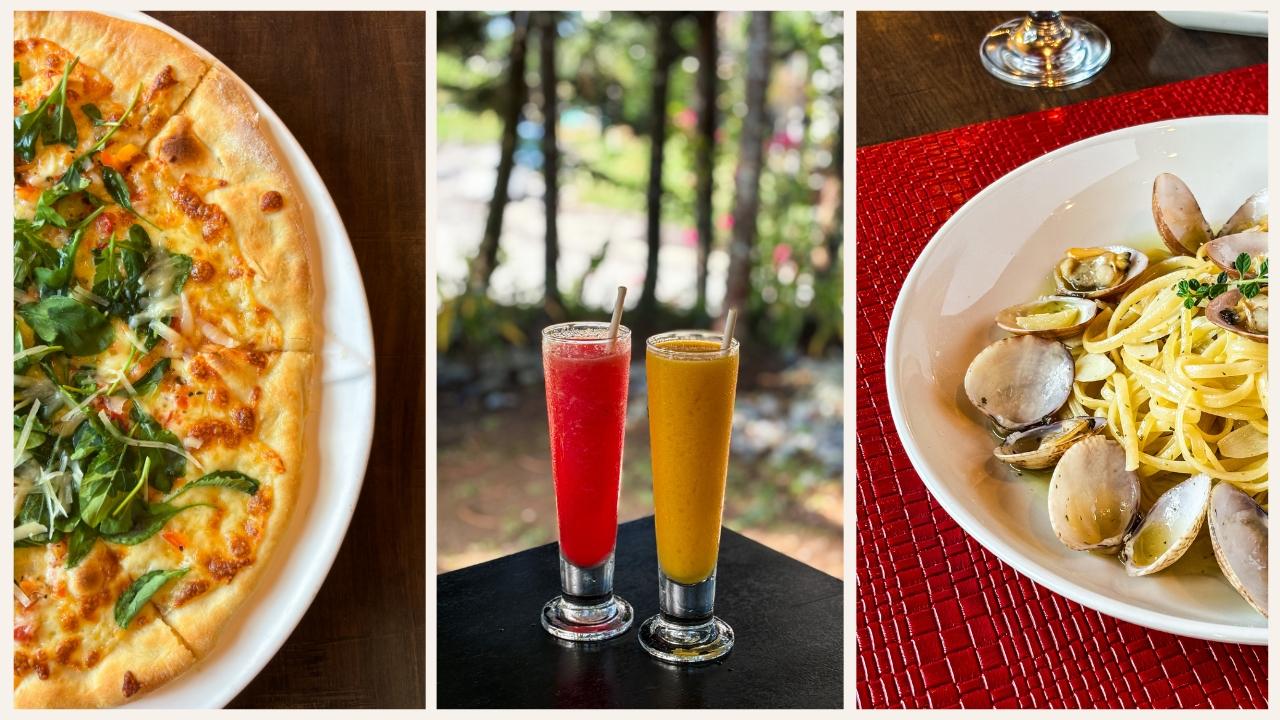
dishes close to my heart. To prepare, I scouted their
Instagram and consulted with the staff to identify
the most photogenic options. Their recommendations include
the parmigiano pizza, pasta Ale vgle, and
signature tall drinks. Now, let's delve
into the step by step process of
capturing these images. First step is finding
the right spot. Like I mentioned earlier, nearly all the tables inside are positioned beside large windows. I tried to do a few test
shots to find the best pot where I will set up my scene
and do my class project. Almost all the tables are beside a window with
abundant lighting, but I chose this spot because of the beautiful texture
and detail of the wall. After finding my spot, I went ahead and
placed my order. I also asked the
restaurant staff if it's possible to prepare the food and bring it out one at a time. So I have enough time to
photograph each dish. After a few minutes, the pizza is ready. So the next step is
to set up my shot. So basically, place your dish on the table and
consider the background. Make sure it's not too
cluttered or distracting. As you can see, there are a lot of things that are
already on the table. So I decided to
remove most of it. Next step is to consider
composition and styling. I tried using some of the
items that are already in the table to style my
shot like the placemat, table napkin, utensils,
and dried flowers. Next step is to frame your shot. Think about how you want
to frame your photo. Do you want to include the entire dish or do you want to zoom in on a specific detail? Play around with framing to find what works best for
your composition. For me, I tried showing the
entire pizza with the props. But I also tried zooming
in on the details. These are good
images in general, but I want to experiment
and take more photos to see which angle will show more
delicious details and texture. So let's proceed with step
five, adjusting your angle. I tried experimenting
with different angles to find the most flattering
one for our dish. I tried shooting from above. And at a three quarters angle. I also removed the rest of the props and focused
on the pizza. It's nice, but I want
to see more texture, so I will try shooting from the shadow area which
leads me to step six. Adjust for lighting. Basically, keep an eye on how the natural light is hitting
or illuminating your dish. I've been taking photos
using the side lighting, so I moved and try taking
photos using back lighting. For me, this is the best
lighting direction so far. But I'm not so sure
about this background. So I will try a different angle and capture the wall
in the background. This is my favorite shot so far, and I'm happy with
the simple setup, the lighting and the background. Let's move on to the final step. Capture the moment and
enjoy the process. Take your time and experiment with different settings
on your iPhone. To get the best shot possible. But most importantly, have fun with it and
enjoy the process. For me, I tried
experimenting with my exposure and
different lens options. I also tried removing
the placemat to see if using the table
as background is better. I also tried to get really
close to the subject and show details using
the telephoto lens. In the end, I decided to put
the placemat back because it actually complemented the
pizza and the green window. Next, I followed the same steps with the pasta and the drinks. I experimented
with the lighting, props, the angles,
and made adjustments. I really love the Italian
brick wall as a background, but I noticed that it gives a warm color cast onto the food. Basically, the natural light
from outside is bouncing off the wall and giving my subject a warm light
instead of neutral. And since we're all about
experimenting here, I also tried photographing
the pasta on the other table far away from
the colorful brick wall. To show you a comparison, here's the photo near and
away from the brick wall. It's subtle, but you'll notice that the one
photographed far away from the colorful brick
wall looks more neutral. I also changed the
props to match the b. It's nice, but I can't help
but notice the reflection of the artificial lights on the
ten seals and the table. Although it's not
very prominent, I also notice the effects
of mixed lighting. To try and resolve this, I tried moving the subject closer to the natural
light source. And here's the result. It's nice, but again, you can still see
the reflection of the restaurant's
artificial light. My solution is to take extreme close up
shots of the pasta. Good thing, we have the
telephoto lens to do this. From this demo, we learned a lot about how natural
light behaves indoors. The quality and intensity of
natural light indoors can vary depending on factors
such as window size, distance, room orientation,
and surrounding architecture. But we were able to
troubleshoot and maximize the available
natural light indoors. In case you didn't notice, I always positioned
the food near the window so I can optimize
the available natural light. I also experimented with
different shooting angles and compositions to make
sure we bring out the texture and delicious
details of the food. Again, here are my favorite
photos from this indoor shoot using my iPhone
and natural light from the restaurants window. While I'm satisfied
with these photos, I'm curious to explore shooting outdoors and harnessing
pure natural lighting without any color cast from the restaurants walls
and artificial lighting. Let's give it a try and I'll
see you in the next demo.
10. Demo: Outdoor Natural Lighting: In this demo, I wanted to
experiment with direct sunlight since it's the afternoon and the sun is
starting to lower. I also aim to utilize the lush grinary as
a natural backdrop. Additionally, I've
noticed sunlight filtering through the leaves, offering each hand to add another layer of
interest to my images. So again, the first step is
to find the perfect spot, grab our food, and head outside. I started with the drinks
this time because it's made of fresh fruits and
changing its appearance so fast, so I had to hurry. For this shot, I wanted to take advantage of
the greenery in the background to add a sense of freshness and
complement the drinks. Although the greenery in
the background is nice, I noticed that the light being captured in the
background is too bright. So I tried experimenting with the portrait mode to add more blur or bouquet
in the background. And here's the result. I had a chance to photograph
the pizza inside, so I just took a few
shots outside to show you a comparison between indoor and outdoor
natural lighting later. For the pasta, I started
with indirect lighting in the shade at the top view angle showing the entire dish
and its surroundings. I tried the same angle, but this time using
the telephoto lens. This shot for me is better because it focuses
more on the dish, showing more texture
and details. I also tried photographing it at a three quarters angle using
the same telephoto lens. I love the balance
in this photo. You can see the
details and texture, but you can also see
the surroundings. The three quarter angle also adds that inviting feel to it. Next, I wanted to experiment
with direct lighting. I also wanted to
try playing with sunlight filtering through
tree branches and leaves. I love the dynamic interplay of light and shadows created by the sunlight filtering through tree branches and
leaves in this photo. For me, it creates a
captivating composition that evokes a sense of
mood and atmosphere. The outdoor shoot
was really fun, but we got hungry, so we took a break to enjoy
these delicious meals. Don't worry, we're not done yet. Around 530 in the afternoon,
we went outside again, and I ordered another dish to photograph during
the golden hours. The golden hours in photography refer to the period
shortly after sunrise, and just before
sunset when the light is soft, warm and diffused. I'm sure you've heard
that the golden hours produce unique and flattering
lighting qualities. The light during these
times has a warm golden hue that can enhance skin tones
and add a beautiful glow, two landscapes and portraits. But we'll see the
effect on food. They recommended this dish because of its
colorful ingredients, perfect for food photography. It's a pan grilled chili
and sea bass filet with a rich tomato and fresh herbs sauce served with
buttery mashed potatoes. Good thing I was full when this dish arrived because
it looked so yummy. If I was hungry, I would have rushed through
photographing it. I also noticed how fast the golden light
was disappearing. So I didn't have much
time to style my scene, but that's okay because the dish looked beautiful on its own. I also tried
photographing it using the telephoto lens for
an extreme close up. And here's the result.
The golden light created a sense of
warmth and comfort. The warm tones beautifully highlighted the
textures of the food. Bringing out the details
in a way that made the ingredients feel
almost touchable and real. But what I love most about the golden glow is how it can
evoke a sense of nostalgia, reminding me of late
summer evenings. This light doesn't just enhance the visual appeal of the photos. It adds a heartfelt
emotional layer that makes them
even more special. After a few shots, the golden light faded. But I kept going making the most of the
soft diffused light as it was nearing 6:00 P.M.
With more time on my hands, I follow the steps from earlier, finding the right spot, setting up the shot,
adjusting the angle, framing the shot, considering
composition and styling, adjusting for lighting, and
then capturing the moment. Here are the delicious
photos I managed to capture. I also tried a poor shot using
the iPhones live feature, but the sauce was too
thick for it to work well. Even so, I really enjoyed seeing the difference that
just 30 minutes of natural light can make. Look at how this dish
appears at 5:30 P.M. Compared to 6:00 P.M. Amazing. The quality
and color of light can change dramatically
based on the time of day. And again, here are my favorite photos from
this outdoor soot. Let's compare them
with the indoor shots where I used window light mixed with the restaurant's artificial lighting
and colored walls. Outdoors, we capture the
dish under scattered, but indirect sunlight, avoiding any color casts from walls
or artificial light. For me, they're all beautiful in their own light and tell
different stories and I really enjoy the process and
learn so much about how natural lighting behaves
indoors and outdoors. By sharing these examples, I hope you gain an
understanding of how natural light interacts
in different settings. Indoors, natural light
is often limited and influenced by
factors like room size, window placement, and obstacles that diffuse or block the light. The quality and intensity of indoor natural light can also
vary with the time of day. Room orientation and
surrounding architecture, including wall color. Despite challenges, though,
we found creative solutions showcasing how
troubleshooting skills can elevate your photography, even with just an iPhone
and natural light. I hope that was enjoyable and insightful. In the next lesson. I'll share a quick
demo on editing the photos from this
session. See you there.
11. Bonus Demo: Quick Editing in the Photos App: Photo editing is a crucial
step in refining and enhancing your food photos to achieve a polished and
professional look. Whether adjusting colors,
enhancing contrasts, or fine tuning details, the right editing
techniques can transform your photos from dull to
delicious. Here's proof. Check out the before and after photo from our earlier demo. Quite a difference, isn't it? Don't worry, you
don't need to be super tech savvy
to achieve this. I did it with just
a few clicks and using the edit button in photos. So yes, you can edit your
photos using the built in editing functions in the
photos app on your iPhone. You can definitely opt for a third party app like
Lightroom for Mobile, SEO, Snap seen dark rum. For this demo though, since we're keeping
things simple, I will be maximizing
the built in editing functions
in the photos app. So let's get started. So I'm currently in the
photos app on my iPhone, and here are the photos
that I took earlier. So we are going to edit one of these photos so that I
can show you that you can improve your photos with just a few clicks
and using the built in editing feature
on your iPhone. So let me just randomly
choose this one. All right. As you can see, it's a
decent looking photo, but let's see what
happens when we add a bit of editing
and polishing to it. So let's just press
the edit button. So we have different
options here. We will focus on the adjust
button at the bottom. You also have filters here, but it's like a preset. Of course, you can
experiment with these presets or the filters. But for this demo, let's stick with original
and adjust it manually. So let's start with exposure. So I'm happy with the
exposure of this image, but we can just add
a bit of brightness. So five, so we can
still play with the other settings here
for the brilliant, so it makes it more vibrant. So let's try to add 15. For the highlights,
let's play around and see if adding more or
showing more details is better. For me when I remove
the highlight, sometimes it reveals
more of the details. But if I add highlights, then it brightens up the
image, as you can see. So I will choose the details. So I will remove the highlights for the
shadows, let's see. I think adding more
shadows just a little bit looks better for me because it looks more
contrast, speaking of contrast. Let's add 15 for the contrast
and for the brightness. A bit. The black point is
the blacks in the photo. I want the effect of the
black point on the table, so I'm setting it 215. For the saturation, it
will saturate the colors, but all of the colors
in your photos, a bit. But for the vibrans
we can set it to 20 to really boost the
colors on this photo. For the warmth, since I think it's still
the golden hours when I shot this photo, so we can improve or increase the warmth too match our
golden tones in the image. The tint, you can set it to
greenish tint or reddish. But I'll just set
it to zero because I'm happy with the white balance on this photo and I
really want to show warmth instead of the tints. For the sharpness, yes, let's add a bit of
sharpness and definition. I just play around
with five, ten, 15. So don't go crazy with
your sliders because it will look unreal
or unnatural. So that's the trick there. Play around with five, ten, 15 and see which one looks
better on your photos. Of course, we want
noise reduction. Maybe 15. And yes, to vignetting, as you can see
white vignette and Blane. I think black vignette
fits this photo perfectly. And let's see our
before and after. Here's the original and
here's the edited one. S. It's more vibrant and it looks more touchable,
tangible and real. The colors are more alive. For me, it's a better
looking photo. This one, the original
one looks a bit flat, even though we used side lighting and
it's the golden hour. So this is why applying even just a bit of editing can do wonders to
your food photos. Oh, and I almost forgot. You can also crop your photos using the built in
editing function. So if you don't like the
dried flowers at the back, you can just remove it, and
let's focus on the dish. Again, here's are before
and after comparison. Let me share more
before and after photos from our demo earlier. It's amazing what you can achieve with just an
iPhone, isn't it? I hope that this has
gotten you excited about the potential of this
small yet powerful device. Let it inspire you to capture more food photos that share
your experiences and stories. Your iPhone is more
than capable of being your camera and tool to kickstart your food
photography journey. In the next video, we'll
wrap up this class, so I'll see you there.
12. Final Tip: Wow, congratulations on
completing this class. I hope my experiences with natural light and
iPhone photography have inspired and motivated you to capture delicious photos
using your iPhone. Remember, it's not
about the gear. It's about who's
behind the camera. And that's you.
Creative and amazing. So go ahead and dive in. Don't forget I have my
class project guide to assist you along the way. Whether your photos are
finished or a work in progress, please share them with us. I love to see them,
offer feedback, and support your journey. If you have any questions, feel free to use
the discussion tab. I'm here to provide clarity and support as you practice
and experiment. Whether you're facing challenges or celebrating
achievements. I'm here to guide you towards
continuous improvement. And as we wrap up, here's a final tip. Once you've found the
best lighting setup using your iPhone
and natural light, resist the urge to photograph on autopilot with the
same setup every time. Embrace experimentation and vary your lighting to achieve
different effects. Simple adjustments like
changing your position or camera angle can drastically
transform your photos. That's it for me. Thank you, sincerely for choosing this
class to delve into iPhone, food photography, and
natural lighting. Your feedback matters, so
please please consider leaving a review to assist
other students and shape feature classes. If you're eager to
explore more photography, especially iPhone photography,
hit that follow button to stay updated on my
latest classes and gives. Explore my teacher
profile for more in the classes on
food photography. And if you're sharing your
class project on Instagram, you can tag me at Russell
ene and Skillshare. I'm so excited to see your
mouth watering creations. See you in my other
classes and bye for now.
 Rose Nene, Photographer & Videographer