Transcripts
1. Class Introduction: Have you ever looked back on
a family outing and thought, I wish I had captured
that moment, the little laughs,
the shared kneels, the silly adventures. Those are the moments
we hold onto forever. But what if you could do more
than just remember them? What if you could relive
them through beautiful, heartfelt videos? Hi, I'm Rose. I'm a mom, videographer, and skill share top teacher, and I'm here to help you
turn everyday family moments into meaningful videos that you'll treasure
for years to come. Whether it's a
spontaneous day at the park or a cozy
evening at home, I'll show you how to capture the magic using
just your iPhone. This class is designed
for beginners, even if you've never filmed
or edited a video before. You don't need fancy equipment, just your phone and the desire to tell
your family's story. And don't worry, this isn't about getting every
shot perfect. It's about capturing the love, joy, and connection
in the moment. In this class, I'll
walk you through simple techniques for filming
natural candid moments, easy ways to make your
shots look cinematic, and a beginner friendly approach to editing that
brings your footage together into a short
but meaningful story to give you an idea
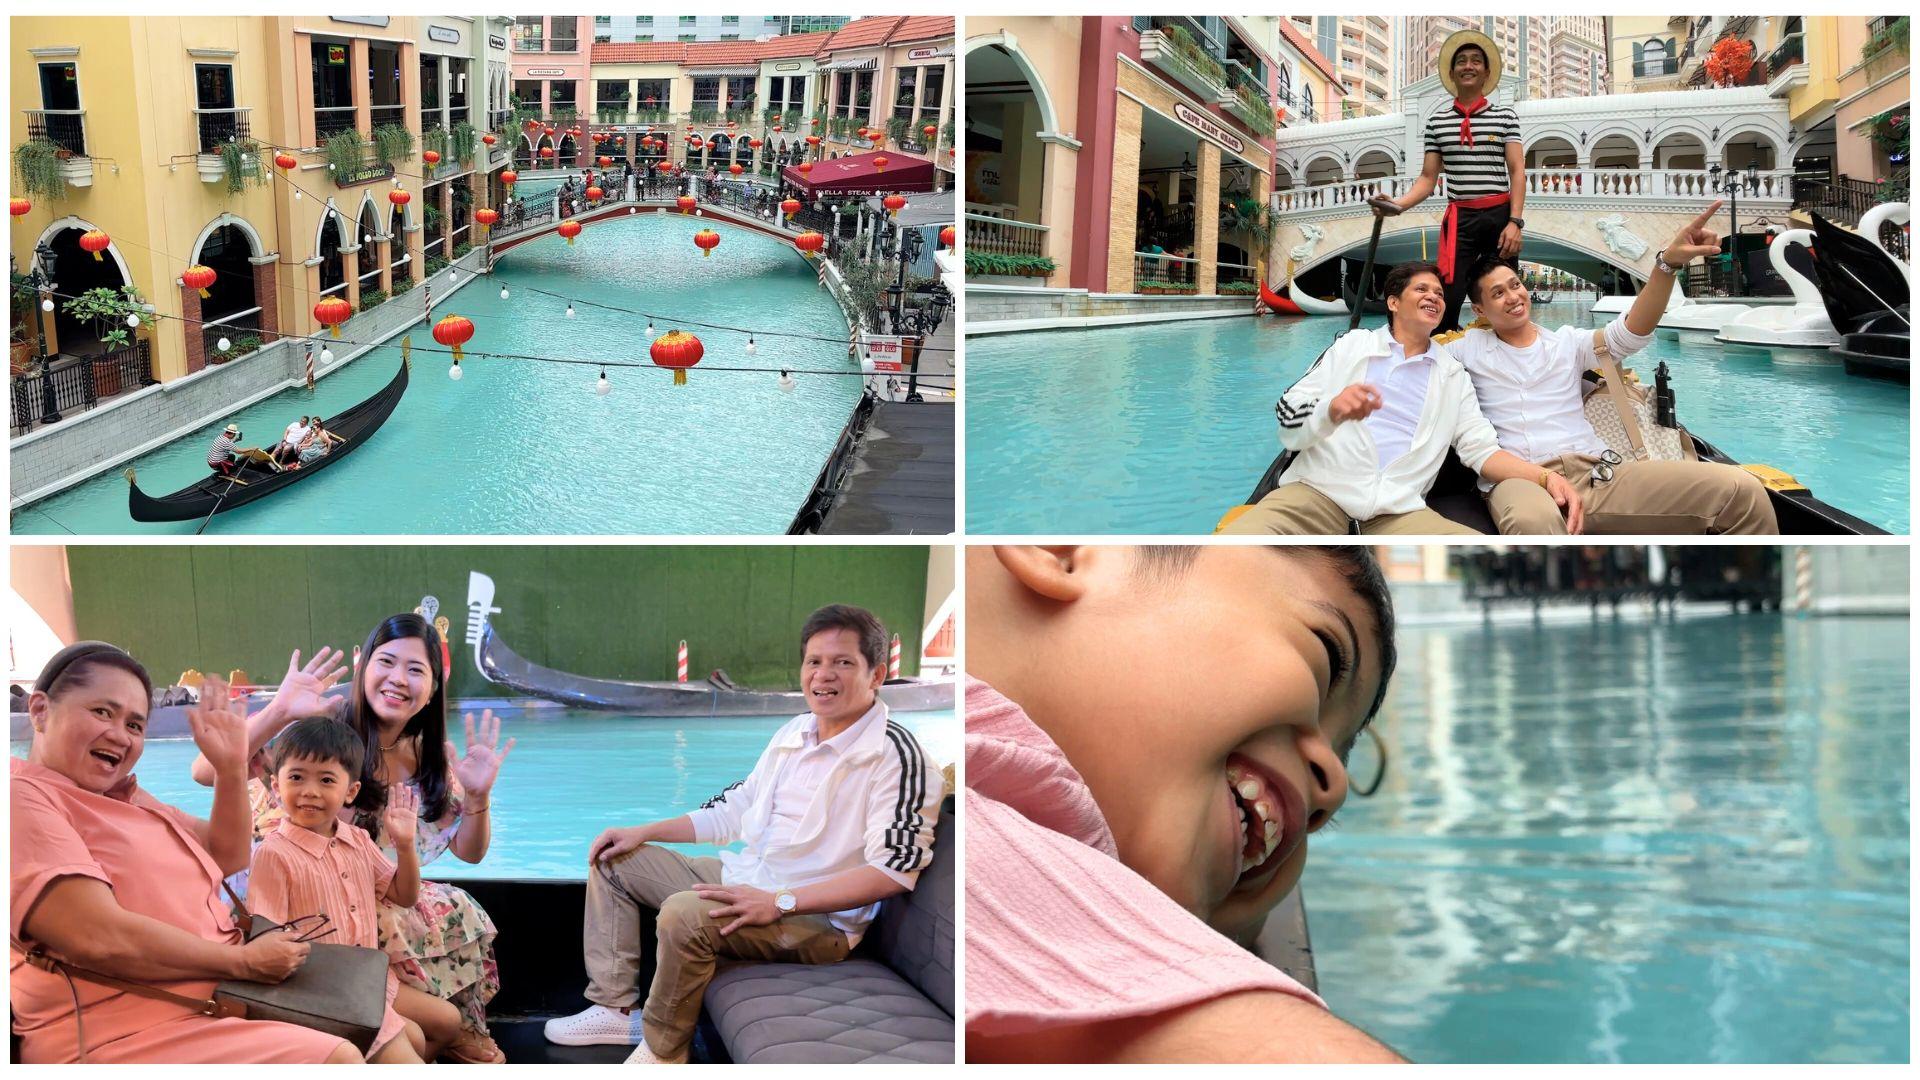
of what's possible. Let me share a personal example. My very own class project. Recently, my family and I took a gondola ride at the Venice Grand Canal Mall
here in the Philippines. It felt like a little
milestone for us, something we never imagined we'd get to experience together. What's the best way to keep that memory alive through video? Photos are wonderful, but videos bring the
moment back to life. They capture the
laughter, the excitement, and the little in between moments we might
otherwise forget. For me, filming isn't just about creating something
to share online. It's about preserving
the little things, my son's wide eyed wonder, our shared laughter and those unplanned silly moments that
make life so meaningful. That's exactly what you'll
be creating in this class. A short, heartfelt video of
a special family moment. By the end of the
class, you'll have a one to two minute
video that brings your family's
memories to life in a way that feels
real and meaningful. Grab your iPhone, bring
your unique perspective, and let's get started. I can't wait to see the
beautiful stories you'll create.
2. Why Your Family Moments Matter More Than Perfection: Welcome to class. I am
so glad you're here taking the first step toward capturing
your family moments. You are now just a
few steps away from creating your very
own time capsules, videos filled with love, laughter and memories that you and your family
can cherish forever. But before we dive in, let's take the pressure off. If you've ever felt
like your moments are not perfect enough to be
filmed, let me tell you this. Your family moments deserve to be captured just as they are. One evening my family and I
sat down to watch a movie. After what felt like an
eternity of scrolling through options and not
agreeing on a single one, we gave up and
decided to just watch some of our old family
videos instead. At first, we thought we'd
just watch a couple of clips. But before we knew it,
we're completely immersed, laughing, reminiscing
and reliving moments we had almost forgotten. Some of the videos were blurry, some shaky and delighting,
far from perfect. But none of that mattered. Because the best part,
my son turned to me, eyes wide with
excitement and said, Mom, I remember that day. In that moment, I realized
something powerful. We don't see the imperfections. We see the love, the laughter, and the joy frozen in time. The best family
videos are not about flawless shots or
cinematic perfection. They're about preserving
the real raw, beautiful moments that make
up our everyday lives. The ones where your kids
are being their silly, unfiltered selves, the ones where life is happening
exactly as it is. So here's my challenge to you. Let go of perfection. Instead of worrying about the right shot, just
start capturing, focus on the emotions, the interactions, and the story unfolding in front of you. Now in the next lesson, I'll show you how to
make the most out of your iPhone settings
and introduce a few simple tools that
can enhance your videos. You'll be surprised at how small tweaks can
elevate your footage while still keeping
the heart and soul of your family
memories intact. See you in the next lesson.
3. iPhone Settings & Essential Gear for Better Family Videos: Before we start filming, let's take a few minutes to
optimize your iPhone settings and explore a few
simple tools that can take your videos
to the next level. The best part, you don't need expensive gear or
complicated setups. Your iPhone already has
everything you need. The first thing we're
going to do is set up your video resolution
and frame rate for the best results. So go to settings,
camera, record video. Here's a simple breakdown
of the settings. Four k at 30 FPS is the perfect balance of
sharpness and smooth motion. It's great for high
quality everyday videos. 60 FPS is best for capturing fast moving moments like
kids playing or running. It makes motion super smooth, but takes up more storage. Next is 24 FPS. It creates a soft
cinematic look, and this is the frame
rate used in movies for a natural storytelling feel. For everyday family videos, four K at 30 FPS is ideal. It gives you high
quality footage without taking up
too much space. If your iPhone doesn't
support four K, ten ATP at 30 FPS is
still a great option. Next, let's enable HDR video to improve color
balance and detail. Again, going back to settings, camera and record video. In here, make sure HDR
video is turned on. HDR helps capture both bright
and dark areas beautifully, which is especially
useful when filming outdoors where lighting
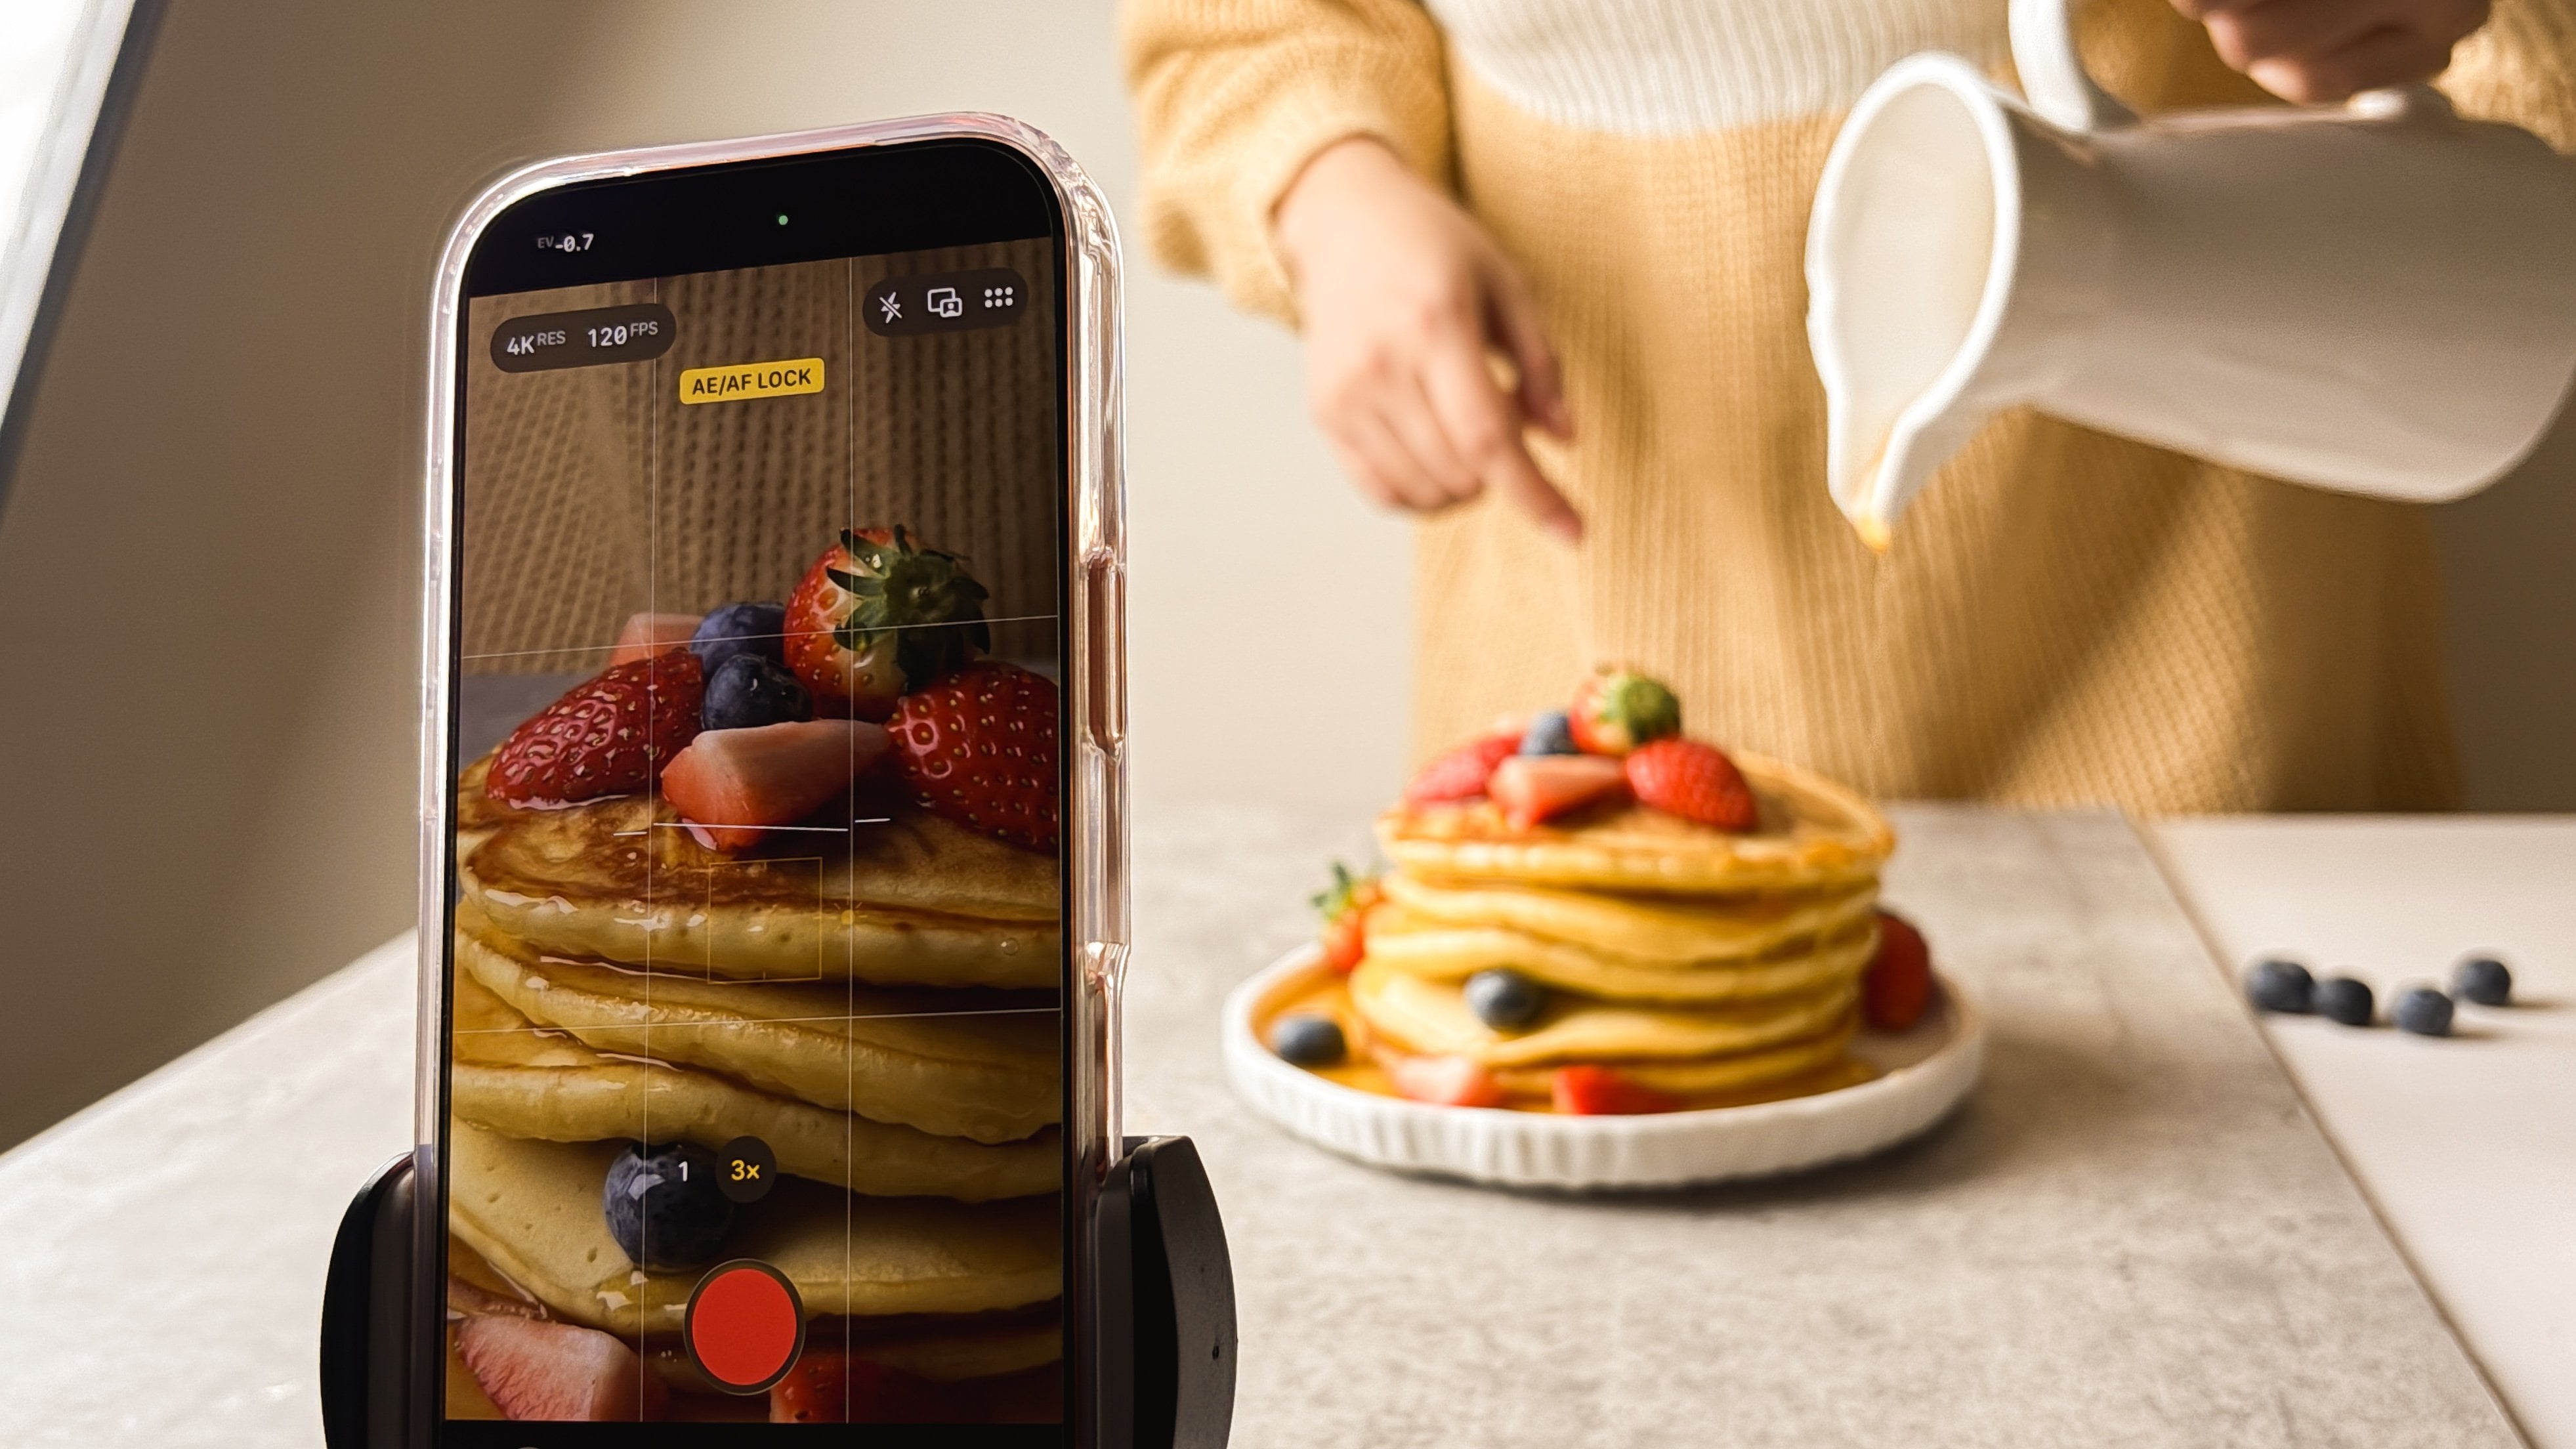
conditions can vary. Your iPhone camera automatically adjusts focus and brightness. But this can sometimes cause flickering or unwanted
changes mid shot. So to prevent this, first open the camera app and
switch to video mode. Then tap and hold
on your subject until AEAF lock appears. Finally, adjust brightness by sliding your finger up
or down on the screen. This small tweak instantly
improves consistency and makes your videos look
more polished and stable. To help frame your shots like
a pro enable grid lines. Going back to
settings and camera, in here, you can switch on grid. This overlays a three by
three grid on your screen, helping you compose shots
using the rule of thirds, a technique filmmakers use to create balanced, visually
appealing frames. More on that later. Shaky
footage can be distracting, but you don't need expensive
stabilizers to fix it. Here's how to get smoother
shots using your iPhone. Number one, handheld
stability techniques. Hold your iPhone with both hands and tuck your elbows
close to your body. If you're walking while
filming, take slow, steady steps to avoid
sudden movements. Number two, using a
tripod or phone stand. A small, flexible
tripod is lightweight, budget friendly, and perfect
for hands free filming. It's great when you
want to set up a shot, record yourself, or
film a family activity. If you don't have a tripod, prop your phone against
a water bottle. A book or coffee mug, anything that keeps it steady. Number three is optional and is best for a next level upgrade, mobile or phone gimbals. If your family is
always on the go and you love creating dynamic
shots while moving, a gimble can give you that
smooth, cinematic feel. Lighting can take an
ordinary clip and make it feel warm, cinematic, and alive. And the best part, you don't
need expensive equipment. Just paying attention
to light can completely transform
your videos. The easiest way to get great lighting is to
find soft natural light. Standing by a window or
filming during golden hour, early morning, or late afternoon gives you that beautiful
flattering glow. Midday light can be a bit
harsh creating strong shadows, but a little shade
or cloud cover can soften everything
beautifully. For example, when we went
on our gondola ride, we were completely
surrounded by natural light. At first, the sun was harsh casting strong
shadows on our faces. But then the clouds rolled
in and softened everything, making the scene look so dreamy. That's the magic
of natural light. It changes the
mood of your video effortlessly. It's
completely free. Another thing to think about is matching the lighting to
the story you're telling. If the moment feels
warm and heartfelt, soft warm light will
enhance that feeling. Like when we were
playing at sunset, the golden light made the
scene feel nostalgic. If you're indoors,
you can create that same warmth
with cozy lighting. For example, when we tried to film our night
routine for YouTube, I turned off all
the bright lights and left only the
fairy lights on, which gave the scene a
really intimate vibe. On the other hand, if you're capturing adventure
and excitement, bright daylight brings
energy to your video. Before hitting record,
do a quick check. Make sure to clean your lens. Dust and fingerprints can make
your footage look blurry. Next is to check your storage. Four K video takes up space, so make sure you
have enough room. Last but not the least, turn on, do not disturb. This prevents notifications from interrupting
your recording. Now it's your turn to put
everything into action. Open your camera app, adjust your settings, and test filming with a steady shot. Try locking focus,
adjusting brightness, or experimenting with
different lighting setups. Observe how these small tweaks instantly improve your footage. Once you're done and your
iPhone is fully optimized, let's move on to the fun part, capturing your family
moments in action. See you in the next lesson.
4. Look for the Story in Your Day: Now that your iPhone
is ready and you know how to maximize
its potential, you might be wondering,
what's next? How do I get started? Well, the first step is to look for the story in your day. Every family outing, every
quiet moment, every gathering. Each one has its own unique
story waiting to be told. Instead of just
filming random clips, take a moment to ask yourself, what makes today special? Is it the first time you're
doing something together? Is it the small funny
or even chaotic moments that make your family
dynamic so unique? Is it a simple but meaningful tradition
you want to remember? Let me take you back
to January 2020. When we first visited the Venice Grand Canal Mall
here in the Philippines. It was me, my husband, and our eight month old son, my mom and my brother. A dear friend invited us
to spend the day together. We had a wonderful time
exploring the newly opened mall, but reality hit when my friend treated us all
to a fancy restaurant. My husband and I
wanted to contribute, but we simply
couldn't afford it. After lunch, we wandered around and saw the beautiful gondolas. I imagined us riding one and
laughing, making memories. So I asked about the price. And when I heard it, an amount that could cover a
month's worth of groceries, I swallowed hard
and backed away. I told my family,
the lines too long. Anyway. We'll come
back another time. They nodded, but
deep down, I knew. I wasn't saying not now. I was saying, we can't that moment stayed with
me, not just the gondola, but the feeling the
longing, the embarrassment, the quiet promise
I made to myself that one day things
would be different. And now, five years
later, they are. This time, my family didn't
just ride the gondola. We treated them to a
fancy dinner, too. It may not seem like
much to others, but to me, it was a milestone, a full circle moment, proof of the years of work, the struggles, the persistence.
But here's the thing. Your story doesn't have to be that dramatic to be meaningful. I learned this from Matthew
****'s book, Story Worthy. A professional
storyteller, he teaches that we often look for
grand cinematic stories, but the most powerful ones
are often the simplest. One of his most memorable
stories a family dinner, something as ordinary as
sitting at the table became a profound moment of reflection
about childhood hunger. It worked because it
was real and relatable. Same applies to
your family videos. You don't need an
extravagant event or an exotic trip to make
your videos meaningful. The beauty is in the
everyday moments. The giggles before bedtime, the way your child lights up when they see their
favorite toy, the quiet moments
with your partner, drinking coffee or tea together, the chaos, the mess, the silly dance offs
in the living room. These are the moments
you'll want to remember. Before you hit record, think about the story
you want to tell. Is it the laughter,
the interactions, the simple joy of
being together? No need to overthink it. Trust me, those little moments
are exactly what matter. It's the warmth in
your child's hug, the way your partner looks
at you across the room, the joy and chaos
mixed together. These are the stories
worth telling, and they don't have
to be complicated. In the next lesson, I'll
guide you step by step on how to see through
a videographer's eye, so you can capture moments
in a way that feels natural, effortless, and
beautifully real.
5. Learn to See Life Through a Videographer’s Eye: Have you ever watched a beautifully filmed
video and thought, Why don't my videos
look like that? Maybe your footage
feels a little flat, a bit random or just
doesn't capture the moment the way you
remember it. I get it. For the longest time,
my family videos looked exactly like that, shaky and focused and honestly
a little boring to watch. The reason I was filming like a tourist. You
know what I mean? Quick pan everywhere shots, zooming in and out
without purpose and long unbroken takes
that lose their impact. We've all been there, right?
But here's the good news. The secret to instantly
better videos isn't about fancy cameras
or complicated editing. It's about how you
frame your shots. To make your videos more
cinematic and engaging, all you need to do is to focus on three simple shot types, wide, medium and close ups. Wide shots set the stage and show where the scene
is taking place. Medium shots add context and bring you closer
to the action. Close ups reveal
details and emotions, making the moment feel
personal and immersive. This is exactly how we're
going to approach your videos. Start with a white
shot to set the scene, like in our gondola ride, where I film the beautiful canal to show the surroundings. Then add medium shots
to capture context, like my family enjoying
the ride in the gondola. Finally, don't forget
those close ups for the details, the
gondolier paddling, the smiles on my family's faces, and those little moments that
make the memory come alive. When I look back at
my old family videos, I noticed that they were
mostly white shots. I thought I needed to
capture the entire location, the scenery, the
landmarks, the experience. But here's what I learned. If you rely too
much on wide shots, your videos can feel distant. People might admire the scenery, but they won't feel
connected to the moment. So to truly immerse
your audience in the memory, you need variety. Wide shots are great
for setting the stage, but it's the medium and close up shots that build
emotional connection. Think of it like storytelling. Wide shots are
your introduction. Medium shots are the
heart of the story. Close ups capture the emotions that make it unforgettable. Here's a fun exercise
to train your eye. The next time you watch a movie or a favorite Netflix show, pay attention to how
different shots are used. Notice how white shots introduce a new location or
transition between scenes. See how medium and close
up shots are used to bring you closer to the
emotions of the characters. Once you start
recognizing this pattern, you'll never see videos
the same way again. Now, it's your turn. In your next video,
experiment with mixing wide, medium and close up shots
like ingredients in a recipe. This small adjustment can
transform your videos, making them more vibrant, engaging, and full of life. In the next lesson, we'll
dive into the heart of every great video. Authenticity. I'll show you how to capture moments in a way that feels raw, real and meaningful.
See you there.
6. Let’s Add Emotion! Capture Candid Moments: The best moments aren't stage. They're real raw and unfiltered. For example, this
video of us cracking jokes after dinner.
Nothing was planned. I simply let the camera roll while we were
enjoying ourselves. Before my husband and I
became online entrepreneurs, we were wedding videographers. Our love for videography started with our own
wedding journey. Back in 2015, after
we got engaged, we searched tirelessly for
the perfect videographer. Let me tell you,
it was not easy. We attended bridal fairs, watched endless wedding films, and noticed one common issue. Many videos focus too much
on flashy transitions, dramatic effects,
and staged moments. They looked cinematic,
but they often missed what truly mattered
the raw emotions. Couples aren't actors and
weddings are not movie sets. The magic isn't in the effects. It's in the little moments, the unscripted laughter, the
happy tears, the real love. Thankfully, we found
a videographer who captured moments exactly
how we envisioned, natural, emotional,
and timeless. That experience led us
to wedding videography, where we focused on storytelling
rather than trends. And while we're no longer
making wedding films, that same philosophy guides how we capture our family
memories today. Some of the most
beautiful family videos come from moments that
unfold naturally. Here's how we apply this. I set up my phone
on a tripod and let my son jump on the bed
completely in his element, laughing and
playing, no staging, no forced poses, just pure joy. Next is during our gondola ride. My son was mesmerized
by the water. So instead of telling him
to smile for the camera, I just let him
explore and capture this excitement as it happened. These are the moments that
make a video feel alive. They don't need directing, they just need space to unfold. So how do we do this? How can we capture candid
emotional moments? Here are three simple ways. First, be a quiet observer. Let your family be
themselves while you record. Avoid overdirecting
or forcing moments. They'll happen naturally. Next, film the in
between moments, the giggles, the small glances, even the occasional tantrum. These are the little
details that make your video feel
genuine and relatable. Lastly, be patient. Some of the best moments happen when you
least expect them. Keep your camera rolling and let the story unfold on its own. And here's a top tip. Embrace and perfection. It's okay if things
are not perfect. The chaos, the laughter, and even the messiness
are part of your story. These moments are what makes
your video uniquely yours. Candid moments are not about
getting everything right. They're about capturing
the beauty of real life. So let the camera roll, trust the process, and enjoy
the memories as they happen. In the next lesson, we'll
talk about tools that can make your videos look instantly
better. See you there.
7. Composition & Angles: Make Your Shots Stand Out: Now that we've captured those
beautiful candid moments, let's talk about something
that can make them even better composition and
angles. Don't worry. You don't need to be a
professional filmmaker to create stunning
family videos. With just a few simple tricks, you'll be able to
make your shots feel more intentional and
visually engaging. A well composed video
doesn't just look nice. It guides your
viewers attention and makes your moments
feel more meaningful. Now, here are a few
easy composition tips to elevate your shots. First is the rule of thirds. Imagine dividing your screen
into three equal sections, both horizontally
and vertically. Place your subject along one of these lines or at
the intersections. This technique helps
create a balanced, natural look that draws the viewer's eye exactly
where you want it. Next is to keep it clean. A cluttered background can pull focus away
from your subject. If there's too much
going on behind them, try changing your angle, zooming in or repositioning
to simplify the shot. For example, while waiting
for our gondola ride, there were a lot of
people in the background. To keep the focus
on my son and me, I simply zoomed in
the shot during editing to remove
distraction and clutter. Last but not the least is my personal favorite
using leading lines. Look for natural
lines like roads, fences or table edges that guide the viewer's eye
toward your subject. In my gondola ride video, the railings naturally led the viewer's eye straight to us, making the shot feel
more immersive. A small change in
perspective or angle can instantly make a shot
more dynamic and engaging. Here are three ways to
use angles creatively. First is to get on their level. When filming kids or pets, lower your camera
to their eye level. This makes the footage feel
more personal and engaging, bringing the viewer
into their world. Next is a try a bird's eye view. Shooting from above adds
a fun, fresh perspective, perfect for moments like kids
drawing, baking or playing. Finally, go for close ups, capture small details
that tell a bigger story, like a smile mid lave, little hands exploring,
or a shared glance. Close ups makes your videos feel warmer and more personal. Now it's your turn
to try it out. Pick a simple moment
like playtime, cooking together or a walk outside and experiment
with these techniques. Here's your quick checklist. Find a moment to capture, frame your shot with intention, try different angles and
see what works best. Remember, it's not
about perfection. It's about capturing
memories beautifully. A little attention to
composition and angles can completely
transform your videos. In the next lesson,
I'll show you simple but effective
ways to edit your videos so
they feel natural, engaging, and full of
heart. See you there.
8. Easy Editing on Your iPhone: From Clips to Story: Now that you've captured
some beautiful moments, it's time to bring
them together into a meaningful story.
And guess what? You don't need complicated
software or hours of editing. Your iPhone has
everything you need to create a polished
heartwarming video. Editing can feel
overwhelming at first, but I promise it's
simpler than you think. So let's break it
down step by step. Your iPhone comes with iMovie, a powerful and beginner friendly editing app
that makes cutting, arranging and enhancing
your clips effortless. If you're working
with landscape, 16 by nine videos, everything exports perfectly
without any issues. But here's the catch. If you're editing vertical nine by 16 videos for
Instagram reals, TikTok or IG stories, I Movie doesn't allow direct exports in
portrait orientation. Instead, it forces
your video into a landscape 16 by nine format, which means you'll end
up with black bars on the sides and a cropped
video like this. Now, don't worry, there are
workarounds to fix this. The first option is
to manually rotate your video before editing
and after exporting. Just export your video as usual, then open the Photos app. Go to Edit and then crop rotate. And rotate your video back
to portrait nine by 16. Now it's ready to upload or
share without black bars. If you'd rather skip
that extra step, the second option is to
use other editing apps. Capcot, VN Video Editor, and Loom of fusion all support Vertical nine by 16
exports natively, giving you more flexibility
without the hassle. Now for this lesson,
I'll be walking you through editing in e
movie since it's free, easy to use, and available
on most iPhones. I film the demo videos
in portrait mode, but to keep things clear, I'll edit them as is, so you can see how the
black bars appear. Then for the final edit, I'll switch to
Capcot to show you how it looks in true
vertical format. Next is step two,
organize your clips. Before jumping into editing, take a moment to
review your footage. First, select your best clips. Look through your
videos and pick the moments that
tell the best story. Keep it concise because shorter videos are
often more engaging. Next is to trim
unnecessary parts. In eye movie, tap on a clip, then drag the yellow handles to trim out anything
you don't need. Next is to arrange
clips in order. Think of it like
building a story. Start with an establishing shot, then move on to the action. And end with a memorable
closing moment. For this lesson, I'll be editing a fun day at the park playing
with bubbles with my son. A simple yet meaningful memory
that captures movement, joy, and candid moments. Fulft use a similar
everyday moment for your very own class project. Step number three,
enhance your video. Now, let's make your
video flow smoothly and feel polished with
a few simple tweaks. So first is to add transitions. Eye movie automatically
adds basic transitions, but you can customize
them for a smoother feel. The key is to keep it
simple and subtle. Cross dissolves and fades
work best for family videos. Next is to adjust
brightness and colors. If a clip looks too dark, tap the adjustment tool
to tweak brightness, contrast and color balance. Next is to stabilize
shaky footage. Eye Movie has built
in stabilization that can help smooth out
any shaky shots. Next, we also have
speed control. You can slow down a
moment for added emotion or speed up a clip for a
fun time lapse effect. Step four, add music and sound. Audio can completely
transform your video, and here's how to
make the most of it. First is to choose
your background music. I movie comes with
built in music tracks, or you can use
royalty free music from sites like
YouTube's audio library. Next is to adjust volume levels. If dialogue is too quiet, boost the clips of volume. Lower the background
music so it doesn't overpower voices if there's any. Next is to add sound effects. A little extra detail
like laughter, waves or birds chirping can make a moment feel
more immersive. An optional step is
to add captions. Maybe you want to add a title
or captions in your video. This is how you can
do it. First is to use I Movies text feature. Choose from simple, elegant textiles that won't
distract from your footage. Next is to keep it
short and readable. A few words work best. For example, in my video, I have the options to
put bubble playtime at the park or joyful afternoon. Simple yet meaningful. Step six, export and share your video. Once you're happy
with your edit, it's time to save
it and share it. Just tap done in I movie, then select the share icon, save in ten ATP for high quality without
taking up too much space. Now, if you're editing in
Capcot or Luma fusion, tap the export icon and choose ten ATP or four K for
the best quality. Select 30 FPS for standard videos or 60
FPS for smoother motion. Save your video directly to
your Photos app or files. Then share directly
to your family or social media
wherever you want to preserve and relive
these memories. Now let me show you
a quick glimpse of our bubble playtime
at the park video. Now, here's how it
originally looked when I first edited
it in Eye Movie. As you can see,
because my husband shot the clips in portrait mode, Eye Movie automatically added
black bars on the sides. If he had filmed in landscape, this wouldn't have
been an issue. But honestly, this was my fault. I forgot to mention
it to him beforehand. That being said, I am
actually glad this happened because now I can
use it as an example for you. If you love capturing
videos in portrait mode, whether for Instagram reals, TikTok or just to keep your
memories in that format, just be aware that I
movie doesn't support direct portrait exports,
but don't worry. The good news is that there are plenty of other
editing apps both free and paid that work
perfectly for vertical videos. I used one of those apps
to re edit this clip and keep it in its original
nine by 16 format. Here's the final result. See, it's easier than it looks. Family videos don't have to be complicated or overwhelming. The goal is to capture the
heart of your moments. Start with what
you have, focus on telling a story and
don't overthink it. The best videos are
the ones that hold meaning for you.
Now it's your turn. Pick a few clips from your
most recent recordings and try editing a short 32nd video
using the steps we covered, trim and arrange your clips, add simple transitions
and music. Export and watch
your finished video. Editing on an iPhone is great
for quick and easy videos. But sometimes you might want more control and flexibility. That's exactly what I did
for my class project, the Gondola Ride video. In the next lesson,
I'll show you how I edited that footage
using a computer, and I'll share extra
tips on organizing clips and refining the
story even further. See you there.
9. Editing iPhone Footage on a Computer: My Class Project: I hope you're feeling super
inspired after seeing how easy it is to edit
videos right on your iPhone. Isn't it amazing that you can film and edit all in one device? But what if like me, you have big fingers and prefer editing on
a bigger screen, or maybe you want a little
more control over your edits. Don't worry. I got you. As you know, I started out
as a wedding videographer, so I naturally feel more comfortable
editing on a computer. Having a wider view and
precise controls just makes the process smoother
for me, and let's be real. I won't be accidentally tapping the wrong
buttons with my fingers. In this lesson, I'll show you how I edit my class project, the Gondola Ride video using your professional editing
software on a computer. That way, you'll
know how to edit on your iPhone and how to edit iPhone footage on
desktop software for a more immersive experience. If you're thinking,
but I don't have fancy software, don't worry. Some of the best desktop
editing apps are free, starting with I Movie
available on Mac. It's simple and user friendly, just like the iPhone version. Next we have Cap Cut. It's available on
both Windows and Mac. It's great for quick stylish
edits and it's free. Third is the Vinci Resolve. It's a professional level editor with a free version available. Last but not the least is Adobe Premiere Pro,
what I'm using. It's a paid tool with
advanced features. Now, most editing software, whether free or paid
follows the same workflow. Once you learn the basics, you can easily switch
between apps because editing always comes down to
these three simple steps. Organize your clips, trim, and clean them up,
add the magic, music, transitions and text. At first, most desktop editing
apps look intimidating, all black screens and
buttons everywhere. But don't worry, let me
make it less scary for you. No matter which
software you use, the layout is pretty
much the same. Import panel, this is where you bring in your clips,
preview window. Here you can watch and
review your footage. Timeline, this is where
all the magic happens. Here you'll arrange your clips, trim unnecessary parts, add
transitions, music, and text. Now, let me walk you through how I edited our Gondola ride video. Start by gathering all
your footage in one phase. Since I filmed
everything on my phone, I first created an album
to organize my clips. Then I use AirDrop to
transfer them to my Mac Mini. Once they were on my computer, I copied them into
a project folder. Next, I open Adobe Premiere Pro. But again, this process is the same in most
editing software. Then I imported all my
clips into the project. Now it's time to
clean up the footage. The goal is to remove anything repetitive, shaky
or unnecessary. What I did here is I
trimmed out the parts where nothing was happening or where
the clips felt too long. I kept only the best, the most meaningful moments. I also made sure that
the pacing felt natural, not too rushed, but
not too slow as well. I didn't just throw
clips together. I structured them like a story. So here's how I ordered them. First is driving to
the Venice Grand Canal Mall, setting the scene. Next is walking around the
mall, creating anticipation. Next is buying tickets
and waiting for our turn, adding to the experience, and then hopping into the
gondola, the big moment. Then enjoying the ride, capturing emotions and
little interactions. Finally, ending with
happy family photos, wrapping up with a
heartfelt finish. This structure keeps
the viewer engaged and makes the video
feel more intentional. For the transitions, less is more because too many flashy transitions
can be distracting. In my case, I only use the film dissolve transition
to keep things smooth. I only added transitions
where it made sense. For example, during our car ride and arriving to the mall, it symbolizes a long
time difference. So adding a film dissolve
really helped the transition. Next is adding music because it sets the
mood of your video. What I did was use non
copyrighted tracks from YouTube. And pick the one that
matched the calm, joyful vibe of our ride. I adjusted the
volume to make sure the music is not too
loud or too soft. So the last and optional
step is to add minimal text. So in my case, I kept
it to a minimum. So I just added a small
title at the beginning. It says gondola ride,
and I added the date. Remember, your text
should enhance the video, not take attention away
from it. And that's it. Once I followed these steps, the final video felt simple,
polished and meaningful. Editing doesn't have to be overwhelming with
just a few steps, you can turn raw clips
into a beautiful keepsake. Now in the next lesson, I'll show you the
final edited version of our Gondola ride video, my official class
project, see you there.
10. Our Gondola Ride Highlights Video: No
11. How to Save, Share & Preserve Your Memories: You did it. You've planned, filmed and edited a
beautiful family video, one that tells a story, captures emotions, and preserves a special moment in time. But what's next?
How do you save, share and ensure
these memories last? That's exactly what we're
going to cover in this lesson. First, let's make sure your
video is saved properly, so it looks its best no
matter where you watch it. For iPhone editors, for example, I Movie or Capcut
when exporting, choose ten ATP, HD for a great balance between
quality and file size. If your phone allows it and
you want the highest quality, four k at 30 FPS
is a great option. For desktop editors,
premiere Pro, I Movie, or Capcut for desktop. Export settings can be
a little more detailed, but stick with h264 format in ten ADP or four K with a frame rate that
matches your footage. Usually 30 FPS. Next is to double
check your audio, Make sure that the volume
levels are balanced and the music isn't overpowering
voices if there's any. M that's it. You
video is ready to go. A video this special
deserves to be shared. Now, here are a few
ways to do that. So first is with AirDrop
or sending the equi. If you're sharing with family, the easiest way is to use
ARJOp for Apple users, Google Drive or WhatsApp
for QuickSending. You can also upload to
private sharing platforms if you want to keep it within your circle, but
accessible anytime. Consider Google Photos, iCloud
or a private YouTube link. Next is posting on social media. If you want to share it
to a wider audience, upload the Instagram
or Instagram Reel, TikTok or YouTube
shorts to inspire others and relive the
joy over and over again. Lastly, make a family archive, save your video in a
dedicated folder on your computer or
Cloud storage to create a collection of
family memories over time. Sharing your video is one thing, but how do you make sure it
lasts for years to come? Here's what I recommend. First, back it up
in multiple places. Store a copy on your
phone, computer, and an external hard
drive or Cloud service like Google Drive,
Dropbox or ICloud. Next, is to create a
family video playlist. If you upload your videos
to YouTube, even privately, you can create a playlist
of special moments that you and your family can
easily revisit anytime. Third and optional is to print a memory book with QR codes. Some families create
printed photo books with QR codes linking to their videos for
something more tangible. That way, years from now, flipping through
a photo album can also lead to reliving
full videos. Last but not the least, and my absolute favorite is to revisit and rewatch together. Set a tradition maybe once
a year or twice a year, gather as a family
and watch old videos. It's a beautiful way
to reflect on how much has changed while keeping
your memories alive. I know this from
experience because me and my family and extended
family do this a lot, and it's so worth it. Now that you've learned how to save and share your videos, it's time for your
final project. In the next lesson, we'll put everything
together to create a heartfelt family video that your loved ones
will cherish forever. I'll guide you step by step so you can make something
truly meaningful. See you in the next lesson.
12. Your Final Project: Create a Heartfelt Family Video: We've covered everything
from capturing authentic moments to editing your footage into a
meaningful story. Now it's time to bring it all together with your
final project. For this class project, you'll create a one to
two minute family video that highlights a
special moment, whether it's a
simple day at home, a fun outing, or a milestone
worth remembering. The goal is to create something
heartfelt that you and your family can cherish
for years to come. Think about a moment that
holds meaning for you. It doesn't have to
be a big event. Sometimes the smallest moments
make the best memories. It could be a cozy morning
routine with your kids, a playful afternoon at the park, a family dinner
full of laughter, a quiet special bunding moment, a fun adventure or
a weekend getaway. Pick a moment that makes you
smile and start with that. You already know the steps. Now it's time to put
them into action. Gather your clips, select the best moments that
tell your story, trim and arrange, cut out any unnecessary
parts and arrange your clips in a way
that flows naturally. Add music and sound. Choose a track that enhances
the emotion of your video. Keep transitions minimal
and intentional. Last and optional step
is to add minimal text. Include a short title or date to give context. Don't
overthink it. Focus on storytelling,
over perfection. Once you've finished editing, save your video in high quality, then ATT or four K. Then decide how you
want to share it. You can do it privately with
family via Google Drive, AirDrop or a private YouTube
link on social media, via Instagram Reel, Stick Talk or Facebook
to inspire others, or as a part of a
growing family archive, a collection of
cherished memories. Once your video is complete, upload it in the class
project section. I'd love to see
what you create and celebrate these beautiful
moments with you. You can post a screenshot, then copy the link so we can all see it and
give it some love. Feel free to include your experience and
reflections, too. What did you enjoy most
about making this video? How did it feel capturing and preserving a special moment? Or what will you do differently
in your next video? This is just the beginning. Keep capturing, keep
creating and most of all, keep treasuring the
little moments. Next up, I have some final
tips to encourage you to continue documenting
your family's story. Let's wrap up this class
together in the next lesson.
13. Final Thoughts: Wow. You made it to
the final lesson, and I just want to take a
moment to celebrate you. Think back to when you
first started this class, maybe you weren't quite sure how to capture family moments, or maybe you felt a
little overwhelmed by the idea of filming and
editing on your iPhone. But look at you now. You're confident, equipped
and ready to create heartfelt videos
that your family will cherish for years to come. You've learned how
to frame your shots, capture authentic
moments, edit with ease. And most importantly,
you've embraced the joy of preserving
your family's story. Again, this is just
the beginning. Your videos will only get
better with practice. I know, because that's
exactly what happened to us. Remember, from shaky,
blurry footage to now editing videos with ease. So keep filming,
keep experimenting and keep creating the
more you document, the more comfortable and
natural it will feel. If you're excited to take your editing skills even further, there are so many amazing
skill share classes by other talented teachers
that dive deep into using Capcot both
on mobile and desktop. I Movie and DaVinci Resolve. Whether you want to master
smooth transitions, creative effects or more advanced
storytelling techniques, I highly recommend
checking them out. Now, I'd love to continue
this journey with you. Follow me here on skill share, so you'll be the first
to know when I publish new classes,
exclusive giveaways, and special
announcements because I'm always working on new ways to help you grow your skills and capture life's
beautiful moments. And if you share
your class project or any family videos
on social media, feel free to tag me so I can see your amazing work
and cheer you on. It brings me so much joy to see my students applying
what they've learned. From the bottom of my heart, thank you for taking
this class with me. It has been an absolute pleasure guiding you through
this journey. Family videos are not
just about recording. They're about reliving love, laughter, and little moments that make life truly special. So here's my final
piece of advice. Don't wait for perfect moments. Capture the imperfect,
the silly, the everyday. It's those little moments
that mean the most. Now, go out there, tell your story,
and keep creating. Happy filming, you got this.
 Rose Nene, Photographer & Videographer