Transcripts
1. Introduction: Hello everyone, Welcome to my comprehensive and
advanced character creation course by pencil. Character design
tutorial is essential for those who want to work in
the field of illustration, animation, comics, cartoons,
and even computer games. In this course, I'll
teach you what ever you need to enter the world
of character designing. In this course, you'll
be taught how to create new characters by drawing unconventional forms and shapes. You will learn these
things in this course. Familiarity with the necessary
tools and equipment. Unconventional forums
and competence of the head and face. Draw different faces
with a fixed pattern, drawing advanced models of
the human body anatomy. How to create different
hand and foot movements. How to create different
clothes and shoes. Creating a variety of
backgrounds for characters. And finally, practical exercises for
drawing attractive characters that will help you increase your creativity in designing
different characters. I hope you enjoyed this course
and good luck to you all.
2. Introducing the necessary tools and equipment: Hello, my dear friends again. We are here with you. And I'm going to tell you about the tools that you want for our second and advanced course for creating different characters. Exactly like previous course, we need B pencils for creating our primary lines and the beginning of our work. Therefore, if you've made a mistake, we can easily erase the lines that fit that have been created by this. And we would not face any problems in the future. And then for shading and completing our sketch, we need B6 pencil in order to bold the lines that we want or even any shavings that we might have in our work. Okay, in this course, I also want to use my edited a little, obviously because we are in the advanced course and we might create even finer and thinner lines. And of course, in the same time we need more details for our sketches. Therefore, we will need some use of this edit. It point that I want to tell you about etiquette is that when you get your edit, you see here we have a 0.5 and this E8, it also needs this 0.5, exactly like that. It's the tip. And as you can see, they're the same. So be careful when you're getting your edited. Get one of these two as well. We also have different kinds of Ed has like this, which is 0.7. And you should be careful. Again, I say why you're getting your edited. You should definitely pay attention to that. You get the same thing. So you get same and it said and the tip for it. And another thing that I should mention for you is that if you pay attention, we have HB. And the two you see now because we want to get our work better and we went to get it even more advanced. We need this be two of them. Because if you want to use HB, her work will be so pay and it would be so light and it won't have any soul or excitement in it. So I advise you to use this one because your work will get more bold. It will be better, of course. Brand of your edited or the equipment that you use is not data important, but it's better for you to use different brands. Therefore, you can just choose properly and then you can choose easier to see which one is better for you. Which one you're more comfortable with. I'm using this bad, but you can use another one, but just be careful that you get to B2 and it should match your ETA as well. Okay? Like primary course, we need a dev or Acer in order to erase anywhere that we want with so much. Find work and delicacy and without getting extra trash on our work from the eraser. And you can also have some edged eraser and sometimes you might need it. And in this course, because we are going to have some shadings, we are also going to use another tool in addition to them, which is fader. As you can see, we have different sizes of faders here. I advise you again, I suggest you to get the small fader because for this course, it's enough for you. But as you can see, we also have different sizes. We have the big Wanda, medium one to small one. And again, we have different brands for them and it doesn't matter really. It doesn't make that much of a difference. And which ever you get, which one you get. It will be useful for you. So you need faders. And of course, we need a four or A3 paper for creating your work on it. And you need sharpener for your pencils. And you can also get some board for getting it underneath your paper to have a firm place for creating your work. It also has different sizes and you can get whichever you want. And also you can use these kinds of attitudes like the previous course, which have also sharpeners at the end of it. And it's true that except pencils and eraser, if you don't have the other tools, you can still do this course with us. But if you have more complete tools and equipments, your work, we'll just move on faster and better. Again, I say for primary lines we are going to use B pencils. And for creating the details, we will use our edit just to get the details better. And it has another benefit, which is we do not need to use sharpener that much. So I prefer to use the etiquette for detailing my work in order to get it easier and faster to move forward. We do not need any other tool and we can start now.
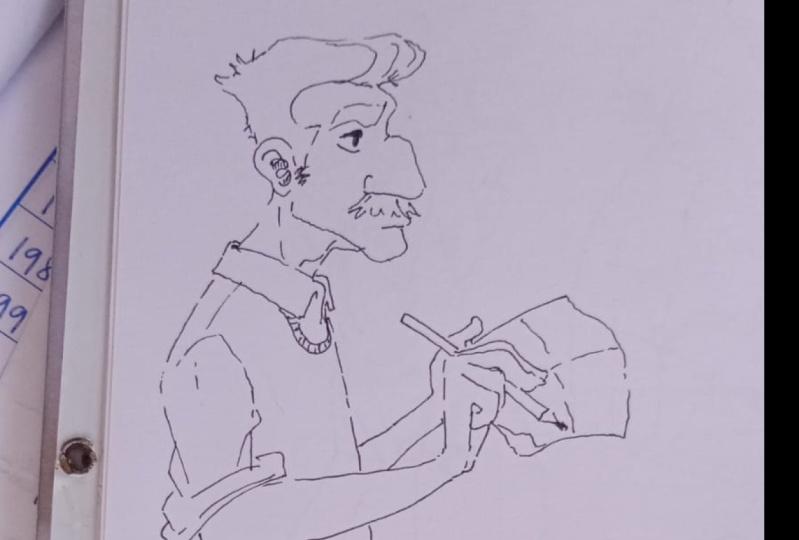
3. Unconventional forms of the Head: Hello again to all of you. We are starting with our advanced course. With different anatomies. We will be starting our work and discourse. Previous work, I mean, our basic and primary course. If you remember, we've taught you complete anatomy for the head and the body. Deanna, to me, which is normal and we can always use it. But in this course, we are going to teach you some unnatural and unusual shapes for the head and self like that. Whereas your anatomy. So we start with one shape and then we continue with the rest of them. For starters, we can help, we can get hill for the triangle shape. So as I said before in primary course, you've learned how to create a normal anatomy for the head. Now you're going to learn how to make it on natural. Let's start creating a triangle we'd around lower angle. As you can see. The bottom angle's knowledge around it's not angular. It's round and such sharp. And then we would add an oval on the top of it. It looks kind of like a glass as you can see. Like a glass. And then for the neck, we would use some simple shapes. For our neck. This is one of the shapes that we can have, which is not really similar to our main shape that we consider for our anatomy always. We can have different shapes for our phase, for our head. And we can even combine two different shapes to create our new head. Unnatural head. For example. We can get help from the circle shape. We can use a circle. And then with an oval, we can continue that with some distance from our circle. And we can use two lines to connect our circle to our overall. And then, as you can see, we've combined two shapes to get our head. And then this would be my character's body. Well, we can even create a big, big circle. And then we can create a smaller circle right next to it. And then after that, we can connect these together. And just like this we would have and neck for our character as well. You can use a cylinder shape, which is the most easiest way to create dynamic, is obviously very popular as it is the easiest. Okay? This is a general shape for our head. And we can even make it a little bit more complete. We did connection of the two circles together and just maybe adding some details to our main lines. Because we want to create our head in a different and unnatural shape. We can even get lines a little bit out of our main lives. I mean, we can and not follow domain lies as we've created, because it should be unnatural. We can go a little wilder and crazier here. Should definitely think outside of the buttocks. And right now I'm just creating the general shape for the heads for you. And then later, I will continue with placing the face components. I just wanted to remind you that we do not have to go exactly on our lines that we've created, on the shapes that they've created. You can just get help from these lines and simpler shapes as your guidelines and then you can even go out of it so you can have a different shape. And as I said, I'm not creating some details in this episode, but later on, I will create the details inside of the face for you. Here we can have a circle. And then inside of our circle, we can have an oval right from inside of it. And then according to our face, who would create deadlines for the body? Something that you should pay attention to, is that when you create a face like this for our character, I mean, when you consider a fat face and fat carry a fat, chubby face for your character. You should definitely consider the rest of your body fat as well because you would have a fat face and a fat body. But as we are working on unnatural shapes, you can also create thin body for a fat face. You can do that. That will be some kind of exaggeration. But right now, our main point and our focus is on the head. So I just created the body into correct proportionate of the head buds. If you want to be creative and you have a special character. Off course, you can create a thin body for this big fat head, but right now I'm just going to create the body as fat so I can have a good proportion. Now, you can connect these two shapes together and then later you can add the details and the parts of the face. The shapes are too much and you can just create infinite different shapes for your head, for your skull, for your jaw. Anything you want, there are lots of shapes and you can, even, as you can see, combine them together. And that's just four-day ahead. And general shape of your head. You can add so many more creative ideas when you're creating the face competence, which I will teach you later. I'm just saying you can create infinite shapes for yourself. Now for my next shape, I'm going to use a small circles. From the sides of these three circles. I would come down. Top and bottom part of my first and last circle would be included in my face, in my face lines. And then I create a cylinder as a neck and the rest of it would be the body. Okay, Now this is another shape for our face. Now we would create some other shapes. I create a small circle and then kind of a bigger circle from inside of it. And after that, I will connect decides of these two circles together. It looks kinda looks like a pair. Here. Our phase looks like a pair. It's going to be funny and whimsical. And as I said before, you can create so many different shapes. And when you are combining the shapes so you can just create so many different sizes right next to each other. For example, I've created a small oval at the top in a vertical position. And then on the lower part I've created a big, big horizontal oval at the bottom of it. And then for the lower part, for the neck. Again a cylinder, a small cylinder, and then I continue to the body. Okay. Now we can come over here and create a circle. And obviously connecting our cylinder to this circle. And then another circle would be placed at the bottom for our characters jaw. So you see, usually at a top part of our face would be our skull, which is usually a circle. And the lower part would be the jaw. This is always true that the top part is the skull and the lower part is the jawed. This is completely always true, even when you are working with unnatural, unusual shapes. But you can just change the symmetrical shapes and different shapes. For our head unless we wanted to. Created very, very simplistic like the left von ridges created all in one place, all in one part. Or we can do it like this. We can create three different parts for our face. Okay? Now we can have our placements for our character's face. We can even use the cylinder that we worked for data, use for our neck. We can work with data and create a head with it. In this shape. Which would be very different. With this practice, your creativity would increase a lot for creating new characters and, and use shapes and your own unique characters. Because when you're practicing on something like this, you are actually preparing your mind for creating something new with different shapes, with unnatural and unusual shape of the head or event. The face competence that you will learn later. And then this is shaved from two different size ovals. One of them smaller, one of them bigger. And then I've connected them all together. The cylinder for the neck and arrest. And okay, and another shape that we can have, which is kind of similar to a usual and normal head. We will create a circle for our skull. And then we would create our draw with sharp angular lines. And then you would create our neck like a cylinder and obviously dead body. Because we can have so many different shapes. And you can even change your normal and usual shapes a little to get that on natural, look for it. You can just think outside of the box in this phase and, and just go very, very creative to create something new. For example, here we can use different circles in different sizes and then connect them all together at last. Just like this. And then we would add the neck and the body. Of course. What else we can do? Another shape that we can create look like this. For example, it can create a rectangle. And then create, we would create an overall and just get through this rectangle and bringing it out. Or we can even create a circle and then add another rectangle to the bottom of our circle. These are due fringe shapes and we can also create so many other different shapes. And for now it is enough.
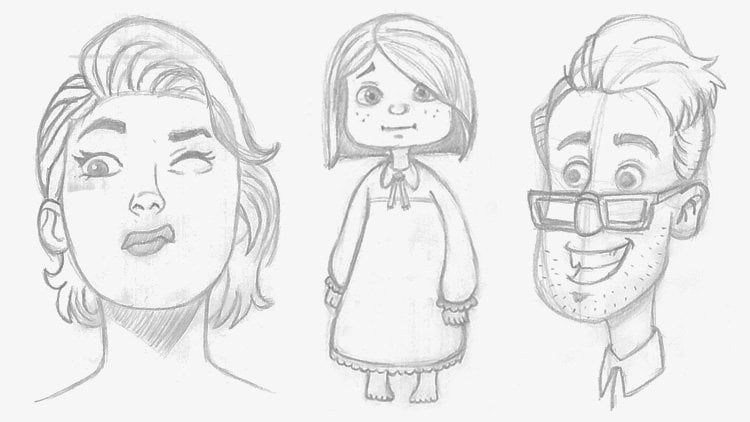
4. Draw Unconventional Facial parts of the Head: Hello to everyone again. Happy to have you here with me now into continuous of our previous TOL kings and explain things that they've created different and unusual shapes for the head. Now, we want to work on their face components and create our whole character. I'm using my edit for this, and I'm going to start on the first shape. All right. As usual, I would devise my face here and I would consider it a front view. So I would draw my main guidelines. Primary guidelines, a line that goes from dissenter. And then I would work on different parts. Now, for this shape, we can consider our face, I mean, our skull in this, overall in this small ball at the top. Or because we are working in an unnatural and unusual way. I would work in the central vine work too. But right now are going to work on the top because we are working unusual and unnatural. So I would create my characters ears in here. It is an unusual start and beginning cell. Consider that you're working in a completely unusual way. You can use very new methods. You can use very new shapes. So it would just look more attractive. Now, on the contrary of my face as volume, I would use very various small Wise. Thank these two. It looks so funny. And then I would create thick eyebrows, thick and big. So cute and funny. This would be the placement of the nose. And here we can have our mouth, which would be wide open, big mouth. And a curved line for the chin. Just to show it has some, it has one. And for the hair and can get different shapes. For this one. I'm choosing this a style which expresses funny. So I can even consider some cheeks for my character, some cheekbones. And as you can see here, we've got our affairs character. Okay? We move on to our second shape. Then our second shape, approximately in S3 faces view notes completely. Now, I would determine the placement of the eyes and ears. Ear. The ear on this side would be seeing less, of course, because it's a three-phase is view. And D are on this side. Opposite of that would be completely insane. In this way, I would create my eyebrow. Then the other one, which would become in which would be obviously smaller as it goes in perspective. Then I would create my eyes. Again. The I on the other side would be a little smaller now too much. And then I would create a nose. Now, for an amount of my character, I would like to create a big mouth. I can create a plenary. I can create an open mouth or a closed bond just smiling. I can even show some teeth. It looks so masculine and strong and on the hair and can create a small portion of it. I mean, it's not necessarily that you would always create a big full hair. No, sometimes just a small amount of it would complete your character. So that was our second character. We move on to the third one, which I believe it's better to be created in a side view and a profile. Okay, now for an a profile, we know that we only see one side of it completely and we don't see the other side at all. So I can create a completely big, big air for it. And then I would put eyes and eyebrows over here. Thick eyebrows would be placed here. I mean, one of them. And I can consider a small eye for it. Sometimes a contrast in your work is what makes it more fun and whimsical, and of course better in creating characters. And then I can create a big nose. You see I'm using the shape data I map that I've created by can also go outside of it. I mean, I can think outside of the box of UDL. I don't have to completely follow all of my shapes and lines. Sometimes I can just get a little bit out of Shaped, of course, a linearly mouth. This is the whole point of this part for you. And the hair would look like this. This is our third character. Now we move on to our next set, which I also consider into front view. And then I would create my primary guidelines. And for this one, I'm going for a small ears. Because up to this point, I've created normal or Big Air's. For this one, I choose different. I want to go with a small ones. And then I would create some eyebrows. And both. This should be created here, two eyebrows. And I will add my character's eyes just right here. Now if you pay attention, none of these characters are looking alike, each other. I mean, each one of them have their own personality, have their own shapes. And because of that unique shapes, a day would have their own unique personality and character. I'm saying basically, weed so many simple shapes. You can create so many different characters with different looks, completely different looks as you can see. For this one, I've created a mile stash, going a bit macho. And then I would create some very, very little hair on him. He's going bald. Male bulk better. So this here would be just this, but just pay attention that when you are creating the hair shape like this, your hair would be completely on your scalp and match it. Don't go over it or under too much. Okay, next character, we can consider it and the side view or in a three phases view. But I want to consider this swan and assigned view set. Because of that, I'm going to create a very, very special shaped ear for it. Kind of an LP look. It looks like in a L Kind of. But still it's very unique. And then I would create the eyebrow forehead facing downwards, coming down. You can even create some shapes for inside of the ear. And this way can also show the air has dimension, it's not flat. And then around i p, then I would go for the nose. Here I also consider some kind of sharp tip, big nose. And at last there would be our character's mouth and lips. And maybe even a bit of it curved in. And then in the rest of that we would have a chain coming a little bit out of the face. I'm loving this profile on a slave and can also give as small shape to the forehead. And this way you can just complete your character. And for the hair, you can create a very simple shape. And here we have the neck, of course. Okay. Now for this one, which looks like a traffic light. So VR that we have three circles. I will consider front view for that of the SLA creating my main guideline. Both of them. And I would play suface. Here. I would create very long eyes, forehead. There are big but they're not so wide, they are more long. Instead of being white. Pop. It kinda looks like an alien or creature her just by creating a highs, but we can just work on it. We can also create the eyebrows is smaller. You can re-size whatever, what ever, your face competence, it doesn't matter. This is completely your taste. It depends totally on you that what kind of character you want to create, a water, the face expressions. And based on them, you can re-size the parts of your face as I did here. For all of my characters. You could even create your face parts and face commas in the top circle. But this time I wanted to create a big face for my character. So after creating the nows, I'll create a mountain, this shape along mouth and teeth. And a tongue would be placed here. Here we go for an IT ears, also, long ears, like the rest of his face. It's two psi. Someone has stretches space right down to the bottom. So everything is more long. Instead of being wide and bake. And that won't be our sixth character. That will be the face. And I can even consider some hair for him. Well, and can go different styles. Will go this fun hair for m, which looks like this. You can create an F for an hour you want. It is your character, your taste and your sign, your signature. So this is this character.
5. Continue training to Draw Unconventional Facial Components: Hello, hello, my dear friends, into continuous of unnatural shapes that we were creating. We are going to continue with the rest of our characters. Okay? Now for this shape, and I'm going to create a division. And then after that, I would place my face here. And I just create a general shape of the head. Just determine it. And obviously I will create my face parts inside of it. Just like what I'm seeing right now. We would also create DI browse. And then we would move on to the nose. And a very, very small mouth. And discrete a very small lip for it. And it looks so whimsical. And of course, I'm going wide underneath his chin so I can show it is a fat face. Now I will create some eyelashes for my eyes. And then I would move on to my character's hair. Obviously. And according to the shape of the head dads we have, I want to create my hair in this shape and in this aside. Now, inside of all of these shapes, you can find a male character or a female character. I mean, with this shape off, with these different shapes of the skulls. And hence, there is no difference that what type of character you want to create, male or female. According to what you've learned into primary course, you can create any type of character that you want. You don't have any limits for creating your characters male or female. Now we would move on to our next shape. I would also consider front view for this shape. Although, you know, I could consider it a three faces view as well. But right now, I'm choosing to create a front view for my character here. In this shape. Create a small lies, small circle eyes. Then I rouse and literary eyebrows, Of course. A small nose. And obviously at big, big mouth. Based on the shape of our head. And I create a tongue and teeth for him as well. And then I would go one's more over my faces shape. To make it look better, bed proportionate. But it still looks natural. Then I would continue with the rest of my work. Now I want to create my characters. Ears big according to the shape that it has. I would consider big ears for him. And then for the hair. I would create this style. It just looks so M-cyclin funnier this way. This is our character for this save shape. And of course I will erase the part that I don't want. I can have a cleaner character here. As I said before, you can create so many whimsical characters here. Alright, let's move on to the next shape. Again. At our next shape is one of the shapes that you can put your face on the top or in the middle. I'd consider it on the top. And even in a front view. Because I want to create a big nose for my character. So I would consider this upper area. And I create an unnatural shape for my ice like this. Then I would consider some eyebrows for him, small eyebrows. And after Dad, I would create a big, big nose for it. Coming all the way down through here. Or I could even consider this nose wider. But I think this feels more proportionate. And then we will consider a linear or a mouth and a chin. That even makes our character more funny. For my character. I can put them in this area which has been carved in like this. Or I could place them on the top of the head. And I would make it longer. For example, I could give my ear this specific shape that I personally think. This way, it looks funnier and more whimsical. And then after that, I would create some hair for him. Definitely. Just like this. Create a funny hair, hairstyle like this. And now we move on to our next character. It is true that it was just a simple pipe like shape, but we can add some more details to it, add some more angles to it. And we can also create some curves in it, going down or coming out. And obviously after that, we can clearly Consider a front view and create the shape of our character in our specific funny way. So I will not create the eyebrows in the same shape, create them differently. Also, I do the same for the eyes. Shapes. You can just test and experiment whatever kind of shapes that u1 for your first phase compartments can go so creative, you can go wild and crazy and create very, very funny faces. Then I create a smirk for him. It looks like is a smirking. And obviously there it goes, the ears. And to create them in this shape. And then for the hair, I went a distance from D, i Rouse, I'm going to create the hair. Kind of a cricket is style yet, uh, so classic. And then I would come back here. And I will create kind of a thick neck for my character. And I would get down to details a little bit more. You can do that after you've created your whole generally. Then you can add some details or not gnats completely your choice. Of course, how much detail you put into this. It would be much more better be considered an X shape in a profile and a side view. So this would be our characters ear. And then I would create the eyebrow. And of course, as you've already passed our primary course, so you should know that you can create so many creative eyes, eyebrows, nose, and stuff. I'm just creating some samples for you here. Just some illustrations as examples that said, you can create so many more creative works. Then we would have the mouth over here, which obviously he's laughing. Not too hard, but still shows like a smile. So do not be afraid of being creative, are going crazy and wild. And at last, we would add the hair for our character. So basically, this was another character. When I am natural shape for the head. Unusual or a natural. Then x1 is approximately normal. I mean, it looks more normal than the others, obviously, as you can see. So I'm not going to work on it because it is too normal. And it can easily do it by yourself. And I would create this swan for you as well. And I would end this episode here. I would also create this one in the side view. I would have the head and the part which is coming out. I would consider it as a nose of my character. Yeah, that's unusual. And on that trial, so he would have a big, big nose or she I mean, it's your choice. And a small mouth. And the contrary of that, beg big eyes. Not as big as the nose, but yet it would have big eyes, big nose, small mouth, and small eyebrows as you can see. And then I would create my characters ear. And as you can see, it is a completely unusual and natural shape for my character. And here he goes. Day hair at last. C was so easy. Go creative, and don't be afraid of making mistakes. Just let go of the limitations in these kinds of works completely. You can even show a little bit of the other eye as well. Just let go and let your hand move freely as much as possible. This was our last character.
6. Face in different directions: Hello, my dear friends again. We are back with a wonderful tutorial for you. In this part. I'm going to show you to MSME of the head in different directions. As we had in our primary course. We have our head in three views. We've also created our head in a front view, side view or three faces view in our previous course, our primary course. So it would be the same here as well. And the shapes are almost the same. We have a circle it draw and a neck. Now, for different parts of the head here, I just wanted to create a head and a little bit, but tilt upward, like your character's looking up and downward. So when our head is going upward, you can see this is the front part of our head and this would the back of our head, which is going down and the front of our face will be going up. And then we can easily show this direction with the shape and the direction of our ear. And then this would be our jaw, which will be showing so much more. And then I move on to the part behind the back, behind the head. Sorry. And we can show that R I don't know, a skin is wrinkled at the back of the head, so we will actually show that he is looking up. So like this, who would have our front part of the neck and the lower part of the phase. And we will create all the parts of the face facing upward. So it would be easy. And just like that, we can show that our head is going up. Now what will happen if our head will be facing down? Again first, we create our skull. And you should consider that this sign, everything is actually facing down all the face part and the back of our head will be turned up for it. So whatever we did for the head looking up, we would come over here and do the same thing in the complete opposite direction like this. So bring here, will come here. And we create the anatomy for the face. And obviously, as I said before, everything is facing down like this. Okay. So this was about the face looking up, which all the face bars would be facing upward. And the other one is looking down, which are all of their face components will be facing down. So if we consider our head going up in this direction, we have to work based on the biggest part that we see. Actually this, in this case, our jaw would be our bigger part, so the other parts should be seen less. So I will create the skull with a very, very smaller jobs. Comparing to usual. I mean, then because the closest thing that we see after the head is a neck, which is create thicker neck. And then like this, you would add this part. We will have the chain and this area is actually underneath the throat. And we can not see them because our faces facing up. We can create our parts of the face, creating these curved lines upward. This is the anatomy of our head, which is looking up in a front view as you can see. We would create the ears like this. So all the parts should contain the fact that our head is facing upward. Even we are, we are creating the eyes or the nose or whatever that we are creating day should be facing upward. Because now I'm just creating the general shape of the face because this is our focus on this tutorial. But you should consider that as well when you're creating your own and whole character. And then we want to create a side view. And obviously most of the face parts would be facing down. So we would have lots of hair. And the face and everything on the face would be facing down. I mean, it would become completely opposite from this part, this character. All of these lines would go in the opposite shape in this part. And then we would have our skull, which would be seen too much. Because we're looking down. Just like this. This is actually our bonus structure and our gel which has been shaped like this for the head facing down and up in different views, of course. Now, another good point is that we should also have the back of the head because we are creating different shapes of the head right now. If you also want to create the back of our head, who would obviously first create our skull. And then we would, maybe some students would consider that because we're looking at the back of the head, the most thing that we can see is the hair. So we should create the ears. And then we should fix the MSME on the back of our head. We should just created not fix it. This would be Deanna to need a basic ad I me for the back of the head. We'll create our ears. Though this time. We can only see the back of the ear. Not all of it from the side, not from the front. So this way. And then we will complete the anatomy of the back of the head when they Harris style here. Because this is the volume of air here that elevate enough. And then we have the neck. So this is our phase from a back view. Now if you want to create the back of the head in a complete view and a front view. How is that going to happen? Of course, again, we start creating the skull. And this would be the job. But the most volume that we are watching is the volume of the back of the neck and the head. And here we go with the ears, which would be placed on both sides and facing the back. And then we would add the hair and create kind of a good Harris psi. And then you can even show some volume in the back of our head. Just so simple lines, simple short lines, I've created a volume here. So we've practiced on our head when it's been, it's been indifferent positions. And then we will just shape the whole thing and we just give them direction. If our face is looking up, looking down in a front view, side view and a three faces view. And you should also pay extra attention to the ears and of course, the face parts. I mean later you can get help from your details, from your phrase parts to show the direction of your head even better. The head and alone is not enough. And as you can see at the back of the head, thing that you see the most is the hairstyle. And this would be the placement of the ears and the out. So it can just see this much of the years from a back view. This was the anatomy of the face and head in different directions.
7. Exaggeration in facial Components: Hello, my dear friends again. We are here with another to Terry L subject. In this session, I'm going to talk about exaggeration in our faces and our characters. So we can see how we can change our faces and our characters, even their personalities with exaggeration in parts of the face. Okay, let's see what can we do for exaggerating our character. For example, as an illustration, we can create the MSME of our head as a long oval. And then after that, we would create a very, very big nose for this character. As you can see, we are actually exaggerating the nose. All right, Now how can we do this? Now how can we actually do that? Because we want to work on this side views so we can show the exaggeration more. We would start our nose right from here, right from the beginning of our oval. We just consider a general shape for our nose, right? And then we come down. We create the neck and year. And of course the chin should be placed here as well. Okay. Now as you can see, it got out of its normal shape. So with exaggerating the nose and some different parts of the head, we've actually created a new shape, a new character. And now we would add the details. I'll do the play determining the placement of the other parts. So when they've considered denotes data big, obviously we would create our eyes a little smaller. And this smaller than usual like this. Now for the eyebrows, we can even get it a little bit out of our work like this. And then after that, we can create the hair. At the top of the head, small hair and the small stein. Ok. Now, for an unknown ZAB we've created, I will just go over an area around its lines and I tried to work on it a little. And then I would definitely go down for my characters live. And because I want to show that my face is long, I create this line, this curved lines, so we can show this volume has been created. And then I would create the lips of my character and his mouth. And down here and I just create it literary mouth. And then we continue down to the chin and to the mic. So as you can see, this is the shape of a character with exaggeration. And we did that by making the nose bigger and changing the placement of some other face components. Now we will just review and work on some other shapes of the exaggeration so you would know better. Okay, for example, I tried to create this not symmetrical shape for the head. And then we can bring our exaggerations into that. Okay, ringo. This can be the shape of our skull and this lower part would be our jaw. And then obviously we can come over here and determined the placement of each part. Create a special ear for my character. And after that, I was create a neck very, very thick. Now, I would place my face competence, but I would determine the placement of my eyebrows. And after that, the nose. You see, I'm just creating some of my parts bigger and the risks of them would be in the normal size. Because if you create all the phase components, big and oversized, just look like you're creating a big face. But if you just resize some parts, for example, you create a big nose or big mouth or big eyes and keep the rest of your work normal or maybe even a little smaller. You can show that exaggeration perfectly. So when you are exaggerating one part, try to create the risks of the face. Normal or with a less exaggeration. That way you can show that personality characteristics and a unique creativity coming out of that exaggeration that you have done. So here, the create the eyes normal. And that's it. So when you keep some parts again, I review and you keep some parts normal and just exaggerate some parts that will be better for you and your character. All right? This is my exaggerated character. And you can even come on top of his head. Make to face a little bit more round. Work on them to make them look better. So it wouldn't be too angular. And this is another exaggerated character, as you can see. Right now, we can come over here and try to use angular shapes with sharp angles. Of course. For example, we can create our face in this. Shape. So just like this, to try to create the circle. And then we would have this circle for the face, for the skull. And then we would create a triangle, an upside down triangle with a very, very sharp angle at the end of it as our jaw. And then we would add the neck. Here would be the placement of the ear. And the thing that you might wander, Where should each face competent go? These are already taught in our primary courses. So if you haven't passed that course yet, you can first watch that and learn where you should put all the phrase competence and you should know the basics. Because if you know the basics and you exaggerate some parts, you can keep the PAR portion of your work correctly. And you can actually, you know, keep that symmetrical shape in your work. And you can show your exaggerations better. But if you don't notice, it, is just might look like you just smushed anything in your work. Just throw some things together to get a shape out of them. Now, as you can see, I've exaggerated even his hair. I brought it out a little and then I moved down and I exaggerated the nose. Honestly. And in fact, the nose is one of the most usual elements for exaggerating. It is very, very easy to exaggerate knows in different shapes for different kinds of characters. And now I worked on the labs and the chin. Of course, the chin might not be this much angular, but as I said before, I'm just exaggerating. So I create a very sharp angle for the chin. And then I go for the nostrils and the eyebrows. So again, I say, if you know the basics, you can easily exaggerate your work, your face competence, and create a unique character. By you should know the basics. You see. And even with exaggerating different parts to my Create new personalities for your character and new traits. And as I said before, nose can be a very, very good tool and element for exaggerating your work. Okay, When create some shapes in the ER. All right. Now we can even add the exaggeration in another way in our work. How can we do that? We can create the main shape for our head like this. And it might look like our character has been squeezed from the top and the bottom is just guy oppressed. So, if you remember, dispose a normal phase that had a circle for the skull and kind of a semi oval for the job. But you see here, we've squeezed our shaped and it looks like our phase is under pressure both from the top and from the bottom. So This is our squeezed shape. So we determined the placement of the hair. And because our character is generally squeezed, we just create all of our face parts in his squeezed shape. I mean, day would usually go wider than usual because when you squeeze something, when you put something under pressure, you can see and it gets wider and wider. So that's what we're doing right now. Here in our face. So again, have the right anatomy for our character. And we can just get it more attractive, more funny, more whimsical. I try my guidelines to create the other eye. And then after that, I would work on the nose. Again, the nose would be completely white because it is obviously under pressure. And as you can see, I've just putting the nose between my eyes to keep that a squeezed shape in my work. Now I will add my character's lips and the mouth. And although it is under a stress and under pressure, you can see it's a smiling. Just getting just creating a different character doesn't mean that it is really under pressure, just physical. And we try to create different shapes and styles. You can even work on the hair is styled a little. So we create the hair cell like this. Now this is our face, which is completely squeezed from the top and a bottom. We can add some more lines for the hair. And then we would have it in this shape and have our character in this shape. Okay? So as you can see that exaggerated character with a squeezing it, with creating a longer, we're creating it in a three phases view or even give it an angular shapes. So we can have so many different exaggerations in our work. We'd resizing things and changing their placement.
8. Different Face Shapes on Oval Head Shape (Draw five faces): Hello, my dear friends. Again, I'm here with you with another tutorial session. In this session, we want to use one shape, one phase. And then with that shape, with the same shape, we want to create different faces. So we have one bonus structure, one shape of the head, and different faces. I'm creating the shape that I want to get different shapes from it, different phases from it. Just creating good hearing the center. And then from the same shape, I would create different phases. Okay, so this would be our main phase, which we are going to get different forms and shapes from them. All right, As you can see, we're continuing down this way. And we are creating multiple heads with the same shape so we can create our different faces on them. Okay? We will later add details on each one of them. Because we have this shape, we are going to create our faces in approximately three faces view. So first, I'm going to create this hairstyle for my first character. Then I would have my eyebrows. And then I would apply the eyes right here. So I would add the eyes. We'll create the line for my nose and there it goes. The other, I be careful if you are creating this in a three-phase as view as well. Consider the perspective of your character. Then I would add the nose. And then. And I will create a cube mustache for my character. And then here it goes to the ER and some textures for the hair. And this is my characters. I would just add some details for the year. And then I have the general shape of my character. And then for these parts below the eyes, I can even add some wrinkles to make them look better. All right, Now we move on to our next shape and cynics head. I would determine the placement of the ear. Then I would determine the general shape and the general style of my character's hair. And then I would determine the placement of other face components, for example, eyebrows and of course the eye. So here we go. We have another different character. Different hair is styled, different eyebrows and eyes, even different ear. And then the next row will be added here. And then here we can have the placement of the nose. And as you can see, I'm just exaggerating my nose or little. Then I would create the other I perfectly and obviously and linear a mouth for my character. And then after that, I'll come over here and I will get rid of this extra part is drawn lines which would go like this. Okay. Now I will move on to the next part. I will determine the placement of the ear. And then I would move on to the rest of my head. Create my characters hairstyle. And then I would come over here and I will add the rest of the things. And as you can see, we can have different kinds of characters. We'd only one shape of the head. You just have to create different face components for them, different sizes, different types and shapes, even different hairstyles. And we can have so many differences between all these faces. Although they have the face basic structure, they can have so many different looks at so many different characteristics. So this is even another shape. We would move on to our next shape. And for this one, I will create a different shape. I want to add the volume of the head. I'm going to create a big hair forum like this. And just with this hairstyle, I'm going to give my character a different characteristics. I'm just going to create another beautiful character. Alright? Then I would come over here and creates almost a soft phase for my character. Because I want to show it's going to have a very kind personality. And I'm just going to show that. See for this character, I'm creating all of the shapes very soft and smooth. For example, in this previous character, everything is so aggressive and wild, and I've used so many angles and sharp angled shapes. In this next one. For all the parts that I'm creating, I'm just using a round shape and I'm trying to. Show that smoothness and softness in my character. And you can use these things that, you know for your character and just shape the character you want. With ofcourse correct parameters. Now for my character, I will create some beard. Just a little too much. And then I would have my hairstyle and I would just complete it. Now I would move on to the next one. As you can see, vid, one, simple shape, how many different characters we can make. It's just a matter of creativity. And trying to work a little more freely. Do not limit yourself and do not be afraid of doing something out of ordinary. And all of these, as you can see, half some different personalities. Now for this character, I'm going to create some thick eyebrows. And then I would consider small eyes for him. And then after that, I would create big nose for him. Just like this. So this would be our character here. Okay, and then I move onto my next shape. This shape has some things to do still. Because you want to just add some details to the hair maybe. And here we have the nose, the mouth, the chin, and our character at last.
9. Continue Different Face Shapes on Oval Head Shape (Draw four more faces): Hello, my dear friends again. We are going to continue with the rest of the shapes that we had. We will continue with the shape of the head data you are creating. And then we would create some more models. We'll finish our work. Okay? Now I would come over here and I tried to create another model and try to determine the ER here. And then for my character, I'm going to create subclasses. So first I'll determine the placement of the nose obviously. And then I would just create my characters. I just add it over here. In this shape. This would be done. All right. Now I would come over here and I would create my characters eyebrows. Here we go with the eyebrows. And then after that, I will create my glasses. So first we get done nose, we get the eyes, we get DI Rouse. Of course we should get the ears and then add last, we would add our glasses to our character to show that nerdy look. Maybe on him. Could be a teacher or professor. And of course the handle of the guys says would go behind the ears. Just like this. All right. This would be my character for here. All right. Then I will move on to my next character. And for the other character, I would create a person with very, very small amount of hair. Maybe kind of an old person. And I would just consider some beard for my character. You can also start your work from anywhere on your face that you want. I mean, it doesn't have any special limitations that you should definitely start from a very specific place. Now, that's completely your work. The best thing to do is to determine the placement, determined the primary placement for each face competence. And then after Dad, you just bring all the face parts together at once. I mean, do them in the same time, just a step-by-step. So if you've created one part and you found out you have a mistake, you can easily create it and edit it. Sorry, you can easily edit and fix it. Because if you don't do something like that, you might get a little bored. And from watching we're doing. It just makes your work look dirty and it's not a good idea to do that. Now I would just come over here and I just had this area. So I can show some details in my work. In this way. Things can be pretty cool. All right. Now I would also add to others shapes, to other heads with the same shape, of course. And then I would finish my work. Okay, now for this shape of our head, we would create another character. So we've understood that with only one shape, you can go creative. You can create things that you haven't done before. You can create different characters with different personalities and shapes. And none of them would look like each other. So don't worry about that aspect. And this can actually add to your creativity. Because a, you are limiting yourself in only one shape of the head. So it will increase your creativity in order to create different characters with different face components for your overall character. So here we go. My character is looking this way, as you can see. And I want to create glasses for this character as well. But although you see, although now two of my characters have Glasses still data look like each other and they look so different. Because of the other measurements and things that I've considered in the risks of my work. For example, they Harris side, the shape of the eye, brows, of course, shape of the nose, and so on. Then I would create it, and then I would create my characters live. And then this would be inside of my year. So here we go. Now we have this look. And after that, I'm going to create a even another one. So you can see even another different character here. Then I would determine the shape of the hair, style of the hair, then the placement of the ear. And after Dad, I would move on to creating my character's face, particularly. And that's how it's done. So once you start with one of them, it would be just it would get just easier and easier for you to move forward and try to do different things and create the eyes DI Rouse and other face competence. For example, in this character, I just stuck the eyebrows on the top of my eyes. I just got them close together. And then I will create and nose for my work. There it goes, the ears. Now this is a mustache that I've chosen for my character, which looks exactly like this. All right. This is the last character that we've created with the same shape of the head. So as you can see, we've created so many different characters with our creativity.
10. Different Face Shapes on Pentagon Head Shape (Draw three faces): Hello, my dear friends again. We are here with another tutorial session. In this session, we are going to create one shape of the head and create different faces and characters on it. Right? We're going to start with this shape. Now I will come over here and create another shape exactly like this. So I'll create some shapes exactly the same as the shape that I first created. So I can show how you can create different faces and different characters with the same shape of the head. For each one of these shapes, we are going to create a complete different character. It would be so exciting. Here we go. All right, I will start this work. For starters. I will create the Harris style for my character. In this shape. I will determine the placement of the ear. All right? And then I also create earrings for my character to give that characters special personality and special appearance. And then after that, I will determine the placement of my face parts. All right. We have the eyebrows, we have the eyes. You know how the process works. Okay, here we go. So in this shape, I will determine the placement of my nose as well. And then after that, I'll move on to the mouth. Even the shape of your mouth will give you some personality. Some face expressions, which is really important in creating a complete character. Okay? So just like this, we have a complete character. I want to move on to my next character and create a different one. Obviously, I determined the placement of the ear. And then of course, I'll move on to the shape of my character's hair. I mean, the Harris site. And all of my characters are in a three phases view. Just so you know better. So then I will determine the placement of the eyebrows, as can be seen here. Then I will create some lines for my characters frowning. And then I would add the other eyebrow and the other side of the face. Then I will create my character's eyes. Like this. He would have his eyes. Okay. At last I create my character's mouth. By determining the placement of his lips. Has some rough shapes in his face. And it looks psi k is a tough character based on the shapes that we gave to the parts of his face and the wrinkles and all the lines and details we add it to that. I mean, the base of the head, that base shape of the head is the same as you can see. But we've created two completely different characters. And I create some lines and details for inside of my characters ear. Then I will create the hair. And this is angry character. All right. Then I'll move on to the next head with the next different one. That will determine the placement of the ear. Then obviously the heresies. And then I would create my characters, eyebrows. And I just create the eyebrows. Well, you shouldn't be afraid of creating too many lines in your work. Do not be afraid of that. Let your hand move freely. This is one of the attractive, this, this is one of the best features of your work. That's you are able to create so many lines in your work in order to find your main lines and emphasize on them. And then at last you can erase the extra lines for yourself. So do not be afraid to create all the main lies from the beginning and do not create so many lines in your work. It's not really important. What you should focus on is your results and the shape that you want to have. In the end. Right? Now I can give more distance between the forehead. And a bottom part of the face. So I've just erased some lines, took the hair a little bit more above. And then I placed the forehead here. And then I would create labs and the nails at the bottom. So again, as you sell, as you've just seen right now, I've erase the lines that I've created. So do not be afraid of creating lies or even making mistakes. Do not be afraid of editing your work At any point of time. If you are not satisfied with VOD you've created, you can easily edit it and get the shapes that you are more satisfied with. So do not be afraid of that and it can even work for your benefit. It can be better for you. So here we go. Okay. And this is the work that I wanted to create. As you can see it adding a little bit of details. I can even make my character look more complete.
11. Continue Different Face Shapes on Pentagon Head Shape (Draw four more faces): Hello again to all of my dear friends. Now we are continuing our session, which was actually creating different faces from one simple shape. Now, we will move on to our next character. Our next character. First, we will start with the Harris style again. So this would be the Harris saw for our next character. Then we determined the placement of the ears. And then you would come here and create inside of the year. After that, we will move on to the eyebrows. And again, we can show some hair volume in here in this corner. And then we will move on to the eyes. In our primary course, we've talked about the placement of different parts of the face. Therefore, we're not going to talk about them anymore in here. So if you want to have more precise information about these, you should watch our primary course, alright, basic course, and then you'll get the information that you're looking for. We move on to denounce. And we completed also we work on the other eye. We complete it as well. And then we'll move to our character's mouth and lips off course. Like this. We will create the lips. And then we will move on to the hair. Because we want to show our hair is cell has some curve and wave. We will use these curved lines to show the US style of the hair. Either its way leads a straight or any other style that we want to show here. Okay. We will darken this area, which will actually show the volume of our hair and this would be our next character. All right. Now we move on to the next one. As you can see, we're continuing to create different faces on one shape of the head. In this one again, we start from the hairstyle. And after that, we will move on to this shape of our face. I will determine the placement of the ear. And then inside of the ear. I'll just create it very easily. And after that, I'll move on to place the other face parts. I will create my character's eyes. Because I want to show that my character is kind of angry. Therefore, I create the eyebrows very close to the eyes to show that anger in his face. And then I use some lines from the site of deface so I can emphasize on the anger. And then I'll move on to work on the other eye. And we also use the use the lines for the anger showing in this side as well. And then we'll move on to the nose. And we also create that. Then with the use of some more lines in the face. Again, we can show our impression more and more. Then we'll create our character's lips. And then we will show the lower lip with a curved line. And then we will show the shape of the face. A little bit more. And then we'll come over here and we add some more details to our face. I'm just adding some beauty marks, so freckles and stuff like this. Just to get this character more completely. So this way we can show the characteristics of him even more. I will darken underneath the nose a little so we can show our nose has some volume. We emphasize on this upper line of the eye, which is also for the eyebrow. Just darken it a little. And then we keep this slide, which we brought down the face for us. And then we erase the extra lines here. And after that, we can even add some details and add some lines here for creating some beard for him. So It's totally on you on how much detail you want to add to your character. And how much do you want it to be complete? Based on the lines or details like beauty marks and stuff like that that you add to your character. You can shape his or her personality and characteristics through that. Except from the general and main shapes. The details would completely affect your idea and your concept for that character. Okay. Then we will move onto our next character. Again. As usual, I start with they hear a style. And then I'll move on to the placement of the ears. And then and I will create the eyebrows. I determined the placement of the nose, as can be seen here. And of course, I create the ICF or that. And then after that I would work on the other eyebrow and the other eye. You see once you've figured out how to create these stuff and details, it's just a matter of practice and creativity. You can create. Infinite different characters with even one shape of the head. If you want to use your creativity in the right way in creating the face parts. I don't know. Choose different shapes for them, different sizes for them, different face expressions for them. These all make you different characters. I want to work on the nose a little bit more. So we can also work on the eyes element more. And then we'll move on to our characters mustache. This one is a bit more masculine. He has a mustache like this. Create some more darkness underneath his mustache. Just to give it a three-dimensional look. And just to show that we have volumes here. And then I will create these shapes inside of the ear. Has you can't see. And then I will create some lines for the hair to show the style of the hair. Just like this. So this is our next character. It's done easily. So easily. Obviously you can work on each character even more than this. Which is, say, this would be enough because rearing tutorial right now. But when you're working on it at home, you can add the details a lot more than this. And as much time as you spend on it, it would look more and more beautiful. And more and more complete with better Personality showing. Again, we start with the hairstyle. We've determined the placement of the eyebrows. And I move on to the eyes. And for this character, I want to create glasses to give it a little bit different shape on the eyes. So this would be the nose. And on top of it we are going to have the glasses. Okay. And I would also create some shapes inside of the ear. And obviously we would create the lines for the hair to show it's assigned. And then just like this, create some earrings for my character. And this is our next character.
12. Draw Faces in Simple Forms: Hello, my dear friends. I'm here again with another tutorial for you. Today. We want to work on different shapes of circle, and obviously triangle and a square. We want to create our characters from this three simple shapes. These are basically some basic and simple geometric shapes, but we are going to use them in order to create different creative characters. This would be their face. I'm going to start with my square and show you how it can be done. So within few minutes, we're going to get a very cute character out of it. Okay, now I'm going to create some Harris sign for my character. And I will continue my work. This would be the Harris style. Then I will create the ears for my character and then move on to the rest of the face. These are my characters, eyebrows. And these are the eyes which I've created in a linear or a shape, just for some variety. And then I move onto my character's nose, which would look like this. And obviously I'm going to create some mustache for him. Just to give it that unique look. Riches From my own creativity. But don't worry, you can easily do this too. And I create a small ellipse for him as well. Mouth, of course. So I consider this for our character. So this is a very, very cute character cartoon, a whimsical character with just a square shape. Now I'm going to create another one for you with the same shape. So you can easily get a handle of it. This time, I'm going to create a female character. See how that works. Sounds. She is going to be key, whimsical and then beautiful in her anyway. She, her, you can see that after the work is done. Alright, my dears see in this shape I gave her Harris style and also the ears. And I will continue detailing my character. First with eyebrows. And I will create some eyelashes for my character. And this would be my character's eyes. And this would be the nose and her lips. Fun. Practicing these staff will actually make you more creative. It will increase your creativity. When you work with just one simple shape and try so many different things on it, different shapes to create different characters. This will definitely improve your creativity. So try to do these practices more and more and don't get tired of them, just let your creativity goal. Why? Okay, now I'm going to create this character with a triangle. Of course. Now I want to create an old man for you. And then I will have my character's hair like this in this way. And then after that, I will come over here and I work on the nose. Create a big nose, and even create a big Mustache forum. A big nose. And a big mustache. Isn't it? His old character, so he needs this. And then I'll work on the eyebrows. With accentuating his eyebrows. We want big eyebrows on him. I'm going to use eyes, which are almost dots. Going to use them. And I will add this just below the eyes and the nostrils. And here we are. We have our old character, brand. And Okay. Now I'll move on and create the next character with our triangle, or simple geometric triangle. And again, this though, I wanted to create a female character, just like what I did with the squares. One male, one female. Gotta do the same in here. You can go different styles in different types of characters with, this is my choice. Yours can be different from mine. So don't worry that you say, because you've done this, we should also do the same thing. No, there are no limits for these kinds of stuff. Then I will create the shape of the nose and the eyes. And after that, I will add my characters eyebrows. And obviously I will add to my character's hair. Just like this ST, this way it would be way more easier and yet creative. So this is our full phase for our female character with a triangle face, based On a triangle face. And after that, we'll move on to the most common one, which is a circle. Now, for our circle, I will determine different parts of actually the placement of different parts of the face competence. And I want my face to look kind of a side view, not too much, just a little spin, twisted and turned a little maybe. So we will have this here, the eyebrows after the hair asylum, the ears, who definitely have the eyebrows. And then I'll have the placement of the eyes. Obviously after that, I'll move on to the nose. And this would be my complete character with a circle based shape of the face and ahead. So this is my character's lips. Then I'll create my second character and the shape of a circle. And I would also create this one in a completely 3 side view. Goes my characters hairstyle. I'm just going to create a pony tail for her. Going to create long hair. Then I will create the ears. And obviously I will determine the placement of the eyebrows and easily create them afterwards. And then move on to my characters I. And in this shape, I just create them into correct position. Of course, according to that, I said at the beginning that my face is in a three faces view. And my character's lips, and maybe even some details inside of the ear. And I will obviously create the Harris style and my character. And also create some hair clips for her. Just to give it that fun look. There isn't any other reason here. So don't get too picky. And this is my next character with, and I've just created these characters with a square, triangle and circle.
13. Anatomy of a Thin and Overweight person: Hello, my dear friends. We are here again. We then another tutorial session. In this session we are going to talk about the anatomy of a thinner person and a person who is a little bit more overweight. For sin and slim person, we start from the face. So we continue this skull and we create the jaw smaller. Actually, we did jaw toward inside and make it more bony. Also from the other side because we want to show that this person is thinner than normal. Unusual because when we want to create a thinner person, that phase should be bony layer, should be more bony than usual situation. So we can also create our neck thinner. And when we get to the shoulders, we can even bring the lines more toward the inside. We can turn them inside and we will create the arms thinner. And you should consider that we can all both reduce the size of the bones and also to meet, I mean, we can change to bone structures and the arms. That would just makes more sense. In this shape, we are creating our character thinner, slimmer. And just like this, we would continue our hand down till we get to the fingers. Hands. With the same size and shape because hands cannot actually be thinner than this. It's just a skin and bones. And then for the chest and stomach, we would definitely try to now reduce the size of the body and how can we do that? We just get closer to the bones of the body to create more muscles. See you like this. I'm creating this curved lines more closer to the bones. Because we want our character to be thinner. Come from both sides toward insight. And you should definitely consider that very ever. We have our bonus structure. We cannot reduce that anymore. For example, if you can see we haven't went down in this area. But later, we can do this for departs, which are not just loans. We can just go a little bit further inside. And just like that, we can show that if the legs and the feet thinner. And then again, for the legs, we should show that the fingers would not actually gets thinner than this and we create them down to a normal shape. So again, I'll review that. You should just work on the parts that you can show, which is thinner or fatter. Now, for the person who is a little bit more overweight, again, we're going to start from our head. But this time, on the contrary of our previous sketch, we try to continue the skull and create the jaw bigger than usual AMI, we can bring our lines out. Comparing to the main line of the jaw. Can bring more shriek to your character or whatever you want. These all depends on your own taste. So I'm just telling you the general shapes. Then we create a thicker neck or we can even eliminate the neck and just Strictly connect to head to the body. And then for the person who is a little bit more overweight and big, we start from the shoulders. I mean, we started from the line that we've created originally for the shoulders. We started above it. And then we create our shoulders and create big arms. Now, if you want to show that this bigger person has some muscles to, we would create shape like this. Okay. We've learned how we can make these areas look wider. You will continue your work. And for the chest and the Semitic, the abs, it will be just the same. I would just add some shapes. Just consider that for making our character bigger. And if you want to show that he's a little overweight and fat, you can create the body parts like stomach, part by part layer on top of each layer and just create a fat body. But if you want to create muscles, try not to add too much volume to it and bringing it a little bit toward the bones to show the muscles as we did for the center person. Yet, if you want to create a fat person, as I said before, you can just create a fat body. If putting the meats and stuff on top of each other layer, bi-layer. So let me show it to you to know what I mean exactly. You see a fat person you see on the left side, I've created a person who has big but he has muscles. But on the right side, as you can see, I'm creating a fat person. And I just didn't separate the different muscles from each other. We've just created all in once and I would just created wider. That's it. For the person who is fat, I will create the chest and stomach part like this, like he's meat are coming on top of each other layer by layer. And then you would come here. And you'll use this area to create your stomach. Four here because you want to show that you have some kind of pizza stuff here. You can use these shapes. And for the person who is big yet it has, he has strong muscles. You can just follow the procedure as you did for the thin person. Bringing the lines and little toward the bones and just separate each part from each each muscle. And you can also create more at, I mean, choppier legs and feet like this. And for the legs, you can just continue to feed, you can just continue the same way. You can create the legs normally for muscular person. Again and just add a little bit size to that. Just a little not too much. Because we want to show that our character has some muscles. It can just create the muscles on the lower part of the leg. A better advocate, a good angle. You can show that. So this was May 4, fatter and thinner character. Now we're about to do the same for a female character. And one thing that I should tell you is that you have already learned the sketch and creating the anatomy of a normal person. In our base sake and primary course. So if you haven't pass that, you should definitely go and watch it and pass our primary course first. And then you can come over here and you see how you should create a character, the anatomy, and so on. And here you would be more successful. And to create my female character and just want to create it. So I would only tell you how to create different sizes of characters. Okay? There are some it as not really useful. Because the most important thing is that you can create the upper body part because I show these to upper body part, which is similar, which is so much different from the male characters. The rest of it would be almost similar to the male characters. Now for creating our female character, we would obviously need some press on. And then we would just start in order to create our character or thinner. Obviously as before, we tried to create the head bow Nir, bit more bones. And then we can create a very thin neck for her. And then when we want to show our character thin, going to show a thin character, we can use these lines which exist on the neck and actually between the neck and chest. It's at the bottom of the neck. We can just show it like this. In order to show that the person that we are creating is thin and bony. And then for the arms, we create our character, strong bone structures. And as you can see, we enter some parts. Why we are creating our thin air person and follow some rules. So it can create that person even thinner. Now I will want to curve my lines. I would want to curve my lines towards the inside of the body right from the lower part of the breast. So I tried to fit thinner with bringing the lines from underneath the breast right closer to each other and towards the inside of the body. And then we move on to the wrist, bought and the leg. This is when we want to create a thinner person. Now for a fatter person and person who is bigger, generally, reveal as you will have some kind of overweight or maybe again, she's sports player. So creative phase, chubby. And then we would create a thick neck. And obviously as the following of our previous ones. Who would create a bigger body like this? Now, for the waste and the stomach, what are we going to do? If we want to show that our character is really fat? We would use some fat actually in our sketch and we create, again, I say, layers of body meet on top of each other. Now, we'll go on to create shapes like this. Instead of going simple, we will create a very curved small line in the middle of the stomach. And then we would create these, again, these curved lines to show that this person is really fat. You would have to bring the whole idea to this level. And then you can add the legs. And then you can make them even try beer. So if you continue this procedure, you can definitely have in a fatter person. And if you want to create a woman bigger with muscles, which is not really dawn so much. You can do this in this shape. I'm going to create it on this side so you can see better. So you can come down a little, come toward inside, and then you would go up again on the shoulder. And you can even create some muscles on her, which is so rare that if you want to create a mask and her woman. But in any case, you might have to face it someday in any challenge in front of you. So you have to learn and you will just spring to shoulder a little bit more above and you create the arms. There's no other extra hints that I would tell you sell, Good luck.
14. Body Anatomy from a Back Angle: Hello, my dear friends. We are hearing again. We had another tutorial session for you. And in this session, we're going to talk about DNS me from behind and we want to work on that together. So in order for us to have Diana to me from behind, exactly like what we had in the front view. We are going to create eight heads for our body. Just in order to show the lens of our body. So we will easily create a heads eight circles. And again, I preview that this is so we can get the sizes correctly and we didn't not misplace any of them. All right. These are our bait circles, which are for the length of our body. And we move on to creating our main character. We start from the head and we will come down. One thing that we should consider is that because we are creating our character from the back of the head, we do not have the draw. And we only can see the behind of the head and this circle. So we should pay attention to this. So we will consider a general shape of the circle for behind of our head. And then we will add just like this. And then we will move on to the shoulders. In this shape. For the back of our body. We will consider a general form and shape, the general volume. And then we will add the arms. Consider that because we are looking from the back on our character. We will not create the arms completely. I mean, we would not some parts of the hand because it goes behind our body. So we can see this area from the bank. And we should consider it. Because our point of view is very, very important. So just like this, who would have the rest of the arm and the hand at the end of it. And this part is a darkest part that we can have. They'll become back to the body. And because we are working on the male character, we should definitely consider that our upper body part, our shoulders width, should be bigger and wider comparing to our waste. And you should also pay attention to that. This would be our waste and our bot. And of course we know that because we are working on our character from a back view. We will consider some lines in order to show that we are creating the back of our character. And we are going to show that with deadlines that recreate. So this would be the lower part of our back and deadlines that we create to show the muscles in this area. Then we move on to the legs. We are creating a lag behind. And we should also consider that as well. With deadlines that we create. We will show this more that we're creating our character from a back view from his behind. So the lines, even the smallest lines that we create, can actually show that when we get to the lower part of the leg and into the feet, feet would be shaped like this. And with the bonus structures that we create, you will show this more and more. So this way we can have our character from behind. And then for the head, we can't even show the volume of the hair. And then we would have the back of the ears behind the ears. And also we can create the other hand, like the one that we've already created, the same shape. You should consider some thing. One thing that you should definitely know is that we'll actually churn and twist around all the body can go straight Lee, horizontal. It can be in an angle like this or it can be completely down next to the body, completely vertical. So when you're creating your body, you should pay attention to that the hand is able to turn from the shoulder. In a third almost 360 degrees. We want to move on and create our female character from behind. So. Consider the length of the body as same as we had for the male character. So I'm not going to create those heads again. I'm just going to drag a straight line from that to here. So I would have the correct measurements and the current length of the body. And when we've created to body SRE, when we've created the head, who will come back to the neck? Just one thing that you should pay attention to that as the female characters usually have long hair. Therefore, we might not see the neck and a part of her upper back because they would be covered by the hair. Although because we are creating the basic of the MSME here, we are going to completely create these areas for you to neck and the shoulders, but just said that. So you know, when you're working on the another character, on a complete character, usually the neck and the shoulders are covered by the females hair. So obviously we would create the shoulders of our female character a little bit smaller comparing to the male 1. And then we would come down to the waist. Here we have the chest, which I've just separated, and then the waste and debits area. Okay. And as you already know, a lot of females is beleaguered. Usually the lower body part of the females are bigger. So the upper part would be smaller and the lower part would be bigger and wider. Exactly the opposite for men. We would create the hands, the arms, and the hands, the same way. We can have a general volume shape from behind. And then we'll move on to our character's legs. I'm just going to draw this other line to determine the placement of the knees and the lower part of the legs. So are gonna get half from these lines. And then we will add slower part of the legs underneath Denise. You should pay attention that women's legs, I mean, generally females legs are thinner comparing two legs. And then you should even pay extra attention to this bonus structure to the ankle. And you should just create a very, very small just enough to show that there is a part coming out that will be enough to not overdo it and do not create big shapes for this area. In this shape, we would create the other hand. Guidelines are mainly for that. You can create both sides of your character does same way and you would keep that symmetrical shape in your whole character's body or even your character's face. Too narrowly in your sketching. All right, and now I will come over here and create some shapes and lines for this upper part of our back. And then we have the line for the spine in this shape. And then we can even add some more shapes in here. I mean, we can curve these lines and bring them up a little to show the bot better. 1 that I should tell you about is that for back part. Now for a female characters for there, but one thing that you should consider is that you should actually consider both sides as a circle. Bots in male characters, you should consider this as a square. You see the difference, square root around corners. But anyway, it, it's like their shoulders and this would be the same on their butts. So you can definitely see a difference in this area between the male character and a female character. And this way you can easier, it would be easier for you to remember how you should create your characters. And another thing that I should mention to you is about the Harris style on the head and venue you're creating that you should know. We will have so much here in this back of the head, especially in female characters. So this is our female and male character from a back view and from behind.
15. Anatomy training sitting on a Chair and on the Floor: Hello, hello, my dear friends. We are here again with another tutorial session. And in this session we are going to talk about the anatomy of the character who is sitting on a chair. I want you to tell you, I want to tell you that how is the anatomy of our character when he is sitting somewhere? Okay, first, I'm just going to create a surface for my character to be sit in on. And then I start creating the anatomy for him. So we would definitely consider that when our anatomy is going to sit, the upper body part will be a straight and this would be the bottom area. And the legs would be actually bend and day would be not a straight. After considering that and keeping that in mind. We would want to create the head. Then we'll have the draw, and then the neck, and obviously the shoulders, and also the placement of the hands. Now, as you can see, our characters is sitting and some direction, I mean, towards some direction because I'm creating my legs in this way. I want to show them my character is sitting in this direction and we should definitely consider that and shaping the anatomy. So I will create this area for antibiotics for his butt and then move forward to the legs. Now, because the legs are kinda twisted and bent and date are also on a surface. This lower part would have some squeeze shape because our character is actually sitting. So we will just consider the top of our knees look like ovals. And then we apply the muscles on that. And for the arms, I want to give it this shape that the hands are coming on top of the legs. So I'm going to create them in this direction. So just like this, I determined the direction of my hands because when you're working on a shape like this, which actually needs some work on it. Until your work is done. You should definitely consider that a you should go step-by-step and you would not create all the main worse and the details at the same time. That's not going to help you. So basically first you should create some main shapes. And then after that, then you've became sure that your work is flawless. On its basics, the sizes, the placements are all okay. After that, you can add the details on your work. Like what we're doing right now. That we are moving step by step. And we are notes completing any special volumes. Okay. Now we try to create the hands muscles. And then just like this, we can have upper body. And based on your character, either it's a female or a male is MSME of your character would be different, especially in the upper body. So you should pay attention to that as well. Why you are creating your character? Right now I'm creating my female character, therefore, I create some breasts for her. And as you can see, I've created some thin but beautiful legs. Now I will get my edited and I will add some details and more shapes to my character. I want to start from the head. Okay? So I'm just trying to emphasize and bold make the lines that I need more bold. And I do it on all parts of the body. The head, the neck, shoulders, obviously the arms and the hands. And you can just keep the hands like this right next to each other or even maybe on top of each other just to get a general shape from them. And then I will work on defeat in this shape. Okay? So consider all the shapes of my body in this way. This is a volume and the anatomy of why sitting character. Now, I want to create a character which is sitting on the ground, not on the surface. Now, because we want to show that our character is underground. We will start from the head of our character. Then we will have the jaw. And after that, we will consider the bonus structure for our character. Again, because our character is sitting, the upper body part is straight. And the most new work we're going to do is on the bottom area and the lower body part basically. So because of that, I'm going to start to be afraid of creating lines because it's helping your work a lot. You can get your anatomy very easily and it can even make your work look more attractive. And it will help you to get the correct shapes. Now, because our anatomy is a sitting, our character is sitting. The hands will be in the front of our body. Now for this area, I only create one type of gender because when you get to general procedure, the small differences that should be done, you can just easily do them. Because obviously by now you know the difference between the anatomy of a female character and a male character, for example, the difference between the shoulder with the breast and even the bot area. So right now because my focus is on the new shape of the anatomy which is sitting. I'm only focusing on that and I'm not going to create different genders for you because you can easily change those little differences in your work just to have them in the same size. Now, consider this butt area. And then I would consider how the shape of my characters legs will be. I want my character to be sitting in this position is actually bent his legs and he took them toward inside of his body. So this time I'm going to create the shape of my legs in the shape of two ovals. Then I would have the knees and ankles and one of them would be bigger than the other. This one would be bigger and the other one would be a smaller because one of them is obviously in the front and foot of this leg is facing this way. And the other one will be fading. Facing this way. We just considered a general volume and then we can add the details later on. So just remember, the overall should not be completely equal. Now, I will get my edited and a start from my head to go over the main lines and the lines that I need in my work, and maybe adding some chops and details. Now, all the things that they are creating right now into terms of anatomy. Most of them has been said in the primary course into terms of creating the base of the anatomy in simple MOOC, in simple shapes like a standing. And some of them has been told in this course like moving and sitting that we are talking about it right now. So if you are lacking knowledge in any of these parts, you should definitely go review our primary course and then come back to this one. We can put one hand on top of the other. The other one would go underneath. And again, based on the gender of our character, we will just have some breast or not. We can also see a little part of our, but just the sides of it in the corners. And there is will be behind our hands. Then we would have the volume of the leg, the knee, and a lower part of your like. Okay. We will consider this leg on top and the other one would go below the other behind DR. they're actually again, I say that's why the other leg was bigger. And you should consider that this leg, which is more in behind, you, should show some little part of the upper leg as well. Just in order to show that our legs are not only one-dimensional, day have more dimensions. So I will also create this food which is more behind. Okay? You can also show a little bit of the upper part of the legs volume in here or even some part of the, but just to show the volume of the work and to give it some more dimension. Because this way it will look way more better. Now I will complete the details on the other parts. And these are characters in sitting position in different angles.
16. Line of Action: Hello to all of my dear friends. We are here again with another tutorial session. In this session, we are going to talk about the line of action. What is it, and what's the use of it and what can it do in our character? Alright? Well, the line of action is actually an imaginary line which would help us in a movement, in domain movement of our body. For example, when our body is bent down or is twisted or it's moving this line, the line of action will actually help us to keep our body parts cohesive and we do not lose this size or symmetrical all of our body shapes or its proportions. So first we will create the line and then we will bring the skeleton of the body on that so we would know how it works. First, I will determine the direction that I want to have my body, and then I would create the line of action for it. The line of action actually is starts from the top of the head until our toes. I mean, it ends on our toes. So as you can see, we have just created this imaginary line, which is representer for the movement, the direction of the movement of our body. Now, bring our bodies skeleton structure. On this line. I just only want to show you how you can use this line in creating your characters, especially in movement. Okay? Now I would create my bonus structures of my body or my characters, buddy. Now you can create the direction of the hands in any way you want. They can be in any different pose. Okay? Now, you can see we've created this imaginary line, which is the line of action. And then we brought our bonus structure of the character's body on this line. And we figured out that wherever our line goes, the bonus structure of our body can be placed on that line. For example, I can create another motto for you here. For example, for a person which is bending down, bending over, you can create a line of action in this shape. You see, this is the line that I want to create my body on. Now how am I going to start it? I'm going to assert it in a way that if my head is going to bend down or whether it's facing up, I would just determine its placement. And then I would move on to my skeleton. To my bones. And then after that, I would create the shape of the body easily. Now for keeping my body imbalance. Consider that this is the back of our body. This would be the bot. And it kind of twists. And you can have one of the feet here going up. And the other one can be placed here facing down. And then kel, so create a need vented. So this way you can show the body is falling down. It's bending over. Bending over. Here we'll create one of the hands more free and the other one would be on the other side. We can not see it actually. But right now, I'm just going to create it for you. And you can create it. And while you're doing your primary design, so you would know the direction and the placement of the hand. So first we've created to head, then the neck and the upper body part. Then we had the bot. And after that we have created two legs in different directions. And this line actually help us not to lose our primary design and a sketch. And we've known where should we start. And because it wanted to show that our body has some balance, we've created our hands in a way, in a direction to show that balance. For example, our character is picking something up from the floor. You see the body has been down and for example, it's picking this up. And with this line of action, we could actually show this perfectly that vessel where our character is going. So I'm going to create another example for you. And after that, I think it's all explained. This time. I would create my line of action in this shape. And I would place my head over here. And as you can see, deadline of action actually helps you not to lose the direction that you're going to and the direction that you're moving forward with. It can help you to keep the track of your work. Will create a bonus structuring two parts because we can show that twisted shape or that bent shape and anything else that you want. Obviously, you can create the body just in one piece as you've learned in our primary course. But when we are creating our body in different shapes, you see in here I've just created all the parts. Altogether. I've connected all the body parts like a cube. And you can add the buttocks area like a circle under a subduct work, but when you're doing your body in a different direction. Now, whether it's bent down, whether it's twisted, turned. In these ways, it's better to create departs separately. So this way you would have more freedom and create into direction of your other body parts, especially in twisted shapes. That's why we're getting help from the line of action. I create this leg based on my line of action. This would be the correct placement for the legs. And be careful that's your character that you are creating should have some balance. So the character it as you're creating should have some kind of balance, of course, to show that is standing still. But any way, you can do some exaggeration, for example, you can show some characters falling off. And you can do stuff like this as well. You can go creative. But, and the thing that you should not do is to deform the structures. For example. Let me show you here. You shouldn't create the legs in the directions that are impossible for the body to move in. For example, this leg is coming down, the other is going up. But we can note creative bones of our leg in the opposite shape of this. Because it's not possible that our legs will be bent on the backwards of DNA and it will go up. So be careful about the bone structures, about the shape of them and the directions which are possible for them to move around. So either, I mean, except that you can do other creative stuff. Just be careful to do the things which are humanly possible. Generally. You should do some exaggerations, but do not just ignore the shape of the bonus structures. In here. You can't add some details to your character and completed. Right now because we're just talking about the line of action and the shape of the body. Are designs would stay as structures, bonus structures and skeletons. But you can obviously do this, add some details to it, and complete your whole character. So you can use the line of action in parts that you want to show your characters moving. And it might be a little hard for you.
17. Anatomy training in moving and walking position: Hello again to all of my dear friends. We are here with another episode. And in this episode, we are going to create a character which is actually in movement. You're trying to show how we can create this movement for him and how we can show that he's moving towards something. First, we start from the anatomy of the head. Basically when a person is moving because we want to show that this person is actually walking or moving. We can have three kinds of stuff. First, we would have the character three phases view on the left, on the right, or from the front view, right. Now we want to create our character in a three-phase says view. Because this shape is actually the most difficult one comparing to the others. So when you learn this, creating other anatomies will be very, very easy for you. So first, I'm going to create one example from the three faces view. Then I'll do a front view for you in order for you to know the bonus structures and the position of the body in that shape. So when you want to do that by yourself, you would know how to. Now we can start from the bottom of the body, from the shoulders. And we'll start creating our character because our characters moving. Obviously, you cannot see one of the hands in this view. And you can only see one of them. Our character is moving into a direction. The hands are actually moving in that direction as well. So we consider that too. The other hand, which cannot be seen. I'm just going to create it backwards. And I'm going to create some parts of my wrist. You can just see some part of the wrist and the hand for the other arm. Now I'm going to complete my anatomy. You should pay attention that at first you would create a skeleton and the bonus structure for your character. And you should try to keep that till the end of your work. Because if you don't do that, all of your shapes would be deformed to end. It would not look at the MFA to me would just be a mess. So because of that, I will consider my characters and anatomy. First of all, I would know that it should have some kind of posture that I can show he is a strengthen that his balance and that therefore I should consider this point. So our character should know as being a way that look like, That looks like he's falling. Therefore, when we are working on different part of the bonus structures, you should definitely pay attention to this. Okay. Here we go. Here we have the legs and feet. You should consider that both legs would be placed here. And the fact that our character is falling or he's walking, these SF will actually affect your work. So when he is walking, you shouldn't create the legs in a way that is out of balance. So you should keep that in mind. After we've determined the placement of this body parts. We would bring muscles into our work. Now the muscles of our work depends on the gender of our character. If it's male, we would have stronger and more exaggerated muscles. But if it's a female, tried to keep it more subtle. And based on that, we would actually add the different parts of it. Even when we are going to create it, we can just create some shapes and we can just bring some different textures to it so our character would look more subtle. We don't have this back area so much. So we would just create the front part that can be seen. All right. And then I come over here and create the other hand, I will create a part that can be seen here. I just take it into consideration and I move on to the other parts. So I basically just start creating them as well. All right, let's see how it's going to look in the end. Just before you get into staff, you should have passed our primary course, which was about a basic anatomy at a placement of the muscles and bonus structures. Because when you are creating a person in movement, those things would just come in handy for you. Okay. Then we move on to the other foot, going all the way up and see because this other foot is facing upward and we are seeing the bottom of the foot. We would also consider this. So in this shape, we're going to create it. Okay? Now I will create my init me into correct and appropriate position. So this is the volume of my anatomy while moving toward any direction. I want to create the anatomy for the character which is moving forward from the front view. So you can have the both as shapes as an example for yourself and you would know how they work. So first, I start from here and then I continue to the anatomy of the upper body part. All right? Now because our character is moving, the upper body part, which ever angle that it's facing. Baltics area are bought. Area will go in the opposite direction. Because we're going to bring it into perspective. These two lines should meet, meet each other at 1. So if the right side of your shoulder is a little bit above, the left side of your body is going to be a little more above. So one side of our body is going toward inside and the other part have some distance. And we are going to create it like this because we want to show that movement in our body. And when we are showing that movement, we should also create the upper body part and the lower body part in a shape that it actually represents that movement. I'm going to show you very easily that how it's going to be done. Okay, Now, obviously should consider that our hand should be facing this way. And because when it's moving, our hand will actually go into the perspective. We want to show that this area is shorter, so we bring it into perspective and our hand will actually be more closer to us. And we would also arc on the other hand as well. I want to create it like this. And then I would create the buttocks area to my character. I will determine the placement of the legs. One of the legs are more in front because my character is bending this way. I am considering to create this leg more forward, more near to me. And just like that, I would create the bottom of my foot. And this foot is also this leg is also shorter and obviously further from us. So I will go into the perspective. And it would look like this, shorter and smaller because it's further from us. So you understood why we've done this. We've got this area in this position and we just dragged it up in the opposite direction of the shoulders. All because of the perspective. Now we're going to work on this area a little. You should consider that when this leg is actually bending, this upper part of the leg is bigger and slower part of leg will be smaller based on the basic anatomy because the leg has been bent down from this side. So this side would be closer to us and the lower part of the leg would be further from us. Okay, Now this other leg is exactly the opposite in terms of anatomy and muscles. This area is further from us and this area is more close to us. And then we have this area which is the bottom of our foot. So if you pay attention, this area has been squeezed a little, and this area has been a stretched a little, comparing to the whole body. And then I would come over here and create these joints for the elbow would just continue this way and we complete the hands. While you're creating your character in movement. Again, I emphasize the position of your muscles and your bonus structure is very, very important. So this is a character which is moving toward you and it's from the front view and the left one is from a three phases v. So the most important point about the front view was the opposite directions. And the other one is simpler.
18. Draw Characters with Different Anatomies: Hello, My dearest friends. We are here again with another tutorial session for you. In this session, we are going to create a different personalities with a specific appearance features because actually each characteristic and age personality has a different and a specific appearance because your appearance can obviously show how is your character. I'm going to create a bad character which is a bit mischievous and maybe even a bit liar. So for doing that, we should have some aspects and features in our character. First of all, a person who has these kinds of personality, we would create very free hands for them. I'll tell you what do I mean exactly? So I'm just going to create a line for the body because first we want to create a general shape for our model. Okay? I create one of the hands going this direction, which look like this, and the other would come this way. So the first thing is that we would create the hands and feet apart from each other a little. In order to show that there is nothing holding this character bag. There are no boundaries for him and his body. The silhouette of his body should be short. I look like some kind of a pair. So you should create that body looking like this. All right. Now for the legs, create very thin legs for him or her. I mean, you can create both genders. Okay? So the character that I'm creating right now is actually a cliche character. That's if you want to create an evil and mischievous character, we can use these features to show that personality and our appearance. Okay? Now for the head of our character, first, so you should know that we should have a very thin neck. Second of all, I will create a big mouth for my character. Also along the nose. These are all the features for an evil character. And obviously we can even add a hat on top of his head. So as you can see, all of these can help us to complete our character in a mischievous way. Okay? We want to show that our character is not a good one, so we stick with these parameters. Now. For his belt. I will create something like this, which is obviously big mouth. And I will also add a big nose for him. And obviously, we will show the teeth in order to give it more evil luck. And we can also show his tongue so the teeth along the long nose and the big mouth. And I also create various small eyes for him. And also smile eyebrows. Is will all add to the characteristics of my character. We should also create our evil character and active person because of this li, He's lying and he should do that with a lot of energy in order for other sibling leaf him. So he might have so my gestures and stuff like that. So I'm just going to create a vest for him. And we will also create a tie for him. Just looks so fun. And we can create this leaves folded back. For this type of the character. It looks like a shaman or a D K. Now we have fingers. I would also create the other hand as well. You don't want to have both hands and detailed hands. So, so as easy as this, we can create our mischievous green character. So we will create a freelance hands and feet FOR HIM. They are look departed. The create big mouth, teeth, long nose, a hat, or even a thin neck. So as I said before, well, we want to create evil, mischievous liar characters. Like he uses elements. I'm going to continue with another character. Our next character can be a nerd, a genius maybe narrowed, okay, Now for our narrative character, we are going to create glass as data at typical way to show Dennard people. Because we want to show that this person has read a lot of books and is working really hard. So he's always using these glasses, usually around ones. But anyway, we can use different types of classes. So I'm just creating different types of characters. So you would have some more exercise to create different type of characters and different shapes for your character. We are still practicing this here. Now for my character. I help create, drag out a small jacket because I want him to look far more serious. So I create a very suitable suit for him. I will also consider a beautiful, cute bow tie for him. Hello, I'm Tim to look like really dressed up and really nerdy. And then after that, I will consider very, very small lags, a farmer, my character, as you can see, his upper body part is way bigger and taller. Alright, now I'll create some buttons for his jacket. And then I'll move on to my character's face. Now I will create a big glass for him, which would look like this. And then I will add the eyebrows, will create thick, hairy eyebrows. And of course, as I said before, are rounded glasses. They will always work. Consider a very small ears for him. And you can see his eyes through the glass. Who would obviously have various styled hair because he's such a good boy. So that's what he looks like. And for the nose. Also, I create a very subtle knows. Oh, I'll create a literary mouth, which is this my link. So he ys are the easy, very good. But I also created a pocket and his jacket. And it's on the contrary of other character which was a mischievous and liar. And as you can see in that character, we've just created a messy silhouette. But this sign, we create the narrative character. Very neat. Alright, I will continue with another character. For this one, I'm going to create a very sad character, maybe victim of some kind. And then I will start with the general shape of the body, which is going to be shown with this curved body line that I created here. Okay? You see I'm just using different types of shapes and characters in order for you to see how much you can go free and how much creativity you can be. You can create so many different kinds of characters. And that would be just awesome. So don't be afraid place. Sure, it would just look great. Alright. Now I also created my character's hand. I create his hand in this shape. It's coming back. It's so sad is just being held down. So down. I'm going to explain it for you from top to bottom that if you wanted to create a victim character or a character which is so sad, how you should actually execute it. Now, for these types of characters, you can create this kind of hairstyle that's your choice. But you can also consider a big nose for him as well, along one. And then you can create eyes that have puff around them, especially under them. Because that shows maybe he was crying and he's so sad. I will also create the eyes right next to each other. Now for the head, I create some more lines. And then for a character like this. We can also come and create shapes like this. We can create just falling down shoulders. You see how much I let my hand go free and down. They want to show that this shoulders are coming down, like he's coming to town. Alright? And because our character is a little bit bend toward front, we create this area curved so we can show that perfectly. Okay. And we will continue with the hands, arms of course, and then hands. So just like this, we will have our legs and we will create a thin lags for our sad character. Shoes. Just looks fun. So these are three types of characters.
19. Unconventional Male Anatomy (The slim and athletic character): Hello, my dear friends. We are here again with another tutorial session. In this session, we are going to use unusual and unnatural shapes to create an out of ordinary character body. So you start with very simple shapes. For the beginning of our work. I start with a circle. And for my character's body, I will use a rectangle. A rectangle which is big error on the top, smaller on the bottom. So it's not complete rectangle. The top part would be bigger than the smaller part, sorry Dan, the lower part. And after net for the shapes of the legs. I would use to simple lines. And after that, I would create my details in these shapes. So I would complete my whole character. Therefore, first few tried to complete our character's head with creating our characters jaw. So I complete the head. And then F their debt. I will create my guidelines so I would show the direction of my head. And then I would add the neck to my work. And after that, we move on to the shape of our body. And we get the shape of our body from inside of this rectangle that we've already created. If you pay attention because our head is kind of in three phases view, the body would follow this direction as well. That's why I'm showing this arm and this hand very, very thin. And I'm just showing this small part of it. So I'm just grading general shapes now. Okay? Now I will come here and I complete the lines that I've just created as a symbol here. I'm going to complete them with the shaping these areas and giving them a depth. And because my character is in a three faces view, I will show this by making that side is smaller and this side Baker. And then I will add the details of the head. And then I also in general hairstyle for my character. Then I determined the placement of the ears. Obviously we saw, we see the ER of this side is smaller. And then I gave my face unique shape in a way that I want to. And then we guidelines that I create right now. I would place my face components. Then I determine the placement of the eyebrows, also to eyes. And then I would move on to the nose and the mouth. The color of my shirt, t-shirt. Because you want to put the hand inside of the pants. Now of course inside of the pants pockets. We would not create the fingers. And we'll just create our hand like this. Okay. And then I would come over here and I will add the details to my hair. And just like this, we will complete our shapes. Now. I will move on to the next shape and I start with the head, obviously. And then the shape that I want to give my body. Because we are creating unnatural, unusual body shapes. I will create a shape like this. And then from here, we would create our legs like this. Okay? Now I will work on my character's body. First. So all I will determine the shape of my character's face. And then I will add my characters neck. And then I would add the shapes of the hands and also the arms. Now you'd want to go to the other hand. Of course, because he's in a three faces point of view. The other hand would be seen less. And because I'm creating a big character, masculine character. So I will create big arms for him. And because we want to show that he is a big character, maybe a bodybuilder, who will create the waste thin. And to do that, I mean, in order to do that, we will create soft and round lines around the waist and we will continue. Then we will add some thin legs for our character, which makes it look so funny. And then we will create the legs. And after that there would be the feet here. So he would be like this, it would look like this. And then we want to add some details to our character. And then this would be his hairstyle. And then after that, our characters ear. And then the rest of his face parts would be created exactly like this. It would be very easy because you already know the basics and you already know how to create unnatural shapes of the head and parts of the face. So now you're about to learn how to create unnatural shapes of the body. And you can practice it over and over again. To master it. We will add the eyebrows and after that, the eyes of our character. And, and our characters, let me see, just like that. We've created a different and unique character. And we should obviously erase the extra lines from it. So it would look like much more better. And then we would add there is stuff, the details of our hand. So if you want to, if you've ever wanted to erase any URLs, we can't, we would do that easily. So just to give them a touch to make them different and special. And then do a great deal of our T-shirt. All right. Now I would come over here and I will erase my faces lines. I mean extra lines of course. Cell you can see the face better and easier. This is our next shape. And then we will move on to the others. So we would erase all our extra lines. And here we go. This is our character.
20. Continue training Unconventional Male Anatomy (Middle-aged and bodybuilder character): Hello again, till love you. My dear friends are going to continue our session on unnatural shapes for male character's body. Now we're going to create our next character. So I will place the circle as the head. And obviously, we move on to the shapes that we want to create. Okay? Now we're going to use another shape. And this sign. Our shape would look like this. As you see, we have kind of a circle at the bottom of our character. And the upper part is kind of a score. Okay? And then I would create two lines as my character's legs just to create simple shapes for it. And then later we can make them more complete as we did for our other characters. All right. Now I will determine the placement of the parts of my face. We will consider the general shape for them. I will add I will add the ears. So Jess length is determine the placement of the hair and then create a general shape for my face. Here we go. Now for our main character, I will consider some thick eyebrows and up vastly at big nose to match the proportion of him. And maybe even the most Nash to give him more character. Again, I will review to shapes that we are working on right now. Or are male characters? We are working on male characters. We would know how to create them. And the later we will also work on female characters with unnatural and unusual body shapes. Now, for this character, I want to create a hands with a different shape. So I will create the primary shape. And then we'll come over here and I will complete my lines. Just like this. And then I will erase and a lines underneath and I will complete my shape. Right now. I want to continue working on the risks of my body and then we will come back and he'll erase the extra lines from here. We will determine the shape of a piece quotes obviously. And then we will separate pants with a belt. Character is an a three faces view in this direction. So this side, we will show the other leg more and this leg would be seen less. As you can see. I'm showing this leg a little thicker and more. This is the leg that is seen more in this perspective. And we will create our character's legs and a reversed shape. And use a little bit opsin downs on your work and creating some curved lines and some straight lines. Our work will look way better. Because we are creating someone in this direction. We should obviously consider that our ops and prominent parts should be from this side. And here we'll have our knees and from this side we'll have our curved parts. You should definitely pay attention to these things when we are working on a character. So we would not lose that human aspect of our work. So that would not make any major mistakes. Just like this. I will come over here and I will add some details to demands to the belt. For example, I create some holes for my pants that are built. We'll go through that. And then we will just add some details to show the pants. And for the separation of the t-shirt and the pins, I will create this belt. That's basically why I do this. Okay. So this is my character. Very well. Just thank this complaint his hair as well. So you'd have a complete character. Then we will shade the eye rounds to make them pop out a little bit more. So length is who will complete our character? And no move on to our next shape. For our next shape, we will create a circle for the head again. And this time we will use an upside down triangle for the shape of the body. So like this, I will create the shape of my body. Copy them upside down triangle. And definitely we will need some lag. So and I just create the legs in this shape. I will continue with the rest of my work and I will complete it more. I will determine the shape of the head. And I want to create my character with more muscles. So I create a very thick neck for him. And then for the arms. I will work part by part. Just to show that character is not does not have too much muscles. Sorry, that I want to show that he has so much muscles. So you see, I'm just separating each part from the other one. In terms of anatomy to show that his body is these muscles. Now in this case, I will come and create a shape off that body. In this way. I consider the top part bigger, the upper body part bigger, definitely. And then I create the stomach and a waste, obviously smaller. And then I will consider some shorts for my character in this shape. And then I will consider completely legs for my character in this shape. Now this is the shape of our feet and the shoes. Now we'll move forward for creating the hairstyle and the head. The rest of the details. Okay. Now I will add the details to my head's shape. Determined the placement of the ears. And after that, we will work on the eyebrows and the eyes. Then we add them. So we add eyes and eyebrows, nose and mouth. And then with this shame, we will complete the shape of the head, of the face. And I would also complete the shape of the cloud. As you can clearly see here. Here we go. Just going to continue our work. And I'm just adding some details to show the muscles on his body perfectly. And then I will create the fingers bigger than a normal finger. Just to show that our character has too much muscles. We will complete our character.
21. Unconventional Female Anatomy (long and curly hair character): Hello, my dear friends and students. We are here again with you with another tutorial episode. Add in this one. We're going to talk about unnatural and unusual shapes of the body for female characters. This sign. For the beginning of our work. We will create a circle for our character's head. And then you will shape the draw for her. And then I will add the rest of the body. And I will create shapes for now, but later I will complete them. So down to worry about it. Now. Okay. Now I will create the general shape of her hair style so I can move forward. I don't want to care for my character. You can have a different taste and create another way. Just decided to go with long hair this time. And then I will come over here to create the neck. And after that, I go down to create the risks of the body and add the other body parts. Obviously, we would consider that because our character is female, we will not consider a very wide body for her. So because of that, we will work inside of the shape that we've created. All right? And then after that we'll move on to the other hand. We also create the other hand and add it to our design. Then we move on to the legs. You can see. We can create them. Sally's late. And you already know the shape of the legs. As we taught them in our primary course. Determine the shapes of the legs. And then after that, we will have the shoes. And obviously we'll have the placement of the legs comparing to each other. One of those would be more in front and the other one did left one would be more into back. Then we come back Today head, we add ears on both sides of the head. And then the shape of the face should be completed. Okay. Then I will erase my extra lines in here. First of all, I will create the eyes. And then according to the eyes, I will add the eyebrows. So I will have this cohesive shape is and then unnatural shape on her body. And now that I've determined everything, I'll pick my work on the details of my face. You can clearly see the shapes coming on together. And your details would look cohesive and fun right now. Shows some facial expressions in your work while you're working on the details. So in this way, I will also create. My color. I will add some more details to my work like hands and fingers, just to make my character a whole. And for my characters drove us and quotes. Even create a heart in this intro of it would look cuter. And this is my character. Okay. Now we will move on to our next character. For our next character i1 to consider to head this shape, a horizontal oval. And then I was create the shape of the body like this. Just add the body below that. And after that I just create the legs. First in a linear a shape, and then later we will be completing it. Now I will come over here and I would create the general shape of the hair. I mean, I'm going to create a hairstyle for her. Alright. Determine the shape of the head more precisely. And then I would add my neck L connected as should I connect to head to the body. And I want to get this hand on the waist. And just like this, I would create it. Now I want to consider a dress for my character. And just like this, I try to create some designs to get a shape for my dress. And I'll start by legs right from here. And according to my body, I will create my legs because she looks then. So we will complete delay eggs. Now that I've determined the placement of the legs, we will complete them. And we will also consider the perspective. So just create this leg smaller and this one that I'm creating right now would look bigger because of the perspective that we put our character in. And I also create the other hand. Because we have shown this side more on the other hand, wouldn't not be seen so much. Now we continue. We did details of the head and we will complete the shape of the hair, which would look like this. We would determine the placement of the ears. Yeah. I would just determines some other face parts placements on the face which is create the general shapes for them at first, just enough to determine their placements. And then we change to our etiquette. And then we add the details completely and we create the eyebrows, the eyes, nose, and of course the mouth. We will create the eyebrows. And then to eyes. This way. The eyes are looking this way. And then I will add my nose. And even after that, I will add my characters lip. Then I will complete my characters ears. I will create earrings for her. And even I'm going to complete her dress, which can be a crucial part to your overall character. Then we would have the shape of the hands. And obviously after that, I will complete her dress. And this way. And then I move on to defeat. Just give them a shape. So this is my character.
22. Continue training Unconventional Female Anatomy (Slim with short dress character): All right, Hello again, my dear friends. We are continuing and another tutorial session. In this session we're going to work on the risks of different and unnatural shapes of female characters bodies. I start with the shape of the head, and I will continue. All right, for the head, I will create an oval, a vertical oval, stretched one. And then for my body shape, almost, I'm going to use two triangles. We're not sharp endings. Can somehow say we are using a sand watch shape. If you want to be more precise, it looks like the sand watch more or less. And obviously I will create the legs that general I'm primary shapes for them. So I will continue to the rest of the elements of my body. For example, they hear, which we should add our hair style in this shape. And after that, I'm going to use add the shape that I've considered for the back of my head. This would be hairstyle. And then I moved forward to the ears. And after that the neck. And then we start working on the body. Now, for an a body shape, I consider the general shape, which will be containing that arms. And four the other hand, I want to create a bag on her hand, on her shoulder. So I will create this shoulder a little bit more above than usual. So I can show the shape of the hand coming up like this, holding the bank. This would be the general shape of the hands direction and placement. And this would be the general shape of the arm. So this is a general shape of the back which is going to be on our arm. Scaling to be held by our character. And then one to work on the shape of the body. And of course her quotes. So I want my character to have a skirt. So we will continue this shape from the waist down. And we'll complete our skirts shape like this. And then we would play silly because it's hidden underneath the skirt. It should be very careful not to mistaken the placement of the legs. So we will follow the shapes of the legs from the bottom, from the buttocks area. And we're just bring them down. And then after that, we'll create her shoes, which would look like this. And we will continue with adding the details and completing our character here. Like this. We will have the placement of the Cold War and a part for the shoulders. And then we'll move on to our characters clothes. I want to create even a belt for her. So I determined the placement of it. And then I would want to create a placement of the face parts for her. We can continue with our details. And for adding the details. I'm going to use my edit. Now I want to start from the head and adding the details to it. I start from the heresies. I determined the placement of the ear and then to character's face, the different parts of her face, obviously. Then the ear. Again. You will complete day hairstyle. Add the details at the styles, at the shapes. We want to create a ponytail for her. That will be hair, hairstyle. And then we will add the eyebrows and the eyes. So here we go. Then we will work on the body's details in this shape. And then you will complete the back, the handbag. Here we go with this. I will erase some lines. Say it would look better. You can see to work better here. So just consider that because different part of the bag is a bit twist said. We should add the details in this side. And we will be getting a bit far from that side because we want to show that bag has some dimensions. Now, in creating the things in objects, I will explain these things more to you. But right now, just, you should know because we want our Back to have some dimension. We should show them in this way and in this shape. Now we want to work on our belt that would be look like this. We can add some details to our work. Like this. This would be our characters are. And this would be the general shape of our hand. That would look like this. And just easy as this. I will add the details of that dress is complete. You can create the legs closer to each other in this shape. And then you can even add some more details to her shoes. Here we go. And then we can erase the lines. And we can have our shape. Obviously erasing the extra lines. This third character, which looks great right now. He can't even shade her boots. To give them a better look. In this way. Can also shade the lower part of her skirt. To get a better design on her dress. It can erase the extra lines and just give it a good luck. Can make your work to really pop out this way and become more different.
23. Training to Dig and Hold Hand: Hello, my dear friends. I'm happy to be here again. We then another tutorial session. And in this session, we are going to talk about the different shapes of the hand in different positions. First, I will tell you the general and the basic shapes of the hand. And I've already told them to you on our primary course, our basic course. And now we want to work on advanced shapes of it, different shapes in different positions. Alright? We are going to start with the shape of the hand being a curved, like we are holding something and there's something inside of our hint. We're going to start with that and move on. See, where does it get us? And in a shape of a square, we're going to create this hand. And of course after that, even another square, discrete the general shape here. And then we come here and we add our wrist to it. Right? You should consider that. Because our hand and our shape has a special volume. We are going to show that in our work. And to show that properly, we should know that these corners also have some volume and dare not flat. Then I will create the thumb. Just add the general shape of it. And then we'll move on to the fingers. The fingers are coming toward, inside of the hand, toward our palm. And for this area, then going to create a corner raise line. And then I will add my fingers. On this line. You should consider that. You should show four fingers in this area. And of course, the little finger is going to be the closest to us comparing to the other ones. And for each finger I create three parts for m. Okay? Now come back to my second finger. And we should just be careful about getting a perspective's, right. And this would be our last finger. In this shape that I have the general shape of my hand. I'm going to add some details to it just to give it that finishing touch ups. Now, what are these details? One of them is the nails of our fingers, which should be properly done here. In this shape. We are going to create a corner ray lines. And this way we can show that the tip of our finger has some volume and it's not flat. And obviously you will continue the line down this part. Down this direction and we create our fingernails. Then we're going to create the second fingers, nails, the ring finger. And we do the same for all our fingers just to show that the tip of our fingers have some volume, we create this curved line over here. So we can show the tip has some of volume. That's it. That's our third finger and a fourth one. And then after that, I will complete my lines to get the details showing better. And I can only see the three parts of my first finger which is closer to me, my little finger. That's the only finger that is showing three parts of it. Can not see the arrest. And then I will create this muscle. Here are the lines for the back of our hand. Okay? Now, for this muscle on the palm of our hand, create this curved line just to show this area is coming up. It's more prominent. To show there is a volume here in our palm. And then I will create some lines over here, some wrinkles actually because we want to show that our hand is forming a fist, but not completely like it's holding something. So when you take your hand in that position, you can see these wrinkles forming around your thumb. And of course, I'm going to work on the tip of the thumb a little bit more. And then I also create a finger nail for my thumb. And because you want to show that our palm is bent, bent over, I just create some shapes, some objects inside of my hand and my palm. To show that this character is actually holding something. Let me erase these lines. I'm just erasing the extra line so you can see better I need would be more clear for you. Now you can see the volumes even better. All right, So this is my volume for the palm and four fingers and a whole hand. Here. I just connected my arm to my hand with my wrist. So I create these two lines as our presenter of the veins on the wrist. And obviously when you just holding something in your hand, you can see these veins popping out and popping up on your wrist. All of these details are added to show anatomy and position of our hand better for you. Now move on to create another position for you. Now our position of the hand. The next one is that like when you're holding something, we'd only two of your fingers. So let me just create this here for you. Therefore, we can have the other hands as well. Alright. Now we're going to use the general shape of our hand, which is bent, of course. And then I will create volume from inside of the hand for you. And in here I'll have my thumb also bent. And then I would have my index finger coming right next to it. Like they are holding something. This way I can show that there is something being held between these two fingers, the thumb and index. Then I go to create a middle finger, and I create the rest of my fingers in this curved guideline that I create here for not losing my textures and the fur. Not a misplacing any of them because I don't want to misplace it and create a wrong anatomy. And the second line is for that, we don't want any fingers to come out more than they should. So it would make no sense. You can also see the little finger. A little. Just enough to show that we have a shape and we have a dimension, and we have all these fingers. And the rest of our hint. Okay? Then I will add the palm of our hand for showing volume. Edges, creates some objects between these two fingers. For example, I'm considering this character is holding a fabric. Just take and go in any simple shape. Our focus is not that. Our focus in this episode is to show the hand in different positions. Now I will come over and add some details to my sketch. Just to pop all the positions out a little bit more. For adding details. I start from the top of my hand, which is actually back of my hand here. Then I will complete my fingers. Obviously. Because we want to show that this area is bent of a. We're just create two lines in there. And to show our sum is holding some things, so heart will just create some wrinkles on it. In here I'm going to add some lines between the parts of my finger again, I say some wrinkles just enough to show that our thumb has a volume and it is also holding something and there is some pressure on it. Because if you do that, you can easily see the wrinkles on your hand. Try to use these hints for getting a correct anatomy. Now I will show these lines even more where at a hand connects to the wrist. And this would be easily complete, completed like this. Now, we can also see the finger lay nail on our thumb, sorry. Can also see the fingernail IR thumb. And because this time we're looking at this finger from this direction and this view. We create this curved line upside down in the opposite side. Because we are going to show that we are watching this thumb. We are looking at it from this direction. I mean, our thumb is facing down instead of facing upwards. So we can easily show this with creating a right anatomy and decorate lines even for our details. Which is very, very important. Okay, this is it. Now I'll move on to the next finger. Create the parts of it may be the tip of the finger. And go and go all the way back to the back of the hand. As we move forward to our little finger, which can be seen the less the fingernails will also shrink and they will be smaller and smaller. In order for us to show the perspective. And we can show that R al whole sketch has some dimension to it. And then a further objects and details are different from the near ones. So these are the shapes of the hands which are actually holding things and they are in different positions. That's it. I hope you've enjoyed.
24. Training Hand Tapping and Hooking: Hello, my dear friends. We are going to work on the hands and we're going to continue our work. And we're actually going to create different positions of the hand. Okay? We are going to start and we want to show the position of the hand and the times when we are hitting something. So when we are going to hit something, we actually make a fist and our hand. So obviously we create some volume here that we want to create a fist in it so that we can have our general shape. Now. Okay. Now we've got our thumb inside of the hand because when you do this, when you make a fist, all of the fingers, we'll just move toward our palm. And they come from the top to the bottom. Therefore, we actually create two fingers over here. And then we will create some volume for our fingers. Just create these curved lines to show that they are not flat. So that's why we create our fingers in this shape with these curved lines. Because we want to show that they have some volume. After that we've made all the four fingers. We will create the volume of the tip of the fingers for him. In this way that these parts will be definitely smaller. But they can still be seen. Just a little of them, not too much because they've gone inside. And then after that, we will create the rest of the hands shapes. And then we move on to the movement that how the hand will look when we are heading something. And for that, because we want to show the movement, we just get help from some lines. When I create these lines from the top downward toward our hand. These are actually showing the direction of our hand coming from the top to the bottom. Because you just want to show This hitting very well. We are going to use these lines. And then later with another set of lines. Below our hands. Again show that we are hitting something and we just complete our work even more. So we can show that a hand is actually hitting something. So you see all of these lines is screaming the hit. Now I will make my some more complete. So I even create the lines for wrinkling the palm because our finger is bent. And then we'll create a finger lying the, sorry, the finger nail for our thumb. Then I add some more curved lines to show the wrinkles inside of the palm. And these are the lines which will come out of the wrist in order to show that our hand is just being squeezed and it's being held a strongly. Alright. So all of these extra details that I'm just adding right now is for making my work more complete and to show the movement of it way more better. Okay, Now in this shape, we are having our hand. Okay? Now I'm moving to my next point. When we want to use our fingers as a hook and take something in our finger, on our finger. We are going to work on that and I will show you how to create that. Just again. Consider a volume for the general shape of my hand. And most of the times this volume is a squared shaped volume which some lines will be added to them or get a stripped away from them. You should always remember that because you're creating the hand. This might actually always happen. And then I will add the details to them. The shapes and details. All right. Now I will go even a bit lower and create this volume. Therefore, we can have a separation between these two parts between the fingers. So right here, I'm going to have, actually I'm going to create some distance between the thumb and palm. Although the sum is bent toward the palm, it is still has some distance between them. And we will obviously add the next four fingers. The little finger, the ring finger, which should be placed a little bit more above. And the middle finger will go underneath our thumb a little. And then at last we will have our fourth finger, our index finger, which should be placed here. And it is showing that it's holding something on it and something is actually clinging onto it. That's why we create this finger. Open. Now it's closed. You should pay attention to that to finger is open in the same direction that a can be closed. So we cannot give too much extra distance between this finger that has been opened comparing to the other ones, because that way it looks, it might look unreal. So you should definitely consider that if this finger will be bent over, it will come back to this empty spot and actually feel it. Now I will erase the extra lines. And then I create my fingernail. We'll create our fingernail in this shape because we want to show that this surface is not a straight and it has some angle. And because our view is from this side, is from this angle, they just show that with these lines even more. Now it also create on our thumbs fingernail. And for our palm, we just create some curved lines to show that Very good luck to show the muscles inside of our palm. And then obviously we come over here and create these shapes. This way. Just complete our forms and shapes. We're continuing them all the way down to the wrist. The hand is bent toward down. And we just create this illusion and this shape with creating some simple lines both around it. Now we create the arrest of the fingernails for the rest of the fingers. Now we will create them in this shape because we would want to show that our finger is bend toward insight. So we create a finger nail compatibility that we always create our fingernails and compatible to the direction of our fingers. So this is very, very important that you consider this while you're creating your own fingers. All the angles when you're creating your curved lines, right next to the fingers and next to the hand itself. And I'll just show that very easily. And now, because we wanted to show that wind is finger is open, we just create something on the finger. I just created a band that it's being held by this finger. And you should definitely consider that you should create the other side of the band or whatever that your characters holding. Even though it's behind a finger, you should continue your lines over the top of your fingers so you can show that is clinging onto the finger and it's coming back down from the other side. And then you can erase the extra lines from your finger and have a cleaner makeup for your character. Have a cleaner actually anatomy for your character. And this is our beautiful hand for our character. We can even add some more details on this first parts of the fingers in order to show that our fingers are actually completely bent over. So That's basically what we're gonna do. And this is actually the different shapes of the hand.
25. Foot training at Different Angles: Hello, my dear friends. Today we are here again with another tutorial session. In this session, we're going to create different shapes of feet in different angles. We've already talked about the principles of creating the legs and feet in our primary basic course. But right now we want to work on different types of IT and making them more advanced. Okay? Now we come over here and we'll start with creating the bottom of the foot. For creating that, we need to first show the direction with a line, just like this. And our foot should be placed in this position. It should go toward this direction. Okay? Now I will come over here and because we want to show at the volume of the bottom of our foot, we are going to create two lies next to this line that I've created here. Okay. Here we go. For continuing our work. We will create a shape for our foot. In these three lines that we've created. That the upper area is the placement of the fingers of our toes. And then this lower area would be the placement of the back part of the foot. Okay. Now, for the upper part that we've created, we will determine the placement of the toes with a curved angle or line. And then after that, for the toes, I will create the biggest over here, which is separated, I mean between these middle line and this sight line to write line. And there is subdata, those would be on the left side between the middle part and the left line. And a part that we've created baker. So we come over here and we will create for all walls for the rest of our toes. Now we've caught the foot in two parts, Va divided into have the considered one part for it, our biggest so and the other part for the other toe. Now, if you pay attention in our foods, some part of it is more above and the other side is more below. So for that, we are going to create one line over here. And we just drag this line curve toward the inside and downward. And then you'll consider that in here. We will have some kind of a circle. Okay? Now, we've created our lines because we want to show that this part is a little bit curved toward inside and actually the volume of our foot. We can also create another curved line in this side. They are just emphasizing on that with this line that what we're creating is actually a volume. Now for the placement of the fingers would also come out from this side and then go back inside and out again. So on the right side we would have more curve. Toward the inside of the foot. Now I will just complete the fingers a bit more and I just separate them from my guidelines. How I'm going to use my edges and continue with that to get the shapes that I want. Now we are creating the volumes for our fingers. In this shape that we'll have a little bit of distance between our first second toe. Just put some kind of a space in-between them. So our work would be more natural. And then after that with a line, I will just separate the back of the foot from the toes. And then I'll get help from two lines. And just go behind my biggest and I'll complete my work. Okay, you should definitely consider that we are looking at foot from the lower part from bottom. So you should not create any TO names for your feet because you can see them from this angle. Okay. Now we'll continue my leg in so many different other angles. We can also create our foot. In this way. This line that would create at first we'll actually show the direction of our foot. So we will create this line right next to it. So we would know how we can create a volume of our foot and recreate these two side lines in order to keep the direction and the volume at the same time. Alright. Now I will come over here and I will connect these lines together in this shape. And because our foot is turned, we will consider a volume also for the top part of our foot, which would look like this. And then obviously we are going to work on the ankle as well. They're going to connect it this part to this area. And then after that, I will determine the placement of my toes. It should look like this. And then we would have the general direction and shape of our foot. Because our food has some has some part curved in. So you try to show that in our work. And then we'll move on to our toes. And we determined their placement as well. And we would also consider that our fingers, our toes are not straight. They are bit Angular on a curved line. They're placed on a curved line so they cannot be all the straight with the same length. One of them is bigger and then they go smaller level by level. One by one. Then I will use my Edit and I will complete my toes. Okay? Now, this part of the ankle will just show that prominence area. Prominent area. And this line also shows that foot has some dimension and it's not flat. And then we will also create one line for this part of our leg. And in this way we have our foot from another angle. Alright. Now I will come over here and create even another angle for my foot. I will determine my direction line. I try to give it some curve toward this direction. This is my general direction of my foot. And then in this direction I'm going to create general shape of my foot. We are going to have our foot from the from this side. And the other side will be in perspective. We have a shape like this, which is kind of a shape between a circle or oval. Day LR apart is a thinner and the upper part is wider, obviously because that's the placement of the fingers. And this is a general bottom of our foot. So we had a shape and a volume like this. We can create the things that we want. We can create the top of the fingers. And then with a general volume like this, I will create to anchor a little part of the rest of the foot. We will determine some parts of the fingers for this area. After that lived done a general shaping. And for creating the fingers, the toes, we are going to use curved lines. Notice straight ones. This is a part which is the placement of the toes. And then right here, we create the bottom of our foot. So we generally divide it into half. And then we come over here. And we use this side of our line to divide the lower part of the foot. Like this. Separated parse that have been separated are different parts of our foot. That's right Now we're going to create this area. Therefore, you would know the divisions better. Okay. Now, for this area that we've created for our ankle, will also add the bones of the leg. So we can show rare it is on our leg. And then I would just go over this line that I've created for this area. And just making it more complete. Now, I will shape the shadings in this way. I will complete the fingers like this. And just like this, you will have the shape of the bottom of the foot and the ankle that can be seen. So these are three different shapes and angles from our foot.
26. Training to Draw the Collar and Sleeves: Hello, my dear friends and students, we are here again. We then the other tutorial for you. And in this episode, we are going to figure out how we can create clothes for our character. And it was shapes. We have quotes for them. Okay, First I'm going to start with different types of cool ours for my character. So I'm just going to create them all together. We would definitely, we should consider that. And a male characters and female characters are way more different. And for female characters we can create a more funny KOL ARS and even more whimsical. And for male characters we can go a little bit more formal. Alright, now I'm going to create one example for the female character. Just like this. From this side, I'll do the same. I will create it from here. And obviously you can even have some lines in this shape in order to show that there is a pressure, this area which is more above. And this is one shape for the Collado for our character. Now, I'm going to create a color shape for my male character as well. So you would know that a friends this would be the neck. Create an oval or round it. And then I'll come down a little. So this way, we can have our coal are. Then I consider two buttons for it. And just like this, I have a color for my male character. Then for creating the Kohler. He can do so many things. I mean, generally in creating dresses and all kinds of codes, we can go really wildly and freely because we can create any kind of design and the style that we want to you can even be a fashion stylists there. I'm just creating some examples here for you so you can know how you can get the shapes around the neck and different shapes in general. Therefore, it has so many different shapes and types if you want to create it. And we are going to work on the Cold War and the sleeves at anything that we can say as close and can also create the risks of dress. So I can show this is a Kohler. And then next model can have some kind of these loose KOL ARS which can be seen in some types of sorters. And in order to create that first or create the first oval. And then right next to it, I come down with a curved line. I come to the front and I go up again. I also come down from the other side, from the other corner and I create some knowledge in order to her shapes to make it look better. Also from this side because we want to show that it has some volume and it has some layers. We just add some lines coming toward inside of the Kohler. And this is our NIC inside of the clouds. Now these are our coal cars. And now I want to create some different types of slaves for you. So you would know how you can create those. All right, As you know, for the male character and a female character does, shapes are different. So we can create them both for the female and the male. I'm just going to start with female characters. Now for the female character, I can create some more whimsical sleeves. And then I can use a general shape for the hand. And then I would just create different shapes like in here. And even our hand can come down to this site. So this is basically the placement of our hand. And because we are creating the sleeve, we just don't pay attention that much to the details of the hand. Of course, you know how to create hands and fingers. So our focus in this episode is to work on this leaves, I'm not going to put anytime and spend any time on creating the details on the hand. So you can even create some curved lines at the top of this live and some other ones at the lower part. To make your work look more attractive. And you can even create different shapes for your sleeves. Make them more puffy look at what it would look like. More fan to see, even sometimes more whimsical. So you can create these types of shapes for your sleeves. And then you can also come over here and have the edge of your sleeve where you can have your hand coming out of it. Even in here, you can create some bands and strings can do so many different things with clouds, as I said before. And this can actually work in your benefit. So in this way you can shape your work. You can continue them. You can continue your slave, or you can just continue this way. So from the rest of the shoulder you can come down to this side and create that puff for your sleeves. Alright. Here we are. You see, you can even add some lines over here. You can bring some codes upward. So yeah, so that you can show in this area the fabric has already been as squeezed and pressed into that position. And now let us work on some other examples this time for a male characters, for my characters, you can just continue your work very subtle. In order to show that your character is male. You can use very simple sleeves, very subtle, very simple, and all in the same shape and same way. So in this way, you can easily have some designs at the end of your slave, where is the placement of the arrest and where your hand will come out. Just in order to give it a shape. You can put some bottoms on both sides of this cut. You can put one of them at one side and you can omit the metal. So again, as I said before, you can do so many different things and styles and designs. And that's totally depend on your own personal taste. You can even consider some kind of a sleeves which are going to be folded back. For example. You'll create an oval like this. And then definitely you know that your hand is here. And then F3 dad after recreated to overhaul the hand and this small design above it. For the rest of your sleeve. You're going to consider a shape like this. And then from this corner you will come up. And F3 data, you can create some buttons on here. Just like this, it is very, very easy. Okay? You can even come over here and consider some shortest sleeves for your wardrobe, for your clothes in a shape like this. I told you to go. So, sotto on simple bots. You can get even a little bit different and you might think a little bit outside of the box. And instead of creating them to symbol, you can give some designs and shapes to them. As easy as this. So this way you will consider the shape of your wrist. And then you use shapes like this to work on it. You can even put some buttons on this side. And you can use so many different shapes here. You can just try different shapes here and create different designs until you get to look at you're more comfortable with. For example, you can create some bands for it from here. Just to give it a simple design. You can do so many things for creating the clouds, as I said before. And obviously for creating the Koehler. For example, for creating the top, especially for your female character, you can use an old ball for the placement of your neck, for the placement of your Kohler. And then you would just come down. And from this side, you would come down. In this case, you can have the cola of the top. In this shape. You can create it in a circular way. You can just make it go a little bit more above. And you can come above. You can do so many different things. And all of them are attractive obviously. So don't be afraid to try new different things. Let me create a different shape for you as well. Let me just create a sweater for you because that might look a little different, although it's not that different, but I just want to create it for you so you would know how it works. You can show that this area has two parts. Or you can show that it's all in one part. And with these lines that you're creating in this area can show the texture of your clothes, whether it's sweater, it was a needed, or as other different textures of the fabric. And in this side, because you want to show that and there has been suing or knitting over here. You can just create some lines, curved lines facing upwards. Even if you want to fold your slaves. You can do this with this procedure. First, I create this shape at the bottom of my sleeve, and then you will continue here in creating the rest of your sleep. Okay, so here we are with different shapes of the colors and the sleeves for both male characters or our female characters.
27. Training to Draw the Skirt and top training: Hello, my dear friends again. I'm here with you with another tutorial episode. In this episode we are going to work on female closeouts, how we can create them and how they would look more beautiful. All right, first I start with creating a skirt. Because we can create a skirts in many different ways, in many different designs. So we're about to start our work. Just 1 that I should tell you about is that for creating this scared, you can have so many different designs. And the thing that you should pay attention to is that for the lower part of this scared, you have to created in a curved line and you shouldn't just created so straight and just as a straight line, you should create an oval for the bottom part of your skirt to show that it has dimension. This is actually where the legs are coming out and coming down. Now for this upper part of the skirt, you can do so many different designs. First I will tell you how you can work on the, the lower parts and then we will move on to the upper parts. So this is one of the simplest way that you can consider for the bottom of your skirt. Or you can add some lines coming down like this. What else you can do? You can actually create some wrinkles in your skirt. How are you able to do that? First, you just continue this simple shape. You come from the top to the down, and when you come down to the wrinkles, you come out a little and then you create your own wall in here. And definitely should consider that when you're working on this, overall, you shouldn't create a too big, well, it should obviously fit your work. If you create this overall very wide and very big, it looks like you are looking at your character from the bottom. So unless that is your purpose, it's better for you to create a normal oval. Now let's see how we can create some wrinkles and poodles on it. From some parts we move on up, weren't. And from some other parts we come down. You see, I'm creating some twists it shapes going up and down, up and down. And I just repeat this pattern. And wherever we have this twist, we will create a line upward and we go down. We can also create one line upward. And then we just continue repeating that. In this way, we are creating the wrinkles on our skirt. Now for the parts that you can see, the legs, you can do anything in that area. But wherever is between your legs, you can also create some more wrinkles. So you will not have any difference between the front part and the back part. It is a same. You should just have to continue that until you get the amount that you want. Ups and downs and ups and downs. If you want, you can just create these wrinkles going to different. What I mean? I mean that first you create the oval. And then for this area, you will bring this part down and then you move up directly on the corners. You can start from the top and can create another line right next to it. This is another way to create wrinkles on your skirt. You can even create a smaller wrinkles. Consider them a smaller. I mean, there's no pressure that you should definitely do this. You can start from the corners and create various small ups and downs for your word QC. I go up and Lidl and down a little. And then you can just bring the corners of them coming up. It's some lines exactly as we did before. Those were bigger and these ones are a smaller. You can even combine these two and get something in between. I mean, you can use a combination of small wrinkles and the wrinkles from the front. So in order for your work not to be very boring, you can even combine these as size once in a while. And other thing that you can create in your skirt is that you create has been cut up to someplace. And you can add it wherever that you want in your scared, That's your design. Again, I create an oval. Or maybe you can just change the size of your skirt. You can make it longer or shorter. Or as a creative and different style for it. With these curved lines that I've just created. For example, here you might have this cod part. It's been caught up to here. You can show that with these curved lines and then you come down and you can add some wrinkles on the bottom. So we've considered some wrinkles here and we didn't come down. So simply, you can even create during codes and just create the cut part. Again, as I said at the beginning, you can create so many difference as skirts in different styles and sizes. Here we might have this different pattern. Now we can go to the top of the skirt and you can see how we can create the top of it. And for that I create a very, very thin oval for the top of my skirt. And another one which would be bigger for the lower part of my skirt. And then I connect these two together from their corners. Ok. Now for our skirts, waist area, we can also create a belt for it, for example, and can create this big belt for it. Or we can just go simple. And then we can bring some wrinkles in here. This would be our dress or our top coming down onto our art was scared. You can even put some zipper on your skirt. As I said, you can go different styles. You can even create some lines in the middle of your skirt, like the ones that we have in pants or trousers. You can do so many different things. And your hand can go freely and your imagination can go so wild. In designing your quotes, you can even have some placement for some buttons, zippers, and whatever that's you can see. Okay. So these are everything that we can do with a skirts basically buddy, You can just improve them and extend them up to your imagination and your creativity. Now, I want to move on to the top area. A very simple shape, which is more normal than the others, is that we would just consider a simple shape for our top. First of all, we create this general shape and then it will add our details on it. Okay, this is our general shape. But see right now what are we going to do? We are going to shape this even a bit better. We determined a placement of a sleeves. And actually I spent two of the hands because it's a top, it doesn't have its face. And then we can even come toward inside a little. And in here, we can create some wrinkles for our top with different sizes in order to show that our top is not so flat and it's a fabric. It has some dimensions. As you can see, clothes and fabric will get folded and a wrinkled. So that's why we are creating these lines. Because we want to show that in our work. Just one thing that I should tell you about is that you shouldn't bring everything that you have on one side, all to the other side. And you've worked with not look really good because this way it looks more natural. Because fabric would not just wrinkle all in the same parts. They can be made in different parts. So you can even bring some parts up or the other parts down. Or for example, let me create another one for here. So that's one would and B2B. And you can see that better. You should consider the same style. But this time, for the lower part of your top. You can even consider a shape empty and this would be the body of your character in the end, this is the design of your top. That in that area, it doesn't have any fabric and codes and you can see the body. Or you can even create a half-time up a tank top. And then Frodo slips, for example. You can come down and create a tank out like this. Half of a top would be looking like this. Or for example, you can just come down and then you create not a straight lines and just some corner away lines to show a different design. And for example, this side, you can see the body and the other side note. So you can go very different in designs of your work. You can see different things with any parts of the clothing that you want with top, skirt, UW, the coal are with the sleeves with anything with belts, zippers. You can just go wild in your imagination and creativity. So try to remember that. And another thing that you should do is that, for example, you would create different sizes, different heights. Actually, for example, you can have a longer skirt or shorter skirt. Or for example, we can continue this top to make it longer or shorter. That's totally on your own tastes. Okay. This is about a top and a skirt. And something that you should consider about the top of your skirt is that even if you wanted to put a belt here or you would want to go simple. And you should definitely come over here and see if this is the beginning of your waist. You should create some lines over here. Because we want to show that this had some volume. Because you want to show that this volume has gone inside. So we will create these lines. So we know this was fabric that has been going toward inside of the skirt or whatever. And if you wanted to be more puffy, you can create this directly on your skirt and do it like this. That depends on the way that you want to create these stuff. Okay? And the best thing is that you create some lines into place That's different body parts connect to each other. And if you want to create a belt, you should know that, uh, your bail to it being two lines next to each other, you see this way you can show that your belt has some dimension Asia and just create one is straight line for it or one curved line for it. It should have dimension. So I create two lines together, tried to create everything in a 3D way. See, I'm creating all the lines in pairs because if you just create them as one line, your work definitely lose its attractive mess. You can dry it and compare it with one line. And linearly shapes or the shapes which has two lines and they've got dimension. This way it would look more and more attractive. You can also consider some pockets for your sketch on top. For creating the pocket, you can use these as size with curved lines usually recreate the pockets. You can create one line or two lines are, for example, you can have a band over your pocket and even some bottom. If you want to show that the pocket can be opened and closed. And again, I say you can design your clothes in so many different shapes. And if you want to create some pockets on your top, you can just created like this. You see there are mostly on the chest area. If you want to create a big pocket. For example, for your skirt. From the corner of your lines, you should go toward inside of the skirt, come down, and then come back to the corners. You can just create it. Addresses a sharp or around that depends on you. Again, I say it is your own design, so this is about the skirts and tops.
28. Learn to Draw Pants, Collars and Jackets: Hello to Alloway, dear friends again. You are here with me in another tutorial session. Now in this session, I'm going to continue the clothing tutorial. In this episode I'm going to tell you about depends and a shirt for male characters. So we're just going to continue on closing. First, I want to start from the Pence. Obviously it has two types. We have female pans, append, so I'm going to create both of them for you as an example, therefore, you would know how to create them by your own. Now that you should pay attention to that A's. When you're working with female pants, you should consider all the areas thinner and more delicate. For example, if this is our foot, this is our leg. And you want to create some pants for that. You can just go exactly on the lines that you've already created. And in this part which we have our knee bending over, you can create some lines in here that you can show this in this area the fabric has been wrinkled because it's the place that our knee is going to bend and being a straight again. So l usually create these wrinkles around any joints and any parts like knees. Okay. You can also create this part is trade. It doesn't make your work look wrong, but this way, it would look more attractive this way. So you can create this area so simple or not. Or maybe can create it a little bit more loose. Then you will work on the edge of your panned. The bottom part. For example, you can create this. I'm saying the edge of their pants. I mean this bottom part of the pan and you can create this and you just gets your pants and just fold them, fold the bottom of your pans upward. Usually see this most in jeans. You just get the bottom part of your pants and you felt them outward and they would look great. The things that I'm telling you right now can be used both for female characters and makeup male character. So it doesn't matter that much. You can also create this shape at the bottom of your hand and then create some lines on the lower part of it and on top part of it. And even some wrinkles over here because you'll want to show that the fabric and the clothes on this area has been pressed over and it's being bent. Or for example, you can create your pans in this way. So when you come down like this, you would create some more lines here. And then you create the lower part of your pans like this in a different design. Or you can create loose pants or and can even create some cars in it. It's been cut up to this area or you can even create some wrinkles at debarred and part of it. So you can do so many things for creating pens as well. As I said before, in creating clothes, you can go so much creative at its designs. It's a style and size. For example, here I want to create some shorts. See this with the placement of your legs and coming down. And then you can go up so you can have this oval. We can create the lines upward and then you can create your legs coming out of them. You see he can do so many different things. Or for example, you can create some xA xB up designs in it. Or you can consider the knee area being torn apart. And in that case, you will just create some wrinkle lines in these areas. And you'd also do the same from the top, but issued and be in a special order. Again, I repeat. It should not be in a special order because this should look more natural. And it can just show that happened all of a sudden. And you can even create strings coming down from depends. Okay? And remember that if you are creating a strange, you should just create them downward because of the gravity, obviously, you cannot create them upward. So this is a general shape of pants and trousers, either from men or women. And, and if you want to create some formal pants for men, for, for male characters, for example, the bottom part of a suit. You can create it in this shape. You see in this way you can create one line as the line of the running. Because when you wear a suit, it has just fine lines and some parts. For example. This would be a very good formal pants. And you can also have sport shape. Sports is style. For man pants. Just the difference between men and women pants is that when you're working with them, you should consider that women's leg are thinner and more delicate. Therefore, their pants are the same. And when you are working for male pants, you should create them a little bit more loose and create them a bit bigger. For example, this would be our knee. If you want to create some wrinkles in here, you can create some lines to show that it's going to be bent. You shouldn't just make your lives too much croquette when you are working with the lines. For the male characters, it's better to use that design. I'm female pants. So on male hands try not to create so many cricket lines, so many wrinkled lines. You can even go down from these parts and you can create two lines next to each other. Okay? This all depends on how you want to create your pans, what kind of designs it would be AD as the characteristics of your character. The personality of your character will affect at his style or harris thigh and the way that they put on clothes a lot, it will drastically affect your cool thing. The personality of your character would be so much important. Okay, Now for to share it, I'm going to create a cola like this. You see, I'm just creating these big, very, very simple lines. They looked like a triangle. And then on the bottom of the Collado, I can even create a bow tie, which look like this. Again, I emphasize you should create all of these things in a way that you want to show that it has some dimension for creating a tie. So we can create this shape for the beginning of our tie. Looks like a diamond, but not a complete one. Or you can create an oval instead of a diamond. It totally depends on you. But when you are coming from the coroner's downward, you should come down up to this area and then you should create these semi triangle at the bottom part of it, which has definitely sharp edges. It has a sharp angle and you would have your tie over here. Again, it depends on the design in your mind. You can even consider this area bigger. You can imagine a wider Thai or a thinner one. That's really your choice and your taste. So this is about to tie and a colon. Now let's see how we can create a jacket. For example, if this is the top part of our coat, these would be the shoulders. We've all we've already talked about the sleeves. So for the cooler of your jacket, for this upper part of your jacket, you can do so many different things and some different styles and designs. You can just created in one shape, all of them in one. Or you can create two parts for it. Or you can come from the top and created like this. You can also have some suing patterns of furnished of your sleeves. I mean next to her sleeves. You can have your sleeve short like this. And from here you would just bring out here, hand your arm. And I think that I should tell you about this sleeve and your arm is that it is part of your sleeve will be empty. And because when your hand is coming out of the sleeve and there will be just a little bit small pockets and the bottom of your sleeve and shade that in order to show the, we have a volume here and something is coming out of another thing. But if your shirt or your t-shirt is too tight, then you can just go all around. And the arm for here when we come down, you can come down in a way that corner ray lines like this, or you can just come down a straight. Again, that depends on your own design. Frame sampling can even create some long coats like here, like this. You can create talks or you can create a sport jackets. And then you would have a displacement of bottoms over here. You might even create some curved lines in here, some kind of a wrinkle. And even for your jacket, you can consider at belts. In this shape. Can be a jacket or a coat. I mean, it's basic shape for all the clothing, which I look like this. You can create some pockets over here. You can even create big pockets for your jacket or your coat at the corner, at the side of your clothes. Or you can create. And now they're simple, small one over here. And for example, you can create a piece of fabric or tissue here. And this way it would be more complete. These are the different shapes and a basic shape of pants and coats. For male and female.
29. How to Draw Different Shoes (sneakers and flip flop): Hello my dear friends. We are here again with another tutorial session for you. And in this session, we are going to work on creating the shoes, how we can create it, and how we can show its placement on our feet. So we're going to review some things in order to create these shapes. Start with creating the shoes. And for a starting that, the first thing I should tell you about is that we have different types and different kinds of shoes. For example, we have high heels, we have sneakers, we have a flip flops and so on. So we're going to just give you some examples so you would know how to create the general shapes of them. We'll start with a sneakers, which are the most popular usually. And for creating the shoes. First of all, we are going to create this lower part of the shoe. I mean, the bottom of it in a way that I create an oval. And then on this overall that I've created, I will work a little bit more and I create my shoe above that. And the first thing that I should tell you about is that the thing that we are creating definitely should have some dimension. It shouldn't look like flat. Therefore, we should create some volume for it. And we are going to do that with creating these kinds of shapes. We can now just create a lines on top of each other. I've just created von oval at the bottom and the other one on top of it. Because we want to show that we have some depth and dimension here. Okay, now I start with the top of my sneakers, that top part. And this part where we create some curve and we move forward and up is actually the front of our shoe. And then for our ankle, and where our foot will actually go inside of the shoe, will create a smaller oval. And then become from the corner down a very smooth curved line. And as we did from the other side, will come down from this side as well. And then we will determine some shapes. Right next to this line. I'll obviously another curved line, which are actually the pockets for our shoelaces. But we're not going to work on that details yet. We just determined the placement of where our shoe laces would go. But before we do them, we should complete our general shape even more than this. Okay? So we have digital shape almost completely. We should work on this area, which is the middle of our shoe. And then we should add some dimension to the bottom of our shoe in a way that we come down from this area. And then we'll get a twist will turn, and we move on to the end of our shoot. Okay. Also for the top part now has much as the bottom part, but we just follow this line and Lidl. And then and then we'll work on this front part of the shoe. And after that, for this front part, we will create a curved line. That's area which is the back of our sneakers, is not be seen too much, so we do not consider it too much. And we consider that the front part of our sneakers will be seen more. Therefore, we start this line from here. Okay? Now we'll create the pockets for my shoe laces where they should go. Exactly like this. And almost totally depends on you. That which, how many shoe lace as you want on the top of your sneakers? So you will add the shoe laces from both sides, even from the side that cannot be seen completely. One of them should come this way and the other should go to the side that we won't see. You just go on them. With these patterns. You just repeat this pattern and this procedure until you get to the top of your shoe. So we will get to the last part of our shoe lace. And then in this part, we are coming from this side, which can be seen less to here. And then we will bring out the last part of the shoelace out of the socket and will also create another one to that side which cannot be seen. Okay, So this was how we create beautiful sneakers. And something that you should know. And we should show about this area has some dimension. And I want to show that our foot is actually going inside of it is that we can darken this area. So we can show this is curved in and it has some depth. Or based on this shoe that we've created, we can create a foot over here, a leg over here. And this way we can show that our leg is coming from, coming out from this shoe. So you can use both techniques to show your shoe has some volume. And if you want to create both legs next to each other, you can definitely create another shoe exactly like this, right next to it. So you can have both feet. Let me show you how we can have the other shoe next to it. And you're going to create that a part of your next shoe will not be seen because it will go behind the shoe, which is more in front of us. So we create this same oval ball. We created a smaller this sine y. Again, I review because some part of our shoe will go behind the front shoe and obviously we are creating it further to us. Therefore, we should consider the perspective as well. We will start creating this stuff. And because this shoe cannot be seen properly and we're just seeing one part of it. Only. Work would be easier because we are just seeing one part of it or you're just drawing one part of it. So it would be easier for us. And we just repeat the same movements that we did for the other shoe. There's just a little bit of a difference that when you're working on this one, you should pay attention to that. It should be smaller than the previous one. All right. Now we will complete our lines. And then like the other one, we will determine the placement of the shoe lace says, you can actually count these holds for the shoe laces at do the exact same numbers on the other one. Here we have seven of them. Now I will create my shoe laces on the other fun. It's very, very easily. I'm just following the exact same procedure, so do not be afraid if you see I'm not explaining every step again because the procedure is completely the same. Just with keeping that in mind that we are creating this one in a perspective. So it would be smaller than the other one. And also do the same thing for the last part of our shoe lace as we did for the other side. You can also have the foot over here on this side as well. Can get this line more straight. So huge. Create the other foot as well and your lines would be straight. Okay, This was our first shoe. Let's see how we can create other ones. Should be very, very interesting. You can erase the extra lines from your work in this way. And now move on to my next shoe. You can have this sneakers both for female and male characters. You can just change the shapes a little bit. Maybe the size of the shoe would be different. We'll work on them later again. But right now, I just want to create a kind of flip flops for you. Some sandals that you might use when you're going to the beach. When you are creating flip-flops. The thing that you should consider is that one of them is further from you and the other one is more near. And in this way you create them. And after that, you should come down a little from sides downward to show that your flip flops also have dimension. And that it's not really flat on the ground. So just like this, you create some dimension at the bottom of your flip flops. Now that you've done this, you should be careful that the shape of your foot can also be seen in your flip flops. Just the shape of it in this way. And then come over here. And I consider as some strips on my flip-flops. Because we want to show that we are not just standing in a flat ground. And we also want to show that our flip-flops have some dimension. I will create the strip and the middle, getting near to this side and further to the other side. So this bond, this bond should be thicker, bigger and near to us. And the other would be is smaller. So we create this more near to this side. And then I will create it in this shape. I'll move toward the size of my flip flops. And from this side here, pay attention to that. Every detail should show that your work is not on the flat ground. Really pay attention to that. You can create some curves over here to get the shape that you want exactly. And then we do the same thing for the other one. You just follow the procedure. But as I said before, because this one is further from us, we created almost in the center. We create this curved line almost in the center, and then recreate them obviously smaller and in more perspective. Well, you can also get the surface of this flip flop, even a smaller, you should be, you can consider the smaller. So just like this, we will create our flip-flops, tops. Either dare flip-flops or sandals or whatever that you decide. You can do the same thing for the same kind of shapes. So don't be worried. And also for this side, I'm going to continue these shapes and forms. You can continue your work this way. So these are our flip-flops.
30. Continue Draw Different Shoes (Women's shoes): Hello again. Now we are going to continue creating the shoes. Again. I say in this session, we're going to work on different shoes. And this time we want to create the foot first. And then after that we will add the shoes to them. We can go through to procedures for this whole idea. One of them is that first we create a shoe and then we create the feet. The other one is vice versa. That first we create a feed and the shoes, and you can only do this shoes only. I mean, you can just omit the fit and you would just have the shoes. But it's their first secrete our feet and then bring up our shoes on them. Now for a depth-first. So all we create our legs, our feet. And because we had different shapes of creating the fade, both in this course and the previous one, which was our primary course. And I'm just going to do this so subtle. I would focus on the placement of the feet inside of the shoes. So I'm not going to review all the steps on creating the feet because you already had that. And we're just going to focus on this. And you're creating your feet in a way that you're going to cover it with shoes. It doesn't matter that you create each detail on it. For example, the fingers into fingernails and whatsoever. You just grade the general shape of it so we have it and now we would know how we can incorporate our shoes on them. Now I want to create my shoes on my feet. I will start from this side of the foot and continue the rest of my shape. If you pay attention, I'm just continuing this shape of my actual foot. And then I start right next to my actual foot and I go to the other side, had a very curved chromosome shaped line. So I can create the tip of the shoe. This also brings some dimension to it. So right from the beginning, we've created these lines and they create these curves and gave this kind of a 3D look. Now for the bottom of my shoe. I will also consider some kind of a hymn. Hi Hill, not so high at a still. Okay. Then I will come over here and then create this shoe laces for our sandals. Right now I'm creating just a feminine sandal. So I'm just creating some bands for them. Something to support my wrist, support my ankle. And now for this other shoe, I also do the same. We start from this side of the foot. We create a slight curved line based on the shape of our foot. And then we move on to the front, to the tip of the shoe. And then we continue this work right alongside of our foot. And very aware that we cannot see and the rest of the shoe anymore, we will just cut it and. We'll just create these shapes on top of it to have the shape down we want. Now I'm going to create another line for the tip of my eye, for the top of my shoe. Because you want to show that there's some foot underneath it. So I connected to this side of the shoe. And also for the other one, I will create some hills in this way. And then I also create the bands for this foot as well. I try to keep this same designs in both of my shoes. And then we can work on, we can erase the lines that we've created underneath the shoe and they cannot be seen actually, I mean, the lines for our actual feet. You see? I've already spoken of them and left one of them to be seen that you figure out which lines you should erase when you're working on your sketches. So this is a design with creating the feet first and then bring on the shoes onto our sketch. Obviously we have different kinds of shoes and you can create them in any type and you just put your feet inside it. I mean, the feed or VR character. Obviously. I'm going to create some other models for you. So you would now have its work. Now for the shoes which are facing forward. I mean, when we are looking at someone from the front view, we will look at the shoes also found the front VIA. So we try to create the feed as the way we've always done. Just consider that because the shoe is on top of your feet. Under your feet fingers will be seen. For example, like these flip-flops or sandals that you can see the finger of the feet. Uh, you should create the fingers. But the thing that I'm seeing right now is that because these kind of shoes, like a sneakers, like the sandals that I've just created for you. The thing about them is that you can note, see the fingers and will be covered by your shoot so you can omit dose the tail. So then I say, I do not think about the details while creating the shoe is when your shoe is actually covering a massive amount of your foot. But if you're wearing some flip-flops or sandals, obviously should work on the details, especially fingers because they can be seen. Okay, also continue this from here. And then from this lower area, I mean, the bottom of my feet, I would create my shoe. Just a you should consider that because this area is our foot and it has a prominent shape, it has some value. The lives that we are going to create in this area definitely should have this curve. They should look like croissants. Now I can add some designs to my shoe. I can bring some details or some actual designs like this. Then I can create some shoe laces for it. Maybe they won't be even practical, but look at so even for creating these shoe laces, you should consider the curve on the top of your foot. Actually, the prominent part of your foot. Should definitely consider that. And then you can create these lines for the corners of your work. And you can even add some pretty little details. So you can make sure your shoe is reading realistic and. It can be practical for your character. Now. If you create the shoe first, it won't be that much good because if you create a feet first and then you put the shoe on the top of it. And your designs and your lines, your sketches, everything in your word will be more in the special order and they would be better and more comprehensive looking. But it still totally depends on your own tastes. You can do this, vice versa. Now and to create another model for you in which our fingers, our toes could be seen, like for example, flip-flops or sandals. Now I will create the general volume of my foot, and then I will create my toes. We've talked about the rules of creating defeat. We've said how the procedure will work into terms of anatomy. And if you've forgotten them or you're just not sure about any of them. You can go back to our primary course and watch down one more time or even more than that if you'd like. But because we've already said it, I'm not going to repeat it again in here. Alright. Now, on the top of this foot, I'm going to create my sandal. So when we are creating sandals will create the volume at the sides of our foot and then we just bring them down. And with a little bit of this dense from our little toes, we come a little bit forward and we create our San belt. Just like this. Is it a tuple of the sandal will include our toes and our biggest TO, will actually match the edge of our sandals. So the rest of them will have a distance to the edge of the sandal. And then we create a curved line on the top of my foot. And then where ever I wanted to be over. I will cover this area with another curved line. And also I can do the same thing for my ankle. I can create another band in this shape. And this line. I can even create some designs, not just not to leave them morale. So they would look like this, this shape. So this would be the top of my design. And because I want to show that it has some dimension, I can also darken this lower part of my shoe and give it a shading. I can darken this line to pop it out more. Alright. So this is the model that I chose and our fingers can be seen. Consider that I'm just practicing here on one foot. I just want you, I just want to show you the example and the procedure of the whole work. Therefore, when you are going to create two feet next to other, you should keep the symmetry between them. It is very, very important that you will keep this symmetry between the fit because they should look identical. Here we would have the toe and the next fingers to it. And you should just figure that out by yourself. But I'm just giving you examples here when you're practicing at home, try to create these lines. A symmetrical, not going to create this next line for you. With this is for, of course, this shape of the Sandel is for men and for women you can create actual center, foot. It a more beautiful shape.
31. Chair drawing: Hello, my dear friends again. We are here with another tutorial episode. And in this episode, I mean, up to here we've created the different types of characters and we've talked about everything about the characters that we need. Now, we need to create a background for our character. And for creating that background, we have to learn some specific objects because our character is not always alone and in a blank space. So there are always some things that we should add to the background of our work, okay? For us to create the objects, there are some rules that we should just respect and take care of. One of them is that when we are creating a shape and object, this object is actually made from some specific lies with a specific shapes. And also they should definitely be in a specific perspective. So they would not be deformed or looks. So I'm natural. Okay, Now for creating a chair, first of all, I will create the lines that I want to put my chair on that right now for doing it. We create four lines that are not straight and have some angle. Why are we doing this? Because from both sides they should just meet each other at 1. In that case, our shape would not get deformed. Our main shape, I mean, this is this is actually our seat where we are going to sit on it. And because we are going to create a dimension for our chair, we're going to create a volume for it. We will connect these parts together because it's a surface, but it also has some volume are not just grading lines. If you do that, work with looks so ridiculous and so on natural. So in this way we are having a good volume for our surface. Now, for my chair. I'm going to create some legs. And for creating them, we can create so many different designs and shapes. These are the simplest ones that I'm creating right now. Now. Because we've created our lines in a corner way and read some angle. Our chair legs should also be in perspective and in this special angle, you should definitely consider this. Otherwise you might end up with a chair up in the air with no base, no ration and wisdom behind your sketch. And for this side, we're just going to see this leg because the other one is in the back. We can not say that completely. We also create this corner ray lines for the bottom of our chair as well. Here. I would have my third one, my third leg. Now for creating our fourth thick, we just see a part of it and it's in the back, it's in the behind. So because it's in perspective, we just see a little bit of it. And based on this line and a structure that we have here. Based on that we will create a fourth leg in this area. I mean, for creating something, some objects like chairs, like tables, like so far as you have some different lines that you connect them together. Until you've get a complete look. So this is my fourth leg. But if you pay attention, you cannot see the most of the last one and we just see a small part of it at the end. I just created them not to lose the placement of it and later I will erase it. And our chair can have something for the back of the person. Actually it can have a back. So I want to create a back on this state. And we should pay attention to that. These lines should go straight up. I mean, from the this leg, we're going to go up a straight line and also from the other side, we do the same. And then after that for this part, for this area, the top of our chair, we can use the same angle of these lines. So I create a line with the same angle that I had. And then I will connect my lines together. You can consider either of the lines angles, but it's better to create it like this. If you want the top of your seat, your chair to be a straight. So here we are. We have our chair. Now for this area, because we have a curve in here. We can even create a dimension to our work from this inner part. Just like this, you see, we've just add some dimension, add some volume to our work. Creating things flat. It helps you a lot in improving your work and making it look better and better. And of course, more natural. You should definitely create both ways and just compare them to each other. Now this is a very simple chair. And for this area that is actually our seat, they can create a kind of a surface. Like we are having some kind of a fabric on this area. How can we do that with designing good with some lines? As you can see, I'm creating some curved lines on the top of this chair in order to show that this area has a volume and it has a kind of a fabric with designs on it. As we go to the back of the chair, we create our SRE. As we come to the right side, we create our lines more straight Sleep. Okay, now for the top part of our chair, we can change our design a little. And we can create it similar to a circle. And then four here, we can go to her inside a little and then come back out again. Because you want to show that this upper part is a little bit behind lower part, we want to show that it has some curve. You can even work on the edges of your chair and give them a special design. So as I said, that totally depends on you to work with your designs. You can do lots of works. You can create the legs of your chair look like this. My tab kind of a twist on this area. You can create some designs to the bottom of your work. Not to creating good, completely straight. You can just give them some curves, some shape, some twists. You can use so many different designs for the objects, for close at anything. Now on the background of your character. First, I'm going to create some lines on the back of my seat. Just in order to add some designs to it. You can create a straight or you can just come toward inside, can make it curve. We're not losing the dimension of your word. Try to keep this two lies in any PAR dad who are working on. You can even create this design to show that. Maybe the back of it, it's not having any texture. Just likes bars. And now I want to create another type of chair. We do to basic the same. Now I will create the dimension of my work. Your work would be way more attractive when it's in a 3D view. We have a dimension at all. Then for the legs of this share, actually using the same procedure. So I'm going to create a megs of my chair. This shape, which is showing actually two parts for each leg. So I consider all of these parts from different size and I just changed the design of my legs and create these into parts. So create also this side of our work. And for the last leg this time, because I just created that angles even more drastically. The other leg is not be seen anymore. It's not seen anymore. And this one because the third leg was shorter than usual, the other leg can not be seen as well. So definitely the point of your view affects your shape and your object. Definitely add a few, don't even add, add a back to it. It can easily be a table for you, a coffee table or a side table. If you don't create any back for it. Now, you can just create some places for your arm chair. So if you create handles like this is what looked like an arm chair. So with the same shapes of the lies recreate these are in places as well with our straight lines and curved lines, but obviously as special angle. So I create the placement of the arms on both sides and for the back of it, we can do something Is that the crate can't create the back of our seed in the various special design. This all comes from your creativity. And you can even create a unique object for you and for your character. Even again, sometimes the objects are affected by the personality of your character, of NADH to environment that he or she is in. So I'm just giving it some beautiful designs to the back of my seat. Well, for example, you can even create a hollow circle in the middle of it in the center of your back. And you just work on your chair like this. So these are two different shapes of the chairs that I've created for you that you would know how you can create some background objects for your characters.
32. Learning to Draw the space of Sofas and Rugs: Hello, my dear friends. We are here again with another episode with you. And in this episode we're going to talk about creating more background for our character. And together we are about to create a rock or a carpet and, and stuff on top of it. Right? Now, we start creating the carpet for creating the carpet or the rock. And I'm going to create an oval, a big one in this way. And then I will create this lower part of my snowfall wish it tends to be on top of my rock. So in this way, we are creating the placement of our sofa. Okay. We've determined the placement of the rock, sorry, of the snowfall. We are about to create our sofa. We'd some simple lines. Just create four lines out of all four corners of the shape that we've just made. And this would actually make some dimension for our sofa. After dad, we connect the two parts, two lines that we've created upward. We just connect them all together. Now we have a square at the bottom and a square at the top. The same shape. And in this way we have a cube basically. Alright, now for nervous of my sofa, I'm going to create a back for it. You can also say it's have semicircle and half a square, C. I came up as a rectangle or square. And then at the top of it, I've grid around a shape. Okay. Up to this part, you've seen how easily with created the bottom part and the top part of our sofa. Now from this front parts, I'm going to create two circles for having the top of our cube. So we create two circles at the front corners of our cube. And then we this straight line, I bring it to the back of the sofa and create a curved line to connect it to the other corner. And of course we do the same for the other side as well. And then again, I will create a curved line at the ending part of it. And now I'm going to come down from the sides of my arms, the placement of my arms under the sofa. I come down and I create kind of an overall is stretched oval. And then from here, from the emitter love cube, I bring this semi oval to the end of my sofa. In this way, just to give it a special design. And of course, I'll do the same for the other side as well. I come from the front, I come down and then again from here, I go toward my arm chairs. Now for this bar, which is actually going to be our seat, I create a small pillow. I give some volume to it. And then for this area, for the back of my sofa. I also create even another part like this. Again, I say just to give it a special design, it doesn't have any necessity. It's better if you continue this back line from next to our arms of our chair. Are there just to give it a better shape? And we will create this added additional part toward inside. So in this shape we are having the back of our so far. Okay, now that we've determined the general shape of our so far, our arm chair. What am I going to do here? I will be adding details to my work. Yet. I'm going to use my edited. But before that, I'll shake all of the parts of my design to see if they are in a proper way and if they're all correct. When I have made sure that I have no mistakes, I'll go over my main lines and bold them with my edit it. So simple. So just like this, I'm going to continue highlighting my main lines. And for this back of the seat, create two bottoms. And I'm going to actually create some lines around them in order to show that the fabric of our sofa husband is squeezed in in these places, around these bottoms. And then for the bottom part of my list, sorry for the arms of my chair. Determine the placement of them like this. And then I also add one other button in here. So it wouldn't load too simple. I'll do the same for the other one as well. Okay. Now, move on to my sofas legs and the bottom part of my sofa. And for this area, I want to show that it's made of fabric and it has a event a has some wrinkles on it. So I start from here and create these designs at the bottom of my sofa to add some wrinkles. And this wrinkling look at the bottom of my sofa to show that it's made of fabric and it's not made of wood or metal or whatsoever. And obviously, it doesn't have a very special order shape. And I can even add some more lines in here. I can continue some lines upward. And for this small pillow on our sofa, I can even create some lines looking like this. Just to show that it has some volume over here. And this also maize is being made from fabric as well. And for this area, for myself, for the seat, I can bring this line a little bit down so we would have less of a seating place and there will be more to the back of the seat. These are only things that will add to the attractiveness of your work. Because even on those levels, our lives were correct and in place, but In order to make it more attractive and different, you can just make some varieties in creating this stuff. You can clearly see the texture of the fabric in this part of our sofa. Exactly like this. So this is our sofa, or rather h. Now I want to create a small pillow for my sofa where sometimes you can sit on it even though, okay. As you can see, I've created some shape between an oval and circle, and then create another one inside of it. But the second one which is inside is not complete. So with the use of some lines, I'm going to show there are some volumes over here. And also in this area, in the spec area, we would have some more lines. These curved lines actually show that this is both around and it has dimension and volume. Even in the center of it, in the middle of it, we can create a line to show that it's in the center. Now for our small pillow, we can even add some more touch ups, some little details in order to make them more beautiful. And that for the rock itself, we can create some strings coming out of it. In this way. We can also create some more lines from almost the center of our AAC in order to show that it's a carpet. And it has some volume for itself as well. And you can spend more time on it and add some more designs of it. For example, I've left this part empty because for example, I wanted to create a ball here because we are creating a background. As much details as you put into it, you would have a better outcome overall. Okay? We can even have a small pillow for r. So phi itself. Again, I'm saying as much time as you spend on it, you're going to get more details, more designs on each object that you're creating. And overall of your work would look way more better. So I'll continue then this shape. So my work will have some dimensions. And I can even come here and create the edges of my work with coming out and going in again. Which actually makes my work look and more funny and whimsical. As I said before, even the objects on the background of your character can speak more about the personality of your character or the story of it. So when you are creating an object, you should definitely make this object as suitable with your character. Even size-wise, I mean, you cannot create a very big sofa and very little small character on it, or vice versa. The objects should be completely suitable to your characters in each aspect and feature. And obviously at the end you can erase these extra lines so all of the features of your objects will show themselves properly. Let me erase them right now so you would know which lines should be erased and which ones should be kept here. You can also erase the lines inside of this a small pillow because you cannot see Thoreau it, it's not really translucent. These are only because we want your work to come out clean and these are guidelines for you. They just help you to build up your foundation and go on top of them. But at the end of your work, you should definitely erase them and you should not keep them in any case. Because that way they would then look clean, they wouldn't look good. So these are the lines that we can keep in order not to destroy any of this special shapes. Okay? Now I will come over here and I will create some more lines. Because why you're erasing your extra and guidelines, you might even erase a little bit of your main lines as well by mistake or because your hand has just slipped in some places, so don't worry about it. You can always go back. Now for your small pillow, I can even add some lines to make it look way more attractive. Okay. This is work which is done. And I've erased extra lines so my work would look better and better.
33. Learn how to Draw a Bedroom Space: Hello, my dear friends. I'm here again. Of course, special tutorial for you. We are going to continue on working on the background and creating demand ground for your character. In this tutorial, we are going to create a bed and maybe a small closet next to it to create a background of a bedroom. Now I'm going to start my work with creating a carpet underneath my bed. Obviously, you can have a bedroom without a carpet. So I'm just going all right. Here we have our carpet. Again, I say you shouldn't be afraid on creating different lines into your work. Okay? So this is our carpet, which is going to be underneath our BET. Obviously some of it knows all of it and the other part of it would be seen. Now, I'm going to determine the placement of my bit. This would be debited and part of my bed which actually will stand on the carpet. And then after that, I'll create lines going up forwards from all four corners of my work. Alright, and then after that, I consider almost in the middle of this line that is going to outward and then I connect it to the other corner to the top site. That's because I want to create the lower part of my bed and a mattress. I want these two to be separated. And if you want to consider kind of a drawer underneath your bed, below your bed, you should just bring this line a little bit more above. And then for this lower part of my bed. And again, I connect these two lines that I've created here. And I do the same for the upper side of my bed. But if I want to create a different design for the top, comparing to the bottom, I can just bring my lines a little bit more above and then I would create my curved line. Okay. And also for this side, I would definitely create a line almost from the medulla of this line that we've had. And I just bring it up to the top of my bed. And then again, I will connect these two together to get a silhouette that I want. Then I will have a square, something between a square and a rectangle. And this would be the placement of my pillow. And definitely if I wanted my pillow to be more horizontal, I can create it just like this. You see? This way. It is more horizontal and is placed way more better. On my bit. Of course the other way, a good too, it depends on you and your own taste. Now for the lower part of my work that I want to create the legs of my bed. I just created in very small that would look like this. And if I want to create some blanket for my work because head is Yvette, it needs pillow blanket. So I just bring my blanket a little bit down. Maybe. I create some of it even on the ground. In this way. And after that, I use some of my lines and I will show them. Actually, I will use them to show that there is a fabric here and it's blanket. Differently, I should just erase the guidelines and the lines underneath it because they cannot be seen. But therefore, after I will add the designs and details, you can see a good blanket over here. Right now we're just going to continue in creating our general shapes. So you can put the pillow in any angle that you want in any position. You can even create some smaller pillows on your big pillow. So you can go like this. And if you want, you can create these shapes. And you may note that depends on you. For example, in here you can get some designs like circles or any fabric designs that you like. For example, you can give some kind of designed to this bottom part of your bed. Or if you don't like that, you can just go simple. Now, I want to create the side table or maybe even as small drawer next to my bed. Depending on how much you want to bring your drawer forward onto your carpets, you would create the bottom part for your dollar. And then after that, as much as you want to draw are to be long and as much as you want it to be higher. You bring all these lines all upward from all four corners. And then you connect them all to each other to have another shape exactly the same on the top. This is the simplest way of the work that I'm doing for you right now. This is a simplest way. In order to get your volumes correctly. Now a phi want, I can even consider two drawers for it. In this shape. Then I would just determines some handles for it. It should be looking like this. And I will create a drawers in this side of our small table. And you should just create a little bit of distance if from all corners. And you should create your drawer in the center of your work. So do not assort your drawer at the edge of your work because that makes no sense. Doesn't it won't look like you can just draw them out. For the details. I can consider a book being placed on this side table. This is small drawer. Or for this area. I can consider sleeping light, night light. I can add created so tall or short, or I can create any different designs that I want. These all depends on your own taste, your own creativity, and the things that you want in your characters bedroom based on his or her personality and also yours. So just like this, I create the base of my lamp and then of course, the whole part of it. Now I will erase the extra lines for you. Therefore, you can see where our main lines will be and then we can add details as we want to write. You should clear all these lines over here. They're just wrong. For the ending part of your sketch, I mean, they're just good at the beginning when you want to get help from them to complete your general shapes. But end to end of your work, you shouldn't still be seeing them because that would just not make your work look pretty. So remember that the guidelines would always be for the primary stage of your sketching. None of these lines can be and continue existing in our work because there are not transparent and you can not see so many things in your work. That's why we just do it at the end of our work when we are sure we don't have any mistakes, so we can erase the guidelines. And now I'm going to use my edit and add my details here. But one of the things that you can do is to extend your pillow, ride up to the edge and side of your bed, can have big pillows. And from this side, you can even create some dimension for it to show that it has a volume. And for doing that, I'll continue this line from this side. And then after that, I add an additional line in these areas just to show that it has some dimension and it is not flat. We do the same for our small pillows as well. I mean, we can do them. And then we can use these kind of curved lines to show that our work has some volume. And then we can add some more lines on different parts of our pillow. So we can show that this is a fabric. And you can even show the texture of your work with creating these lines. It's very, very simple. Also for the blanket, we are going to show that as well. So I will create some lines for this area in which our fabric has been folded. And for this side of the work, we can show this folded area on the blanket. And in order to doing that, we can make it a little bit difference from the lower area. And we can just bring it a little bit out. So you can see this is an additional part and it's been folded on top of itself. And then it can continue this line exactly like the upper area. You can give it a curve and you can bring it down to the end of our blanket. Obviously after that, you can add some lines looking like this, showing that we have some kind of textures and wrinkles here. And in this area, maybe because you want to show the texture of this blanket. You can easily use these kinds of lines. Then after that for depart on the top of our bed, we can show lines like this in order to show the volume. And obviously after that, we come over here and we create some shapes for our mattress. Okay? If you wanted to create any design over here, you should definitely consider that because our wood has some volume and dimension as well. When you want to, for example, create a heart shape at the top of your bed. You should also created this side of the heart in order to show that dimension to it. Like it's a hole that has been caught through to wood. So you can see even inside of the wood. So this side should show that our shape and our design has some volume so that you can see it is not flat. For this lower area. Again, a few of light to create a design as well. You can create a circle over here. And I just do the same thing that I told you for this lower part. I mean, I create some shape exactly like the one that I did for the outer part. And I want to show that you can see even inside the word or whatever texture that your bed has. So as you can see, is very, very easy. You should just be a little bit careful. And you can go wild with these designs and use your own creativity to create very, very cue to whimsical or even scary designs on your objects. Now, I'm going to even incorporate some more lines to my corporate. Just to make it a little bit out of that pay lens simple shape was just so plain. And we don't want that. I'm just creating some stripes. My car peds. As you can see, this line has gone underneath the blanket. A little came out from the other side. And we can also work on our drawer, even our book. You can even give your book and name why you are practicing or working on your own sketches. You can even add some more lines on these areas that you can see the paper. And you can bring out the book a little bit out. Or for example, for my knights lamp, I can't him and put a button on it so you can see, okay, I can turn it on or off. And this would be the general shape for my night lamp. And if you wanted to add any designs and details over here, for example, you can create some lines like this to give it a special detail. Okay, So basically this is our bedroom background, which was including a bed and a side table.
34. Learning to Draw Table and Chair: Hello, my dear friends. I am here again. We then another tutorial. Now, this time we are actually going to work on the back ground shaping. We're going to create a table and a chair. Okay? Just like always, because I want my work to be easier, of course. So I will create the background of my background. Because this way I can figure out that the things that I want to create where they would exactly go and where they would be their placement. I don't want the legs of my chair or my table to get out of the area that I want. So I will create my lines as a carpet for example. And I want to put my objects on top of this. Now for creating the table, I wanted to be here in this area. So first I determined the placement of my desk, sorry, of my table. And then from all four corners of the shape that I've created, I will go up and then I will create this same and the exact same shape on top of them. So now I can make these lines together with this same angle. I've created a lower shape, which would look like this. Alright. Now that we've determined a placement of our table and we've got to this place. Now, I will create maybe some draw on my table and desk. And if I want to do that, I can do that in this phase and indices step. So I will just add some more dimension to my desk. And then for this front part, I will also create a drawer for it. And I also created from the side as well. Then I come down and then I will create the legs far my desk or table, it doesn't matter. I mean, depends on which one do you want? You can make these legs longer or shorter. That depends on you as much as you want. You can just change the size of them. Now, for the surface of our desk, will work on it later. Before that, we are going to create this draw for it. And I just graded in this shape to make it more attractive. I do not seek the lines of my drawer to the side of my desk. Just keep them in the middle. And then I create two handles on it with the shape of two circles. Now, for the tip of my desk, for the surface of my desk. First, I will erase the extra lines that I've created because it's not translucent. So i, and I want to create some objects on top of my table. So I'm going to erase these. So I would not get confused when we want to put our stuff on this table. Okay. Now, we'll work on the sides of my table. Now. For surface of my table, first I want to create a lamp. So I determined is placement. And then this would be the stand of my lamp. And then I will create this upper part of my lamp, which would be the placement of the light bulb. Now, if you see the bottom part of the lamp, you cannot see the top part of it and vice versa. So you should consider that while you are creating your lab and you should pay attention to the direction and the angle of your own view. So and I will use this line coming down as the bottom for turning off and on my lamp. And here I will create a glass and I'll put a handle for it. I can even create a book here. And you should consider that if you are working on a surface like here, you should just make the directions of your work and every line in a way that it would suit your surface. I mean, it can be in a way that my lines on the surface would go rise, but everything I create would go left. That just doesn't work. Okay, now I would want to work on this inner side of the book. So I'm just creating some lines for a to give it some textures and stuff. So you can even show some papers in it. Now then I will want to work generally on my chair and add less. I will add some more details to my background again. Well, determine the legs of our chair. From the bottom. For example, our chair has been placed exactly next to our desk. You can put your chair anywhere you want. You can put it in front of your desk or next to your desk. That totally depends on you to character. You want to create a background for it and everything else. So I will move upward from all four corners and then I create the exact same shape on the top part. So just like this, this would be the place which is our seat. And then I will create some back for it. This would be the back of my chair and the lower part would be are you seat actually? Well, like to create around back for it. You can go your own style, give it a special design good with sharp edges. So that totally depends on you again. Now for to see two of our chair, I will create some lines in this shape, which they are, as you can see, my lines are very soft and they are round the corners of my seed. Round. And then for the back of my seat, I create another semicircle inside of it. Just to give it a design to make my work look better, more beautiful. Now I will complete the legs of them as much as I can. And even if I want for the front part of my chair, I can create a design like this. That will be definitely my choice. Now, far this part on the seat of our chair, I first erase the extra lines because I want to create some design over here. So first I erase the extra lines and then I add my design so they won't be mixed, stop or confused with each other. For this side, I'm going to create a line like this. For this side. I do the same. And then for example, we can create even smaller lines. We can have a line like this on this side. And just like that, we can show that we have some kind of a fabric on the seat of our chair. Now for our making my work even more complete, I want to add some details to my work. I start from the details on the chair itself. So these are some bars on the back of our seed. So I'm going to create another line next to them to show that they are not flat and they have some volume and error bars. K. Then I will come to my desk. And then for my book, I'm going to create some lines in order to show that there are some papers here. And I can even consider as small part, as small section on top of my book. So there goes a title. I can even create some lines on the disk itself to show the text. Drove it to show. My desk is made of wood. I can't add some more details even to my glass, to my mug II. Then in here, I can design this cop like that with curved simple lines. For my lamp. I can just darken this stand of it and give some dimension. To the stand of it, which shading it and darkening some part of it. I can even create some design on the top part of my lamp. Where is the place of the light bulb? Ok. And we darken this area to show that this part is inside of that top part of the lamp. And in here when it gets the desk connects and meets the chair, will just dark and the lines of it a little bit more. Now with erasing the extra lines I've worked with look so amazing, so much more amazing. But as far as you can see right now, is still has its own attractiveness here. Even with some lies not being erased yet. For example, you can even create a basket or a vase here that depends on you because you're just creating the background. So as much time as you spent on your background, you can create so many more details and attractiveness of your work would just go so high. For example, I've created, been here a basket, trash can, and then I even create some papers that have been thrown away. You should be careful with the lines that you're creating. That all of them should not look the same because these are different papers of having thrown away and they have been squeezed in different shapes so they should not look alike. If they do that would just decrease the attractiveness of your work. You can even work on the carpet that you've created. You can add some strings coming out of this side of the carpet. And you can even create a ball over here. And as I said before, as much more time as you spend on it, it can create so many details. You can create a very beautiful background for your character. Depending on the personality of your character, the age, the gender, and everything else that you've got going there. So and if you create more details, obviously are worked leg way more better. So this is our final background.
35. Learn to draw Sofa from the Front View: Hello, my dear friends again. Today I'm here with another tutorial session for you. In this session we are going to work on the background, on creating the background. And you would see when we want to create something from the front view, how we should actually do that. Okay? Now we start creating a straight line as our horizontal line or horizontal line. And then after that, I'll come over here. And I'm going to use two imaginary points for creating the volume of my work. For example. Now we want to create as so far. So for that, we are just trying to imagine some imaginary lines and then we create two lines from the side. And something that you should be careful is that they should just match each other. They should meet each other at 1 if we continue them. So we create them corner raise. And then we create another line, again, a horizontal line. And then we bring these lines down looking like this. So these lines that we create toward down will be actually are so Falls legs that we are working on right now. Okay, now for this area, again, we create another line because we run the lower part of our sofa to be also in the same direction as these lines on top of it. Now what are we going to do? We're going to create the same thing that we had on the top. On the bottom, I mean, we should create the same shapes. Now, if you want to create something like a table or anything similar to that, this would help us so much. Okay. So now we came over here and we've created the legs. And now for this area, I'm going to come up a little. And then I want some parts of my arm chairs coming out. Therefore, I create this slide, some kind of corner rays. So I do the same for this area for this part. And you can just continue this line and you can come up as long as you want. So for here we have a two circles looking like this. And these guidelines are only going to help us to have the both sides of our work in the same size. And you would just not lose the size and the proportions of your objects or your character. Now I will just bring these arms toward inside of the sofa. And then we tried to create the back of this sofa, which would be looking like this. We would do the same for the other side as well. Now that we have the general shape for our work, we can even come over here and create the rest of the work. So we should consider some place for our. Seating area. And then I can say almost this area of our work can be the set of our sofa. So if we consider this for for the placement of our arms on the chair, consider these the arm chairs. We can shape them like this, which would be really easy. And just like this, we have the inner part of our so far. Okay? Now for the play says, we also consider a design and a shape in order to make our work more attractive and more unique. So I will design them just like this. And then bring it out a little and down, of course. And then I'll do the same for the other side as well. And because you want to be sure where should we start this design, I'm going to use my guideline to keep all parts of my object in same positions to keep it symmetrical. And then we come down and exactly like this will move forward. And we apply our lines. And for this lower part of our SO file for our armchair. You can even create some more designs. And in this area, we can still have our sofa, so it has very small legs. And here it's, we'll end this part of the so-called actually connect these two legs together. And because you want to show that it has some dimension, we can even create something like this and show that dimension in our work. So we would know our work is not flat. And there is a volume behind this area. And then for this part, in front of the handles, in front of the placement of the arms will just create two buttons in order to create some special design. And because we want to show that the fabric has been squeezed in and underneath this button, we can just create these curved lines around it and show that easily. And then I come over here and I will erase the extra lines of our SO file. The guidelines, the primary guidelines and extra lines that I've created generally. So you can erase all these extra lines of your work so you would have a cleaner outcome. And then you won't be confused between which one should stay there and which one should eliminate it. So I'm doing this for you in order for you to see and have an example for yourself. Cell. Just like this, we would have our work. And then after dab it very subtle lines. We'll come over here and we'll continue our work. Okay? As you can see, I'm wearing, I'm using very simple and subtle lines over here. So you can easily see into my work, I'm just going over my main lines, making them bolder or maybe even add some touch ups so to make it look more cohesive and complete. And then that would be it. Okay. As you can see, we almost have our ending part. So just like this, the extra lines will be deleted. And then after that you can work on this area and just get the lines that you want from it. Say it can show our work has some volume. And in here we can also continue our leg right down here. That would look exactly like this. Okay, We can also work on this lower area of our sofa. And four here we can create some designs and maybe even some wrinkles in order to show that this area is a sale from the fabric of this, of, of, um, the fabric texture of this. So phi and snot, wooden or metal or any other material. So as you see, as you can see with very, very small details and touch ups, we can give some realistic aspects and features to our work and make it just pop out. And we can even design some part of the cloth here. Or maybe some designing by some kind of fabric. You can easily add it on the top of our work and the top of our sofa, as I said before, it will actually give it a better look, give it a more realistic, better look. This is a fabric which is on top of our work. Okay? So this is our general and final shape of the sofa.
36. Learn to Draw Character on the Sofa: Hello to allow my dear friends again. We are here with tutorial. Well, but this couch, and so far that we've created, you want to create a character on this couch. So you would know how you can fix the size of your character and your SO file altogether. Now, what am I going to do here? I'm going to create a general shape for my character at first. I want my character to be actually lying on the sofa and defeat the legs would be coming down from the corner. In order to do that, I will consider this area as the head for my character. And then this area would be the placement of my character's hand and the body. And, and after that, I will create my shapes like this. And then I will bring my character's legs downward from this side. And you can even create flip-flops for your character just to give it that fun and whimsical look. Okay, this is a general shape for my character. And then I will add day hair to my character. And this would be the general shape for her head. And also to Harris style. So it would look like this. And this would be my characters are. Okay. We can also create a small pillow in the back for our character. In order to make our work look more interesting. And we would be working on the whole background, not just a part of it. Now, I want to add some more details to my character. I can even create a sleeping hat for her. There for it would look way more fun and cute. And this would be the risks of TA had, which comes down up to this area, up to this point of the sofa. So and I create a very long cared for her. She would look so fun and cute. And then after that, I will create this circle shape for the ending part of hair hat here on the ground. Okay? Now you see we have a smallest face here. It's because I want to create a pillow underneath her head. Looking exactly like this. And for making it look more interesting. Okay, now I will add details to my character here. I will use hat, dad I've created for the beginning of my work. Okay. Then I will work on the details of the face around the face. And then may be working a little more on here, here, then the eyebrows. And considering that she's asleep, I will create her eyes closed like this. Then I'll work on the nose and the lips, just making the lines a little bit bold so they would pop out. And then for this area, for the top part of my pillow, create this shape in order to make it look more fun. And I'll just drag my hat downward. And then at last, I will create these shapes for my characters neck and her quotes. All right. Now for this part of the character, we can create some lines in this shape. And then we will create our characters. Fingers. They're so tiny and small but still their fingers. And then after that, we will create our character's feet. Legs and feet obviously. For example, my character can be wearing a skirt. That this looks fun. And we might even have some kind of wrinkles at the bottom of her skirt just to make it look way more cute. And then it would look like this. And then we can create socks for our character's feet. Because she's sleeping and choosing her sleeping clouds. Then she might have some socks on. And maybe we can even bring the legs a little bit downward. And they can create this cute flip-flops for her, which would look like this. They're so cute and fun. And then we can show that it's been separated from her foot. And now it looks like this. And then we darken this inside area. And for this little pillow at debate ground, we can have a circle in the middle. So we would show the fabric is, is squeezed here on this bottom. And then for its address. We can create some designs for it. Just looking like this. Okay? Now we can show that this is the back of our character and we just skip creating it. And we can create the hair. In this very vague VQ to style. Then maybe we'll add some details to the ER of my character. And then after that we create some more lines for her hair to show the hair texture on here. Alright, now I will erase the extra lines from my work, the guide and a primary lines that I've created. So my work would just pop out and the outcome result will be cleaned. And therefore, you would know which lines are going underneath the other objects and they should be erased. Whichever part that was going underneath the hat will be erased. And k in here. Do the same for the sofa. Erase the extra lines for it. And in this way, you can even create this same design that we create on the other corner of the PLO, in this corner as well. And this part is actually being placed on the armchair. This would be our whole design. Here we have a character, we have a background for her, and as much time as you spend on it, you can always add more details, even some more designs to her clothes, to the so far to the pillows, to the head, every word that you like and wants. So it totally depends on you and your own taste and of course the time that you spend on it. We would also create one line here in order to show that this hand is actually pressing the fabric, it's squeezing it. We can also have some lines that would look like this to our work. So it would be obvious that our texture in the dress is fabric. And as you can see, we can easily create these textures with simply adding some lines, some curved lines and two different spots of it. But you should know, enriches spots to give that texture, to represent that texture pretty well. And also in here we can create a line like this to show that their arm is banned from the elbow. And this is our final character with a background. And now you've figured out how we very simple shapes and we've creating it back. Good background. You can create a whole character.
37. Girl Character: Hello, my dear friends again. I'm here. We deal with another tutorial session. In this session we are going to create another character. Now for starters of our work, I will create the skull. And then F there that I would also create my characters jaw. Okay, here we go. And then F 30, I'll also add my characters neck. As you can see. With the type that we are working with creating, our character obviously is a woman. And because we are going so delicate, it is so obvious. Okay, Now for making my work more subtle and easier, I will just create this middle central line like this. Then I determined the volume of the hair as well as its style up to some level. So I would have the cysteine here. And I've just concerned some busy hairdo for my character here. So I would have to create a big volume for it and I'm just determining its general volume. And then later I will work on the details and I just add them to my work. Right now. I'm just determining the general volume of the hit of the hair and just the style of the outer shape of it. Just like this. The way more easier. And obviously, I have a corner ways partying for my hair. And some of it it can even come toward inside of the face. I can have some here. Inside of my face. Just helps the whole silhouette of this character. Okay. Dad, we've determined the placement of the hair, will determine the placement of the rest of the face parts. So you would have the eyebrows, the eyes, didn't nose obviously. And then our characters lip. Okay. Because the hair is coming in here. Inside of deface. We will show a little part of the eyebrow for this side because the rest of it has been covered by the hair. And in here we will complete our eyebrow. Okay, now move on to the eyes. And as you can see, the eyes of my character are big. I just want her to have these beautiful big eyes just like this. And I also create big pupils for her. I'm just going to exaggerate these things are lit also. It would look more elegant and it'll just pop out of the work. Now, I'll do the same for the other ions. Well. All right. Now for the upper eyelid, I want to create some lines. And in order to have that bell create more volume and just add some more darkness on the upper eyelid. Okay. As you can see, I'm just creating one line for the upper eyelid as well. And then we'll come over here and I determine the line is spot for both of my eyes. And then for the rest. I just darken the whole I mean, the rest of the eye. Just like this. And then after that, I'll come over here and for my lower eyelid, I will create some eyelashes just like this. And then I go toward inside of the eyebrows. And I will darken this area. I would do the same for the other eyebrow as well. So the eyebrows should match each other exactly. They should be matching each other size-wise, and the placement of them should be exactly the same. They should be on a, on one horizontal line, basically. So these are my eyebrows. And now I want to incorporate some shadings and some hatches into my work. All right, I think we're good here. So now I will move on to the nose of my character. I want to create a very, very small and cute nose for my character to show that she is so beautiful ashtrays, so a proportionate. And she has beautiful small nose. So I will create very small and delicate nostrils for her. And then after that I will add some lines next to the nose to show that it has dimension. Okay? So I would go just like this. And then for my characters live, I would consider a big lip. And I will even creates. The mouth a little bit open wide. And this would be our upper lip. This is the line between the lips. And then I would have my lower lip. I would also place my characters teasing here. And I also create some more shapes and some darkness for my lower lip. So just like that, we will dark in, inside of our lips. And then I will create my character's chin. And just bring it a little bit more above. Because this would read her face better. This would be more proportionate for her. As I said, that's why first we do it with B pencils because we might create so many mistakes. So until you're not sure, you cannot use your EBT it, or you can nudge, create very bold lines. I can also create some of some part of my ear. So you would know there is a phase part ahead Part, a body part like this, just underneath the hair. Now, I will move on to my character's hair. As you can see. In the way that we've created our hair. We can have are very busy hair. And because of that, we will not use very simple straight lines. It will just create these lines very messy without any special order. And that's how it's done. So we shouldn't have any especial ordering here. We're just going wild and busy on to hair. Now, we are just shaping different areas with different shapes of the lines only. And because the general shape of our hair, our hair cell is a little bit messy. We don't notice be concerned too much about these lines being very at a specific. So just like that, we can even hatch some areas in order to give them that cool shape. You can even bring some parts down with lines like this. And also from this side I will darken the pod which connects to the side of the head. And we're just going to create them with some lines looking like that. And I can even work on this side. We'd some not organized lines. All right. I will move on here and I will darken the upper eyelid of our eye. Because I want my work. To read better. So we do this. And then I just get a little bit of the lower eyelid. I will darken it. And I will add some more darkness in this upper area above the eye. Okay. And then after that, I will erase it extra lines. I will erase the extra lines from my work. And then in this way I will create two hatched line for my cheekbone, looking exactly like this. So I can even add some are shadings into this upper area and have that great looked at. I want you see the adjust created this character. So simply we are from very simple shapes. And we just used a little bit of our own creativity and the principles that we've already learned both in primary basic course and this course. Now, to hear of this character has so much work. Basically because they've been created so messy and without any special order. So in order to have these lines in all parts in our work, we would event. Emphasize on these lines more and more. Alright. There's nothing else more to do. Maybe we can even work on some little details like the lower eyelashes. And if you like, you can use your fader and you can work on the pupils darkness to create a more cohesive just like this. And then obviously, you can dark in this area below the chin little bit more than it already is. And just like that, you can get a part of the hair and you work on it with your fader just like this. Alright. Can also add a darkness inside of your lives. And for this area below the chin, can also add this cool shadings for the shadow. The shadow of the face which has been appeared on the neck. Just like this. Now it will be so cool. Okay. Now for this lower part of the eyebrow, also, you can erase it in order for your eyebrows to show itself more and better. And it's finished.
38. Boy with Hat Character: Hello. Hello, my dear friends again, we are here with you with another tutorial session. In this session, we are going to work on a character and individual character based on the things that we've learned during the course. All right, I'm going to start with creating a skull of my character. I don't wanna go too subtle or too crazy. And then after that, after creating the skull, I'm going to draw. All right. This would be my middle guideline which goes through the center of the face. I will add the neck. And I want to work a little bit more literal on the draw. So this way, I dress sides of my face toward inside. And then I would have the color of my characters, clouds, and this would be my primary sketch. Now, I will create the placement of the ears. So here we are. With the ears. Maybe I should just grade this one a bit bigger because I've created this one bigger. I just try to match the sizes of them. And obviously out there we want to complete our work. We details. We will complete it more. After that, I determined the placement of the nose. The placement of the eyebrows should be determined here. Now for my character, I want to create hat. For him. For starters, I would want to create my hat a little bit above the skull. So in this way I'm actually incorporating the head. Because of course I wanted to be exactly fixed on my characters hit. So I just try to do this. Okay, now, for the top of my head. It's actually one of these caps that our character is wearing it with the opposite position of it. I mean, he's wearing a cap but not from the front part of it is just turned it all around and he's wearing a cap from its spec. Okay. We should just only creates a little bit of the hair in here. Therefore, we can show he does have hair and it's actually coming from underneath the cap. And maybe it's even a little bit under pressure. I will continue creating the hair from the sides of the hat, coming out on the ear. Which would look like this with the spatial wave and this funny look at L. So from this side I tried to continue my hair all the way coming down until when I can separate it neg from this area because my character's neg is a very thick right now. So I tried to make it a little bit more normal. And after Dad, I will incorporate day here in this area. It used to be our NIC. We don't want so thick neck for him. So I think for him. And also for our decide, we come from the top and we add to hair for our character. So I can get this cool shape and cool design for his hair. And even of course, the lower part of my air would have hair as well. I mean, we will continue to hear even below the ear in this way. Alright, now I will move on to my characters. I. After creating the eyebrows, It's the eyes turn. Well, I want my character eyes to look in that direction, so I will create both of them looking that way. You see, it looks like he is ultimately looking to his right. I'll do the same for this one. I create the upper eyelid and then I will create the eye and the lower eyelid. After dad with placing the pupil. I can choose in which direction my character is looking. Now I will move on to my character's nose. And I will add the details to that. So just like this, we will have my character and his nose. And we can also create a line alongside the nose, all the way going up to the eyebrow in order to show my nose has some volume and it's not flat. Then I will just shade my eyebrows and little, just hatching them. For the beginning part of it, we create some shapes and then we will dark and the rest of it to get that great look. And we even do the same for the other eyebrow. Now move on to my characters lip. And my characters lives is going to be our kind to be open in this shape. So I would have my characters teeth showing in here in this shape. And then after that, for my lower lip, for my lower teeth. And I create a general shape. And after that, in this area I will create my characters tongue with some had truss. I'm just going to pop it out and bring it out comparing to the other parts of my work. And this part in the middle should be completely darkened. So we separate the teeth area and then we will dark and the rest of the mouth. So we shade at hatched the tongue. We keep the teeth clear and then we darken inside of the mouth. And because my character's head got to try B and big, I will just bring it down and bring it towards the inside from the sides. And I keep the chain part still lung. Then I will just erase the extra lines. And then we move on to this shading. Okay? Now as you can see, I can complete my characters ear. And I would do the same for the other ear. Just adding some more details to them a lot. Okay. And now I will move on to my extra lines and just want to erase them. Okay. Here we go. I'm just erasing all my extra lines here. And it starts looking pretty cool right now actually. That in mind, I start to go a little bit more detailing here. Generally, this is our character's face. Now, I want to add some shadings wherever I feel it's needed. And as you can see, I'm just going over this opera lies above the eye, the lines of the upper eyelid. I'm just darkening them, making them more bold. And for the most part, we will darken the nostrils. And then for this part, beneath the legs, I just add some more darkness. And then I even create some shading for this trick dimples. And for this part, I actually underneath our ahead phase because we're looking at it from the front view. I just shade this area a little bit to show that our phase has created some kind of a shadow on our throat and neck. And then after that, I will just create the neck, this shape. I'm just going to make it more complete. And now I'm going to use my fader. And I will continue my work. Then I would work and this eyebrows with my fader to give them a better look. We can also do the same for the hair and as you can see, him just shading day here with my fader and it just gives it a great look. So this is a darkness for the mouth and then go back to the hair and so continue darkening them. And this is our boy character way the cap. Because in this area we have our character's hair. We are going to create it like this. And then after dad, the even, add some more details to the cap. So this is our final character.
39. Physique Man Character: Hello everyone. We are here again with another interesting tutorial for you. In this session, we are going to work on a unique character that we can create it with the things that we've learned. So let's say what do we have in store for you? We start creating the general shape of the face, which is obviously the head and the draw. So try to continue our work. This would be our skull and this would be our characters jaw. So this some kind of usual shape would just create the job bigger as you can see it. And then we would have the neck which comes from the back of the head all the way down. And we are trying to create a very thick neck. And then we move on to the rest of the body. Then we'll move on to the hands here. Here we have the shoulder sleeve and obviously the hand which is coming out of it. We are just creating the general shapes over here. And then later we will move on to the details. We also create some kind of volume For the other hand as well. And then we continue to body. Okay, So this is the general shape for our body, which we exaggerate a step-by-step. And we bring more details to them. Obviously. Start with the general shape of my head. And I detail it as much as I can, obviously with creating general shapes. So here we have the hairstyle. As usual, the first thing that we create. Then I will create my characters year. Of course, you will also see one ear. Because our phase is in a three-phase as via, therefore, we can only see one are here. And then come down. And I go over here, creating a general silhouette for my character. Right? Now I will determine the placement for the body parts, for the parts on the face, and then I will just put them through. And I also determine that how much our phase is turned to get degrade profile that I want from this character. K. Then we'll be creating the general shapes of the body. We will just actually make them more clear to look at because they are already clear. So try to do that. We are just exaggerating our body parts because we want to show that he has a lot of muscles. So we try to keep these parts as big as a bodybuilder, someone who works out well. And again, I'm saying that first, I'm just creating the general shape of each body part or face part. Like that in here is hands would look like this. Is kind of forming a fist or maybe he's holding something in his hand. Okay. And then in the next step, we will talk about more details on deface and of course Doris of the body. Okay, I start with the face. And first of all, we will complete. Our character's hair is styled because it is very, very important. Just like his hair. So I'm still working on darkening the main lines of the head. Visual started with the Harris star and end that with my jaw line connecting to the ear. Then I will move forward to the details of my face. So I would create the eyebrows and ask there I've completed them. Obviously I'm moving forward today. Eyes, you see. Now my character's eyes are looking this way. Therefore, just try to keep them simpler. I will create my pills in this area in the corner of the eye. And we give that illusion that he's looking this way. Then I will move forward to the nose, which is also an important part of your sketch. In any escape shot you're creating, doesn't matter. So I'll create a nose here. And I will also create my mouth exactly below the nose. So he has a little smirk on him, which is so cool. Remember is just a character. So don't get too excited. And this is your creation actually. Okay. Right now, I will complete the eyebrows. And then after dad, I move on to my characters neck. As I said before, we create a thick neck for him. So I'm just going to continue this neck all the way through his back and even front parts. This is somewhat of exaggeration in muscles in order to show that our character has a muscular body. Okay. Now we'll work on the lines of the arms and of course the sleeves. And after that, we'll move forward to making my hands look more complete. Which helps me a lot. Now I'm just trying to create. And now we can even put some designs onto his shirt. And because he closed his hands, we should show some lines in order to give this illustration that he is forming a feast here and he's holding something in his hand. So we just create these curved lines on our hand. Show that with our character is having something in his hand and he's a squeezing it. Alright. And then like this, we will complete our work. You see, it was very, very easy. You just had to pay attention to the details and just spend a little time on it. That would make your character look way more complete. Even adding some lines over here, H would help you to create a better hairstyle for him. So we just easily add them as well. Here we go. And just like this, our work will be complete. And obviously at the end of our work, we will erase the extra lines. So our outcome and our result would look great. Okay, Here we've got it. This is our strong scholar character. Okay? Now because you know, the basic assess, it would be easy for you to create a complete advanced character. Enjoy.
40. Chef character: Hello, my dear friends again. We are here with another tutorial session. And in this session we are going to work on a very cute and whimsical shift. So I start from my character's head. And this way, I'll create my characters, the skull. And then I will add the jaw to my character. Okay? Then I want my character's face going to this direction, which is not completely straight. And then I will also add my chef's hat on my character, which is a very, very important part to this sketch. Then I will consider a big oval for this top part of the head. And then we would just divide it. Therefore, it would look like a chef's hat. Dress like this. I'm going to create this divided parts to make it look more like a chef's hat. Then like this. And this is r hat. Now, we will move on and work on the character's body. Do my character's hand, both of them to go this way. So I create from the hand which is coming from the behind. And then after that, I will add the hand which is in the front. You should consider that the hand which is closer to us is shorter and the hand which is further from us is a longer. So they would look exactly like this. I put a sleeve on the other hand, a little bit more to the front and this one would be placed here in this shape. And then after that, I will give a general shape to my hand and then I will work more on the details of my sketch. I will also consider the other hand as well. And then I will work on my palm and I will also add fingers. Okay. Now I will move on to my shapes body. And obviously it has been started from here. And we go down like this and creating a chubby, overweight character, which also adds to its whimsical aspect. Of course, the height is shape of the jaw. You've already known that. But I'm just saying it again. So because my character is overweight, I'm creating the front part of the body looking like this. And then for his lower body part, I will create this shape. And then I move on to his legs. So just like this, I want to create the other leg of my character moving upward, looking like this. Then I can see this bottom part of his leg because he has lift his leg up. And definitely we can see the bottom of the foot looking like this. And then we would also do the same for the other foot. Going this way in this direction. Okay. Now I will come from the top again. And this side, I will be adding details to my work. So in order to do that, I'm going to start from my character's face and I'm going to start determining the parts of the face. And I will just create ears for him as well. I also do this for the other side. Then I will determine the placement of the eyebrows. My character has brought his eyebrows up in here. Therefore, I'm just making it looking like this. And then after that I will create the other eyebrow. I want to work on the eyes. And this part that we've added here, in here, we can have the eyes which would look like this. They are so cute and so funny. So I'll add to eyes, but this proportion in here. And then I will also create his pupils. As you can see, my character is looking to the right. I do the same thing for my other eye. And right now it looks like is looking to the front. And then I move on to the nose. Again. I will have a pig nose for my character because the whole character is chubby and fun. So I'm going to create this for him. And I will also create a mustache lorem that would just look so cool. The kind of mustache that is actually coming out of his face from the sides. He has a very, very macho big mustache. Cell. This will add to the whimsical aspect of our character way more. Then I will create my character's chin. Because my character is overweight. And Trevi, you can actually see the chin being emphasized on, can see accentuating of the chin. And then I will add the color to my clouds. And my character can even be more funny if he has a scarf around his neck. And we can just create the end of our scar coming out like this because you can not see the whole thing. And obviously he is a shift, so you might probably have one of these. So this is the face. And then we move on to the hands. And we just make the details on the hand and there's a bit more obvious and clear. Now for this lower part of the head, which is actually facing upward and coming out, It's been curved out, is a little bit darker comparing to the palm and this upper part of the hand. Why they are creating your shapes. You should also consider this. And okay, and up VS. And after that, I will create my thumb and my thumbs nail. So I will also darken this part which is a bit out and just coming out. So it can show the clothes has a distance from the body itself. I mean, there's a very, very small gap between the clouds, the coat, and his body. In order to show that there is a shadow over here. It'll darken this area just to make sure there is a shadow. To actually emphasize that the code is coming on top of the pants. And for this side, because you want to show that our fabric has been twists said. We'll just create these lines to create some wrinkles for it. And then we move on to our character's legs. And then we'll complete it. And this is the bottom of our shoe that I just create some horizontal lines for it to create the detail and to show that it's the bottom of the shoe. And then for this upper part of it, for the top of the shoe. You can also create some designs. Just in order to give it a dimension and a half to work too much on it. And then we work on the other leg, which would be looking like this. Then I bring the pants on the shoes and then I'll work on the shoe and little bit more. We consider an add fluoride like we did on the other shoe. And that would be it. Okay. Now because we want our pants to be more separated from that coat. We can use some is stripped lines to show them just like this. And then we can continue our work like this. And then we create, add a strap lines on this one. The opposite direction in order to show that. And the direction of this leg is different from the other one. So tried to create this as a stripes in different direction. And of course, as you can see, we've created the lines both vertical and horizontal. And because we want this line to be separated from our striped lines, we will darken these lies a little bit more and just pull them more so I'll we can separate them. And then we can also dark and inside of the eyebrows. Then I'll create some lines inside of the ear. And I will do the same for the other ear. Then we will erase the extra lines from our work because we want to add some more shadings event to his hat. So I'm using my edge eraser to get these lines erased perfectly. So just like this, I will erase this part of the face because we want to show that the mustache has gone through to phase out of his shell. We will erase the extra lines from it. And then after that we can also erase the extra lines around the hands. Because in the end we want to have a very clean sketch. And for that, we have to erase guidelines that we've created at first and the extra lines around different parts of the work. Now that we want to shade our character and we create a shadow for it, It's better to delete and eliminate all extra lines. Now I will use some lines to create a shadow on my lower part of the hat because this top part is very big and it has a big volume. Therefore, it creates a shadow on the lower part of the hat. I will also create some kind of shading and shadows here because his face is chubby and fat. So it consider a shadow for here. And then also create some shadows on the hand and a little on the clouds. And we then consider a button for our coat. And this is our beautiful, whimsical and funny chef.
41. Man and Woman Facial character: Hello, my dear friends again. We are here. We then another tutorial session. Well, in this session we are going to create some kind of characters together with different, different shapes. And then you know how they would look like actually. Alright. Now we are going to use our primary shapes. Again, this cool idea. And this is obviously a very unnatural shape. And we just tried to transfer this unusual shape into an iconic character. Alright. Now let's move on a little bit further. Craning these shapes for the neck. And of course, some part of his quotes. I'm even creating a special Collado for his clothes. He is wearing a suit. Then I haven't decided yet. I want to work on this very unnatural shape of the head. But even in this unnatural shape, I should create this main guideline in order to keep the direction of my face. And then I would work on my face parts. This is just y this is just because we would know where should be the placement of anything. First, I will determine the placement of his ears, obviously. And then just like this, I will create the risks of the character. I mean their body parts. So I will determine the placement of the nose. And in this way, I just I can go and create a very linearly lip for him. He has a very funny nose and I've created the lips. As it can see, he's not really happy. And then I just continue my neck from this area. And then I will work on the jaw line and chin also work on that. As you can see, I'm just even creating very small differences and changes to my basic work to give it a unique shape. Then I will create the hairstyle of my character. We also should match the personality and impression on the face. So now I would come over here and I create DI browse line in this shape. And then I'll move on to the eyebrows. And of course the eyes, which are one of the most important things in our whole character. Because they're the best thing to show our face impressions. And as I said before, are the character that we are creating right now is not really happy. He might even have some sorrows. So. Tried to create his eyebrows. This way. Look like upside down. It shows that sadness in his face. Then we obviously create the eyes. And the eyes of our characters are looking that way. So I create my pupils over here so I can show that it is looking the other way. For the other. I will also do the same. I just determined the line of the nose. The bridge knows even more. Bolden, it's a little. And then I would do the same exactly for the other eye. Just because it's in perspective. We can not see it in a hole and we can notice it as big as this one. Then I will also add some shared to my character. And maybe even adding a tie to him would look great. So this would be an overall complete character. As you can see here. Just like this. So he's code. We will work and Lidl and just to create some details and designs, which would look like this. And then after that, I will create this line right next to the face. So I just completed this line right on the edge and the side of the face. I can even create some designs for inside of the ER. They just create the shape that we want and then we move on to the hair. Will even create some more shapes in order to keep the shape of the hair. Just adding those. Okay. Now as you can see, I can come over here and I will work on inside of my hair with my fader. I just add some more darkness to it. And this would just look great. So I can easily add these detail textures with my fader into my work. Okay. Now as well as for his eyebrows, I tried to do the same for his eyebrows. And then after dad work a little on his tie, darken it too much. I try not to overdo anything. And then maybe even I darken my jacket, a little suit. Maybe. Just like this. Now, I want to work on my other character. Well, I want my next character to be some Watts different. And I want to create it some shape between at a circle and an oval, which would be looking like this. Obviously. And then after that, I wanted to create something like this. Later, of course, want to create a scar for him or for her. And then I will determine the Harris style. Very, very simply. Right into it look exactly like this. And I want my character eyes to be more specific. So I just create them right here between the hair exactly in this shape. And then after I create some part of the hair behind the ears, and the other part would go in front of the ear. And then we will consider are partying corner ways. And we come down with the hair inside of the face. We would also do the same for this side of the face, this side of the head. I bring some of the hair from the back of the ear, from behind the ear. And I'll bring some other ones from front part of the year. And then for this front part of the head, I will create very small banks. Kind of funny and a good. I will determine the placement of the eyebrows. I can bring the ears a little bit more down because now I feel it when just so high up. So I can even create the ears a little bit lower, which would look like this. And then after Dad, I can work on the eyebrows. Because my character is a female. I will consider very delicate and thin eyebrows for her. So she would stay beautiful just like this. And then I can move on to the eyes. Obviously. Then I will create two ovals for her eyes. And an author that I will create this big, beautiful eyes for my character. Usually female. Usually female characters will have beautiful and bigger eyes comparing two men. And then I will even create some eyelashes for her. And I'll do the same for the other eye as well. So that square we go. I also consider some are eyelashes for this one. And then after that, I'll create this cool, beautiful nose for her is very, very tiny. And even linearly mouth would be created for her. So that's it. I've just nailed the characters all the way through because you can see the queued and beautiful and her, and you can see that sad impression and the other guy. Okay. It will be just like this. And then I will use my eraser and I will erase the extra lines from my work. Therefore, my outcome, my final result would be prettier and of course, more. Here we go. Alright. Now I'm just adding some more details, some more touch ups. Just to make sure that my character is a complete. It is complete. Now, even for my scarf around her neck, I can create some designs like just creating very simple lines, simple curved lines in order to show that this scarf has been wrapped around her neck. So my designs kit don't be flat or straight. And then I can even use my fader. And I just give a very slight shade and darkness to my hair. Last touch ups are the things which can take your work from good and okay from wow, Brilliant. So do not ever underestimate them because they are so crucial to your overall concept and to your overall characters, of course. Okay, I can also create the clothes for her that the scarf can actually show itself more and better. So just like this, I will extend trade some parts of my hair. I will make some lines in my hair more darker, more bolder. And in this way. And I can later even work on my nose or Lidl and darken the tip of it just to show some small textures on it. I can even create this line a little bit darker. The line for the upper eyelid. And this way our characters are done.
42. Surprised Man Character: Hello, my dear friends again. We are here with another interesting, exciting tutorial for you. And this episode, we are going to create a new character. Okay? Now I will start from the skull, like always. And then with creating a circle for our skull, I will start my work. And then after that, I will add to that in this shape. And then after Dad, I will add the LPS layer. And I'm going to create the body in a shade that it's twisted and it's turned. The head is going to the front side and ability is in the side view. The head and the phase is in a front view. So just like this, I would apply my primary in first lines and then I would want to work on the other parts. So here we go. And I'm going to work on his coal or maybe even add a bottom to it. And then I come over here and I complete my general shape even more than this. Okay? Now, I will determine the placement of the ears, which are very important in my character. And then it will look like this. And after determining the placement of it, truly create my ears. And also on the other side, I would do the same. And they'll create the same shapes. So here we are. And after that, I will determine the general placement of my character's hair. Okay. So this would be the Harris He's hairstyle. And this would be its placement. Okay. So dress like this. We will create our character's hair. We will create a basic general shape like this. And then after that, we will extend that and we will create more details for our work. All right. Now for getting the different parts of our face, especially in their exact own placement. I will create this middle line as my guideline. And then after that, I will determine the different placement of Bye phase components. So it would look like this. There goes the placement of the mouth and of course the nose. Okay, Now I will get hub for my eyebrows to determine some placements here. Now for our character's face, we actually creating a sad face, which is also mad. So he is sad, mad. Let me just LA, they'll math but p is. And in this character, as you can see, the eyes are very big. They're very exaggerated. And they would look like this. So we are addressed having this. And then we'll move on to our character's nose. So it hasn't, this would be the look in his eyes like a is angry and at the same time, he is sad. And for the nose obviously because he's angry. We're just going to extend the nostril is a little, just a little. I'm just working on the nose character. And it would look like this. Now, I will work on my character a little. And I will make it a little bit thinner. Because I want my character, I want my character's face to look thinner. And then because our face has some angry expression, I will give some shapes to these parts of the face in order for you to show this even more. And then after Dad, I'll move on to my characters mouth, nose create a mouth in a very normal shape because our face is not a normal shape, is showing a different expression. So based on our expression, we create our mouth looking like this. So we'll create it like this. It's just so cool and fun. And after that we will create the teeth and the tongue. And at last, Here we go for the lower lip. And we create our character's chin looking like this. And I will also want to create some beard for my character. He's actually having some light beard. And we're just going to create that as well. Okay. Then we have the main lines for our beard. To create the shapes that we want for our beard. Now I will erase the extra lines so I can show the details more and better. Because now I'm sure my main parts are okay. They don't have any mistakes and they're in the right place and right shapes. So I'm just going to erase these extra lines in order to create my fine details. So this way, I'll just erase the extra lines. Okay. Here we go. All right. Now I will continue my work. To get the shapes that I want. E then on his quotes, I'm going to create all these shapes for an ear in order to make them more complete. And then I will apply inside of the ER and make them more complete. And then I move forward creating details of my work. For example, darkening the upper eyelid, creating the lightest spot inside of my characters pupil. And then I will also create the eyebrows. And I just use my lines to create them. And they would be looking like this. So wherever that it's needed, I'm going to add some more shades and darkness. So we won't leave anything untouched. And we can also have our characters lip. So it will dock and our characters lip like this. And then we would move on to our characters beard. And we will work on this outer part with some lines that are coming out of his face. These lines are actually representing did beard, a very light beard and a fun one. These are just showing there are some kind of hair on our face. And it showing that we complete our work exactly this way. And then we would move on to the hairs details. And we can even work on the parts which are closer to our scalp. They would be darker. And then this area should also be shaded a bit more because it should be darker. Comparing to the upper part of the hair. And can actually see the hair being squeezed and pressurized in that area. So just like this, we would also darken this area underneath the neck and then we move on to the details of the clouds. And just like this, with just some lines, we will design our clothes and we just give them a unique shape. And at the same time we are showing that it's not flat, it has some dimensions. So we complete the clouds like this. Then I would also add some more lines for our characters sleeve. And in this way we have kind of a complete character here. I also work on the other eyebrow shaded to make it more cohesive the rest of the face. And maybe even shading a little bit inside of the mouth. Then I take my edit eraser and I will just create a shine for here to show that. We also have teeth in this area. We dark and the parts around it to show the depth four inside of the mouth. And then we will keep this area a little bit light to show our characters tongue. And then after that, with the use of some hatches, we'll make our work look more complete. Actually will complete our work. Okay? And this would look like this. So this is our character over here. This is actually our finished character.
 Amelie Braun, Artist & Cartoonist