Transcripts
1. Introduction: Hi, my name is Harry and I'm a professional 3d artist with over a decade of experience. I've most recently worked
as a Studio Director for an award winning architectural
visualization studio. The work you're seeing
now on screen are examples of my past
professional work. My class structures prioritize, clear and easy to follow
beginner's guides. We'll go through each
process step-by-step, so it's easy to
follow along with me and avoid any confusion. This class, I'll
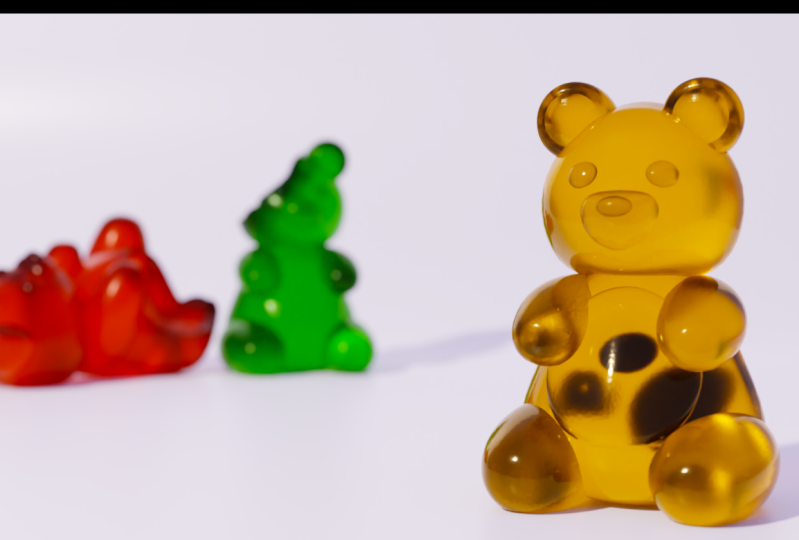
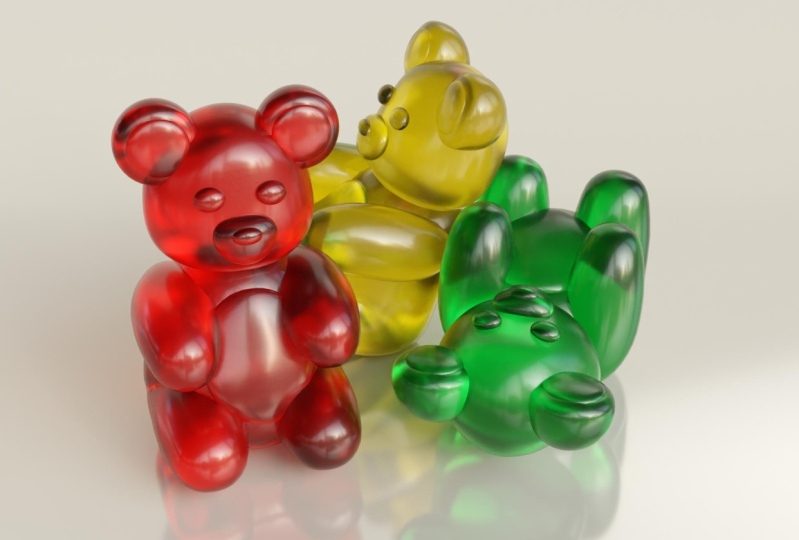
guide you through the pfk-1 and beginner friendly process of creating a
gummy bear within Blender. We're using Blender
for this tutorial, which is an amazing and
totally free 3d software, the only barrier to entry is having a computer to
run the software on. A gummy bear might seem like an odd choice for
Beginners project, but it really is a
perfect place to start. In this class, you'll learn the Blender Interface
and it's tools. We'll be learning the basics of the interface
and the tools in order to create our gummy
bear, We'll learn Modeling, Which is how we'll create
the body of our gummy bear, will add modifiers
to our gummy bear, which adds additional
modeling effects such as smoothing or mirroring. We'll create Lighting
for our gummy bear so we can better illuminate
it for the final image. Will go through the process
of shading to create a transparent gummy candy
material for our gummy bear. Lastly, we'll finish with
Rendering how we'll create the final image
of our gummy bear that you can then share with
your friends and family. The processes you learn in
this class can be applied to make any other gummy
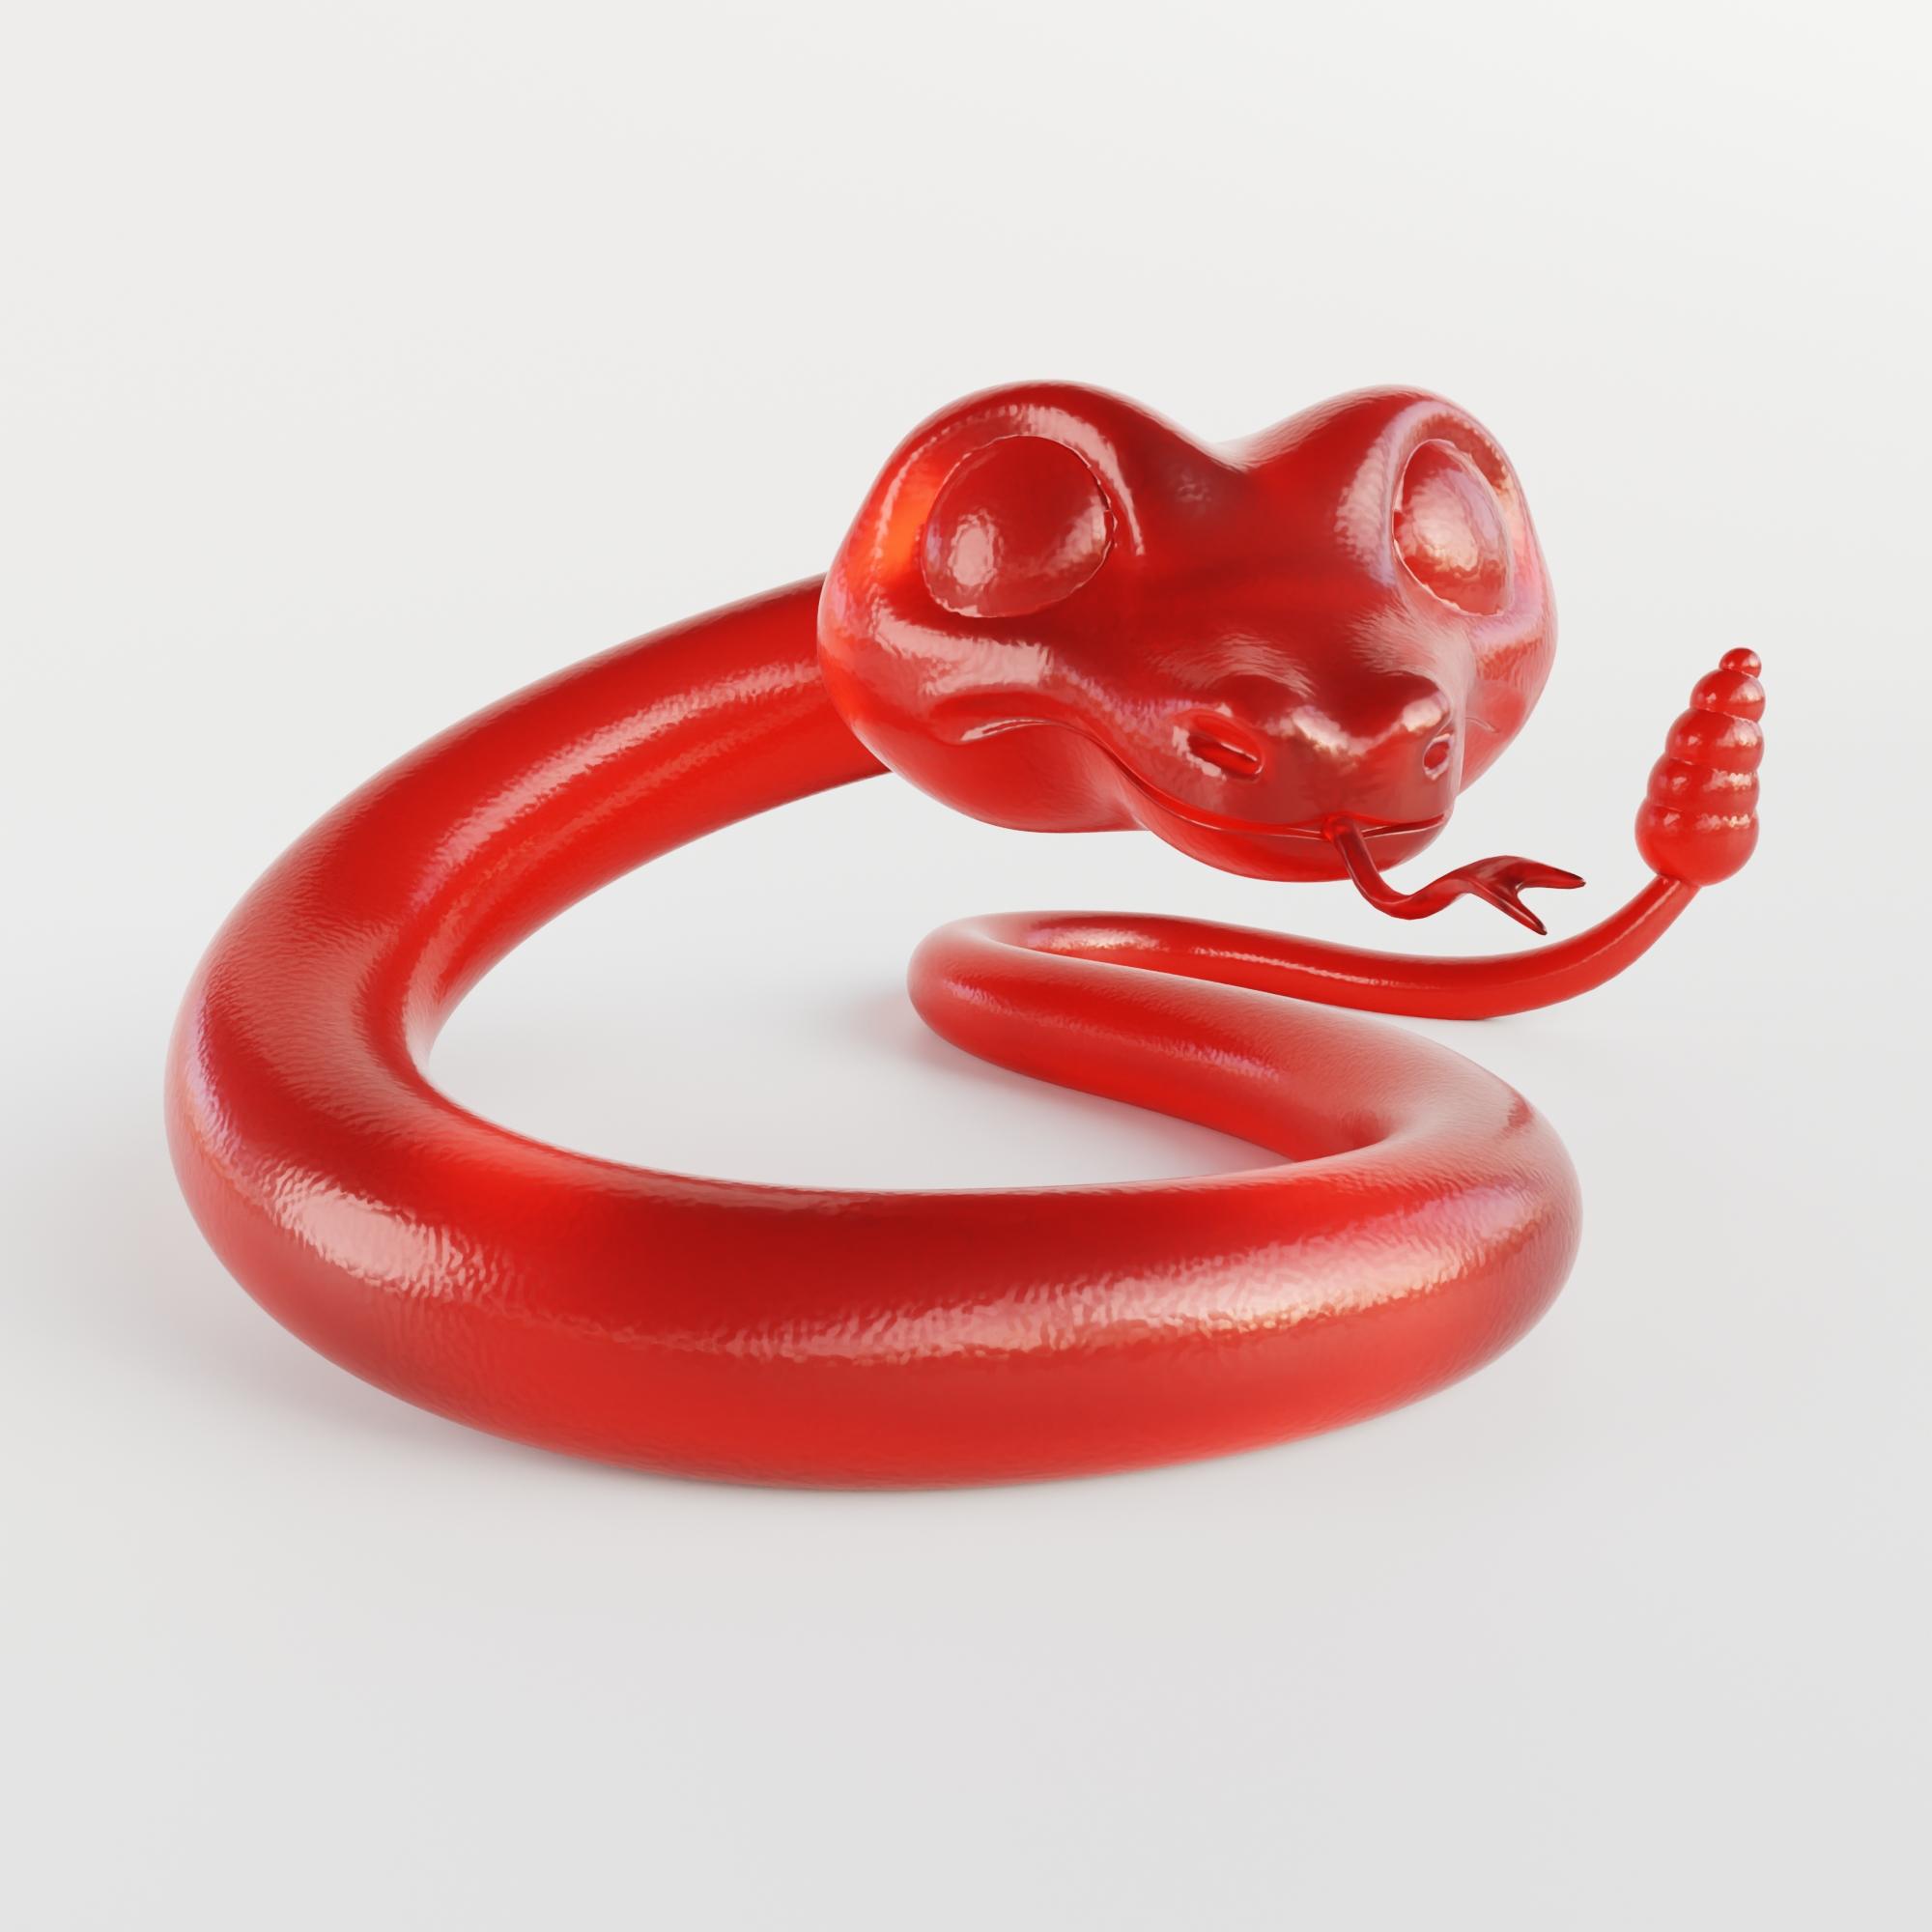
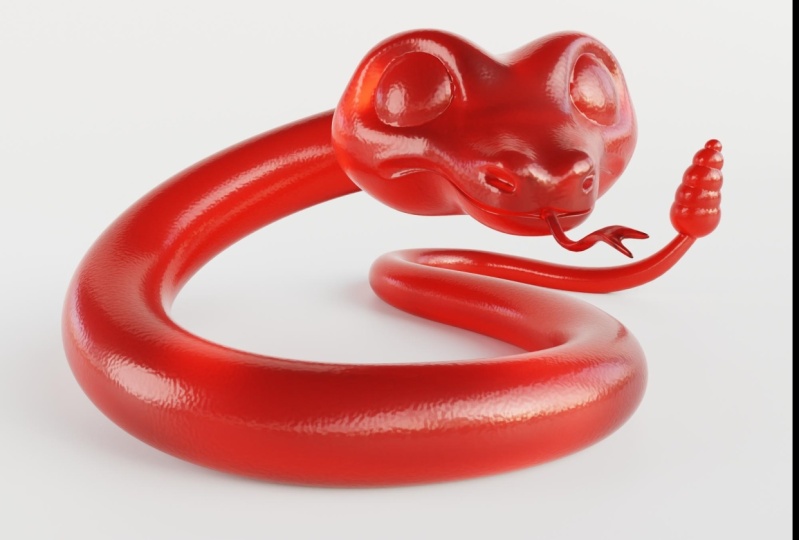
animal that you'd like. For our class project, you'll be doing
just that by using all of the techniques you've learned throughout this class, I'd like you to create
a gummy animal of your own design and then
share it with the class. I'll personally review every
render That's posted to the gallery and then provide feedback on what
you've done amazing, as well as anything that could use a little bit of adjustment. I hope you'll join me on this fund beginner's
journey through Blender by creating your
very own gummy bear. I'll see you in
the first lesson.
2. Setting Up Our File: If this is your first time
taking in Blender class, I'd highly recommend
you start with my complete beginner's
guide to Blender first, this class was designed for the absolute beginner to
Blender and 3D Art in general, we cover every single necessary
topic in order to get you up to speed and running in Blender will accomplish this, but short and focus
lessons that cover each topic from it
beginner's perspective, utilizing a well-organized
starter file, we end the class within
easy project where you set up and customize your
very own cozy camp site. With that out of the way, let's continue with the lesson. In this lesson,
we'll be preparing our Blender file for the rest of the project. Let's begin. Let's start by
clicking general on the left side
underneath new file. That'll start us out
with the general File. We're now going to go to Edit. And then down to Preferences. Center, this one node here. Then we can choose system
here on the bottom left. That at the top here we
want to choose cuda. So we're going to
just click this tab. So you have different
options here for these. Over in this case, you're
gonna wanna choose cuda and then make sure both of these checkboxes are turned on. In your case, you should
hopefully see your CPU, the name of the CPU
on your computer, as well as the name of the
GPO and your computer. Regardless of how many
options you have here, make sure you check all of them. Ordinarily, we would use
optics for most projects. However, in this case
we'll be using cuda. These settings here are
telling the Cycles Render, which is the render
style we'll be using, which type of software to
use to enable our hardware. So in this case
we'll be using cuda. However, in most cases
we would actually use optics for the purposes
of this tutorial though, cuda will actually render our
image faster in the future. If you want to branch
out into your own thing, you might want to choose optics if you have the
option to use it, you would only have
optics as an option here. If you have an RTX card, a card that is
enabled ray tracing. If you don't have a
ray tracing guard, you'd have to use
cuda either way. But as I said, for
this tutorial, we're going to use
cuda and we will have both of these checkboxes. Now that we've made
these changes, we can close this window. We're gonna go over here on
the right side of our window. I'm going to click this little
icon here that looks like the backside of a
digital camera. So these are render properties. The settings we just changed on that last window for
the cycles engine, and right now it's defaulting
to the EV render engine. So we're actually going
to switch it to cycles. Difference between EV and
cycles is EV is a lot faster. However, there is a little
bit more limited in terms of what it can render and it's also not quite as realistic. For the purposes
of this tutorial, we're going to be using cycles so that we can get a
more realistic render. We're not really worried about the speed and we just
wanted to look good. Now we can go down here
to devise and switch it from CPU to GPU compute. Which means it will now use both our CPU or GPU
to make our renders. That'll speed up the
render speed considerably. As we scroll down here, we're going to make sure
that this is set to 0.1 for the noise threshold. And it has this
checkbox turned on, and that's the default, so it should be already
set for you. We're going to change
max samples to 256 and then hit Enter. Then we're going to check
on this de-noise box. We're going to twirl
down this menu at the little arrow here. And we're going to switch
the de-noise or from automatic to optics instead. So in this case here we will use optics if you have
the option to use it. However, if you don't,
you can just leave it on automatic settings
we just changed here are only for the viewport
rendering portion of this and this will have no
effect on your final image. Final image render settings are below where it says render. In this case, we're going to
change the noise threshold. Instead of being 0.01. We're going to
switch that to 0.03, which means that they image
will be a little bit noisier. But we're going to have de-noise turned on so it won't matter. We're also going to change
these max samples from the really high 40 96. We're going to change it
down instead to 256 as well. Then we have de-noise already
checked on by default. However, we just
want to double-check when we throw this down that the noise or is set
to open image de-noise. In this case, we
don't want to use optics for the final render. Optics is much faster, which means it's good
for your viewport. However, for the final image, we would rather have
quality rather than speed. So we're going to use
open image de-noise. Now that we have these
settings changed, we can switch to a new tab, which is our output properties. So this one looks
like a little printer printing out a picture. Then we're just going to
scroll up to the top thing we're going to change here
is our output resolution. By default it's set
to 1920 by ten at, which is a normal ten
ADP TV resolution. We're going to
switch that instead to being a square image. So we're going to make
this just 2000 pixels. By 2000 pixels. That will be have a
nice square image that we can share
on social media. With those setting has changed. We can now click
on this icon here, which is our scene properties. It looks like a little cone
with a sphere next to it. So we're gonna click that. Then we're going to talk
them down. Units will be changing our units display
from metric to imperial. This change is optional. However, for the purposes
of this tutorial, I'll be using imperial
units such as inches. So you will find it
easier to follow along if you change
your units as well. So we're going to switch from unit system from
metric to imperial. The, we're going
to change length from feet, inches instead. With the last Setting changed, we can now go up to File. And then we'll do Save As. Then you should navigate to wherever you'd like
to save this file. So I suggest you save
this into a folder, maybe in your desktop or
in your Documents folder, or on a separate drive. That way you can
always come back to this file when we're
working on it. You don't want to be losing the file and then losing the
progress from this tutorial. We're going to save
this file that we all the settings
we've just changed. We'll be ready when it comes
to the next tutorial lesson. So go ahead and
just give your file a name of whatever you'd like. I'm gonna just named
mine gummy bear O1 just in case I'd like
to branch the file, I could call it O2
if I wanted to. And I'm going to save this into a safe file that I know
I can get back to. Once I have my name setup, I can just hit Save As now my file has been saved and it's ready to go
for the next lesson. In the next lesson,
we'll begin modeling the body of our gummy
bear. I'll see you there.
3. Modeling the Basic Body: This lesson, we'll start modeling the body
of our gummy bear. Let's begin. Before we start, make sure you're working
in the file that we saved with all the settings changed
from the last lesson. The first thing we're
going to do is go up to Edit Preferences. Then we're gonna go to Add-ons. So we're going to
enable an add-on that's already
built into Blender. You're gonna go up
here to the top-right. And in the search box, type in Add mesh. We want to enable them by
checking on the box next to it. At mesh extra objects. This will just give
us a few more objects to start our model with, which will make our lives
a little bit easier. So at this box checked, we can then close this window and you don't need to
restart Blender or anything. It'll just enable
it automatically. And we're good to go. For this tutorial. We'll be modeling our gummy
bear at a realistic size, which is about an inch in size, possibly a little bit smaller. And as far as blunders concern, that's a really small size. If we leave our viewport
settings to default, then as we zoom in
closer to our object, you'll notice as we get closer, the object begins
to erase itself. We're able to push through this object and it'll start cutting away the
faces in front of it. So to avoid that happening with the really small gummy bear
we're gonna be modeling. We're going to need to adjust
something called the clip. We're going to start by
hitting N on our keyboard. Then we're gonna go to View. Then we can see here clip start. If our object is only
1 " in terms of size. Now this isn't, this box
here is larger than an inch, but once we start our gummy bear or box is gonna be
about an inch tall. We're going to do
adjust this clip starts so that doesn't
start clipping at almost almost
half of an inch, little less than half an inch, it's going to start
clipping away. So we're going to make
this the smallest we can. So we're just going to type
in 0.1 " and then hit Enter. Then as we get closer
to our object, it won't start clipping away those faces temporarily
to let us see inside it until we're 0.1
" away from the object. This will ensure that we
can continue modeling our gummy bear without
any issues arising where we're starting to see
through the gummy bear when we're just trying to zoom
closer into a vertex or a face, we can how I hit N again on our keyboard to
hide that menu. And then we're ready to delete this basic cube that
it starts with. So we can just select
that and then hit Delete or X on your
keyboard. Either work. Now let's create a new
mesh using some of the new ones that we added with that add-on that we
added in the beginning. So we're going to hit shift
and a and then Go team mesh. And let me want to go
down here to round cube. We're going to
choose round cube. Then I'll, it starts
out as a cube, but we're actually going to
convert this into a sphere. But the sphere will be
made up entirely of quads. So these faces here, we'll all be four-sided
faces rather than having the normal triangular
faces at the top. So we're going to go down
here to the bottom-left. We're going to twirl
open this menu so that we can adjust
these settings here. Then we can go to
Operator Presets. We're going to choose quad sphere because
that's what we want. So you can see here it
makes it into a sphere, but it's made up entirely
of four-sided faces. As I mentioned before, we're going to be modeling
this gummy bear to an actual real life
size so that I love our lighting and
our textures make sense in a real-world sense. Some of these values we're going to be typing
in here I'm going to go into seem
really, really tiny, but that's just what we need to type in
and make sure that what we're creating is
actually at the correct size. For our radius. We're going to type in 0.0, 075. Okay? Then we're going to
select the X and the Y. So if you just click and hold
the X and then drag down, it'll highlight all
three of these. Now we have all three
of them highlighted. Any number we type in here, we'll go into all three of those categories so we don't
have to do it three times. In this case, we're
going to type in 0.015 and then hit Enter. Now we can zoom in
here and we can see how much smaller this
gummy bear actually is. Then that cube, cube starts out pretty significantly large. This is actually
the real-world size of the stomach of
our gummy bears. So our overall gummy bear is going to be
about an inch tall. If you had to think
about, uh, how, how big an actual gummy bear is not the giant
ones you see online, but the ones that you
get where there's a bunch of different
colors and a small bag. So this is gonna be
the tummy section of our gummy bears or full
overall gummy bear. It will be about this tall and this will be
the bottom of it. This overall is about an inch. Then the last thing
we want to change before we close this is we're going to change the ark
divisions here from eight. I'm going to make these 12. So we're just going to add
a little bit more cuts. You can seek out a
little bit smoother ear and added a little
bit more faces. Now that we're done with
that, we can right-click on our object and then
choose Shade Smooth. So it'll change it from that sort of faceted
look where we can see each individual
face that this object has. We want to make it
look nice and smooth without adding a
ton of faces to it. So we're just going to
right-click Shade Smooth. And it'll just make Blender, make this sphere look
as if it's smooth, even though it's not entirely smooth, before we get too far. And let's start some
organization for Our File. On the top right here we can
see our collections and by default we just start out with this regular collection here. And anything we create
is going to go into it. So we can see here that
the round cube that we created is now inside
this collection. However, let's make a
new collection that's just going to contain all the
pieces of our gummy bear. So we're going to right-click
in this menu up here. Choose new collection. We have collection to now. We can click and drag round
cube into collection to. Now we're going to click
this little white box next to this collection. So it's sort of
like a folder box. We can click this. And now any new object we
create is going to be by default created
inside collection to rather than the
base collection. So let's start renaming
some of these things. For the first collection, right now it has a camera
and a light in it. So let's rename
this render Studio. So once we get to that
point in the lesson, we'll be creating a render
studio within this collection. And then collection to, we can just double-click
one collection to. We're going to rename
this gummy bear. Hit Enter. Then finally, let's
rename this round cube. We're just going
to call this body. Then hit Enter. Before we begin modeling, Let's go up to our
overlay panel up here. So it's this two
overlapping circles. It should be checked
blue by default. We're going to click
this Drop-down, go down to the bottom. Turn on Wireframe. Then we're going to set
the opacity to 0.25. What this is going
to do is just even when we don't have
this model selected, we're just going to
see a faint wireframe. So we can see our model. We can see all the faces and
the vertex of our model. Okay, now let's actually
begin shaping this body. To start with, let's rotate our camera around
and zoom out a bit. And we're going to click on the X icon up here on the top-right. When you click on any one
of these colored dots, it's going to put you into
an orthographic view, which is a flattened kind of technical view that will make your model
look as if it's 2D. So it will remove any sort of perspective that's
going on in your model. And it's more of a, like I said, it's a technical view
that allows you to get a very straight on
view of your model. So let's start by
clicking the X button. We're going to click that. So this little red
X ball at the top. And now we're in a nice flat, perfectly straight
view from the X axis. We're going to start
doing some shaping of this model from this axis. Let's hit Tab to
go into edit mode. Now we can see all the
vertex in this model. We're going to
switch to our move tool over here on the left. The last thing we're going
to turn on Up, is up here. It's called
proportional editing. This little bull's eye
icon we see here next to this hill shaped graph icon. We're going to click this one. It's an ounce blue
to blue bulls-eye. What this allows us to do is select a portion of our model. So say I select just
this vertex here. I start moving it. Now by default, you'll find
since this model is really, really small, the proportional
editing is going to be so large that's
moving all these vertex. So I'm going to hit Control
Z to undo that change. Now as I grabbed this. So if I grab that vertex
again to start moving it, I can scroll up when
my mouse wheel. And as I do up the
top-left corner, you can see where it says
proportional size smooth says 3 " 2.51, 0.8. So as I start scrolling up, it's making this influence
much, much smaller. So now what it's doing
is anything inside this circle is being influenced by this
proportional editing. And you can see how
this is adjusting the movement of these vertex. With proportional editing
on the larger it is, the more influence it will
have on the surrounding area. It's moving all of these
things nice and smooth, almost as if they're
made of clay. So this allows you to get really nice gradual transitions in your model without having to move every single
vertex by itself. So if I move it here, I'm
going to hit Control Z. Now I'm going to turn off
proportional editing just to give you an idea of how
this looks without that, without this turned on. So no proportional editing. If I grab this vert See it only moves just
this one single vertex. You can imagine how
much longer it would take to get a nice smooth shape. If I had to move every
single one of these vertex individually,
it would take forever. It would make
modeling a nightmare. I'm going to Control Z. These changes to
get rid of that. Turn back on
proportional editing. And now it's back to
being nice and smooth. Again as you're moving this, use your mouse
wheel up and down, and that'll change how influential it is on
the rest of your model. So the bigger it is, the
more it's going to move, the further it is from
the selected vertex. The lesson we'll move overall. Smaller I make it, the smaller the influence. So you'll get a little
bit of a sharper move. Okay, I've explained that
I'm going to Control Z that so I can go back
to the original shape. Then the last really important thing when you're working on your model is you almost always, there are some
exceptions and we'll go over those once
we get to them. But you'll almost always
wanted to be working in something called X-Ray mode. What X-Ray mode does me, I'm going to back out of
that view here so I can give you a better example this. So by default,
without x-ray mode, if I just drag select
over top of these vertex, as far as you can
tell, everything looks like it was selected. However, if I spin
around my model, nothing on the
backside was selected. So when you're in
this shaded view, which is the default, when you drag select
over your model, you're not actually selecting
through the entire thing. You might be working in
this view here, you grab, grab this top half and you want to make it a
little bit taller, you move it, and then
you spin around. And you realize you only
grabbed half of your model. So now when you get
back into perspective, view and your model looks
really messed up because you're only working
really on the one side. So the way to avoid that, as we can go into our
x-ray mode and simply just hit Alt Z the same time. So Altman Z. And now your model
goes see-through. That's kinda why it's
called X-Ray mode. Now if I drag select over this, if I rotate around,
you can see it went through the entire model. This is really important when you're modeling
on something and you wanna make sure it stays
symmetrical and you're not only working on a single
side of that model. Now if I just drag select, I can select over the entire thing and I don't have to worry about only working on
half the model at once. Now it doesn't
matter the direction in which you select it. So if I select it down
vertically like this, so I'm selecting
down it at an angle. It's only going to
select these vertices, but it does still select
through the entire thing. Now that we're in X-Ray
mode with Alt and Z. So you just hit Alt and Z to switch in and out
of this x-ray mode. Alternatively, if you'd rather use a button on your interface, I wouldn't recommend it,
but if you prefer it, this button up here. If we click this
one here, and when it's blue, you're an x-ray. If it's not blue, then you're in just this sort of
standard shaded view. Now I'm gonna go
back into my X view. So I'm just going to
click this little red circle at the top. Nice flat view when I
go into my x-ray mode. So I'm gonna hit Alt and Z. Now I'm just going
to zoom in up here at the top and the model. I'm going to drag
select over these top two here. It
doesn't really matter. You can select one or two. Maybe we'll just select
them one at the very top. So we're selecting just
the very top of the model. That single central
vertex selected. And now we're going to start
shaping this body into a kind of a melted
gum drop shape. So it's gonna be a
little bit tapered at the top and it'll be a little bit elongated and then we'll
flatten out the bottom. So let's start by
making sure we have proportional editing on number. Just going to drag this up. And then as we're dragging it, we're going to want to make
this a little bit bigger because we don't want it
to be such a sharp point. We're gonna be
making, like I said, a melted gum drop shape. We're going to pull it up
to somewhere about here. Then as we start pulling it, we can go back to
that same selection. And now if maybe we want to flatten out just
the top of it here, we can make it a bit smaller and then just pull it down to make it a little bit flatter so it's not so pointy at the top. Then we're gonna do something
similar at the bottom, except we're just going to
try to flatten this out. So we can just zoom in here, click and drag to select
over top of these. Let's make our selection a
little bit bigger by scrolling on our mouse wheel to make the proportional editing bigger. We're just going to flatten
that bottom out a little bit. That way when we make a little ground plane for
it to sit on it, it'll sit nice and flat. So let's select these vertices going around the model here. So we're going to hold Alt. And then we're going to
click on these vertices, one of these vertices here, and it will select this
entire loop around. So make sure you
have Alt selected. So if you hold down Alt and then select one
of these vertices, it'll select around the object. Now, if you find
that it's selecting a up and down on the vertices, just try selecting a little bit to the left of the right of it. Rather than selecting
above or below it. So if you select just slightly left or right of
the vertices one, it will select this
entire loop around. And we're going to
actually scale this one in a little bit. Now we're going to hit
S on our keyboard. We have S turned on,
which is our scale. Let's make this influence
a little bit smaller. So I'm gonna make this circle a little bit smaller
by scrolling up. And we're going to pinch
it a little bit here. So you want to give
it an upper body and a lower body that aren't just blending directly
into each other. We want to have a little bit of a distinction between them. I think that looks
good. Maybe we want to fatten up the lower
body a little bit. We're going to hold
Alt, then select this loop right here. It S and we're just going to scale this
one up a little bit, give it a little
bit of a sort of a punchier Belly bottom
at the bottom here. So the top of it is
sort of our chests, that's where our head
is going to rest. Then the bottom here
is the actual stomach. Let's de-select that. I'm gonna hit Alt and Z to
get out of my x-ray mode. And I'm going to rotate
around to hop out of this orthographic mode that
we were in this ex vivo. Soon as you rotate, you can see, you can actually see
the difference here. So as soon as I rotate, just pay attention to
the shape of this. See how it looks like it's being stretched back in space
when we're in perspective. That's essentially what
we're trying to avoid by working in the X view. It just gives us a nice
perfect front view. Now we can just rotate around, make sure our shape
nothing looks weird. We didn't forget to go into X-Ray mode and only
half of its fixed. So now we look around, if we're satisfied
with our shape, we are going to move on then. Now let's hit tab to
exit our edit mode. Now we're back into object mode. We're going to hit
shift and a go to mesh. Then we're going to
click Round Cube. You can see by
default in remembered all of these settings
that we had before. And that's important
because we don't want to have to type
those in every time. So we're actually
just going to leave these settings as is, we're not going to
adjust anything. Now we can start
using this new cube, which we're going to name head. Obviously, we're going to
use this to make the head. So let's start by moving it up. I'm just going to
slide it directly up. Let's right-click on it
and make it Shade smooth, because by default
it comes in with the flat shading, shade smooth. Now let's go into
our X view again. So we're going to consider
this the X view, our front. So everything we
do, we're going to consider this the front
of the gummy bear. This is the back
and then this is the Gummy bears left side where his left arm and his
left leg will be. And then same thing, right, right arm, right leg. We're gonna go back into the X or what we're calling the front. And let's just scale
this down a little bit. By default, this is
a pretty large head. We want to make sure that
we're only moving this up and down right now with just the blue handle on
the z-direction. And we don't want to
offset our head at all. We don't want it to
be a little bit too far left or too far right. I'm just going to
Control Z that we make sure we'd stays
directly above the body. We're going to move it
down to about here. Let's hit S on our keyboard. To just start scaling this down, we want it to be a
little bit more of a realistic head size. Now this is gonna
be a little bit of a goofy looking
cartoony gummy bears. So we don't want to
make it an actual real-world bear size because this isn't a real-world bear. But we don't want it to be. So oversize that it
looks kinda ridiculous. I think somewhere around
there it looks okay. Maybe a little bit bigger. I'm not quite as wide as
the base of the body. It's about, if we look
straight down here, it's emits about halfway point
of the taper of the body. So here's his about
the size. You're good. You don't have to
worry about the exact size that I have mine at. Just make sure yours is
relatively the same size. So let's start by shaping this head sort of like we
did with the, the body. So we're gonna be doing sort of another kind of gum drop
shape that we didn't hear. It's gonna be a little
less tapered though, a little bit more round overall, sort of almost squarish. Actually. We're going to hit Tab to
go into our edit mode. We're going to hit Alt and
Z to go on our x-ray mode. Now let's start
shaping this head. The first thing
we're gonna do is sort of flatten out
the bottom here. So we're just going to drag
select over the bottom. Drag these up, and make sure your influence
is large enough that you're not making a
really sharp movement. You want it to be
a pretty large, soft movement that
we're doing here. We're going to pull this up. Now let's start tapering the top of the
head a little bit. So with just this
top vertex selected. Let's see if we can
use scale for this. We're going to hit
S on our keyboard, so S then make your
influence much larger. That way it's a nice
gradual change. It's going to change
almost the entire head. We're going to scale
that in a little bit. Now let's scale this center
part end because I think the head right now is a
little bit too wide overall. So let's hold down Alt. Click to the left of the
central vertex here. So we select this entire loop. We're going to scale that in. Might want to make our influence a little bit smaller here, just by scrolling up. It seems like it's
moving really fast and it's kinda hard to
do a small movement. Just remember to hold down
Shift and that'll make your movements a lot slower
in a lot easier to control. Some of the scale
that into about here. We're going to do something
similar on the bottom, except we're going to actually going to make this a
little bit larger. I'm going to select
right around here, maybe a quarter to the way down. I'm going to scale
this up a little bit. We're just gonna keep
working on this head here. We have it's sort of
shaped like we want. Now we are gonna be doing another round of
adjustments on this head, but we wanted to
make sure we get this front view correct first. I'm going to scale
this in a little bit. Again. It's a lot of just
eyeing it up, shaping it. Sometimes you might need to select an edge loop and move it down because you want to flatten out this
bottom a little bit. So I think that's
actually helping this head in this case. So by moving this down, I'm giving it a little
bit more of like this is the bottom of
its cheeks here. And then the head tapers up to eventually where
our ears will be. I think the head might be
a little bit too pointy. I'm just going to
grab this top one here and flatten that
out a little bit. Maybe scale it in a
little bit with S. Scale that up. Okay. Now that we have the front of
the head shaped as we like, now we need to go to
the side view because the head of the Gummy Bear won't actually be entirely
symmetrical. The front of the
face is going to look different than
the back of the head. So they both shouldn't be just featureless
spheres on either side. We're actually going
to add a muzzle or a snout to the front of this head and as
well as flatten out an area where the eyebrows
and the eyes would go. To do that. We're going to
go into our negative X view. Because remember
if we're in the X, that means we're in
the front, sorry, we're going to
actually go into the negative Y view for the side. But as I said, the X is the front
of our gummy bear. We're going to rotate
around and then we're going to click
on the negative X. Now we're in a nice
flat view again. And we're going to
shape the front of this head so that it's not just this nice round
back of the head. Let's start by grabbing the
front of the forehead here. I'm just going to grab just
a few of these vertex here. We're going to start pulling
this out and then we're gonna make are
influenced a little bit smaller because we
really only want to be affecting the
front of the head. I'm gonna pull this
out to give it a little bit of a forehead, sort of a bump where
the forehead meets. I'm going to start
grabbing the Eyes here. This is the area roughly
where the Eyes and sort of like you
could think of the eyebrows would be about here. I'm just going to
slide this back. I'm going to make this
a little bit smaller. You can see here just
that small little Change. Adding the area for the Eyes made a
pretty big difference on the look of the
front of the head. And so we can tell
now that this is the forehead and this
is where the eyes go. And then down here is
where the snout or the muzzle or the nose would be. Let make this one a
little bit bigger. We want to move this
a little bit further. Then maybe we'll just pull these Eyes back a
little bit more. You don't want to make
any of these things too drastic because we are at the end of the day
and making a squishy, featureless gummy bear, it doesn't need to have
really sharp edges. Everything on a gummy bears. It's very smooth,
very melty looking. So don't have to worry about
making very specific areas like you don't want to Model in and exact eyebrow probably. Now if you wanted
to make your gummy bear look a little less, maybe realistic and a
little bit more stylized. You could. But we wanna go with probably a little bit
more of a realistic look, which is gonna be a very smooth and featureless
gummy bear. I'm going to pull this
chin down a little bit. We want to give it a
little bit more of a, a bottom of its face. You can scroll our wheel down to make the influence
a little bit larger. Then just continue refining the shape until you get a shape that you're pretty happy with. So think for now that
looks pretty good for me. So the last thing I'm
actually going to do is move the head forward. When we do that, we
don't want to be doing that in edit mode. We want to move
the entire object, not just the vertices. So once you're happy with
the shape of your head, I actually just, just decided
I'm not entirely happy. I'm gonna move this just
a little bit forward. I don't like quite how round
the back of the head is. Okay. Now I'm done, I promise. Okay, So now that we have our the head shape
as we like it, we're going to hit tab
to leave our edit mode, we're gonna go back to object. And then we're gonna
move this head just a little bit forward. We might want to move it
downward a little bit too. Because we want the head
to be set a little bit forward so it juts out
a little bit more. The chin overhangs
the body a bit more. It just looks a little bit more natural if this head isn't directly over top of the body. This is also a time where
if you think your head is a little bit too small
or anything like that. We can also just hit S
and scale up our head. Make it to a size that we feel like it's appropriate
for our body. Also, if you feel
like, like right now, this body is very symmetrical. If you want to make it a little
bit flatter on the back, so it's not so round
on both sides. We can just go back to our body, hit Tab to go into Edit Mode. If I can just pull this body in here at the bottom to make
it a little bit flatter, sort of like the back
of the head to give it a similar detail. So maybe I'll move it in there and then I can scroll this down to flatten this out a little
bit further than it was. Okay. Now let's rotate
around it Altman Z. To go back to this
regular shaded mode. Now I can spin around my body and just see how does this look? Is this feeling like the head
is the appropriate size. This is the shape needs
to be adjusted at all. If you're happy with it,
then we are now done with the Basic head as well
as the Basic Body. In the next lesson, we'll
be adding the arms and legs to our gummy bear.
I'll see you there.
4. Modeling the Limbs: This lesson, we'll be modeling the legs and the arms
for our gummy bear. Let's begin. We're now going to start
creating our legs. So we're going to shift and
a good a mesh Round Cube. And again, we're
just going to leave these settings as they are. And we can just scale
this from here. We're going to right-click, go to shade smooth. This looks nice and smooth. Then this object
here we're going to start to shape into a leg. So we're going to
have this kind of stubby little rounded
leg on the bottom. Let's start by going into our X view so we can see
our model from the front. We're going to click X.
Now I can zoom in here. We're gonna go into our
x-ray mode as well. So Alton Z. Now we're going to
position this leg roughly where we
want the leg to be. And then we're gonna scale
this down by hitting S. We're going to scale it
down to around here. None of these things that
I'm doing here, super exact, your gummy bear is going to look slightly different than mine. Yours, you'll look,
yours will look different from another
student. Students. But that's just gonna
be a way to give everybody's gummy bear a
little bit more character. We don't have to, once we
have it at the correct size, the individual proportions
of these elements can vary. Maybe we'll scale
this up a little bit and just kinda get it roughly in the
position where you think the leg would be
on this gummy bear? I think about there
looks correct. So now if we spin to our side, our leg currently is
just an orb here. So we're going to
stretch this out so that our leg is stretched
out towards the front. So now we can go into
our negative Y view, which will be the side view. We're going to hit Tab
to go into our edit. Then we can zoom in here
and we're going to grab this front vertex here while
we're going to x-ray mode. So we're making sure that we're selecting through
the entire object. With our proportional
editing still on. We're going to start
pulling this out. We want it to be
relatively large pool here because we wanted to
pull it pretty evenly. We're going to pull it little by little here to the front. So we're going to
pull out about here. Now we can drag
select over the back, just uniformly stretch,
stretch this out. We can grab these frontier. I'm actually going to probably stop the back right about here. I don't think it needs to
go much further than that. In this case here actually, let's try to drag select over more than just one of
them here because we want to keep this
anything we select here with our drag select will
remain at a fool influence. So this will move altogether. It won't do that clay movement where it moves it proportionally
with everything else. If you have all of
these selected, they'll all move as they are. But everything else you
can see is going to be affected by that
soft fall off. We're going to move these
out to about, about here. Maybe. Let's rotate around. I'm going hit Alt C just so I can see what the
model looks like. It's a little hard to see
sometimes when it's X-rayed. Sometimes it helps to
hop out of your X-ray, see what you're working with, see if everything with
shapes are looking correct. Then you can go back
into the X-ray mode when you're ready to
start modeling again. I think right now our leg is probably a little
bit too pointy. So we're gonna go back
into our side view here. Go back into X-Ray with all T. And let's flatten
out this tip here. So we're just going to select just these front
center vertices. We're going to make
this good bit smaller. That way we can give this
leg a little bit more of a blunt end on
it. It still round. We just don't have to come
to so much of a point. We're also going to scale
this down now as well. We want to tighten this
curve up a little bit here. As you start
stretching these out, your faces are getting
further and further apart. So they're getting
larger and larger. Which essentially is making your model look a
little bit more jagged. The tighter your faces
are, the smooth ER, these curves are going
to be going again, scale this down
just a little bit. I think the front of the leg is getting a little bit too large. Now let's grab these vertices here and let's pull
them down a little bit. So I'm going to make
this might influence. You can see my influences
pretty large right now because I want to move
a lot of the leg with it. We're gonna pull this
down to the legs are angled down
just a little bit. We don't want the legs
sticking straight out of the body when we
want them to feel like they have some weight and they're laying on the ground. Something like that. We're gonna go out of
our x-ray mode now. Just get an idea of
what we're looking at. I'm gonna hit tab just to get out of my edit mode as well. So it's a little bit cleaner. I think that looks pretty good. So you can see here how I have this leg intersecting
into the body In the front here, it's lined up roughly to where the
edge of the body IS, goes down a little
bit past the bottom. Because we work. Basically the Gummy bears sitting on the
backs of its legs. Then as we go back here
you can see it tapers back and kinda meets
the body back here. So you want to make sure
that your gummy bears leg is pushed into its body about
as much as mine is. If you need to shape the vertices while
you're doing that, you can hit tab alt Z and then just drag select
over the back of the leg. And then you can
just move the leg like the back half of the
leg inward a little bit. If you'd rather have the leg not poke out of the side
of the hip as much. While you're moving this stuff
once you've already made your selection and you know your selection goes
through your model. You can hop out of
your x-ray mode just to see how it's
affecting things better, you don't need to stay in
X-Ray mode Azure modeling, you can always hop out of it once you know your
selection is correct. Okay. So I'm pretty happy with that. I think that looks like
a pretty good leg. So I'm gonna hit tab
to exit my edit mode. I don't need to
be there anymore. Now that we have our
left leg, rather, I guess E gummy bears
right leg created. We'll want to make our the
other side of the leg, but we don't want
to have to remake the model identical to this leg. And also it's a little bit tedious to duplicate this model. So if we hit Shift D, we can duplicate this leg. And then we'll have
to rotate the leg and make sure it's positioned
exactly the same. So rather than
doing all of that, then having two separate legs that we have to
adjust independently. We're going to delete that. We're actually going to be
playing a mirror modifier to this leg so that it
mirrors it over here. And we have two legs on either side that are going
to be nice and centered. So we're gonna go to our
modifier panel here. With the legs selected. We're gonna go to Add Modifier. And then from this
modifier list, we're going to choose mirror. By default, it's mirroring
it in the x-direction, which you'll remember is
the red direction here. So it's mirroring it
back-and-forth this way. We want to actually
mirror it on the Y. So we're going to uncheck the x-direction and then
we're going to check the Y. However, when we switch it to why you can see it moves
it a little bit here, but it's actually mirroring
it exactly in place. So it's mirroring it right where this little orange dot is. So that's the center of
the model right now. It's mirroring it
exactly where it's at. We want to actually
move this over. We also want to uncheck the merge button here.
So we uncheck this. This is actually welding
these vertices together. That's not something
we need because we actually want to separate legs. Okay, so now that
we have it set to access is just Y and
we unchecked merge. How do we move this over? So the way we do that
is go up to Options. We're going to
check when origins. What this is doing is
this is allowing us to move this orange
dot for this model. And as we move it, you'll see that
second leg is now mirroring from that new
point that we move. We're gonna go into our X view. So we get a nice
straight on view. We want to move this dot directly to the center
of our gummy bears. Right now our gummy bear has the central line
that runs down it. So if we zoom in here, you can just drag this so
that these lines match up. Again. If you hold Shift, it'll move
it nice and slow for you. Right about there. Now,
this is nice and centered. We have two legs that are on
opposite sides of the body, and it's actually mirrored that. So our legs right now are pulled in at the back and then they
flare out at the front. That's going to make sure that that mirror detail exists
on this right leg as well. So with that, moved over, we have to remember to make
sure we turn off origins, or by default will
only be moving origins and affecting the
origins of the objects, not the objects themselves. We're going to uncheck origins. Now we have two legs that are
on either side of the body. And if we want to make any
adjustments to our leg, we can hit tab to
enter the edit mode. And if we select any vertex
or do any changes over here, it's actually going to
do it on both sides. So both of these legs
now are being affected. So we find that our legs
are too long or too short. We can just quickly adjusted. And now it's back to being
correct on both sides. I'm going to Control Z
to undo that change. And then I can hit tab to exit. The last piece of
our gummy bear we need to make was the arms. Before we do that,
let's make sure we rename the legs correctly. So we're just gonna go up to
the top-right double-click and then just call this legs. Now let's duplicate
these legs and make the arms out of them so the arms are very similar to the legs. It's not really any
point and going through all that hassle
of doing it all from scratch when we can just use
the legs and just adjust their positions and
their sizes a little bit to make them
look like the arms. So to start with, we're
going to hit Shift D, and then we're going
to hit Z as well. So once we hit Shift D, we're going to start
making a duplicate, but we went hit Z afterwards. Now it's only
allowed to make the duplicated vertically
up and down. We're gonna place it roughly
where the arms are gonna be. Right now. I mean, you could leave
them as arms if you'd like, but they're pretty large arms. And most of the time
your arms are gonna be a little bit
smaller than the legs. So let's start by, let's disable this mirror modifier
because it's going to make it a little bit confusing as
we're working to begin with. We're just going to uncheck over overgrown your
modifier panel here. We're just gonna uncheck
this little monitor here. So this Modifiers
didn't go anywhere. It's still there, it's just not displaying anymore in this. Now let's start
scaling this down. Now, since we moved our origin, it's actually going
to be scaling from the center of our model. It's moving from the center of the Gummy Bear rather than
the center of the model. So it's going to behave a
little bit differently. You just have to get a
little bit used to that. Scale this down slightly. Go into our X view to make sure our arms are positioned
roughly where we want. Now don't worry about this
not being centered here. We can always recenter it. Right now. We just want to
make sure our arms are roughly where
they should be. I think about here. It looks correct. So our legs we had kind
of flow into the hips. It's not so bad that your
arms stick out though. We want to have a little bit of a shoulder here where
the arms start. I'm going to move it up to just below the bottom
and the chin here. I think about there looks good. Now we can start shaping this so that it
looks a little bit more like the arm and a
little less like the leg. I'm going to hit Tab,
go into edit mode. When I go into my
negative Y view, which is that same side view that we were looking at before. Now let's, with her
proportional editing turned on, make sure we have the
front here selected. Now I'm not an x-ray mode, so that would have been,
would have been pen. So I'm gonna switch
back to x-ray mode. Select these vertices again, because if you just
switch to x-ray mode, it doesn't know what
you tried to select, so you have to switch to your x-ray mode if you made
a selection without it on, and then remake your selection now with your X-ray
mode turned on, we're actually going
to pull these arms downward a little bit. So we went the arms to look like they're resting downwards, not directly on top of the legs, but at least angling
down towards them. This is also situation
where we can shorten the arms up a
little bit if we'd like. I think something around
there it looks okay. Maybe we select these and
scale them down a little bit. Let's make the arms
a little bit more pointed than the legs where. And then we can if we want
to can scale or we can flatten this out just
by moving them towards the back here with a smaller influence on
our proportional editing. Now let's select these
back vertices here. So I'm just going to
select roughly in the middle of the
back of the arm. I'm going to rotate around. I'm going to turn
off my x-ray mode so I can see a
little bit better. Now I'm going to try to taper this arm backwards
into the body. I don't want it
to just kinda jut out like that at the back. When it's a nice, Have a nice smooth transition
into the back of the body. I'm going to actually scale
this up a little bit. So that's a nice
smooth transitions. It looks like the arm just
kinda flows backwards. Here's roughly the
shoulder and then it flows backwards into the I guess if our gummy
bear had shoulder blades, this is roughly where the
shoulder blades would be. With our selection still made. So you can see I still have
these vertices selected. I can just pull these out
a little bit if it seemed like a dove in a
little bit too far. I think that looks pretty good. I'm pretty happy with
that arm shape now. We can always adjust this
later if we start adding pieces and the arm seems a
little too big or too small, That's something we can
easily adjust down the road. Okay, so now I'm gonna hit
tab to exit my edit mode. I don't need to be
that there anymore. So he can now turn back on
this little monitor icon here, which will enable it
and Review Board again. Now we just need to
re-center this orange dot the origin back to
the center of the body. And then that will make
sure that this arm here is that the exact same
spot as the other side. So again, we need to
go up two options. Turned on origins. We're gonna go into our X view. So we're nice
straight front view. We're just gonna
move this origin over to the sensory here again. Then the further you zoom in
a little bit more accurate, you can be again holding Shift. We'll make it a
little bit slower. Now I can zoom out,
turn off origins. Then I can rotate
around my model. And now we have a pretty good
start on our gummy bear. So we have our body or head, or legs and our arms. So let's not forget
to rename the arms. Oops. Sheets, spell it correctly. So arms. In the next lesson, we'll
be finishing the model of our gummy bear by adding
the remaining details. I'll see you there.
5. Modeling the Belly and Ears: In this lesson,
we'll be modeling the Belly and Ears
of our gummy bear. Let's begin. Let's start by creating a rounded cube
like we have been before. So we're gonna hit Shift a
kind of mesh Round Cube. Then we'll be using
the exact same parameters that we had before. In case you forgot, you have to go up to Operator Presets, switch it to a quad sphere. Then for our radius, it's going to be 0.0, 075. Then for our size,
for all of these, we can just click on the X dragged down so we
highlight all three. Then it'll be 0.015. Then our divisions
will set to 12 for the ark divisions here,
which you have that set. Now we can right-click Shade Smooth so that our
sphere is nice and smooth. Now we can begin shaping it. We're gonna go into
the negative Y view so we can see it from the side. We can zoom in here. We're just going to move this
towards the front. Then I'm gonna hit Alt and Z
to go into our x-ray mode. Now I want to rotate
this so that it matches the angle of the
body a bit better. So we can see right
now that the sphere is currently rotated
perfectly vertical and perfectly horizontal here. But we want it to match
this slight angle we have on the stomach. So let's start by going to my rotate tool here on the left. Then we're just going
to rotate it on this green axis here,
which is the Y. We can rotate it this
way and we can hold Shift to rotate it a
little bit slower. We can move it a little
bit more fine adjustment. We can see here how this line
here now, the central line, we want it to match
up to roughly about the same angle as the
Belly as the body. So this angle here that we have, it doesn't have to be perfect. It's gonna be a little
bit easier to shape it if it's rotated a bit closer. Now let's switch
to our scale tool, which is over here on the left. It's the box with the
arrow pointing out of it. Then up at the top
here we're going to switch this from global, which is currently set to, Which means that the
handles here on our gizmo, we're going to match identically to what we see at the top. So Z will always be up, regardless of whether
or not we rotated it. If we switch it to local, it will now take into account
the fact that we have rotated this sphere
a little bit. So now Up is actually at an angle because we
rotated the object. So now these, these
gizmo controls here no longer directly
match the top-right, which these are the
world coordinates. We're gonna go back into
our negative Y here. We want to flatten
out this sphere here. We're just going to grab this X handle. We're going
to pull it in. So we're going to flatten
this out until it's sort of like a big rounded disk, will flatten it to about there. Now we need to shorten it
up a little bit as well. So we're going to shorten it
to somewhere around here, and we're gonna be able to
adjust this after the fact. Now let's rotate our cameras
so we can get out of that, that negative X view. I'm going to hit Alt and Z to get out of my
x-ray mode as well. Because this is going
to be a little bit easier when we're just
looking at the shaded view. Now we can squish
the y-direction, which is the green handle. That seems about the right size. However, it's not, it's not quite intersected as we'd like. So let's go back
to our move tool. We can see here we're
still in local. This change is gonna
be applied for all of these tools here. We're still in local, so
everything is rotated. We're just going to push
this into the body. We're going to slide this up. We're just going to try
to find a nice spot where this looks like the
Belly of like a, we're kind of
replicating a detail that is on teddy bears. So this a teddy bear, this would be like
a different color, like Belly segment, maybe the first a dark brown and then the center would be light brown. We're trying to replicate
that on our gummy bear. Now let's go back to our rotate. We're just going to
rotate this so that this little Belly
segment seems to be just kinda be protruding
out of the body here, giving it a little
detail in the center. I think that's looking better. Let's move this forward
just a little bit. I don't like quite how much
it's intersecting at the top. I think the top and
the bottom look good now because of the sides, I don't I'm not a
huge fan of how this has this ledge here on the side. So I think we're going to
actually bend the sides inward so that
they look a little bit more similar to how the
top and the bottom look. So to do that, we're gonna
go back into our x-ray mode. So Altman Z, you can
select the Belly again. Now we're going to hit
Tab to go into edit. We'll make sure that
we're into vertex mode, which is up here at the top. Should be by default,
in vertex mode, that's the first
mode it goes into Now we're going to
select the left and the right of the
center of this Belly. So we're going to select here. We only want to
select like maybe the first two vertices here. And I'm going to hold Shift. And then I'm going to, while I'm selecting this holding shift, just select the other two
and that'll make sure it adds to my selection,
not replaces it. It's now have these
selected on both sides. That's about what yours
should look like. I'm gonna hold Alt Z
again to get out of x-ray mode because I want to actually be able to see a
little bit better here. I'm going to move
these back with proportional editing turned on. So make sure you have this little blue
bulls-eye turned on. So your proportional
editing is on. I can move these handles back. I might want to make
these handles are the proportional
little bit smaller, so it's not moving
quite so much. I'm just going to pull this back till this intersection here. It looks a little bit nicer. So just look around your
model and see if there's any areas where it
seems like it's protruding too far out. So I think here it might
be a little bit too far. I'm gonna go back into
X-Ray mode and make sure I'm selecting through the model. I'm just going to select
this corner here. Same thing on the other
side holding shift. We've my x-ray with Altman Z and then just pull these back. In this case, I definitely
will have to make it a little bit smaller
because I don't want to move the top too much. I wanted to be a
pretty local movement. Think about there looks good. I'm pretty happy
with the bottom. I think the sides look better. I think the top looks good. Now I'm gonna hit
tab to exit this. Click off the model and
just give it a spin. C if you liked the way it looks, I'm pretty happy with this. Your belly should look
something similar to mine. Again, don't, don't worry about
it being exactly perfect. It doesn't have to
meet, you know, exactly where were all
these lines meet up? Just something similar
to this will work. Okay, so once you're
happy with your belly, then we can move on
to the next step, which will be adding the Ears. Before we add the ears, let's just make
sure that we have our Belly renamed up
in the top-right. I'm just going to
rename that Belly. And now we can hit shift into a. It's add a new mesh mesh
and then round cube again. This by default should just remember the last
thing you answered. So you shouldn't have to
type this in every time. We're just going
to leave it as is. Right-click, Shade Smooth. So that looks nice and smooth. Now we're gonna go
into our front view, which has worn,
remember is the X. So we're going to click
the X at the top here. Now we can move this up and we're gonna be
scaling this down. So that's about the
size of any ear. Let's get it roughly
where it should be. We're going to hit S so that
we can enable a quick scale. We're just going to
scale it down to, it's about the size
that we want our ears. Again, this is a bit
of a personal choice. If you'd like to make
yours a bit smaller, a bit larger, can do whatever
you think looks best. I'm happy with
this size for now. I think we'll leave
it there. Now let's go into our negative X view, which is the side view. We're going to start shaping this ear so that it's
flat on this front. And then we're gonna
have it's kind of taper off in the back. So it comes to a smooth
cone in the back, and then it'll be a little
bit flatter in the front. So first we'll hit tab
to enter the edit mode. Alt and Z denser our x-ray mode. Now we're going to start using proportional editing
to flatten this out. Let's just drag a
selection here over the front few vertices here
it can be one or two. We're going to start
moving these backwards. We might need to
make it a little bit bigger because we want to affect pretty much the
entire front of the sphere. We're going to move
it to about there. We don't want to move
it so far that it starts buckling in on itself. You can see now in this front selection here
it's actually going concave, it's going inward. So
we don't want that. We want to move it until just before that starts happening. I think somewhere around
there it looks pretty good. Now maybe we can
drag select here. See if we can get
a little bit more of a large selection here. So something around there. And then we're going to
move these back again. And this will help prevent that concave thing that
we were getting. We might need to
make our selection, the proportional
editing a little bit smaller here to prevent the, the whole year from moving. I think that looks pretty good. Now let's use our scale tool. We're going to actually
switch to the scale here. We're going to scale
this in the x-direction, which will further
flatten this out. You can see as we're scaling it, it's flattening
all these vertices out that we have
selected as well as the other vertices nearby based
on the proportional editing. We're going to flatten
this out pretty flat. Not entirely though. You'd want to have a little
bit of roundness to this. Because again, this is a
gummy bear and nothing on this would have
really hard edges. We're going to scale
it to about there. Something that
looks pretty good. Now let's start
shaping the back here. Before we finished the front. Let's track select
over the back here I'm gonna go back
to our move tool. We're just going to
start pulling this out. We get a bit of a taper. You'll notice our
Ears seems like it's going too far back. We can adjust that just by
moving the entire ear forward. We're only worried really
about the shape at the moment. I'm gonna make my selection
proportional editing, editing. I'm scrolling it a
little bit smaller. So I'm not moving so
much of the year. I'm just going to taper
this down a little bit. So I want the slope to be a
little bit more drastic on the top and then it
flattens out and gets a little sharper here
on the bottom. So that's about what your
ear should look like. We can drag select over
the front of this ear now. Pull it forward roughly to
where we'd like about there. I think that shape looks nice now that I'm gonna hit tab
to get out of my edit mode, just pull my ear back
forward where I want it. I think about here,
it looks good. So a little bit before the start of this foreheads
segment that we have. I think that positioning
looks pretty good. Maybe be back just a little bit. Now let's finish off
the front of the ears. I'm gonna go back into tab, or rather it back into
edit mode using tab. I'm just going to track
select over the front, front, a couple of vertices
here right in the center. I can rotate around
and I want to see, want to see the center
of the ear years. Maybe we actually just select just the center vertices here. It's rather than having
it select a few of them, just try to select the
dead center of this. The roundness of your Ears
is the center of the circle. I'm gonna hit Alt
and Z to get out of my x-ray mode so I can
see a little bit better. With my proportional
editing still turned on. I'm gonna hit S to
start scaling it. I'm gonna make my scale or my, my proportional
editing a little bit smaller so it's not affecting
so much of the ear. And I'm going to scale this up. So you can see as
I scale this up, it's actually
sharpening the edges of the ear a little bit. So I'm going to scale it
up just a little bit. And we can see now
we have a little bit more of a tight edge here. So more of a, an obvious sort of stopped for
the front of the ear. I think that looks pretty good. Pretty happy with the
shape on this year. If you want it to taper back into the head a little bit more, all we have to do is just select one of these
back vertices. You're not to worry
about X-Ray mode since we're only selecting one. Then we can just pull this made me make the proportional editing
a little bit bigger. And then just pull this
inward towards the head. That way it kind of tapers back into the head a
little bit better. That's what our ear
looks like right now. If you ever think
that, your know, your ear looks a little
bit too big overall. Control Z that we can get
out of our edit mode. Then we can just scale our
ear down a little bit. Maybe we want to just scale it just below whatever
it was before. Then just move the ear a
little bit into the head. And that'll just make
our your overall a little bit smaller. So that's how I look or Ears looking from
the front right now. Maybe we want it a little
bit higher on the head. I think there it
looks pretty good. Again, just adjust your ear
to whatever you think looks best for the current
proportions of your gummy bear. Now we can rotate around. Now let's add the last
piece of the ear, which will be this sort
of puff in the middle of the year, can zoom out. It shifts into a go
to Mesh round cube, just like every other time. Right-click Shade Smooth. Now let's move this up to
the center of this year. So we're going to go
into our mode here. So the X view, it, Altman Z. Then we're going
to center this in the middle of our
ear the best we can. Just start scaling it down. Again. If it seems like it's going a little wonky a
little too fast, just hold Shift and that'll
slow it down for you. We want to scale
it down so it's a little bit smaller than our ear, and then just try to
position it so that it's centered as possible. You're not really going
to notice if it's just a little bit off one
way or the other. So don't don't agonize over
the exact placement of it. You might be able
to use, depending on how much U-shaped your ear, you might be able to
actually use the wireframe of the ear itself to
line up the puff. So here I can see
that this is the, seems to be the
straightest line here, which means it's probably
centered on the ear. So I'm just going to wind
my sphere up to that. Then the vertical
one I can see here that this seems to
be a sensor of that. Then I can just shift
this a little bit to the side to center it there. It's approximately centered and that's all we really need. Now we can rotate our camera. We can hit Alt Z to get
rid of the X-ray mode. We won't really
need that for this. This will be a pretty
simple adjustment. Then we want to pull
this ear puff until it's about halfway inside the ear. So you see we have
about the front half of this sphere sticking
out the front. Now we're just going to
squish this down very similar to what we
did with the Belly. So we're gonna go
into our scale, use the X scale. In this case, we're going
to flatten it out this way and find it out as much as you'd like if you want
it to be relatively flat, just like the front of
the ear, you can do that You can have it puff out just
a little bit more to give the front of the
year a little bit more of a volume on it. Then just use your
move tool and just push it into the year
as much as you'd like. I'm going to leave
mine about here. Now if we zoom out that
year now has a little bit of a central detail
here is something similar to what the Belly has. If you think the puff
overall is a little bit too large and you don't have enough
of a border on your ear, you can just hit S and just
scale the whole thing down to give your ear a
little bit more of a breathing room on the edges. And then just push it in or out depending on how much
you've scaled it down to make sure you
maintain the amount of puff that is coming out
of the front of the year. Okay, So it looks pretty good. Now we're going to
rename these pieces. So we're going to
call this piece of the large tapered piece in the back with the
front, the flat front. We're going to call that ear. We can actually name this
Ears because it will actually be both of them once we
apply the mirror modifier. Then the front here,
and we're going to call this Ears puff. So now we have both of
these pieces renamed. Now we're going to go and add our mirror modifier so we get it on the left and
the right as well. So let's start with the ear. We're gonna go to
our modifier panel, which is this little
blue wrench here. Go to Add Modifier.
Choose mirror. Again, you can see
it defaults to going front and back rather
than left and right. So we're going to
turn off the X. We're going to turn on Y, which you won't notice any
difference right now. And then return good to turn
off emerge because we don't need it to weld these
vertex together. Now we can go up
to the top-right, choose Options, then
choose origins. Now we can slide this over and it'll move the duplicate over. So I'm gonna go into
my x-value here. That way I can center it. Just going to zoom in, in line it up as close as I can
with the center here, hold shift, move it
a little bit slower. Now we have our ear on
the left and the right. We don't have to worry
about turning off option origins yet because we're going to be doing it
immediately again anyway. So just select your ear puff. Now. Go to the modifier
panel just like before. Go to Add Modifier, mirror. Turn on, turn off,
uncheck Merge. We still have origins
selected up in the options. We can just move this over, Zoom in here and center it out. That's pretty close. Now we can turn off the
origins selection here up in the options that we can
move our objects regularly. And we are now done with both the ears as
well as the Belly. The next lesson, we'll
finish our gummy bear model by creating the
Eyes and the nose. I'll see you there.
6. Modeling the Eyes and Nose: In this lesson,
we'll be finishing our gummy bear model by
adding the Eyes and Nose. Let's begin. We're going to start with the
nose as it will help us find the best
placement for the Eyes. Once we're done, let's
add a round cube. We're going to hit Shift
a mesh round cube. And we're going to use
the same parameters as we have been for
the last pieces. So 0.00, 750.015 quad sphere and then 12 for
the ark divisions. Once we have that made, we
can right-click Shade Smooth. Now with our Move Tool selected, we're going to select
this little green square here and move it up towards the front of the
face and then scale it down. We can rotate around here, scale it down a little bit more. The piece we're actually
making right now is the muzzle or the snout of our gummy bear. So we're going to
have this piece, this larger piece that will
show where the mouth is. And then we're going
to have a smaller Nose that sits near the top of it. Now let's rotate around. I'm just makes sure it's
about the size we want. We're always going to be able to change this in the future, but we want it to be
roughly about this size. Just make sure uses
about that large. Now let's go into
our negative Y view so we can see it from the side. We're going to rotate this, something like we
did with the Belly. So we're going to rotate
it so that it matches roughly the angle of the head. So let's hit Alt and Z. We can see this. Just rotate it slightly. So about there. Looks like it's about ten
degrees roughly to the left. So that's good. Now we can begin the process
of starting to shape this. To start with, make
sure you're in local. So the top here, make sure
you have it set to local. Then we can switch to our scale. Morgan going to squish
this down a little bit, not quite as much as
we do with the Belly. I'm going to squish it to
maybe about, about here. Should be proud that flat. And then we're going
to start shaping this. So let's go into our front view. So using the X view at the top can now hit Tab
tend to our edit mode. Make sure we're in
our move tool here. I'm going to move. Now we're going to start
shaping this from the front, and then we'll finish the
shaping from the side as well. So let's start with
just selecting the vertices appear at the top. And with proportional
editing turned on, we're going to pull
this down and kind of flatten out the top. So let's make sure are
proportional isn't quite so big. So we're going to pull
it down to about here. Now we can select
this bottom area. We're actually going
to scale this. So with these bottoms
vertices selected, we're going to hit
S, scale this down, sort of pinching it a
little bit at the bottom. Now, let's drag select
over the top here. Try to get a couple of
the selected appears, so we have a fair bit
of them selected. Then we're going to
move all of these down that we were
trying to prevent, that concave thing
we add on the years. We don't want it to
collapse in on self. We're trying to get it
to about sort of like a heart shape without the
sort of V at the top. We have this kind of,
or maybe a guitar, guitar pick if you know
what that looks like. That's kinda the shape
we're going for here. I think that looks pretty good. Let's rotate around and
just make sure that it's looking like we
want somebody had Alt Z. So right now I'm only concerned with what it looks
like from the front. Does so does it look large
enough at this point? I think it looks pretty good. We don't want have really
large muscle here. It's gonna be a
cartoony looking bear. I think that looks pretty good. So as long as yours is
looking pretty similar to mine with this sort
of pinched bottom, then the flattened top, then it flares out here almost like a
really rounded triangle, if you want to think of it
that way, upside down rather. So that's what
we're looking for. Now let's go into our side view, which is the negative Y. We click that at the top right. Now we're gonna be shaping what it looks like from the side. Let's hit Alt and Z
to go into our x-ray. Then we can select the
top vertices here. And what we wanna do is make a, I guess, another triangle
shape here on the side. So we wanted to poke out more on the top and then taper back inward as it
goes to the bottom. Now it's all gonna
be pretty round. We're not going to go with
any sort of sharp shapes. But that's the general
shape that we're going for. Let's drag select over these
vertices right around here. We're going to move these out. Let's scroll to make sure are proportional editing
is a bit smaller. So something about there. Maybe make it a
little bit bigger. Now we can pull these
vertices at the bottom. Rescale this one up a lot.
I'm going to pull these in. Then let's round this front
out a little bit more. We can pull this
out a little bit. Now again, you don't want
to make this too sharp. So if it seems like
it's getting really pointing at the
front, just try to, try to round these
off, just select some around, push them in and out. And so you have a nice, nice gradual kind of triangular
shape here on this side. Then don't worry about what
the left side is doing because this is all going to
be hidden inside the head. Now that we have the shape correct from the
side and the front, let's rotate our camera around. We're going to hit Alt and Z
to get a better look at it. I think it looks pretty good. So the shape looks correct. However, I think it sticks out a little bit too
much on the sides. I'd like it to taper back
a little bit better. I'm gonna go back into
my friend view here, switch into my x-ray mode. Again. We're gonna be selecting
the vertices about here. So don't worry about exactly which vertices it
is on the side, just make sure it's
roughly this position. So maybe about a third of
the way down from the top. We're going to select
the side vertices here. I'm going to hold Shift and select the same thing
on the other side. Just make sure that
they're the same, same horizontal level. Let's rotate our
camera around now. We can hit Alt and Z, so we
can see a little bit better. We're going to pull
these backwards to help sort of taper this back
into the face a little bit. And you're gonna
want a relatively large proportional
editing fall off here. We're going to pull this
back till it starts. Tapering back into the face, makes it nice and round
on the sides here, gets rid of some of
that squareness we had. I'm pretty happy with that. I think that looks pretty nice. Then the last thing we
might want to do is to, if you're getting any sort of like hard creasing
down the center, you might have noted this,
this also on your belly. So if you have any sort of hard line where it looks
like you have a left and right side rather
than one smooth face. What you can do is
hit a when you're in your edit with
your vertex mode. So I hit a that'll select
every single vertex. So essentially a means all, with all of these vertex
selected, we can right-click. And then we're going to
choose smooth vertices. That's gonna give us
a menu down here. By default, a
little start out at one repeat with 0.5 smoothing. We can see here as we
turn up smoothing, what it's doing is it's
trying to take all of these vertices here
and average them out and move them either in or out in order to make the shape
over all a bit smoother. It's trying to get rid of
any hard edges that it sees. If we turn our
smoothing up to one, you'll notice a tiny bit of
smoothing goes occurred. And that might be enough
to achieve what you want. But if that's not enough,
you can tell it to repeat that same amount of smoothing
more than one time. So we can turn this number up here at the bottom from one. So we turn into two. You can see the
smoothing happens again and it gets more drastic. The more we turn this up, you can also click
and drag on this. The more you turn this up, the more smooth That's
going to get until it eventually smooths out
until just a smooth ball. And we don't want it to
smooth nearly that much because then we just lose
all the shaping we did. So maybe it will smooth it up, maybe to the fore. So in my case, I mean,
this will be different based on yours,
how your shape is. But I have my
smoothing set to one and I have my
repeat set to four. Now if I smooth around
or spin around rather, think that looks pretty
good and we still have that same kind of
shape we had here. It's just all of it. It's
just a little bit smoother, which I think helps with
the Gummy Bear look. Everything is really
smoothed off and kind of blobby and gummy. You notice it also made it a
little bit smaller as well. So if we're happy with this, we can just click off that
will confirm those changes. Let's hit tab. And then I can
just scale this up over all a little bit more. So I'm gonna hit S to scale everything all
at the same time. I'm just going to scale this up just a little bit
because it didn't make it a little bit smaller as
it's smooth, everything out. Now it's about roughly the
size that it was before. Now that we're done
with the snout, let's add the actual Nose
to the top of the snout. Let's hit Shift and a
go to mesh and then go to round cube is
always same parameters. Right-click, Shade, Smooth, going to move
to my Move tool. Now. We're going to move it up
to the sensor of the snout. Start by scaling it down. Again. You can use shift. If it's getting a little wonky. You can zoom in here. That looks pretty good. Roughly the right placement. Go into my X view here so I can see what it looks
like from the front. Now I'm going to shape this now, so I don't want it to
be a perfect circle. I'd like it to be a
bit of an oval shape. I'm just going to switch
to my scale tool here. Just squash this
down a little bit, make it a little bit wider. It's now it looks about the
right shape from the front. It might be a little
bit too squished. I think something about
there looks good. Now I'm gonna go
to my side view. So the negative Y,
which is the side here. And I'm going to squish
this in a lot as well. Right about there looks okay. Then we're just going
to rotate it so that it somewhat generally matches the rotation of
this, this Nose here. Now, it can't be perfect
because this is when a curve, so you kinda have to just
choose a medium between them. Something in around there, Let's maybe 20 degrees,
if I had to guess. So we can see it's there. Now let's just
make sure it's not protruding too far
from the face. If you want a more
pronounced Nose, you can let it push
out of the face more. Or you can push it into the, the snout a little bit and it'll make the nose a little
bit smaller overall. That's what our nose
looks like right now. I think that looks pretty nice. Now before we get too far, Let's start naming these pieces. We're going to select
this one here, which was the snout and
we're just going to call that snout as no. You and T, sorry, SAN OUT snout. Then we're going
to name the nose. I'm just going to
call that Nose. Alright, so now let's
move on to the Eyes. For the Eyes, we're actually
just going to reuse this Nose here because this is very similar in shape to what
the Eyes are going to be. We can switch off
of local for now, just to make the
movements a little less, less odd, we're going to
switch back to global. We're going to hit Shift and D. And then we're just going
to move this backwards until it's about the
height of the eye. It's now we can
move to the front. We're going to place
this roughly where we think the first I would be. Now we're eventually we are
going to mirror this over. So you're going to have to
visualize what it would look like on the other side
when you're placing this, I tried to make try to use this center
line here is that Guide. You don't want to have your
eyes really far spaced apart. And you don't want
to have them really close to each other either. In my case, I'm probably
going to try to make sure I have
at least one face, this face here I'm going
to use as my guide. So I'll have two
phases between my, I might change a little bit
as I as I adjusted around, but roughly two phases total between my eyes as
after I mirror them over. So first let's go into
our front view here. So I'm gonna go into the X. I'm going to move it to
roughly where I want. So in this case here, I'm
also going to have a face in-between the top of my snout
and where my eyes start. Let's reshape these
Eyes a little bit. I'm gonna go to my
my scale tool here. I'm gonna switch it
back to local because I want to make sure that I'm
scaling it based on the logo. If I scaled it based
on the, the global, you can see it'll
start actually skewing the shape of it, which
isn't what I want. I wanted to actually scale based on the rotation
that it currently has. So let's go back to local. I'm going to scale
this up a little bit because I don't want the Eyes to be
quite Sue like squinted. I want them to be a
little bit more round. They'll still be flatter on the top than they
are on the sides, but just a little bit
different than the Nose. I think. Can I shape about That looks better so that in
kept for comparison, that's the nose, Here's the eye. So it's about how
different they are. I think the width
is actually fine. So the width of the nose was also about how wide I'd
like the Eyes as well. Now what we're going
to do is rotate these eyes so that
they match this more, slightly more complex
rotation that the head has. So let's go into our
negative Y view. Make sure that the rotation, so this side here we're
going to rotate in the Y. Let's make sure it's a,
about the same rotation as this slope of the
head on the front. So think about there,
it looks good. Now we can rotate around. Now we need to actually
rotate it so that it matches this angle, so the horizontal in this case. So in my perspective view here where I'm able
to move around, I'm actually going to
move the blue handle. I'm going to try to
match it up so that it looks like it's about the
same angle on either side. So i'm, I'm looking
at the distance here from the mid point to
where it intersects the head. Now I can tell that
I haven't rotated it quite enough to the right. So I'm gonna have to
rotate it back this way because I can see the eye starts you can start seeing underneath the eye
on the right side. Whereas this side
it's already meeting. This takes a little
bit of nuance. So it might take you a few tries here to get the rotation right. Let's zoom in here on the I so I can see a
little bit better. And you won't be able to
get a perfect because the eye and the head
aren't quite flat. So I'm rotating down inside my model so I can see a
little bit better from below. I think that looks better Now that I had the
rotation correct, I'm actually going to push this into the head just a
little bit because I want to get rid
of that kind of overhang I was
seeing on the edges. I don't want to
be able to see up underneath the eye at all. I want to make sure
that the I is entirely intersected at least up
until the halfway point. Now I can deselect, spin around and I think
that looks pretty good. So the eye is rotated correctly and I think
it's intersected enough. Now we can just
double-check that the placement looks correct. Again, like I said, you're
gonna have to try to visualize this without the
second one to begin with. I'm going to move this
down a little bit. I think it might be
a little too high, but I think the left
and right looks okay. Okay, So that looks pretty good. Now let's rename this so we can double-click up here
where it says Nose. And instead we're just
going to call this Eyes. Hit Enter. Then we're going
to add a mirror modifier. But if you don't want to
follow along for this part just yet, I would hold off. So I'm gonna show you why the mirror modifier
won't work right now. And that's because the
way we rotated this, so don't fall along
for this part. I'm just showing you
something as an example. I'm going to add my
mirror modifier. Switch the settings
like we always do. Go up to Options,
switch to origins. Now when I move this, you'll notice that
when I move this over, it's moving the
eye off the face. And that isn't just because
of the local rotation here. So if I'm going to
my, if I Control Z that I choose global. Now that the gizmo is
lined up correctly, even still, when I move it over, it's moving off the
side of the face. And that's because
we moved this, or we rotated this object
in the x-direction, or rather we move the Z
rotation which rotated the X. It's moved it so
that the I and now is shooting off the
face because this is actually the direction
that the I is facing and that's what the mirror
is using as its base. The way we have to fix that is by applying the transformations
that we've made to this so that it
thinks that this is now the default position and
it's not actually rotated. So I'm going to delete this. First. I'm going
to Control Z, the movement I made on the origin. So Control Z. I'm going to delete my mirror modifier
so we can just click this little X here next
to the mirror modifier. That's gotten rid
of it. I'm also going to turn off origins. What I wanna do now
is hit Control and a, so this part you should
follow along with. So with your eyes selection, control and a, and
that's your apply menu. The things we want to apply
are actually the rotation. I'm going to hit
Rotation now that it has applied the rotation so that as far as
Blender is concerned, this is actually the
default rotation. So when this thing
is set to local now, so right now it's on global. Soon as I switch it to local, you'll notice nothing changed. And that's because
we've switched the Or we've applied
the rotation. So as far as Blender
is concerned, this is exactly how
it should have been. It hasn't been rotated at all. And that's because
we have applied it. I'm gonna go back to global. And now we can add
our mirror modifier. Set the settings
like we usually do. So why instead of
X uncheck Merge, then we can choose options, origins to move that. Now when we move this over, everything works
like we used to. I'm gonna go back into my
front view, center this up. Turn off origins. Now my eyes are exactly
as I expected them to be. This is also a situation
now where if you'd like to move your eyes apart now that you've seen
where they're at. So maybe it feels like I think my eyes might be a little
too close to each other. So I'm going to select the eye. I'm gonna go into my
edit mode and hit tab. Make sure I hit a
to select all of these vertices So I have
everything selected. Now I can start moving this
I over just a little bit. Since we have the mirror
modifier turned on, it's going to move
both of them equally. So if I move this over, you can see it's
moving both the Eyes. Now since we've applied this, these rotations to it, It's a little bit
harder to move. It's a little less
fiddly because we won't be able to use local. Let's just move it
over just a little bit and then I can
rotate it in the Z. Let's make sure that
the rotation is still accurate to the head. Something like that.
Now let's backup. And I think that looks
a little bit better. Maybe they need to go
down a little bit. There we go. Okay. So now I'm happy
with the eye placement. And we have our nose as
well as the snout created. So at this point we've
created everything that we needed to for our
gummy bear model. The next lesson, we'll
be combining all of these individual elements
into one solid mesh. Then we'll flatten out the
back of our gummy bear. Said, it looks a
little bit more like a realistic gummy bear candy. I'll see you there.
7. Connecting the Pieces: In this lesson, we'll be combining all of the
pieces together into a single mesh and then shaping our gummy bear to look a
little bit more realistic. Let's begin. We'll be using a modifier
called Boolean to attach all of the parts together
into a single solid mesh. This will be very important when we get to the shading lesson. If we select our model
and then zoom into it. Now we can rotate our
camera around and then zoom inside the model and
we can see a lot of unused geometry on
the inside here. And these are from the Pieces that we've made on the outside, just intersecting onto
the inside of the model. We can also see this
if we hit Alt and Z. So we can see that
the Ears don't stop right here as
they meet the head, they continue on
inside the body. These faces are not only useless and that
we don't see them, therefore, they're
serving no purpose, but they'll actually
detract from the look of the Gummy
Bear once we get to the shading step
because we will be making our gummy
bear somewhat clear. If we make our gummy bear clear, we'll see all these unused faces on the inside of the model. So we want to make
sure that we're going through in this step here and removing all of
these interior faces. So I'm going to leave
my x-ray mode now by hitting Alt and Z to go back
to the regular shaded view. And then before we
start connecting all these pieces together, we're gonna go
through a step now where we're going
to duplicate all of these pieces so that it might
comes to the class project. You have a version of
this that you can make much more simple edits to without all the pieces
being attached together. So if you decide you
want to use the Gummy bears a base for
your class project, say to change the animal
into a lion or something. It'll be a lot easier to make these edits when all
these pieces are separated rather than when
they're all attached. So we're going to make a
duplicated version of this, hide it, and then we'll be working on the original version. So let's start by going up
to our scene editor up here. We're going to click on
scene collection here. So we're going to click on this little white
box next to it. Now we can right-click
new collection. Now we've created
a new collection. I'm just going to
collapse these for now. We can see the new collection. So right now it's called
Collection three. We're just going to call
this class project. Hit Enter. Now we will want to do is select all these pieces
of our gummy bear. So we can do that
through the list or we can just drag select here. So to start with, I'm just
gonna do it with the list. So I'm gonna select the
very top one, the arms. Then I'll hold Shift
and select the snout, and that'll select
everything in-between. Now we can hit Shift
and D and our viewport. That'll make a duplicate. And rather than moving or
duplicate around or anything, we're just going to right-click, which will snap it back
to where it used to be, but it'll still create
the duplicates for us. Now we can see that we have the O1 version of
all of these pieces. So before we deselect all these, we're just going to click
and drag on any one of them. It'll select all of them if you just drag over top of one. And we're just going to drag
those into class project. Now we can see we've
moved to all of these duplicates
into this folder, not a hide this Class
Projects folder for later. That way if you want to use it, you can, You don't have to, but it's better to
do this step now, before we connect everything, we're just going to collapse this folder with
the little arrow. And then we're just
going to click this little checkbox here, which will hide that entire
collection completely. So now we don't see
it anywhere in here. And we can go back to working on the original pieces that we had. Now let's begin the process of connecting all these
pieces together. The first thing
we wanna do is go through a model and select each one of the pieces that we've applied a mirror modifier to. We'll go through here in order. So we're just going to
select the year puff and we're going to hold Shift. We're going to select
the Ears itself. Now we'll hold shift down
and still select the Eyes, the arms, and then
finally the legs. Now with all of these
pieces selected that originally had a mirror
modifier applied to them. We're going to hit Control and a gonna go down to the bottom
and apply all Modifiers. This is going to do is cement in the mirror
modification we made. We now we can see over here
and our modifier panel. Even then these Ears still look like they're
being mirrored. The mirror modifier
has been baked into the model so we can adjust
the mirror modifier anymore. But we still have
both halves of it. If we didn't do that before connecting these
all into one piece, we would actually lose
the mirrored sides. So we would lose all of these mirrored elements on the right side of
our gummy bear. But now that we've applied them, we won't have to worry
about losing them. Now let's zoom out a little bit so we can see the whole model. And then we're gonna go
through here and select every piece of our model
except for the very, the larger body segment here. So the one right in the center. So let's just start
out by selecting the ear and then we're just going to hold shift
the whole time. We're just gonna
go down the model and start selecting
all these pieces. Avoid the body segment for now, we're going to avoid the body. We're going to select the arms, can select the Belly. Then we're going to
select the legs. And now we can select
the body segment last. The last one that
we select will be the parent of all of these
individual elements. And we want the body
segment to the parent, not something weird
like the left ear. So whatever you select last in this situation
will be the parent Now that we have
everything selected with the body being selected last, we can hit Control and J. And then we'll connect
all of these models together into one model. Now we can see here that the pivot has switched
down to where the body is. Will also notice over here on our layer panel that the body is the only
piece remaining. So even if we throw this down, the only thing left
here is the body. And that's because
we've attached all of these individual
elements into one model. However, if we go into our
x-ray mode with Altman Z, will still notice that all of
these intersections remain. So that's what we're
gonna be getting rid of. Next. We can leave the X-ray
mode with Alt Z again. Now we're going to
be adding a modifier to this called Boolean. Swear-in. Go over to
our modifier panel, click Add Modifier. And we want to go up here to add a Boolean modifier that's
directly blogged double here. We'll click Boolean. Now with our Boolean
modifier applied, this is how we're
actually going to be removing these interior faces. So we're going to hit Alt Z
to go into X-Ray mode again. And you'll notice that
hasn't done anything yet. And that's because
we haven't changed the settings yet to what we need in order to get rid
of these interior faces. It a Boolean modifier does, is it will take one shape. So say we had a box
over here and we move the box to intersect
with this model. We can tell the Boolean
modifier to cut away all of the faces that that box would be intersecting
with our gummy bear. So we could add like sort
of cut away a quarter of the head here if we wanted to do something different
on this side, or we could cut
the Gummy Bear in half to show the
cross-section of it. However, what we're going to
be doing with the Boolean is telling the Boolean
modifier to look at all of the interior faces and remove them and then
just connect the mesh together so that it's one
contiguous outer surface with none of these interior
elements existing. It'll look as if
it's sort of like one solid piece of
glass or in our case, gummy candy with no
interior elements. It's just one giant
molded object. Within the Boolean modifier. We're going to be
choosing intersect. So we have three
different options here. The one we want is intersect
because we want to get rid of all of
these intersections. So essentially this
is kinda giving you an idea of what the Boolean
is going to be affecting. In our case, we want it to
get rid of the intersect. So we'll switch to intersect. Will notice that hasn't
actually changed anything yet. And that's because
we haven't switched our operand type right now by
default it's set to object, which means it's looking
for an object in order to remove the
intersections from. However, since we only
have a single object, but we wanted to look at itself, we need to switch operand type
from object to collection. So it's going to look at
the collection of objects and then make a determination
on what's or remove. So when we select
collection here, your computer might freeze
up for just a second. And then once it's done, it'll have removed all
those intersections. Now if we move around our model, we can see how that all of
these interior faces are gone. When we're inside it, it just
looks like one solid mesh. We can zoom back out. And all those
intersections are gone. Now let's leave our x-ray
mode. We can hit Alt and Z. While the Boolean modifier has done a pretty good
job of connecting all the models together and
making it one solid mesh. It has left behind some
weird Shading artifact here in the process of attaching all these
models together. So to fix this
relatively easily, we can go down to our
object data properties, which is this green
colored triangle. We're going to select that. Now we can scroll down
until we see normals. Twirl that open. And then we're just going
to check auto smooth. After checking auto smooth, we can see our model
goes back to being nice and smooth
like it was before. So now if we zoom in on a model, well known is pretty much
all of those kind of nasty shading
differences that we had after the Boolean have for the most
part been fixed up. There are some subtle ones here on the backside of the model. But for the most part, those will be hidden by the shader that we're adding
because the shader is transparent and it's
not going to have a lot of detail on the surface. That's gonna be more of
a cumulative effect of the transparency as
well as the reflection. And a lot of this stuff will
disappear in that effect. However, if there are any
particularly bad areas. So let's see if I can find one that might be something to fix. So we're seeing a little bit of shading here on the
face that's kind of blocky because of the face is going to be a bit
of the focal point. Maybe we'll try to fix that. So to fix that,
we're going to hit Tab to go into our edit mode. And then we're going to
go to our face mode. We can either select it up
here or three on our keyboard. Now we can select a face, and while hovering
over that face, we can hit L on our keyboard and we'll select all the
linked polygons with it. Then we can hold Shift, select another face here, and hit L again. And it will select all of
those linked polygons. Now what we're gonna
do is just edge this forward just a little bit. I'm just going to nudge
it up a little bit. So basically what we're doing is just trying to move
it as littles. We can then get the Boolean to recalculate how it's attaching
these faces together here. So if we can just do these
little tiny micro movements, we can hit tab and now we
can check and see if maybe the boolean has done
a better job of attaching some of
these faces together. Might be a little bit
smoother up here, but we're still seeing a little
bit of issues down here. Maybe in this case we'll
just rotate it a little bit. So we'll go back into
our edit mode with tab. We'll switch to our
Rotate tool and maybe we just rotate this just, just a tiny bit holding shift. Basically our goal
here is to just try to get it to recalculate it in a way that it's gotten rid of wherever the worst
of the shading is. Again, this doesn't
have to be perfect. Like I said with the shader, a lot of that is going to be minimized and obscured
with their shader. So I wouldn't really
agonize over this step. Now we can hit tab to exit that. Let the Boolean recalculate it. Then just double-check
your results. So I'm gonna let you go through and if there's any areas that you find particularly
distracting, just try that method of moving your elements forward and the best way to
select your elements, as I said before, now that
they're all in one model, is you're going
to select a face. You'll hit L while
hovering over that face. And now you have
everything that's linked to that model selected. When you're in edit
mode, you'll notice that these interior
faces still exist. And that's because Edit Mode is prior to the Boolean
being applied, which is why what
we're doing here has a chance of fixing the
shading from the Boolean. I'll let you, as I said, go through any places on your model where you feel it's
a little too distracting. I just try shifting
your elements around until the Boolean plays a
little nicer in those areas. Now that you're done with
your adjustment of all of your elements and you're happy with the shading
the way it looks. Now, we're going to actually
apply this Boolean modifier. We're going to cement
this now into the model. We're going to select the
model it control and a. Then we're gonna do
apply all Modifiers. Once we've done
this now if we go back to our modifier panel, will notice that the Boolean is gone and all of these
changes have been made. So now if we go into edit mode, we're actually going
to be editing the, the Boolean version
of this model. So all of these faces here
have been chopped out. Our next step is going to be to flatten the back
of our gummy bear so that it looks a
little bit more like a realistic gummy bear candy. So most gummy bear candies
we will have been created in a mold and the backside
of them will be flat. So our gummy bears a
little bit more stylized. However, we still want to add that sort of flat
detail in the back. So it looks more like
a candy and less like a Gummy teddy bear instead. We can see that example here and a lot of these
different styles. So there's gummy bears
that are a little bit more detailed and ones that are
obviously a lot less detailed, but they all, for
the most part share that same flattened back. We're gonna be replicating
that in our gummy bear. To flatten our gummy bear, make sure we have it selected. Then we're going to go into the negative Y view so we
can see it from the side. Then we're gonna go into
Edit with our tab key. We're going to use vertex mode, which is also one
on your keyboard. If you had that one in edit mode and it'll switch you to vertex, then make sure you have your proportional
editing turned one. So our goal here is to initially flattened these out until
they're about the same level. Right now the backside is a little bit further out
than the back of the head. So let's pull this
in so that it's about the same distance as
the back of the head first. So we're going to select
here of across the bottom, but make sure you're in your x-ray mode
before you do that. Because we want to select
through the model. So an x-ray mode,
select the bottom here. Switch to my move tool. Then I'm just going
to move this in. You might have to change
the size of your fall off here because we
don't want to be moving the entire
model in or out, just the bottom side of it here. So we're going to
start out moving it in just a little bit
to flatten it out. Then we can make our selection
a little bit bigger here. The falloff, we're just going to start
slowly inching this in until it's close
to the same depth, the back of the head. This doesn't have to be perfect. We're just trying to
get it close to flat. Since we haven't
mostly flat here, we're going to pull this in
just a little bit further. Now let's start flattening the back of the head
out a little bit. Now we might be able to select across the whole backside here. We're going to select across the top and the
bottom of the head, or rather the back of the head and the bottom of the body. Make sure we get enough here. With these both about
the same depth. Now we're going to switch
to our scale tool. And then we're going to
use just the X scale. So the red handle, we're going to start
pulling this until it starts slowly flattening
out the back. Now you don't want
to make this super sharp and you also definitely don't want to go past
it or else you'll start getting this concave back. But we're going to pull
it to about there. And you'll get a different level of sort of flattening if you have a larger or smaller fall off on your
proportional editing. Now that we have that done, we can select a little bit more. Maybe it will just
flatten this out just a little bit more trying to pull a little bit more of the middle of the body
backwards as well. So let's spin around,
see how this looks. So I hit Alt and Z to
get out of x-ray mode. And I'm going to hit tab
to exit the edit mode. And then I can click off the
model and just spin around now and see how your
gummy bear looks. So we've maintained that sort of bubbly look that we had before. But if we ever look from our
gummy bear from the side, we'll notice that
it has that flat back that we saw before. So we can see that
it has this sort of similar detail to how
these kidneys have. Ours is probably a little bit
similar in the way the back looks as to how these
references here look. Now our gummy bear
shares that detail. Now that we have our model
completed in our next lesson, we'll be adding lighting, creating our render studio, and Staging our scene. I'll see you there.
8. Lighting and Staging: In this lesson, we'll be setting up the Lighting
for our gummy bear, creating our render studio
and Staging our scene. Let's begin. We'll start with
making our render Studio infinite
plain background. This is simply a curved
plane that will serve as a nice solid color
background for our render. Before we start, go up to your list here on the right
where your collections are. Select the little white
box next to render studio. That way any model we create now will be made in the
render Studio folder, not the Gummy Bear folder. We're going to hit shift
into a Go to mesh. Then we're gonna
go up to the top here and you'll see
there's a little arrow. And then if you hover over that, it'll scroll the list up. And then we can choose plane. Now we've created our plane. However, you'll notice
that our gummy bear is actually intersecting
into the plane. And that's because the
plane is being created on the zero for the Z. So it's sort of at the floor of the world if you
want to call it that. However, our gummy bears
a little bit below that. So we're just going to
select our gummy bear. Then we're going to
pull it up until it just slightly
intersects the plane. So we want it to just poke into it a little
bit, but not a ton. So another way you can
see whether or not it's intersecting or not is
to go below the plane. So just rotate your camera and we're just going to pull
this down until it just, just a little bit intersects
through the plane. So about that much is fine. It doesn't have to be perfect. Now that we've moved
our gummy bear, we can go back to our plane.
We're going to select it. Then we're gonna
go into edit mode or hit tab to get
into edit mode. And now we can hit two on our keyboard to switch
into our edge mode, or just select this
icon up the top. We're going to select
this back edge here. Then we're going to hit
E to start extruding. But we'll hit Z as
well after hitting E to make sure it's
only extruding upward. So we're going to extrude
it up to about here, about as tall as it is
wide. So about up here. We just want to make
sure that wherever we extruded up to that, wherever we put our camera, it'll be way outside of you. We don't ever want to see
the edge of this plane. Now that we have
the back extruded, we can go to our modifier panel with the plane's still selected. Click Add Modifier, and then
we're going to choose Bevel. Now what bevel is going
to do is it's going to smooth out this corner here by adding more edges
here and trying to average the
distance between them. So by default it starts out
with just a single segment. But as we add more, notice it starts to smooth out. We're going to turn
this up to 15 and then hit Enter to make sure we have enough curve here to
make it nice and smooth. Then we're going to change
the amount here from three all the way
up to 10 " instead. Because when we want
it to be a nice gradual curve that we have here, Not a relatively abrupt one. The more smooth
this curve is here, the less we'll notice
that this is actually, it's actually a plane behind it, not an infinite plane and
infinite void of white bind. It, will have a
nice smooth curve here to avoid any shadows. Now we can hit tab to
exit our edit mode, right-click and then
choose Shade smooth. It's now if we deselect it, we can see here we have
a nice smooth curve here and there's no faceting. Now let's zoom into
our gummy bear. And we're gonna be creating
more than one gummy bear here for our scene. So having more than
one is just going to add a little bit of
variety to the scene. It'll make it a little
bit more interesting, and it gives us the
ability to make multiple colors of gummy bears, rather than just having one single red or blue
or green gummy bear, we can have a few of
them in the scene and make them all
different colors. So let's start out
by duplicating this gummy bear by
hitting Shift in D. And then we're going
to hit Y to make sure we're only moving in,
in the y-direction. We don't want it to
just go any direction. We want it to move
over this way. So we've kind of click
to accept the change. Now we're going to rotate
this one onto its back. So we can switch to
our Rotate tool here. We're going to rotate this down. And while we're rotating it, just hold down control to make sure you're rotating
it in increments. So we want to rotate
it backwards, negative 90 so that it
rotates flat onto its back. Now we're going to switch
back to our move tool. And again, we can
go down underneath the plane and just push it down until it starts
intersecting a bit. We'll go back to our
rotation tool here again. We're going to rotate it around this time you don't have
to worry about snapping because we're just
trying to get it to an arbitrary sort of place here. And then we can move it. We're just going to have
it laying in front of this gummy bear with
its heads towards us. So we're going to
eventually be placing our camera right about here. We want to set up
our scene so that we have a few different
interesting parts of our gummy bears so we can
see multiple angles of it. So right now we're seeing the nice front side of it. Here. We're going to be able
to see the top of the head and looked
down the body. And then we'll be putting
another one over here at a different angle to show
off another aspect of it. Let's just rotate this
one until we get it into a position that we're happy with keeping
in mind that we're gonna be having our
camera roughly here. So make sure you don't actually have it
intersecting with anything. It's okay to get it close and you do actually want
to get it close. So we have a nice compact scene that we can get closer
to the subjects. But we also don't want them
intersecting too much. I think that looks okay for now. Now we're going to create
a, another duplicated. We're going to start
with this one as well. So we're just going
to select this hit Shift D to start duplicating. And then we can
apply to make sure that only duplicates
in this direction. This one, we're
going to rotate it. So that's backs towards us. I'm going to switch this into local movement up at the top. So now it's rotated based on the way that
gummy bears rotated. I'm going to rotate this one
down at a 45-degree angle, maybe a little bit less. Then we're also going
to rotate this one towards where the
camera's going to be. So it's still gonna be facing a little bit towards the camera, but mostly rotated
onto its back. Okay, now our job here
is to place this one. We're going to switch
back to global. Now that we've rotated it. Job here is going to be to place it so that it looks
like it's leaning into the gap between the
arm and the leg here. We're going to rotate
it about here. Now, in this case, you
are going to have to intersect this just slightly. It's not really going to
be something you notice. We're going to select
both of these with shift. Move them out of
that so they have a little bit more
breathing room. Maybe we go back
to our Rotate tool here and rotate them slightly. We're just trying to make sure
that they fit in together nicely without too
much intersection. Might be okay there
maybe I went to this one to rotate a little
bit more towards the camera. Again, I'm gonna
switch back to local. I find it a little
bit easier to rotate this thing on local than it is to rotate it on global because it's at a
weird angle here. I'm just going to use
the blue handle to rotate it a little bit
more towards our camera, we see a little bit
more of the face and a little less of
the back of the head. Then maybe we need to
adjust the position here. So I'm gonna switch back to
global with my movement tool. Just kinda nudge it forward, making sure that it's
still intersecting slightly so that
it looks like it's actually resting on the surface. If it's not if it's
not touching it all, it will look like
it's just floating. We want it to make
sure it looks like it's leaning on the
other gummy bear. Okay. Then we're just
going to pull this back. So you can see here
it's a little bit of just trial and error,
see what looks good. Nudging them
back-and-forth until you get something
similar to what I have. Or if you'd like to change
it and adjust the positions, by all means, go ahead. You can just have a line
of them if you'd like. Or you can have them
all laying down, are all standing up,
whatever you'd like to do, I would just suggest
that you have probably three gummy
bears and you're seeing and probably not too
many more or too many less. Three is a nice sort of
grouping here that will be able to have a few different colors that all compliment each other. Now that you have
something similar to mine or something a little
bit different, we're going to proceed
on to adding our camera. Now let's go up to the top
here and select a view. Cameras. We're going to switch our view to
our active camera. So we never deleted
the original camera that we hadn't our scene.
We can see it up here. Our camera is just really
far away because by default, Blender assumes that our scene is going to be much larger. Since it's not large, we're going to Neha
now, now need to zoom our camera further in. I find the most intuitive
way to move your camera is actually to enable a
setting within our view. So we're going to start by
hitting N on our keyboard. To bring up this panel. You want to make sure you're in the view panel here so
that you probably have, we'll start out by
default in item. You're gonna wanna go to View. We're going to choose
camera to view. So if I make this
a little bit wider here you can see what it says. We're going to check
Lock camera to view. What that'll do is now we'll
zoom in on our camera. It will actually move
the camera with it. So by default, you would
normally have to actually move your camera in the scene in
3D as if it's an object, but not really be able
to see what it's doing. If we check camera to view. Now one more in the camera
and we move our camera around like we are used to by just spinning
around in Modeling. We'll also move the
camera with it. But you'll start noticing as
we get closer to our object, we're dealing with an issue
that we had before that we fixed in the viewport
which is called clipping. This is a really clear example
of how clipping would have affected our model in the beginning when we
had it in the viewport. So now our camera has a
totally separate clip value, which means we will
need to fix it again for specifically
the camera. So we're just gonna
go down here to the little green cameras symbol. And then our clips start. We can see it starts
out at 3.94 ". We're just going to type
zero here, hit Enter. And now it's made it as
small as it possibly can, which is all bunch of zeros
and then 39, that's fine. So now if we zoom in,
we can see our camera. Now it doesn't start
clipping anything. We're just going to
rotate our camera until it frames up
something around here. We're also going
to change some of these focal lengths here. So in our with our camera still selected down
here at the bottom right. So our cameras settings. It starts out by default at a
50 millimeter focal length, which is a little
bit of a long lens, which means it's
going to flatten out our scene a little bit. We're going to make our
camera a little bit more dynamic by widening the lens, which is going to be giving
it a smaller number. In this case, we're going to
type in 36 and hit Enter. It'll look like your
cameras zoomed out. You just have to zoom
in a little bit more. But it's going to make, it's
a relatively subtle change, but it will make the camera
a little bit more dynamic. It'll stretch the shapes
a little bit more. I think it adds to a little
bit more dynamic of a render. So we're just going to
frame our camera up here till it's about
even on all sides, we'll have a little
bit more room on the top and the bottom, but make sure that the left
and the writer about even. We also want to be a little bit higher than our gummy bears. Having a higher view does
to sort of things for us. One, it allows us to see more of the faces over the Gummy Bear that it's laying on the back, as well as the one on the back. As well as making the Gummy
bears appear a little bit smaller because
they are a tiny object, it would be difficult to
get a view from below the Gummy Bear in real life because you'd
have to have a really, really tiny camera or a really, really large gummy bear. In our case, we're
going to try to mimic real-life conditions by
going a little higher. So somewhere around here. Again, the way I'm moving
this camera is exactly how you've been moving your camera
before in the viewport. So when we're just
spinning around modeling, that's the entire way
that I'm moving this now. Now we have something
that we're happy with. I'm going to leave this as is. We need to uncheck camera
to view because we don't uncheck this every
time we move our camera. If we're inside the
camera view itself, it will actually move
the camera around, so it'll change what we're
going to be Rendering. We don't want that
to happen once we're happy with
what we've set up, we're going to check cameras or uncheck rather
camera to view. And now it's removed
the ability to adjust the camera
position while inside it. Now, soon as I move
you can see it snaps me outside of the camera. It leaves the camera
where it was. Now that we're done with this, we can hit N, tied that menu and our camera is
placed where it would be. For now, I'm just going to hide the little eyeball
on the camera here. And that will just make
sure that we don't have to look at it in the view
because it's really close to our gummy bears and it kinda gets in the way when
we're looking at them. So just hiding adhere
won't affect anything for the render is just getting rid
of it within the viewport. If you have an issue
with your plane being visible off the
edges of your camera. So if I go back to my camera, view, the edges here that
I'm seeing around it. This is the border
of my view here. This is just showing
what's outside the view. If for some reason your
plane, which it shouldn't. But if it does, it looks like this and you're seeing off the edge
of your plane, one, you could just
move it off to the right until you can't see
the edge of it on anymore. Or you can hit S and then Y, and then just scale it in the y-direction so that
it makes it wider. So those are two
ways that you could get rid of seeing the edge here. In this case, I
don't see it in as long as your camera angle
is pretty similar to mine, you also shouldn't see it with our camera placed and let's move
on to lighting now. Normally, in a
normal 3D project, you'd probably just
be placing lights in your scene and then putting them in different positions and different brightnesses in order
to illuminate the object. This is how you've
probably either seen or assumed that all the
lighting was done in most 3D. So if we zoom out here, we can see that we still
have our light left in from our from our base seen. The light is really far
away and that's also super bright right now
because the scene, like I said before, it assumed that we were going
to start much larger. So when we make it really tiny, all the defaults end up
being way, way too bright. And the way I got into this
rendered view up here is by clicking on this
far right button here. And this will switch us into the Cycles Render
for the viewport. So this is the method
that will be Rendering our final rendering,
which is also, we should probably be working in our viewport using
the cycles render as well so that all
the results we're seeing are as
realistic as possible. So as I said, this
is really bright. So even if we make
this down to like 0.5, can move it closer to our scene So this is how you
might assume that most Lighting is done and this is definitely a valid way to do it. There's certainly reasons
to do lights this way. However, we're going to be going about our lighting a
little bit different. So we're going to be doing
image-based lighting for this using something
called an HDRI. So an HDRI is an image
that has lighting information baked into it
that will put into Blender. And then Blender will interpret
that image and create Lighting for scene using
that image instead. One of the best websites
you can find free HD or Eyes online is
called poly haven. Poly Haven has a lot of different things including
textures and models. But one of the largest
libraries they have is H DRIs. If we just scroll down here and choose Browse, HD or Eyes, we see all of these
different images as well as the lighting
that it will produce. And all these HDRI images are totally free to
use for your projects. So we can just scroll
down here and then find an HDRI that we like, and then use that
for our project. Now we have different options
here such as Studios. We can have our gummy bear look like it's
sitting in a field. Or we can have more interior
options such as this one. Now I've already
taken the effort and finding the, what I would say, I've really good HDRI for the scene that has
nice lighting as well as nice reflections which will help highlight our
gummy bear material. I've scanned the options on poly haven for you
and found that this HDRI actually works really well for our gummy bear render. You can just download
this HDRI from the project resources
for this lesson, this sort of abandoned
warehouse might seem like a really odd choice for
Lighting for our gummy bear. The reason I chose this one
is because it has nice soft, warm Lighting, Which will
look nice for our gummy bear. And it also has a
large amount of bright areas such as
the sky next to the, the pillars there,
that will apply a lot of really nice reflections
to our gummy bears, which will accentuate
the material we're going to Pete
putting on them. So we won't actually be seeing this environment at all
in the Gummy Bear render, since we'll have that nice
white plane behind it. All we're really
getting out of this is just the lighting
environment. However, for the class project, I'd recommend you look
around poly haven and see if maybe any HER
eyes jump out to you. You might find one that better suits the look in
the mood that you're going for with your
new gummy animal or the scene that you create. Now that we've decided
that we're gonna use an HDRI for our Lighting rather than manually
placed plates such as this light here, we can actually just delete. This one will hit
Delete to remove it. And we're going to
have a little bit of ambient light leftover. However, that will
be replaced with the HDRI image that we chose. Before we go any further though, we're going to need
to enable a new add-on that's free and
built into Blender. So we're gonna go up
to Edit Preferences. We'll go to the
add-ons tab here. Then up in our search bar here, we're going to type in node. Then we can see
here Node Wrangler. So we're going to put a little
checkbox next to this to make sure it's enabled
with Node Wrangler. And then we can close this. This is just an add-on
here that is going to take out some of the
tedious processes from creating a
texture from scratch. It'll just add a
couple of little shortcuts that will make some basic nodes for us that we can then plug images into. I'm going to close
this window now. Then we can go up here to the Shading tab and switch
to that by clicking onto it. And this will bring
up a new work area. We're going to click on the
top-left of this bottom cell here with the little
plus sign and then just drag it over
to hide that window. Then the same thing on the top. Click here at the
top-left it over to hide that window
because we don't need to either of
these two windows. Now we can switch to the
cycles rendered view. So this one here, the one that it starts
to add in default, is more equivalent to the other render engine
which is called EV. We're not going to be using EV, So it's not really going
to be doing as much help. We're instead going to
select this ball here, which will switch it
to the Cycles Render, which is the one we are using. And it'll give us a
more accurate preview. Now we can go up here to view cameras and then
choose active camera. That'll set our camera
view back to how it was. We can zoom out a little
bit so that we can see the whole gummy bear window here at the bottom is where
we will actually be creating this HDRI. So by default, it's going
to start in an object view. We need to click on this and
then switch it to world, because the thing
we're going to be adjusting is actually
a world texture, not an object texture. Now we can see here that it starts out with a
few nodes here. Nodes or how all of the textures within Blender are handled. Each one of these nodes has a specific property
that it's adjusting. And then these connections
here are leading to other nodes that
will either adjust the property or
display the property. So in this case we have
just a single node. These nodes move
from left to right. So this is the output which is what we're actually
seeing in the scene. Then we have our
background here, which is showing
this gray color, which is why we have
a little bit of ambient light within our scene. Even though we have nothing, we have no lights in
our scene right now. If we change this to black, we can see all that lame, ambient light goes away. If we turn it up to white, we can see the ambient
light gets a lot brighter. But we're gonna be using this
for a different purpose. We're going to just set it
back to gray and the color here won't matter because we're going to be overriding it. Now to add the HDRI image, we're going to select
this background node, so make sure we have
it highlighted. And then we're going
to hit Control and T. Then we'll create
these three nodes here. Now don't worry about
the pink at the top. We're going to be getting
rid of that here soon. So we just can drag
these over now. So it has all three of these selected so that they're
not overlapping. And we can see here that
it's automatically linked all these different nodes
together into the background. And this is actually what Node
Wrangler is doing for us. So by default, hitting Control
T wouldn't have done that. By enabling Node Wrangler. We've gotten rid of the
tedious step of having to create all three
of these nodes every time he went to add
a new image texture and then linking them
all up together. So Node Wrangler is just kind
of cut out those sort of tedious steps that we do all the time and just made it into
a single button press. With these Nose added. We can now select our
environment texture. We're going to select Open. And then we're going to
navigate to where we've saved that HDRI image that I included
in the project resources. So in this case it's called
HDRI one and it's an XR file. I'm just going to
select this image and then hit Open image. We can see that all of the
pink has disappeared and now it's been replaced with
this EX, our image. We can actually see
a little bit of the EX our image here
in the background. However, like I said, this is the bounds
of our cameras. So all of this
stuff is outside of our camera view and
we won't see it. So we don't have to
worry about seeing this construction site
in the background. All we're going to see is this nice white soft
illuminated background. There's a few things
we can do now that we've put that image. One thing we can do is
to change the rotation of this image that the light is coming from a
different direction. If we rotate this
z-direction down here, we'll see the image in the
background actually moves. As that image moves, we'll notice that
the lighting on our gummy bear also
moves with it. And that's because
that image itself is generating the light. So as we move it around, we can see the
shadows are changing. The light starting to
come from behind them until it eventually will be entirely blocked by that plane. Now I've already done
this process here, so I know that the best
lighting direction for these gummy bears is actually
negative 76 degrees. So if I type that in, I can see we get nice soft
lighting here from the right. So the main lighting direction is coming from this direction. And then we're getting
nice shadows here between the Gummy bears
along the back side, along the backside of this one. So it gives a lot of nice shape to organic gummy
bears the latest, accentuating the
roundness of them. Now you don't have to use this
exact lighting direction. This is just what I've
found works the best. Now the next thing we
can do is to adjust the brightness and the contrast at this image in the background. So first we can drag select over these nodes here and move them over so that we make a little
bit of a gap here between the HDRI image and then
the background node. Then we're going
to hit shift into a Up in the search bar here. We're going to type
in brightness. Then we're gonna make a
brightness contrast node. Then with this made as it's dragging it around
here by default, we can just drag and drop
it directly on top of this. And it will automatically
connect the links for us. Now if there's ever
a situation where you make a node and it doesn't automatically connect the nodes together with these
little lines. Simply all you need to do
is just click on one of these dots and then just drag it to one of these other dots on another node and then
I'll link it together. Now in this case, don't
change what I just did. I'm just showing you
an example of how to connect these
things manually. So I'm gonna leave it
back to generated, connect that back to vector. Now this brightness contrast
and know that we added, we'll do exactly what it says. So it will change the brightness or the contrast
depending on what we adjust these values to
its everything prior to it. So we can think of everything
that's going before it, funneling into
this node and then being output from this
node to the next one. If we change a number here, it's changing everything
to the left of it, then outputting the results to everything to
the right of it. The change we're going to
make here is going to make your render right now
look much too bright. And that's because
everything right now is just pure white. So all of the light that's being cast it into the scene is being made even more intense once
we make our shaded material. So once you make the
Gummy Bear material, we want a really bright
light because we want the lights to cast
through our gummy bears. So for right now
we're going to change this contrast to this
background image to four, which will make our scene
really, really bright. But that's okay because
in the next lesson, we'll be adding our gummy
bear material, in which case, bright over like overwhelming brightness
that we're getting on all these white
gummy bears won't be present once the Gummy bears are clear and made different colors. For right now, it's going
to look really bright. But just trust me that the increased contrast
here we will make the Gummy bears once their
color look a lot better. Without this increase in brightness and
increase in contrast, the Gummy bears are going
to look a little dim and a little dark after we
add the material. With the HDRI complete
and the Lighting done, we can switch back
from World to object. In the next lesson,
we'll be creating a gummy candy shader for our gummy bears to give
them some FUN colors. I'll see you there.
9. Shading the Gummy Bear: In this lesson,
we'll be creating a colorful gummy candy
shader for our gummy bears. Let's begin. The first thing we need to do is switch to our Shading tab. So I'll go up here to the top
center, click on Shading. That'll switch this
back to the tab that we were adjusting
the lighting in. And just as a reminder, to get into the rendered view that we have here at the top, makes you click this
top right circle here. So it'll be the viewport
shading far-right one. Once you have that selected, you should see what I see here. And then we'll be
working down here on the bottom in this
bottom shading cell. You want to make sure it's
sets. You object here on the left instead of world, which is how we were
adjusting the lighting. So make sure your an object. And then lastly, make
sure your camera view is set to show the
camera perspective. So go up to view cameras and
then choose active camera. With all that set. Now we're ready
to start shading. Let's start by selecting
the far left gummy bear, the one that's sitting upright. We're just going to select that. And then down at
the bottom center here, we're going to click New. Now that we've done
that, we've created a new material for this. Now you'll notice nothing
has changed because it defaulted to a white
material as it had before. Let's rename this material. Read gummy bear, and then hit Enter so that we know what color this
is going to be. Because what we'd be
making more colors here. Just like the HDRI
nodes that we set up. These nodes flow
from left to right. If the farthest right
being the material output, and then the left
being the nodes that are generating the
properties of the texture. There are many
different properties on this principled be SDF node, which is the standard
default node you'll be making most of your textures
within, within Blender. Now I won't be going
over every single one of these properties
because we won't be using every one of them. However, I will be explaining
what the ones that we are using actually
due to the texture. So let's start with
going up to base color. And we're just going to click
this little white box here. And we're going to choose
the color of our gummy bear. Now this will just be a
temporary recolor we're using here because
we will eventually be adding another node. We can decide what color we
want our gummy bear here. So when you select this, you get this little
circle at the top. We can just click and drag this white dot to find
the color that you like. My case, I'm gonna go
with like a sort of an orangey reddish color.
Maybe around here. Then if you want to,
you can adjust the hue, which will change
the actual color with the slider down here. We can see as we move this, it moves it around the circle. We can adjust the saturation, which moves it towards
the center of the circle, which makes it a
little less vibrant. We can change the value, which will make the
color darker or lighter. And then we can
adjust the Alpha, which in this case won't
do anything for our color. Now that we have our color set, Let's start going down through some of these settings here. The very first setting
we're going to change is actually
near the bottom. So if we move our mouse down, I'm just painting around this using the middle mouse-click. I can go down here and we're
gonna go to transmission. So transmission as
we turn this up, it's going to make this material more and more glass-like. Until once it hits one, it will be essentially
entirely glass. We're going to turn
this up to one. Then we're going to set our
transmission roughness 2.3. Essentially the transmission
roughness is saying how blurry is this glass
that we're making? It super clear, or is it a little bit cloudy and it's
kinda hard to see through. The higher this number is, the more rough it is, Which means the
more blurry it is. Now we have our transmission at one and our transmission
roughness at 0.3, we can go back up. The next thing we're
going to be changing is our roughness here. So this roughness refers
to actually to things. In this case, this will
simultaneously adjust the blurriness of the
clearness of our gummy bear, as well as the blurriness of the reflections on the
surface of our gummy bear. So let's start by making
this a bit lower. So those smaller
numbers are going to make your reflections
a little bit sharper, a little less blurry. We're
going to type in 0.2. We can see here
that one actually made a huge difference here. So the roughness here
was making the surface really textured and
not very shiny. So we want our gummy
bear to look fresh and new and right off
the assembly line, We're gonna go
with a nice shiny, very sharp reflection on the
outside of our gummy bear. And by adjusting this,
we're actually making the Gummy Bear slightly
more see-through as well. The next thing we're
going to change as the specular tint, the specular value up here, we're going to leave
at 0.5, but I'll just show you as an example
what this does. The higher this number,
the shinier overall, our gummy bear is going to be, it's going to pick up more
and more reflections. The lower we make it,
the less reflections that will pick up overall. We're going to set this
back to 0.5 as it was. And then we're going to
adjust the specular tin instead what the specular
tint and we'll do Is it will allow the specular, which is the
reflections on this, to inherit some of the colors
that are underneath it. So in this case,
Oliver reflections are very sort of white. They're mimicking
the environment. I'm gonna make my reflections
a little bit more red so that the reflections don't
stand out quite as much. I'm going to do that by
turning up specular tin. So as I turn this up, you can see my reflections
get a little bit dimmer, but they're also a little
bit more red as well. So I'm going to set mine to
0.75 and then hit Enter. And you can see overall my
reflections are a lot dimmer because they're using the
red color rather than white. I think this looks a little
bit more realistic in this case to have these dimmer, but also more
saturated reflections. Now another way we can add back in some of those
reflections that we've lost as by
increasing the clear coat. The clear code is essentially, if you think this as
if it's car paint, a car paint has a
color underneath, say in this case, maybe red. And then there's a
clear paint that sits on top of it that
protects the paint below, but also adds a lot
more reflection to it. So that's essentially
what we're adding here, is we're adding a clear, shiny layer on top of our red
color that we have before. We're going to set this to 0.5. We can see we've added back in some of those
reflections, however, they're more red than they
were before because of the specular tint
that we've added. The reflections from the
base material that we had before we added the clear
coat are still there. They're just visible underneath
this nuclear shiny layer. Now we might also think that these are a little
bit too sharp, is getting back to that sort of glassy look that we had before. So let's increase the
clear coat roughness, thereby making the
reflections of the clear coat a little less sharp and a little
bit more blurry. So we're going to
also set this to 0.5. We can see by doing that, we still have more
reflections of rho, but they're not quite so sharp
and glossy as they were. At this point,
we're done actually adjusting any of the settings
on this base material. And you can see
it's already having this gummy look to it, really able to see through
it in certain areas. So if we zoom in, we
can just scroll in on this upper cell up here. To zoom in on our camera. We can see here that
we have this kind of nice dark areas where we're seeing through the Gummy Bear. Here we can see some
dark areas where the shadows are inside
the Gummy Bear. We're also getting nice
bright areas where these light is hitting the back of the Gummy
Bear and showing through. So we're getting to see that nice gummy material
that we wanted to. However, there are some
additional things we can be doing to make this look
a little bit more deep. Like it has a little bit
more shadow with inside it. So let's start by going down
here to the bottom cell. I'm just going to zoom in
here and then hit Shift and a to add a new cell
or a new node rather, I'm gonna hit search. Then actually the
right of the very top. Now we could type it in, but it's actually
the very top result. I'm just going to
type an ambient AMB. I'm going to choose
ambient inclusion. Once I create this node,
I can drop it here. Now in this case, it did
not automatically connected to it because it doesn't know exactly where we want to put it. In our case, we're
actually going to drag this little color,
yellow dot here. We're going to drag
it into base color. When we do that, it's going to override the color
we had there before. Now, if you don't want to have to repack the
color you had before, you can hit Control. And then right-click
and drag across this, this connection
here to separate. Then you'll be able to
see this color again. Now you'll be able to hover
over this base color, the one that you chose before. Hit Control and see just by
hovering over top of it. And then go over to this color
node and hit Control and V while hovering over top of it and it'll copy
that color over. Now when we replace it, it will already be
the same color. It's, now we're
going to read, drag this color node
back to base color. Now we'll see that our
gummy bears kind of read. But overall it's this kind
of weird, really dark, sort of metallic looking
black red color. That's because the parameters on this ambient occlusion so
quickly to explain what ambient occlusion is trying
to do is it's replicating the shadows that
you get either on the inside of an object
or in this case, the way it's setup now is on
the outside of an object. So when two objects meet
in real, real life, the light being cast around that environment
that they're sitting in. It doesn't really get into
the crevices between objects. So ambient occlusion
is trying to mimic the shadowing that is occurring in the
crevices between two things, setting
on a surface. So if we have, say, a book
sitting on top of a table, there'll be a small
little shadow line right underneath the book where
the lights just bouncing around in the environment don't really reach that
crevice because it's so tight and there's
very little room for the light to bounce
around inside it. So the immune occlusion node is doing its best to mimic that. Now there's different
parameters we can adjust here to make it work. In our case, for the Gummy Bear We just zoom in here. We're going to check
the inside box here. When we check inside
now instead of checking the outer crevices
of the gummy bear. So this area here and the arm, and then like this crease around the Belly are
underneath the nose. It's going to instead start sampling on the inside
of some things. So as surfaces get closer together on the
inside of the Gummy Bear, then it will put the darkening. So I'm gonna check this
little inside button here. And now we can see it's
almost entirely black. Now. There's almost none
of the color leftover. And that's because
of this distance, will remember that our gummy
bears really, really tiny. So it's, this whole gummy
bear is about an inch tall. This distance here is really, really big for the gummy bear. So instead of this one, for the distance,
we're actually going to type in a small number, which is 0.002 and
then hit Enter. And now we can see that our
gummy bear goes back to being read like it was before or
whatever color you chose. You don't have to choose
red in this case. We can see that we're
actually getting a little bit more darkening
here around the ears. Now, it'll be a
relatively subtle effect because we have such
a small distance. But if we again hold
Control and then right-click and drag
to sever this link. We can see that the Gummy Bear has a bit less Shading overall, it's looking a little
bit more flat. And then when we drag
in this base color, we gained some more shadow
here on the top of the nose. These arms get a
little darker here. So essentially what this
is trying to mimic is the areas where the Gummy
Bear is the thickest and where the light is just not making it all the way
through the light rays won't penetrate the
material of the Gummy Bear. We're getting more shadowing. So like on the inside
of its thigh here, we're seeing more shadowing. This node here is
just trying to add a little bit more
realism to this kind of dense gummy material
that we're making. At this point, we're getting
pretty close to having a relatively successful
gummy material. Now. Right now our gummy
material has see-through, so you can see through
it, It's transparent. It has this darkening that we're seeing in
these areas where the light doesn't
penetrate it as much and it's also shiny. However, right now it's
almost perfectly smooth. So there's not really any
surface detail on this. Now in a real gummy bear, at first glance, it might look pretty smooth because
it's so small. But if you've got this
close to the Gummy Bear, you would notice that it has all these different
surface imperfections and these kind of wavy, bumpy lines from the mold
that's made in or the just the fact that
it's been put into a bag and it's been rubbing
against other things. So we're going to try
to mimic some sort of simplistic detail on the surface here just to give it a
little bit more realism. So it doesn't just
look like this class sculpture of a gummy bear. And it actually looks like a kind of a lumpy
textured gummy bear. We're going to be doing
that with a bump node. We're going to start out
by hitting Shift and a. Then in our search bar here, we're going to type in bump, going to create this bump node. Now we're going to
drag this normal node. So the little dot up here
into the normal here. Now we have it
connected. Now you'll notice nothing has changed because we haven't
actually put any information into this bump node. We're gonna be making more nodes over here that plug
into the bump. And then the bump. We'll convert that information into something that Blender knows how to make the surface of this gummy bear look bumpy. Now we're not actually adding any more physical
detail to this. This is entirely essentially
an illusion that Blender is accomplishing
by making this look bumpy. So we won't actually be
adding anymore faces to it. It's just going to look bumpy without actually being bumpy. Let's start by creating the
next node that one need. We're going to hit shift
and a go to search. This time we're going to
type in Musgrave, so MUS. And then you can see it up
here, Musgrave texture. So this texture
here is essentially just a generated noise. And it's using this
Musgrave pattern to make this sort of generated
procedural black and white noise that we're going to be
plugging into this bump node, which will give the Gummy
Bear It's bumpy texture. So let's start by plugging this heightened node up here
into the height on the bump. And we can see right
away that our gummy bear has gone really bumpy. It's kinda looking almost like camouflage or it's made
of rock or something. So we can tell right away that the Musgrave and the
bumper doing something, they're just doing
a lot right now. So let's start by
adjusting some of these bump values here. So we're going to
change the strength, something really
small because it's a small object, we're
gonna do 0.025. So now we can see that
this Musgrave texture, because it's so large right now, it's almost appearing to do nothing but it
is still there. It's just been significantly reduced in its effectiveness. And we're going to leave
our distance at one. So now let's start
adjusting the parameters on this Musgrave texture to
preview what a node is doing by itself without all the other parameters
that it's being ran through. We can hold Control
and Shift down Then left-click on it. That'll show us a preview
of what that node is doing without all of the other
things working together. This is something that
the Node Wrangler add-on that we've enabled in the last couple of lessons is giving us the ability to do. If you want to
disable this effect, where we're only seeing what the output of just this node is. Just hold Control and Shift, and then click on the
furthest right node, which in our case is
this principled be SDF. To go back to seeing what
the full output of this is. Essentially whatever
you click on is just going to use
that as the preview. So it's going to run it directly into the material
output like this. So in our case,
if we want to see back to what we had before, which is using all
of these parameters, just hit Control Shift
and then click that furthest right node before
the material output. And then I'll go back
to how it was before. Let's zoom back in on this
Musgrave texture here. I'm gonna hit
Control and Shift to click this so we can see what this actual output is because we're going to be
adjusting some of these values. The first thing we're going
to want to adjust is actually the scale of our texture here. Sorry, now by default
it's set to five. And because our odd
object is so small, five is really, really large. So even if we make this as
low as say one and hit Enter, you'll notice it's actually, it hasn't really changed much. It's still really big and almost looks like it's
too big. In this case. We actually need to
start going down into the negative values in order to make this texture as
small as we'd like it. You can see as we go
further and further down, the texture gets smaller
and smaller until it's starting to get to a somewhat of a size that
we're looking for. Now, these values here
are going to end up being really, really,
really small. And we're gonna be able
to make them a little bit more easy to work with by using a couple of
nodes so that we can simplify this process. We're going to start by
just setting this back to, we'll just set it
back to five so we can see what it
started out as. The next thing we make is
going to be a math node. So we're going to
type in shifting a to bring up this menu. Then we're going to search math. This node here does exactly
what it sounds like. So this is actually
going to use math in and perform some specific
action that we can choose. We can choose all of
these different things. So add, subtract, multiply, divide, so on and so forth,
all the way over here. It will take the values
that we type in here and then perform this function and then output the new number. In our case here, we're
going to choose multiply. And now we're going to make
another, another new node. We're going to hit shift into a. Then we're going to search. And we're going to
search for value. A value node is
simply just a number. So whatever number we type
in here is going to be output and then put into
whatever we plug it into. Let's plug this first value
node here into the top. Then here we're going
to type in five. Now we're going to multiply this number by negative 1,000. So this might seem
like a really, a really weird way
to go about this. But essentially this is going
to let us do is not worry about having some really
weird hi negative value here. In order to make this smaller, we're only number we're
going to have to worry about is just this far left one, which is just gonna be a
regular, normal style number. In this case it'll be
like five or four or six. So now we can plug
in this value into the scale so that these nodes here are overriding
what the scale is doing. So we can see here
that these dots have gotten much, much smaller. Now to adjust the scale, all we need to do is
to adjust this number. We can type in like three and we can see it
update over here. I can type in five
and see it update. So now we don't
have to worry about what these numbers are doing. It's, this number
would normally be, in this case negative 5,000, but that's a weird
value to work with. So we're just going to simplify this,
collapse it all down. So we only have to
work with this number. Now before we go any further
and adjust these values, we want to make sure that
Blender knows how to display this texture
on this gummy bear. Because right now it's
kind of just guessing. And using whatever the
default unwrapping method is to apply this
texture to this. But we wanted to make sure that it's using the way that
we want to use it. So we're going to
hit shift into a. We're going to search
for texture coordinate. So type in texture and
then soon as you hit C, you'll see texture coordinate.
We're going to make that. Now we're going to drag the node object down here and
then put that into vector. Now we can see that makes
a huge difference here. What this is doing is it's
using the object here. It's looking at this object and there's a bunch of
different options here. So we have generated
normal UV camera, and all of these will make
this texture down here. So this Musgrave texture be applied to our
model differently. We can just see some of them
quickly here if we move them So that one's using the UV, which we didn't set up
the UVs so it's blank. And then there's just
different ones here. So this one is
using the normals, but we can see it's kinda messing it up in
some of these areas. There's generated. So you can see all these different outputs and some of them require more
effort prior to using them. In our case, we're
going to use objects. We're going to leave
it what we had. And now we see that
this texture here, when we change these
numbers, looks a lot. We can actually see
what we're doing here. It's not so small that it's
just completely invisible. Essentially, it just
looks like static. We're going to leave
our value here at five, which is what we had it before. Because I think that
size looks nice. Then we're gonna go down here to the detail dimension
and lack of clarity, which I'm not even sure if
I'm pronouncing that correct. We're going to type
in for the detail. We're gonna make this 1.3. As we zoom in on
the texture here, we can see what
this is doing here. So let me, I'll just move mine. You don't have to adjust your
video or your value rather. So as we lower this, we can see the higher
the value here, the more sharp we're getting. We're getting these
little protrusions here that pop off
of the texture. We want ours to be a
little bit softer. So we're going to type in 1.3. We're going to adjust our
dimension down to one. Which is just giving
a little bit more like smaller details
here that we want. So it's adding these
little gaps here. Then the lacunae charity, which again, don't, don't quote me on that
is how it's pronounced. So we're going to type
in 5.8 for this one. And then hit Enter.
This gives our edges here a static II
kind of cloudy edge. So we can see as we lower
this, it gets simpler. And then as it gets higher,
it gets this more dotted. I guess more detail essentially is what
we're adding with this. So again, we're going
to leave that at 5.8. We can see this sort of ragged
edge that it's giving it. Now. With all of this done, we're going to hold
Control and Shift and click back on
this main node here. We can go back to
our gummy bear now and see what that
actually is accomplished. Now when we zoom in here, we can see this kind of
like rippling we're getting on the surface and that's all
thanks to this bump node. Using these parameters that
we just plugged into it. Again quickly. If I want to break this off, I'm going to control and right-click to sever
that connection. And we can see how
it goes back to being really glassy
and really smooth. Then if we plug this in from the bump to the normal and
then note on the principled. It's still nice and reflective, but we're getting these kind of surface imperfections
were things that are a little wrinkly. They're a little bumpy. There might be like right here it looks like
there's a little bit of a gouging in it that
just gives an overall, a more realistic look. The key to realism in 3D is almost always imperfection,
not perfection. So something that is super perfect is to perfect
for real life. So even if something, if we see something
in real life, we're looking at a
perfectly smooth glass orb. From a distance it might
look perfectly smooth, but as you get closer to it, you realize it has some
scratches, some stuffs. There's an area
where the reflection wobbles a little bit. So it's all those little
imperfections that we add to our 3D renders that make
them look more realistic. If for some reason you think
overall this bump is little too strong for your tastes
or it's not strong enough, simply just change the
strength value here. So the higher the
strength value, the more bumpy it'll be. So we can see here now it's
really, really wrinkly. And if we make it lower
than we had, it'll be less. I'm just going to Control Z, those changes to
bring it back to what I had, which is 0.025. And we'll leave
it there for now. Let's zoom out on our scene and see the other gummy
bears that we have. So now we want to
duplicate what we have here and apply it to
these other gummy bears. But we want to make sure
that they're not all red. We're going to have different
colors for each of these. So let's start by selecting this gummy bear laying
on the ground here. Then this case,
soon as you click on a gummy bear that
has no material, you'll see everything just disappears. Now
it's still there. If you click back on your red gummy bear, it'll come back. It's just hiding it for now. We're going to select the
one that's laying down. And then instead
of clicking New, we're actually going to choose
from the drop-down here. And this will show
us all the materials and our senior right now, we're going to choose
red gummy bear. So now we can see that this red gummy bear is going to be using the exact same material
rather than laying one is going to use
the same one as the standing one, which is the red. So if we change
anything about this, it's going to actually
change both of them. We don't want that. We want to have different
colors for each of them. So I just Control Z that Change there in case you also follow it along,
changing the color. In this case, we're
going to have the laying down
gummy bear selected. Then we're going to click
this little two here. So this two is
letting us know that this identical material is currently applied to
two different objects. And by clicking it, we're branching this material, so nothing will
happen by default, that number will disappear. But now we can rename this
and we're going to call this green gummy
bear. Hit Enter. And now if we change this color, any change we make
on this gummy bear will not be replicated
on the other one. We're going to find a
greenish yellow color. And then green gummy bears
are not typically so bright, they're actually a
pretty dark green. So I'm gonna move this down. We get more of a forest green. I might be a little
bit too dark. You can adjust the
hue so if it's seeming a little
too yellow or not, not blue enough, we can
always move that around. Maybe I'll make mine
more of a true green. Then we can adjust
these values here. I think something
like that looks okay. If you're following
along exactly with me, I'm using 0.3 to
five for the hue. And then about 0.39, I'll just change my Exactly
0.39 for the value. Now we have a nice
sort of forest, the green for this one. Now let's do the same thing
for the back gummy bear. So again, soon as we select it, all this stuff disappears. From this drop-down. It doesn't really matter which
one we choose. Now this update, yeah, actually you just saw it update there. It might not update immediately,
but they are caught up. Now it says green. I'm just going to choose the green
gummy bear in this case, it really doesn't
matter which one you choose as the base. Click this number to
say that it's unique. Now, going to rename this
yellow gummy, bear it, enter. Now we can adjust this
to a different color. In this case, I'm going
to choose more of a slightly orangey yellow
maybe right around here. Then I'm going to
brighten this up a bit. So this, this little
slider here on the right is the same thing
as this one on the bottom. So either when you
want to use this fine, I'm going to brighten this up. Somewhere in the We'll try 0.7. So it's a nice number here. I'll do 0.1 to five for the hue. So if you're following
along exactly hue, which is the H, 0.1 to five. And then the value is 0.7. It's now we have the nice red, yellow, and green
that we had before. When the thumbnail
for this lesson. Then the very last thing you
might wanna do is to change the background color here
or make it more reflective. So we're just going
to select this plane. So you can see here
I've a little bit of a highlight here to let
me know I have it selected. I can also tell I
have it selected here on the top right
with the highlight. And with that selected, I'm
going to click new this time because I don't
want to make it gummy. Now I just get a plain
regular principled be SDF. One thing I can do is make this plane a little
bit more reflective. The way I can do that is by
turning up the specular. That'll make it more reflective. And then I can turn
down the roughness, which will make the
reflections a lot more sharp. Now in our case here, the
angle that our camera is, it's not really showing a
whole lot of reflection. We might be seeing a
little bit right here. We can see a little bit
of reflection here. But in general it's the angle. So the higher angles you'll
get less reflections. And then the lower
angle you have, you'll see more reflection. So we actually, outside
of the camera here, we can see these
parameters are working. We're seeing reflections here on the plane, on the outside. We're just not seeing so much on the inside here, Which is fine. That's just a symptom of the angle that we're
taking our camera. If you really want to
see the reflections, you'll have to
lower your camera, lower it down,
further down below the eyeline of these gummy bears and be looking up at them. And then that will
allow you to see the reflections on this plane, assuming you have some sort
of similar values here. So maybe we'll say 0.75 for the specular and we'll do
0.1 for the roughness. This, this amount of value here should allow you to
see some reflection. You can also adjust
the clear coat. So if you wanted to
add a little bit more reflection on
top of all that, you can also increase
the clear coat, which will add more reflection. For our case, we're going
to leave that down at zero. Then the last thing
that you might wanna do is to change the base color. Now I will caution you about changing the base
color to drastically. If you do anything that
you will want it to be very subtle and you have to think about what color you use. The reason for that is, as I change this color, you can see it's actually
really heavily affecting the color of my gummy bears
because they are see-through. So as I adjust this color, it's changing the way
my gummy bears look because the color is mixing with the color
of the Gummy Bear. Whatever color you use. Maybe we'll go with a
really light tan kind of goldfish color. You want to make sure
whatever you're using is not really that saturated, should also be relatively
bright as well. I've given my gummy
bears just a really subtle kind of tan
color here behind them. And you can see even
that amount has actually changed the
look of our gummy bears. And that's simply just because the Gummy
bears are see-through. So they blend with whatever
colors behind them. If you go with something
really drastic, like blue, you can do that and you can see how
shiny your plane is. We can actually see where our reflections would have been, had our Colorbond darker. But then you end
up getting really dark looking gummy bears. The Gummy bears really our best showcased and a
really light environment. My case, I'm just going
to go back to white. But again, feel free to use
whatever color you like. Just be cautious
of what color it is and how saturated
and dark it is. If you'd like your gummy bears to look like they're sitting on more of like a
mirrored surface, like say a sheet of metal or an actual mirror, you'd
hang on the wall. You can adjust your
metallic value down here. So as you raise this up, that background
element is going to get more and more metallic until eventually it just
looks like an actual mirror. Now in this case it's
a pretty stark look. So we can lower this down. That actually will
give you a little bit of reflection down here. So if you liked
this higher angle, but you still want to
see some reflections underneath your gummy bear. You can also do that. Maybe we'll raise
our metallic value. That doesn't look too bad. So maybe we'll do a nice
round number like 0.4. Now we can see a little
bit reflections here, but overall it's still
remains mostly white. The next lesson,
we'll be finishing this tutorial by Rendering a final image of
our gummy bears. I'll see you there.
10. Rendering the Gummy Bear: In this lesson, we'll be
Rendering the final image of our gummy bears so
you can share it with your friends
and family online. Let's begin. Before we begin,
let's just perform some quick housekeeping from the previous lesson that
we needed to take care of. We never actually named our
gummy bears unless you went out of the your way and did a good thing by
naming them yourself. If you haven't
already, that's fine. Let's just rename them now. We're just going to name
this red gummy bear. Then we can select
the laying down one. In our case, it's green. Now, obviously, if you've
changed your colors, you're going to want to
adjust your names as well. So if you didn't use red, green, and yellow, that's fine. Just rename them
what color they are. Then we're going to name the
back one, yellow gummy bear. So now that that's
out of all the way, everything over here is nicely
named and we can proceed. The first thing we're
going to do is go through and just really
quick checklist here. I won't belabor the point here, but we're going to just
double-check that you have all the correct render
settings because that'll be important for when we come
to the actual render time. So quickly, you just go to
your render properties here. So this little, the backside of this little digital camera, click on that tab and then you're going to
go to render engine, makes sure it's
set to the cycles. Go to device, make sure it sets, is set to GPU, compute. At this point, it doesn't really matter what your
viewport settings are, but just in case you're curious, they should be at 0.1
for the noise threshold. Then max sample set to 256. The D noise should
be checked and then set to optics as long as
that's an option for you. Otherwise, you can just use the open image de-noise or
just leave it at automatic. We're going to scroll
down to the render which at this point are the
actual important ones. Make sure you have
noise threshold checked on and it's set to 0.03. Max samples is set to 256. We can leave our
time limit at zero. This shouldn't really
take too long to render given our
settings are pretty low. And then for D noise, make sure your D noisier is
set to open image de-noise. You don't want this
set to optics. In this case, this one will actually give us
a better render. So open image de-noise. Next, we're going to go
to our output properties, which looks like a little
printer printing out a photo. Then up at the very top, we're going to change
our resolution. It should be 2000 pixels for the X and then 2000
pixels for the Y. And that'll give us a
nice square image that is a 2000 and by 2000 image. And then finally, we're
gonna go into Edit, then go down to Preferences. And then on this menu, we're going to choose
system when the left. Then make sure you
have it set to cuda, and then have both of
these boxes checked. Now if you have multiple GPUs, you might have 33 boxes here. But either way, make sure
every single box that you see on this menu
here is checked. And again, you won't actually
see these exact words here because this actually shows what your current hardware
is on your machine. So you won't see an
NVIDIA G-force RDX 26th super if you don't
actually own one of those. So just make sure
every single one of these boxes is checked, which will enable the use
of your GPU in my case. And then my CPU, or
you're on the bottom. With all those boxes
checked and set to cuda, we can close this
and now we're ready. Let's go up to the top and
then choose the Rendering tab. Now we're going to go to render. And then we're just going
to choose render image. You could also
alternatively you just hit F12 when your keyboard, and that will also
render the image. So let's hit this. Now we can see here
that it started the process of
rendering our image. There we go. Now
it's popped up and it starts out really grainy, really noisy and fuzzy. And then as the sample number
up here goes up, sorry, now it's at 11:12 and we'll keep counting up
until it hits to 56. And then once it's done, the image will be as clean
as it's going to be. It, the render will
stop and then it will process the denoising, which is done after
the fact that will use the open image denoising
that we chose before, the open image de-noise. Or we'll go through
here and find any remaining noise,
any remaining speckles. And it'll try to smooth that
out using some AI software to best guess at
what it should look like had it not
been sort of noisy. I'm going to let this
render Continue. And then when it's
done, I'll be back. Okay, so now that
my render is done, we can see up here at the top, the time for this render was
about 3 min and 10 s. Again, that's with my current settings and that's with my
computer's hardware. So if you have significantly
better hardware, this will have
rendered much faster. If you have significantly
worse hardware, it'll probably have
rendered much slower. If the render rendered really slow for you
and you'd rather speed it up and it wasn't
really that close to 3 min. Now, again, you can
leave it as what it is that and be happy
with the quality. And then it'll
just take a little bit longer for it to render. So maybe you have to go make a cup of tea or something
while it renders. Or if you just want to get
it really quick preview and you're tired of waiting
so long for that preview. We can adjust these
settings over here. So if we go to our render
settings on the right, so again, it's this tab here. It looks like the back
of a digital camera. If you adjust this
noise threshold here and you make
this number higher, the higher the number
the more noisy will be. In this case, we could
change this from 0.030, 0.04, or maybe 0.05. And that will make
the render care less about how noisy it is. It'll stop rendering when it
gets to a certain noisiness, which in our case will be more noisy because we've
raised the number. We could also alternatively
adjust the Mac samples so it has to go through less
samples before it finishes. And then performed
the D noise operation that we've told it to do here. But again, if you
lower this number, the less Mac samples, the lower the quality of
the image because it's not taking as many samples
to complete the final image. And then if we raise
the noise threshold, it will be more noisy, but it will also render faster. Now, you have to be okay
with a less quality image. So we'll lower
quality image that just gets done a
little bit faster. An example for the max
samples is something you could lower to do
like to 25 or 200, or maybe as low as 175. But as you start
getting really low, you're going to really
notice a degrade in quality. For my purposes, I'm just
going to leave this at 02:56 and then we'll
leave it there. So at this point, we've actually completed our final render. This image is done.
We can zoom in on it. We can see the quality. We don't have to worry about the constant reprocessing
that it was doing within the viewport
every time you moved your camera or zoomed in. Because this image is complete, it's final, it's done, it's not being
processed anymore. It's just been converted
into a flat image. Now in order to save this image and share it with people
and say social media, like Facebook or
Twitter or Instagram. You'd have to go up to Image. And then Save As. Now it'll bring up
at the location wherever this file
is currently saved. Then we can just call
this gummy bear. Then maybe we'll just call it O1 so that we know that this
the first version of it in case we make any further
adjustments and we want to see what the old
renders look like. So that's the name down here. And then we can change
the file output. Our case, we don't have
any transparency in this, so we don't have to
worry about keeping the transparency
with the PNG format. We could just save it
as a JPEG if we'd like. So we're going to
set it to JPEG, and then we're going to make
the quality up to 100%. That way it's as clean as
possible for this JPEG. With this set and
our name given, we can hit Save As image. Now our image has
been saved out. It's saved as a JPEG, which we can then share
wherever we'd like. In our next and final lesson, we'll be discussing
our class project. I'll see you there.
11. Our Class Project!: Congratulations, You've made
it to the end of the class. Now that you've
learned how to create a cute little gummy
bear with me. I'd like you to try
your hand at making a unique gummy animal
of your very own. You can use all of
the techniques you've learned in this class
and apply them to adjusting this gummy bear into a brand new animal or start from scratch and make
something brand new. A few ways you can adjust our current gummy bear
model are Go back to the duplicated version
we made before connecting all of the
parts into one mesh. And you can change the
scale or placement of the body parts to put the
bear into a different pose. Add or remove parts from the gummy bear to turn it
into a similar animal, such as a lion or wolf. Start from scratch and create
an entirely different base, such as a snake or a fish. Or Continue using
your gummy bears, but arrange them
into a small scene with simple props
that tell a story. An example of this
might be making a small picnic basket and
blanket for them to sit around. Lastly, you can just think
way outside the box and surprise everybody with your unique creation
of your very own. When you're done with
your new gummy creation, post the render to the
gallery and share it with me and all of
the other students. I'll personally
review each project posted to the
gallery and let you know what I love
about your image as well as anything that
could use some adjustment. Here's an example of what I've created for my class project. I made a FUN little gummy snake, including a forked tongue
and a tail rattle. I used all of the
same techniques we discussed during the class, as well as some basic modeling to create the tongue
and the mouth. I can't wait to see what
you all come up with. Thank you all so much
for taking my class. I really appreciate it. If you enjoyed the
class and want to know when I
release a new one, please click the Follow
button here on Skillshare. Also, please consider
leaving an honest review for the class so you can let other students know if it's
worth their valuable time. If you liked this class, please check out my teacher profile. You might just find another class of mine
that interests you. Thanks again. I hope to see
you in another class soon.
 Harry Helps, Professional 3d Artist