Transcripts
1. Trailer: in less than 12 figure drawing Siri's. We are going to tackle one of the most overlooked areas of drawing, and that is fate. Fate construction is somewhat unique compared to other areas of the party, because we are dealing with shapes and forms that no other area really has to contend with . So we're going to try and simplify everything down and look at it from multiple perspectives, as always, will do a lecture bullet by demonstration and then finish it all off with a 25 minute time during session. So let's get cracking on this rather challenging area.
2. The Importance of Feet: feeder, probably one of the most overlooked areas for beginner artist. We tend to get locked into drawing these nice, gestural figures thes lovely flying hands and portrait of the head one we're starting out. But when it comes to feet, what usually ends up happening is we'll do whatever we can to avoid drawing them. Part of that is due to not knowing how they're constructed. Part of that is that we're so used to seeing people with footwear on that. It's difficult for us to envision what the feet actually look like. And part of that is just how boring that they can actually look. A swell food don't offer us the same type of exciting, gestural movements and positions as other areas of the body, So it's easy to look at this area as being not nearly as important. The reality is, if we want to develop a well rounded, a perch to out figure drawing, this is an area we're going to have to tackle. Whether we like it or not, they can be a particularly tricky area. In general, the foot is not so different to the hands in its structure. The underlying bones are more or less the sign. The only difference, really, is the proportional measurements of different. The one benefit we do have with feet is that they are not nearly as articulate as hands, so in some sense they are a little easier to tackle in that regard. The main problem with fate is because we don't look at them as often as we do our hands. We don't have his good and understanding subconsciously of how things should look and move . So even though in some sense they are a little easier to construct and hands, they are still going to possess a bit of a challenge for us. So let's start breaking all this down now.
3. Basic Structures & Proportions: Now, before we start work on the foot, let's talk a little bit about its structure. The main conceptual shape behind the foot is a triangle. A triangle is the most stable shape there is. An evolution has fortuitously provided us with that shape in our anatomy in order for us to remain balanced. If our food didn't fan out the way that they do, we will have far less stability, structurally speaking, and leg and foot can almost be considered a corn. And, like a calm, it's much better for the corn toe. Have a wider base that fans out in order to support the white that it's carrying. This base shape allows us to stand in numerous positions, both narrow and wide, with great stability. Without this trying your wage fanning out, we wouldn't have anywhere near the balance or support structure needed in order to hold up out body. So our main ideas, when constructing the feet, are more or less going to revolve around it being the base off the overall column that is L . A. One of the easiest mistakes beginning artists make with feet is that they tend to box everything off. They crunched the toast together and square everything off into this nice, boxy area. The reality is the food fan out. If we draw a box around our foot here, what you'll see is that the big toe and the pinky toe sit outside that boxy area, pushing out and giving us something closer to that triangular wedge shape. So it's going to be important to remember to not crunch out toast together into this boxy confinement that if we want to ensure the stability is present in our design, we need to maintain that calm idea for our legs and feet and ensure our toes are fanning outwards. So just to reiterate, the basic mechanics of their foot are going to be this triangular wedge shape that fans out now in terms of proportion. There are two ways we can go about getting our measurements right if we use out toes as a measuring stick. What we'll find is that, on average, the foot is about 3.5 toy links down in measurement. This is obviously going to be different from person to person, but as a general rule, this is a pretty good place to stock from another way we can measure is across the width of the toes. If we use this as our measuring guide. Foots length is about 2.5 times its width. So we've got two ways we can go about getting out proportions. Now the other area. We have to look at all the ankles, just like how we don't want to draw the hands without some part of the wrist attached. We don't want to be drawing out feet floating in space with nothing attached to them, either. So even though the ankles aren't really part of the foot for the purpose of AL lesson, we'll consider it as part of the role foot structure. The ankles are the pivot point for our faith and will allow the foot to rock back and forth freely as well as a little bit from side to side. Also, it doesn't have nearly the range of motion as our hand does with the wrist, because the ankles act a little bit more like a vise gripping onto the foot. What's the hand and wrist act more like a bull joint? The thing we have to be aware of the ankle bodes is that they are in different positions in relation to each other. The inner ankle sits higher than the outside ankle. What will notice with this positioning is that it actually runs counter toe other areas off the leg. If we have a look at this example here, we can see a Siris of implied diagonal directions air leg as we move down. But as soon as we reach the ankles, that diagonal movement moves in the opposite direction. So if we haven't forget which direction the angles are supposed to be sitting, all we have to do is remember that they are sitting in the opposite diagonal to the other landmarks in the lake. So that's our basics covered for the foot. Let's move on to some more details.
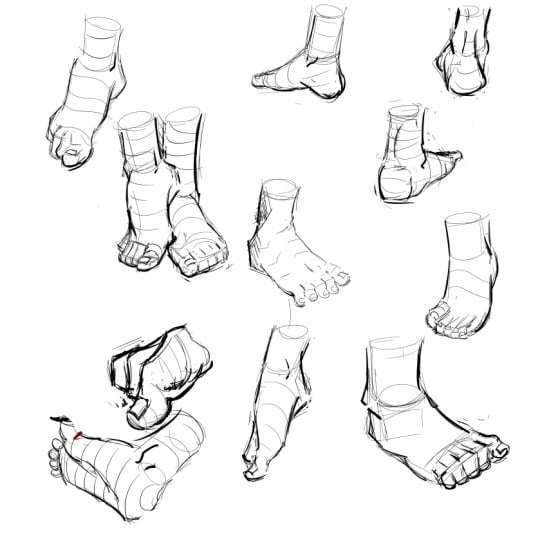
4. Profile Views: we've gone over a rather crude set of ideas for our structure. So let's start diving into a few more specifics. Let's start with the profile view, as it's generally the easiest perspective to start with. The inside and the outside of the foot are slightly different, but the oval shape is roughly that of a triangular wedge that we talked about when we go about drawing out feet what we're always going to be looking for other simple shapes and forms to draw the characteristics of the foot's design. In other words, we're not looking to be drawing bones and muscles just the easiest shapes that represent those bones and muscles. We can already see that this simple shape is a pretty good representation of it foot. So when we start laying down our initial structures, this is a perfectly fine place to begin. But we obviously need to do more to it now. This basic structure will work for either side of the foot, but because of the asymmetrical nature off the foot shape, there are going to be differences in the overall structure on each side. The outside view differs because we've got this slope developing the top plane of their foot is not flat across. In fact, it's changing. Direction is quite steep. If we have a quick look at the front, we can see this slope developing more clearly, creating that triangular wedge shape. And if we move around to a slightly 3/4 view, we can see what we have going on. He is a series of distinct plane changes, how foots direction moves up from the inside and then gradually starts to step down to the other side. So we have to remember when you're dealing with a perfectly flat top plane on their foot. We've got a series of sloping planes developing. Now because of that directional plane change, what we'll find is that all of our toes will be visible from this position. There are going to follow the same slope path, all stepping down, all overlapping each other. The little toe is obviously going to be the one closest to us whilst the big toe will be sitting behind the wrist. Now, it's always best to group the toast together when beginning. So in this instance, as a group, they wrap around to the other side of foot. The other thing will have on this side. Is that padding on the foot? We've got these three padded areas from this perspective, the petting underneath the hell underneath the knuckles of the toes and in the space in between, the middle pillowy area changes the most as it compresses with the ground, the more contact it makes with a surface, the more it starts the flattened push outwards. This bulge starts roughly where the ankle begins and flows towards the knuckle pads almost like a flattened egg shape. What will also notice is the knuckle padding is actually overlapped by the little tow. It doesn't merge directly into the toe itself, so that's the main structures to the outside of the foot. Now, if we look to the inside of the foot will come across a different set of challenges. The first thing is, the ankle on this side is going to be slightly higher than on the other, probably about 50% higher. The most noticeable change from this perspective is we're going to have this archway developing. We, of course, have got the padded area where our toe knuckle begins. But in this case, what we see develop is an arch that moves up and over to well, hell more often than not, will also get a little bit of the bottom plan of the foot peeking through this arch. The other thing we need to know is that the hell is curving inwards about in line with shin bone. The outer side of the hill stays relatively straight, for the most part in comparison. On the inside, it's curving inwards for the toes. Because this side plane is a lot straight up, it means we usually going to see no more than the 1st 2 toes. The big toe sits a little bit lower than the second toe, although it can sometimes still covered up completely. From this perspective, it's just going to depend on what position? Things, that rain. So those are the basic profile structures now, of course, this is looking at the foot in a very inactive and relaxed way. All the toes and padded areas will start to shift in their shape, depending on how they are moving and what they're coming into contact with. But it's a good starting point toe work from Let's move on to some other perspectives
5. Front View: so if we move onto the front, we are really going to start noticing the difference between the inside and the outside of our feet. We get a really strong indication of that triangular column idea we talked about earlier. Whether our feet are close together or wide apart, those inside planes of the foot almost pressed flat up against each other in a vertical position when standing at attention, creating that column like bites. What you'll also notice is that inside plane will retain that vertical position, no matter how wide apart we spread the legs, helping to give us that strong, stable triangular support. So whether the feet are close together or far apart, the idea of that triangle is going to remain now. The thing to know about the shape of the foot from the front is that it tends to look a little odd at first. When we putting our rough foundations again, we start with that triangular wedge. But the truth is, this is really lacking in dimension. The biggest issue we're going tohave from this perspective is really getting the feeling that what we are drawing is moving backwards in space. So whilst our triangular shape is perfectly fine. As a general idea, we're going toe. Have to alter our thinking to help get that three dimensionality, right? We are now going to move on from that initial triangular wedge shape I D. And instead start considering the foot structure as being something more of a cylinder shape but a cylinder shape that gradually starts to curve down and flatten as it gets closer towards the viewer. Even though our base idea is a triangular wedge, we want to ensure we keep that roundness of the foot and not go overboard with sharp corners. So using this cylinder shape that gradually compresses will help to reinforce that front on position and perspective whilst keeping that triangular shaped prison a good comparison we can make in real life is actually using an empty toilet rope if we crush one end of the toilet rope. This is the approximate shape that we're trying to achieve for a foot. Now. If we move on to our toes, you might be thinking we simply cut off a little bit of the area at the front here and just simply fill the toes and accordingly. But the position of the toes isn't flat cross. If we take a look at things from above, we can see the toes actually move in a C shape arc around the foot with the big toe usually sitting slightly further back in the second with the pinky toe sitting further back than a lethem. This means we've got a little bit of a problem to deal with from the front in terms of getting these position correctly, as some of our toes are shifting backwards into three D space instead of just aligning them across, we're going to snake them around the cylinder shaped in an s cook now wine s curve, you might say. Well, if we simply just used the C shape from the top, we run the risk of making out toes look as if they are a line straight across an S curve. Is going to help retain the proper positioning a lot better in comparison. And it will also help to ensure the toes look properly connected to the main structure off the foot itself. The other thing with the toes we have to be aware of is actually the big toe. What will find is that the big toe angles in words. It can vary from person to person just how sharp that changes. But broadly speaking, it angles in a lot more than the other toes. Now in general, we want to group least toast together before we define them individually. But the big toe shape is a bit more unique than the smaller toes. The big toe shape resembles more of a flattened bean shaped, whilst the smaller toes are a lot more of a rounded box structure, sometimes even closer to egg shapes. We can also use for a big toe, a shape closer to 1/2 cylinder or even something like a flattened ball. Shapers work, whichever you feel comfortable using, So the front of the foot is going to be a little bit more work than what the profile is. In general. This perspective is actually the least interesting to use in our designs. So even though we have to learn it from this perspective in order to understand the foot structure, it more often than not ends up being the least interesting perspective to use for our drawings. So if you're doing some figure drawing or some character concept work from the front. Try and tilt or pivot the foot a little bit rather than just having it straight on as we are learning now. Okay, so let's move on to the next video.
6. Bottom View and Heel: Let's move on to some other areas. Now we've all seen what a footprint shape looks like. And as simplistic as this sounds, it's actually the best idea we can use as a starting point for the bottom of our foot. We've got this C shaped padding curving away from the start of our toes to the ankle. But of course there's more dimension he What we're going to find is this area of the toes is really going to be split into two egg shaped cushions. One is going to encompass the structure underneath the big type. The other is going to cover all the remaining toast. Collectively, the hell padding is also going to somewhat stand out because it bulges out a little more. These bulging areas are quite subtle when the foot is flat or arrested position, but are more noticeable when it's in motion. So they are subtle changes, but they are present now. Of course, we've got the bottom plane next to this panning as well. This is where that archer that foot is. So what we'll find is that there's a little bit of a step down into this area this side of the foot is the equivalent to the palm of the hand, and so, like the hand we've got, these areas that are curving down in words orbit in a slightly different shape. Well, sometimes get a little piece of the ankle. Picking through is well, that's really going to depend, though on the overall legs position now moving on to the hell itself. The shape here for the hell can vary from person to person, ranging anywhere from being a square shape to something that's more egg shaped. The structure we have to think about from this perspective is not only the hell itself, but also the Achilles tendon, which attaches to it again, going back to the idea of out feet being made of triangular wedge shapes. We can see with the heel and Achilles together that I am making another wedge shape in this area. They're caving in words now the further the Achilles moves up towards the car muscles. But why did this overall shape starts to get so another way to look at this whole area is that we are almost creating something that is reminiscent, often hourglass shape. With these two parts now, the last thing we have to cover from this perspective is how the hell overlaps everything else in front of it. We're going to get some part of either one or both sides of the front areas of the foot poking out from the back perspective. A lot is going to depend on just how why that person's foot actually fans out, as well as the position and perspective of things. Usually it's the big toe side that is more noticeable, but it's all going to vary from person to person. The hill isn't a part that simply covers everything in front of it. Its shape and structure is such that we're going to get some semblance of the features that sit in front of it sticking out. So we need to get the feeling that the hell is overlapping all of these other parts that we have covered. So that's all the areas of the foot, some tricky places to contend with for short and some unique challenges compared to other areas of the body. But with a little bit of studying practice, it's nothing that we can't master. So with all the views out of the way, let's quickly have a look at the toes in greater detail,
7. Toes and Tendons: toast is simply the equivalent to the fingers and thumb on the head. So if you've already covered Lesson eight in this figure drawing Siri's, then you've already got somewhat of a familiarity with how things should be structured. The big toe is going to be made up of two parts, just like the thumb, and the toes will be made up of three parts, just like the fingers. The shapes themselves relative to the hand counterparts is actually going to be remarkably similar. The main difference is really just going to be proportions. Altos really have these similar, almost butter knife shaped structures that out fingers do, albeit in a slightly more boxier shape. Now, as we mentioned earlier, the big toe is somewhat of a different shape compared to the rest of the toes, farm or oven egg or being structure. And it's the area that's also going to have the most articulation. The other four toes tend to work almost together like a team, whilst the big toe has a far greater range of motion in independence, in the same way that it's a good idea to group our fingers together when we lay in our foundations, for the hand. It's also a good idea to do this for the toes. The benefit we have with the toes is because the range of articulation is far more limited . We usually don't have to contend with as many moving parts as our fingers, so even though we still watch it develop and separate them eventually we're going to have a much easier time doing it. He, by virtue of them acting almost as if they are a single shape now the toast and actually start right on the edge. Here, the main knuckle starts a little further back. We've got some skin that is overlapping these areas. This is usually a little hard to see if the foot is in a neutral position this first knuckle. But if you start to crunch your toes, you'll start to notice that first set of knuckles poking through a lot more. Those knuckles sit roughly about half a totally back, so if you have trouble finding them, that's roughly their starting point. Now the last area we have to cover are the tenders, just like the hands we've got. These tendons that are moving up out foot, the natural pulley system for our fate or converging upwards towards the ankles. These are just simply cylinder shapes and really only starts. Will P. When the foot is in a really active position when it's neutral, will at risk the tendons. Aunt nearly is easy to see. The tendon on the big toe is the most prominent, though it doesn't take a lot of movement for that toe tendon to start showing through. It's easy to overlook something as simple as the tendons, but if you're looking to make a career and it's an area that you really don't want to skip over, so that will do it for the lecture part of this to toil, let's finally move on to doing some feet demonstrations.
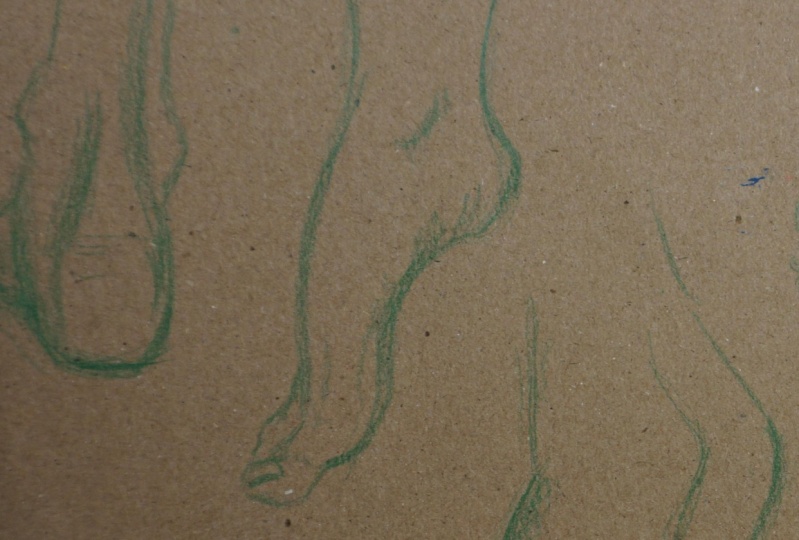
8. Profile Demonstration : all right, let's get started and will do a pretty simple, straightforward profile of you to begin with because, as we said, Oh, they're in the lecture. That's probably the easiest perspective to start with without with their feet. And we're just adding a little bit of, ah across Contour Line here to get the feeling of round this with that shinbone area. And as we also said in the lecture, we really want to feel as if these parts of connecting together. We want that ankle Byron feeling as if it's merging into that shin and being made structure that foot feeling as if it's arching over and connecting to that shin and just adding in the hell section now and we can see in the reference image it's quite squarish. And as we said in the lecture, that's going to be some variation in terms of what shape the hell is actually going to be from person to person. It can be quite blocky like this and can also be quite egg shaped is well, so it's putting in now as we move down the the foot we're putting in the shape instructions for the middle petting area and we've got a little bit of, Ah, very subtle indication of a corner being prison in this. And so if we need to chisel things out with sharp edges, that's perfectly fine. Start doing. At this stage, we can always smooth things off the more corners that we put down in our construction, the better idea will have of where things are in three dimensional space. So we always want to think of our corners in our shopping areas. Is being positioning Marcus for us. So I'll start adding in the gesture for the toes and course we're going to use that s shape that we talked about, and that's really gonna help make these toast feel as if they are feeding correctly into this flattened cylinder. Shaped. That effort is making its A rather odd shape and not always an easy shape to actually draw because it's starting off in one direction at the top. It's quite thin and narrow and then starts to spread out the closer it gets to the ground. So I'm just extending these gestural rhythms out to roughly about where the length of the toes should be, and it's gonna be perfectly OK. Actually, if we make the toes look a little bit longer than what the reference might actually be, the worst thing we could actually do with feet is make them look very short and stocky. And one of the easiest mistakes beginning ideas to tend to make is that they tend to bunch the toes up and make it look a lot shorter than what it actually is. I'm just trying to break down the toes now into the individual parts, and as you could see underlying all that was, of course, the rough, gestural outline off them as a group. And as we talked about, the idea of putting them in a group first is just going to make life a lot easier for us. If we try to dive headfirst, there's a good chance will start to lose track of things, and we'll end up inadvertently making one slightly longer or slightly thicker than the other. And so it's just far easier to just get that initial shape down and then just start breaking things down piece by piece, just dividing things into quarters and slowly building things up from there. So as you can see, we're starting to finally get some sort of definition out of all these shapes that we're putting down while still retain that overall triangular field. Still, it's a little flat the moment something go to now come over the top with some cross contour lines just to develop the overall form of the foot a bit more and in particular, that middle padded area that is pressing outwards because the foot is coming into contact with the surface. You can just see these subtle indentation that's being made here to give it that sort of rounded egg shape. So this is a pretty good foundation for us, and it's at this stage where we can actually start thinking about making further refinements and modifications. I'm just gonna start working on the toes a little more and in particular going to start working on the tone else. The toenails are very useful for us because they not only help to reinforce the overall structure off the surface that they're sitting on, but they're also very useful as positioning markets forest so we can use the toes for this landmark, not just in terms of where things are positioned in three d space, but also to help defied what the shape of the form is. It's sitting on. So I'm pretty happy with how things are looking at the moment. So I'll just start coming over the top in making some dark alliance and a few more gestural rhythms. To really try to hope. Shake this just a little bit more now. One of the problems we're going to come across with these type of pose is that they tend to look a little bit lifeless. And so what we're going to have to do is as we construct this rather stiff and lifeless place, that's gonna be super important, that once we've completed this construction phase where we're just sort of feeling things out, that we come in over the top afterwards and really starts it laying some curvature and gestural rhythms. Now I'm really early. Focusing on the construction will phase at the moment, which is why there's a lot of sharp angles and what's come over the top here and start to define the form a little bit more with these cross contour lines. But once I've got this late outs and I'm relatively happy with how things a position that I can come over with the Racists much. Some things that then go over the top of it again with some nice big courage is, as we've said in previous classes out, two main ideas for figure drawing are the construction all face and the gestural face, and we're free to go back and forth between the two of them. However we please, depending on what the poses, what part of the body were working on. So there's no real hard and fast rule whether or not we start with one or the other. But what's important is that we keep the two ideas that might that we're working with the building phase, which is construction and the life in the fluidity that comes with that gesture. Let's do another demo.
9. Heel Demonstration: All right, let's head around to the back and start working on this hell area, putting in a little bit again off that lower leg. Just get a little bit of a foundation for ourselves. Now you can see from this perspective just how much the shape of the hell has changed. It looked a lot square up when we were looking at from the front, but from behind, it's become a lot more rounded, so we're gonna get these instances where the different perspective that we're looking at things from is going to change the shape of things. I'm reasonably happy with that beginning, so just stop adding in the triangular wedge check for the front of the out foot. Now this position, as we're looking from behind is going to throw up some pretty unique challenges. We'll just start to develop the bottom part off foot here and really just trying to feel my way over. It's almost as if I'm actually guiding my hand across that lumpy area of the foot. We really want to get into the habit off. Imagine that we are drawing over these real objects and it's not necessarily an easy thing to do to imagine it. So it's always good to actually move your hand across, really objects around you to try to get feeling of what that feels like and to try it in Munich. That motion onto the page, so good a man foundations seen. So just start refining things a little bit more, bringing out a little bit of this ankle and really trying to feel my way around a with this and trying to keep those gestural rhythms in place whilst building up these more structural components. Getting in That's Achilles tendon. Yeah, that's going to be a lot more prominent on some people compared to others. There's just going to depend on the pose and the person that you're working with, just how much that indentation that creates. The Achilles starts to stick out and just sort of our king my way through all of this and trying to get that sense of round, that's he. We've got this vein, which is popping out on the side, which is acting almost like a cross contour marker and sort of giving the sense of roundness that bull shaped squares bullshit to the structure of the heel. We're not bound to the shapes and the forms that we went over in the lecture. If we need to break things down even further and to find additional shapes to help construct out parts, and that's perfectly fine. Veins are pretty prominent on foot. And so they actors really useful natural cross contour lines to help to really get a sense of what the shape is doing, where the lumps and bumps on the foot start forming. Because we're dealing with something that is quite bony and doesn't have very many muscles on it, we're going to get a lot of very subtle peaks and valleys that sometimes very difficult to see, especially if the lighting conditions are very flat. So something like the veins, which protrude quite noticeably on the feet, suddenly becomes a very useful tool in helping to shape the forms of the foot. And it's especially useful from this type of perspective where we don't necessarily have these easy to identify landmarks such as the toes. So always look for these type of helpful landmarks. All right, let's move on to another demonstration
10. Toes Demonstration: All right, let's move on to doing some toys for a next demonstration. We got some nicely crunched up toes here to give some nice gestural rhythms and movements in your now did you see on the bottom. And then we're just gonna start with a regular cylinder shape he for the first part of bail Peter and then Movil to doing something that I can only best described as being a butter knife shape. I've never been able to figure out what else to call. It may be a bullet head shape as well. That's the general idea I like to use for it. Is that Clapper's shape and also works for the thumb as well, More or less, I think I will point out he is actually how we stepped down onto the Nile. We don't just merge straight across some. That knuckle into the Nile is a little bit of a step that we actually have to walk down to get to that Nile starting point. And as we talked about in the demonstration, it's a super useful position market for us. It really helps to reinforce that position. The to prevail big toe is in. It's slightly curved. Nature also helps to reinforce the shape off the underlying structure it's sitting on. We can also look to the folds and Cruces that are being formed underneath the Tohira zits, crunching to also help reinforce that positioning and that structure. Who is the overlay? It's sumed up on that first part of the big toe in the same position in direction. Those cross contour lines that are being created by the folds in skin here would very much here to that soon. The shape and position creases are really the natural cross contour lines that are available in all areas of the figure. So whenever we start to see these folds in the skin happening, these are essentially markers that can help us figure out where, exactly in three D spice that body pot is sitting in. All right, let's move on to another. All right, a similar image to what we started with, although we've got a lot more crunching happening with the toes. So we're gonna put you now basic foundations again and just making the gesture. He for the top part really long. It's sometimes good, actually, just to make that significantly longer than what you actually need to because what that's going to do it It's going to give you some room to play with, essentially. So as we said, Italy, we don't want Teoh feels if our toes are being to crunch together, it's very easy to do, especially if we're working with very difficult perspectives. If we've got a lot of overlapping happening, if we've got a lot of four shortening that's going on, then we consult get lost very easily. So I'm just going to start to build the foundations for the toes. Now, I'm not gonna worry too much about behold foot with this demonstration is just mostly going to be a tow exercise. So again, using that s curve to snake around and to start to build the structures into the feet or into the toes rather and again using out just you here too. Really bring those 1st 4 toes together as a group. And do you get that sense of that changed direction that we can see? Quite obviously he got very sharp change happening because the toes up, we're crunching together, start developing the big toe now, and this is why it's a good idea to actually separate the big toe from the small toes because you can see just how much more distinct it looks compared to the rest of them. It doesn't really fit into that natural gestural flow that natural one big shape that the other four toes is doing. So it's a bit like the thumb with hand. You separate that from the rest of the digits, and you just kind of group the other four together. So you're just working on this top shape in stepping down onto that turn island Struna trying to work my way through this and film away through it and already I can sort of tell , probably screwed this up a little bit. But this is the right time to make mistakes. We're not going to get it right the first time around. So don't put that talk of pressure on yourself because we're all human, we taking stakes. But as long as we are aware of what our process is, and we've gone over several times over, the lost dozen listens where we talked about construction, about gesture, about proportions, about analyzing things as long as we have that in the back of Amboy then there's no error that we can't come back later on. It fixed even if we were to stop right now and start adding in lots of shining and lots of color. If we see later on that there's an air present, we know how to go about fixing it. But this is essentially playtime. In a way. We're just sort of not really taking things too seriously at the moment. We're just trying to work things out and if anything, this is probably the most enjoyable aspect off creating not just a art but anything else. It's the initial ideas that we put him down. The real work comes later on. We have to start putting in the shading and we have to think about lighting conditions and what cars are going to be what other objects air in the environment. So the rule work really comes later on. This is all just very much a place for us to really make areas as I have made earlier with that big toe. So I think now it's time change because I'm quite happy with how the other toes are structurally go to the moment, so it's time to start putting this together a bit better, and that's looking a lot more structurally sound and not better positioned as well. So if a particular part is giving you some problems, don't stress over it. Don't obsess over. Just move on to a different area and then come back later on because it will give your eyes a chance to refresh themselves and give you a different perspective now that you've got other things in the environment that are relating to what you're doing, So just defining these toes a little bit more now remember that the small toe is actually overlapping that padded area underneath the knuckles. We really want to get that feeling that it's wrapping around in over that padded area underneath it. Those pads are underneath the toes, they are protecting the toes. And so we have to ensure that when we're drawing this area that I feel as if they are positioned lower. All right, let's consider this demo done and move on to one final demonstration
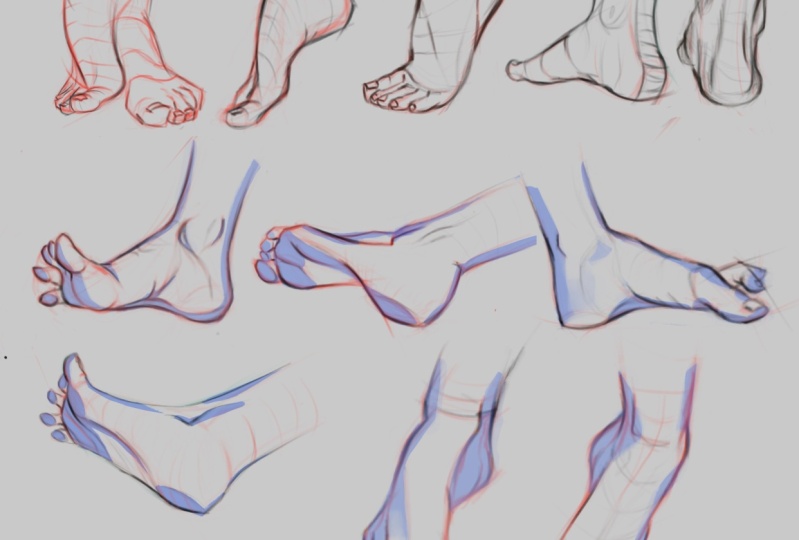
11. Dynamic Feet Demonstration: all right. We've got a pretty interesting post here. Some nice dynamic rhythms and movements within these feet positions. We started with some pretty basic stuff, some pretty straightforward stuff. Now it's time to we want to something a bit more dynamic, so we've beaten all their vegetables. Now it's time for dessert. Finally, cause these are the is the fun type of poses to do it feet very hard sometimes to get any real sense of expression and excitement out of feet just because of the nature of their design, as well as the lack of articulation that they have. So it's a good idea to really push these type of designs and make them super dynamic and very gestural in a and they floated. Right now, I'm just really trying to think of capturing a lot, these curves and all these gestural rhythms, and trying to really get a sense of that rhythm and flow through outs. Because, as we've mentioned in previous license is that the gesture is really the flow and the rhythm and the thing that it's kind of the glue that holds all of our figures together. It gives it life. If you were to just rely entirely on constructing parts using shapes and forms. Then we're only ever going to get stiff poses. So got a pretty good rhythm going on here through these gestural movements. Now it's time to stop bringing a little bit of construction back into this. And this is the process we've talked about before going backwards and forwards between gesture and construction to hope Croft and helped build these. Build these parts of the body. And remember, when, No, considering these feet, these are just our best ideas of what a foot looks like. We have to consider these parts is being mechanical is being ideas that we ourselves have created? We'll start building up this big toe now started to shape this out again, using that sort of about a nice slash bullet shape. For a structure you can also use sort of 1/2 cylinder structures. Well, that's also an option We've talked about using boxier shapes and bull shapes and green shapes. So a whole range of options and it's just really about what position things Aaron as well. So some angles a gonna require a different approach in terms of shape, structure and others At the end of the day, it's just really basic shapes that we're trying to work with here. Boxes, spinners and cylinders and just manipulating those three basic shapes to build platforms going over the Nile section again, stepping down onto that. One thing we do have to be aware of with denial and it's a lot more noticeable with the toes and it is with the fingers is that the nail embeds itself into the finger. So what ends up happening is that curbs into the finger and the folds of skin are the side puff up, creating so too little he was either side of it. So that's just something to remember a lot more problems on the toes than on the fingers, especially that big toe is usually quite the dip into this skin that's happening there. It's all going to depend, of course, on just how closely your view is off the feet or the hands. So just these few extra things to think about going to help in your development now just have to alter the shape off this big toe here because it's actually flat upon this surface here, and I haven't taken that into account, so I made it far too, rounding it structure. So something we have to think about is what, actually the fate of coming into contact with and when feet of coming into contact with certain areas, the piping underneath is obviously going to changing shape. All right, I'm liking how this first one's looking. Let's move on to the other side and start structuring this thing up and again, just starting with something simple. Basic triangular wedge shaped for the main basis for your foot here. Now, the trick we're going to have here is getting these toes right. We've got a lot of overlapping happening because they're coming towards the viewer. And so you've got the big toe, which is overlapping itself. We've got the toes which are overlapping the front off the main body of the foot. So again, putting that s structure in, that's really going to be It's kind of the glue, really, which gets the toes toe work together. You can probably sit somewhat in the reference image. Help the shadow indications on the foot itself have that s shaped quality which flows around. So getting that s shape right is going to go a long way to ensuring that those toasts feel as if they are in the correct position, that they are coming towards the viewer. So instead of being structure this time in four a big toe a little bit different from the other side, just developing the tar is a little bit more individually. I'll just go back up Teoh, where the ankle isn't just start getting the shapes to be right, because we don't really have. You're a part of your leg going back down to the big toe here and started to really get the sense that that toenails wrapping around you can see how we've got that underlying being structure, that egg structure there and how much that turn out is really feeling as if it's adhering to it and again, looking at the the folds and creases that we're having here, we've got a very fortunate situation without feet that they're actually a lot of creases that end up happening. We might not necessarily have a lot off gestural rhythms that happened in terms of movement that we get with other areas of the body, but because of the nature of the feet they petting and how they bunch up get all these really cool, gestural rhythms that you can start to see when the fight gets into more dynamic positions . Even relatively glad positions like this is well, we conceal these sort of creases that unfolding, which are helping to really reinforce the shape in perspective of where the food is in. So we can always exaggerate things as well. We don't necessarily have to adhere to the little truth that's happening in their images. We can treat a little bit as well if we need to you if we I have to add in additional additional folds increases in there just to get the point across. Just to get the point that this area is going up and over, for instance, that this area is going up this direction, that this area is a little bit flatter. If we have toe ad additional veins in additional mark is like that to help reinforce that idea. That's perfectly fine. That means darkening an area if that means making things a little bit more squarish. You're a little bit more rounded just to get the point across, then it's perfectly fine. It's about what we want to convey not necessarily what the image tells us. So if I want these gestural Marcus to be a bit more exaggerated, just in order to get the sense that this part of the heel is moving that way, we'll this part of the toe is moving in this direction. Then we just simply do it. There's nothing wrong with exaggerating things. If anything, it's probably going to end up making our designs. Our figures are concept pieces look a lot better. We were just to stick to the literal truth of reference in Mutual, a live model, that there's a good chance the image isn't going to end up as good as it could be. So always pushed things further than you need to. For instance, if I really want to get the point across that is around its service here, maybe I start putting in a vein that goes across here that doesn't actually exist in the reference image. So it look for things that will help bring these forms toe life, but structurally and gestural e. So now that we've completed the demonstration, sections talk for you to do the time during session, there's going to be 55 minute sessions. Each session is going to have two different images in it. So it feel free to just focus on one average or split your time between the both of them, and then afterwards will come back and do one final demonstration.
12. Timed Drawing Session: - but oh , - you know, - Yeah . Way, Way, - way , - way , - way . No way. - You all right? - No , Really? - No . Uh right. - Oh !
13. Timed Demonstration: All right, let's get things going. I'm going to choose the one on the left. It's pretty straightforward and simple one to begin with. So it's always good to just start off with something pretty easy and straightforward when we're just starting out and not worry too much about just how accurate were getting for these earlier ones. We just kind of want to loosen up a little bit. Don't worry too much about accuracy and proportions and things like that. We always going to start off a little bit stiff and just like any other exercise, we need to do warm ups usually, so always do warmups. Even the best I could still do warm ups to this day, even if that's just simple things, like drawing circles and during straight lines. It sounds like a very simplistic exercise, but it's one that many artists, even the most seasoned of artists, still do during simple circles, trying to get as round and as accurate as you can. Just during straight lines. Getting used to the idea of trying to drew lines is evenly as possible, so I don't feel like you don't have to do these things because they're really going to help with your draftsman shipping get you to a higher level. So it's always a good idea to set aside a little bit of time throughout the day. Do your warmups do your exercises, cause in the long run they are going to be beneficial. It's like push ups. If you do push ups every day, you're going to being much better health. And if you don't do any, the more we practice, the more we retain. The information that we're trying to learn and the better out are working out illustrations can end up being just working on this turn. Now. This is a pretty good example. Like we said in the lecture, how this particular perspective is only ever going to show us two toes normally, sometimes depending on the position of the foot as well. You might only get one toe showing that big toe might be covering everything else. Problem with that type of position know is that it tends to make this perspective looked very flat. So I would recommend that even if you're doing a foot in this position, from this perspective that you add that second toe in just to give a little indication of a bit more form being there, even though that can be instances off that big toe actually covering everything covering all those toes behind, it just tends to look a little bit too flat. So just keep that demonic again. It comes back to the idea that when you don't have to be literal without interpretations, if we need to add a little bit of extra form in there just to help give the sense that we're dealing with something that has a lot more dimension than what might first look, then that's the more important thing than being literal, trying to get a little bit more curvature. With these nice, flowing rhythms, we can see just how different this perspective of the foot this sort of the foot is when it's an action compared to when it's just in a neutral position. How how many more flowing areas of gesture, how much more movement? It feels like your reason. In reality, the foot is really only just barely touching the ground. It's not actually looking as if it's doing anything wildly dynamic, but compared to the first demonstration that we did, this has a lot more life in it. This feels like there's a lot more activity going on, and it gives us a lot more room to play with. The first demonstration that we had a look at was just very, very stiff and very lifeless, and this one has a lot more life in it now. Just Rose. Just put an extra towing point. Mistake is what happens when you don't pay any attention, but it still works, so it doesn't really matter too much. No one's really going to question that. There's 1/3 toe. They're in this position when the river, its image only has to. So I I don't think too many people will be asking any questions of that extra toe there. The thing is, it still works. And as we talked about in the lost demonstration, we need to add little things in extra shapes and extra forms in to help reinforce their idea. Then we just go ahead and do it. I wasn't intending to do this, but sometimes you just get lost in the moment and not really focus on the reference image. That's perfectly fine. The reference really needs to be considered the worst case scenario. So I looked toe. Think that as let's move on to the next image, you know we're going to do something from the back now. Other back pose not too dissimilar from the one we tackled earlier. Little bit of, ah, slightly different position. Of course, I'm referring to the one of left the one on the right. We talked about in the lecture how we're always going to get a sense of there being additional form in front of that. He'll even if we are looking at it directly from the back. And you can just get a sense in that that second reference image that little bit of structure at the front is just peeking out from side there. It's relatively easy to fall into the idea that it's almost just a strike column that's happening from that perspective. But again, we're better off exaggerating things a little bit and sticking out that little bit of toe from the front than having nothing. There is looking a little bit too much like a shoe at the moments that will fix that up. Set up in a moment, footwear is actually a completely different subject matter altogether, even though the basic idea is relatively similar to the feet, we've got some additional challenges that we'll have to go over eventually. The thing with footwear is that because we're so often have our feet covered, we generally don't have as good an understanding off. How things are supposed to look compared to our hands were always seen hands that are exposed. So we have an idea of how things are supposed to look, how they move, how that shaped with the fate. However, this is where it gets us into a little bit of a problem because we sort of have an idea of how the feet are supposed to look, but not nearly to the same extent as the hands. So what tends to end up happening is beginning. Artists tend to avoid drawing the feet, and it's mostly because that we just don't necessarily have the information needed to construct them. We can can figure out how hands work. You can break them down in a little bit of an easier way than what you can't feet hand can be looked at as a simple books, the palm of the hand and the fingers moralist just soon the shapes, but with the fate. We've got a very strange shape that's happening there. It's a triangular wedge and it's loping very highly on one side that flattens out as it comes towards the viewer. So it's a very odd shaped to be working with, and if all you ever see up people's feet that are covered, then you never really going to develop a subconscious understanding of how it should look. So we generally have an idea of what we think it looks, but not an actual idea of how it looks. So feet are a little bit strange because in some respects they're actually easy to construct that out hands and in other ways that are a little bit more difficult. The lack of articulation and the Tories compared to the fingers is a little bit of a bonus because it means we've got less moving parts that are happening, which means overall, we've got less shapes that we have to build west directional changes, less gestural movements. But in other respects, we're dealing with a relatively odd foundational shape is well, there's really no other areas in the in the body that has that triangular wedge form that's being created got a lot of cylinders and arms and legs and a lot of egg shaped bull structures without headed without muscles. We generally don't have too many other shapes that I quite like those that the feet have, of course, weaken break the feet down into those more spherical shapes or more boxier shapes if we want. But the main idea of that triangle a wedge is really only present in this one area off the body. At least primarily, we could maybe look at something like the wedding in between the thumb and the index finger up, a sort of triangular wedge shaped area to. But it's not really the dominating feature of the hand hand is mostly, as we said, that sort of boxier shape that rounded boxier shape. But it's old, just part of the learning process, really just gonna work all these really complex ideas of the human figure into the simplest forms and doesn't really matter how we go about that, what shapes that we use. We'll find that we will tend to lean towards a particular shape one way or another. Some people will tend to have their figures that end up looking a lot more box here. Some will be a lot more spherical. Some will be a little cylindrical. We'll find what works best for us. All right, let's move on to the next. Okay, now, that's a really dynamic feet going on here. I'm going to do the one left. These are the type of poses that I find to be the most enjoyable to do. I never really used to like doing feet that I used to find them quite unattractive, Teoh drawer and kind of boring to look at. But once you start to look at, especially some of the old Masters works some of their sketches and have I could have ended up bringing their feet poses to life. You realize that you know this. This area of the figure, which generally doesn't get as much love as it should, can end up being quite exciting to drawing, funded or as well. Like I really strongly recommend looking at some of the old masters, works from someone like the Vinci and others and get a real sense of how they went about drawing their figures and in particular their hands and their feet you're notice just how much they tend to exaggerate all the shapes and all the gestures within the closes, gives much life and to get as much movement out of these rather sometimes mundane parts of the body. And a good idea is actually to just trace over them. It's well, get yourself a copy from some images online taking into Photoshopped or get yourself a piece of tracing paper and just sketch over the top of what they did to get an idea of how they went about constructing things, how the hand moved over the drawing. Try to replicate what it is they were doing, and you'll see a lot of the the rhythms and the the construction, all components that we've talked about and not only this lesson, but other lessons as well. All of this stuff that we've talked about his, you know, being in existence for hundreds of years. Now you can see the construction could see the gesture. You can see they're proportional markings. You can seeing their sketches, how they were trialling things out and making mistakes as well. They're just a human is as all of us. So they made errors, too In fact, there's toughing. We're ensuring that seeing a great artist making errors, sometimes they will do it. We've all done it. You just live and learn from it as you consume. Really trying Teoh bring as much curvature as much rhythm in these strikes as possible. This is because this is one of my favorite types of prizes to do because you really get a sense of all this movement that's happening here, even though the foot's not really doing anything dramatic, the whites positioned and the way the gesture rhythms of flowing all around it. It just makes it all sorts of fun. Really. Get in there, just push these things a little bit. Mawr Make those shapes a little bit more exaggerated, adds a little bit of character in there as well. Ultimately, you'll find what it is you personally like. You'll find your taste, so that's something a little bit more curved and Florida's this images or maybe something a bit blocker. As we said, you'll just lean towards one way more than the other. But it's also good to try different things out into get away from your style as well. Sometimes if you stick to mobile boxier shapes with your with your forms. Always good practice to try and do something that's a bit more curved in its design and vice versa. Of course, here's your chance to really explore and Charlie find better ways to do things because sometimes you might be doing something a certain way for a while. And then you come across a new technique or a new style that no really gives your drawings a a different look that you might like. But it also it might give you a new way to do things. So don't you stick with one particular style of drawing? And don't just stick with one method of drawing as well branch out and try different tutorial methods. What we've gone over here in the loss dozen listens is just one way of doing things. There's a number of ways we can go about building things in Ott. This is just one white. This is the way that works for me personally, but there are other methods that that which are justus useful. So don't restrict yourself to one method of drawing. Just keep exploring A to you find something that works for you all this information that you're getting will become useful in the end because one day you'll figure out a method that works for you. And it might very well be a combination of things that you've learned, right? So let's move on to the next image again. We've got some really nice dynamic poses here. I'm going to do the one on the left with the toys flaring out like that with one on the right, I must say, quite twisty. I didn't even think you could twist a foot like that. Maybe we'll do that one. A different. Listen again. We're just building up slowly. He with these basic shapes and that bass triangle. Now we've got a little bit of overlapping that's happening. He, uh that's quite extreme. We've got that big toy, which is really overlapping that at base of the foot. You have to really figure it out with these toes. He or executive position now probably broken my rule a little bit here. I haven't actually group the toast to get up. That's because in this instance, there quite far pot, So there are gonna be times where we don't necessarily have to group the toys together like we've talked about. There are always exceptions to the rule, so it just again going to depend on the pose. This is the type of pies again, like the lost one, where it's it's super fun to draw because again got all this curvature happening. It gives us a real chance to to build this this dynamic form here and get a lot of action going on. We're really trying to capture action. Essentially, we're trying to capture a frame in time, and we don't have the luxury of film where we've got 24 frames in its second to be out to tell that story. We've only got really one short in this one image, and if we don't really capture the action correctly, then it's not really going to translate, and people aren't really going to are going to see it. Other whites, you think of gesture is actually being the action, the the summary almost of what's happening. So when we started developing our gestural rhythms, sweats super important that we sometimes exaggerate things a little more than what they need to be, because we really need to emphasize that this foot is flaring out that maybe it's about two . Kick something will step on something. So that's what we have to heighten things a little bit sometimes. For that reason, just really get that point across. Because if we don't do that, then there's a good chance that things will get lost in translation and the audience. What sit? And it's really the artist's job to God the audience into seeing what the artist wants them to see. It's not the audiences responsibility when it comes to telling a story when it comes to our odd, it's the artists role. Be clear and concise with the message stat trying to present, because the audience is not there to do homework there, wanting to see your particular perspective on things. So if you want that foot to Lucas, if it's kicking something or is about to step on something or is recoiling from something even then, it's your responsibility as the oddest to construct that scene or that image in white, which hopes to deliver that message to people. Because if you're having to explain things to your audience, if you're having to tell them well, this is what I actually met when I was doing this, then something's going wrong with the construction process. Some part of this composition hasn't actually worked. It hasn't reached its intended message. The worst type of creative people are the ones who tend to blame the audience for quote, not getting it. The reality is they're the ones at fault, though, because whatever it was that they were trying to say, whatever it was, they were either trying to draw or to bring to life in film or within music, whatever other creative endeavor was was not handled correctly. Somewhere along the lines, they screwed up and they didn't notice the era all they didn't care. You're serious about creativity and your art, and you are trying to say something. Every artist usually wants to say something. Then all the responsibility is going to lock you. So if we need to exaggerate to get the point across with their drawings, and that's exactly what we need to do, it's the same with any creative profession, really, with acting with music. It's the same idea that we've gone over throughout these lessons is that it's better to do too much to go over the top, then to do too little cause we can always bring it back. We can always scale things back if need be. Having way too much fun with this image of the moment. Unfortunately, times nearly run up on this. One could work on this top of the ridge all day if I'm perfectly honest. But this will do us for now and we'll move on to our final image of the day. Alright, lucky last. I'm just going to work on some toes. You're writing cause kind of neglected, working on toes really full this time. Drawing sessions are going to do. The one left here on the rights is we're not that interesting. What will movement happening with? It's one. The lefty on the right seems to be sort of all fanning out in the same direction. So what's a nice movement that's happening? These tires on this perspective, the big toe, he really just straight out. It's got that nice big movement false to put the Bristol footing here. That this lovely gesture line that goes all the way from the start, where the foot in the ankle connect all the way down to where that big toe is and like we've said in previous lessons. We really want to tap shop, biggest range of shapes in one fell swoop without initial gesture. Foundations. So if I was doing the whole foot here in this instance, I'd really put that initial gesture line from the ankle all the way down to that toe. Stop building from there. Just building this bullet like shape again it was, actually can vary a little bit in terms of their shape. I know we've talked a lot about boxer structures for the smaller tars, but we will get instances sometimes where no, actually start a lot boxier and sort of get gradually round up as it goes towards the little toy that little toes often quite round for most people. The other thing that we have to be aware of without toys is that that second toe next to a big time in no everybody but quite a few people, actually is a little bit longer in some instances. So that C shaped arc that we looked over in the lecture is not always going toe apply. We'll just start adding in these toes. It's smaller toes, quite happy with how things looking for the big star can actually see with this reference energy that second, I was actually quite rounded. It's bunching up a little bit as well. That's the other thing we have to think about is when the toes stopped coal up. All the underlying patting underneath um, is going to stop bunching up as well. Similar to how what happens with the fingers. Both the toes and the fingers have these hides underneath there that helped protect them, and when they stopped to crunch to get up, start to compress and their shape changes somewhat. Normally, we don't end up seeing these shapes or that often this close almost were just interested in drawing feet. So it's not something we really don't have to worry about too much. But it's still good to know about this stuff and to practice it up. The more information we have with the construction of the feet, the more we can start to draw it from our minds from the memories, and we won't have to look a reference images as often as we need to. But don't feel you have to know everything because it's just a lot of information that we're dealing with not just with the feet but the anti figure as well. There are a lot of pots in here, and you're never going to Maastricht. All that's the reality of it and get really good understanding of how things should be structured where they should be sitting. But you never really going to monster it'll. Unfortunately, it's a never ending process. It's all part of the fun there. So as we start to rock this listen up. I hope you've found all the information here, the school and hope it helps you with your creative journey. There are going to be additional images in the class project section, along with old deep images from this top drawing session and the demonstration part of lecture that we've gone over. So feel free to practice these up and really try and challenge yourself as well. Don't just stick to the simplest images that are there. If it means having to go over images a couple of times, then it's really going to be worth the effort worth all the frustration and tears that no doubt will be coming cause we can't just really stick to thes simple poses, especially with feet. We don't really want our characters and figures tohave boring looking feet. We want some sense of movement, some sense of Dine Eric shape to them. Well, it's a really push them, too. The best level that we can so keep on practicing, Keep working hard, keep studying, and I'll see you in the next lesson.
 JW Learning, Drawing the Body, Head and Hands